Air Campaigns
Want to start or join a group build? This is where to start.
OFFICIAL: Overshadowed Fighters of WWII
Bushioka
_VISITCOMMUNITY
Oregon, United States
Joined: January 13, 2014
KitMaker: 107 posts
AeroScale: 105 posts
Posted: Tuesday, January 20, 2015 - 08:34 AM UTC
Here are my assorted Royal Netherlands Air Force fighters, all 1/72 scale:


Noting that 2 of these are RS Models products makes me a bit wary after the problem that Ray's had with his He. 112. However the D-XXIII's canopy seems to fit fine with a bit of quick dry-fitting/measuring. The D-XXI's instructions have gone missing but it looks straightforward enough.
SGTJKJ
#041
_VISITCOMMUNITY
Kobenhavn, Denmark
Joined: July 20, 2006
KitMaker: 10,069 posts
AeroScale: 3,788 posts
Posted: Friday, January 23, 2015 - 12:47 AM UTC
I have now added the decals. Unfortunently I noticed too late that the decals were out of register and the white backing. I had to paint it out with the base color. A little disappointing and first time I have seen Eduard/Cartograf decals out of register.

More to follow.....


SGTJKJ
#041
_VISITCOMMUNITY
Kobenhavn, Denmark
Joined: July 20, 2006
KitMaker: 10,069 posts
AeroScale: 3,788 posts
Posted: Monday, January 26, 2015 - 04:06 PM UTC
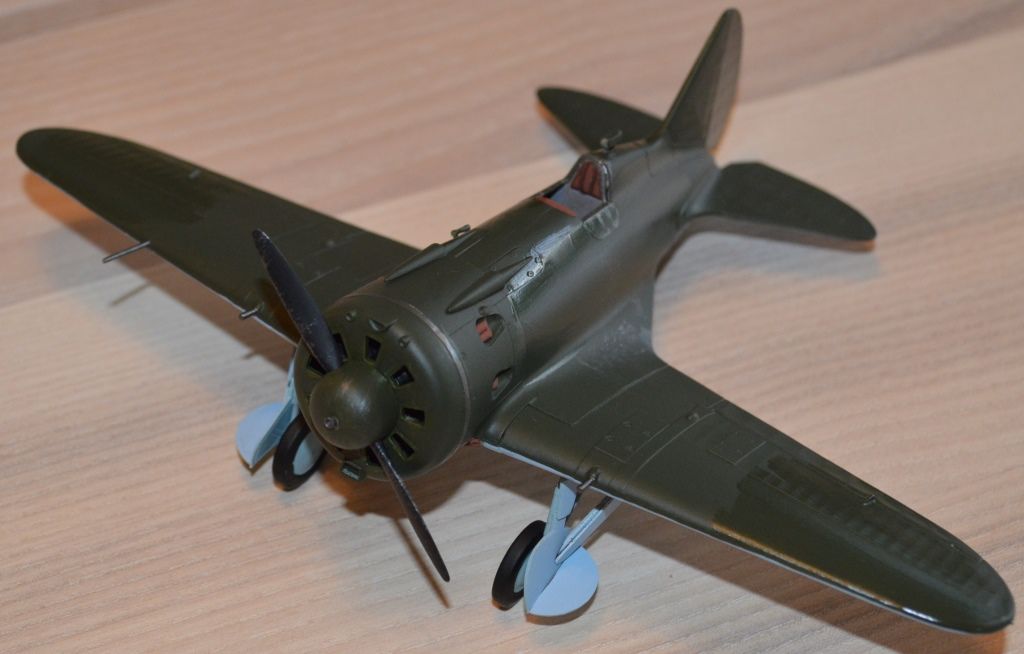
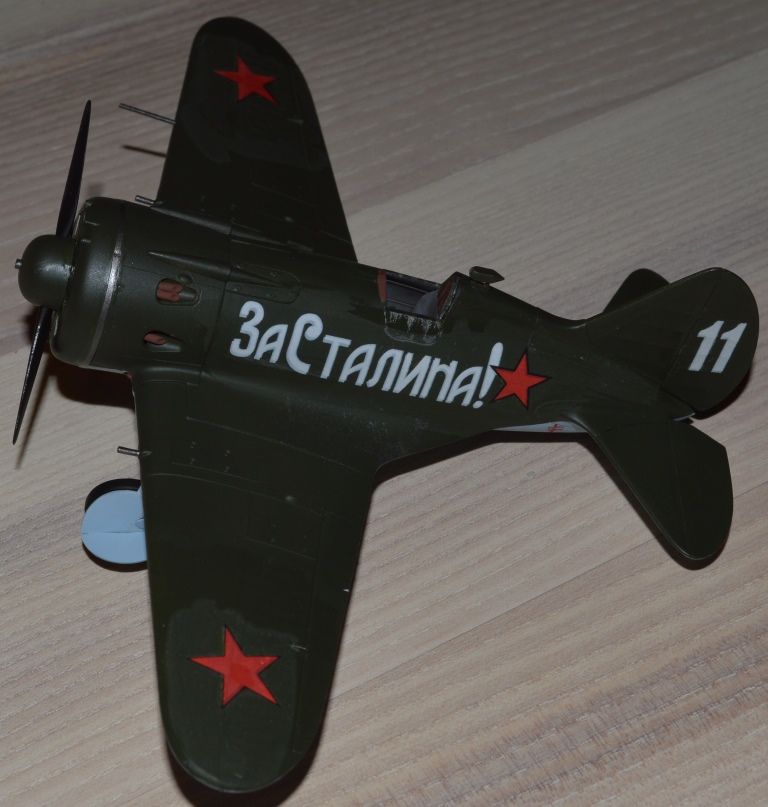
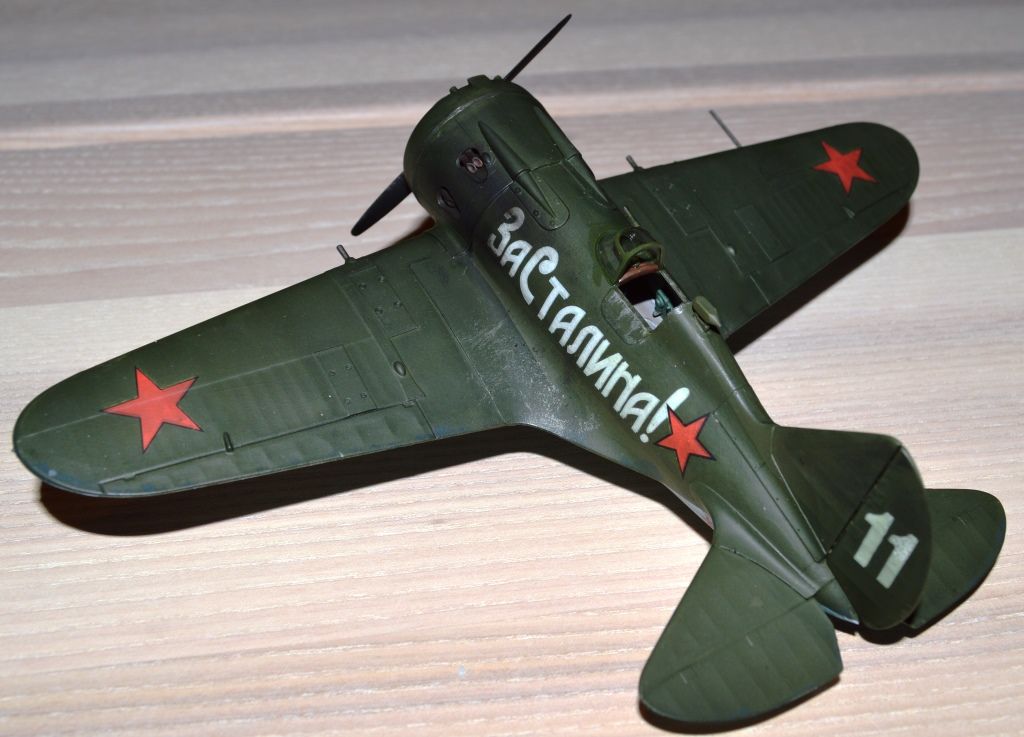
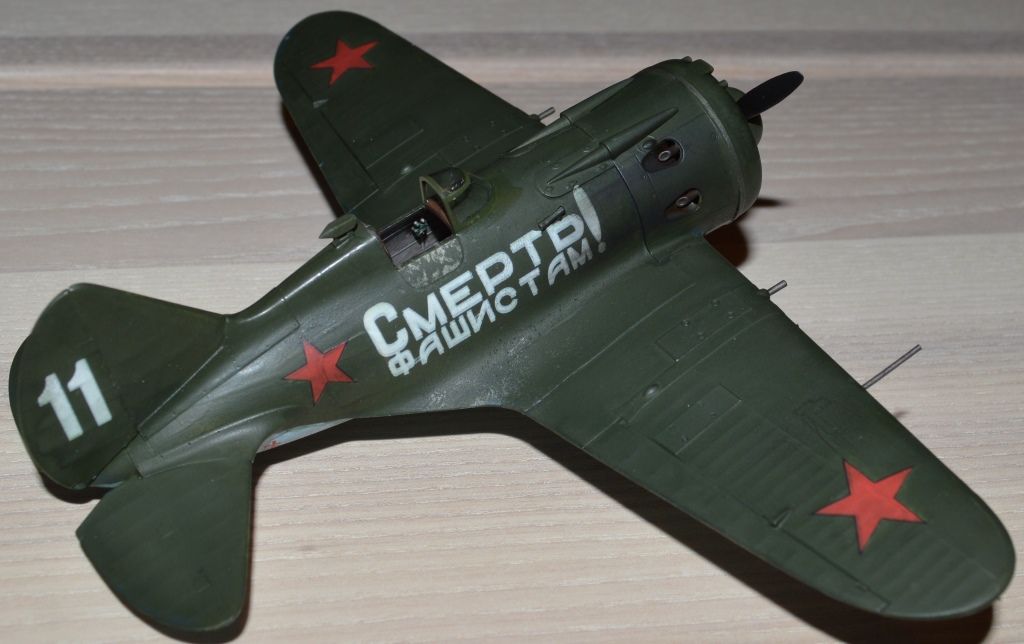
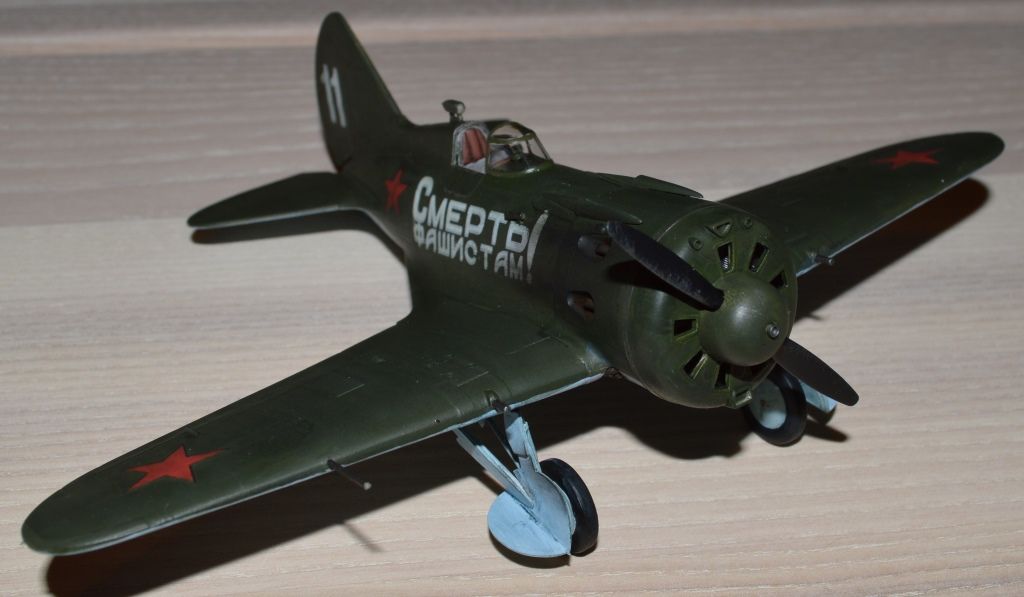
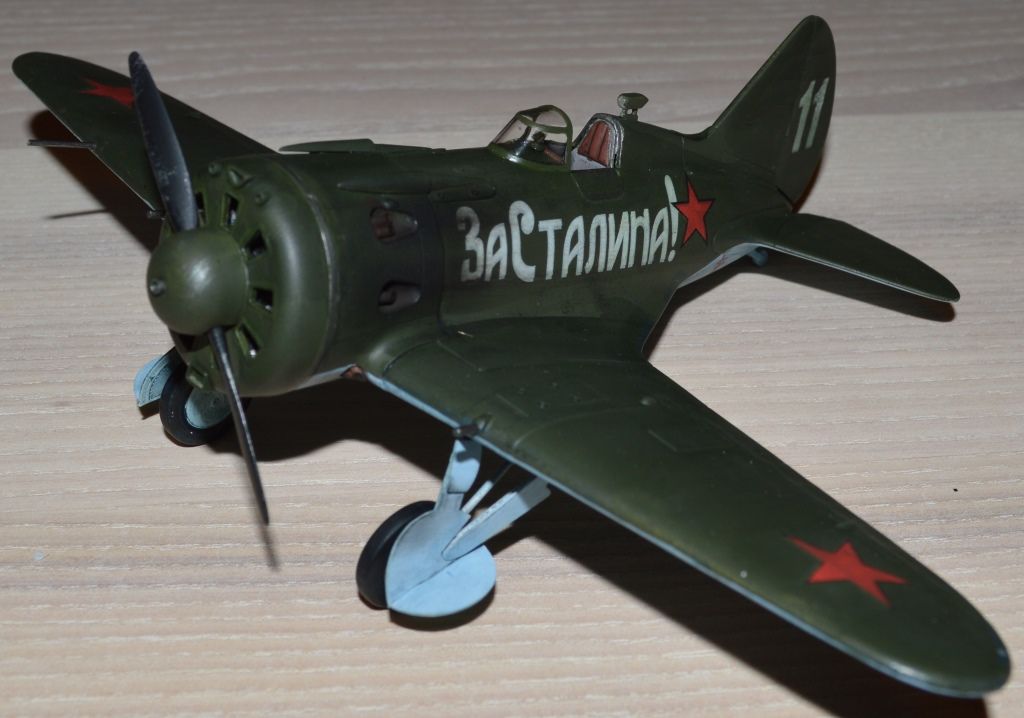
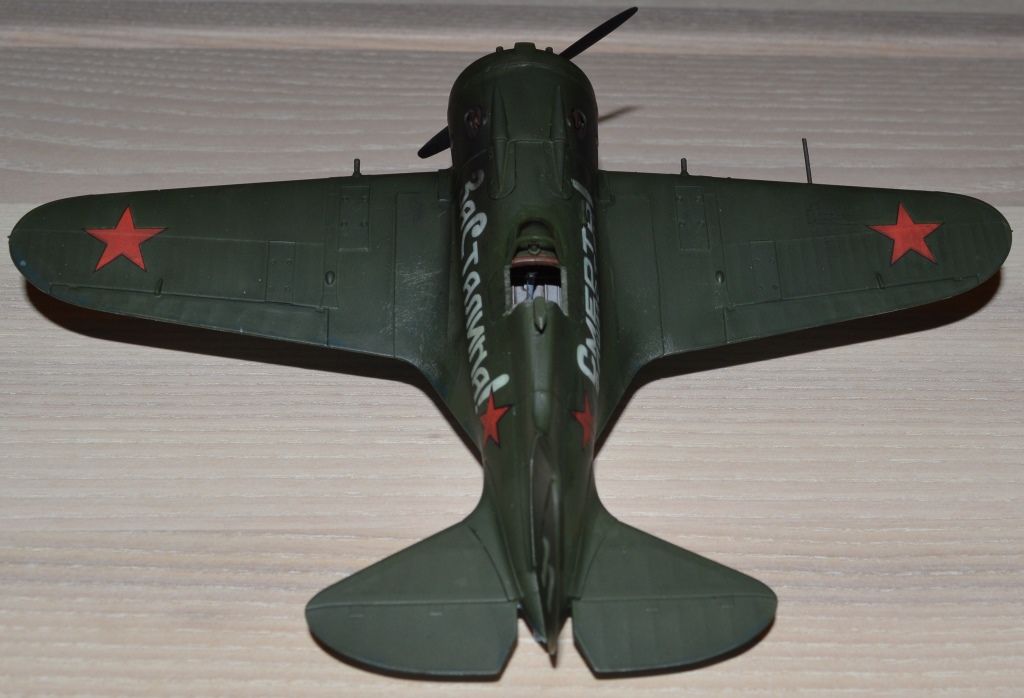
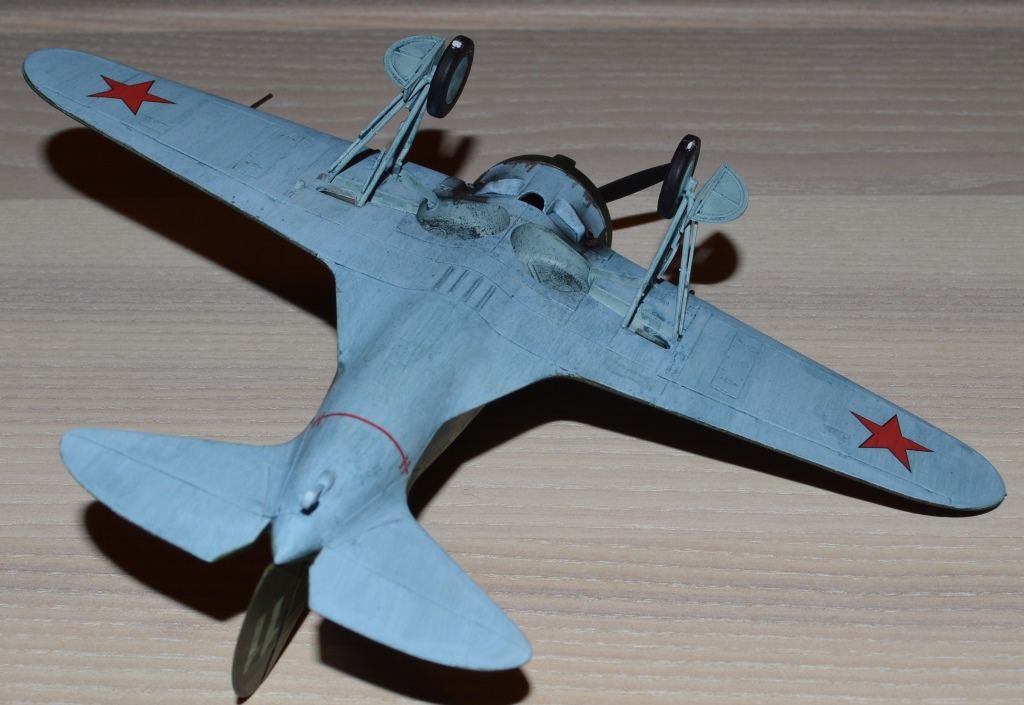
Here is my finished build for this campaign - The Eduard 1/48 I-16.
A great kit that fits perfectly. The only disappointment was the decals which were out of register and had a white "shadow".

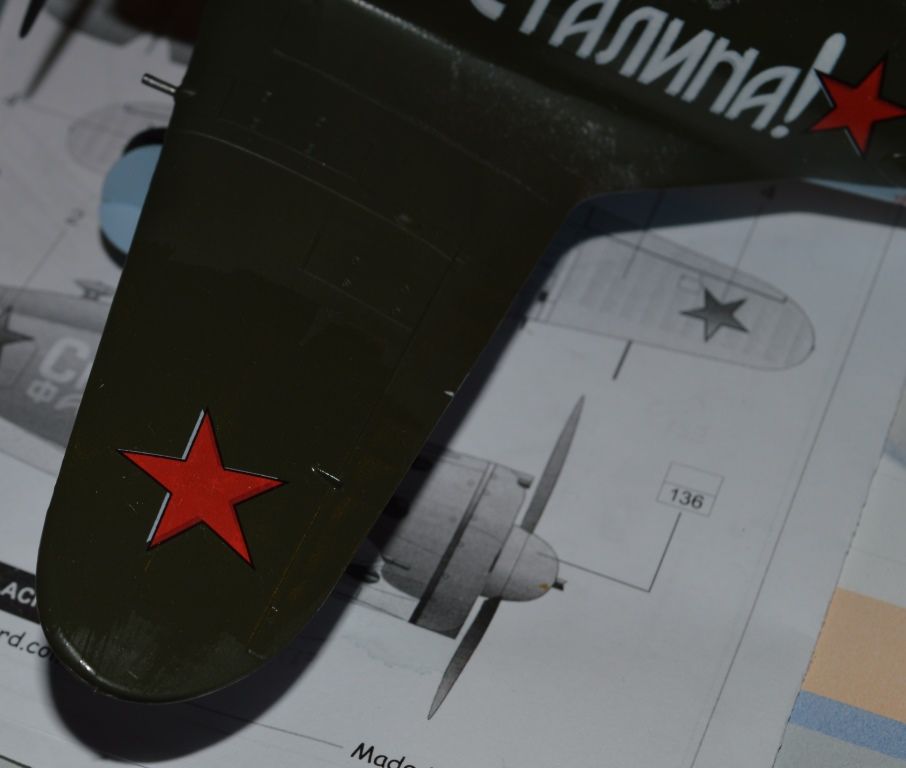
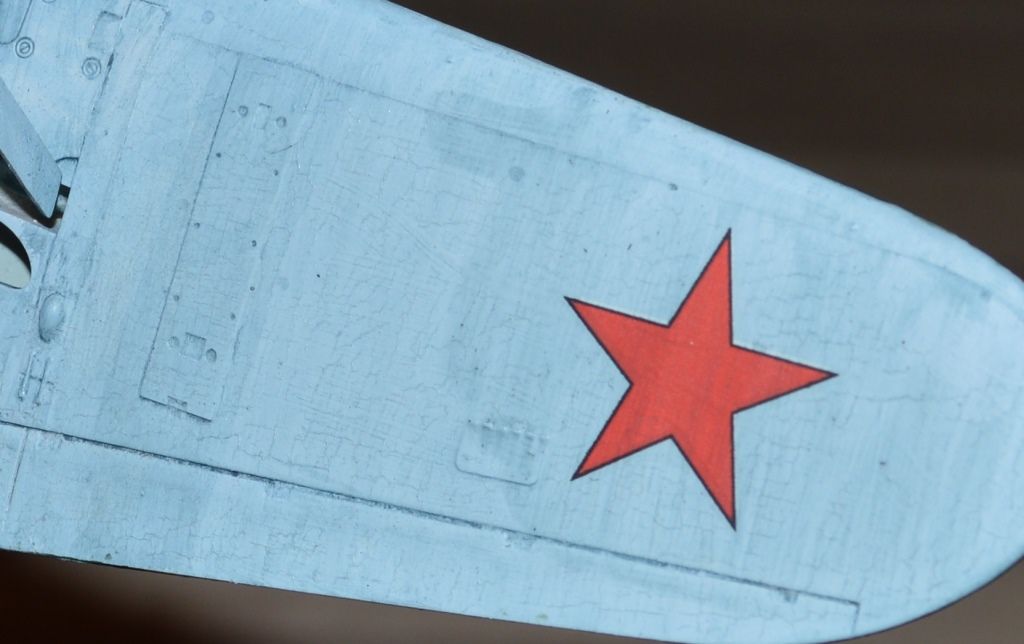
The dull coat for somw reason made very fine cracks as seen in the below photo, but only on the undersurface of the wings. Anybody know what causes that? Some reaction between the paintand the dull coat.

Coments welcome


Bink123
_VISITCOMMUNITY
Quebec, Canada
Joined: June 23, 2008
KitMaker: 414 posts
AeroScale: 364 posts
Posted: Tuesday, January 27, 2015 - 05:57 AM UTC
Jesper-

re; the Polikarpov I 16

Hmmm, too bad about the crackling fine lines. I have no idea why this happened. Odd about the decals, too.

It is still a striking model. The weathering is very effective, especially the engine exhaust stains. Well done!
SGTJKJ
#041
_VISITCOMMUNITY
Kobenhavn, Denmark
Joined: July 20, 2006
KitMaker: 10,069 posts
AeroScale: 3,788 posts
Posted: Tuesday, January 27, 2015 - 01:17 PM UTC
Thanks a lot, Richard.

Despite the crackling I am actually also very satisfied. It is the first time I use Vallejo washes for aircraft. They work very well and are easy work with to create a slightly weathering/faded look.
eMan
#298
_VISITCOMMUNITY
Hong Kong S.A.R. / 繁體
Joined: August 08, 2002
KitMaker: 1,182 posts
AeroScale: 351 posts
Posted: Wednesday, January 28, 2015 - 08:14 AM UTC
I'm going to build the Classic Airframes 1/48 Heinkel He-112 B2 for the campaign.

The He-112 B-series first flew in the summer of 1937, powered similarly to the Bf-109B with a Junkers Jumo 210Ea engine. However, series production of the Bf-109 had already commenced and the RLM resisted all efforts by Ernst Heinkel to mass produce the He-112B, therefore Heinkel concentrated on the export potential and the aircraft was exported to Japan, Spain, Hungary and Rumania.

Grenadier37
_VISITCOMMUNITY
Texas, United States
Joined: June 02, 2008
KitMaker: 232 posts
AeroScale: 155 posts
Posted: Thursday, January 29, 2015 - 03:26 AM UTC
Here's what I'm planning on building for this campaign. The Hasegawa 1/48 Ki-27

SGTJKJ
#041
_VISITCOMMUNITY
Kobenhavn, Denmark
Joined: July 20, 2006
KitMaker: 10,069 posts
AeroScale: 3,788 posts
Posted: Friday, February 06, 2015 - 12:59 PM UTC
Nice choice, grenadier.

Looking forward to see how it goes together.
c4willy
#305
_VISITCOMMUNITY
Christchurch, New Zealand
Joined: February 01, 2006
KitMaker: 1,673 posts
AeroScale: 1,517 posts
Posted: Friday, February 06, 2015 - 02:43 PM UTC
Well this P39 is pretty much done! I had issues with the black magic masks lifting and I got paint on the canopy where I really didn't want it. Didn't think it would be difficult to remove however I was proven wrong! I've managed to clean it up a little but removed some of the top coat in the process which I've touched up (Last couple of pics) but I'll need to tone it down (now done) to match the other paint work. So here a few pics to illustrate what I mean.


Bink123
_VISITCOMMUNITY
Quebec, Canada
Joined: June 23, 2008
KitMaker: 414 posts
AeroScale: 364 posts
Posted: Friday, February 06, 2015 - 09:02 PM UTC
Lookin' Good.

I especially like the subtle shade differences of the panels.

Very nice!
c4willy
#305
_VISITCOMMUNITY
Christchurch, New Zealand
Joined: February 01, 2006
KitMaker: 1,673 posts
AeroScale: 1,517 posts
Posted: Saturday, February 07, 2015 - 09:46 AM UTC
Hi Richard and thanks, it was my first try at panel shading and panel line wash, I'm rather pleased with the results!
magnusf
_VISITCOMMUNITY
Stockholm, Sweden
Joined: May 02, 2006
KitMaker: 1,953 posts
AeroScale: 1,902 posts
Posted: Saturday, February 07, 2015 - 07:28 PM UTC
Just strolled by here...

Jesper! As active as ever in the campaign circus ? You managed to save the day even if the decals were a disappointment!

Chris! A very nicely done P-39. And in one of my favourite liveries as well!

I have to ration my campaign participation otherwise this one had been perfect to join with a J 22! "The fastest fighter in the world compared to engine horsepower", or maybe, as one perspn I once knew who had flown it said "The fastest fighter in the world compared to the distance between its mainwheels"...


Magnus
SGTJKJ
#041
_VISITCOMMUNITY
Kobenhavn, Denmark
Joined: July 20, 2006
KitMaker: 10,069 posts
AeroScale: 3,788 posts
Posted: Saturday, February 07, 2015 - 08:37 PM UTC
Magnus, good to hear from you again.

This campaign and the seaplane campaign are the first campaigns in a long time. Had to move the family from the USA to Denmark including my stash of models. So have not really been that active for the last 6-8 months. However, now I am getting excited about modeling and campaigns again. A nice collaborative aspect of the hobby.

The J-22 would definitely have fitted well in this campaign. Hope to see it at a later date on the forum
PeeJay74
#363
_VISITCOMMUNITY
Pennsylvania, United States
Joined: January 08, 2014
KitMaker: 425 posts
AeroScale: 401 posts
Posted: Sunday, February 08, 2015 - 04:55 AM UTC
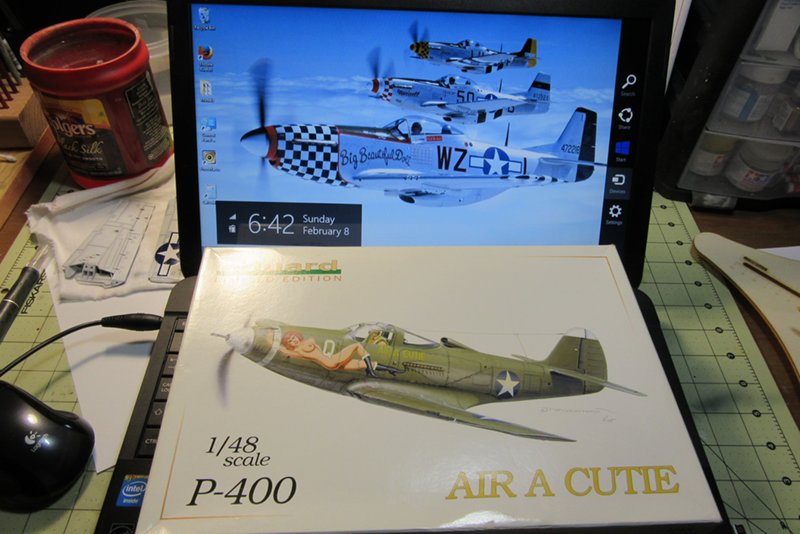
Eduard 1/48 P-400 Limited Edition

I am getting a very late start but I am going to try and build Eduard's LE P-400 before the campaign ends. I don't have a P-39 in my display cabinet yet and thought I might as well build one with ridiculous nose art. I snatched this up last year on Ebay for cheap, it's a great kit.


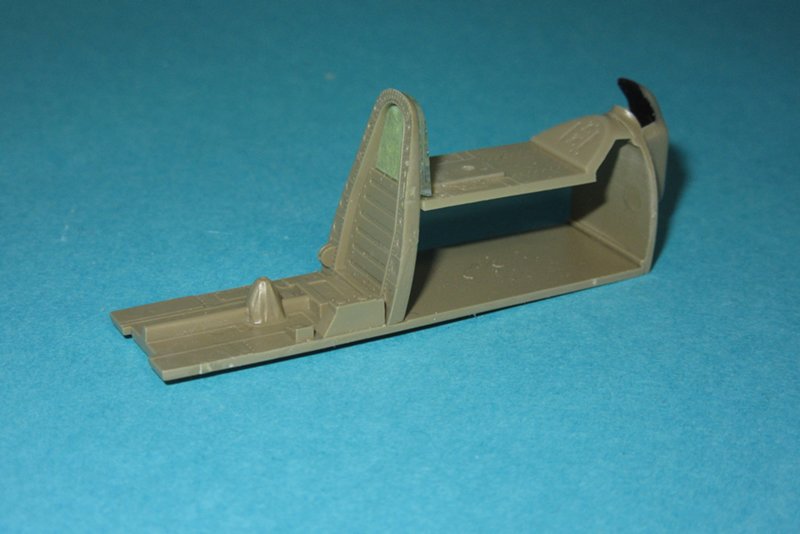
I managed to clean all the parts today and assemble the cockpit plastic. It had to be aligned by trapping it between the fuselage halves while the glue set. Hopefully I got it straight because it seems the entire kit is aligned off of this sub-assembly.


Two months is a tight timeline for me but I should make it.
c4willy
#305
_VISITCOMMUNITY
Christchurch, New Zealand
Joined: February 01, 2006
KitMaker: 1,673 posts
AeroScale: 1,517 posts
Posted: Sunday, February 08, 2015 - 07:16 AM UTC
Go for it Paul, I'm dying to see what you make of the Eduard kit!
c4willy
#305
_VISITCOMMUNITY
Christchurch, New Zealand
Joined: February 01, 2006
KitMaker: 1,673 posts
AeroScale: 1,517 posts
Posted: Sunday, February 08, 2015 - 07:38 AM UTC
Well after a subtle reminder from Rick here's what information I've gleaned so far about the Italian P39's. (All gleaned from Wikipedia!)

In June 1944, the Italian Co-Belligerent Air Force (ICAF) received 170 P-39s, most of them -Qs, and a few -Ns (15th USAAF surplus aircraft stored in Napoli-Capodichino airfield) and also at least one -L and five -Ms. The P-39 N (without the underwing fairing for 12.7 machine guns) had engines with about 200 hours; a little newer than the P-39Q engines with 30–150 hours. A total of 149 P-39s would be used: the P-39N for training, while newer Qs were used in the front line.

In June–July 1944, Gruppi 12°, 9° and 10° of 4° Stormo, moved to Campo Vesuvio airstrip to re-equip with the P-39s. The site was not suitable and, in three months of training, 11 accidents occurred, due to engine failures and poor maintenance of the base. Three pilots died and two were seriously injured. One of the victims, on 25 August 1944, was the "ace of aces", Sergente Maggiore Teresio Vittorio Martinoli.[67]

The three groups of 4° Stormo were first sent to Leverano (Lecce) airstrip, then in mid-October, to Galatina airfield. At the end of the training, eight more accidents occurred. Almost 70 aircraft were operational, and on 18 September 1944, 12° Group's P-39s flew their first mission over Albania. Concentrating on ground attack, the Italian P-39s proved to be suitable in this role, losing 10 aircraft between 4 November and 3 December 1944,[68] to German flak. In February–March 1945, 10° and 9° Gruppi moved North of Galatina, in Canne airbase, near Campobasso, while Allied allowed Italian pilots to use the airstrip of Lissa island, in the Adriatic sea, as an intermediate scale during the long sorties on the Balkans. The 4° Stormo pilots flew many effective ground attack missions on northern Yugoslavia, losing only one more P-39, for engine failure in Sarajevo area, on 2 April 1945.[69] The Italian P-39 flew over 3,000 hours of combat.[70]

By the end of the war, 89 P-39s were still at the Canne airport and 13 at the Scuola Addestramento Bombardamento e Caccia ("Training School for Bombers and Fighters") at Frosinone airfield. In 10 months of operational service, the 4° Stormo had been awarded three Medaglia d'Oro al Valore Militare "alla memoria".[71] After the war the P-39s were taken over by the Aeronautica Militare Italiana (the new Italian air force) and used for several years as training aircraft. In Galatina fighter training unit (Scuola Caccia), war veteran Tenente colonnello Francis Leoncini was killed during a flying accident, on 10 May 1950.[69]
PeeJay74
#363
_VISITCOMMUNITY
Pennsylvania, United States
Joined: January 08, 2014
KitMaker: 425 posts
AeroScale: 401 posts
Posted: Tuesday, February 10, 2015 - 08:03 AM UTC
Thanks Chris. I mixed up some Bell Green today and got started with painting components. I really like that OD paint job you did, very nice variations in the color across different panels. I am hoping to end up with a similar effect on mine.
SGTJKJ
#041
_VISITCOMMUNITY
Kobenhavn, Denmark
Joined: July 20, 2006
KitMaker: 10,069 posts
AeroScale: 3,788 posts
Posted: Tuesday, February 10, 2015 - 08:35 AM UTC
Paul, welcome to the campaign. Cool choice.

It will be nice to see how it goes together and see some colors on it.
Scrodes
_VISITCOMMUNITY
Ontario, Canada
Joined: July 22, 2012
KitMaker: 771 posts
AeroScale: 763 posts
Posted: Thursday, February 19, 2015 - 12:00 AM UTC

Quoted Text

I'm in on this - need something simple after my Airfix Mosquito

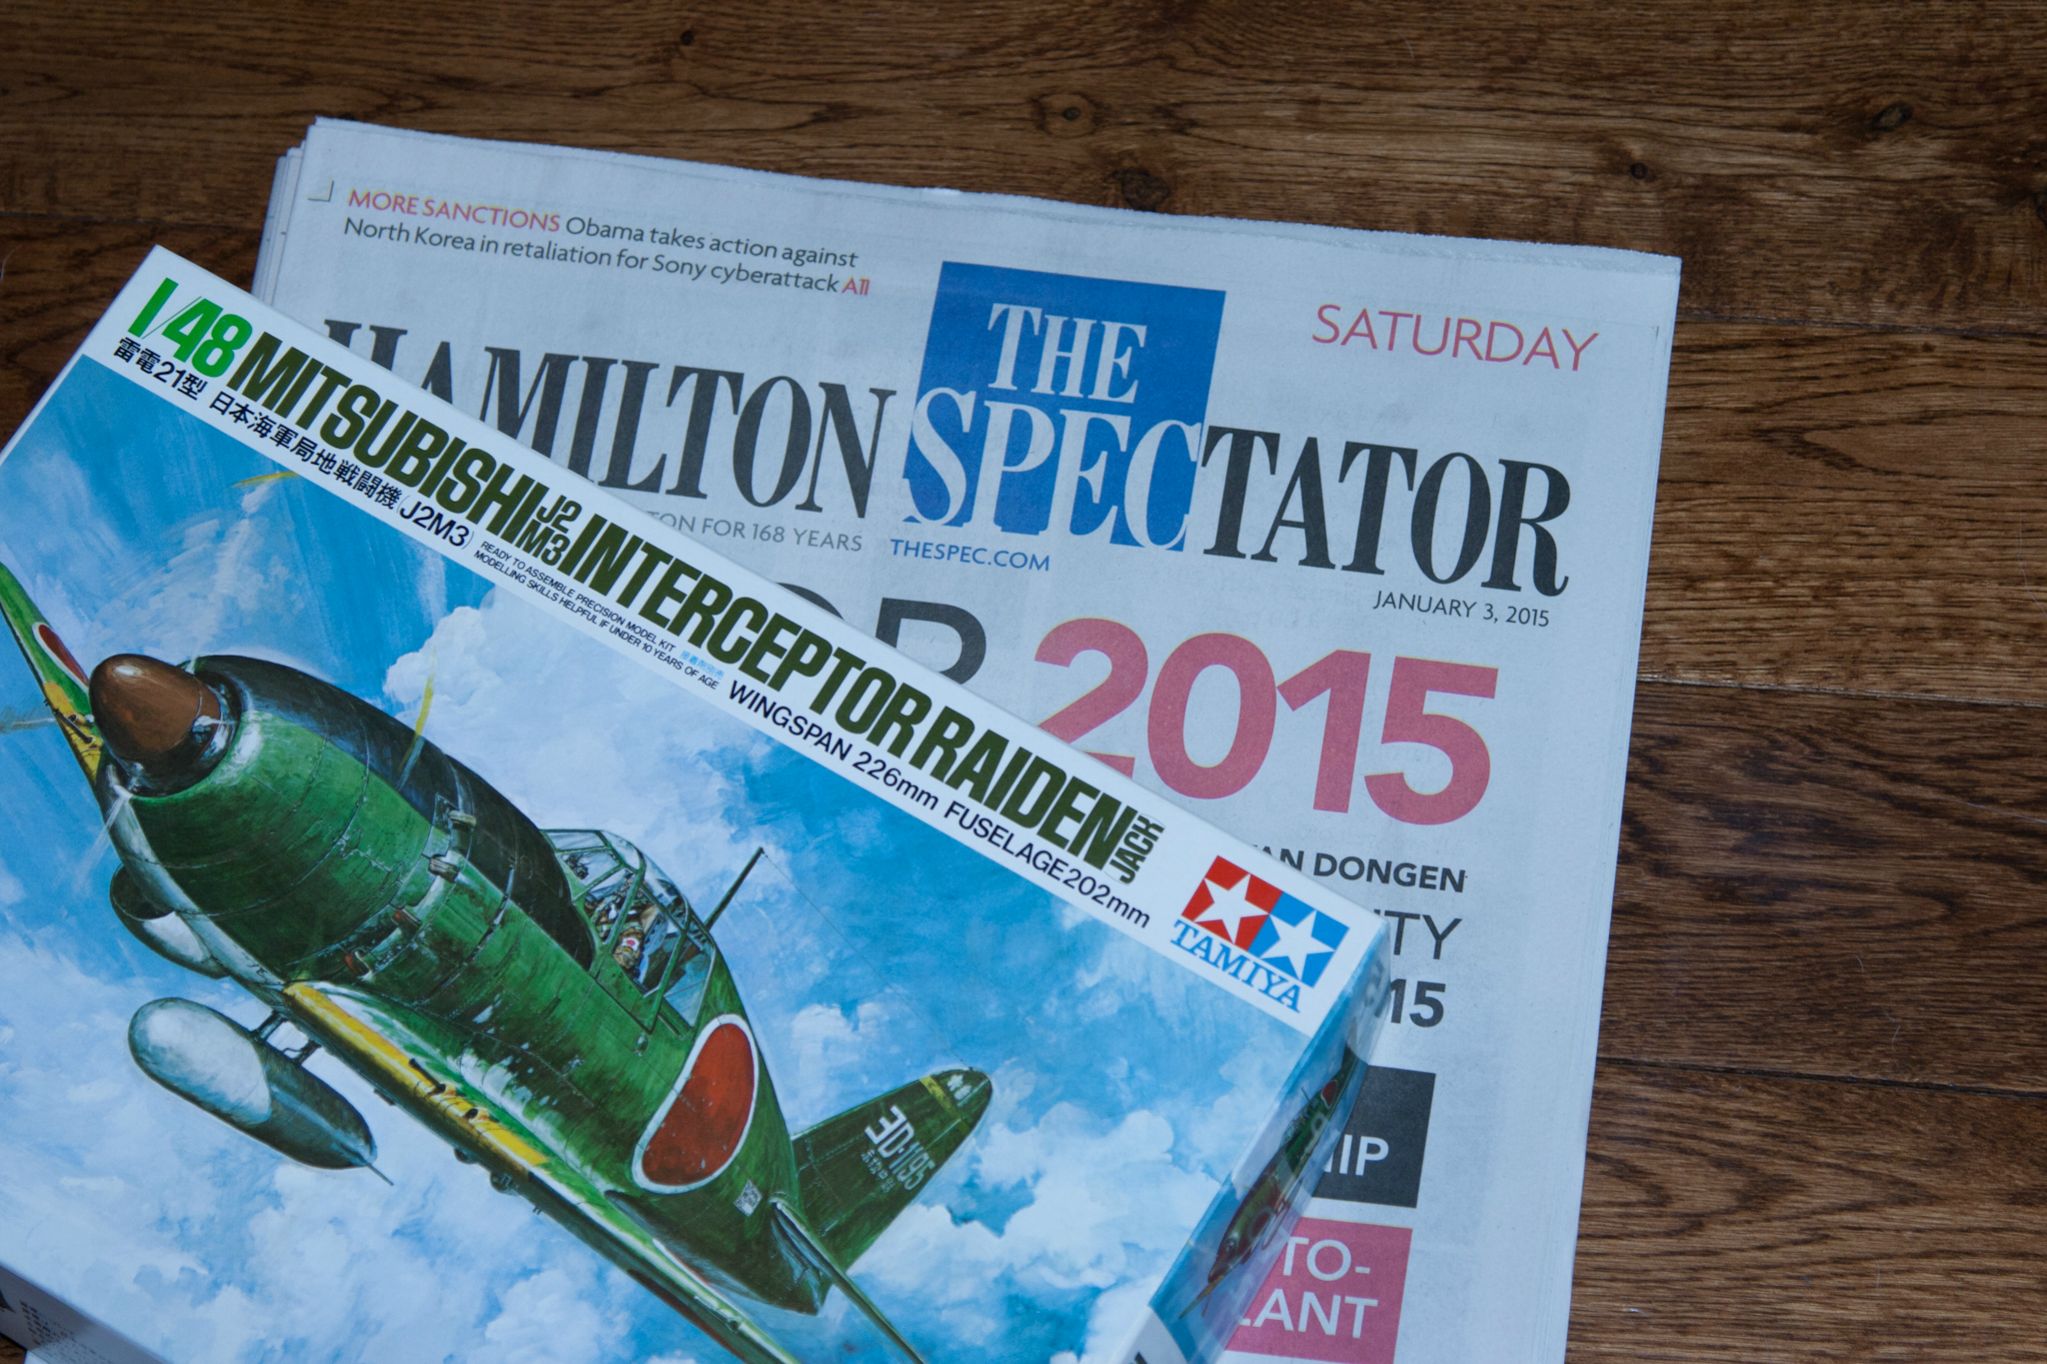
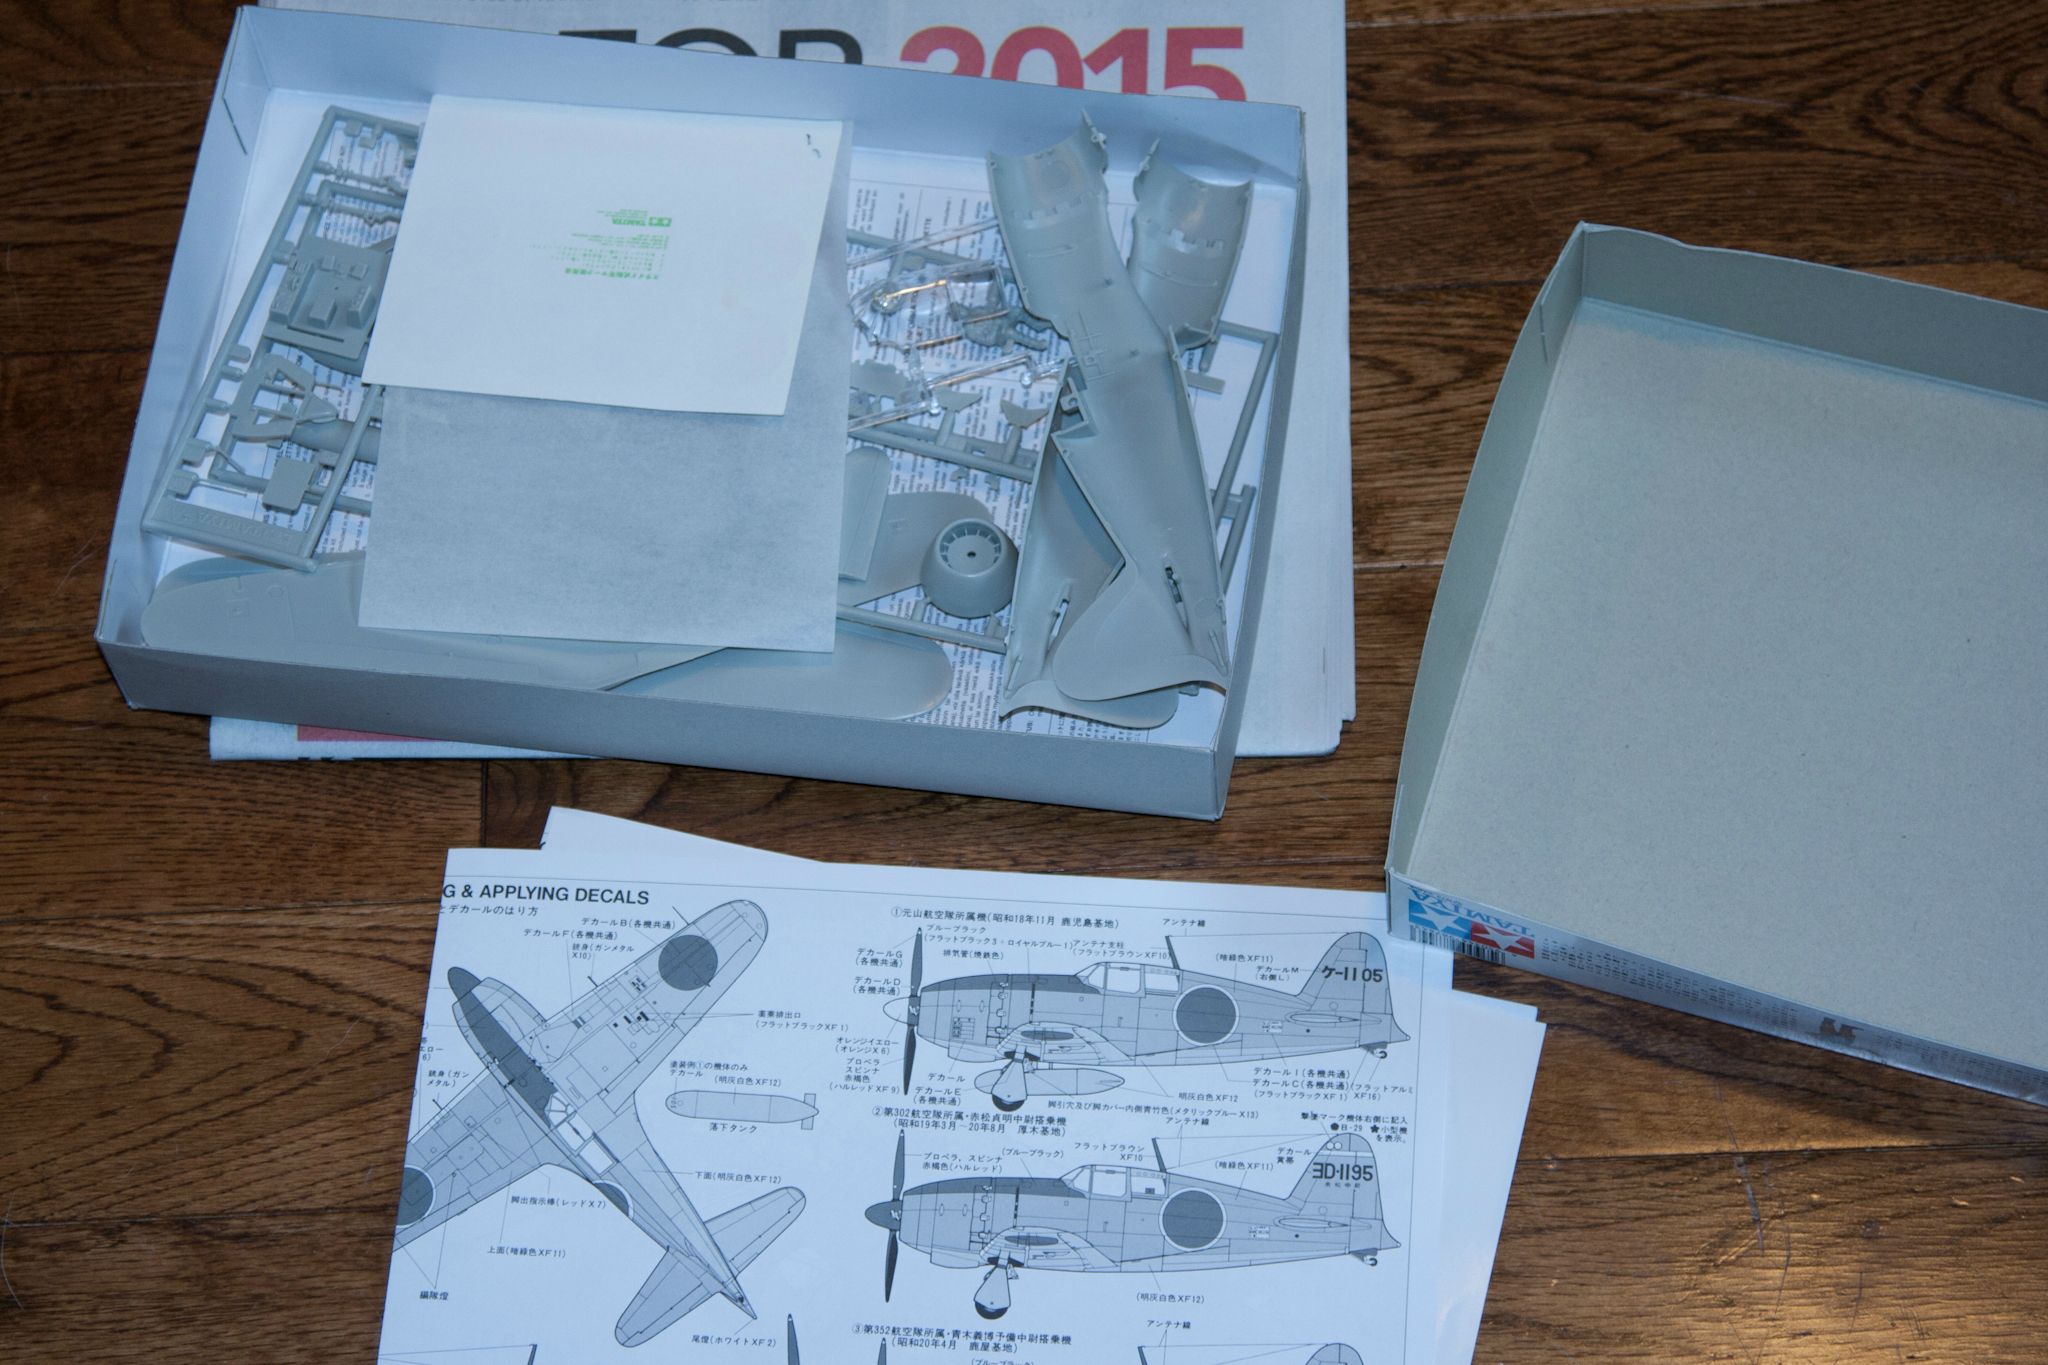
Tamiya 1/48 J2M Jack.


Look at all of those glorious 1970s parts. Fit is still immaculate.


The cockpit is going together today, the fuselage will be closed shortly thereafter.
scribbles101
_VISITCOMMUNITY
United Kingdom
Joined: May 25, 2013
KitMaker: 137 posts
AeroScale: 103 posts
Posted: Saturday, February 21, 2015 - 10:09 PM UTC
Well, its hardly a perfect representation of a Malta Gladiator, but I'm calling this thing finished. Here are some pics of the finished product, I will take some better shots for the gallery.
I decided to leave the arrester hook off the underside of the fuselage because despite the fact that the Malta Glads were Sea Gladiators, I read that the arrester hooks were removed from these to save weight as they were ground based on Malta.


The light in the last pic is not great, I know, and there is a little of the rigging thread overhanging the leading edge of the wing in the first shot, but I have since trimmed that off.
I wish I could say that this kit was great, but I cant, there was a lot of flash on the parts, absolutely zero interior detail and the fit was pretty iffy in places. Oh and the decals for the roundels were of the kind where the central red circle was separate from the blue and white circles, but then again this is an old kit now, and just my luck half way through my build Airfix release a new tooling of the Gladiator. Typical

Any way, there it is, and while it is clear I still have plenty of room for improvement with regard to my own abilities, I am pretty pleased with the end result

Constructive criticism is very welcome
Cheers, Simon
Bushioka
_VISITCOMMUNITY
Oregon, United States
Joined: January 13, 2014
KitMaker: 107 posts
AeroScale: 105 posts
Posted: Monday, February 23, 2015 - 10:43 AM UTC
With the end of the campaign nearing us within a month, give or take, this may be my last entry. I started working on my RS Models Fokker D-XXIII over the weekend.


I'm concerned about it needing a 10 gram weight in the nose - my fishing weights are too big to add up to that.. time to go shopping for a more condensed weight!
PeeJay74
#363
_VISITCOMMUNITY
Pennsylvania, United States
Joined: January 08, 2014
KitMaker: 425 posts
AeroScale: 401 posts
Posted: Wednesday, February 25, 2015 - 05:03 AM UTC
Eduard 1/48 P-400 Limited Edition

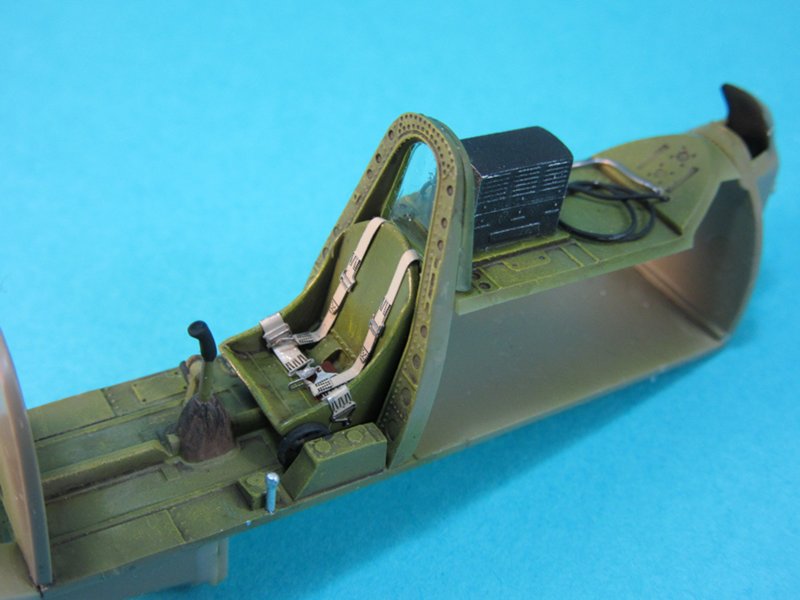
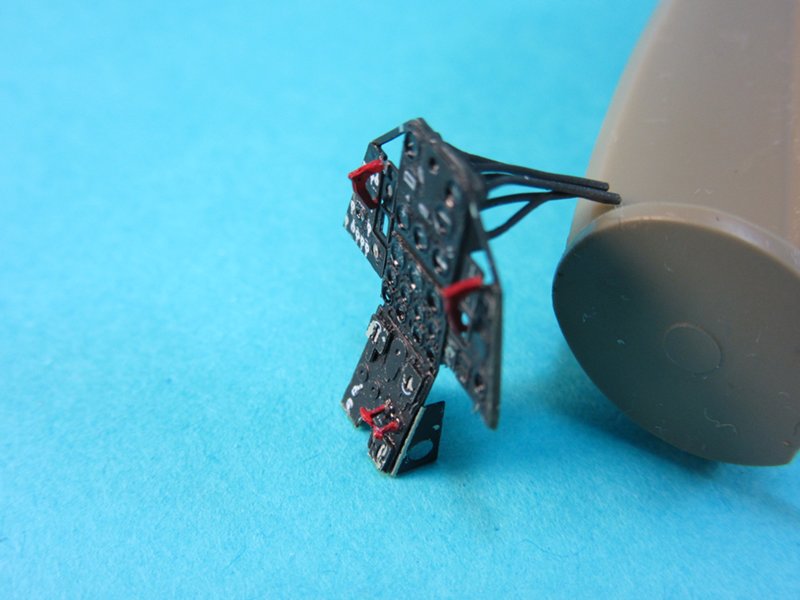
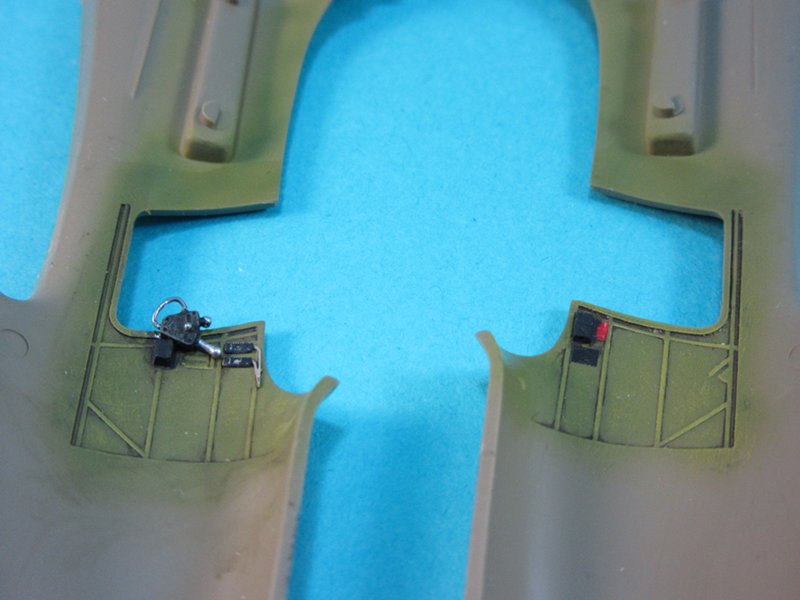
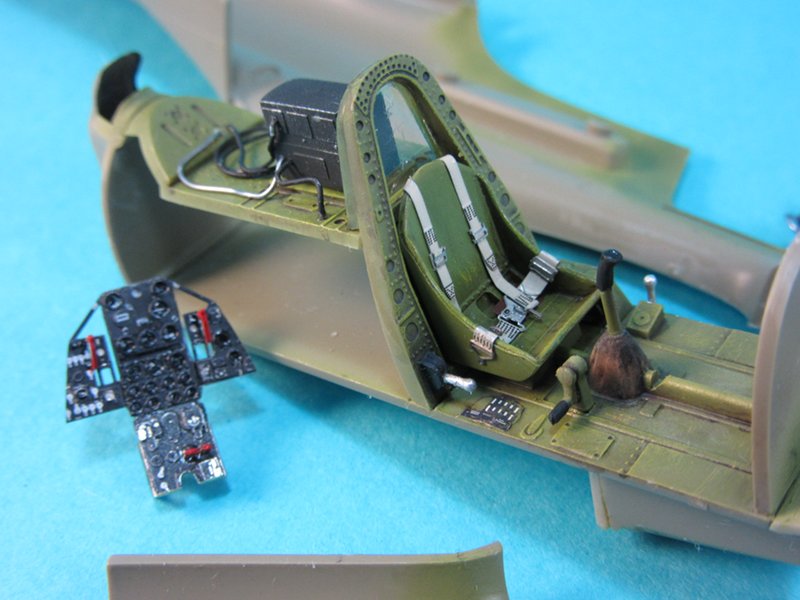
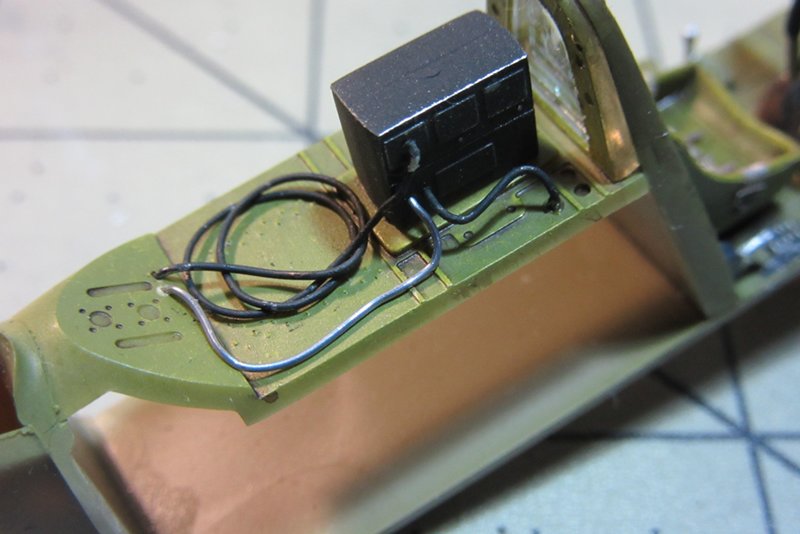
I got a great deal of work done on the interior over the last week or so. Everything except the gunsight is finished, I just need to alter the plastic sight and add the acetate sheet provided for the glass to have it done. I was very impressed with all of the detail Eduard squeezed into the kit's cockpit. I used about half of the included PE, skipping all of the ultra tiny parts and replacing all of the flat PE wire with 0.15mm lead fly tying wire. I have a half dozen spools of that stuff, I like the look of 3D wire much better than flat PE. I used some of the plastic small parts rather than drive myself mad trying to fold teeny tiny shapes in PE. I wish I had replaced the small levers with stiff wire with CA beaded heads, the plastic levers seem a bit thick.

All in all though, I think Eduard's P-39 Cockpit is excellent right out of the box. There isn't much it's lacking for detail.


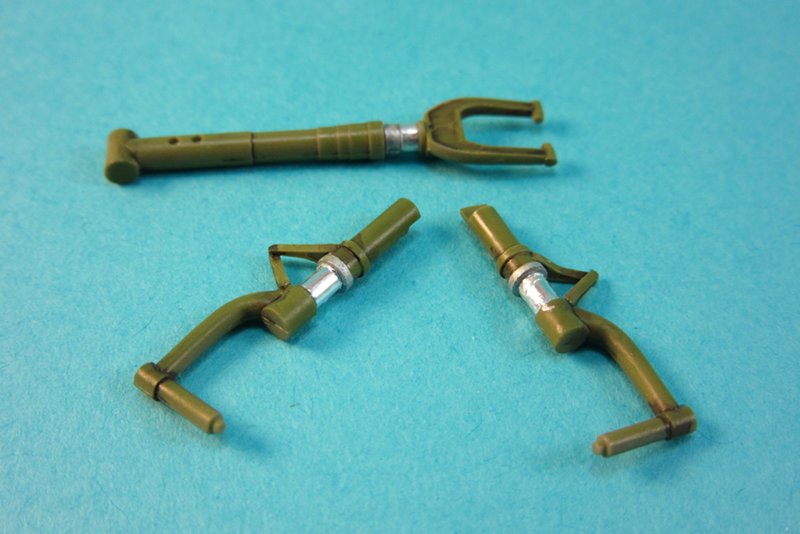
The landing gear struts, ready for lead wire brake lines to be added. This was the first time I did the oleos with chrome bare metal foil. I will be doing this from now on, it makes a huge difference in their final appearance.


The 3D wire makes such an improvement IMO. I had a small fitting made of foil on the upper wire but it seems to have become dislodged in handling. I'll have to fix that up before I close up the greenhouse.

Next up, I need to tackle the wing joins. My kit seems to have a little bit of issue at the wing roots, there are some bad gaps during test fitting.
Bink123
_VISITCOMMUNITY
Quebec, Canada
Joined: June 23, 2008
KitMaker: 414 posts
AeroScale: 364 posts
Posted: Wednesday, February 25, 2015 - 05:45 PM UTC
Simon - re your Malta Gladiator.

It looks to me as though you have touched all the bases in finishing your Glad.
FAA camouflage - check.
Rigging - check
Exhaust stains - check
Machine gun powder stains - check.
Research ( arrester hook) check
Brush painted - check and check

I am a fan of the Gladiator and especially Malta Glads - well done.

Every time I build and finish a model I learn something and improve my technique. For rigging I use EZLine, a black or grey, stretchy nylon thread. I use washes and dry brushing to break up the eveness of my paint finishes, they highlight details and similate shadows and dirt. I use acrylic paints- especially good for brush painting are Games Workshop acrylics.

Congratulations.

Rick


scribbles101
_VISITCOMMUNITY
United Kingdom
Joined: May 25, 2013
KitMaker: 137 posts
AeroScale: 103 posts
Posted: Thursday, February 26, 2015 - 07:12 PM UTC

Quoted Text

Simon - re your Malta Gladiator.

It looks to me as though you have touched all the bases in finishing your Glad.
FAA camouflage - check.
Rigging - check
Exhaust stains - check
Machine gun powder stains - check.
Research ( arrester hook) check
Brush painted - check and check

I am a fan of the Gladiator and especially Malta Glads - well done.

Every time I build and finish a model I learn something and improve my technique. For rigging I use EZLine, a black or grey, stretchy nylon thread. I use washes and dry brushing to break up the eveness of my paint finishes, they highlight details and similate shadows and dirt. I use acrylic paints- especially good for brush painting are Games Workshop acrylics.

Congratulations.

Rick


Cheers Richard I will bear all of that in mind for future builds, particularly the games workshop acrylics, the only white paint I had at the time was Revell acrylic which I must say I am not a fan of, they are too thick for my liking, rarely look good when brush painted, and require a lot of thinning before they can be air brushed
PeeJay74
#363
_VISITCOMMUNITY
Pennsylvania, United States
Joined: January 08, 2014
KitMaker: 425 posts
AeroScale: 401 posts
Posted: Saturday, February 28, 2015 - 04:52 AM UTC
Eduard 1/48 P-400 Limited Edition

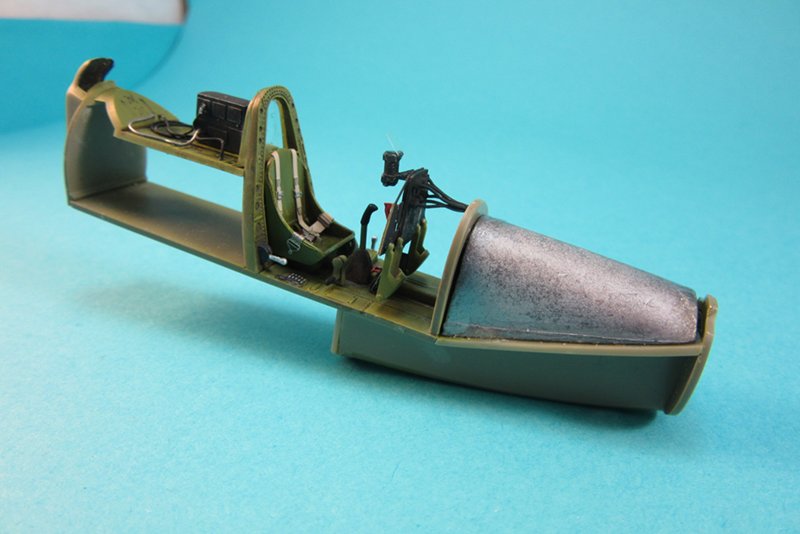
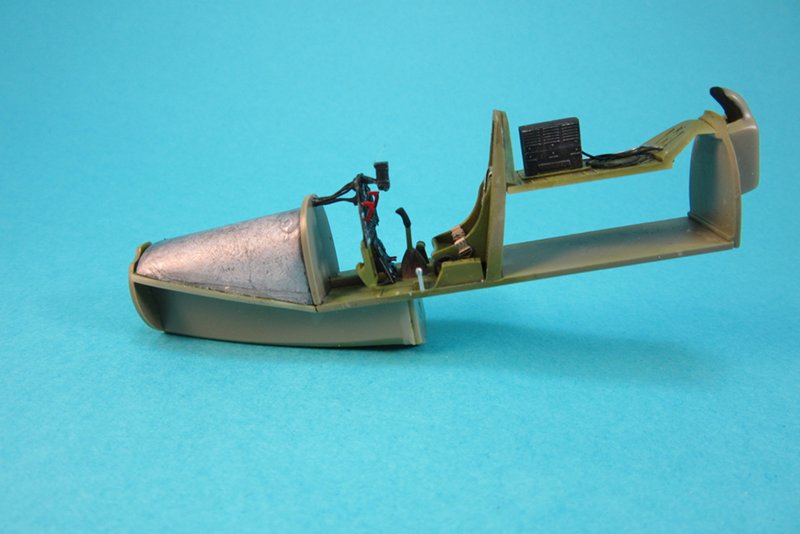
I finished up the cockpit sub-assembly; attaching the foot pedals, reflector gunsight, and wiring the back of the instrument panel then gluing it in place.


Once everything had time to set up, I glued the cockpit in and closed the fuselage up. You can tell this is one of Eduard's earlier efforts, the fuselage is going to need a lot of work on the seams and some panel lines will need to be rescribed to clean it up. Its a far cry from their Spitfire Mk.IX for instance.

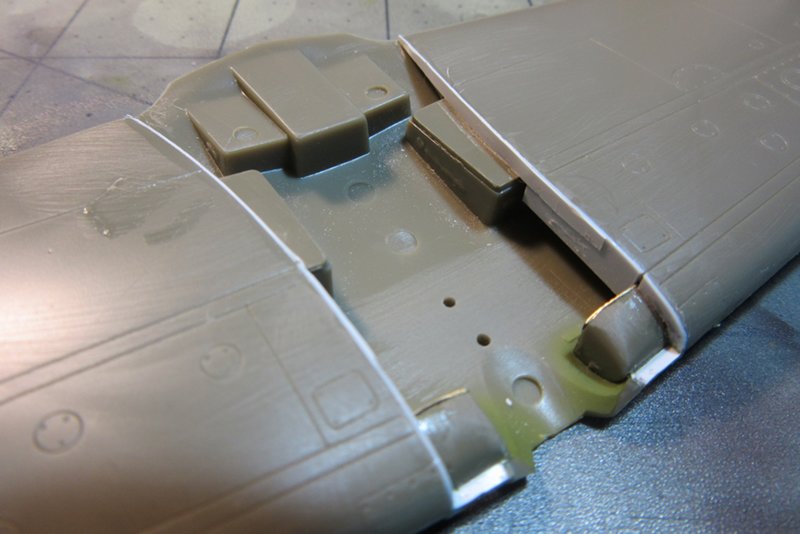
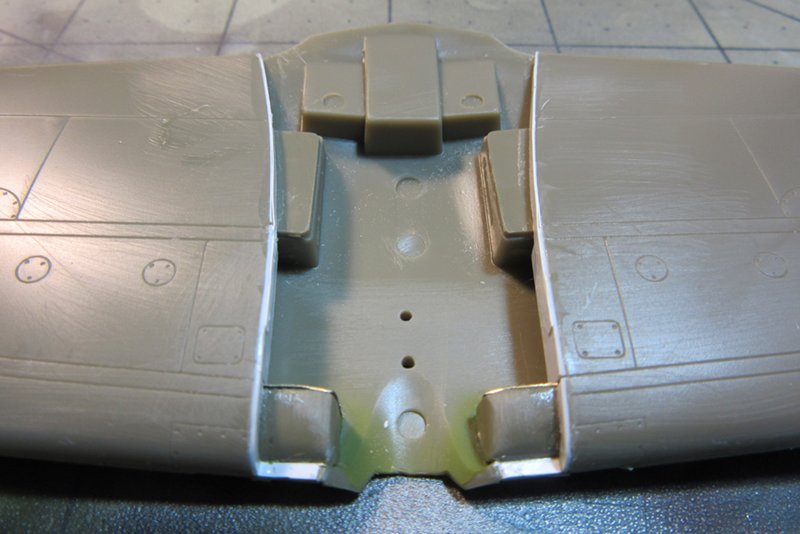
Test fitting of my fuselage and wings revealed a very bad gap on both roots, and the front of the wingroots required me to carve away plastic just to get them to sit flush. I ended up using a lot of shims to close the gaps, I am hoping Mr. Surfacer will do the rest.


I didn't get a pic before I started adding shims, but the gap was about 0.5mm at the front of each wingroot and about 0.25mm at the back of each. I didn't trust trying to close that large a gap with putty.


Next up, cleaning up the wings before attaching them. Then I need to finish off dealing with the gaps at the roots. Once that is done though, it should be smooth sailing. I am pretty sure I will make it before the campaign ends. One month left!