Air Campaigns
Want to start or join a group build? This is where to start.
OFFICIAL:- Airfx III campaign
North4003
_VISITCOMMUNITY
England - West Midlands, United Kingdom
Joined: August 01, 2012
KitMaker: 960 posts
AeroScale: 391 posts
Posted: Monday, March 09, 2015 - 05:49 AM UTC

Quoted Text


Quoted Text

Hello everyone,
I was able to spray primer on my Matilda ....


Good looking build so far Joseph ....


Quoted Text

Well, here it is, my first completed campaign, and my first completed Airfix kit .....


Nice duo Logan and cool inspiration pics too.


And here's my effort so far, attacked the 50 year veteran Sherman using sharp knives and solvents ....

Brent


Gosh, I remember building the Sherman many moons ago. What a fun build! I finished it with a brushed on coat of Pactra OD Green.
phantom_phanatic309
#372
_VISITCOMMUNITY
United Kingdom
Joined: March 10, 2010
KitMaker: 2,568 posts
AeroScale: 1,619 posts
Posted: Tuesday, March 10, 2015 - 02:43 AM UTC
Brent, that Sherman brings back some memories. It was the first Aifix kit I ever finished and I did a pretty decent job of it too. My first completed model was a Matchbox Hellcat painted in FAA colours (and the wrong colours too). The first I ever tried to build was an Airfix Harrier GR3, but the less said about how that turned out the better

Anyway I've decided against building the S-boat for this campaign. Looking at, test fitting it and realising that I will need to source a fairly substantial case to display it in, it just looked like more work than I could do in the time scale of the campaign. What I need is something simpler and smaller.
So, I had a look in my stash and I found a real blast from the past in the form of a bagged Jet Provost mk.3. I bought it from a bargain box at a show a couple of years ago for a couple of quid. It was sold as 'spares only' but luckily contained the complete kit and a set of yellowed decals. The only thing missing was the original card header and instructions.


I can easily replicate the kits markings from generic decal sets, but I might have a look at other JP schemes.

So apologies to anyone who wanted to see the S-boat but I hope this rarity will make up for it.
tinbanger
_VISITCOMMUNITY
Ontario, Canada
Joined: February 04, 2008
KitMaker: 2,507 posts
AeroScale: 1,814 posts
Posted: Tuesday, March 10, 2015 - 02:56 AM UTC
Good work every one , nice variety of subjects being built!
RedDuster
_VISITCOMMUNITY
England - South East, United Kingdom
Joined: March 01, 2010
KitMaker: 7,078 posts
AeroScale: 118 posts
Posted: Saturday, March 14, 2015 - 02:36 AM UTC
What Richard said! also this campaign is real trip down memory lane. great job!

On with the Dornier.

The bomb doors and undercart doors on.


and sat the right way up.


by the by the wheels aren't fixed yet.

The rear ventral gun in place.


The four main cockpit guns and main canopy in place.


the nose glazing on.


Am really enjoying this build, it is a great kit.

Si
MichaelSatin
Staff MemberCampaigns Administrator
AEROSCALE
_VISITCOMMUNITY
Colorado, United States
Joined: January 19, 2008
KitMaker: 3,909 posts
AeroScale: 2,904 posts
Posted: Saturday, March 14, 2015 - 04:10 AM UTC
OK, the 1/72 Typhoon is all pre-painted and ready to start building. Again, I'm building this one out of the box but using the painting instructions from the big 1/24 kit.

 photo 2015-03-14_15-59-47_957_zpso0rmgg8x.jpg

Michael
Jessie_C
_VISITCOMMUNITY
British Columbia, Canada
Joined: September 03, 2009
KitMaker: 6,965 posts
AeroScale: 6,247 posts
Posted: Saturday, March 14, 2015 - 04:29 AM UTC
To prevent your cockpit from looking like the black hole of Calcutta, I'd recommend that you overpaint that black with some dark grey.
DaGreatQueeg
_VISITCOMMUNITY
Napier, New Zealand
Joined: August 01, 2005
KitMaker: 1,049 posts
AeroScale: 41 posts
Posted: Saturday, March 14, 2015 - 04:41 AM UTC
Thanks for the interest in the Sherman guys, re-watched Battle of Britain last night so I'm loving that Dornier Simon !

And the fun on the Sherman came to a halt as I started the "Battle-of-the-Tracks".

There's 6 Shermans in the stash box and as fate would have it all of the tracks have either shrunk with age or were never long enough in the first place. I can see a "newbie" getting given a gift Sherman and having a little disappointment at this stage

Here's the tracks situation below, no panic, I have a plan .....

Brent


Removed by original poster on 03/15/15 - 06:13:29 (GMT).
Berwickboy
_VISITCOMMUNITY
England - East Midlands, United Kingdom
Joined: April 27, 2013
KitMaker: 450 posts
AeroScale: 387 posts
Posted: Monday, March 16, 2015 - 06:37 AM UTC
After a couple of weeks of inactivity I put brush to plastic again tonight and added a bit more to the Defiant. I have added the guns, jacked it up on the undercarriage, added the pitot but I used Albion Alloy tubing rather than the kit part, stronger and easier. She has been decaled, all the stencils proving a task to achieve and I even lost a couple but not of any great consequence.

I am in the process of painting the glass so all being well, and with good weathering, I shall complete this week

Onwards and downwards
Jessie_C
_VISITCOMMUNITY
British Columbia, Canada
Joined: September 03, 2009
KitMaker: 6,965 posts
AeroScale: 6,247 posts
Posted: Monday, March 16, 2015 - 08:32 AM UTC
My Airfix kit for this campaign is the venerable 727 in its latest incarnation

For once, I'm going to do one of the box colour schemes, since Airfix saw fit to give us the Air Canada delivery scheme printed by Cartograph. Quite a departure from the Airfix decals of yore...

That Alitalia is a nice one also. I may need to get another kit...
Airfix has begun to put their kits inside sensible plastic bags once again

Only one part has been knocked off the sprues, but the bag contained it nicely


For my first trick, I mixed up a lump of Milliput and did my usual window filling trick. The remainder had a substantial amount of liquid gravity kneaded into it and ended up crammed into the nose to keep the model balanced. The fuselage is glued and drying as I type. One thing is certain; the fit of this old beast has not improved one little bit. There's a ton of flash and one fuselage half seems to be a little larger than the other at the fin. I foresee much sanding in days to come...
ljames0874
_VISITCOMMUNITY
England - South East, United Kingdom
Joined: August 15, 2012
KitMaker: 408 posts
AeroScale: 365 posts
Posted: Monday, March 16, 2015 - 10:53 PM UTC
A bit more progress on the Hunter to report. The primer is on, the undersides have been sprayed Light Aircraft Grey and then masked off. The topside has received a coat of Dark Sea Grey. Today I have masked the camouflage pattern and sprayed it Dark Green.


Cheers Everybody!
North4003
_VISITCOMMUNITY
England - West Midlands, United Kingdom
Joined: August 01, 2012
KitMaker: 960 posts
AeroScale: 391 posts
Posted: Thursday, March 19, 2015 - 07:10 PM UTC

Quoted Text

My Airfix kit for this campaign is the venerable 727 in its latest incarnation

For once, I'm going to do one of the box colour schemes, since Airfix saw fit to give us the Air Canada delivery scheme printed by Cartograph. Quite a departure from the Airfix decals of yore...


That Alitalia is a nice one also. I may need to get another kit...
Airfix has begun to put their kits inside sensible plastic bags once again

Only one part has been knocked off the sprues, but the bag contained it nicely


For my first trick, I mixed up a lump of Milliput and did my usual window filling trick. The remainder had a substantial amount of liquid gravity kneaded into it and ended up crammed into the nose to keep the model balanced. The fuselage is glued and drying as I type. One thing is certain; the fit of this old beast has not improved one little bit. There's a ton of flash and one fuselage half seems to be a little larger than the other at the fin. I foresee much sanding in days to come...


Jessie, looking forward to the Air Canada version. I agree the Alitalia version is also very nice. Wouldn't a 1970's Continental or Braniff scheme be very pleasing on this model too!
Jessie_C
_VISITCOMMUNITY
British Columbia, Canada
Joined: September 03, 2009
KitMaker: 6,965 posts
AeroScale: 6,247 posts
Posted: Thursday, March 19, 2015 - 08:14 PM UTC

Quoted Text

Wouldn't a 1970's Continental or Braniff scheme be very pleasing on this model too!


It might be a trifle difficult to paint...
North4003
_VISITCOMMUNITY
England - West Midlands, United Kingdom
Joined: August 01, 2012
KitMaker: 960 posts
AeroScale: 391 posts
Posted: Thursday, March 19, 2015 - 11:02 PM UTC

Quoted Text


Quoted Text

Wouldn't a 1970's Continental or Braniff scheme be very pleasing on this model too!


It might be a trifle difficult to paint...


One of the Braniff Flying Color Schemes might be a tad easier. Or how about National Airlines Sun Scheme.

Boy, do I miss the days of airline service.
Berwickboy
_VISITCOMMUNITY
England - East Midlands, United Kingdom
Joined: April 27, 2013
KitMaker: 450 posts
AeroScale: 387 posts
Posted: Friday, March 20, 2015 - 04:34 AM UTC
Look what I've done

I finally bit the bullet and painted the glass without masking, I was having enough trouble with my bulky fingers and lack of space so I thought "sod it!" I have also begun weathering but am letting it dry before ploughing on. Perhaps, just perhaps, I might finish it this weekend in celebration of England winning the 6 Nations
firstcircle
_VISITCOMMUNITY
England - South East, United Kingdom
Joined: November 19, 2008
KitMaker: 2,249 posts
AeroScale: 34 posts
Posted: Friday, March 20, 2015 - 05:13 AM UTC
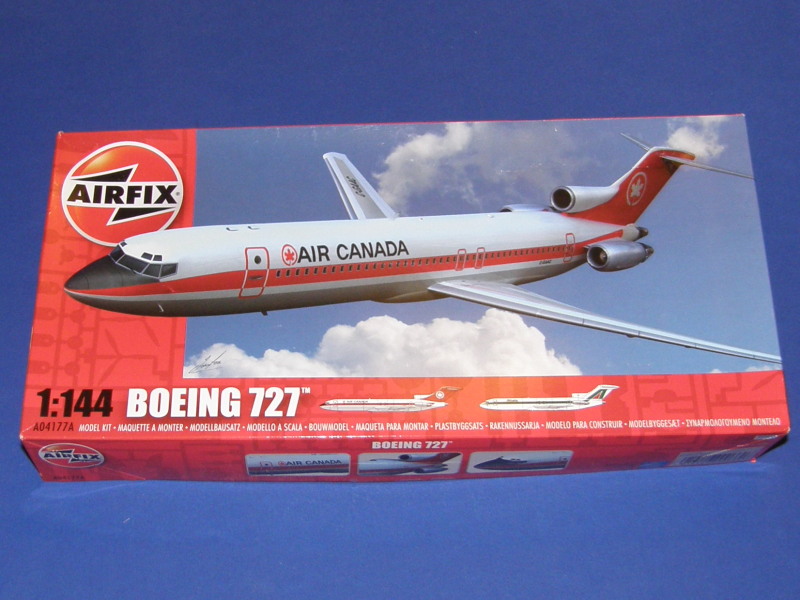
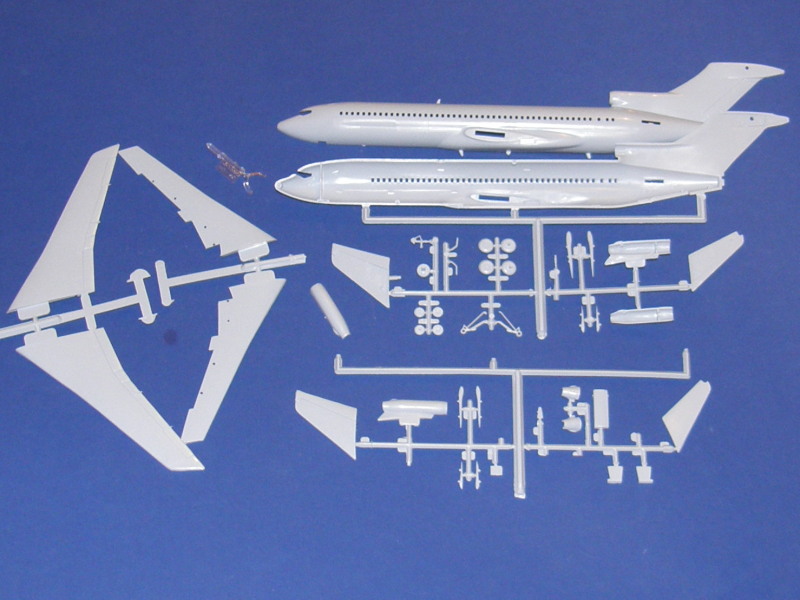
Lots of models coming along nicely and bringing a blast of nostalgia. The dogfight double, marketing genius. The Typhoon was the first kit my mum bought me. The Hunter always looked great - brutal, in fact. The Dornier undercarriage is reminding me of those wobbly ones that collapsed sideways when you tried to flip them over. The Defiant, so ridiculously big to just have one propeller. That airliner thing... isn't that the same one you made in the last Airfix campaign? They all look the same to me.

On the armour - the Matilda looks like a really decent kit. The Sherman on the other hand... and to think that Airfix were giving this kit away the other day as a prize in a competition linked to "Fury". Yes, it's not a good way to encourage kids to start making models.

Also blogging this on the "Big A", so lots of detail here

After trying to "just get on with it" I seem to have fallen into that long episode of doing the details that precede putting paint on, and in the terms of this campaign, correcting "egregious errors"...
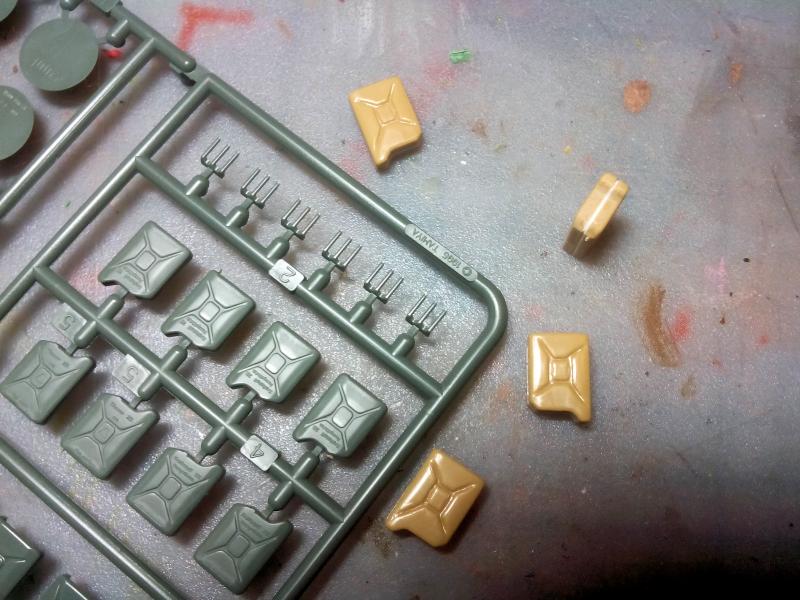
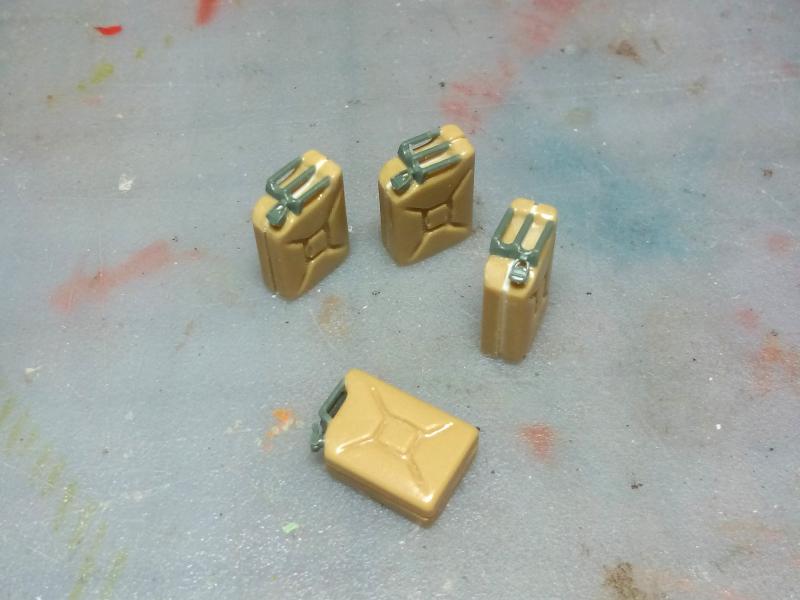
Over the years half of the jerrycans went missing from the box, leaving four on the sprue. I have the Tamiya set and found that the triple handles fit the noticeably bigger Airfix cans quite well, as do the separate spout / caps,

both an improvement over the incorrect Airfix details (single handle, centred cap). Each was assembled sandwiched with a sheet of plastic shaped slightly smaller than the can to provide the groove around the edge.


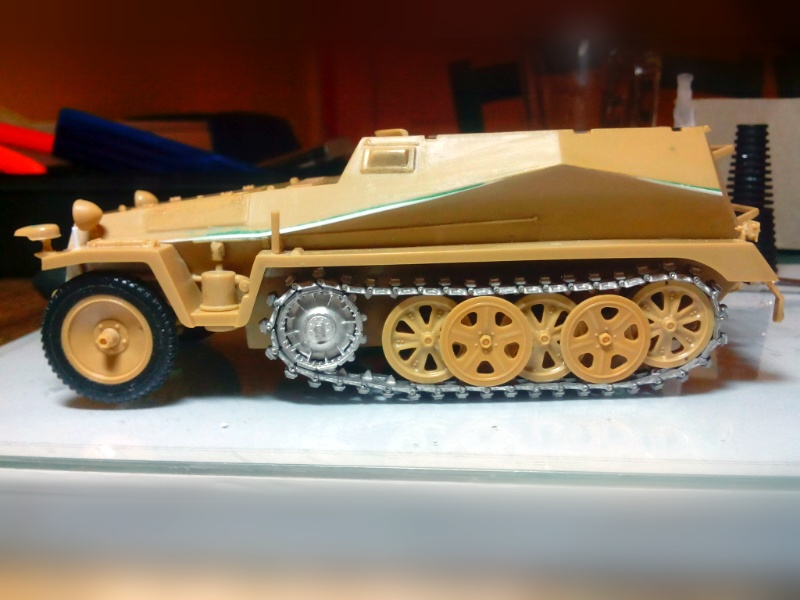
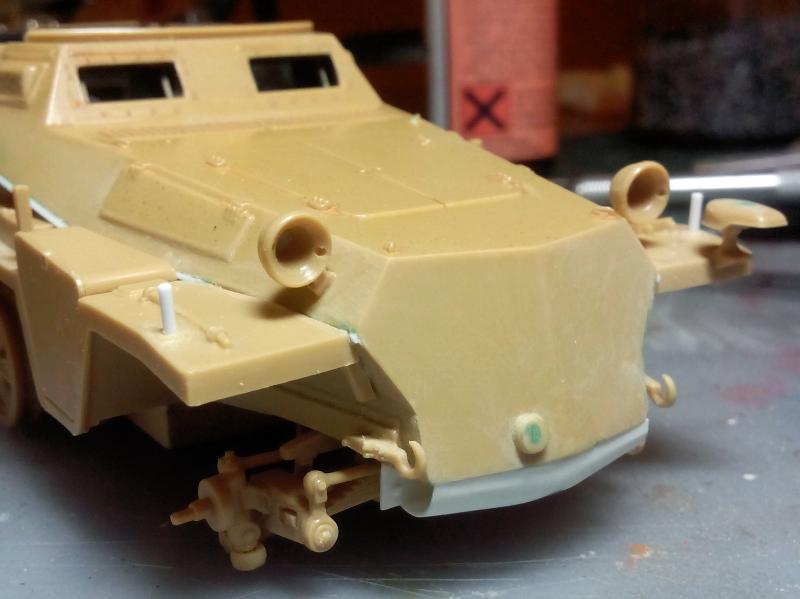
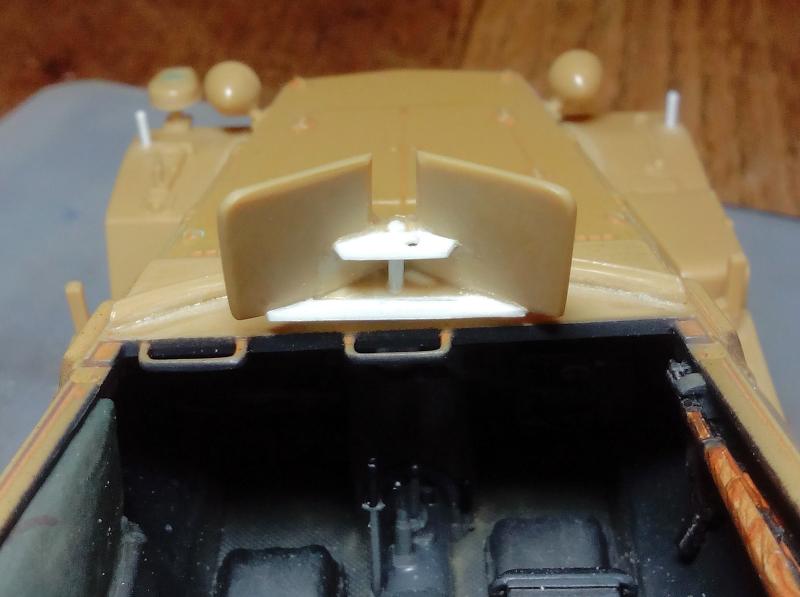
Another issue is the block of V section plastic that sits right under the nose and that is so well illustrated on the box art:


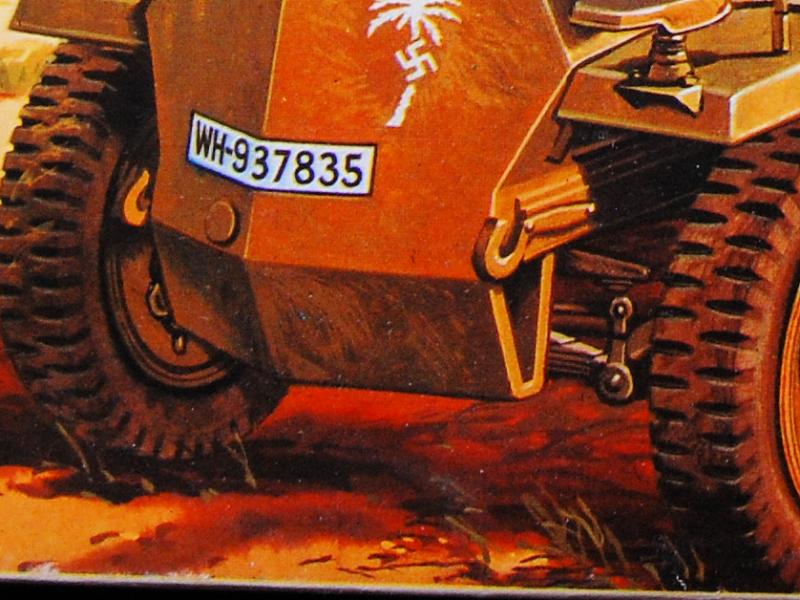
It makes it look like a thick piece of armour plate, but in reality, this part under the nose armour (bugpanzer ) was protected from just dust, stones, water etc. by a thin piece of sheet metal riveted or bolted on then curving

under until it meets some kind of plate attached to the underside of the armoured hull just in front of the axle:


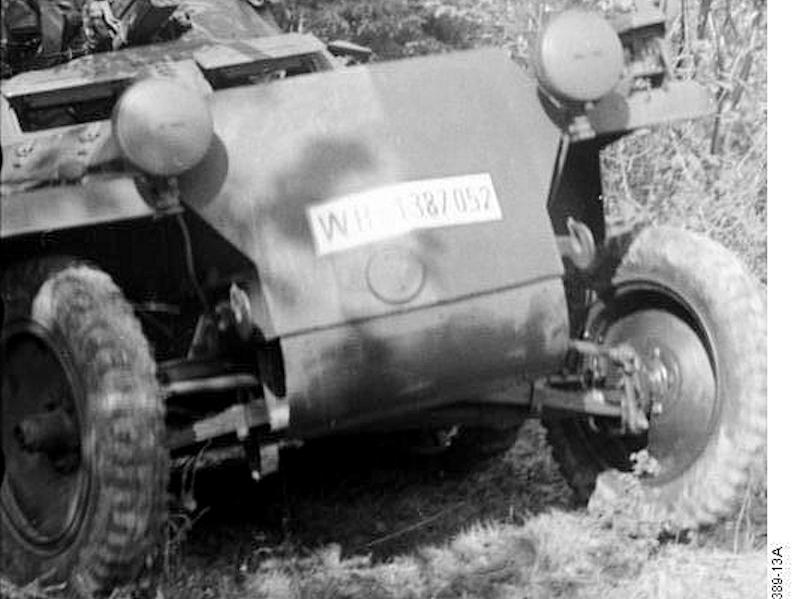
(This photo was cropped from the original file Südfrankreich, Schützenpanzer im Wald , used with following copyright: Bundesarchiv, Bild 101I-259-1389-16A / Micheljack / CC-BY-SA)
It seems strange that this detail is done in exactly the same way by Tamiya on their "Greif" kit; I hope Gary Boggs won't mind me using his excellent rendition of that kit to illustrate this:


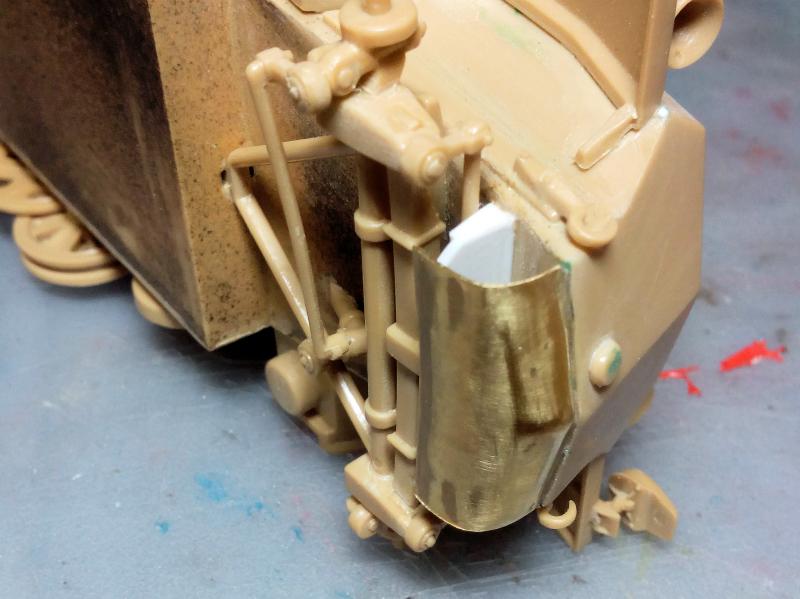
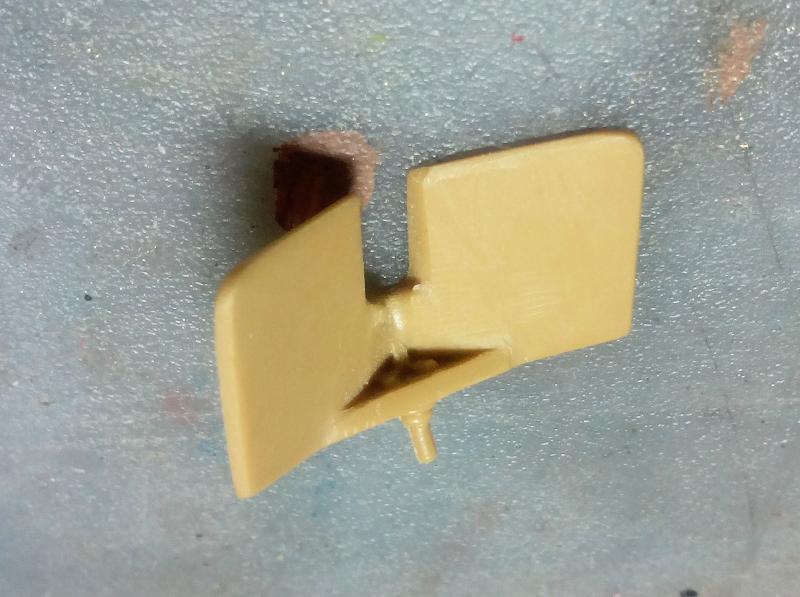
So already having attached that part, I removed it, and the first attempt with a thin sheet of styrene produced an upward curve on either side that didn't look right, plus it was too short:


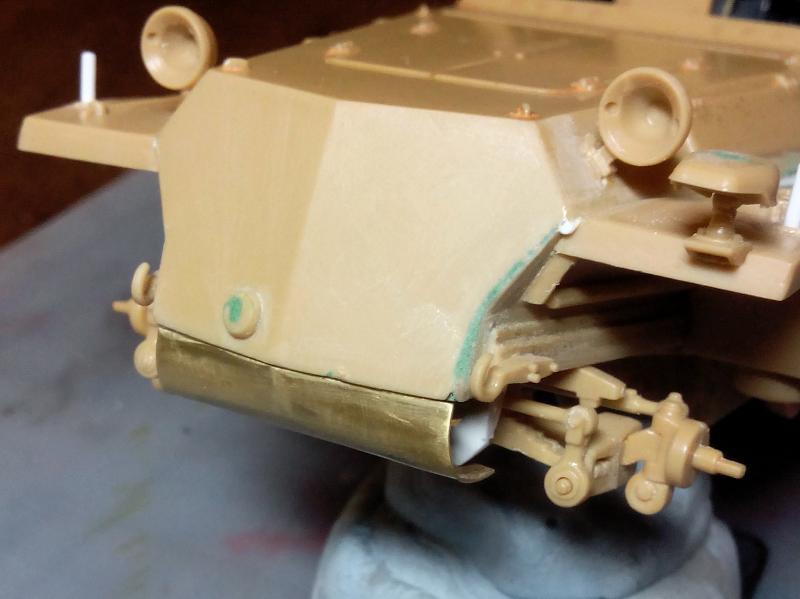
The difficulty is the curve coming to a bent point where it meets the nose armour plate, while still remaining perfectly square in section when viewed head on. Tried again with thin sheet brass and got something that looked a lot better. The sheet when flat is a rectangle with a shallow chevron cut out.


Interesting to read that one of the main mechanical problems this vehicle suffered from was damage to the front axle due to the centre of gravity being too far forward in relation to the tracks, so too much weight bore down on
the front wheels. Though based on the SdKfz10, for some reason the track run was shorter, with one less road wheel, and then of course the whole vehicle is considerably heavier due to the armour plate. It struck me that
that big lump of metal right under the nose plate, as portrayed in the kit component, would only have made matters even worse...

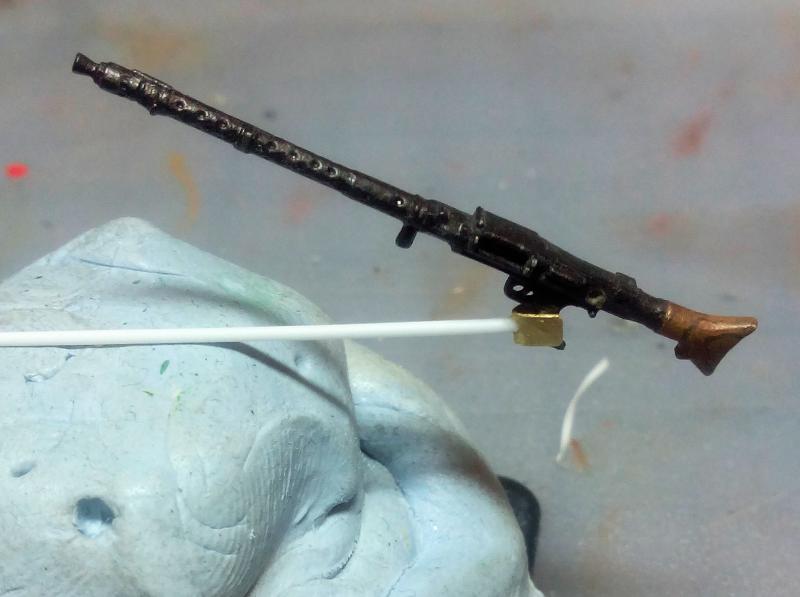
Next is the quite toy like machine gun shield that has no internal detail and is too thick. Here it is thinned down but with no detail added, then with the start of the detailing:


More details are being added to the inside of the shield, including the bracket that the MG34 handle slots into:


MichaelSatin
Staff MemberCampaigns Administrator
AEROSCALE
_VISITCOMMUNITY
Colorado, United States
Joined: January 19, 2008
KitMaker: 3,909 posts
AeroScale: 2,904 posts
Posted: Saturday, March 21, 2015 - 08:51 PM UTC
Interesting variety here. Matthew, the Typhoon was a very early Airfix kit, but I'm building the new release which is in a whole different class. Here's the cockpit:

 photo 2015-03-21_15-25-52_545_zpsvlk2ea8g.jpg

and fully assembled with the wheel wells and installed in the right fuselage:

 photo 2015-03-21_15-31-52_808_zpssdkrimek.jpg

I repainted the fuselage inside with Tamiya NATO black to make it a little lighter but Jessie was right, it's still a bit of a black hole.

Michael
Jessie_C
_VISITCOMMUNITY
British Columbia, Canada
Joined: September 03, 2009
KitMaker: 6,965 posts
AeroScale: 6,247 posts
Posted: Saturday, March 21, 2015 - 10:36 PM UTC
For reasons best known to himself, when the designer designed the kit, he put the potato chip fences on the trailing edges rather than the leading edges where they belong. See this photo for a perfect shot of the fence in its natural habitat.
The incorrect fence on the trailing edge where it will do no good at all

A quick little saw cut and a square of ten thou card later...

And once the glue has set, a little trimming and sanding brings it to its final shape

I trimmed off the incorrect fence at the same time. Total modelling time for both wings is about 5 minutes, time well spent.
tinbanger
_VISITCOMMUNITY
Ontario, Canada
Joined: February 04, 2008
KitMaker: 2,507 posts
AeroScale: 1,814 posts
Posted: Sunday, March 22, 2015 - 03:56 PM UTC

"I trimmed off the incorrect fence at the same time. Total modelling time for both wings is about 5 minutes, time well spent."
Nice quick fix Jessica.
c4willy
#305
_VISITCOMMUNITY
Christchurch, New Zealand
Joined: February 01, 2006
KitMaker: 1,673 posts
AeroScale: 1,517 posts
Posted: Monday, March 23, 2015 - 12:39 AM UTC
Great work Jess and a great catch too I wouldn't have even noticed, I'm no civil aviation enthusiast. I am however interested in your fix though. Did you mark the profile of the fences or were they done with your Mk1 eyeball till they looked correct?
Berwickboy
_VISITCOMMUNITY
England - East Midlands, United Kingdom
Joined: April 27, 2013
KitMaker: 450 posts
AeroScale: 387 posts
Posted: Monday, March 23, 2015 - 05:03 AM UTC
I have weathered and am letting it dry before a final coat of varnish


The first coat was Humbrol Dark Grey wash taken off almost immediately with a paper towel. The exhaust staining is the Grey mixed with Humbrol White Wash and left on a bit thicker.

Onwards and downwards
Jessie_C
_VISITCOMMUNITY
British Columbia, Canada
Joined: September 03, 2009
KitMaker: 6,965 posts
AeroScale: 6,247 posts
Posted: Monday, March 23, 2015 - 08:00 AM UTC

Quoted Text

Great work Jess and a great catch too I wouldn't have even noticed, I'm no civil aviation enthusiast. I am however interested in your fix though. Did you mark the profile of the fences or were they done with your Mk1 eyeball till they looked correct?


I did it all by the TLAR[1] method. I've looked at tons of 727 pictures, and I have a really good idea what the fence looks like, so shaping the card wasn't a huge effort.


[1]That Looks About Right.
DaGreatQueeg
_VISITCOMMUNITY
Napier, New Zealand
Joined: August 01, 2005
KitMaker: 1,049 posts
AeroScale: 41 posts
Posted: Thursday, March 26, 2015 - 04:04 AM UTC
Small progress on the ancient Sherman, fixed the gap in the short tracks with bits cut from one of the other "too short" track sets. Can move fwd with some of the detailing now ...

Brent


firstcircle
_VISITCOMMUNITY
England - South East, United Kingdom
Joined: November 19, 2008
KitMaker: 2,249 posts
AeroScale: 34 posts
Posted: Saturday, March 28, 2015 - 02:38 AM UTC
I also now have tracks fixed up. Including the 1/35 sprocket...

:|

RedDuster
_VISITCOMMUNITY
England - South East, United Kingdom
Joined: March 01, 2010
KitMaker: 7,078 posts
AeroScale: 118 posts
Posted: Saturday, March 28, 2015 - 03:55 AM UTC
Great builds going on here.

The final push on the Dornier. The props in place.


The krystal kleer masking removed from the dorsal windows.


And refilled with new krystal Kleer.


Job done!


Have to say this is a superb kit, bags of detail, excellent fit, and just looks right.

will post some pics on the gallery in the next day or so.

Si