OFFICIAL:- Airfx III campaign
California, United States
Joined: June 11, 2009
KitMaker: 461 posts
AeroScale: 4 posts
Posted: Tuesday, February 24, 2015 - 09:38 PM UTC
England - South East, United Kingdom
Joined: March 01, 2010
KitMaker: 7,078 posts
AeroScale: 118 posts
Posted: Saturday, February 28, 2015 - 01:58 AM UTC
More work on the Dornier,
all the masking, and most of the temporarily attached transparencies removed and the decaling under way.

Decalling, all bar some swastikas, if I can find some the right size in the spare decal box,

Including the instrument panel.

Si
Ontario, Canada
Joined: February 04, 2008
KitMaker: 2,507 posts
AeroScale: 1,814 posts
Posted: Saturday, February 28, 2015 - 02:16 AM UTC
Nice looking build you have there Joseph.

" The Die Hards"
43rd MIDDLESEX REGIMENT
MACHINE GUN CORPS
XXX CORP
The most effective way to do it, is to do it.
- Amelia Earhart
England - East Midlands, United Kingdom
Joined: April 27, 2013
KitMaker: 450 posts
AeroScale: 387 posts
Posted: Saturday, February 28, 2015 - 03:49 AM UTC
Progress is slow as I have been busy all week, but, progress has been made.

The finish is, well, patchy, the decals are on with the exception of the underside stencils and the canopy parts need proper masking, the liquid mask was not a great success.
Onwards and Downwards
Ontario, Canada
Joined: February 04, 2008
KitMaker: 2,507 posts
AeroScale: 1,814 posts
Posted: Saturday, February 28, 2015 - 06:08 AM UTC
Simon and Mike both coming along nicely!
" The Die Hards"
43rd MIDDLESEX REGIMENT
MACHINE GUN CORPS
XXX CORP
The most effective way to do it, is to do it.
- Amelia Earhart

#305
Christchurch, New Zealand
Joined: February 01, 2006
KitMaker: 1,673 posts
AeroScale: 1,517 posts
Posted: Saturday, February 28, 2015 - 07:18 AM UTC
Ontario, Canada
Joined: February 04, 2008
KitMaker: 2,507 posts
AeroScale: 1,814 posts
Posted: Saturday, February 28, 2015 - 08:15 PM UTC
Great build Chris!
Added this model to my wish list.
" The Die Hards"
43rd MIDDLESEX REGIMENT
MACHINE GUN CORPS
XXX CORP
The most effective way to do it, is to do it.
- Amelia Earhart
England - South East, United Kingdom
Joined: March 01, 2010
KitMaker: 7,078 posts
AeroScale: 118 posts
Posted: Sunday, March 01, 2015 - 12:25 AM UTC
Nice work on the Annie Chris.
The Instrument panel in place, took a little wrangling, but wasn't too tricky.

The stbd main leg in place, nicely detailed and solid fit.

Main undercarriage leg done, for two parts it is very solid and looks well detailed. Flaps also on.

Mudguards & wheels on and sat the right way up.

The wheels aren't glued. hence the moulded in flat not yet squared up.
Si
England - South East, United Kingdom
Joined: August 15, 2012
KitMaker: 408 posts
AeroScale: 365 posts
Posted: Sunday, March 01, 2015 - 10:12 PM UTC
@ Joseph, Simon, Mike, Chris - looking good chaps!
Right - the Hunter is all sealed up, and as you can see, the primer is on! I decided to use all four fuel tanks, rather than rocket pods. Due to the way the undercarriage goes together, I will be painting those parts separately, and attaching them last of all.
I'm going to blu tack the undercarriage doors in place during painting, as I have to work out how to cut the serial number decals to fit the doors, before the undercarriage and stores get attached.

Cheers Everyone!
On the workbench
National Pride - 1/72 BAe Nimrod MR2.P
Tiger Meet! - 1/72 Panavia Tornado ECR (Luftwaffe)
Airfix III - 1/72 Hawker Hunter FGA.9
Hairy Brush - 1/72 P-51D Mustang
Mustang 75 - 1/72 P-51D "Ferocious Frankie"
England - East Midlands, United Kingdom
Joined: April 27, 2013
KitMaker: 450 posts
AeroScale: 387 posts
Posted: Monday, March 02, 2015 - 12:43 AM UTC
Quoted Text
I'm going to blu tack the undercarriage doors in place during painting, as I have to work out how to cut the serial number decals to fit the doors, before the undercarriage and stores get attached.
My suggestion is to use a template.
1; Place the u/c doors butting together onto an upside down piece of masking tape. Make sure the doors outer surface is uppermost.
2; Take a sheet of tracing paper, cut a bit big enough to cover the doors and give an overlap of about an inch+ either side. Overlay the doors, you can press the overlap to the tape to hold it in place.
3; Using a sharp 2H pencil (not HB it dulls too easily) draw around the door outline.
4; Cut the decals from the sheet and lay them onto upside down masking tape.
5. Remove the tracing paper and position it over the decal using the tape to secure it once you are happy with the position.
6; Using the lines and a sharp knife cut the decal
You now have what you need. Hope it helps

England - South East, United Kingdom
Joined: August 15, 2012
KitMaker: 408 posts
AeroScale: 365 posts
Posted: Monday, March 02, 2015 - 01:48 AM UTC
Thanks for that Mike, I'll try that out, and I'm sure it will work.
On the workbench
National Pride - 1/72 BAe Nimrod MR2.P
Tiger Meet! - 1/72 Panavia Tornado ECR (Luftwaffe)
Airfix III - 1/72 Hawker Hunter FGA.9
Hairy Brush - 1/72 P-51D Mustang
Mustang 75 - 1/72 P-51D "Ferocious Frankie"
California, United States
Joined: June 11, 2009
KitMaker: 461 posts
AeroScale: 4 posts
Posted: Monday, March 02, 2015 - 04:45 AM UTC
Hello everyone,
I was able to spray primer on my Matilda. Here's how it looks:


Thanks for looking,
Joseph
California, United States
Joined: October 10, 2012
KitMaker: 204 posts
AeroScale: 52 posts
Posted: Tuesday, March 03, 2015 - 12:54 PM UTC
Just popping in to say i'm still here. I've had some health things come up that has prevented me from working on my SBD,but now im in remission I should be able to get back to work somewhat baring my collage schedule. Only real update i have is that i finished the fill work and after a little more minor sanding should be able to prime and get ready to paint.
England - North West, United Kingdom
Joined: September 03, 2011
KitMaker: 608 posts
AeroScale: 31 posts
Posted: Tuesday, March 03, 2015 - 06:48 PM UTC
Because of other committments I'm very late to this, and also the hairy stick campaiggn.
Because I only do thing that have legs.....(Figures)
I can only make airfix figures straight from the box in so many ways.
So...... For the hairy stick campaign I tipped a load of japanese multipose into a bowl, picked parts at random and I have a japanese infantryman ready to paint.
Because I have many of the 1/32nd scale collectors series historical kits as well I thought I may as well do the same.
My official entry is a hybrid (conversion) figure out of airfix parts only and now have a bengal lancer charging, lance lowered with a scots greys right arms adapted to hold the lance and on a scots greys horse.
I haave yet to add the riders legs and feet because I want to give him proper spurs for extra detail later.
Please check this link to my album
http://gallery3.kitmaker.net/data/29741/IMG-20150102-00489.jpgThanks for looking
Pauk

It's not wether the glass is half full or half empty that counts, what's important is who should already be ordering the next round.
What kind of dumbass fool asks rhetorical questions anyway ?
Colorado, United States
Joined: May 18, 2014
KitMaker: 69 posts
AeroScale: 67 posts
Posted: Friday, March 06, 2015 - 07:54 AM UTC
British Columbia, Canada
Joined: September 03, 2009
KitMaker: 6,965 posts
AeroScale: 6,247 posts
Posted: Friday, March 06, 2015 - 08:52 AM UTC
Quoted Text
And can anyone give me a walk-through on how to upload to the campaign gallery? I tried, but couldn't get it to work.
The most common cause of upload failure is the images being too large. Try resizing them to 800 X 600.
When once you have tasted flight you will walk the Earth with your eyes turned skyward.
For there you have been, and there you will always long to return.
-Leonardo Da Vinci
Ontario, Canada
Joined: February 04, 2008
KitMaker: 2,507 posts
AeroScale: 1,814 posts
Posted: Friday, March 06, 2015 - 06:29 PM UTC
Quoted Text
Quoted Text
And can anyone give me a walk-through on how to upload to the campaign gallery? I tried, but couldn't get it to work.
The most common cause of upload failure is the images being too large. Try resizing them to 800 X 600.
Thank you Jessica for the photo guide.
Again this points to the need for a "How To" pinned on the site.
" The Die Hards"
43rd MIDDLESEX REGIMENT
MACHINE GUN CORPS
XXX CORP
The most effective way to do it, is to do it.
- Amelia Earhart
Ontario, Canada
Joined: February 04, 2008
KitMaker: 2,507 posts
AeroScale: 1,814 posts
Posted: Friday, March 06, 2015 - 06:35 PM UTC
Casey:-
Take you time and build when you can,if you finish after the end of the campaign not a problem just let me know when for the ribbon posting.
Paul:-
The mixed up man came out great!
Logan:-
Your dual build look's great!
Let's hope that there will be more Airfix campaign for you to enter in the future
" The Die Hards"
43rd MIDDLESEX REGIMENT
MACHINE GUN CORPS
XXX CORP
The most effective way to do it, is to do it.
- Amelia Earhart
MichaelSatin
 Campaigns Administrator
Colorado, United States
Joined: January 19, 2008
KitMaker: 3,909 posts
AeroScale: 2,904 posts
Posted: Friday, March 06, 2015 - 07:03 PM UTC
Logan,
Did Jessie's tip solve your problem, or are you still having trouble?
Richard,
You're probably right. If I actually wake up this morning, I might take a shot at it.
Michael

On the bench:
Sorta depends on your definition of "on the bench"...
#259
Massachusetts, United States
Joined: October 23, 2011
KitMaker: 2,265 posts
AeroScale: 1,715 posts
Posted: Friday, March 06, 2015 - 07:13 PM UTC
Another common trip-up is that you have to log in again when the gallery page appears.
Colorado, United States
Joined: May 18, 2014
KitMaker: 69 posts
AeroScale: 67 posts
Posted: Saturday, March 07, 2015 - 07:30 AM UTC
Actually, I'm still having some troubles... it's telling me that
"The category you chose for this photo can't contain photos"
How do I remedy this?
#259
Massachusetts, United States
Joined: October 23, 2011
KitMaker: 2,265 posts
AeroScale: 1,715 posts
Posted: Saturday, March 07, 2015 - 12:28 PM UTC
Quoted Text
Actually, I'm still having some troubles... it's telling me that
"The category you chose for this photo can't contain photos"
How do I remedy this?
you have to have the folder open in the view where you can see previously uploaded images thumbnails.
Ontario, Canada
Joined: February 04, 2008
KitMaker: 2,507 posts
AeroScale: 1,814 posts
Posted: Saturday, March 07, 2015 - 04:44 PM UTC
Hi Logan
Check out this link:-
https://aeroscale.kitmaker.net/forums/170740&page=1Also searching in the box at the top of the page will find other info as required.
" The Die Hards"
43rd MIDDLESEX REGIMENT
MACHINE GUN CORPS
XXX CORP
The most effective way to do it, is to do it.
- Amelia Earhart
Colorado, United States
Joined: May 18, 2014
KitMaker: 69 posts
AeroScale: 67 posts
Posted: Saturday, March 07, 2015 - 09:57 PM UTC
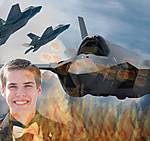
Thank you everyone, I got it!
I got my inspiration for this build after watching the two planes tangle at an air show this summer-


Napier, New Zealand
Joined: August 01, 2005
KitMaker: 1,049 posts
AeroScale: 41 posts
Posted: Sunday, March 08, 2015 - 01:55 AM UTC
Quoted Text
Hello everyone,
I was able to spray primer on my Matilda ....
Good looking build so far Joseph ....
Quoted Text
Well, here it is, my first completed campaign, and my first completed Airfix kit .....
Nice duo Logan and cool inspiration pics too.
And here's my effort so far, attacked the 50 year veteran Sherman using sharp knives and solvents ....
Brent


Available for commissions,visit my Flickr Albums and modelling/painting blog to discuss .......
http://houseofqueeg.wordpress.com/
https://www.flickr.com/photos/134514258@N04/albums


 I think it looks better in person than in pictures, I need to figure out settings and lighting to get better model pictures.


