

1⁄35Razzle Dazzle' em
9
Comments
Rudder and Tail plane
After the wings were completed the painting of the rudder and tail plane were straightforward. The underside was sprayed in Tamiya Buff and masked. I then sprayed the whole tail plane and rudder white overall. Blue stripes were added to the port side and then the red area was sprayed. Finally the two black stripes were painted. The rudder was painted in the same way.The Fuselage
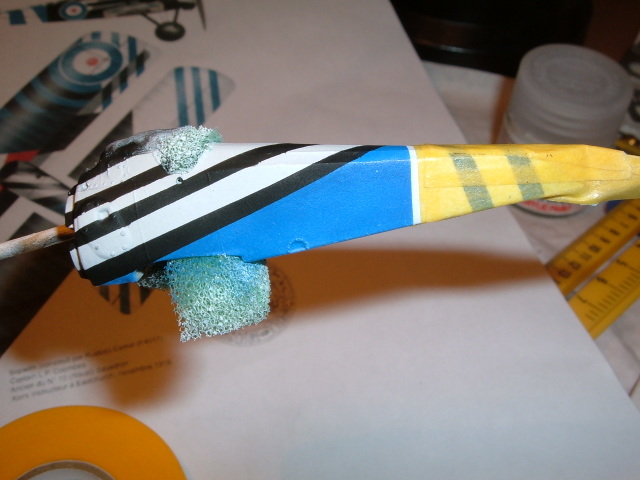
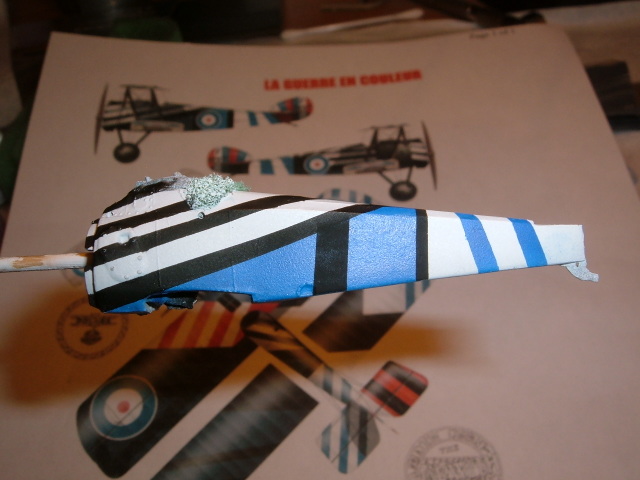
This was the area of the Camel that I was looking forward to the least. The biggest problem for me being the tiny size of the fuselage compared to the tree trunk fingers I was blessed with. Once again the whole fuselage was painted white overall, and I sprayed the cowling at the same time. I decided that the way to approach this was to start at the tail end and work my way forward. Back to the taped together scalpel blades and more thin strips were cut and the blue stripes at the rear and sides were masked and sprayed. Once this was complete I was able to mask the last third of the fuselage off completely which also made handling a lot easier.For the black stripes I first masked and sprayed the angled stripes on the port side. The top of the black line on the starboard sign was first masked and the entire starboard side taped over. First step to painting the angled stripes was to mask the edge between the bottom stripe and the blue area. I then masked the bottom black stripe and sprayed it. The next three stripes were done one at a time working from the bottom up. This enabled me to use thicker strips of Tamiya tape, which were a lot easier to handle on such a small, and curved surface area.
The horizontal stripes on the starboard side were painted in the same way, again starting at the bottom and working up. Saving the easiest bit until last, the olive drab section on the starboard side was masked and sprayed. The masking on the whole fuselage was then checked and the underside was painted olive drab. An overnight break for everything to dry thoroughly and the fuselage masking was removed. Finally the vertical black stripes were added and the fuselage was complete.
A couple of small areas required attention where paint had crept under the tape and then the fuselage was coated in Future/Klear for protection.
The Cowling
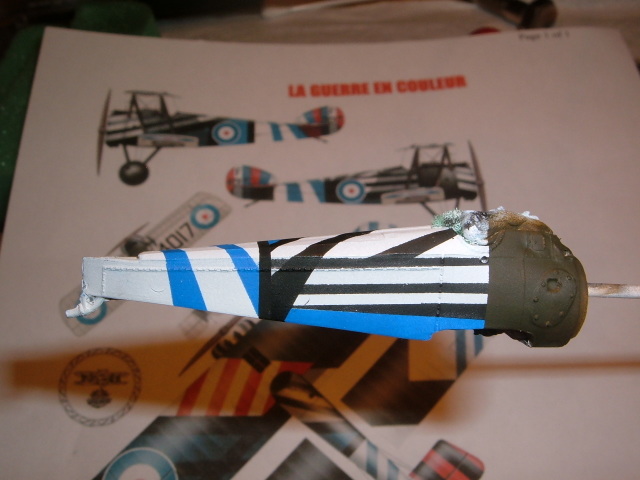
This presented its own challenges. On the port side the black stripe continued along from the stripes on the fuselage but there were no reference points on the starboard side. I overcame this by painting the cowling in two halves. Firstly I tacked the cowling into position with a small piece of blu tac and using very thin strips of Tamiya tape continued the fuselage stripes along the cowling and masked them off. After removing the cowling from the fuselage I sprayed the port black stripes.When this was dry I again tacked the cowling into place and with a combination of more thin strips of tape and the Mk1 eyeball I was able to mask the starboard side of the cowling. The cowling was removed and spraying was completed.
Final Assembly
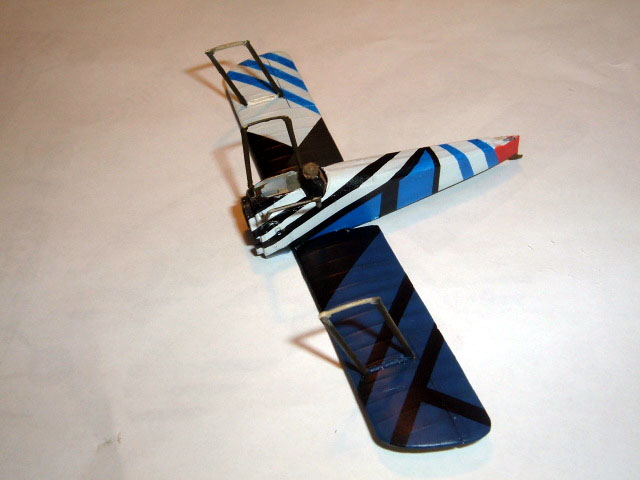
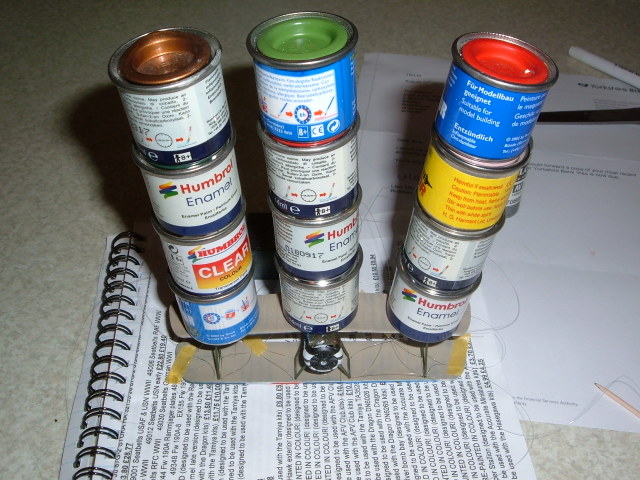
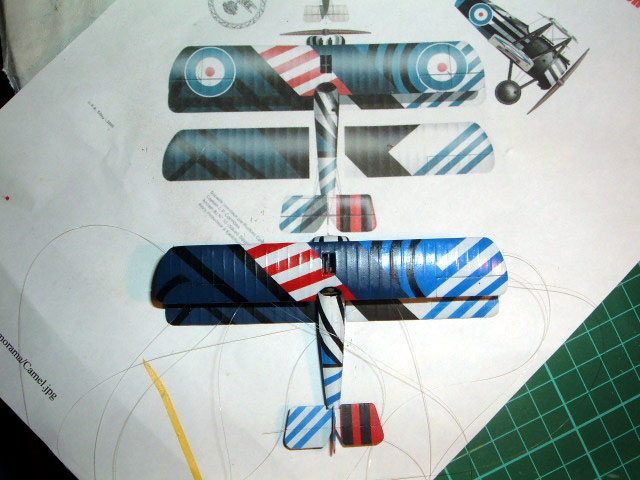
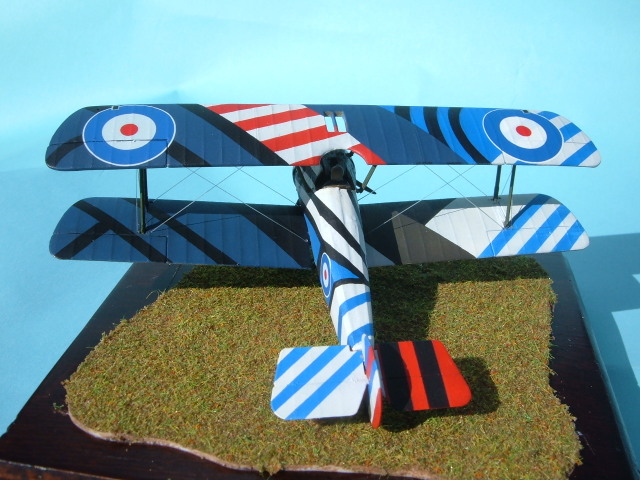
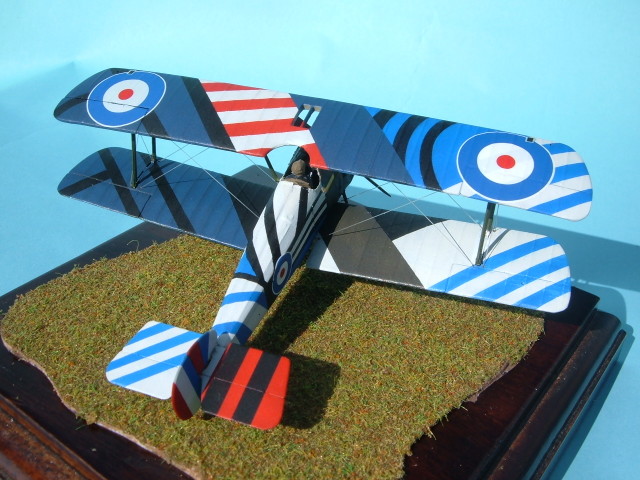
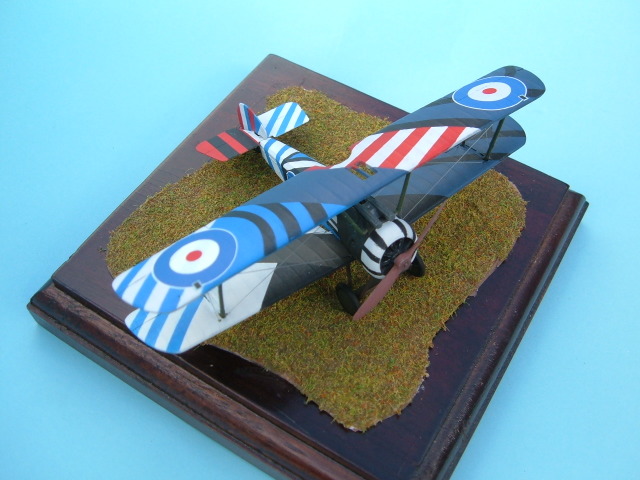
Once all the separate pieces had been coated with a last coat of Future/Klear assembly continued as normal. The bottom wing was attached to the fuselage and the cabine struts glued into position and left overnight to dry. Next day the top wing was attached and again an overnight wait for the glue to dry properly. I dont have any Lego to build a jig for this and used some tins of Humbrol enamels (unopened!) to add a small amount of weight while the assembly dried. Yes, its as precarious as it looks but it worked!The tail assembly, undercarriage and cowling were attached and once all the rigging was connected up the decals were applied. After more coats of Future/Klear the whole model was sprayed with Humbrol Matt Varnish from a rattle can and the Dazzle Camel was complete.
In Conclusion
What started as a halfhearted challenge in a forum post has taken on a life of its own. I was amazed at the reaction from the Aeroscale site members to my little Sopwith Camel and it took first place in the September Model Of The Month with a record number of points. I have deliberately avoided explaining how I did the rigging on the model as I intended this article to concentrate purely on how I approached masking what on an initial view seems a very complex paint scheme. I hope by explaining how I broke the model down into sections and these into sub sections for masking and spraying has taken some of the mystery out of how painted the Anti Dazzle Camel.

About the Author

FROM: ENGLAND - EAST MIDLANDS, UNITED KINGDOM
Restarted modelling in late 2005 after a break of over 20 years.Built a lot of armour as a teenager but now concentrating on WW2 aircraft. Some skills are coming straight back to me and Im learning new ones everytime I log on to this site it seems.
Comments

Nigel Very impressive. Thanks for taking the time (which can amount to many hours of compiling) to write this down. I am itching as it were to do one in 1/48...Again nicely done, impressive build!
OCT 06, 2006 - 05:18 PM


As an alternative to cutting your fingers I recommend Aizu Micron masking tape. Similar to Tamiya's kabuki tape it comes in various narrow widths from 0.4 mm to 2,5 mm. It can also be easily bent around curves and so is useful for the smooth curves of camouflage. About £1 ($1.60) for a 5m roll. You can get from Hoobylink Japan.
LINK
Just search for masking tape - should bring back something like this
LINK
OCT 07, 2006 - 12:49 AM


Hello Nigel:
Razzle Dazzle indeed. . . I really enjoyed reading your article on dealing
with all the masking aspect of painting your Camel. Well done, and
great pictures as well. The tip about the spray bottle of water on the paper
masks for the curved lines was a new one for me. Ah yes, there is always
something to learn from others.
OCT 07, 2006 - 05:18 PM

Nice one Nige. You make it sound so easy the way you have written this.
But you forgot to put in all the swearing, bad dreams involving masking tape, muttering "lines" every other word and the fact you have no hair left on the back of your hands :-) .
Andy
OCT 07, 2006 - 05:27 PM


Thanks everyone for the comments and a special "merci beaucoup" to Jean Luc for giving me the inspiration to build this and also for making a fabulous job of presenting the article.
It really was a lot of fun building this and the MoM win was the icing on the cake.
Im hoping to have both the Camel and its Harricature displayed together on the IPMS British Bulldogs stand at Scale Model World Telford next month.
Oops,,did I forget to write that chapter? :-)
Nige
OCT 07, 2006 - 11:15 PM

Wow, now that took practice and patience!, Great model paint job
OCT 09, 2006 - 06:40 PM
Copyright ©2021 by Nigel Julian. Images also by copyright holder unless otherwise noted. The views and opinions expressed herein are solely the views and opinions of the authors and/or contributors to this Web site and do not necessarily represent the views and/or opinions of AeroScale, KitMaker Network, or Silver Star Enterrpises. Images also by copyright holder unless otherwise noted. Opinions expressed are those of the author(s) and not necessarily those of AeroScale. All rights reserved. Originally published on: 2006-10-07 00:00:00. Unique Reads: 14112

WEB HOSTING BY


Copyright ©2021 AeroScale and Kitmaker Network, a subsidiary of Silver Star Enterprises
All Rights Reserved. Please read our Conditions of Use and Privacy Policy.
All Rights Reserved. Please read our Conditions of Use and Privacy Policy.