

1⁄35Westland Wyvern
20
Comments
painting and decaling
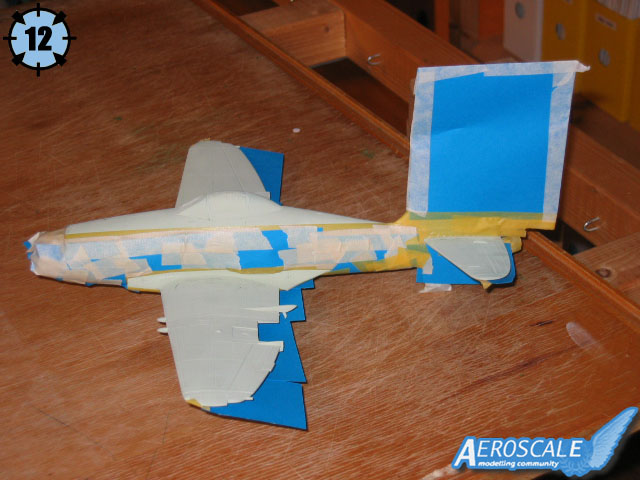
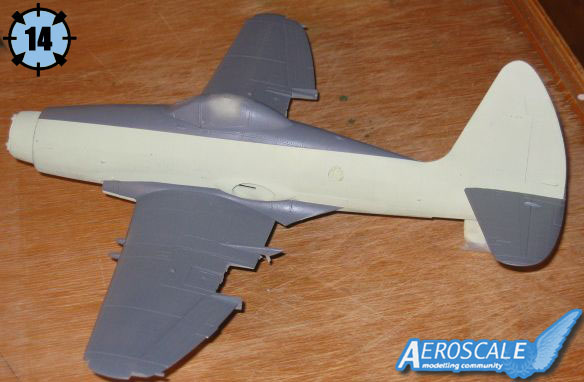
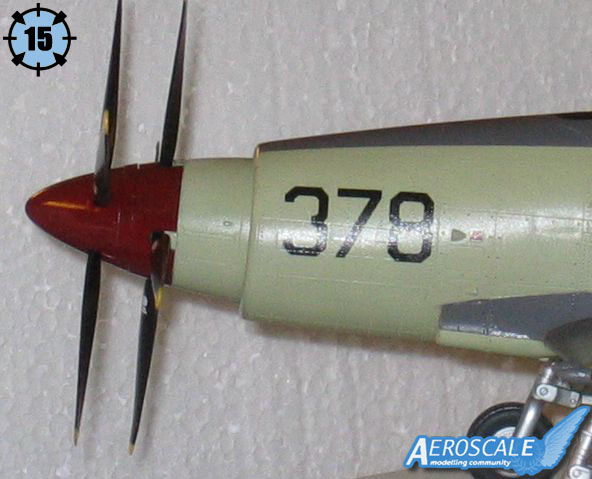
I painted the whole model with Sky (H90) and let it dry thoroughly. Then I could mask for the second colour (picture 12). Instead of Extra Dark Sea Grey, I choose the slightly lighter Dark Sea Grey as the contrast would have been too stark (picture 13). I got some overspray and had some touch-ups to do, but nothing major (picture 14). After this painting session I let it dry for at least three days before I clear coated the model with Humbrol Clearcoat. I then left the model for another day to dry before I could begin with the decals.Trumpeter gives you three nice options, but I decided to do an aircraft with Suez-stripes AND those big nose numbers (picture 15). I found such a machine in the 4+ book, ac number 378/WP337. The nose number was easy enough to do, but the serial wasn't possible to be cobbled together. I decided to use the serial for no. 278/WN325, so my model isn't quite accurate, but both aircrafts served aboard the Eagle, at the same period. Close enough for me!
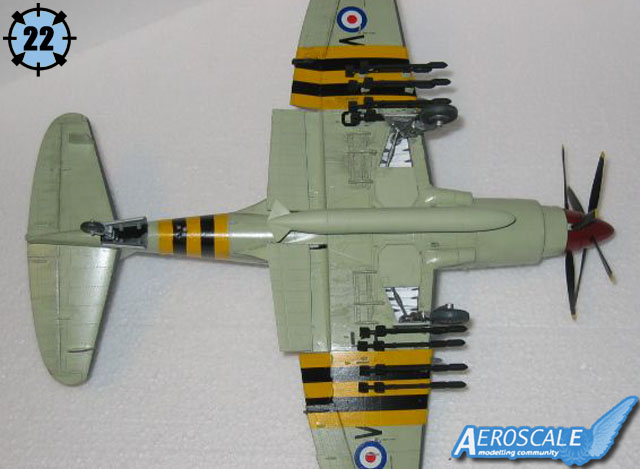
The options in the kit seems to be accurate, but the inner part of the spinner should be Sky, not Extra Dark Sea Grey on the options provided. Decal no. 23 isn't shown anywhere, but it should be used on the centreline tank on 278/WL879 "Dennis the Menace". I could find no use for the decals no. 32, so I just left them off. Most Wyverns had a small anti-glare panel in front of the windshield. Trumpeter forgot to include this on the decal sheet. I used a spare anti-glare decal (for a Hasegawa A-4B Skyhawk I was building at the same time), which I cut to shape. In my opinion Trumpeter's decals are the weakest part in this kit. They are very thin and very brittle and sticks within seconds on the model and can't stand much handling without tearing apart. This is no problem concerning the smaller decals, but it can be a bit problematic with the bigger ones such as the stripes. They are also printed out of register, not much, only a fraction of a millimetre (0.1-0.2mm), but it's enough for the white undercoat to show trough in the edges on the dark portions on the model. The white undercoat is rather thin so the decals are a bit translucent too. This caused no problems where the decals went over a single colour, but it bled trough on the fuselage stripes and the upper wing British cockades. I used some white discs (Tamiya Spitfire) from my spare decal box, cut to fit the cockades. I could not do anything about the fuselage stripes, though. It's important to place the big decals (The stripes) as correctly as possible at the first try. Luckily this is quite easy if you do it this way:
- Before dipping the decals in water, make sure you cut out the slot in the rear end and the gun port cut in front on all wing stripes.
- Begin with the lower wing stripes and use the slot and gun port cut as a guide for placement, making sure the stripes are straight.
- Let the decals dry thoroughly.
- Now you can attach the upper wing stripes, using the slot and cut in the same manner as earlier, and lining up with the lower stripes will make sure it's straight.
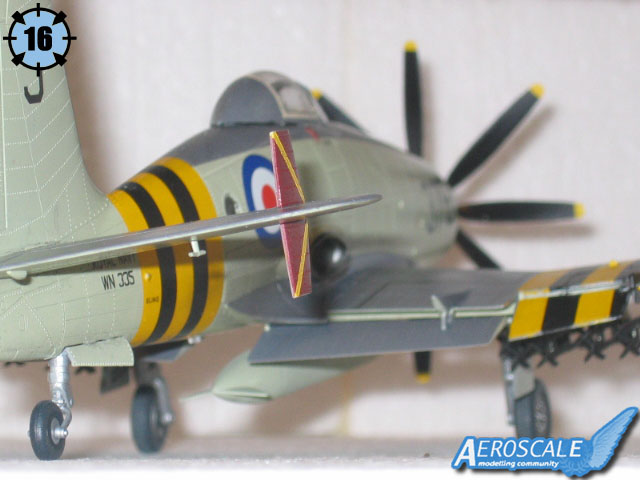
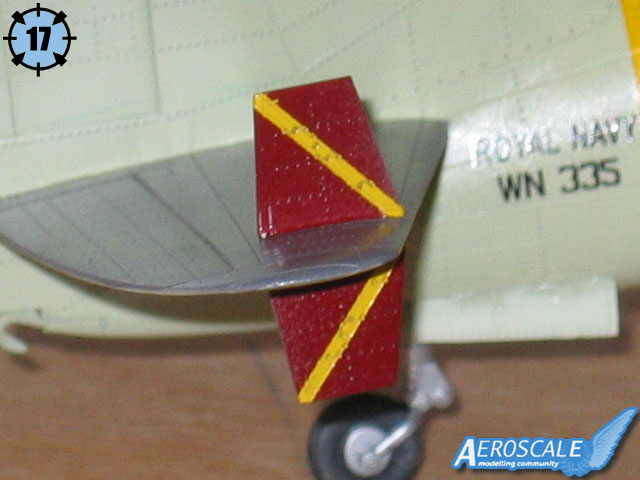
Trumpeter has supplied the decals for the upper air brakes in separate parts, but not for the flaps on the underside. If you (temporarily) glue the flaps in the up position and attach the decals, you can cut the decal and reposition the flaps later. This is how I did as I wanted the airbrakes closed but the flaps down (picture 16). I used Micro-Set and Sol liberally to get the stripes to settle, only Set was needed on the smaller decals. All decals snuggled down very nicely when dry and look almost painted-on. I got some silvering on a few wing stencils, mostly due to the surface not being glossy enough. Ensure you have a really glossy surface on the model, work slowly and do not rush, is the best advice I can give on the decals. I used three days to get all decals on the model, there are more decals then you might believe. I decided to paint the finlets, as they should have the same Maroon colour as the spinner. I believe they are way too light and red on the decals (picture 17). After wiping off every residue from decal solutions and fingerprints I let the model dry for a day.
I used a wash (black paint and white spirit) to enhance the deeper recesses, and a "sludge wash" (Tamiya acrylic Nato black, white, water and detergent) all over the airframe. Exhausts were sprayed with Alclad II "Jet Exhaust" (this is a turboprop ac after all) lightly along the sides. I tried to keep the aircraft fairly clean as they were never old on carriers. The Wyvern served in the navy for only 4 years and this is the group commander's mount (one yellow diagonal stripe on the finlets). A nice clear satin coat sealed in the decals and washes. From this point it was downhill all the way!
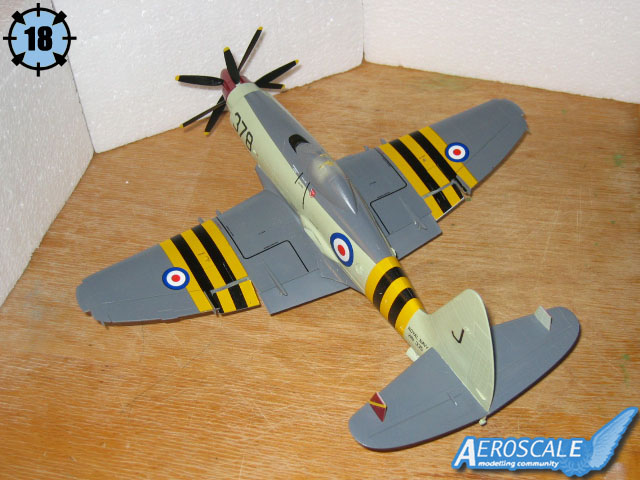
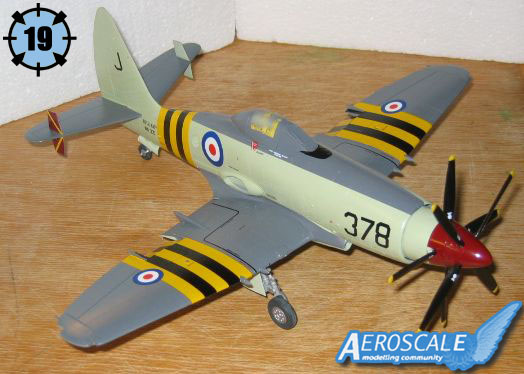
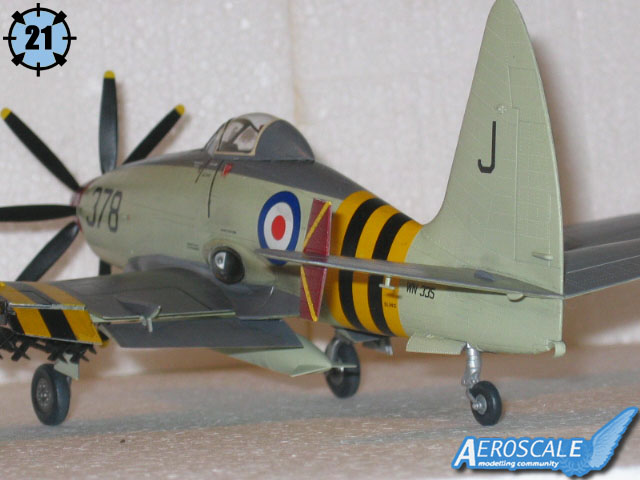
Now I could attach all those small parts and I started with the landing gears. The struts fit a bit loose in the holes, but are easy to align at the correct angle. Be aware that the inner gear doors should be closed on the ground, not open as Trumpeter shows. Just cut off the mounting lug and they will fit fine after a little sanding. I had to enlarge the holes for the rockets, but this was an easy task and then they fitted very well. The rocket stubs are Sky, the racks and rockets are matt black. Note that the he wing tip lights have red (port) and blue (starbrd.) covers, while the formation lights (rear) are clear. After fitting all the antennas and some other small parts, it was only a few touch-ups and removing the canopy masking before the model was ready to take its place in the cabinet (pictures 18 to 23).
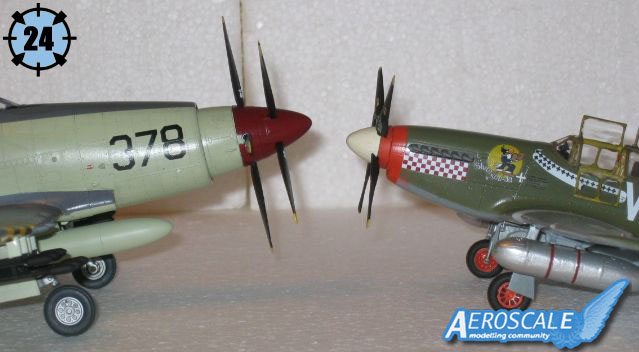
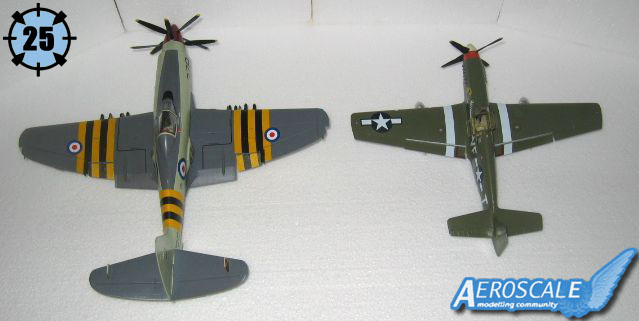
The Wyvern is a large aircraft and pictures 24 and 25 will give you an impression on how large it really is!
conclusion
My first impression of this kit was very good and it still holds true! Fit during the whole build have been between very good and excellent! Only drawback is the decals that require some experience to cope with, and Trumpeters dubious colour-recommendations. Everything else would be nitpicking. This was is a very easy and fast build, almost as easy as the Tamiya Skyraider or P-47 Thunderbolt. I can recommend this kit to anyone but the absolute beginner (Lots of parts, Wing fold option, and tricky decals) and it represents very good value for money. Thanks to Trumpeter for doing the Wyvern in 1/48, can we please have a Gannet next?Essential reference: Westland Wyvern, 4+ Books


About the Author


Comments

Hi again!
Maybe I don't get it... don't forget I'm French! :-)
I made a copy/paste of the Wyvern text in my TextEdit program but it appears fine with no squares or the like...
Could someone send me a copy of the text with squares via e-mail? That would be nice. I just can't spot these damn "things".
Jean-Luc
OCT 28, 2006 - 07:49 PM

Nice article and a nice build.
As for the text problem, I use Opea, and it appears fine, I then checked with IE and again it appears fine, but when I use Firefox, that's when the little boxes for spaces show up. Maybe it's a browser thing?
I copied and pasted from Firefox to a PM,and all the little boxes disappeared when it was pasted.
OK hopefully you got the PM with the little boxes, seems to only be on Firefox.
OCT 28, 2006 - 09:24 PM

Hi All!
Sorry If I have caused any trouble to anyone who wanted to read my feature!
Yes, I wrote this feature in Word, as I did with the SM79 Feature wich worked as it was intended to do.
I can´t understand why this one doesn´t work?
It works fine on my screen though.
In the submissions help you state that features can be written in MS word OR in another simpler format?
Why not say "use (this format) period" to avoid any confusions in the future?
Jean-Luc, Please excuse me if I forgot to number the pics correctly!
Not my intention to give you more work then I understand you already must have with this site.
I find it very rewarding to write these features, and it´s also a way for me to give some "pay-back" for all the help I´ve got myself from modellers all over the world on forums like this.
I love this site and all the wonderful, helpful people here, but the submission process could be a lot easier as on other sites.
It´s a bit too complicated for a "computer-challenged" modeller like me! :-)
Cheers!
Stefan E
OCT 28, 2006 - 10:16 PM

Hello Stefan
my comment was not meant to cause you any trouble. Normally Word should not be a problem. Sadly the stuff sometimes produces strange signs ...
BTW great Model
cheers
Steffen
OCT 28, 2006 - 10:42 PM
Hi Steffen, and thanks!
No troubles here!
Guess we have to blame it on the computers, that sometimes don´t act as we would want them to! :-) :-) :-)
Cheers!
Stefan
OCT 29, 2006 - 12:43 AM
Hi all... and Stefan!
No need to apologize! The first time I sent my submissions to Rowan I think I gave him even more work...
This is a file standard problem and something must have gone wrong in the editing process. You have a PC, I have a Mac and those who experienced the problems have PCs... this was likely to happen one day! :-)
This is why I asked you (the members who submit features and reviews, not only you Stefan ) to use the simpliest text editing program as it will avoid any issues like these. As for the name of the pictures, we should set some standard yourself so editing is less complicated. Believe me, you can save an hour or two of editing with such things. Maybe I should write a "how to submit an article to aeroscale" feature...
By the way, I edited the Wyvern feature with the text you sent me guys... is it working now?
Jean-Luc
OCT 29, 2006 - 01:48 AM
Hi Jean-Luc
many thanks ..much easier reading now!
You might have noticed that I optimized my posts to mak this whole thread more model related and to praise Stafans craftsmenship
cheers
Steffen
P.S. bist du eigentlich Elsäßer ... wie auch immer herzlichen Glückwunsch zum WRC Titel von Super Seb
OCT 29, 2006 - 02:10 AM
Hi Steffen!
Yes, that's kind of you! It's to bad this thread was hijacked with technical problems. But let's see it in a positive way. It's been a long time since a "What's New" thread didn't generate that much replies! :-)
Nicht ganz, mehr Lothringer und ein wenig Saarländer (Vater). Aber ich freue mich trotzdem! :-)
Jean-Luc
OCT 29, 2006 - 02:30 AM
By the way, thanks to Jean-Bernard (French), Steffen (German), Dave (American) and Eetu (Finnish) for helping me out with the text. And of course thanks to Stefan (Swedish) for submitting the feature!
Jean-Luc
OCT 29, 2006 - 02:35 AM
Hi all!
I also want to say a big: Merci, Viele Danke, Thanks, Kiitos and "Tack för hjälpen" (Thanks for all the help!).
Cheers!
Stefan E
OCT 29, 2006 - 10:58 PM
Copyright ©2021 by Stefan Ericsson. Images also by copyright holder unless otherwise noted. The views and opinions expressed herein are solely the views and opinions of the authors and/or contributors to this Web site and do not necessarily represent the views and/or opinions of AeroScale, KitMaker Network, or Silver Star Enterrpises. Images also by copyright holder unless otherwise noted. Opinions expressed are those of the author(s) and not necessarily those of AeroScale. All rights reserved. Originally published on: 2006-10-28 00:00:00. Unique Reads: 16900

WEB HOSTING BY


Copyright ©2021 AeroScale and Kitmaker Network, a subsidiary of Silver Star Enterprises
All Rights Reserved. Please read our Conditions of Use and Privacy Policy.
All Rights Reserved. Please read our Conditions of Use and Privacy Policy.