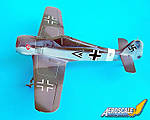
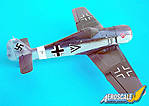
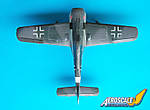
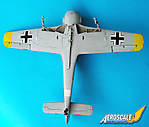
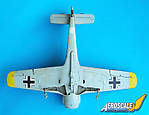
1⁄35Focke Wulf Fw 190 F-1
3
Comments
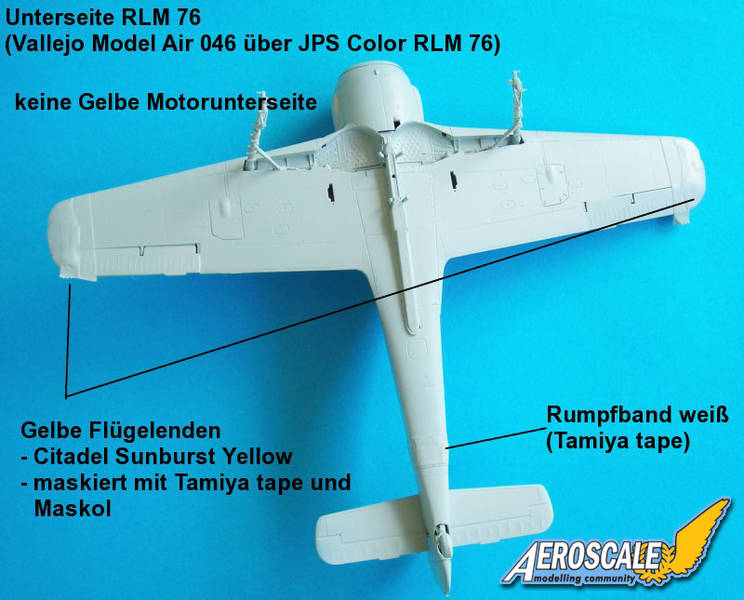
Camouflage
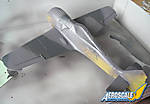
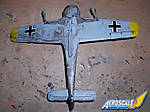
I first masked off the white fuselage band (theater recognition) with Tamiya tape. Then I sprayed Citadel Sunburst Yellow on the lower wingtips. Pictures in "Fw 190 in North Africa"(Arthy/Jessen) pg. 133-135 indicate this, though it could be a misinterpretation. The same pictures do not show a yellow lower cowling (in my opinion). The wing tips were masked with Tamiya and Maskol.Now comes the fun part. I wanted to try the new JPS Color for the first time. It is not lightened for a scale effect and Jens Popp is known to be quite obsessive when it comes to color shades, but when I had it on, it looked much too blue for my taste, which could be either a problem of not shaking the bottle long enough (although my arm almost fell off, and yes I had put in two bearing balls) or of missing scale lightening. However, I like the hue of the Vallejo Model Air and thus I sprayed a light coat over the JPS layer, which resulted in a slightly more blue hue than I normally use (to my eye) ... which is what I wanted for my Africa machine.(pictures 14, 15)
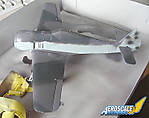
Then I masked the fuselage sides and tail and sprayed the upper side RML 75 grauviolett (JPS color). I had to polish and respray some areas, but nothing too serious. I had an early batch of those new colors, which was not fully tested and had some problems staying on the model, so I mixed in 50% Klear for better adherence and sealing. This worked fine, but the color was of course much less opaque, which made controlling the layer thickness a little difficult. The RLM 74 in particular was not really easy and would require some more fine tuning with sealing, polishing and weathering to look good. For the soft edge camo on the wings I used a paper card with a ripped edge holding it a few millimeters above the model. (picture 16)
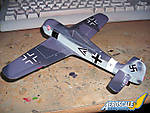
Finally I de-masked the plane --- except for the canopy. (picture17). Due to the thick coats of paint, I got a ridge around the fuselage band and also along the upper edge of the tape where I'd masked the camouflage. I sanded/polished the latter area to smooth it out and then resprayed the edge - which also gave an irregular transition between the RLM 76 sides and the upper camo. The band ridge was just polished a little. Then I sprayed on a nice coat of Klear. (picture 18)
I used the Hasegawa decals with swastikas from Aeromaster. These were probably the most problematic Hasegawa decals I've ever used. They just did not want to come off the decal sheet (and I used very hot water which normally brings decals off in 2-3 seconds) and had a very strong tendency to fold over (if you ever have worked with Propagteam decals, you know what I mean).
Well, to cut a long story short, I managed to get most decals on, except for the starboard walk way, which was twisted. I put it on anyway and used plenty of Daco red, while another coat of Klear did the rest. All decals blended very well with the surface.(pictures 19, 20)
Some small decals are still missing in those pix and were added after 24 hours (picture 21). One small mistake: the fuselage "Balkenkreuze" are a few mm too far backwards as is the "<<" (compared to the instructions) but IMO it still looks OK.
The final bits and pieces also took some time. I painted the black panels behind the exhausts, mantles for the u/c gear legs, tail wheel ... Furthermore I added the inboard u/c covers (Fahrwerksrestabdeckungen - which were up on the pix in "Fw 190 in N.Africa"). Then I gave the whole thing a nice wet coat of Klear and let it dry for some hours.
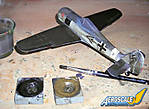
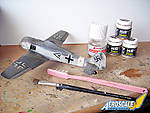
Now for the dirty part. As my first wash I use black and umber water colors (see pictures 22, 23, 24) which I mix according to the underlaying color --- more umber for the lighter colors. Then I put it aside to dry. The earlier you start to wipe away the watercolor the less it sticks to the panel lines. If you do not like it .. just take a wet cloth and wipe everything away (the gloss coat makes things easier). Also if you add more water to this wash it will lighten up as you have less pigments on your model. (see the difference in picture 22 and 23 and the left and right side in 24)
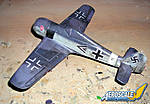
I let this dry almost completely this time and use a damp cloth, which will leave the lines very pronounced, but I intend to use a filter/pigment wash afterwards which will reduce the effect. After all is rubbed away with that damp cloth ... I hope the pix show the effect, as it is not easily photographed on dark surfaces (just take the underside as reference and think a bit darker ...) (pictures 25, 26, 27)
To seal the wash I airbrushed a layer of semi-matt (Vallejo Air). After it was dry I took out my MIG set "Sand and Earth for desert and summer conditions" and mixed Light Dust, Gulf War Sand and a little African Earth (not too much as it is pretty red). I applied a first coat dry with a flat brush but the effect was not as I wanted it and so I mixed the dust with Humbrol thinner (a lot of thinner! ... 95% or even more) and applied it wet. (Pic. 28 .. the wings are still wet)
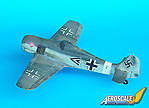
After it dried I removed most of the pigments from the panel lines and other corners, as I just wanted to give the machine a dusty finish. Then I “sealed” the pigments with dusted on flat coat for protection. On the underside I used my toothbrush --- actually an old spare --- to simulate some mud thrown up by the wheels (just read the mentioned book .. it rained a lot in Tunisia ) but I tried to keep it subtle and not as pronounced as on my Soviet P-40E. (pictures 29 and 30)
The exhaust stains are just experimental and were added with my airbrush later. Unfortunately I realized to late, that it was damaged, so they are very pronounced and a little overdone. The Revell boxing of Dragon's Fw 190 A-8/G-8 contains a 500kg bomb, so I got my armament. The brake lines are thin wire. Then the wheel bay covers and the wheels were added. And finally the bomb, guns, u/c indicators, position lights and other small stuff were attached.
Comments
Thank you Rowan!!
especially for ironing my mistakes out!!!
cheers
Steffen
JUN 23, 2007 - 12:56 AM
Hi Steffen
My pleasure! It's a great article - keep 'em coming!
All the best
Rowan
JUN 23, 2007 - 02:06 AM
Hi Steffen!
Nice one! Congratulations for your first article here!
Unfortunately (for me) I don't have the Hasegawa Focke Wulf in my stash... now I have to buy one to follow your advices.
Jean-Luc
JUN 23, 2007 - 07:32 AM
Copyright ©2021 by Steffen Arndt. Images also by copyright holder unless otherwise noted. The views and opinions expressed herein are solely the views and opinions of the authors and/or contributors to this Web site and do not necessarily represent the views and/or opinions of AeroScale, KitMaker Network, or Silver Star Enterrpises. Images also by copyright holder unless otherwise noted. Opinions expressed are those of the author(s) and not necessarily those of AeroScale. All rights reserved. Originally published on: 2007-06-23 00:00:00. Unique Reads: 12472


