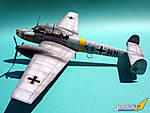
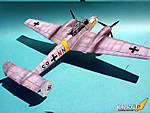
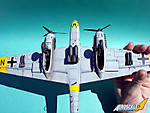
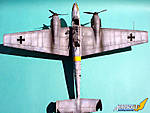
1⁄48Eduard Bf 110E
1
Comment
Introduction
For me the most anticipated aircraft kit release of 2007 was Eduards promised Bf 110 series, beginning with the Bf 11 E. I wasn't alone it seems, as I didn't manage to even see one for real until almost December! And by then it turned up at the same time as the second release in the series, the Bf 110C. So I had to make do by reading the excellent Aeroscale reviews by Rowan Baylis (Merlin) and just kept waiting. The Bf 110E review can be found here and the Bf 110C review here.My initial impressions of the kit mirror the majority of reviews: a complex well detailed kit that will take some care. To their credit Eduard themselves have been quite open in saying this is not a begginers model kit.
Construction
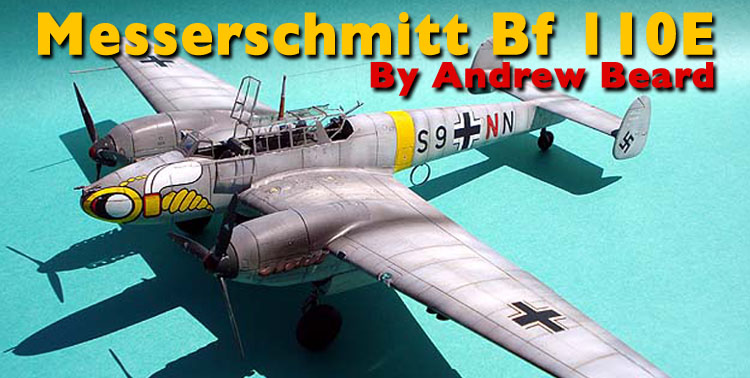
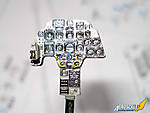
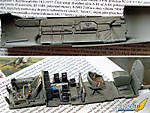
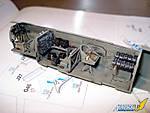
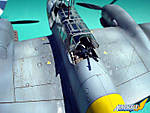
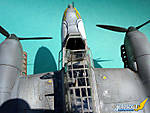
My method of building is to assemble everything I can first into subassemblies that I can spray the same base colours. For me this speeds things up, especially as I only tend to use Tamiya/Gunze acrylics which dry fast. After base coats, I then detail paint and assemble further.The cockpit is the most detailed I've seen for a 1/48 kit so far. In fact a bit too detailed for me... I left off a few fiddly etched bits such as the handles for the machine gun magazines. No excuses, I'm just a lazy builder sometimes! Anyway I feel that such things can just as easily be molded onto the parts anyway. In general I like pre-painted instrument panels and seat belts, and the one in this kit looks nice when put together, except for the RLM 02 (on the panel) which has a strange grainy finish. I've noticed it in review photos before, yet no one ever made mention of it. It doesn't stand out at a normal viewing distance but can be clearly seen in a close up pic. I just left it alone, lazines again!
I finished the interior in RLM 02, washed with thin Tamiya Smoke, before finally a flat coat. Like most people so far, I decided the best way to do the fuselage was to mount the sidewalls onto the fuselage halves instead of making a complete tub. It worked fine for me as the fuselage halves just fell together.
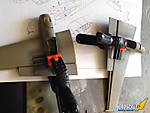
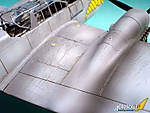
Not so for the engine nacelle to wing joins! The fit to the undersides was fine, but I couldn't get the tops to match very well at all. I ended up with both a gap and step which needed quite some filling and sanding before I was happy with it. I think next time I may try using some scrap platic blocks around the upper nacelle to wing joins in an attempt to do it a bit better.
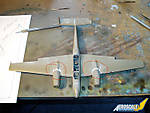
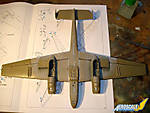
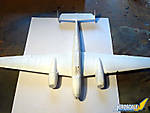
The rest of the wings fit very well, including the radiators. Watch out for the join at the wing tip trailing edges, if not careful you can accidentally glue the aileron mounting area together which would end up causing fit problems later with the ailerons. I just made sure not to get any cement into that area. The wing to fuselage was ok, but first I needed to carefully file down the mating surface on the wings. They have a raised ridge running up the middle, removing it helps the fit. Even so, for me there was still some filler needed along the bottom fuselage to wing join, the top was perfect.
The worst fit problem for me was the fit of the nose pieces. Much of it was my own fault for this one, and I know how to do it better next time. The problem being that the interior bulkheads seem a bit wide, which spreads the nose pieces slightly. If you are building with the nose closed then my advice would be leave everthing out that is not needed, basically just use the gun mount. Fit the lower half to the fuselage first and then the upper gun cover and it should go better. I completely assembled the nose and then fitted it to the fuselage...and it didn't fit! I had to do a bit of filling and filing on the nose join.
The SC500 centre bomb rack also needed just a small amount of filler to fair it in, but I didn't get carried away as it wouldn't be a perfect join in real life- it's removable afterall.
The tail surfaces fit perfect, same with the ailerons, and that was the airframe complete.
Nothing to report on the other subassemblies, bombs etc. They all went together easily and look good enough to me.
Painting
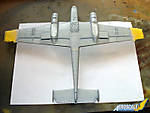
I like all the options Eduard give...varied and interesting. My first idea was to do the Iraqi Sonderkommando Junck aircraft W.Nr. 4035 of Martin Drewes. However I decided against it after lots of research help from Neil Page (thanks!). Whilst the aircraft was definately an early E-1, I think it was actually an extended tail fuselage aircraft (it held a life raft)... apparently most very early E-1's were. This seems backed up by one pic of this aircraft under British capture- a section of the rear fuselage under the tailplane has been removed, my guess is they removed the tail extension... maybe due to damage. Anyway my decision was to wait on an Iraqi scheme until Eduard bring out the long tail D versions, and use the Iraqi decals on that one as a D-3. So my new cuning plan was to do the white washed Wespen aircraft of Lt.Herbert Kutscha. My first attempt at a white distemper scheme as a matter of fact.I alway prime my models with a laquer primer as it helps acrylic paints adhere more like enamels. On shiny smooth plastic, acrylics have trouble sticking to. I use Tamiya primer, expensive but seems to shrink down and not obscure detail. I use white for aircraft with white or yellow ID bands, grey for everything else.
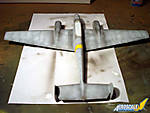
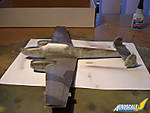
So I now had a white primed Bf110. Yellow ID markings were sprayed using Gunze RLM04. Then I roughly free handed the camoflage colours RLM 74/75/76. I didn't even use my double action airbrush for this, just my usual Paasche H. It was all going to be mostly covered by white distemper anyway, I just wanted the basic colours underneath.
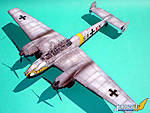
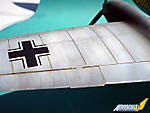
Then followed the white wash. I didn't know how it would turn out, being a white wash virgin and all. I just used well thinned paint and a fine spray pattern and just built up the effect. It tuned out ok, but looked too artificial intially, so I used some fine worn wet and dry paper and scoured the leading edges and other selected areas to give it an abraded and scratched look. With hinsight I think a laquer clear coat (laquer is very durable) before the white wash would work well and allow far more wearing of the white top coat. Next time...
Gloss clear for me is usually Tamiya TS13 spray can laquer. Usually straight from the can, but I sometimes decant it and use the airbrush. In fact the same applies to all the Tamiya TS and AS range, they sound expensive, but if you decant them they go a long way and actually aren't so expensive afterall. Each can has 100ml of pre-thinned paint ready to airbrush. All contained in a convenient air tight can! And the way to get it out for the airbrush is like this: go to the supermarket and buy a pack of those drinking straws with the corrugated bendy bit near one end, so you can bend it through 90 degrees. If you buy the right straws they will be a tight push fit over the Tamiya spray can nozzle, bend the straw 90 degrees and put the other end in your airbrush jar and spray, shake the can well first to mix the paint of course. You get a nice slow dribble of paint come out of the straw and into your jar. Only decant what you need, as it goes thick very fast. And this important...NEVER put a lid on the jar and store! The paint has propellant mixed in. You know what happens when you shake a Coca-Cola can and open it? Well that's what happens if you put a lid on the jar and come back later and open it. Whilst, as an avid modeller, you may think RLM 04 walls and ceilings look nice, others you currently live with may not agree.
Back to topic, the great things about using clear laquer is that it dries fast and you can decal withing 30 minutes and it's impervious to any type of wash you wish to use... ok except a laquer based one, but why would you want to do that?
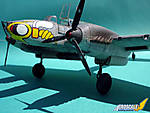
The decals were quite possibly the best kit decals I've ever used. Thin, with almost no surrounding clear film, and worked perfectly with micro-set and sol solutions. The all important wasp went on ok, just needing a little brush touch-up, mostly because it's designed to go onto the open gun cover which I built all closed up.
My version of a panel line wash followed. I use a similar technique to the oil paint sludge wash. Just without the oil paint! They dry too slow and I don't get along well with the smell of turpentine or white spirits, they make me feel sick actually. I use a cheap kiddy set of water colours from K-Mart, cost $2 I think. They are the tube kind. I just mix until I have the colour I want, usually starting with burnt sienna. I thin slightly with water and dishwashing detergent (breaks the surface tension). It then gets applied to the panel lines, left to dry- only takes a few minutes. Then I remove using a very lightly dampened cotton bud/Q-tip worked across the panel line. Then just clean up as much or as little as you like. Just like oil paints, I find I can leave a film on the surface or make streaks etc, which works like a filter. For this model I left the surface more stained than usual. I figure the white scheme is wearing away and it may be starting to thaw outside, resulting in mud getting sprayed up by taxiing aircraft following each other etc.
I decide not to white wash the canopy. I actually got some reference books during this build. And whilst some show white canopy frames, more than half the white aircraft I've seen pics of don't. The canopies being left in regular camo colours with a sharp demarkation. I decided to do it that way. It looks like most German ground crews didn't like masking canopy frames any more than we do. And on that subject the Eduard masks worked like a charm and saved hours of the sort of work that no one really likes. The tedious kind.
Final finish is my usual Gunze clear flat. It works for me every time, something I can't say for others I've used. I'm really looking forward to trying Tamiyas newly announced TS Flat Clear spray cans as soon as I manage to get some. Promises to be another great time saver.
Final assembly
Not much to report, the bombs, landing gear, antennas, canopy parts all fit without drama. Take care fitting the parts to the inside of the clear parts. Once again laziness set in and I left off the etched canopy handles from the inside...Conclusion
It took me 14 days to achieve a model good enough for my own standards for displaying in my cabinet. I enjoyed it a lot, it's a well detailed, accurate looking model. And it's worth the effort to build for sure. I'll be building the extended tail D when it comes out as well.But the kit is not quite the perfect wonder kit I first thought when I opened the box. Eduard put together probably the best overall "package" of anyone out there at the moment, but they can still improve their engineering. They are not near Tamiya in that regard yet. The kit has a few annoying areas to the fit, areas that maybe could have been done a bit smarter. I also think some brass detail parts give no advantage and could just be done using regular moulding techniques. But don't take what I'm saying wrongly, it's a superb kit and kit of 2007 for sure in my opinion...but it's not perfect.
Compared to the other 1/48 Bf 110's that are out there, well for the early C,D,E versions these new Eduard kits have no close competition. The Fujimi and it's offsprings were nice for their time but don't compare to these new offerings. When Eduard do the G's I'm not sure things will be so clear cut. I have the Revell G-2/R-3 to compare with. The Eduard version will no doubt be better, but not by enough for me personally to throw away the Revell kit and buy a new Eduard one when it comes out. Especially since the Revell G's sell here for half the price of an Eduard! The main problem with the Revell kit is the shape of the engine nacelles. To me they look good enough, needing to be put against a photo or plans for comparison to show up their defects. But If it matters to you then you'll have to get the new Eduard kit, assuming they don't mess it up as well of course! But I'm looking forward to building the Revell G2 sometime in the near future I hope.
Comments
Stunning build Andrew.
It looks like your the first Aeroscaler to finish an Eduard 110 as well
That nose decal really stands out against the white winter scheme.
Nige
JAN 31, 2008 - 10:14 AM
Copyright ©2021 by Andrew Beard. Images also by copyright holder unless otherwise noted. The views and opinions expressed herein are solely the views and opinions of the authors and/or contributors to this Web site and do not necessarily represent the views and/or opinions of AeroScale, KitMaker Network, or Silver Star Enterrpises. Images also by copyright holder unless otherwise noted. Opinions expressed are those of the author(s) and not necessarily those of AeroScale. All rights reserved. Originally published on: 2008-01-27 00:00:00. Unique Reads: 24278


