

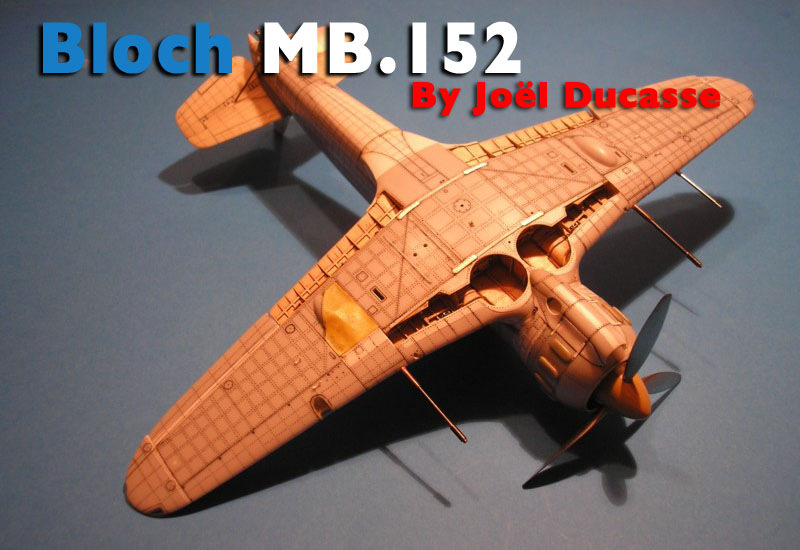
1⁄48Bloch MB.152
11
Comments
Introduction
Several models of the Bloch 152 are available in 1/48 scale. I've purchased them all in the hope to find at least one that is accurate. Unfortunately none of them are. Neither the JMGT and POMK resin kits, nor the Fonderie Miniature and Classic Airframes injected ones.How can I declare with such certainty that they are all false? Well, I searched for exact plans. I found them in the Bloch 152 Bible, namely the book by Serge Joanne. It features superb plans in 1/72 scale by Jacques Robineau, which I enlarged with a photocopier to 1/48 scale. These plans were compared with photographs and profiles in the same scale and they matched perfectly. The work of M. Robineau is amazingly precise and detailed. Many thanks to him and to M. Joanne.
I then compared the models with the plans what a disappointment! I don't want to list all their shortcomings but all have at least one big problem in common: the wings are too far back by more than 4 mm, which translates into almost 20 cm on the real aircraft. By the way, the same error affects the models of the MB 155 in the same scale.
However, the models also have their good points and I finally chose the Classic Airframe kit as a basis (picture 1), not because it is the best model, but because it is the one which requires the least amount of structural modifications.
Of course I needed a lot of references for this project and here is a list of them: several books about the Bloch MB.152, le Fanatique de l'Aviation, Avions, les Ailes Françaises, Ciel de Guerre, Réplic, Wing Masters, etc...
I made most of the modifications using scratch methods. Virtually all the parts of this model were either heavily modified or replaced. This was a long term project which took me a year and half to complete, two to six hours per day.
The fuselage
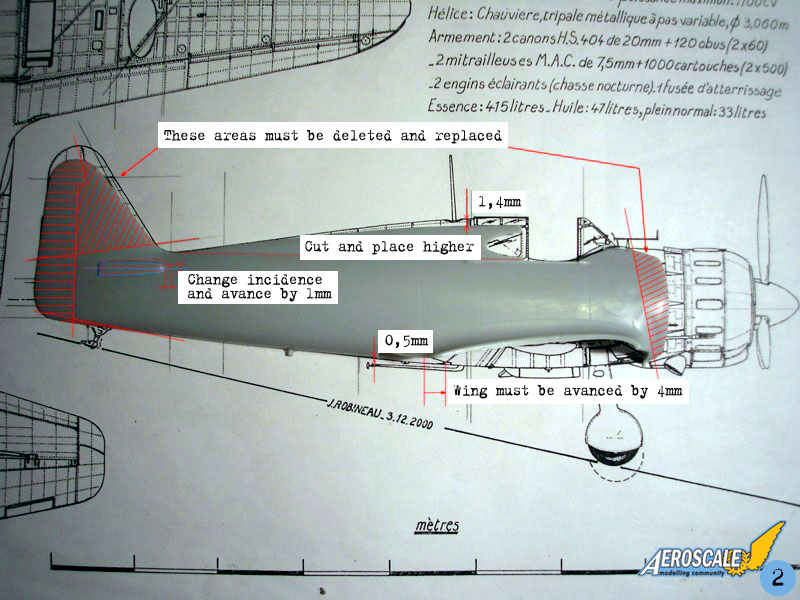
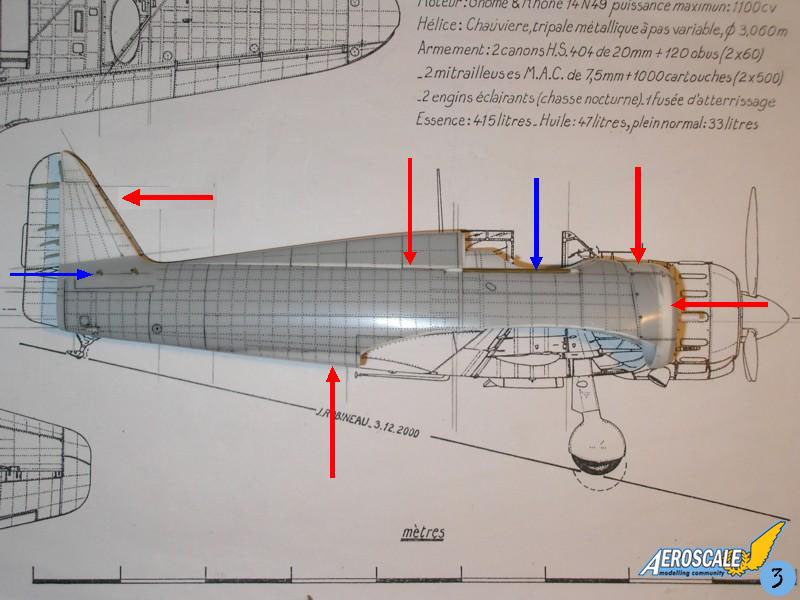
The fuselage's rear, behind the cockpit, is too low by 1,4 mm and it's shape is too round. I have cut it and placed it higher. The lower area isn't "fat" enough so I added 0,5 mm of material and sanded it to shape (picture 5). The rudder, as well as the front area of the fuselage are wrong and must be removed and replaced (see picture 2). The horizontal stabilizers must be moved forward by 1 mm and their incidence changed.I sanded away all the engraved details and rescribed the model (picture 3). I decided to add all the missing rivet lines as well. For this I used a home made riveter (picture 4 and 5).
The fuselage halves were then glued together. Two U shaped brass rails were also added on the cockpit sides. Now the airframes starts to look much better.
The tail of the plane
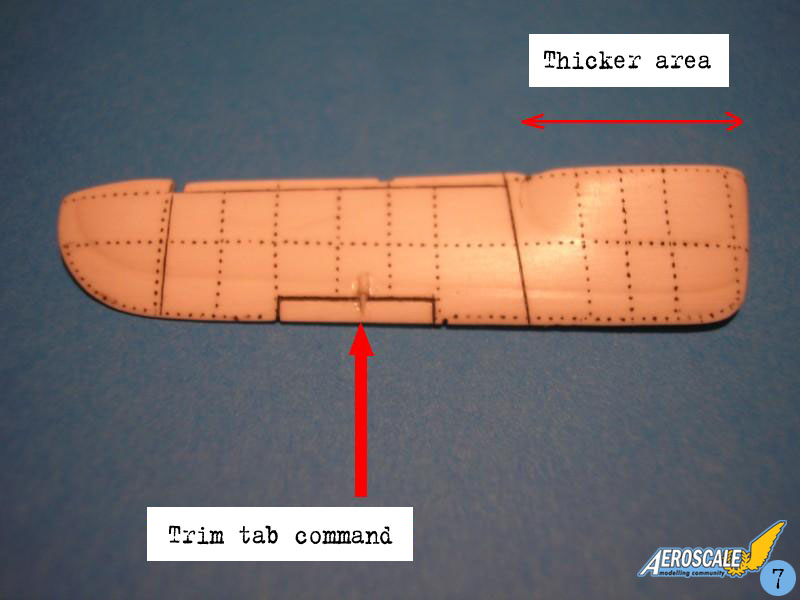
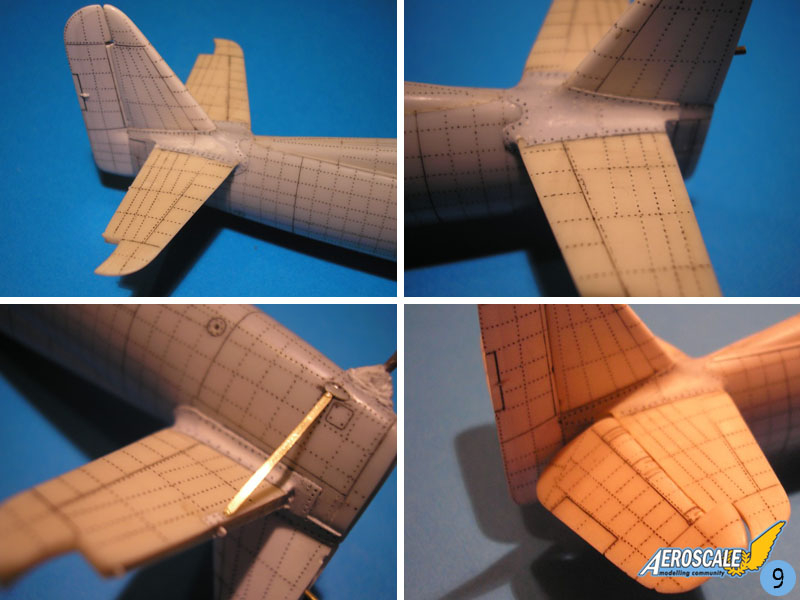
The rudder is too short so I replaced it with a scratchbuilt part. The horizontal stabilizers are the wrong shape and are too small (picture 6). I used the resin parts of the JMGT kit, not because they are better, but because the control surfaces are separate. The hinges are made with small bits of plasticard (picture 8). I also added trim tabs instead of flettners (picture 7). The latter being a feature of the first series of Blochs (sérial number under 640).The horizontal stabilizers were carefully placed and secured using Cyanoacrylate and brass rods. The control surfaces are movable thanks to small brass hinges (picture 9). I made the tail fillet with Sintofer putty. The two reinforcement struts are made with spare photo etch. They are positioned against two small clear teardrop shaped bulges. On the real aircraft, each bulge was fitted with a position light. The tailskid is made of white metal and the fabric cover made from putty.
The front of the plane
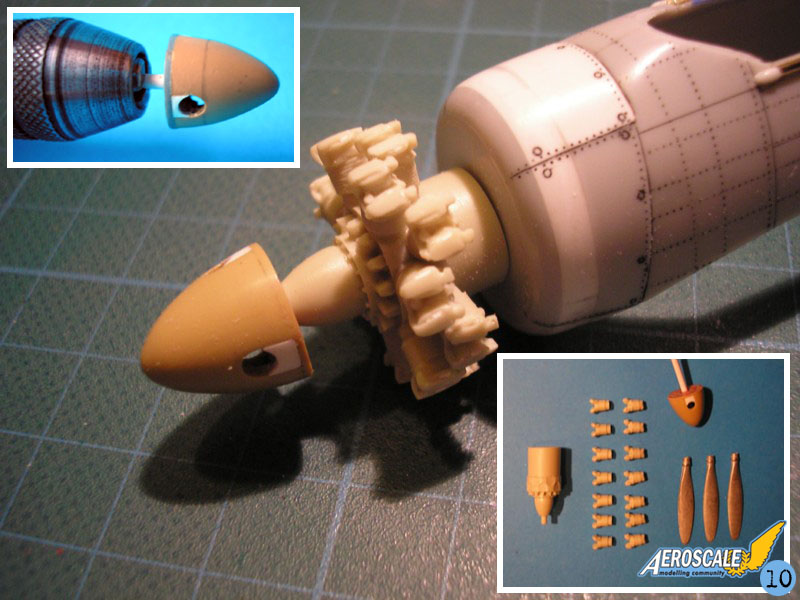
I replaced the kit's spinner because it's diameter is too small when compared to the real one. I used one from a Spitfire Mk V instead, which was sanded to shape using a Dremel tool (picture 10). The propeller blades are the white metal parts from the JMGT kit. I thinned them down a bit though.The radial engine comes from the Classic Airframes kit and is superb. I only added some wires for more realism (picture 15).
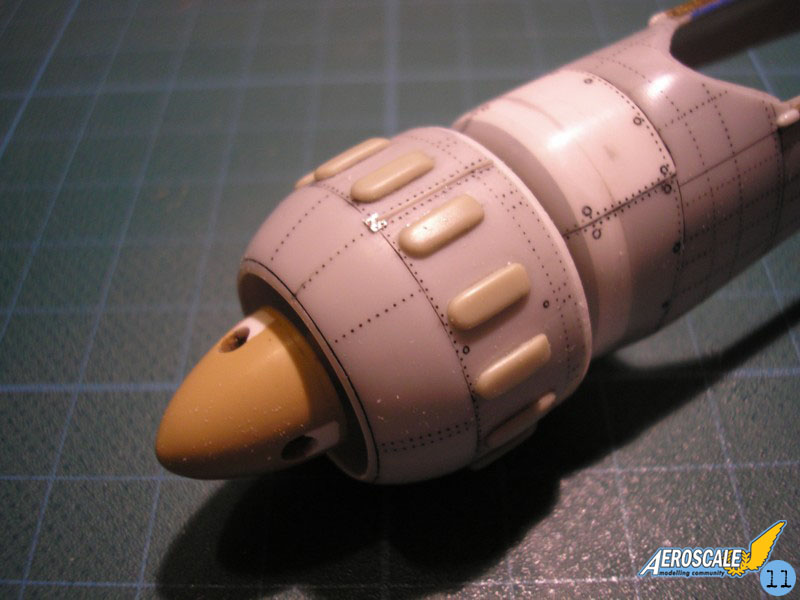
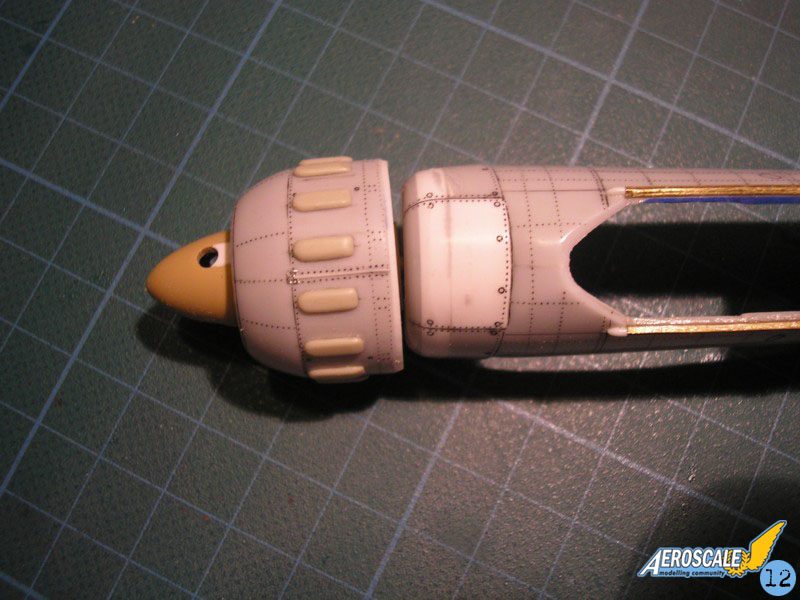
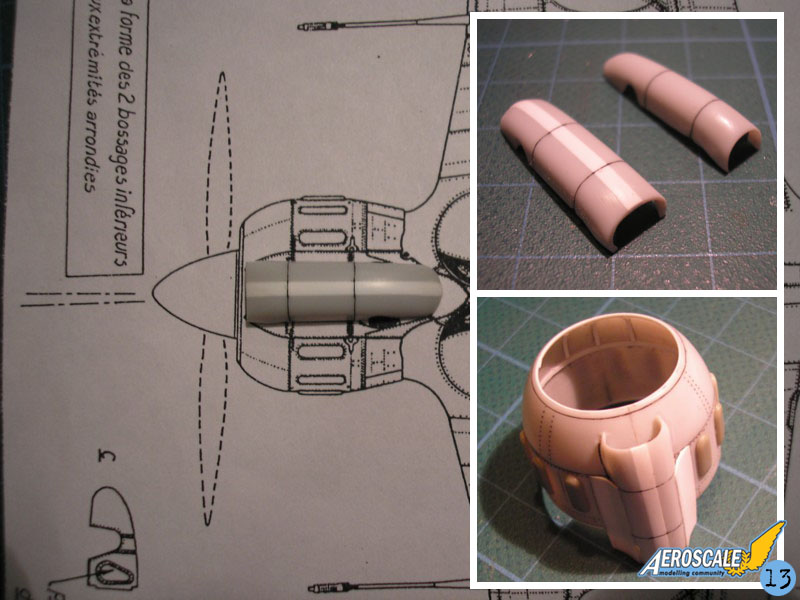
The engine cowling of the kit is too small in diameter. I tried to enlarge it with plasticard but I noticed the bulges didn't match the cylinders anymore. So I decided to use a Bloch 155 cowling instead which was slightly reduced and reshaped. However, I adapted the resin bulges of the Classic Airframes kit (pictures 11). An spigot was then added to the fuselage with an 2°5 angle to the left and the engine glued in place like on the real aircraft (picture 12), to counter the torque effect.
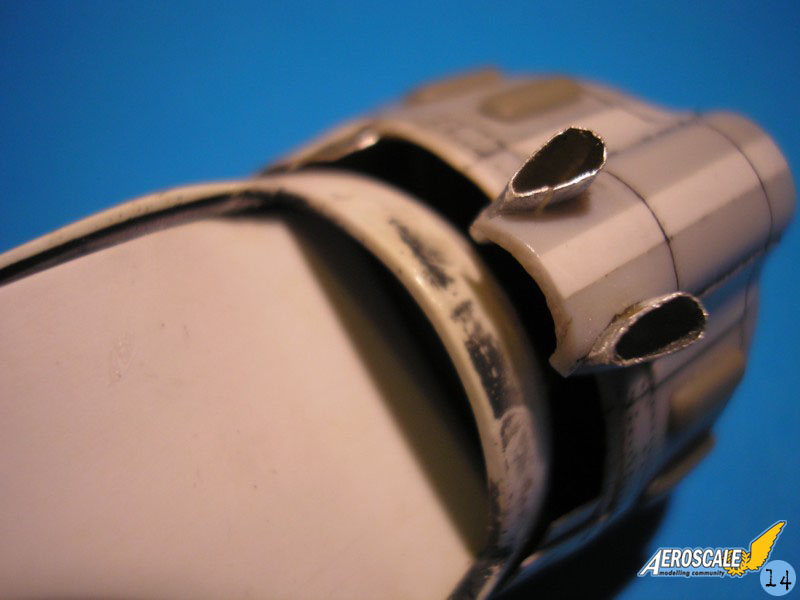
I enlarged the air intake located below the cowling by adding some plastic to the original part (picture 13). The cowling flaps were made with plasticard as well, but I used aluminium foil from a toothpaste tube to do the exhaust pipes (picture 14).
The cockpit
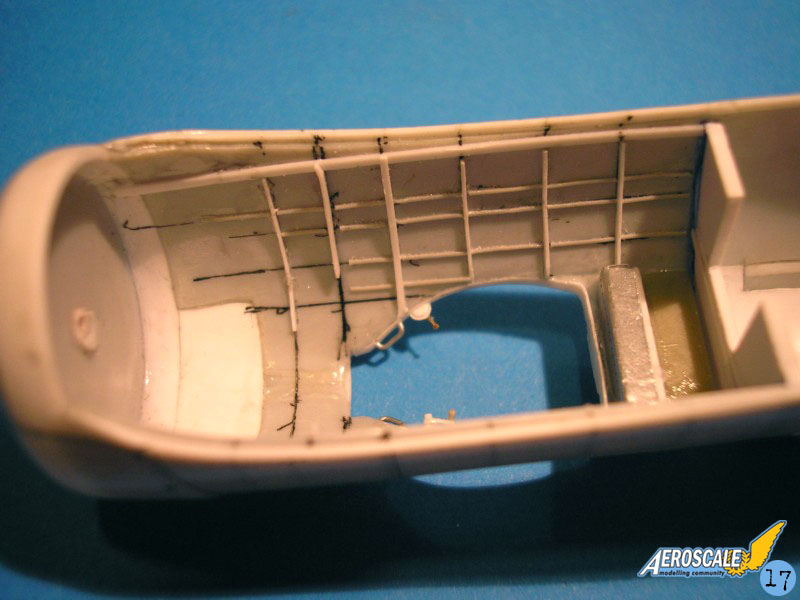
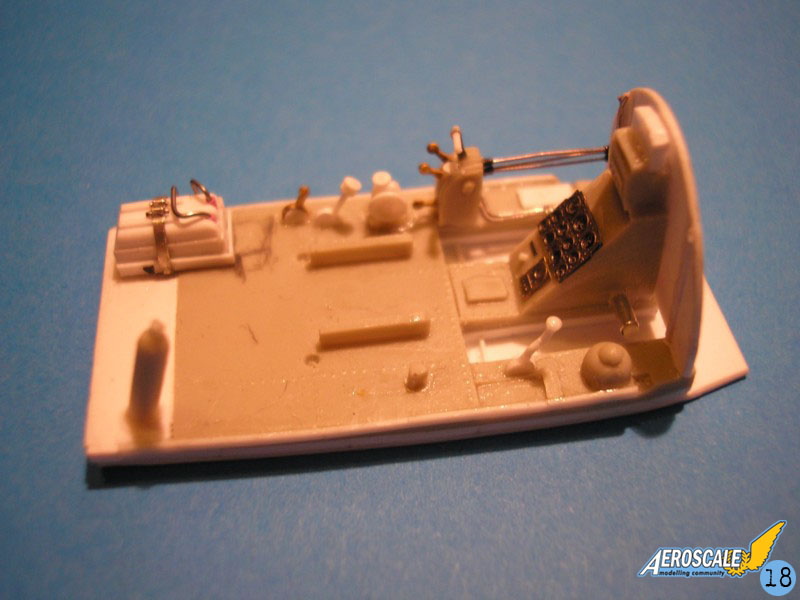
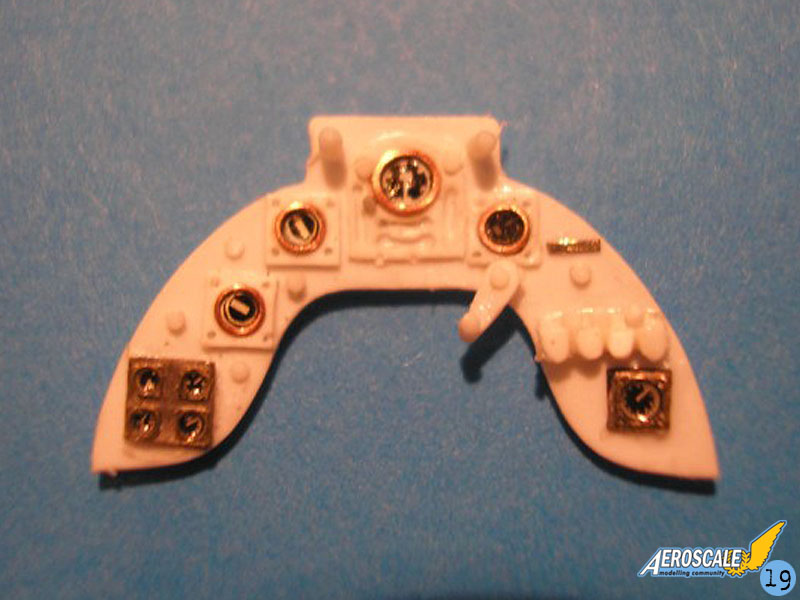
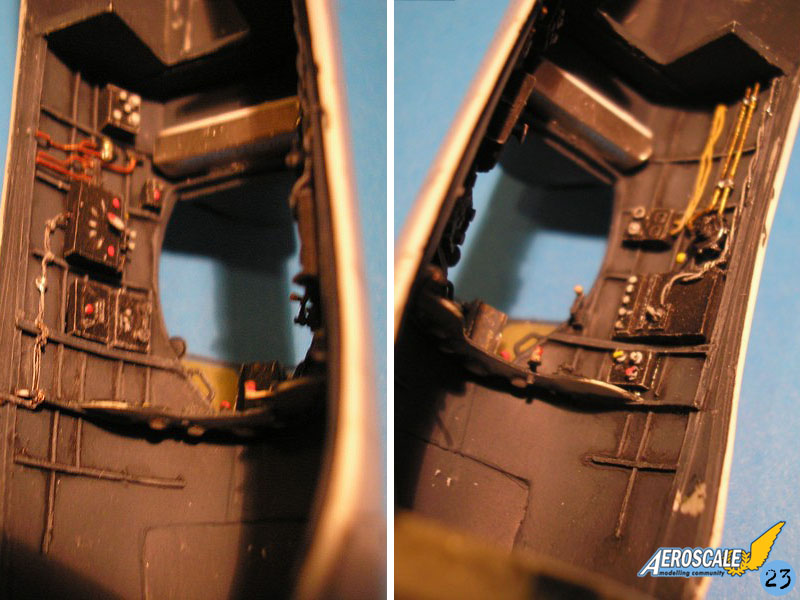
The cockpit opening, as well as the whole area behind the pilot was scratchbuilt. I also added the missing fuel filling cap (picture 16). The fuselage inner ribs were made with thin plastic strips (picture 17). Of course they match the rivet lines of the fuselage.I had to pay great attention when aligning the cockpit floor to the fuselage because latter the wings would be connected to it. Details were added such as levers, instruments, batteries etc... (picture 18). I used plasticard, brass rods, spare PE parts etc... The instrument panel was made accordingly with the same techniques (picture 19).
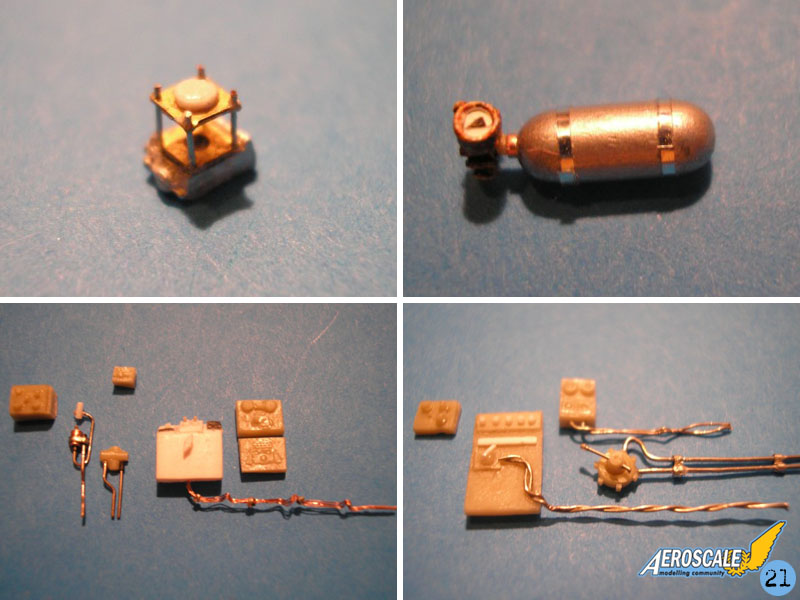
I made the seat with soldered copper wire. The back of it is made with Tamiya masking tape and the cushion is a spare resin part. The seatbelts are made with lead foil and PE buckles (picture 20). The fuselage sides have been detailed as well and a tiny OPL gunsight was scratchbuilt (picture 21).
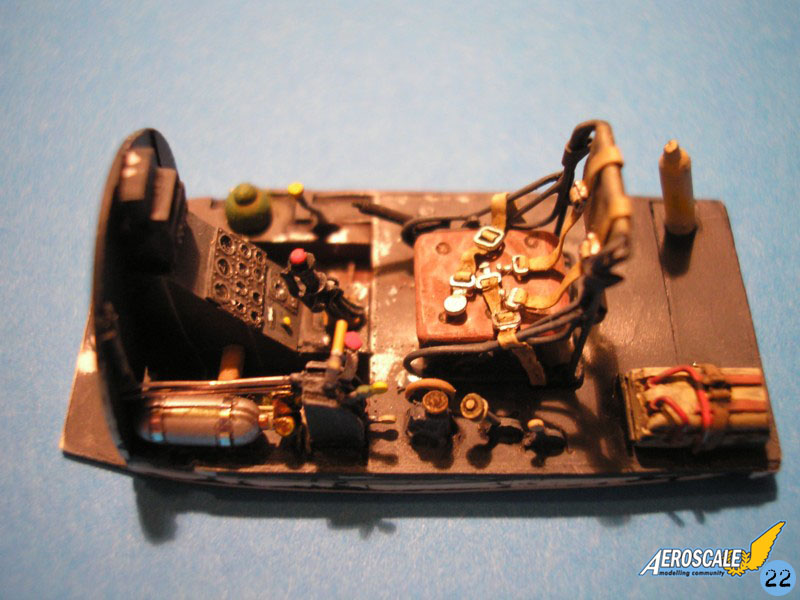
Then, the interior was painted and weathered (pictures 22 and 23). I also added the small back windows which I made with thermoformed transparent plastic.
The wings
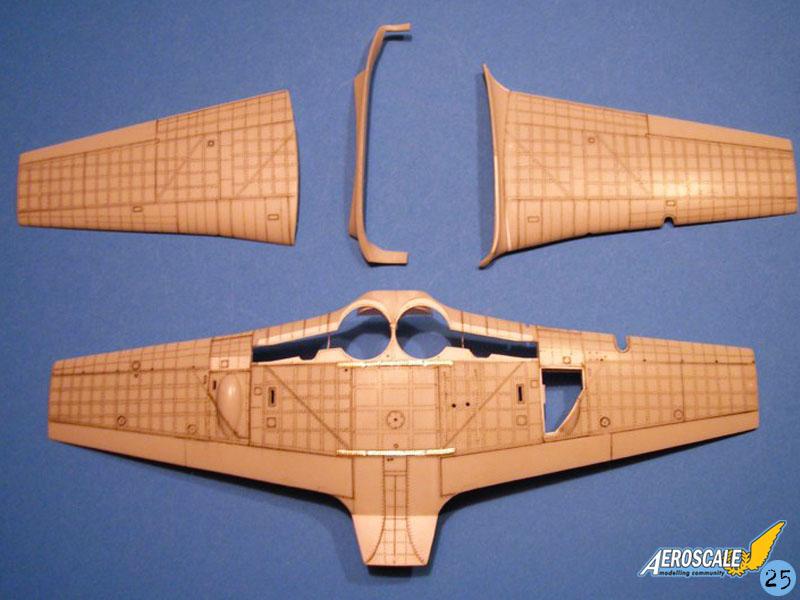
One would think the most difficult part of the build is behind us. Not at all! There is still a lot of work left to do!The dihedral of the wing must be modified. The landing gear openings must go back by 2 mm. The armament casings and bulges must be moved back as well by 4 mm. The wing tips are too narrow. The chord of the wing is not correct (picture 24). Of course, once all this has been rectified, the wing parts have to be rescribed (picture 25).
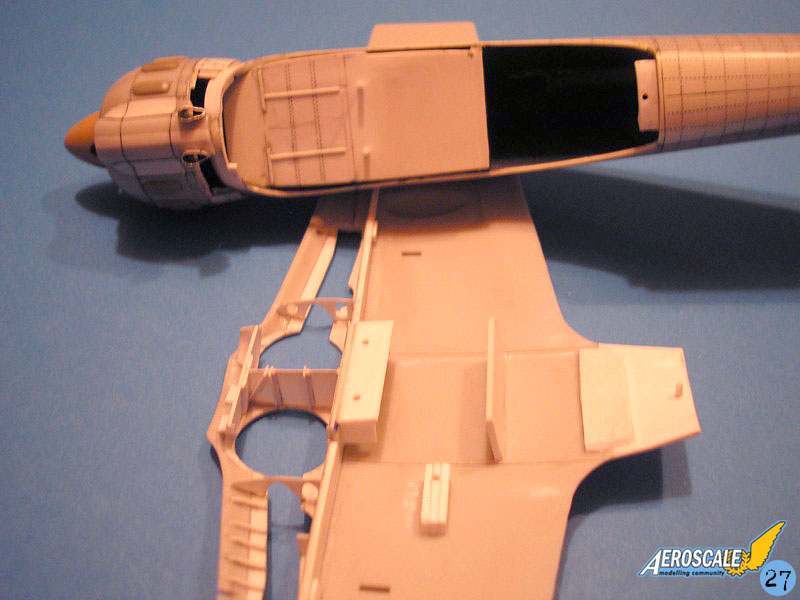
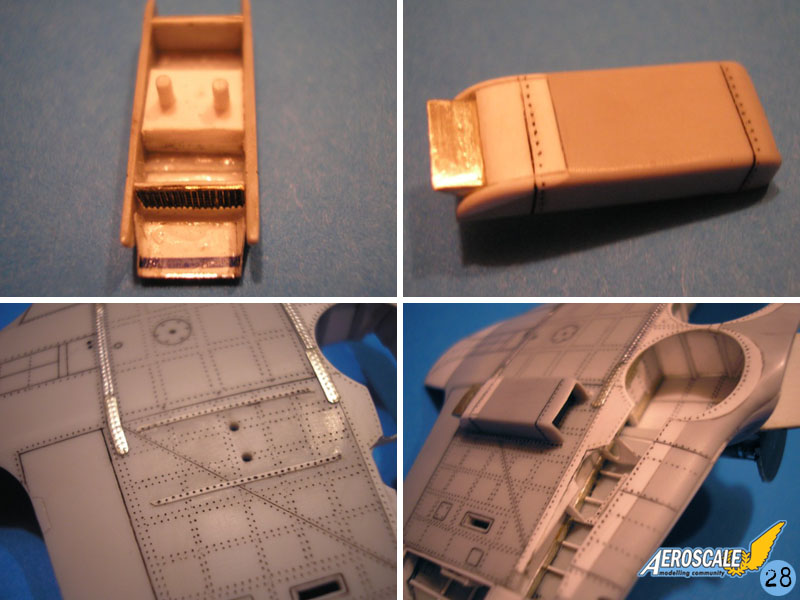
While I was at it, I also detailed the landing gear bays (pictures 26 and 27). I also modified the oil radiator since it had a wrong shape (picture 28).
I decided to cut out the control surfaces, as well as the landing flaps. On original photos, one can see that the flaps are almost always deployed when the MB.152 is on the ground. This was because the hydraulical system was connected to the engine. When the latter was shut down, the hydraulic pressure fell, and the flaps deployed naturally. The internal details of the flaps were made with plasticard.
Final assembly
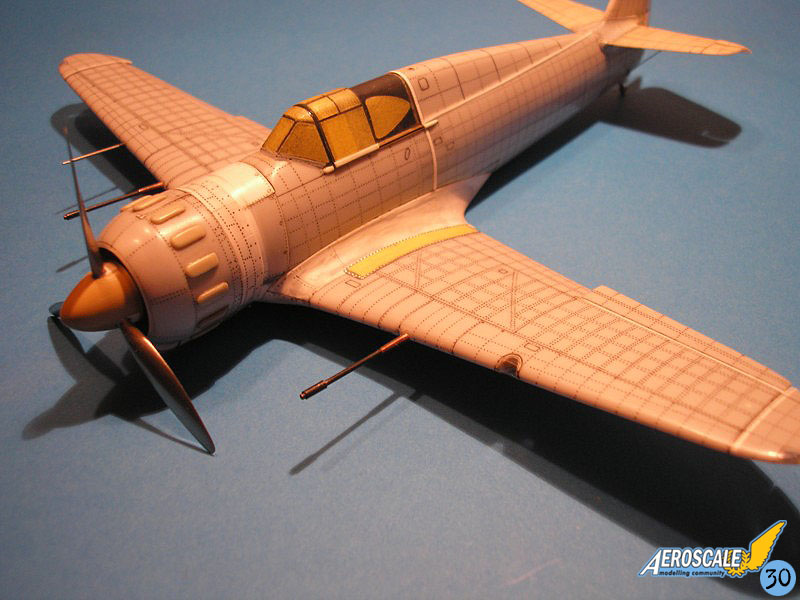
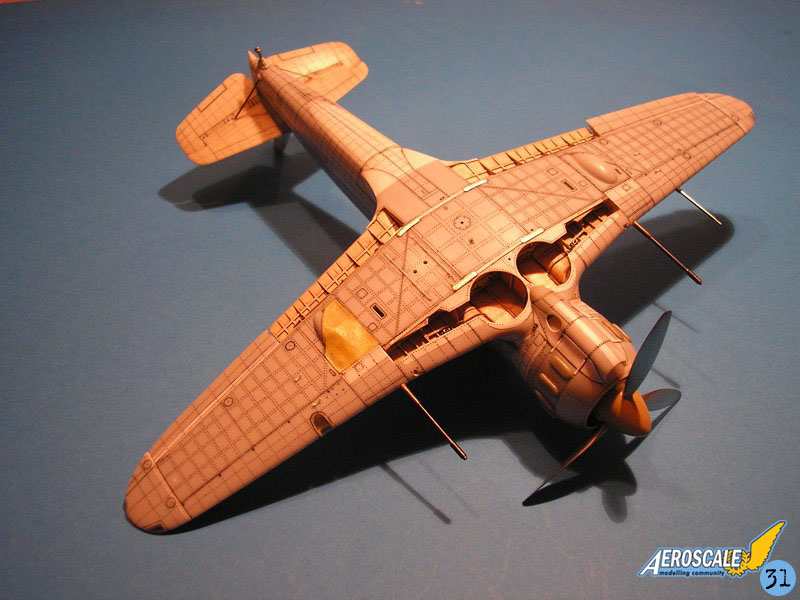
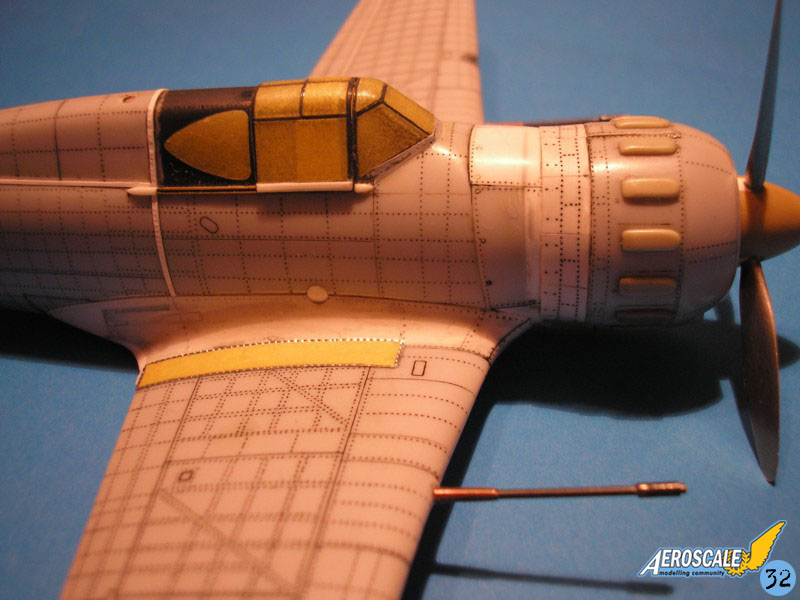
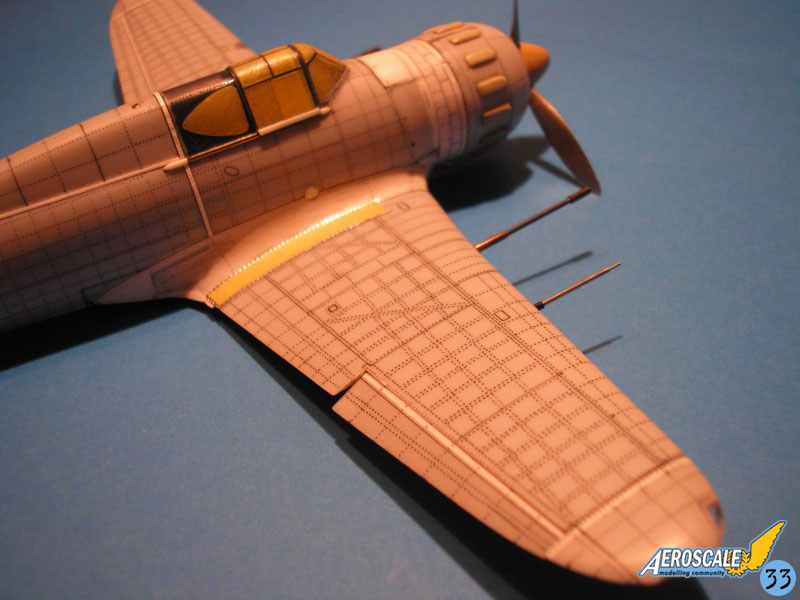
I detailed the landing gear legs and modified the thickness of the tyres by adding some plastic between the two parts assembly. I also detailed the wheel hubs (picture 29). The cockpit sub assembly was glued to the wings and then the fuselage. The wing fillet was made with several layers of plasticard, a lot of putty and plenty of sanding. Finally, I added the pitot tube and the cannons which were made with copper rods of various sizes. After some masking with Tamiya tape, the model was ready for painting... at last! (pictures 30 to 35)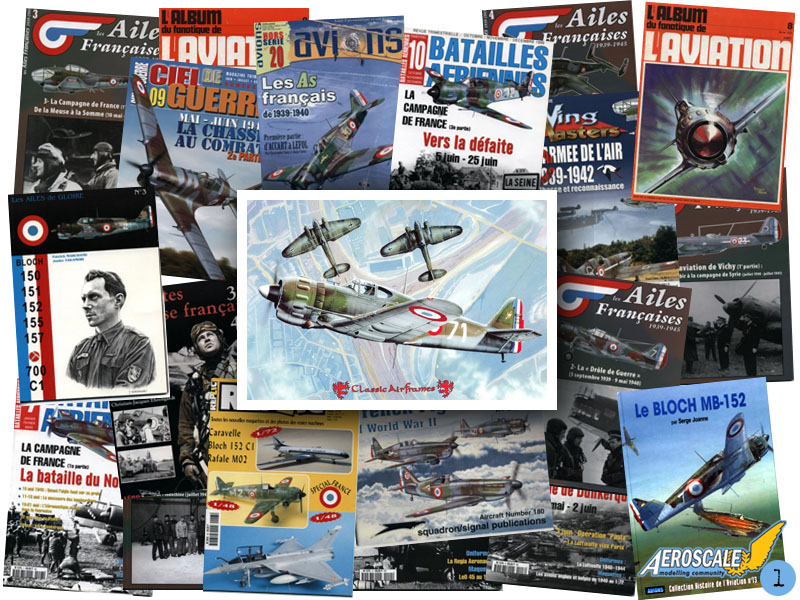


About the Author

Comments

Simply amazing workmanship. Superb build!
This is one model in that small and selected bunch that are almost a shame to see painted and finished, hiding all the hard work done to the base kit(s).
Not that there's anything to complain about the paint job and finishing, quite the contrary. It looks as good as the work before it. It's good to have such comprehensive photo coverage on the model in-progress, as it offers a far better glimpse behind the scenes than just saying "some kitbashing, added some details and rivets on the exterior".
Great work inside and out.
SEP 06, 2008 - 09:12 AM

Wonderful work Joël!
It really is an inspiration to see what can be achieved!
Thank you, Jean-Luc, for bringing us such a great article!
All the best
Rowan
SEP 06, 2008 - 09:42 AM

I like the model as well, and a very useful article.
And thanks for giving your mixing ratios for the French camo colours as well, i use Gunze/Tamiya paints and have just started preparing the resin parts of AZ Models MS406. Your paint mixes will save me a bit of time experimenting.
Andrew
SEP 06, 2008 - 02:06 PM
Stunning. Masterful. Enviable! I've got to study this article- many thanks, and congratulations on this beautiful achievement!
chuk
SEP 06, 2008 - 03:20 PM

Hi all,
That's exactly what I told to M. Ducasse when I saw his model just before the painting stage...
I knew you would like this one.
Jean-Luc
SEP 07, 2008 - 07:13 PM

aaarghh !he bloody frenchman from COTAM strikes again! I am melting with pleasure! Coucou Joêl!
SEP 09, 2008 - 08:27 AM

Joel...Amazing work on your kit....As a fan of the MB-152C1 I am wondering why you picked the Classic Airframes over the FM kit? I have both and although I don't have the 3 views you used it seemed to me that the FM kit would be a better place to start. I would be VERY VERY interested in hearing your reasons.
Thank you.....Flypaper
SEP 09, 2008 - 04:37 PM

simply unbelievable!!!
A stunning piece of work and a very good article
thanks a lot
SEP 10, 2008 - 10:31 AM

Hi Jean,
Nice to meet you Here !
Hi Flypaper,
I will try to improve my english to answer you.
You're right, some pieces are best shaped on the FM model then on the Classic one, like the horizontal stabiliser and the wings. But i finaly decided to choose the Classic Airframe model because on the FM, on the fuselage, the distance between the canopy rail and the wing is too small. It would have been too mutch work on the fuselage halfs to accurate them.
Your choice is the following : Even you choose the Classic one and you'll have the most of work on the wings ; or you choose the FM one and your work will be principaly on the fuselage.
Up to you and good job.
Thanks a lot evrerybody, many thanks Jean-Luc.
SEP 10, 2008 - 10:35 PM
Thank you for your input Joel, I am looking forward to your insight on the new 1/32 Azur MB152C1.....Thanks again Flypaper
SEP 11, 2008 - 05:12 AM
Copyright ©2021 by Joël Ducasse. Images also by copyright holder unless otherwise noted. The views and opinions expressed herein are solely the views and opinions of the authors and/or contributors to this Web site and do not necessarily represent the views and/or opinions of AeroScale, KitMaker Network, or Silver Star Enterrpises. Images also by copyright holder unless otherwise noted. Opinions expressed are those of the author(s) and not necessarily those of AeroScale. All rights reserved. Originally published on: 2008-09-06 00:00:00. Unique Reads: 24025

WEB HOSTING BY


Copyright ©2021 AeroScale and Kitmaker Network, a subsidiary of Silver Star Enterprises
All Rights Reserved. Please read our Conditions of Use and Privacy Policy.
All Rights Reserved. Please read our Conditions of Use and Privacy Policy.