

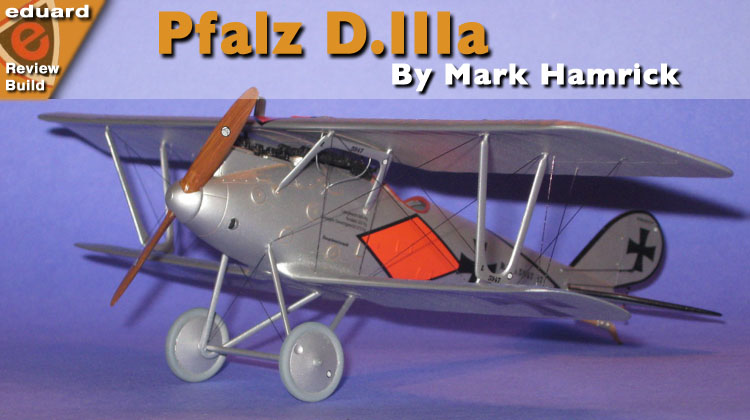
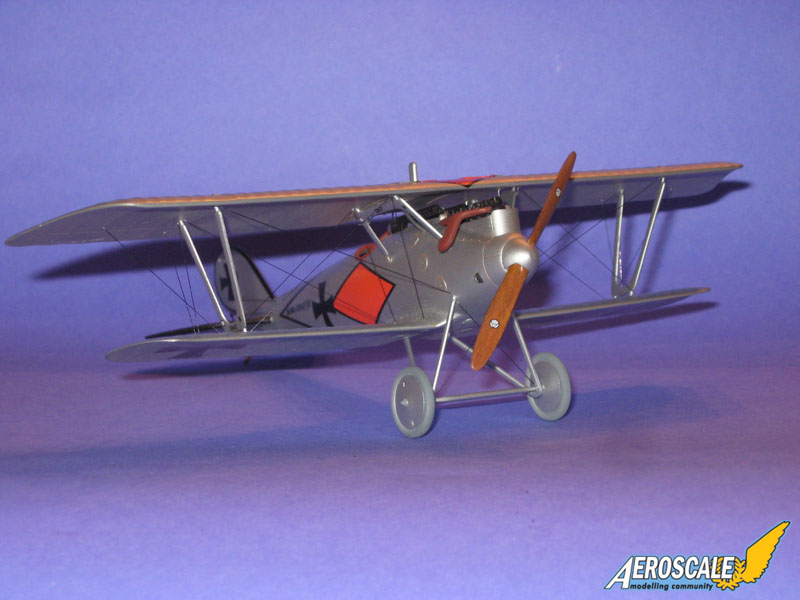
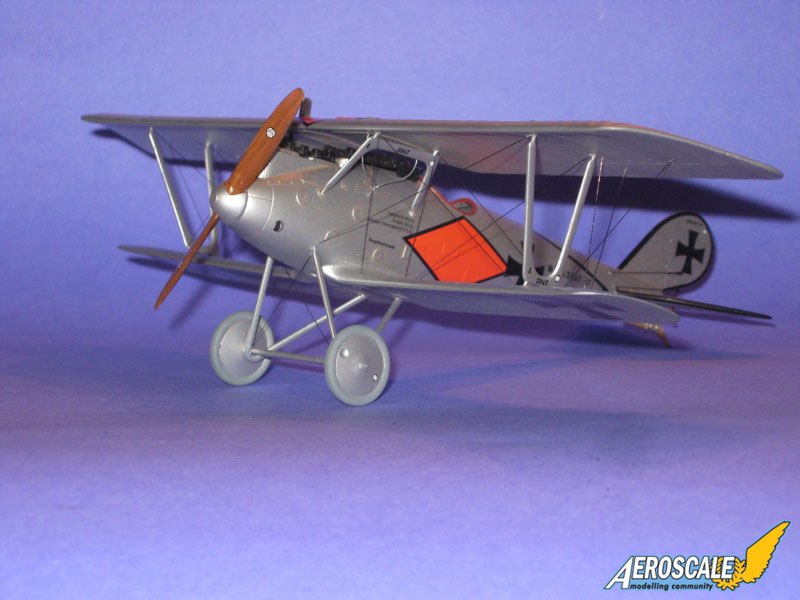
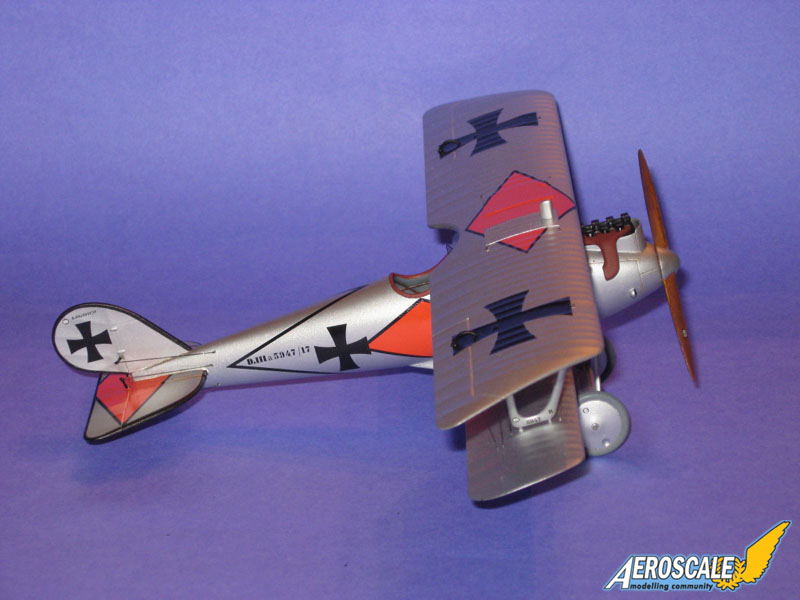
1⁄48Pfalz D.IIIa
5
Comments
History
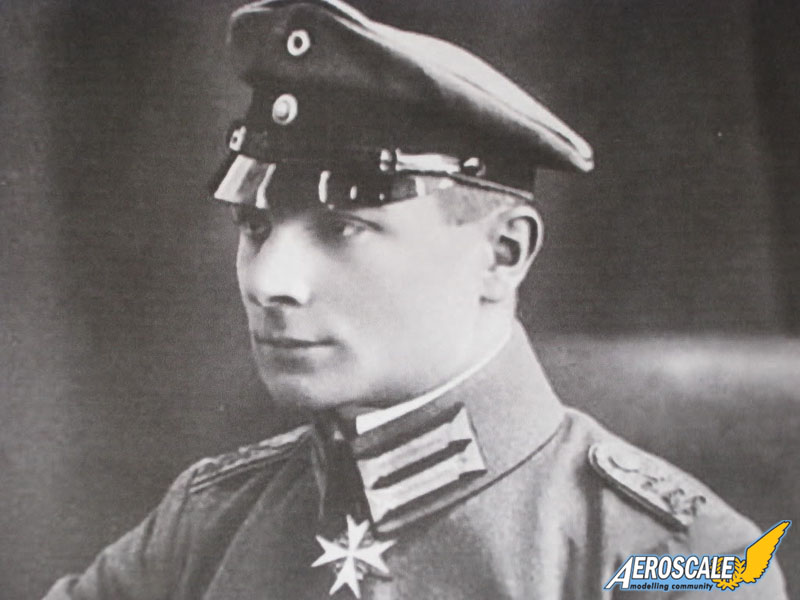
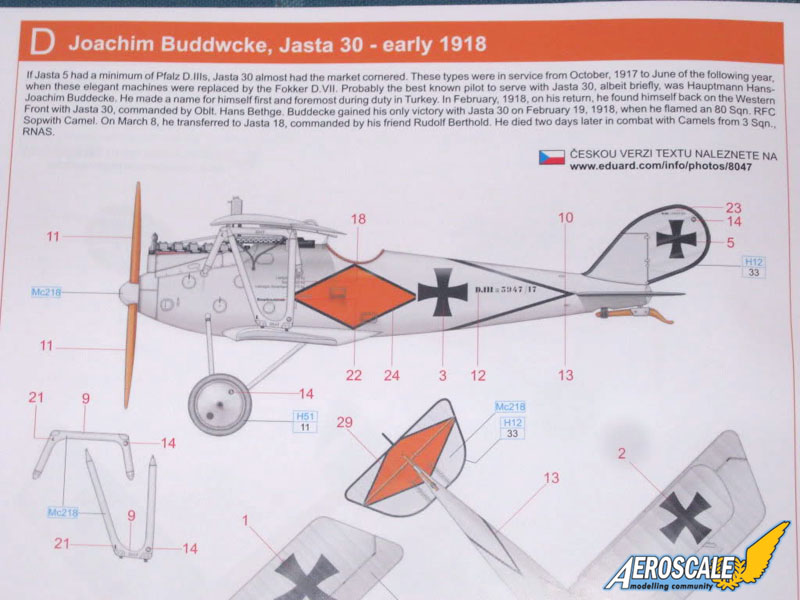
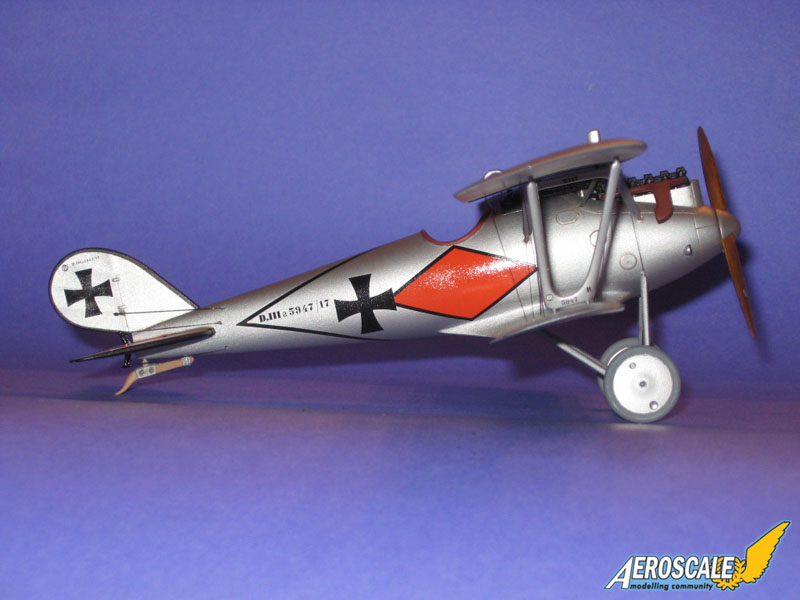
Hans-Joachim Buddecke was born in Berlin on August 22, 1890. Buddecke was the third aviator, after Max Immelmann and Oswald Boelcke, to earn the Blue Max (Pour le Mérite) during WW1. He was killed in action on March 10, 1918 while serving in Jasta 18 during an aerial combat above Lens, France falling to Sopwith Camels of Naval 3, RNAS.The aircraft I've decide to model is the Pfalz D.IIIa he flew while stationed briefly with Jasta 30.
Construction begins
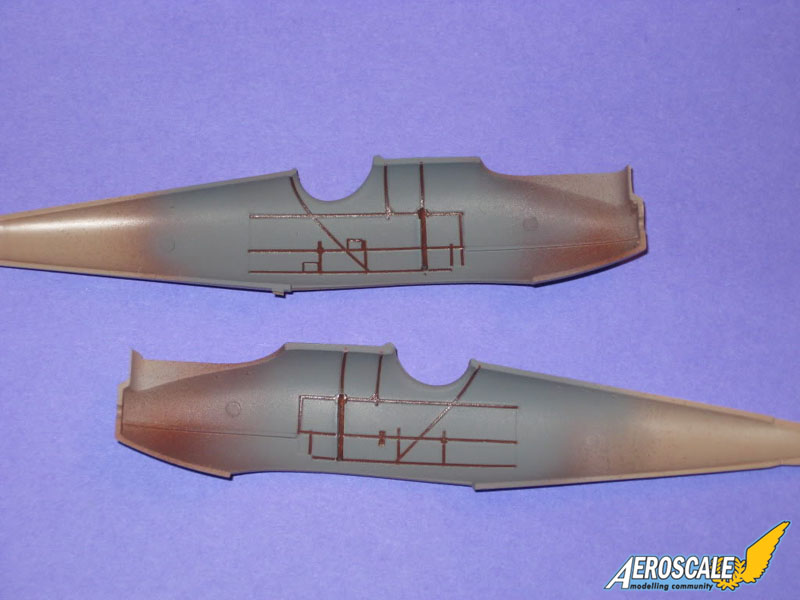
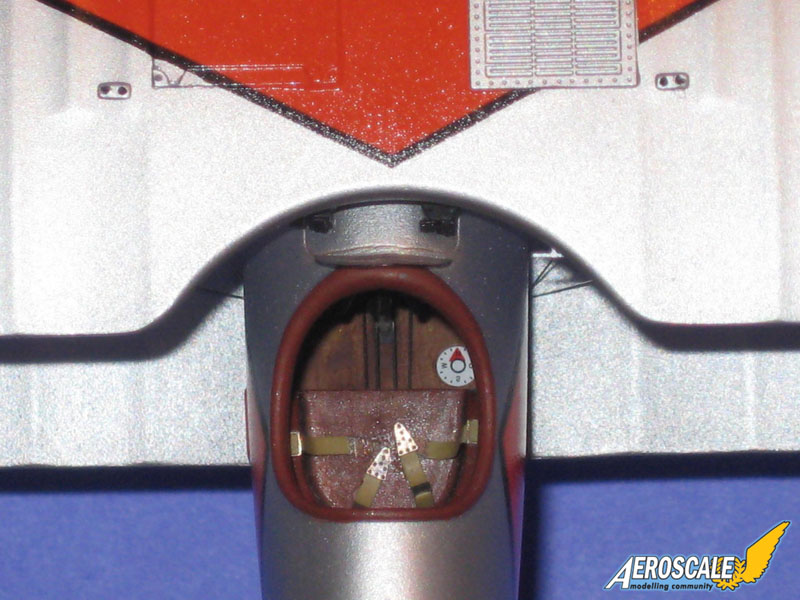
The structural details are molded on the inside of the fuselage sides. I painted the fuselage interior brown. Then masked the raised details with Jammydog tape and painted the interior light grey, then removed the masking tape.There are many opinions out there on the interior color. There are no surviving examples of the Pfalz and there are no descriptions of the interior color in any of the contemporary reports. There is no definite answer on the color because there is no hard evidence available. The kit instructions call for "grey" overall on the sides. One of the theories is that the interior of the fuselage "shell" was painted before attached to the framework. The way I did it is just one possibility. The interior could have been all varnished wood or all grey (including the framework and instument panels). I picked the grey interior/varnished framework variation to give the interior some differing color to the sidewalls. Like I said previously there are no surviving examples or contemporary reports of the interior color to give us a definite answer. The best we have are educated guesses.
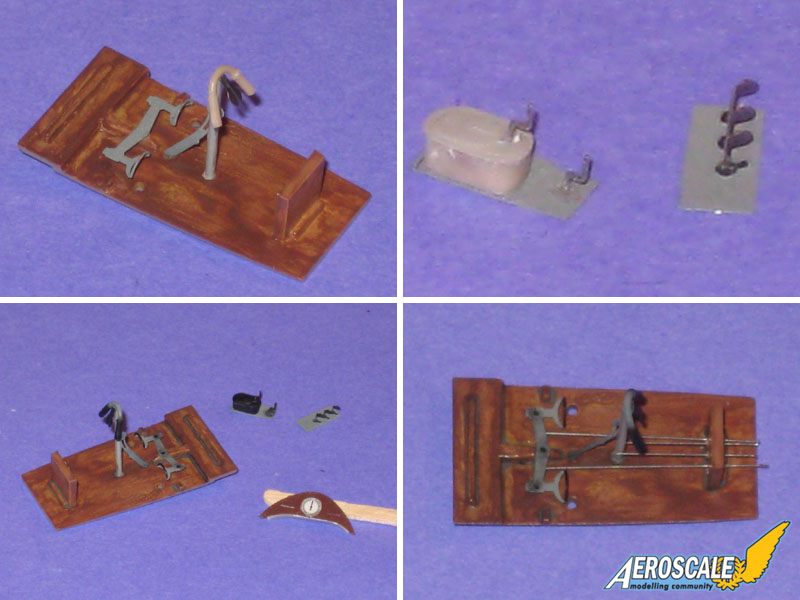
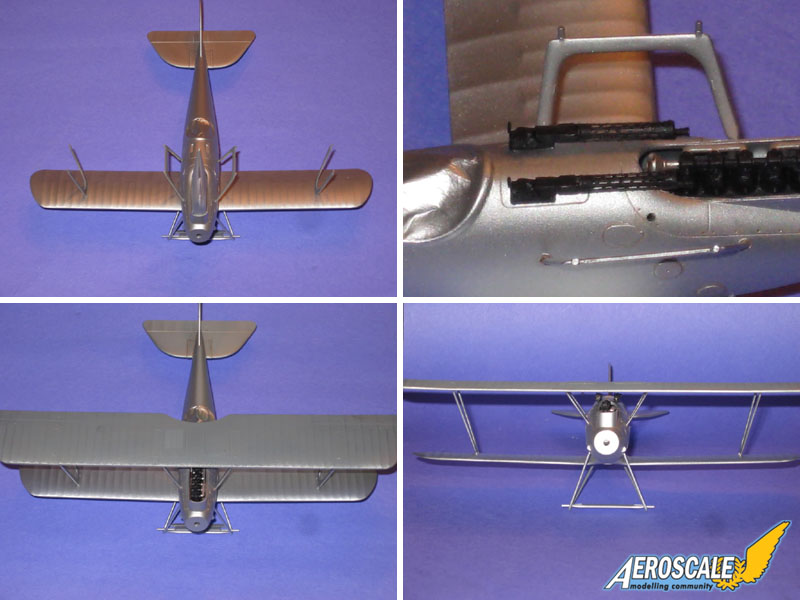
Next I worked on the cockpit flooring, flight controls and some engine controls that are to be mounted on the fuselage sides. I added control wires made from guitar strings. The kit goes together extremely well. I did a test fit of the fuselage halves and they matched up nicely so I've closed up the fuselage.
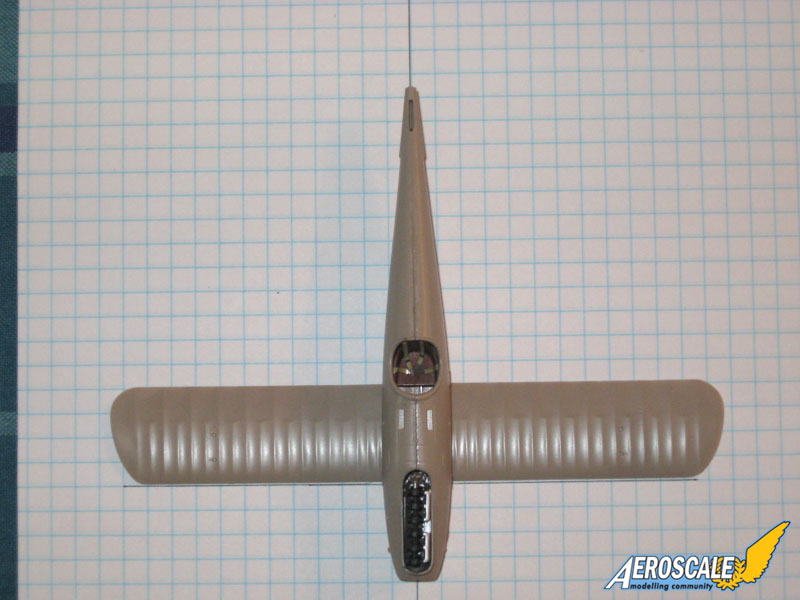
To put the lower wing on, I drew a "T" on grid paper. I lined up the wing leading edge with the horizontal line and the fuselage seam with the vertical line, then glued it.
To blend the fuselage and lower wing, here's how I did it: first I masked off the wing and fuselage up to the point where I wanted the putty to go. I was out of Tamiya masking tape so I used regular clear tape. (I don't recommend clear tape because it leaves behind spots of sticky residue when you peel it off). After it dried overnight, I masked off the cockpit and engine and sprayed the seams with grey primer (Tamiya grey) to check to see how they turned out, sanded any out any imperfections and resprayed primer. Since I'll be painting the fuselage silver later, any seams will show, so I had to be very careful.
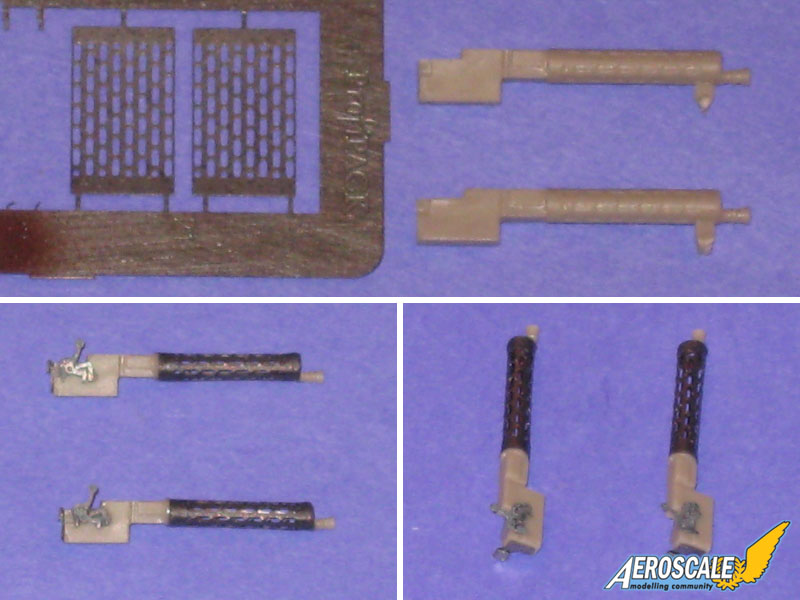
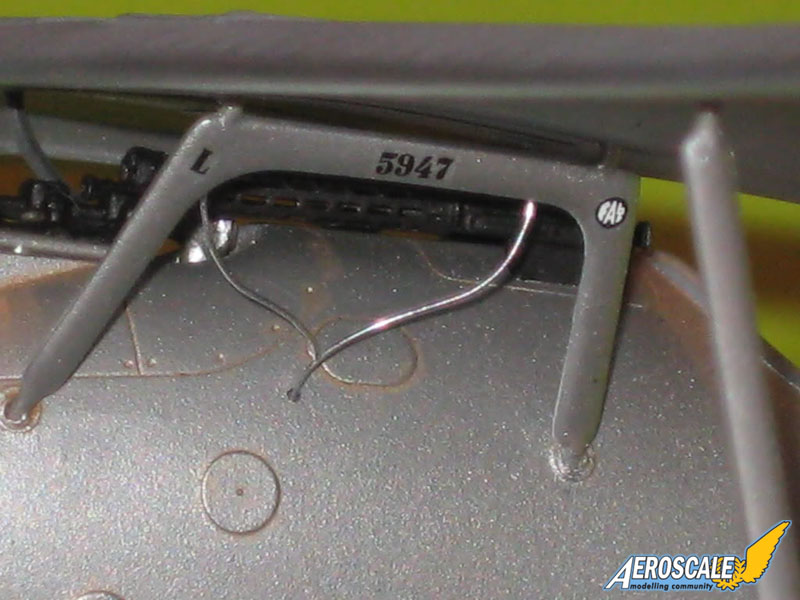
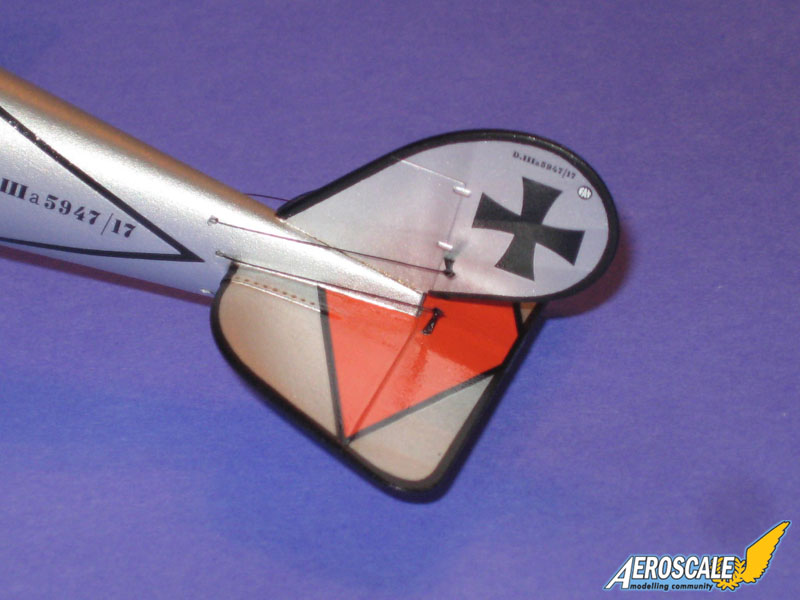
Rudder and tailplane were installed next. The plastic guns were modified with photo-etched parts from the kit. Some details were included as well such as the radiator cover with handle.
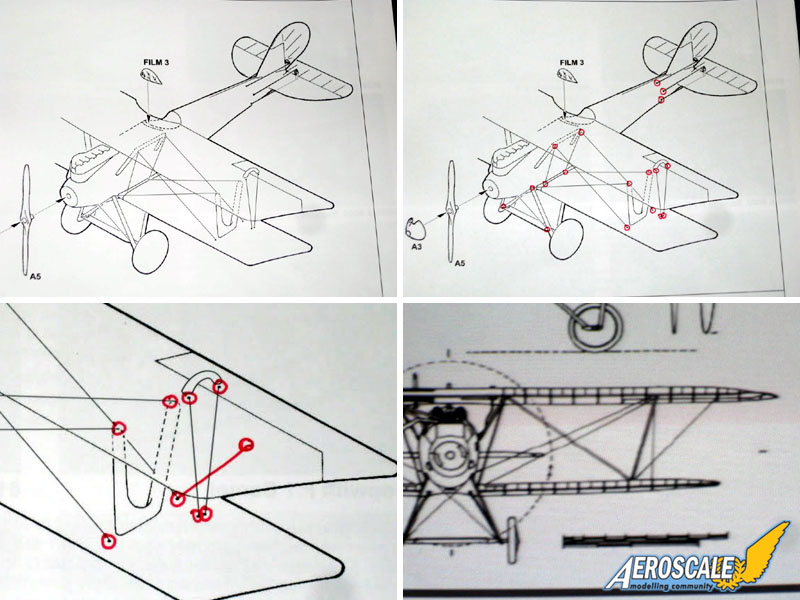
Rigging method (part 1)
I have decided to use the "through the wing" rigging method and here's a short tutorial.Firstly, check your kit instructions (and any references you have to confirm the kit instructions). The kit rigging diagram has the rigging for the starboard side only so you will have to carry all points over to the port side.
Next, you can mark out the points to be drilled on the diagram so you can check them off as you go. The Datafile shows one more rigging line from the outer bottom of the outer strut to the top wing. Check all of your references. I drew the line on the rigging diagram in red.
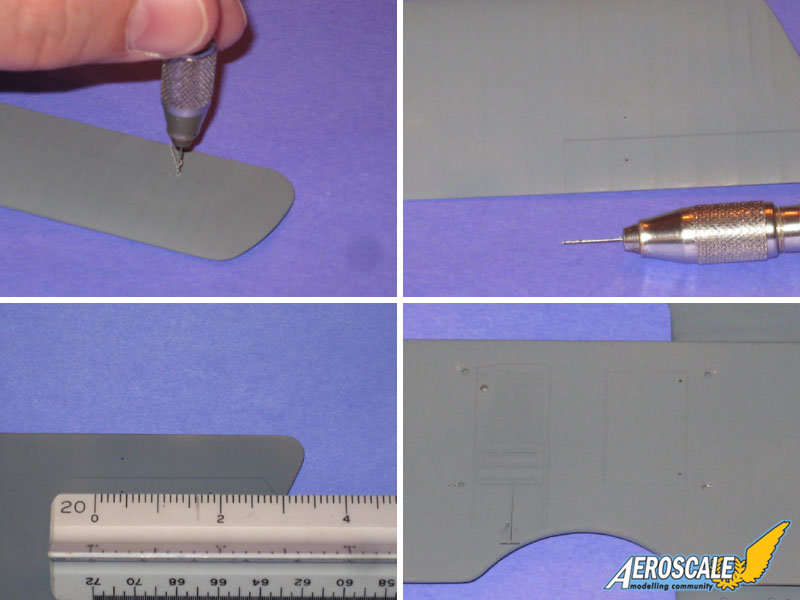
To drill the small rigging holes, I used a pin vise with a #80 drill bit. When I drill through the wing I try not to exit the other side on the top of a rib. It is harder to fill in and almost always makes a flat spot on top of the rib from sanding. You can angle your bit to the side a little to avoid this. Check your references and start drilling.
The entry has nice holes with no rough edges. The exit will usually have some clean up to do. I used the detail of the wing support brackets to drill through the wing from the top. Next I measured the rigging point not indicated on the kit instructions. It's on the third rib out from the strut attachment point. Seven holes on one half of the top wing, six on the bottom wing.
More construction and painting
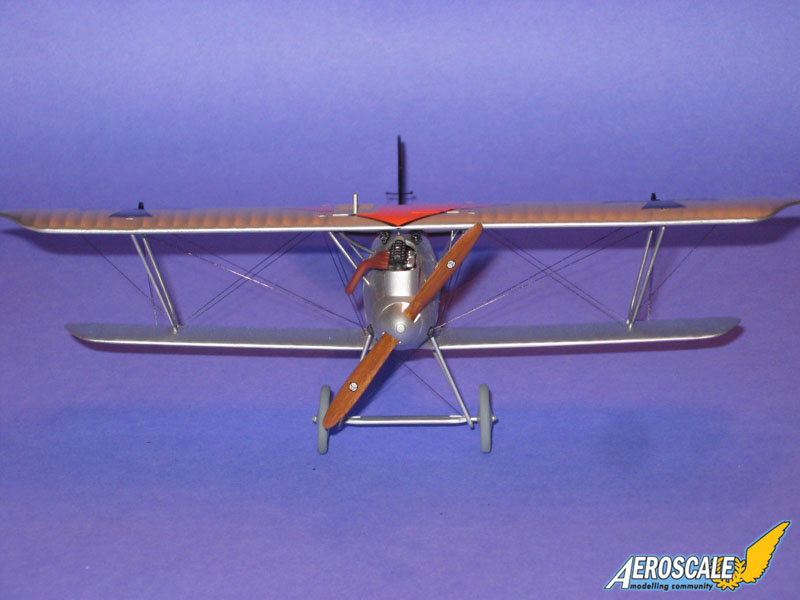
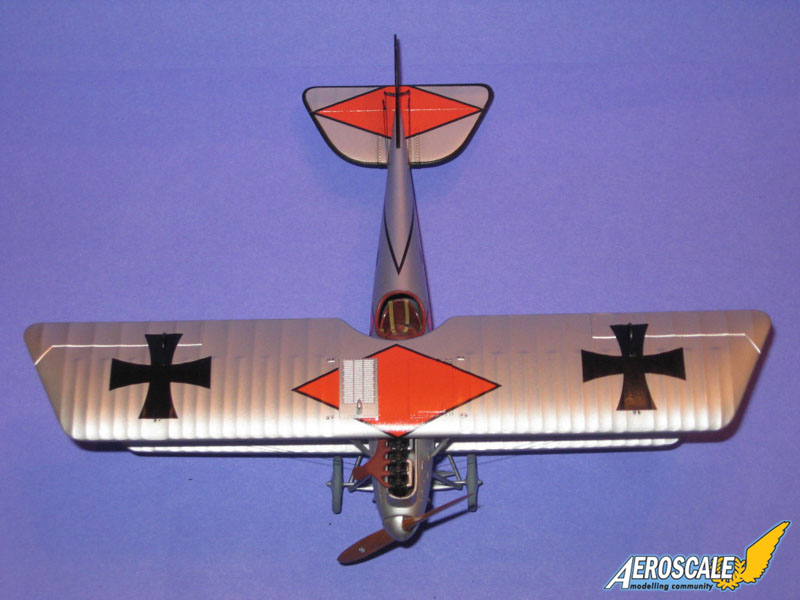
I decided to run fuel lines to the gravity fuel tank on the post side and a hose from the wing radiator on the starboard side. I used some pictures from the Datafile and Flight magazine as references. Then I installed the tailskid and undercarriage with PE.Before continuing construction, I primered the model and then after it dried I painted it Model Master Aluminum Non-Buffing Metalizer.
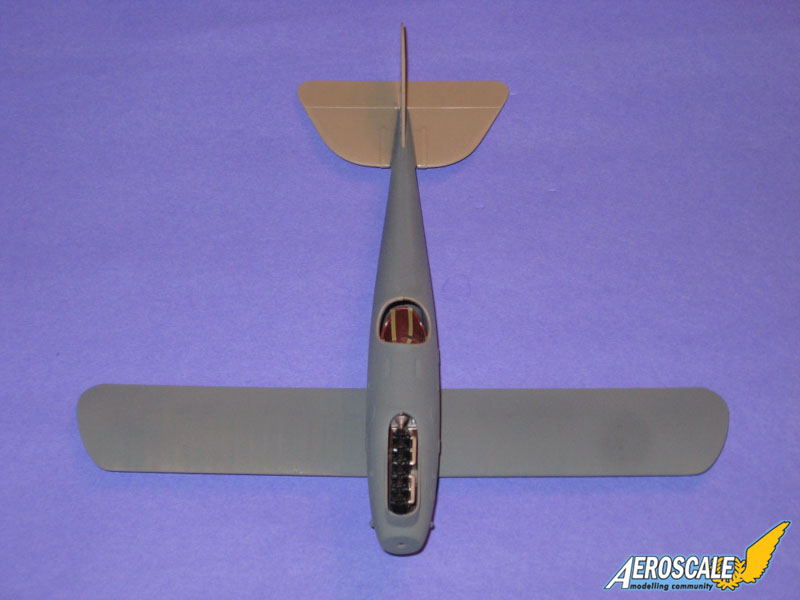
Next step was to mount the struts and the guns. I already did a little detailing around the radiators with a wash of van dyke oil paint. At this stage I glued the top wing in place.
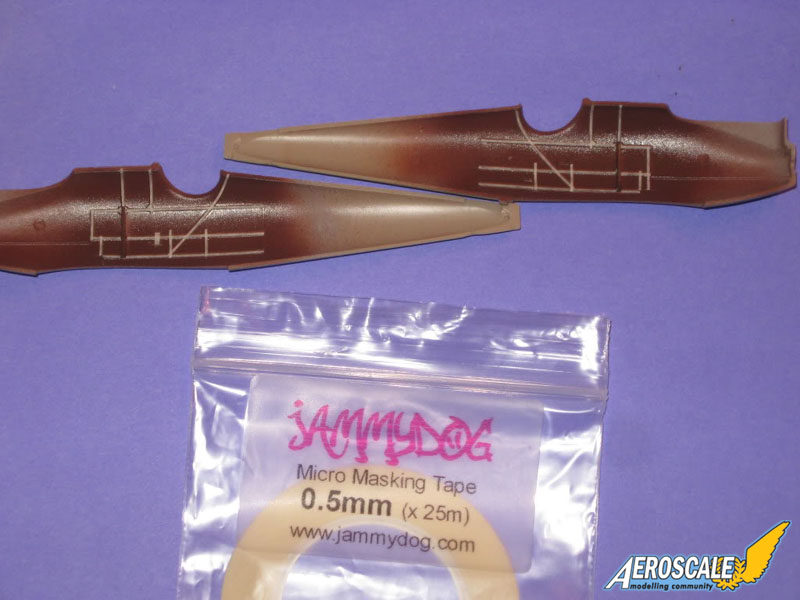
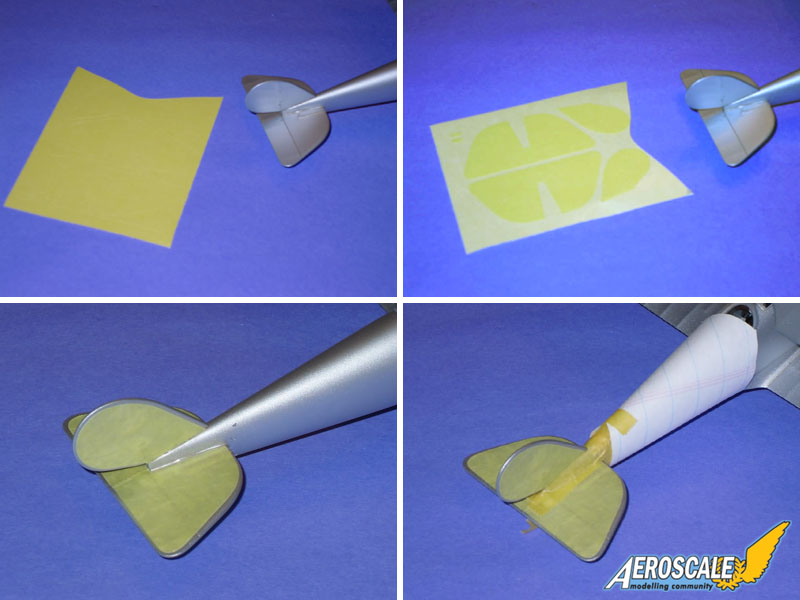
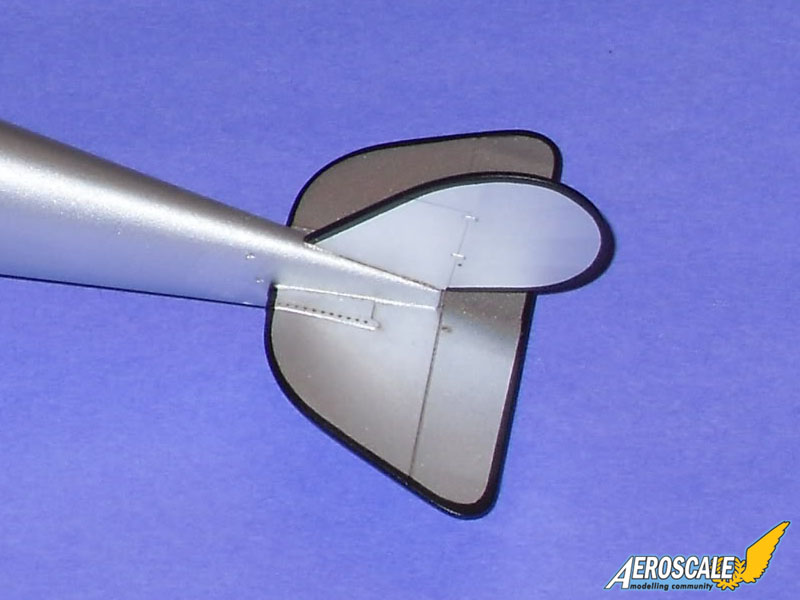
I decided to use the kit supplied masks for the tail. I removed the parts around the masks to make them easier to remove. They went down well with a few repositions to line them up accurately. Then I masked around the other areas of the tail that need to remain silver in color. Then I painted the tail Tamiya black and after it dried I started to remove the masking tape and Eduard Masks. And it left a nice border around the edges. It took about 15 minutes to do it all.
I decided to put the struts decals at this stage so I wouldn't have to fish them through any rigging lines.
Rigging method (part 2)
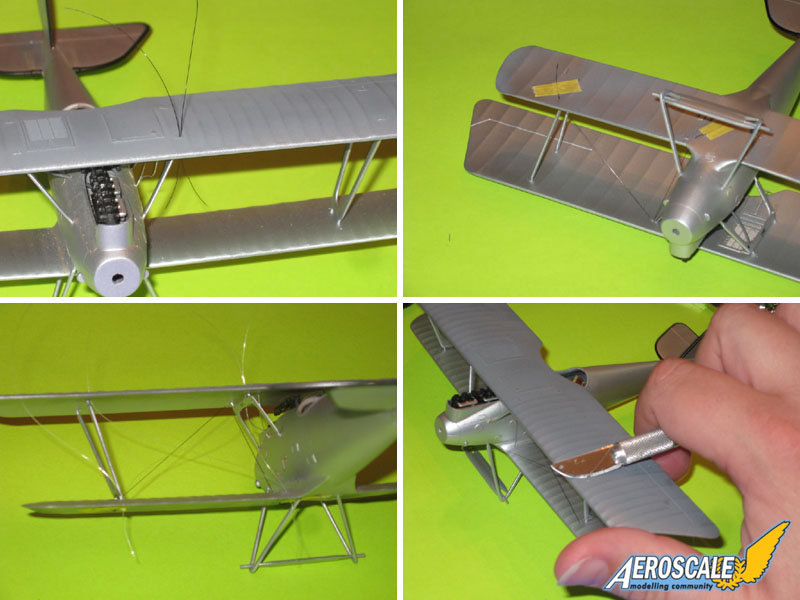
To begin the rigging, I used a black "Sharpie" to color the first two rigging lines so they are easier to see in the pictures and inserted them in the pre-drilled holes. Then I pulled them through the lower wing, always checking the rigging diagram to make sure I have them in the correct holes. Then I used super-thin "Super Glue" to glue the top wing rigging lines and let them dry. Then I glued the bottom wing lines and secured he ends with tape to hold the tension until the glue dried. Then I used a new curved blade to cut off the excess line on the top and the bottom of the line flush to the wing.What I suggest is to run ALL of the rigging lines to make sure you have them all installed before you glue any holes shut. As you can see there can be two (or sometimes three) lines through one hole. That way there is less chance of realizing there should have been another line to go through the hole and you have to re-drill it and start over again. In all it took me about an hour and a half to rig the wings with this method.
Conclusion
I wanted to show how you could make a very nice model out of the box so I kept this build very basic with next to no weathering. I always assume that it's mainly people who are here to learn something who are watching my builds and are not here to just admire a picture. That's why I added the control lines and fuel and radiator lines to show you can add a little something here or there to make your model a little more personalized. Most of the 1/48 Pfalz models I see online don't have the fuel lines and that's OK and they are very fine looking models.I did the rigging tutorial because I have friends of mine who are into 1/35 scale armor and are REALLY good at it and even they ask me how I do the rigging on my models.
I liked the build so much I just bought two Pfalz "Dual build" boxes for myself. I took notes along the way of things I would change, reposition or scratchbuild for my next Pfalz build to superdetail it.
A special thanks to Rowan Baylis and Eduard for giving me the opportunity to build this kit.
The original Eduard Pfalz D.IIIa Dual Combo Build thread can be found here.


About the Author


Comments

Nice work as usual Mark! Consistancy in your builds is prime. Model On!
AUG 22, 2009 - 07:34 AM

Congrats on the feature Mark !
You have been a big inspiration towards my improvements as a builder and hobbyist
Cheers to you on a job well done !!!
AUG 22, 2009 - 07:46 AM

Just one of many excellent pieces by you Mark. What else can I say?
AUG 22, 2009 - 09:00 AM

Hi Mark
Nice Build and great build photos.
I must admitted the Pfalz D IIIa is a very pretty plane.
Cheers
Chris
AUG 23, 2009 - 06:39 PM
Copyright ©2021 by Mark Hamrick. Images also by copyright holder unless otherwise noted. The views and opinions expressed herein are solely the views and opinions of the authors and/or contributors to this Web site and do not necessarily represent the views and/or opinions of AeroScale, KitMaker Network, or Silver Star Enterrpises. Images also by copyright holder unless otherwise noted. Opinions expressed are those of the author(s) and not necessarily those of AeroScale. All rights reserved. Originally published on: 2009-08-22 00:00:00. Unique Reads: 10028

WEB HOSTING BY


Copyright ©2021 AeroScale and Kitmaker Network, a subsidiary of Silver Star Enterprises
All Rights Reserved. Please read our Conditions of Use and Privacy Policy.
All Rights Reserved. Please read our Conditions of Use and Privacy Policy.