

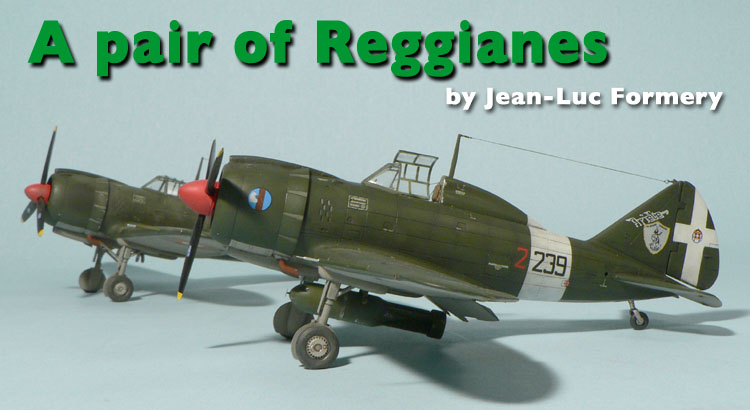
1⁄48A pair of Reggianes
3
Comments
The Kit
If you want to know more about the Italeri 1:48 scale Re.2002, please take a look at the excellent review Rowan Baylis wrote when the kit was released in 2009 (see here). The first impression, when you look at the plastic sprues, is that the kit is rather crude and that the detail is heavy, especially on the wings. First test fits also revealed some problems shape wise. Here is a list of the shortcomings of the kit which have been adressed on the modified model:- the wings are too thick and look as if they have been inflated.
- the fuselage hump is of the wrong shape and way too long.
- the rendering of the fabric on the movable surfaces is exaggerated.
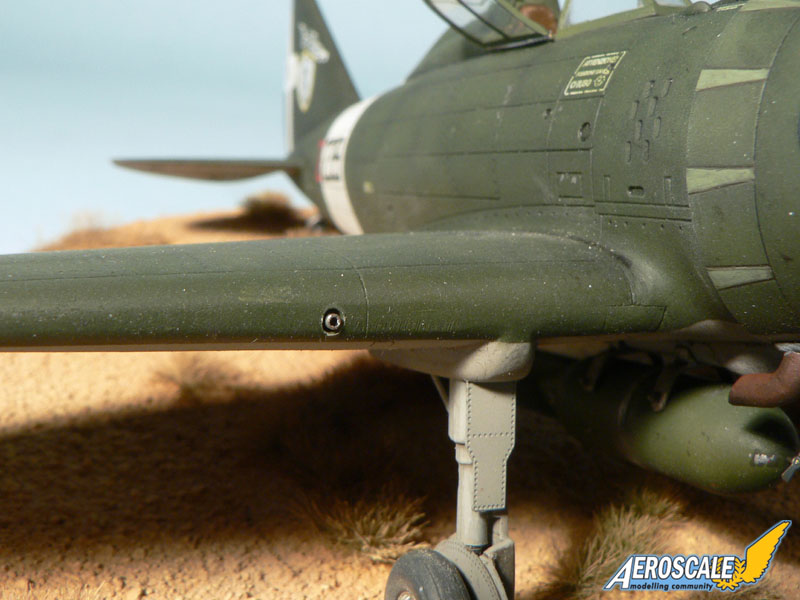
- the landing gear legs are too thick.
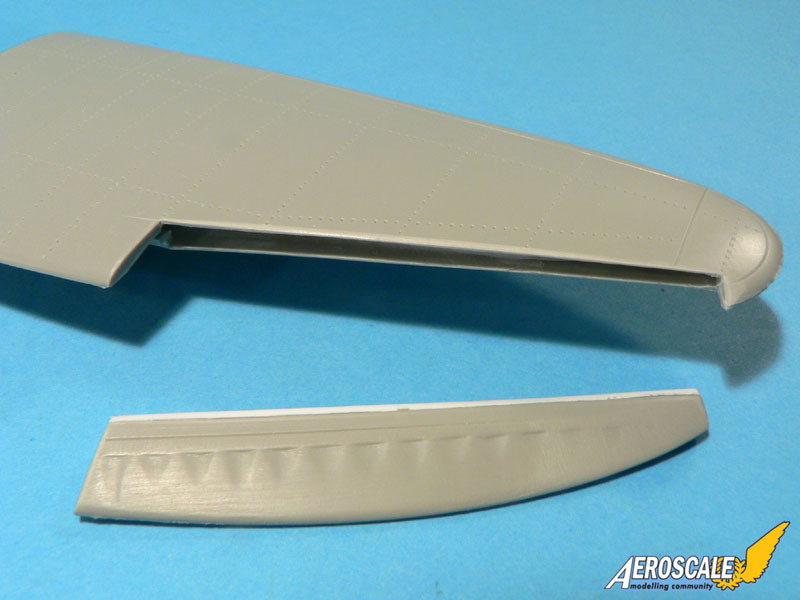
- the inner detail of the separate landing flaps is very basic when compared to the real thing.
- the rivet lines don't necessarily match the ones on the real aircraft and are heavy.
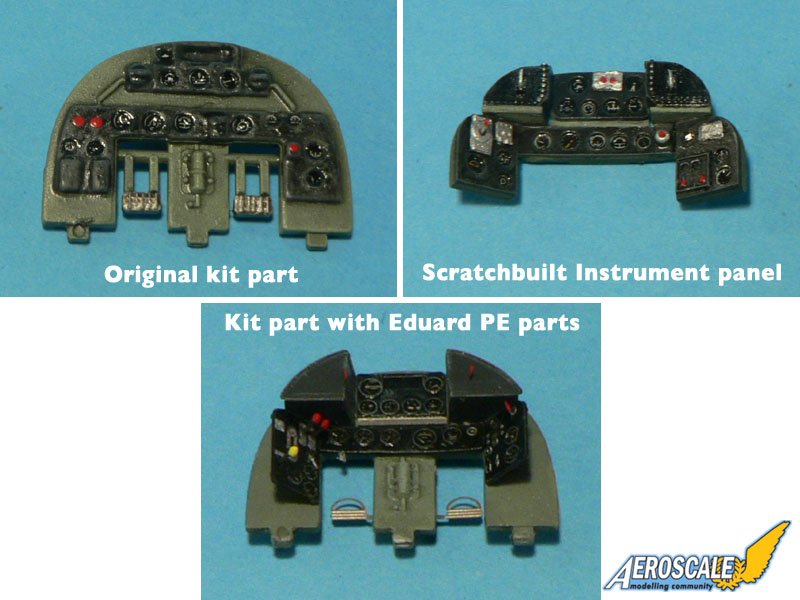
- the cockpit looks more like the one of a Re.2000, so the rudder pedals and instrument panel are wrong.
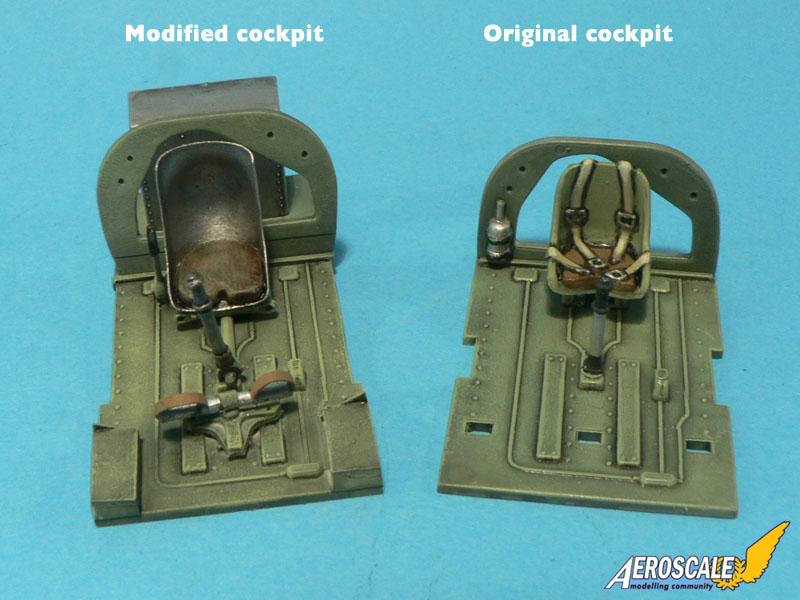
- the pilot seat is wrong and the molded on seatbelts don't look at all like they are of an Italian design.
- the gun sight is a joke. It looks as it has been designed to chase elephants.
- the wing machine guns are located in the wrong place.
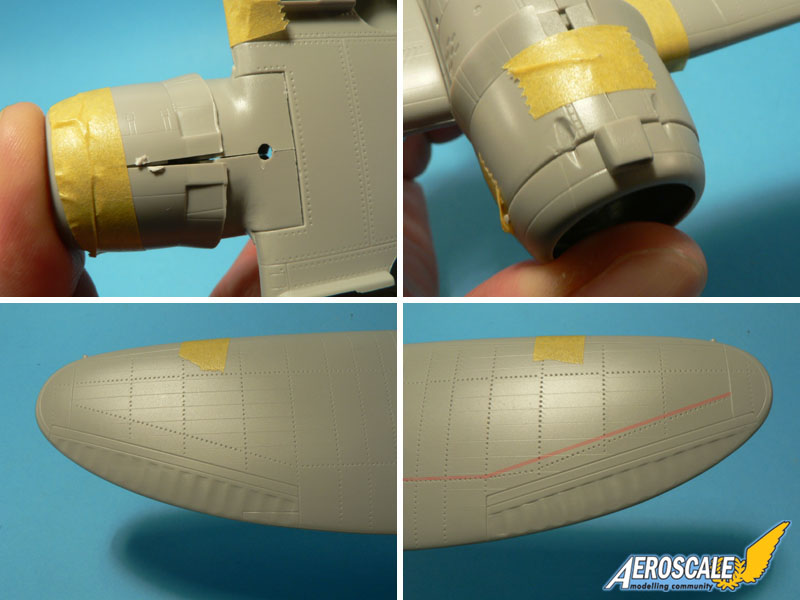
- the gun openings on the engine cowling just look bad.
- two bulges and two airscopes have been forgotten in front of the windscreen.
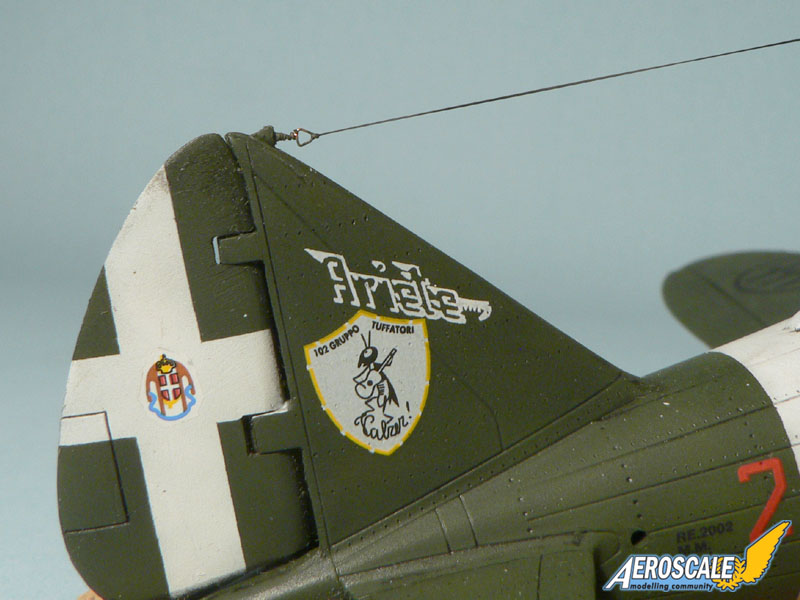
- there is no attachment point for the aerial wire on the vertical tailplane.
- the aerial mast is too thick and the wrong shape.
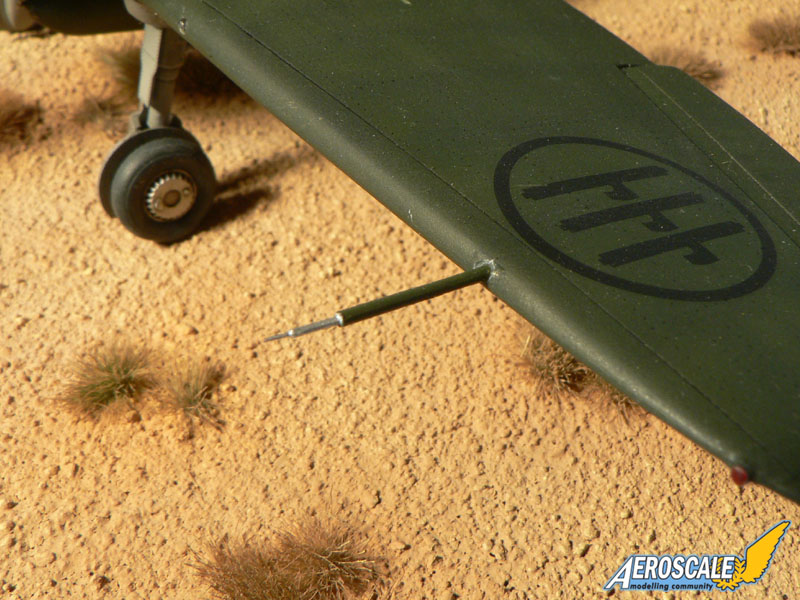
- the pitot tube has the thickness of a small tree.
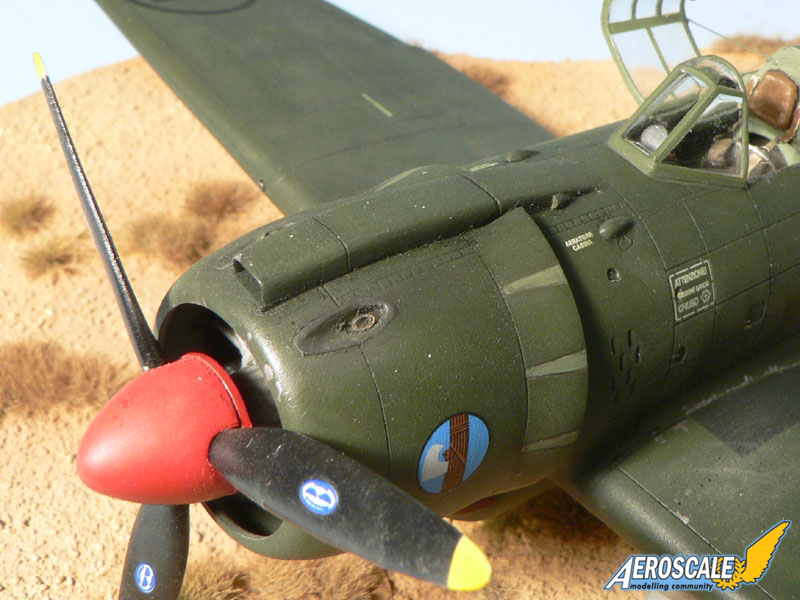
- the propeller blades are too thick.
- the spinner is too small.
- the frontal cowling ring has a panel line that shouldn't be there.
Other than that, the kit is quite good...
Two Reggianes
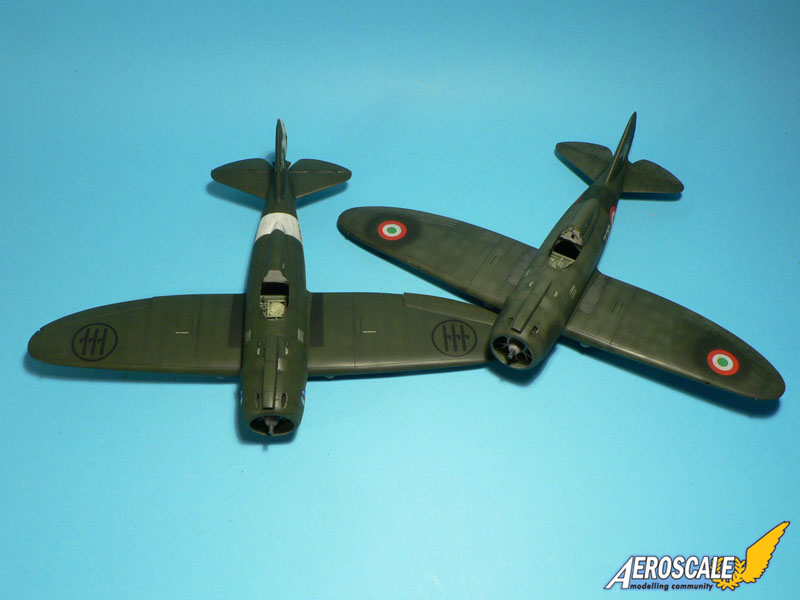
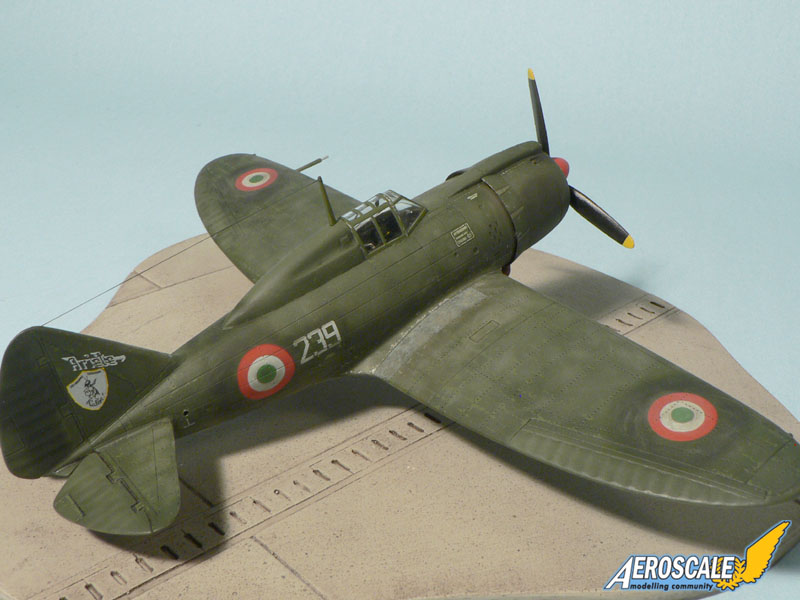
I decided to build two models for two reasons. The first is that the kit includes some interesting paintshemes. Of course, there are some Regia Aeronautica subjects (three), but also two German machines and one of the Aeronautica Cobelligerante Italiana with three color roundels instead of the Italian Fasci roundels. I soon decided to build two Italian machines, one for each side. Though I must admit that one German aircraft in particular was also appealing as it had an interesting operational history. Indeed, it was shot down during one mission over the Vercors region by the French Resistance, but I disgress... The second reason is that I wanted to be able to compare the modified kit with the one built from the box, to see if all the additional work really shows at the end.To help me in my task, two photo etched frets from Eduard destined to the Italeri kit were incorporated into the build. A review of each can be found by following the links below:
- Re. 2002 S.A.
- Re. 2002 Landing Flaps
Construction
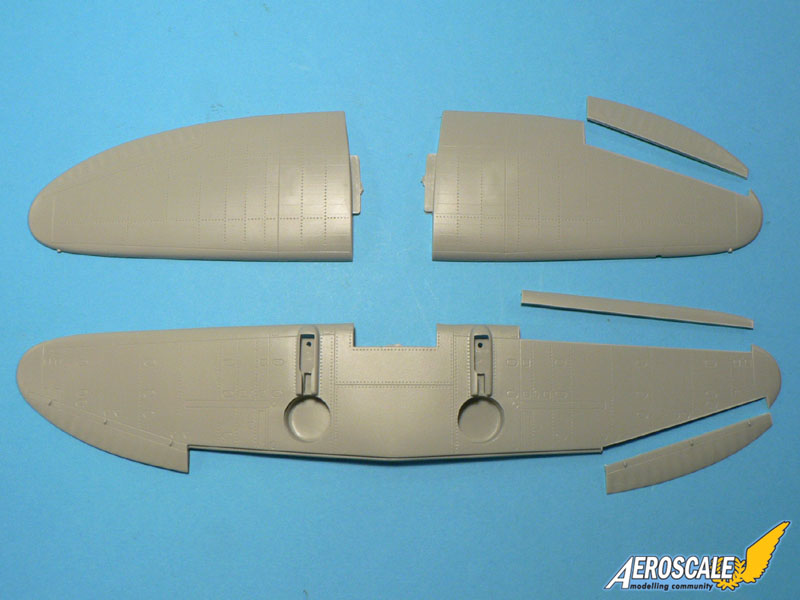
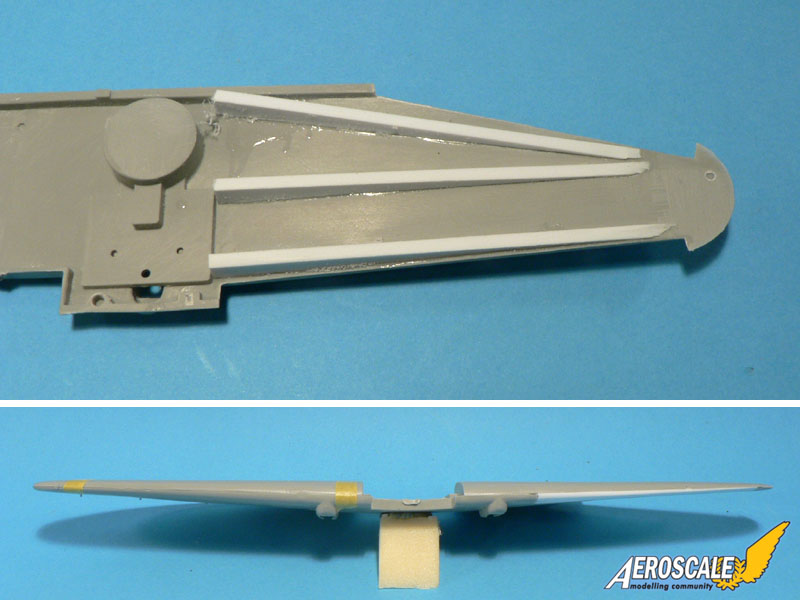
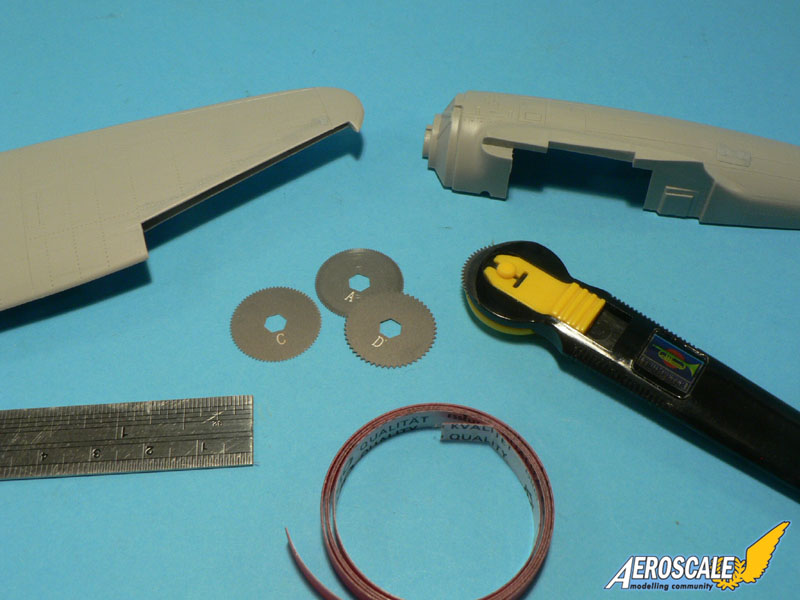
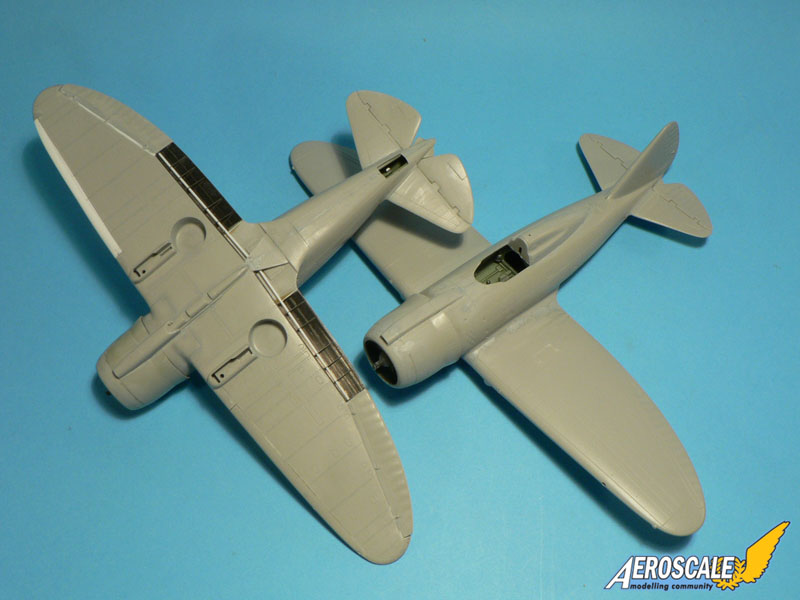
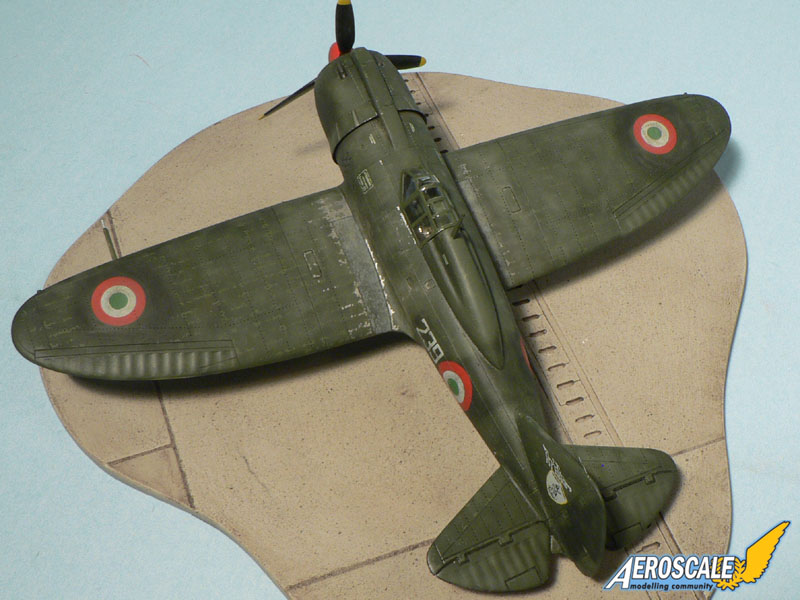
I've started the build by reducing the thickness of the wings of the first model. To do this, I've cut the ailerons away, as well as the leading edge of the underwings. Then I've sanded away as much plastic as I could inside of both wing halves, without alterating their outline. Finally I've placed some pieces of plasticard inside to have something for the underrwing to grab onto while gluing it in place with CA glue. The result, though not spectacular, is that the wing looks less bulbous than the one of the original kit, which really gives the impression it is inflated from the inside!The ailerons have been thinned down and a piece of round plasticard was added to replace the lost plastic and give it a more realistic appearance. At the end of the build, the movable surfaces were glued in dynamic positions on the model. The areas in the wings were the ailerons are supposed to go, have been hollowed accordingly.
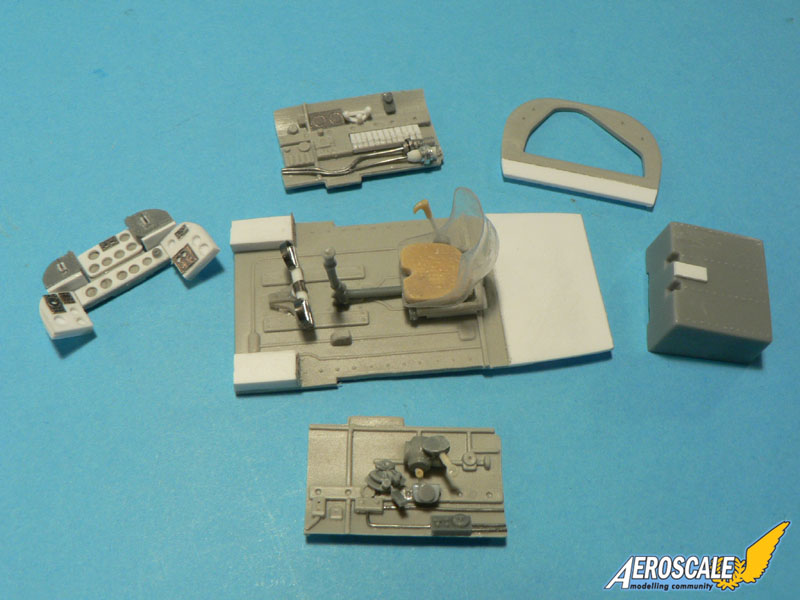
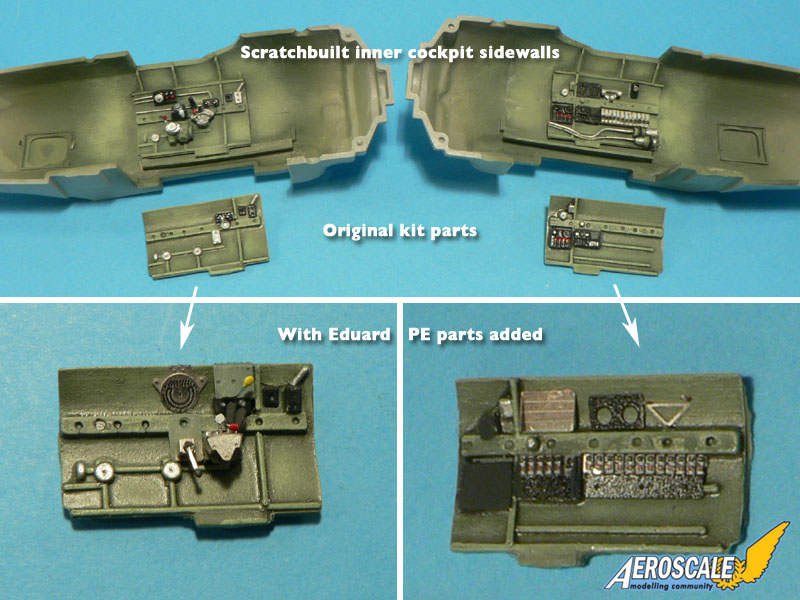
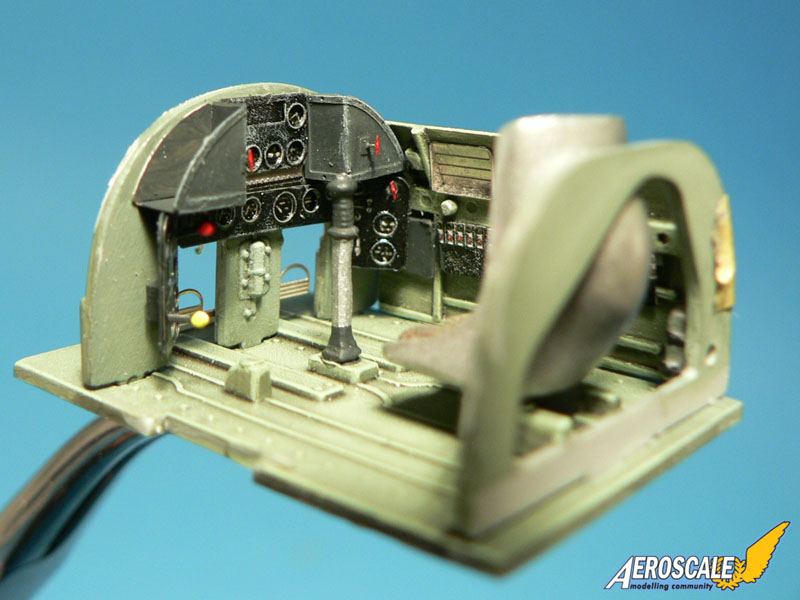
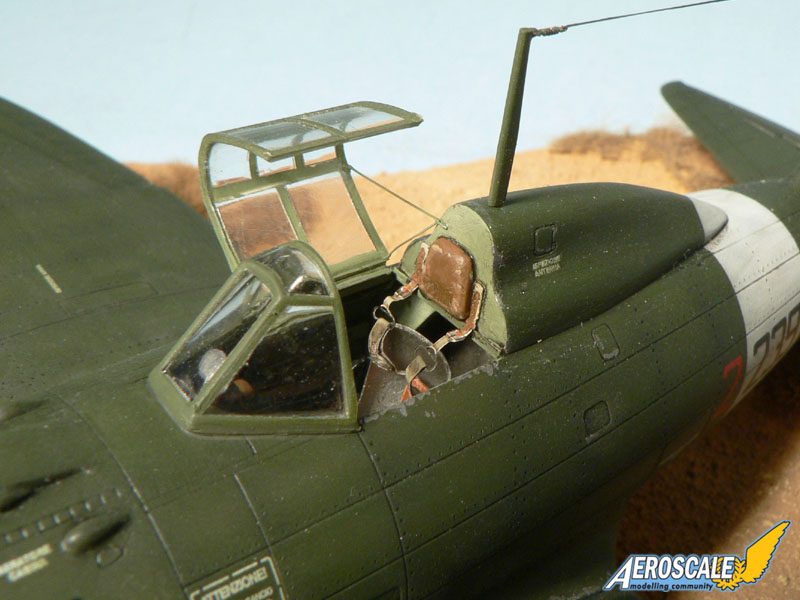
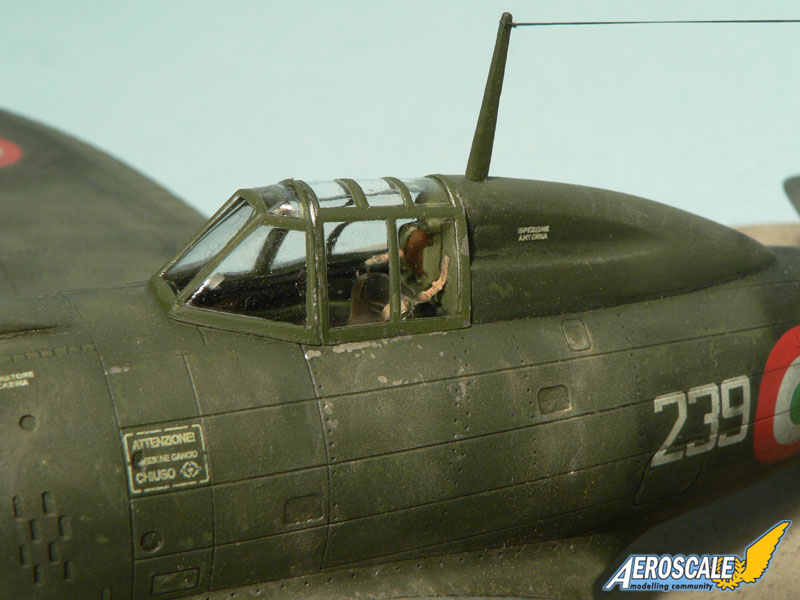
Obviously, Italeri have mixed the references for their kit as there are elements of a Re.2000 in their Re.2002 cockpit. The rudder pedals are all wrong as well as the layout of the instrument panel. The gun covers that are visible on both sides are missing as well. It is necessary to have some good references to correct all the mistakes and omissions. The cockpit walls are much more busy in the real aircraft than the kit part show. I've made a first attempt at correcting the kit by modifying the parts and adding scratchbuilt details, including a new vacuformed seat since the one provided in the kit is not even near ressembling to the one of the real aircraft.
I also used some PE parts for the cockpit of the "from the box" model but if Eduard's set increases the overall level of detail, in doesn't correct all the mistakes. However, it is a big improvement over the original kit parts. On the accompanying photos you can compare the original kit cockpit with the modified ones. I think that the scratchbuilt interior is the most accurate of the three. Sadly, Eduard couldn't do anything to ameliorate the look of the seat as it's complex shape is impossible to reproduce with PE parts. Therefore, the only way to correct it is to make a new one by yourself. The typical seatbelts are provided on a pre-painted photo etched fret though.
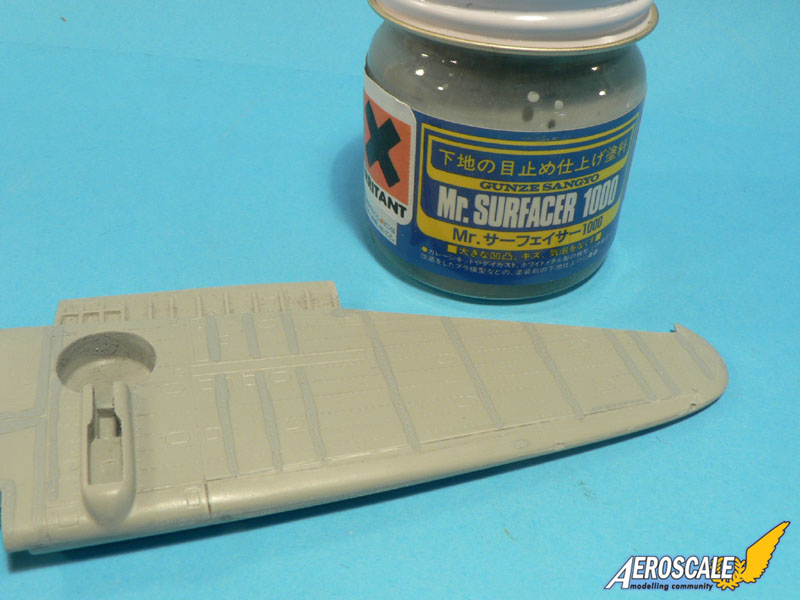
The rivets on the kit are a problem, so rather than eliminate them all I have chose... to add some more! If you want to hide a tree, plant it in the middle of the forest! To do so I have used Trumpeter's rivet tool fitted with the wheel B. However, the difference between the rivet lines was so obvious that I finally had to tone down the original ones by brush painting Mr. Surfacer 1000 to achieve a more coherent finish.
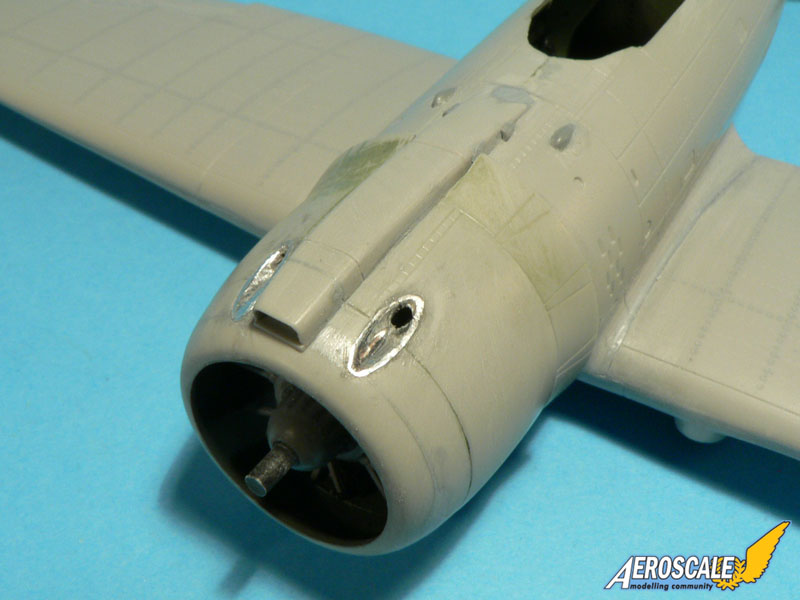
The engine of the kit is acceptable I think. I only added some ignition wires but they won't be very visible because they go behind the engine on the Re.2002's Piaggio P.XIX. In fact I think it was a waste of time because this sub-assembly will be hidden inside the cowling and behind the propeller hub later anyway.
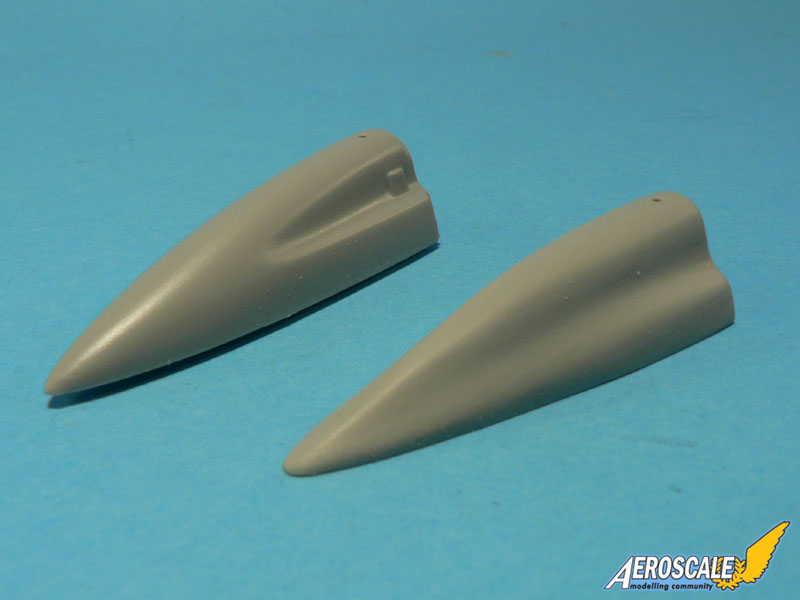
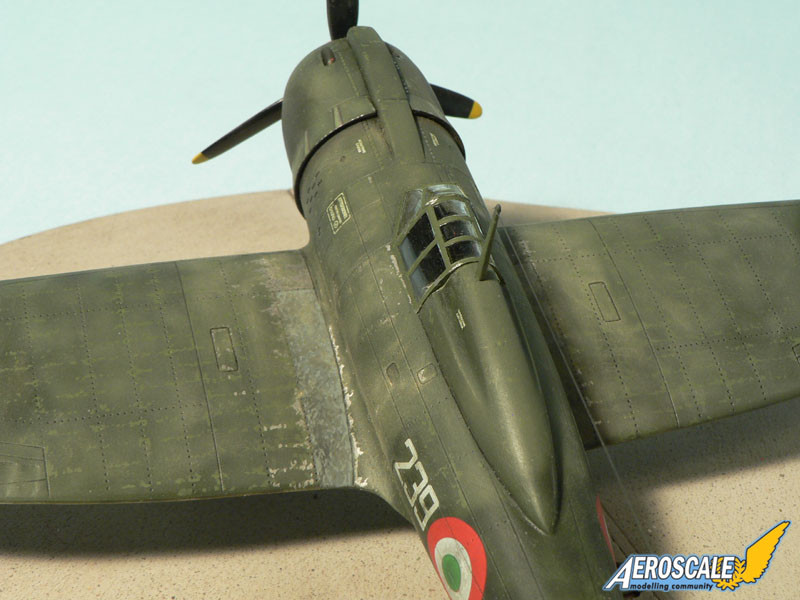
I've also modified the fuselage hump behind the cockpit. While it still not looks 100% like the one of the real aircraft, this is the closest you can get when working only with the kit part. If I had sanded just a little further, I would have gone through the plastic! However, when compared to the original part provided by Italeri it is a big improvement I think. It is to not that only one small access panel should be present on the left.
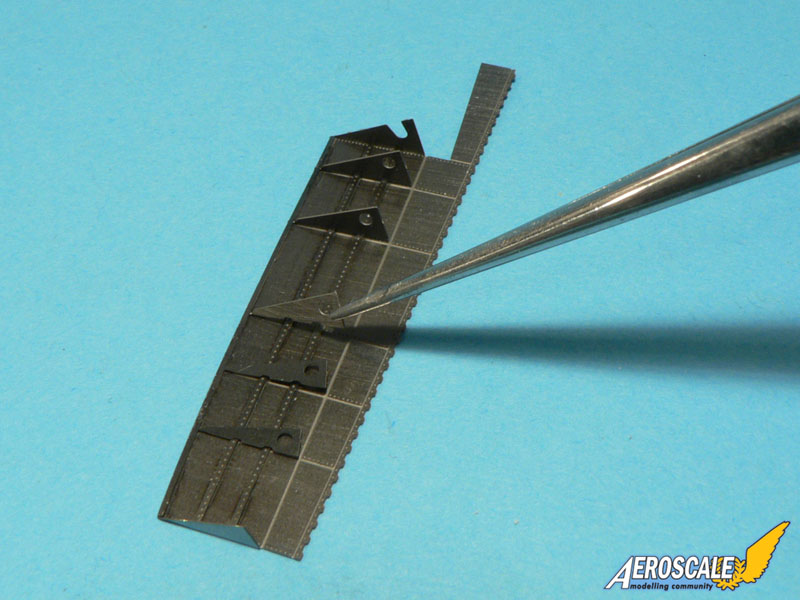
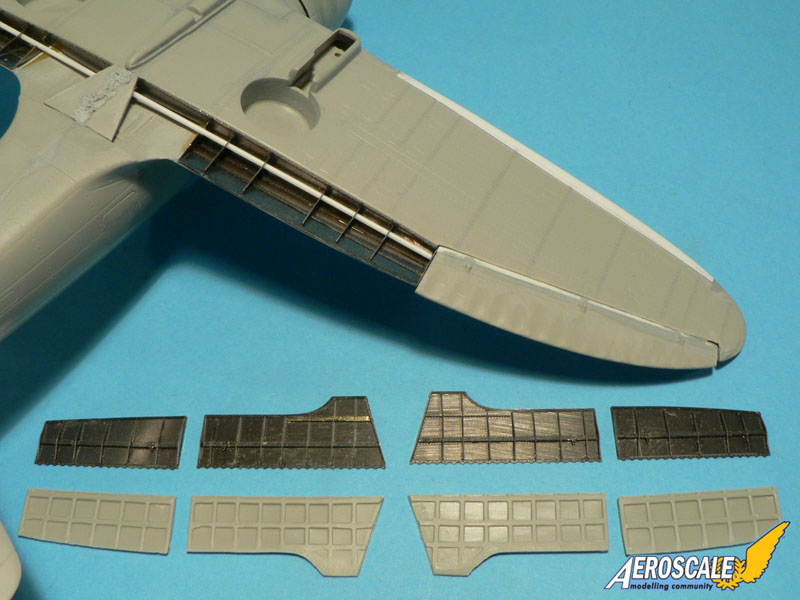
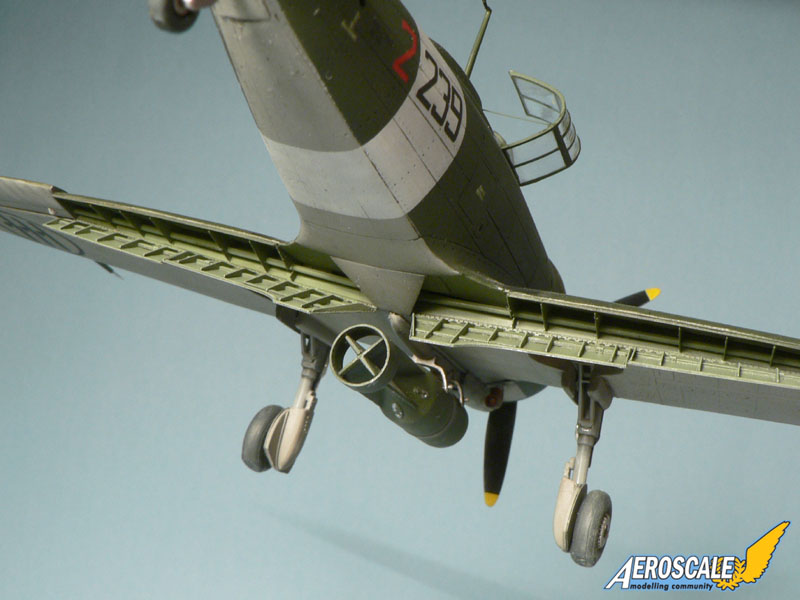
The PE Flaps from Eduard were assembled next. I must say they are great and not too difficult to put together. You just have to bend the pieces to shape with a flat plier and add some liquid CA glue. It is not necessary to add too much and it is better to work with capillarity action. Once the fuselage and the wings have been put together, I glued the flaps in place. I think they are a big improvement over the original plastic parts. One model will have the flaps down and the other the flaps up.
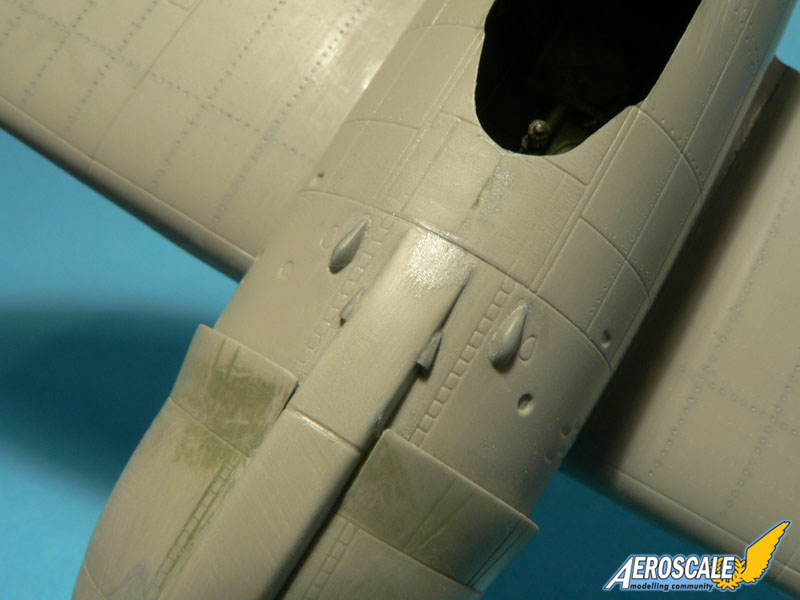
On the "improved" model, I have added two small bulges and two airscopes that Italeri have omitted. They are located in front of the windscreen, on both sides of the upper airscope fairing (see photos). about the latter, I've noticed that it is offset on the model. Don't modify this as this was a feature of the real aircraft. At least this is something Italeri have made right. The machine guns openings on the engine cowling are a real shame though, so I have reworked them with self adhesive aluminium foil.
Painting and decalling
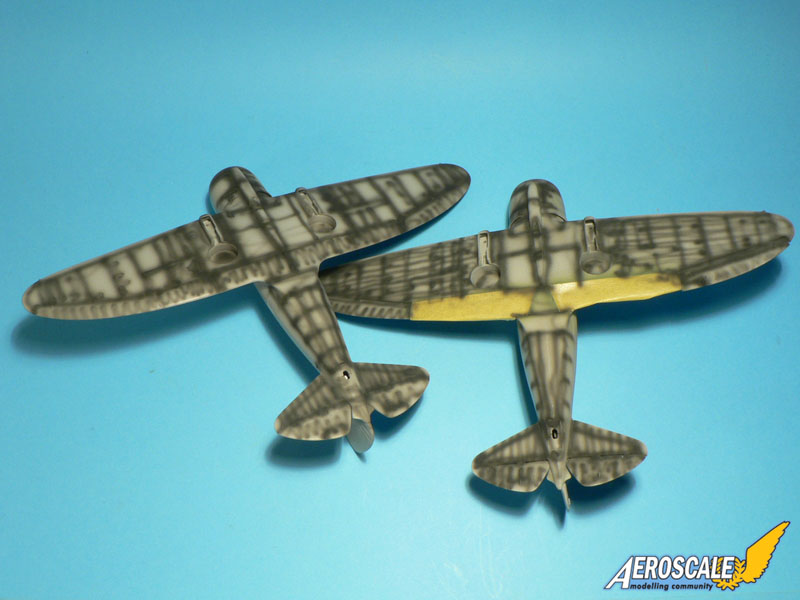
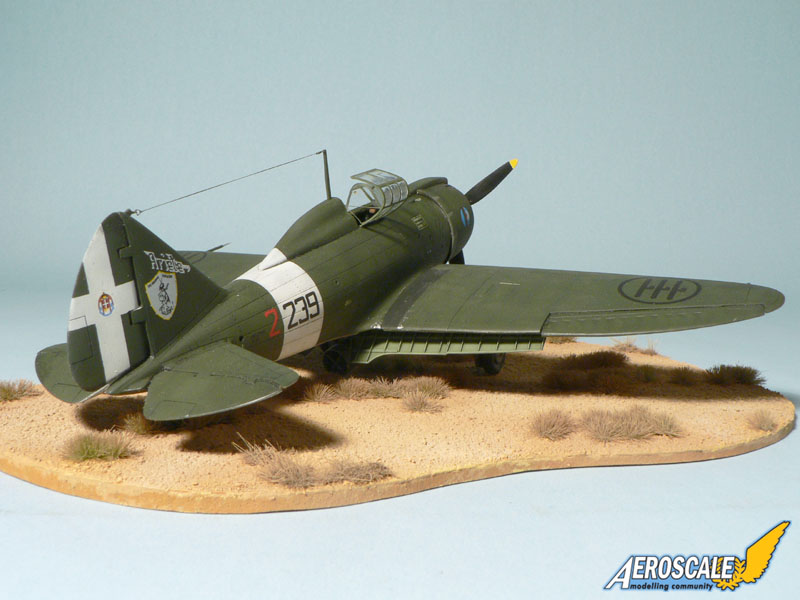
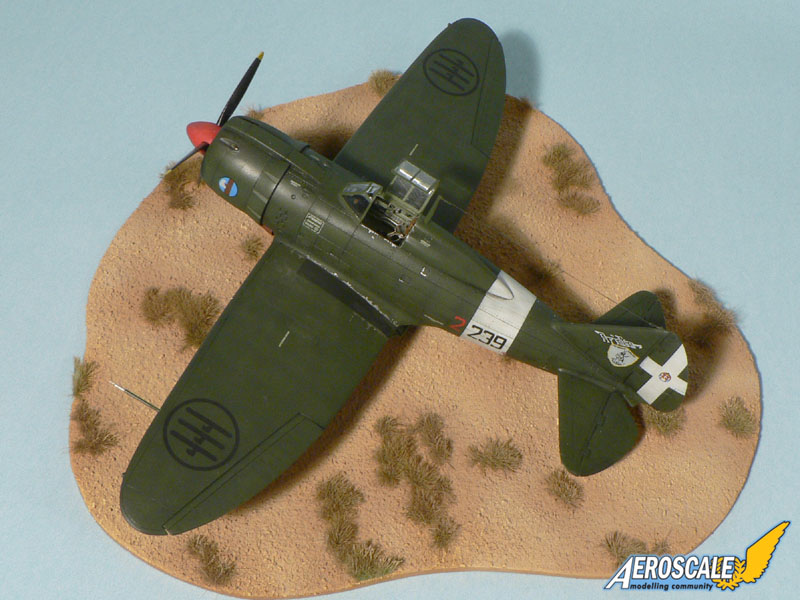
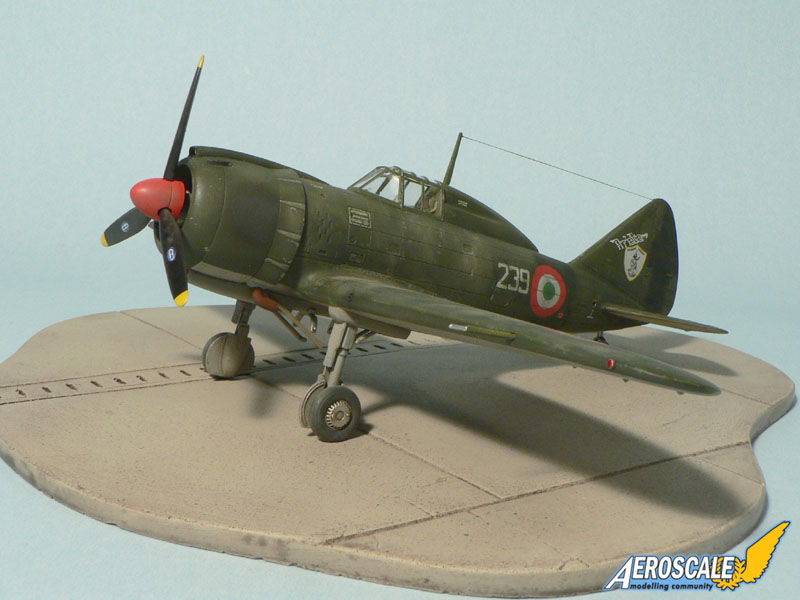
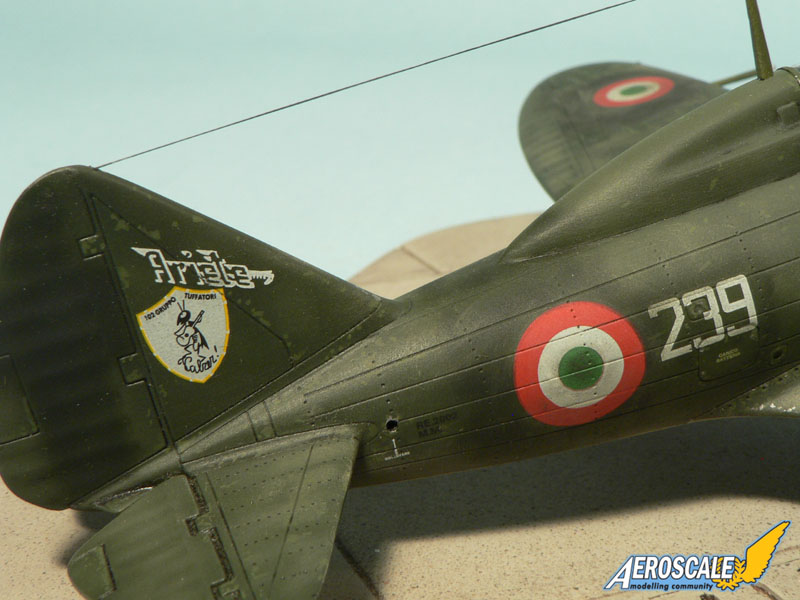
I won't go too much into detail about the painting stage as I used techniques which are well known: pre-shading, application of the base colors, washes, weathering with Tamiya pastels, paint chipping, etc...The difference in the final aspect of both models is that the Regia Aeronautica one has a cleaner finish than the Aeronautica Cobelligerante one. The main reason for this is that the Reggianes weren't widely used in combat against the Allies and most of them were destroyed on the ground. Most period photos show rather clean aircraft. However, in the reference book provided by Italeri with the kit, there is a picture of a Re.2002 that shows a very worn out aircraft of the Aeronautica Cobelligerante. This allowed me to "hide" the flaws of the model built from the box behind a more elaborate paint finish.
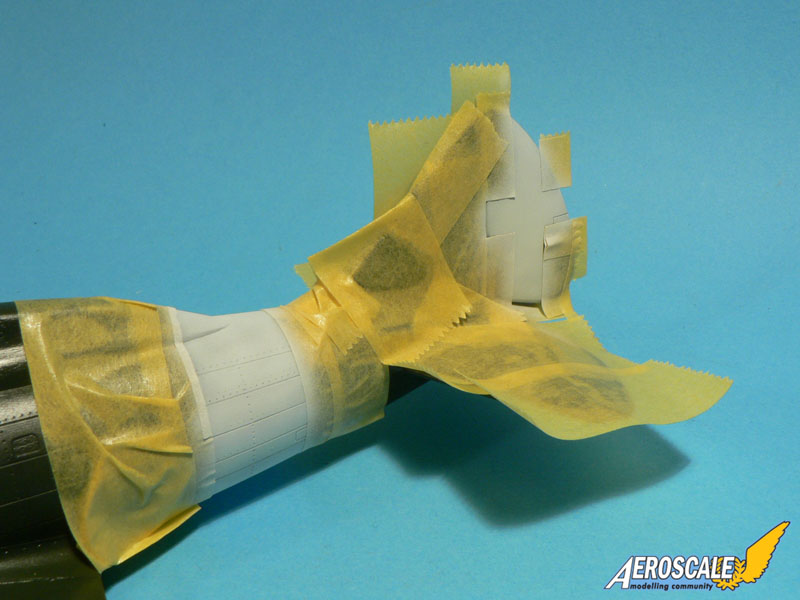
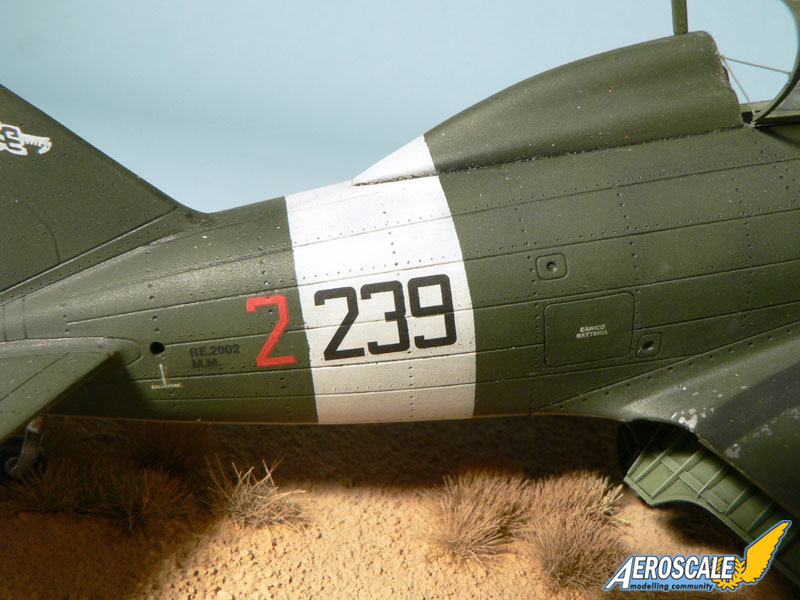
The decals went on more easily than I thought and they worked well with Mr. Mark softer. I first thought they would not conform to the surface but finally they did. Rather than using the white fuselage band provided on the decal sheet, I chose to mask the model and paint it myself using Tamiya XF-2 acrylic paint. While I was at it, I also did the rudder cross because the decals are rather thin and translucent. The final flat finish was achieved with a coat of Hobby Color H20.
final construction
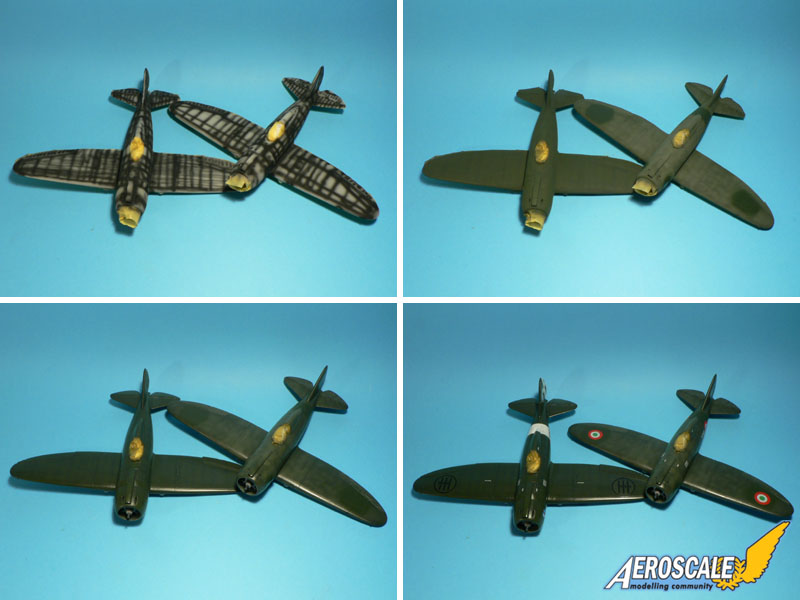
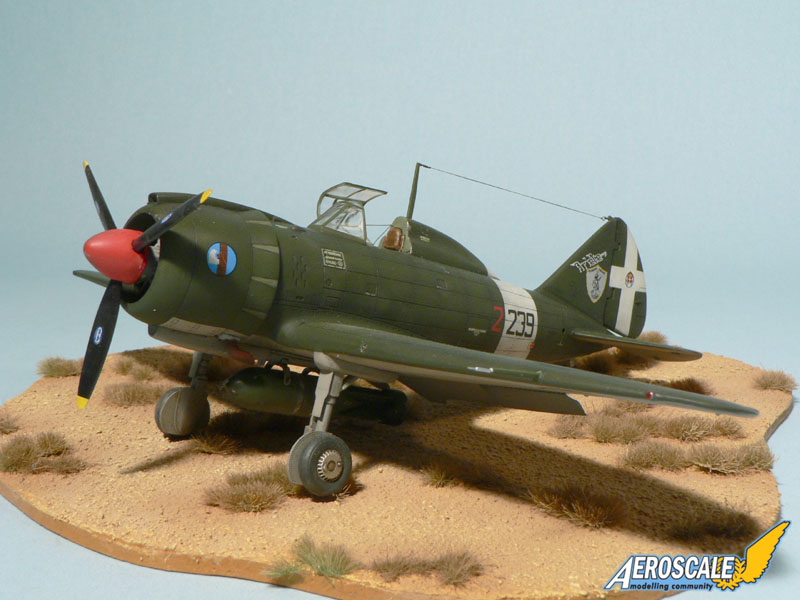
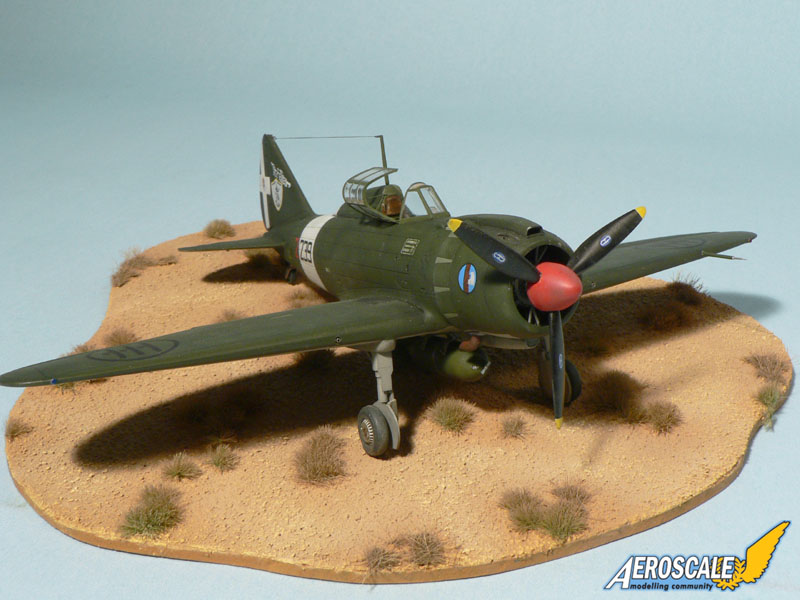
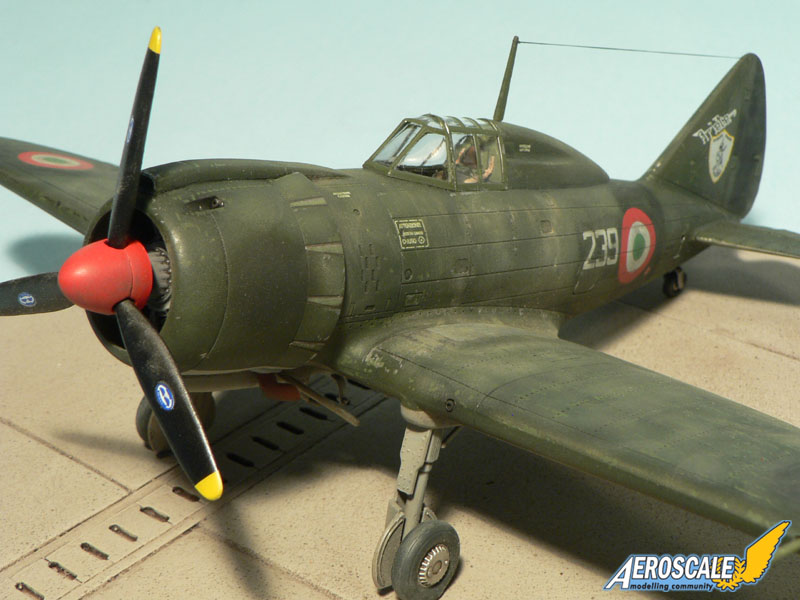
With the overall painting done, finishing work consisted in adding all the smaller detail parts: landing gears with their respective covers, exhausts, bomb attachment mechanism, bomb, propeller, pitot tube, antenna mast, aerial wire, windscreen, canopy hood etc... The very fragile photo etched flaps were glued in place at the very end.Of course, many parts were scratchbuilt or replaced with Eduard PE parts on the "enhanced" model while the other one was finished with the lesser attractive kit parts. Now you can decide whether all the modfications are really necessary or if the model built right from the box is close enough to the real thing for you. I have my own opinion on this matter...
The finished models were photographed on Mark58 display bases.


About the Author


FROM: MOSELLE, FRANCE
I'm mainly interested in WW2 aircraft and I build them in 1/48 scale.
Comments
Well, they're both excellent builds, but I think the extra work on the "improved" kit was worth it (of course, it wasn't me who had to have to do the work, though). The Reggiane is an attractive aircraft--a shame Italeri didn't do it a little better justice.
Regards;
Automaton
JAN 16, 2010 - 09:28 AM
Once again, you prove your bravery...
They look great Jean-Luc. Excellent work on the scratch built details.
JAN 18, 2010 - 06:26 AM

Jean-Luc you are quite talented,I hope to match your skills someday
JAN 18, 2010 - 03:55 PM
Copyright ©2021 by Jean-Luc Formery. Images also by copyright holder unless otherwise noted. The views and opinions expressed herein are solely the views and opinions of the authors and/or contributors to this Web site and do not necessarily represent the views and/or opinions of AeroScale, KitMaker Network, or Silver Star Enterrpises. Images also by copyright holder unless otherwise noted. Opinions expressed are those of the author(s) and not necessarily those of AeroScale. All rights reserved. Originally published on: 2010-01-16 00:00:00. Unique Reads: 15127

WEB HOSTING BY


Copyright ©2021 AeroScale and Kitmaker Network, a subsidiary of Silver Star Enterprises
All Rights Reserved. Please read our Conditions of Use and Privacy Policy.
All Rights Reserved. Please read our Conditions of Use and Privacy Policy.