

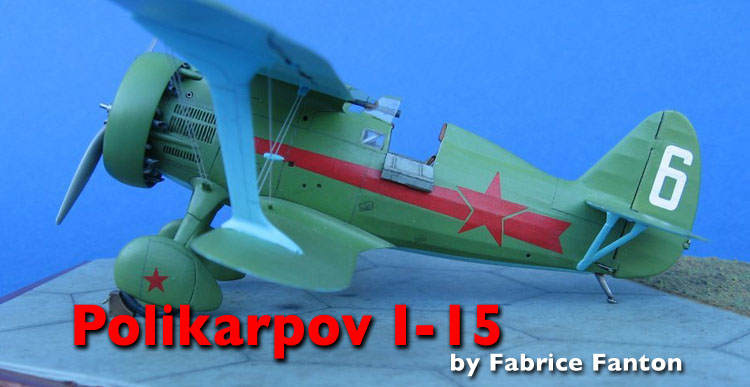
1⁄48Polikarpov I-15
4
Comments
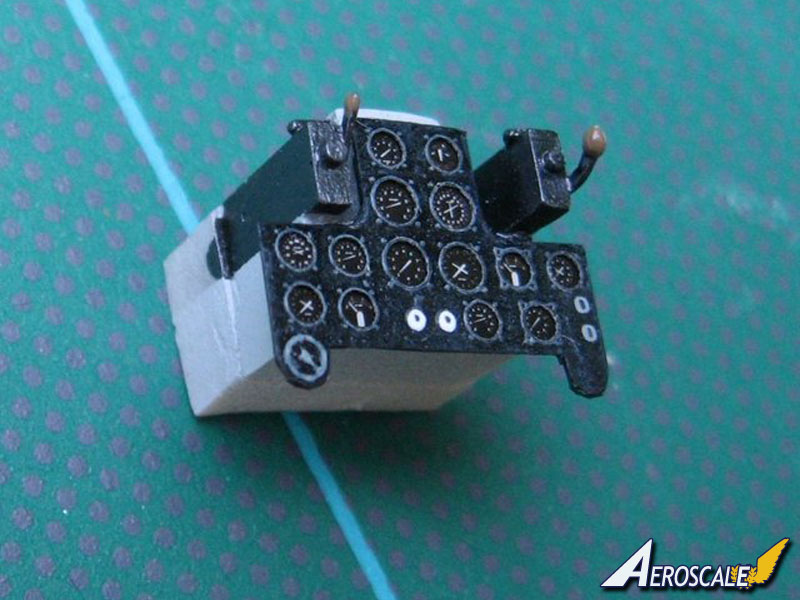
Cockpit and engine
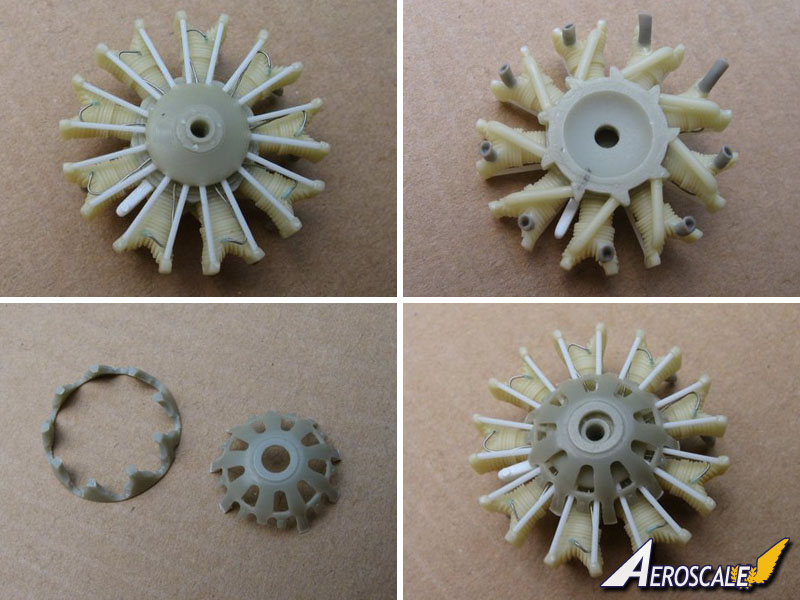
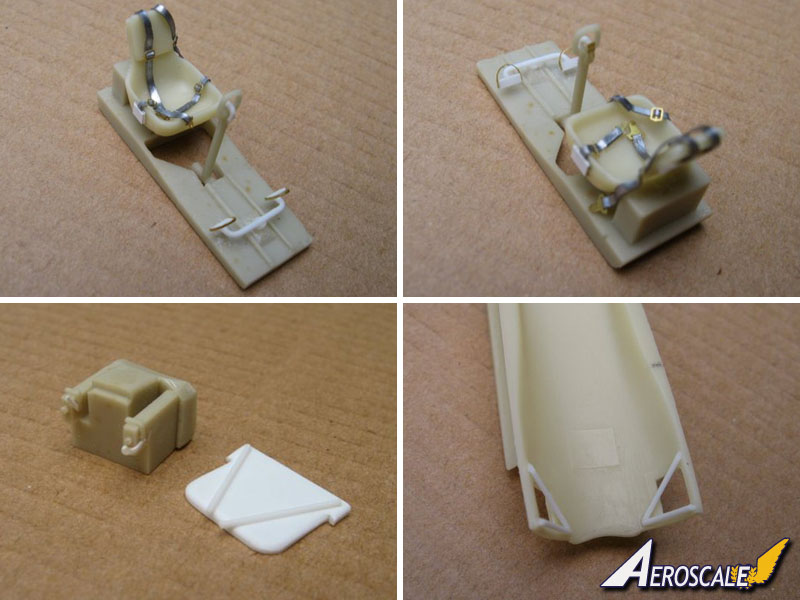
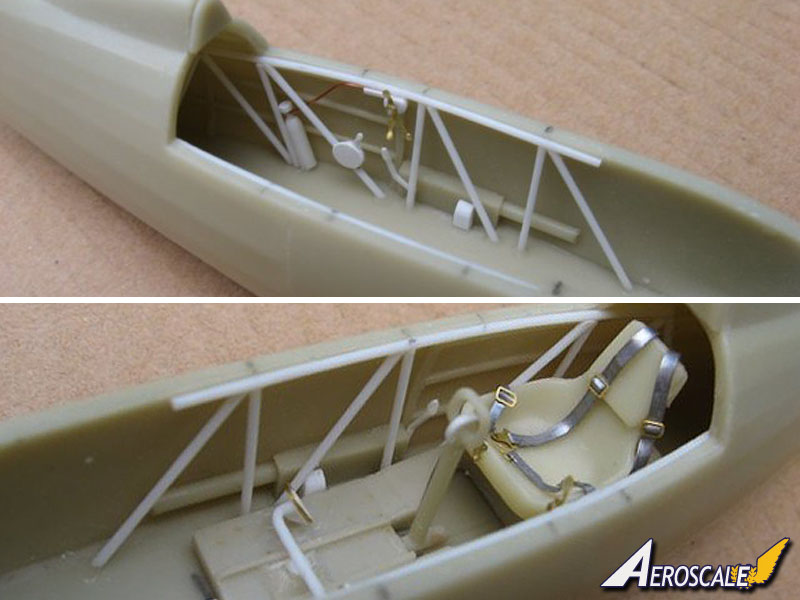
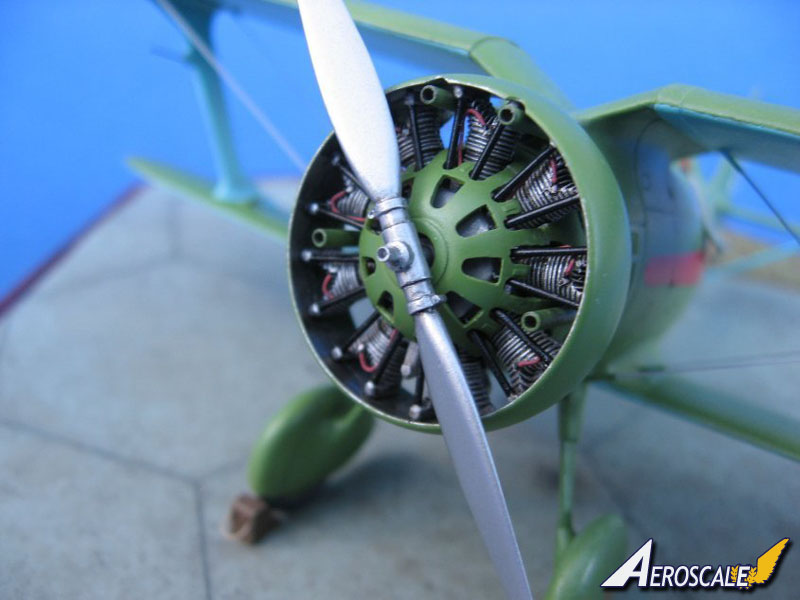
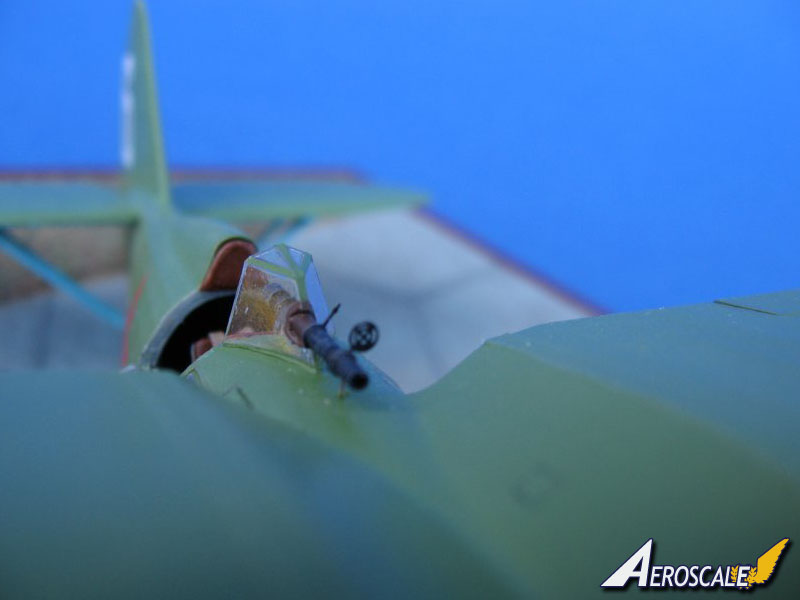
The resin parts are superb in Rest Model's 1:48 scale I-15 kit, but the photo etched ones are too fine. This is why I have made the internal structure of the fuselage with plastic rods and added some scratchbuilt details (compressed air bootle, machine-guns armament levers, rudder pedals etc ). The part supporting the machine-guns and the instrument panel came from the box while the back of the fuel tank was scratchbuilt. For an easier painting of the cockpit I would have preferred a fuselage made of two parts rather than the one piece airframe provided in the kit.The engine pushrods have been added using 0,64 mm wide plastic rods and the exhausts are Quickboost resin parts destined to the I-16 type 10. The front engine cover is originaly a one part resin piece which has to be cut in the middle to imprison the engine. Not a piece of cake!
Before applying the interior color I have airbrushed a coat of Mr Surfacer 1200 diluted with acetone. It worked well but this mixture dries very quickly. Then I worked with the brush. The light gray is color number 64 from humbrol. Once painted, the floor/seat sub-assembly was installed in the fuselage, as well as the photo etched and acetate sheet instrument panel.
For the engine I have used Mithril Silver from Citadel Color heavily diluted with alcool and then I have applied a wash of Tamiya Smoke also diluted with alcool.
Main assembly
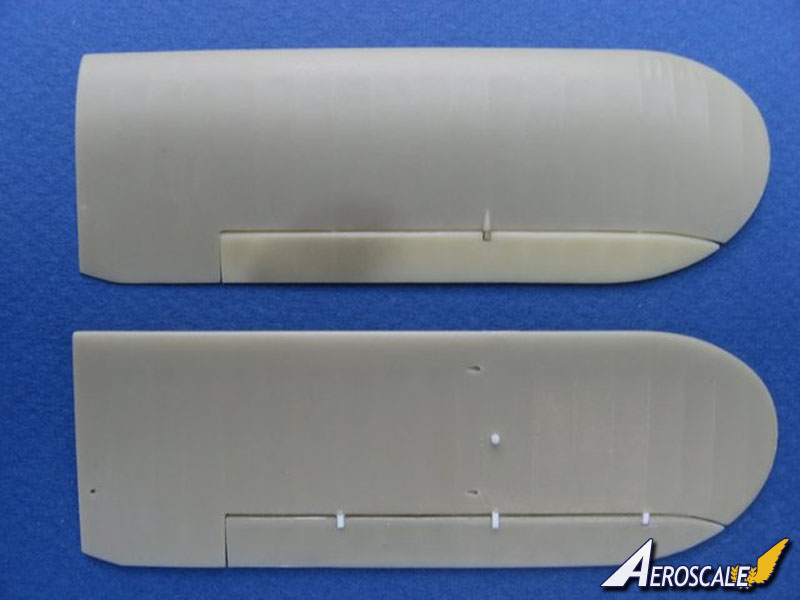
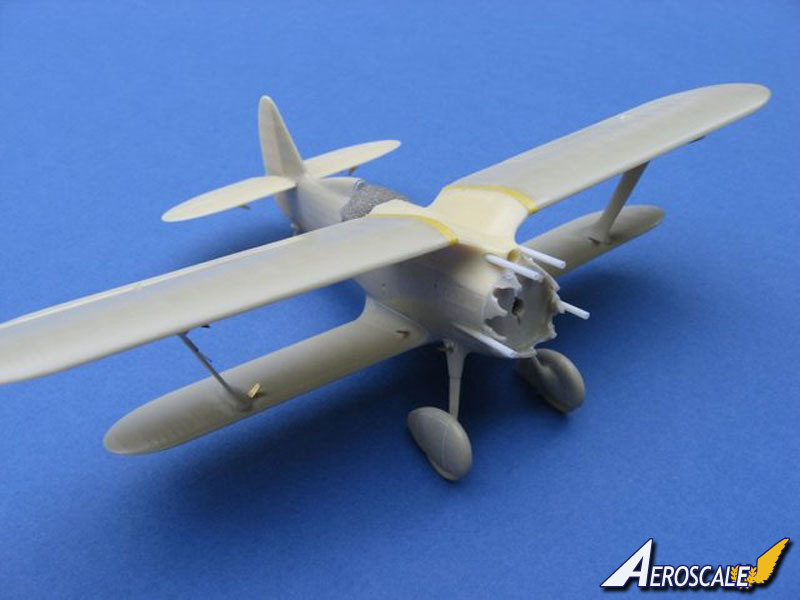
Assembling the wings to the fuselage wasn't too difficult, some Surfacer smoothed with acetone is only what was necessary. One just has to blend the canvas covering of the fuselage into the rear of the lower wing.The one piece landing gear assembly litteraly fell into place. It appears frail and fragile, but the manufacturer inserted a steel rod into each leg, from the base of the tire until the portion of fuselage supporting the legs. Some more work was necessary as the engraved detail is a little bit soft on the wheel spats. After the undecarriage part was glued in place, some filling, sanding and engraving was done to get a clean result.
The wing gull upper piece is too wide at the front so I had to enlarge the forward fuselage to obtain a nice fit. To do so, I made a cut and added a small piece of plastic. Some spars are necessary to ensure a strong fit of the upper wings to the wing gull. I did mine with plastic rods. The machine guns are made of hollow Contrail tubes. The engine is easily fitted to the back of it's housing. I just had to redo an exhaust piece which was in the way of one of the machine guns.
The horizontale tailplanes are very nice and very fine, unfortunately the V struts supporting them don't fit very well to the fuselage. I only kept the endings of the struts and decided to add the masts later after painting. The tail skid is a resin piece and I was afraid it could break on any occasion, so I have inserted a 0,3 mm steel wire to strengthen it.
I have added some hinges to the wing ailerons which are very long. One of them was a little twisted so I had to get it straight with the flame of a lighter.
The wing struts are well designed if you consider the different angles and curves of the real ones. Some locators help to get them into the right position. At the base of each upper wings, were they meet the wing gull piece, I have added some Tamiya tape to reproduce the strengthening present there. It is to note that small photo etched attachment points are provided in the kit which must be folded to shape. These were glued in place at the right angle before painting.
Painting
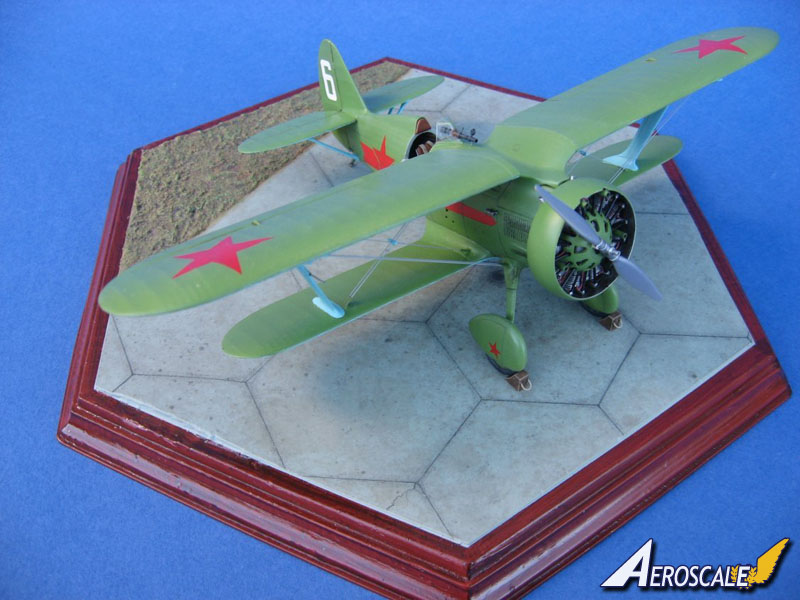
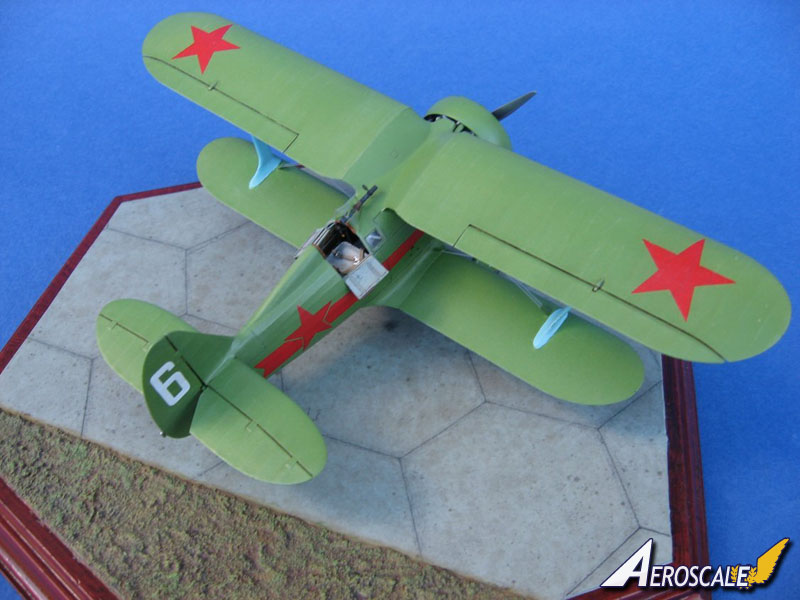
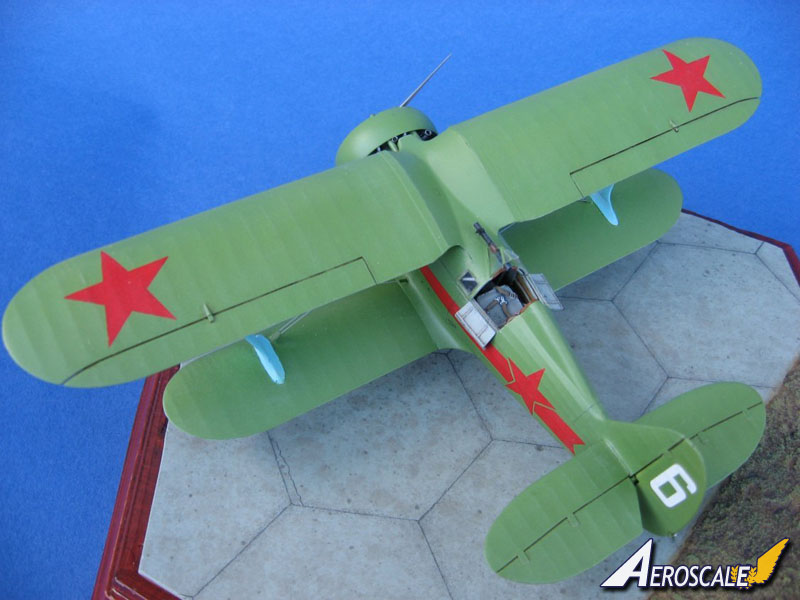
For the decoration, I used a profile I found on the following website: Modeling the Aircraft of the Soviet VVS.According to the infos gathered there, this is one of the few Soviet I-15s to have kept it's wheel spats in 1937. The aircraft was painted AII Green and Blue and I used colors from the White Ensign range. See here for more details about this particular machine.
The base is a vacuform item from Remi. The original rectangular pattern was sanded away and replaced with a typical Russian hexagonal pattern drawn with a pencil over a concrete like finish.


About the Author


Comments

Lovely build Fabrice!
...though I must say that the Rest models kit I built was easier than many plastic short run kits OTOH this being a bi-plane makes it probably a bit harder than the He 112V-6.
Anyway, great model!
all the best
Steffen
MAR 19, 2010 - 07:27 PM

Hi Fabrice
Great build! I made a start on this one myself before I left London and I can vouch for what a gorgeous little kit it is - it's high on my list of builds to get back to once I'm unpacked and have a proper workroom again.
All the best
Rowan
MAR 20, 2010 - 12:21 AM

Copyright ©2021 by Fabrice Fanton. Images also by copyright holder unless otherwise noted. The views and opinions expressed herein are solely the views and opinions of the authors and/or contributors to this Web site and do not necessarily represent the views and/or opinions of AeroScale, KitMaker Network, or Silver Star Enterrpises. Images also by copyright holder unless otherwise noted. Opinions expressed are those of the author(s) and not necessarily those of AeroScale. All rights reserved. Originally published on: 2010-03-19 00:00:00. Unique Reads: 6979

WEB HOSTING BY


Copyright ©2021 AeroScale and Kitmaker Network, a subsidiary of Silver Star Enterprises
All Rights Reserved. Please read our Conditions of Use and Privacy Policy.
All Rights Reserved. Please read our Conditions of Use and Privacy Policy.