

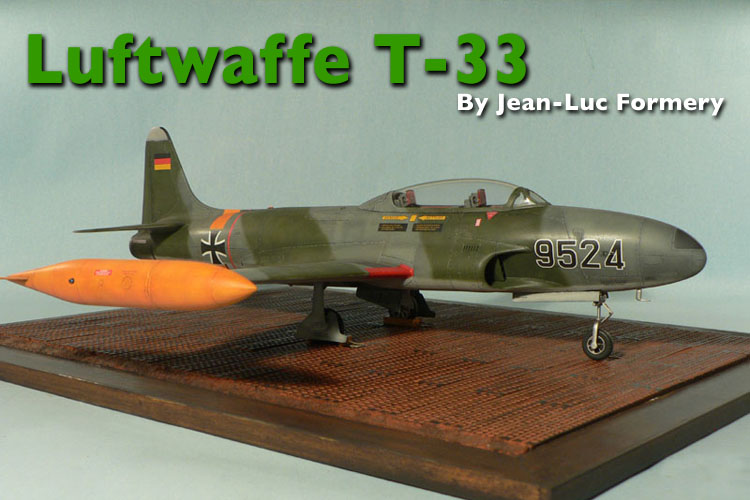
1⁄32Luftwaffe T-33 Shooting Star
7
Comments
Assembling and painting of the interior
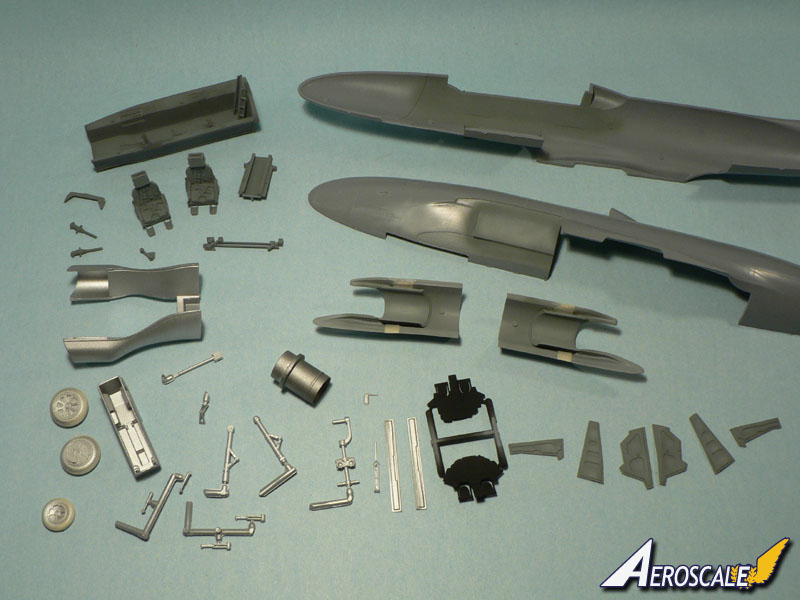
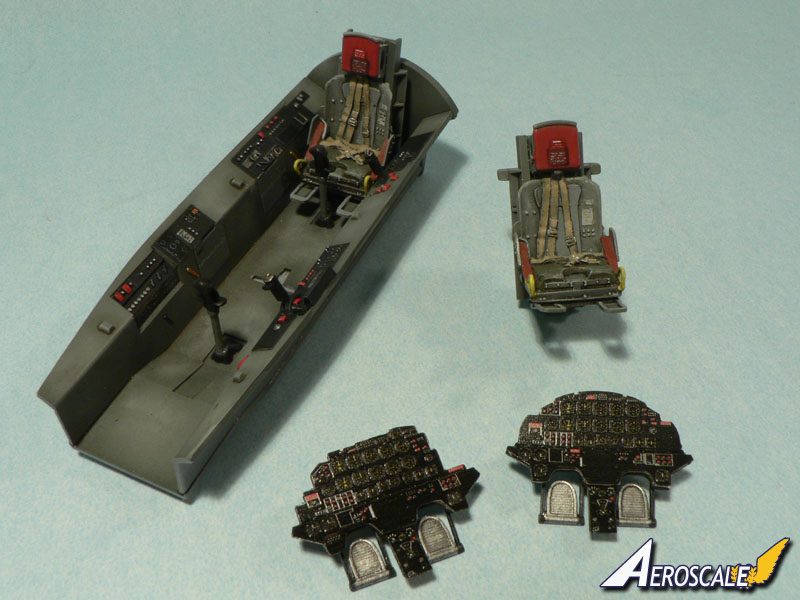
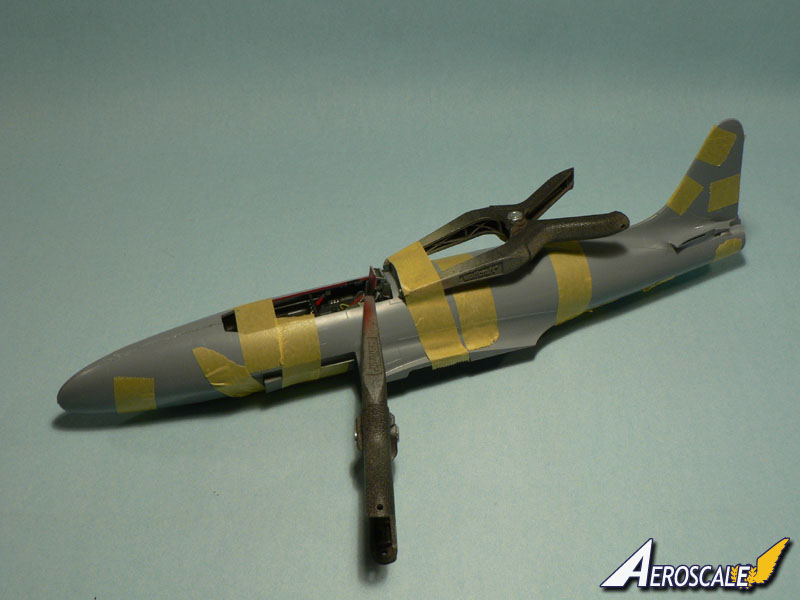
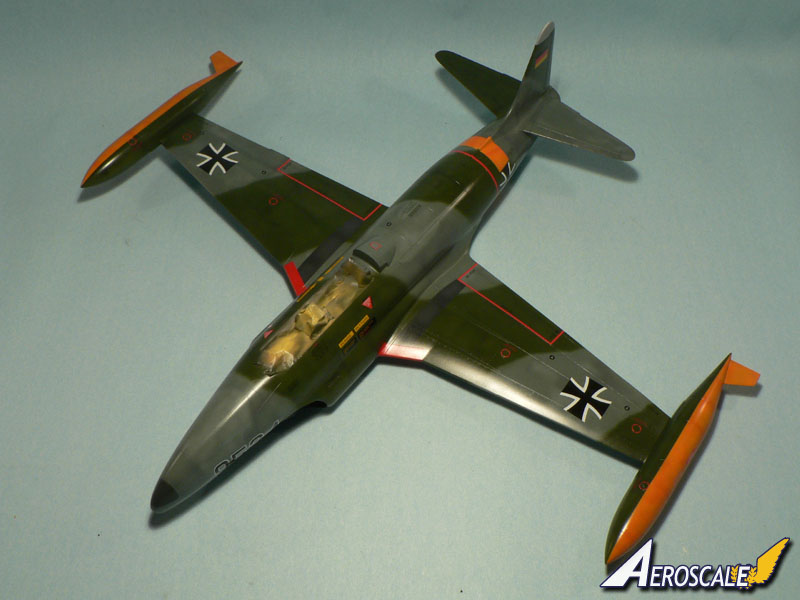
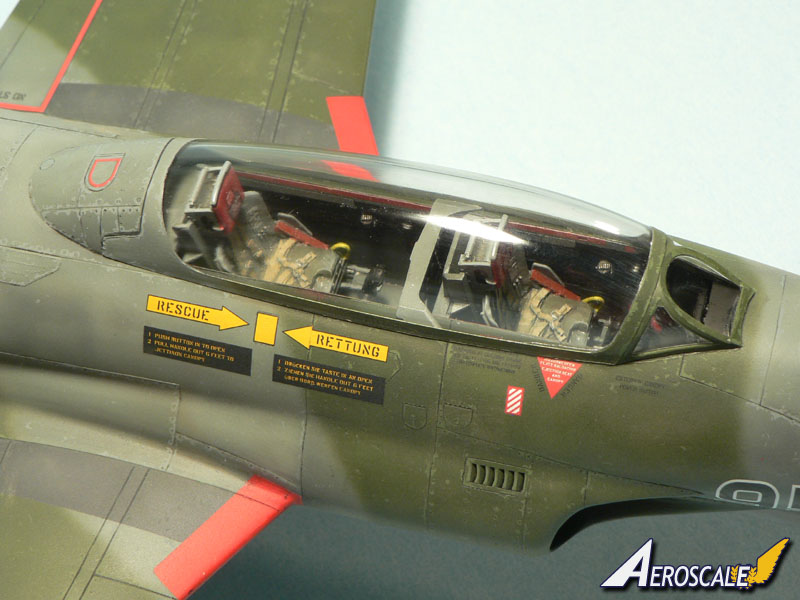
First step was to get as much plastic and resin parts together before applying the first coats of paint. The wings for example can be already glued together, as well as other sub-assemblies like the wing-tip fuel tanks, the cockpit tub, the wheel wells, the intakes, the horizontal stabilizers, etc... Once this was done, I have applied the basic colors to all parts following the kit's instructions and internet walkaround photos: Dark Gull Gray (Tamiya XF25) for the cockpit interior, Light gray for the main wheel wells, the inside of the landing gear covers and the inside of the air intakes (Tamiya XF-80), silver for the landing gears, nose wheel well and intake trunking (Revell Aqua Color 90 Silver) and black (Tamiya XF-1) for the instrument panels. Later I have dry-brushed and washed the parts to give them a light used appearance. The cockpit interior was finished using my usual techniques: dry-brushing with Prince August paint, a wash of tinted Klir (french Future) and the detail painting made with a small brush once again with Prince August paints. I don't know if the colors are 100% right but the more I've looked at pictures of the T-33 interior, the more differences I found between each machine. The instrument panels are pre-colored photo-etched parts probably made by Eduard. To reproduce the glass of the dials I have simply applied a transparent tape. It's very effective and realistic. The seats are resin parts and though not the best I've seen they look good once painted. Getting the cockpit to fit inside the fuselage was not a piece of cake. Not that the fit was bad, but the locators inside each fuselage halves where not really helpful and the whole process was a little frustrating. This is clearly a design problem of the kit and one of it's weak points. However, with some persuasion (and a lot of tape!) I managed to get a decent result.Main assembly
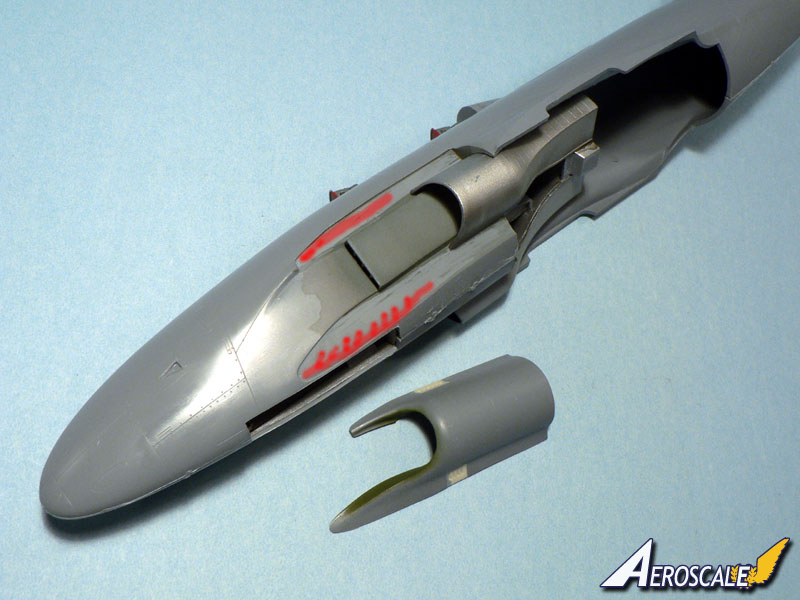
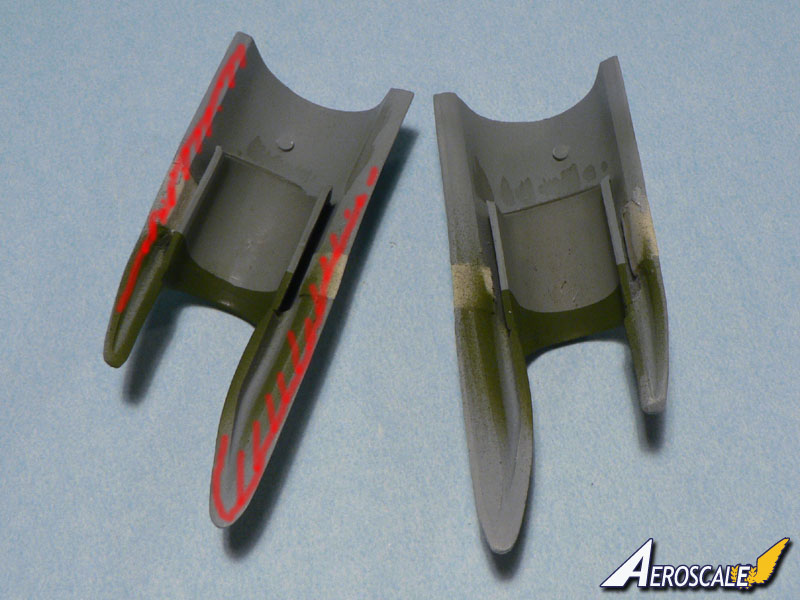
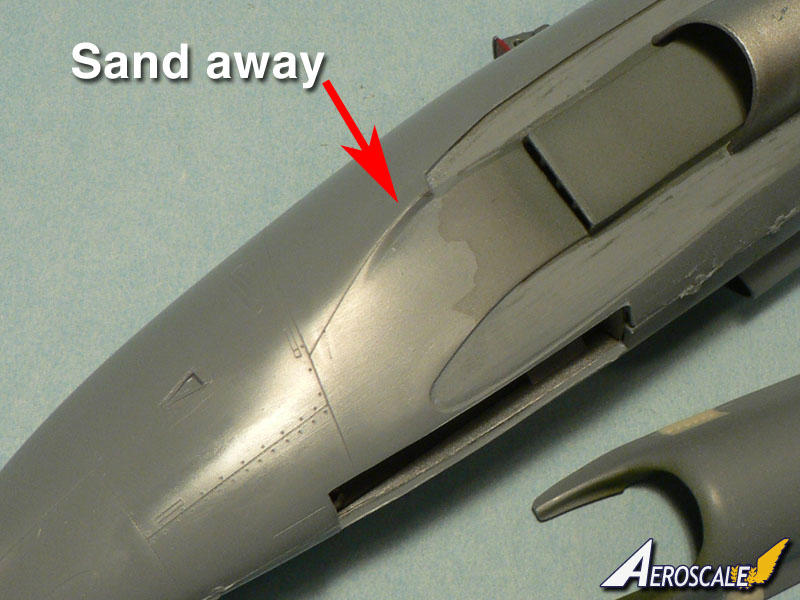
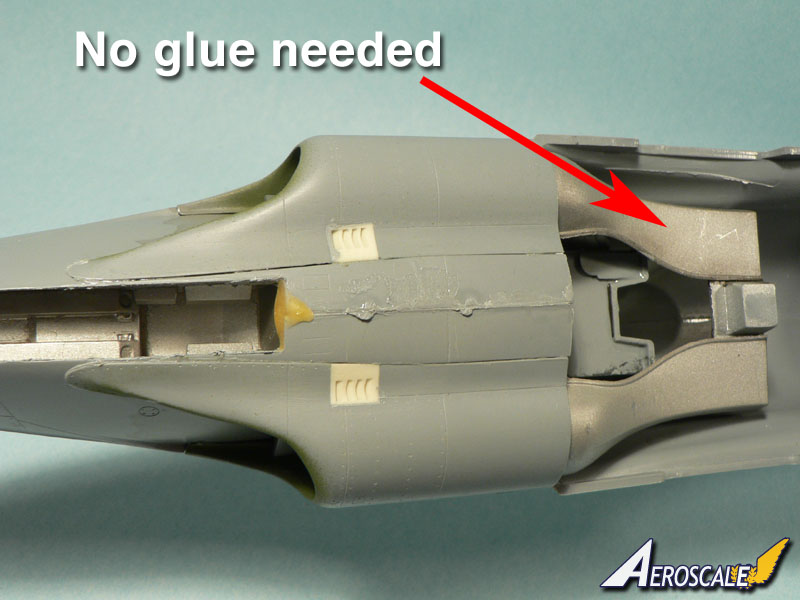
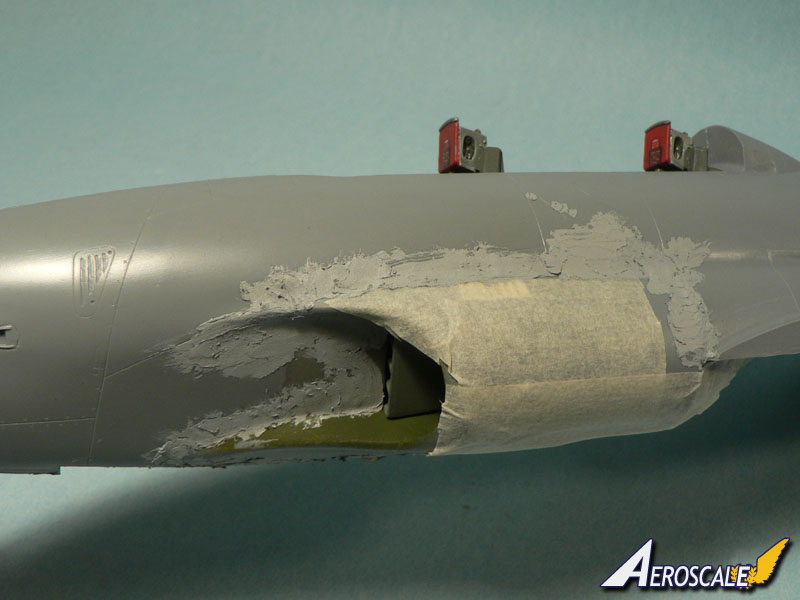
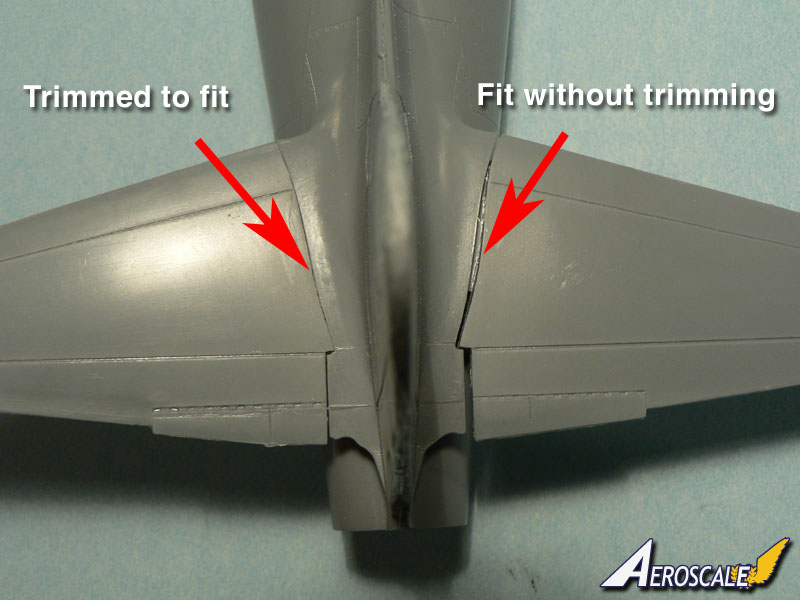
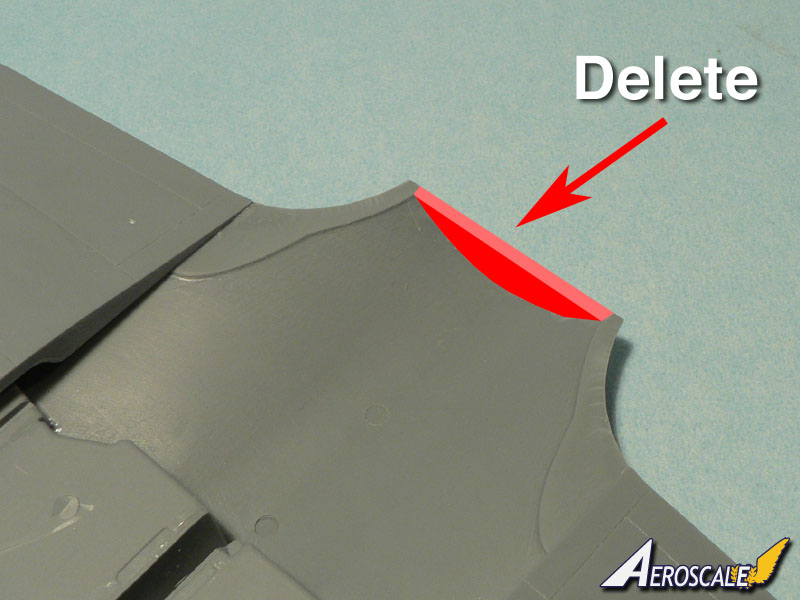
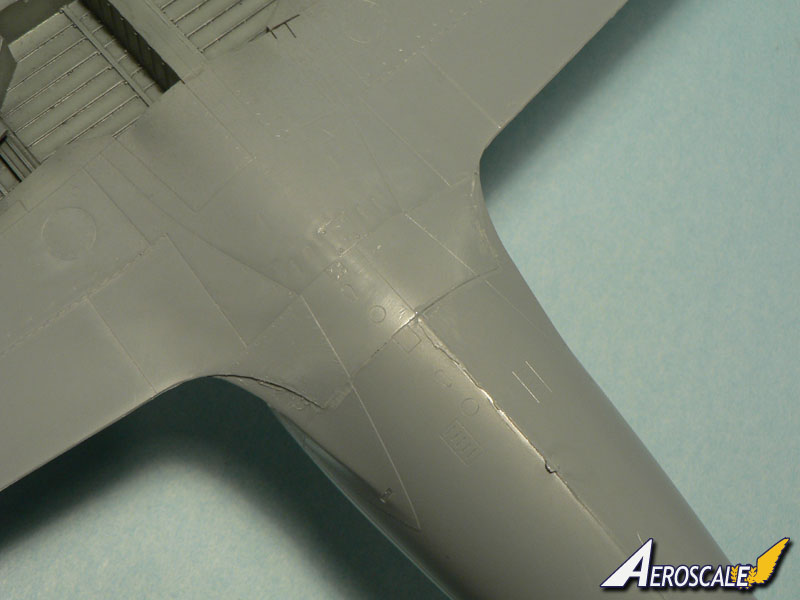
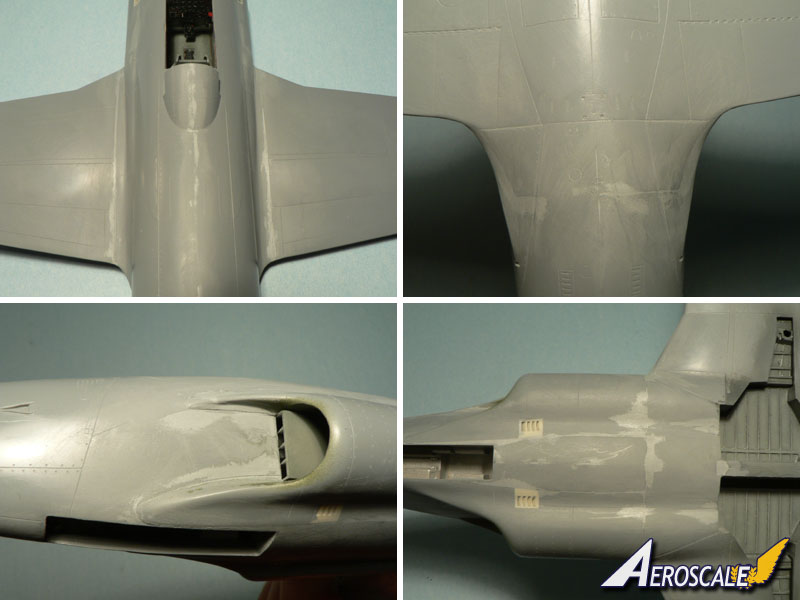
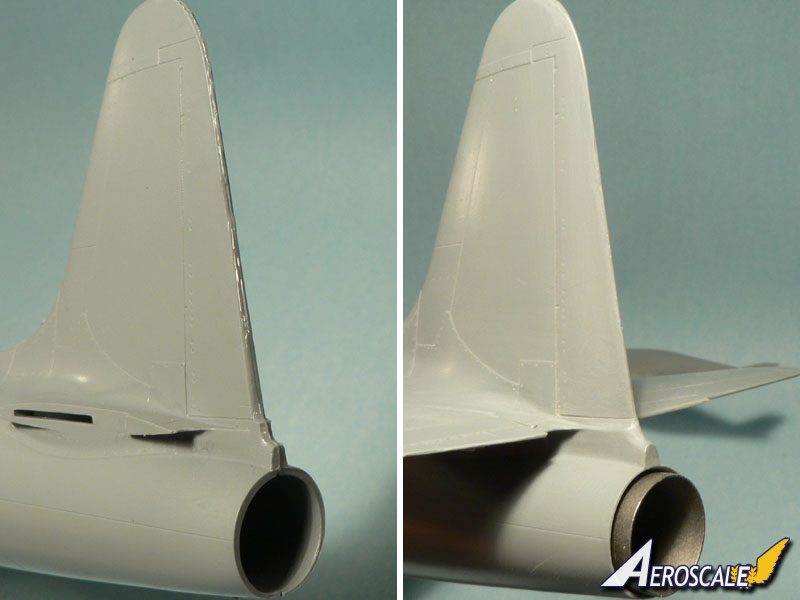
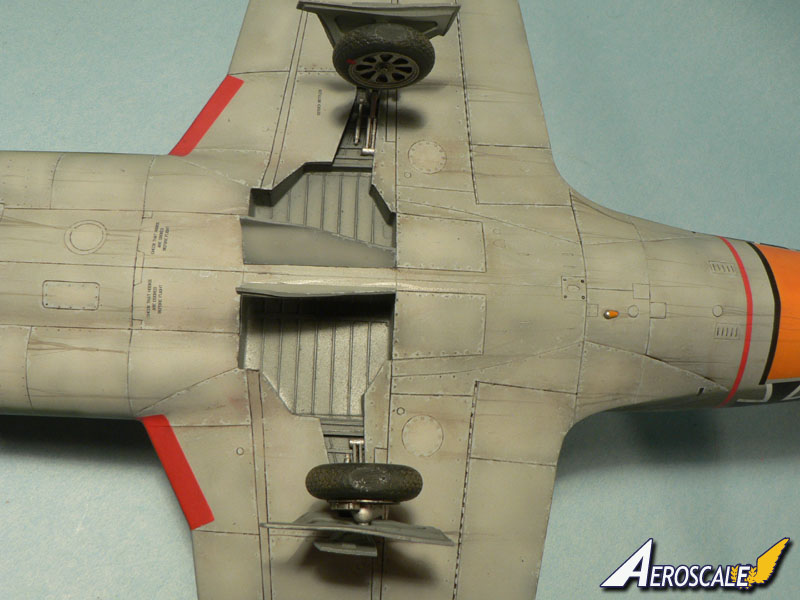
The fuselage air intakes are composed of two plastic parts and two small resin inserts each. I have painted the inside of the intakes in grey and masked the area to apply some green as I believe it will be impossible to do properly once they are in place. Before fitting the air intakes, a lot of preparation work is needed. One has to trim the parts (red areas on accompanying photos) in order to get a decent result. If you try to fit the parts without doing this, you will end up with gaps which are quite huge! A small scalpel blade is perfect to scratch the plastic away in some places. The fit of the air intakes is not very good so a good amount of filler is needed. It looks terrible on the photos but I always apply a lot of Tamiya Putty because this stuff eats itself through the plastic so there is always a lot of shrinkage. Note that it is not necessary to glue the Intake Trunking sub assembly as it won't move once in place. Some work is needed to achieve a decent fit of the wings but nothing too serious. To glue them in place, it is best to eliminate the area shown in red on the accompanying picture. This will allow you to bend the plastic so the curvature matches with the one of the fuselage. The horizontal tailplanes need a lot of trimming or there will be a big gap left to fill afterwards. There are four areas which require some hard scraping, careful filling, heavy sanding, etc... These are the wing roots, the wing to fuselage joint at the rear, the air intakes (of course) and last but not least the bottom of the fuselage. The latter area is where the fuselage, the air intake, the wing underside and the air brake parts meet together. Not quite a digestive cocktail. The rudder and the engine exhaust hole also need to be refined a lot. I chose not to glue the exhaust pipe piece before assembling the fuselage halves for two reasons: first it wouldn't have allowed me to properly thin down the rear opening of the fuselage and secondly it would have been too far inside it. In real the exhaust pipe is not flush with the opening but it goes out a little. I forgot to add that there is a small curvature ahead of the air intakes which has to be eliminated. On the real aircraft the surface was much smoother. The curve only start with the air intake fairing. Once the basic surface work was done, the lost panel lines were restored and the model was ready for the painting stage at last.Camouflage painting and decaling
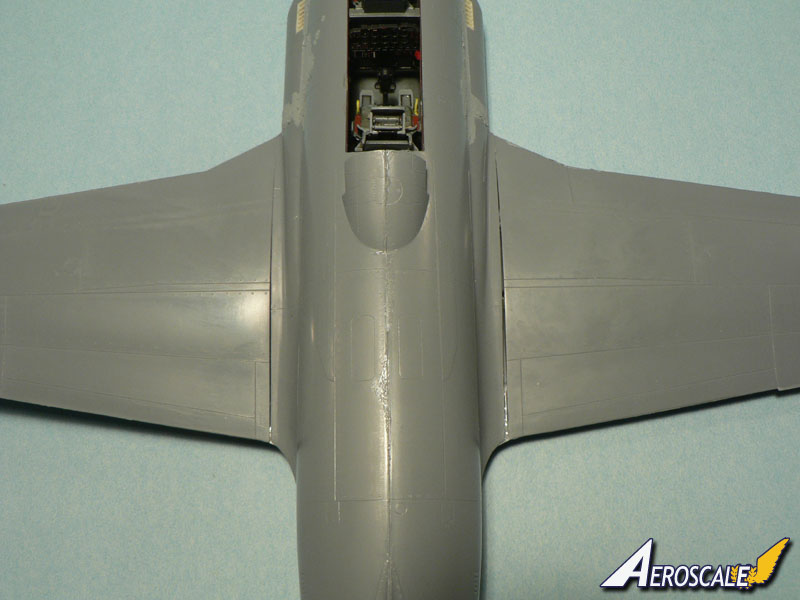
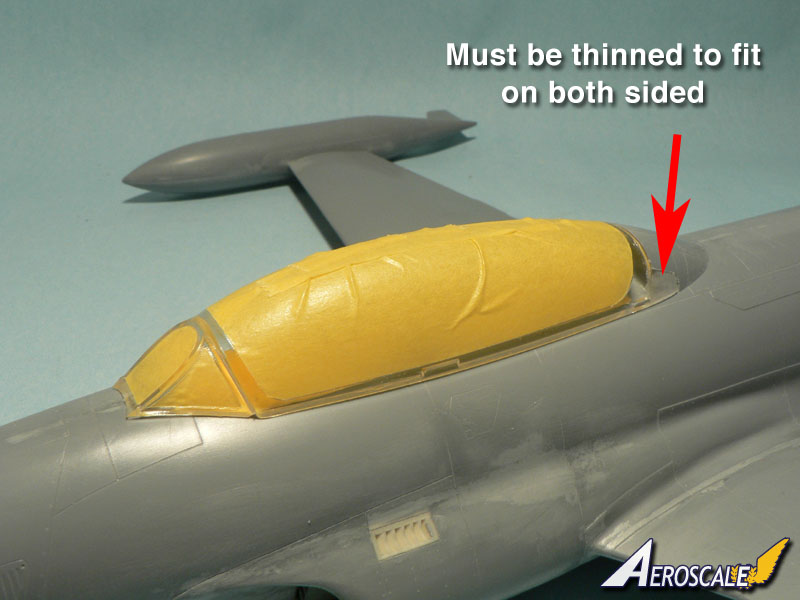
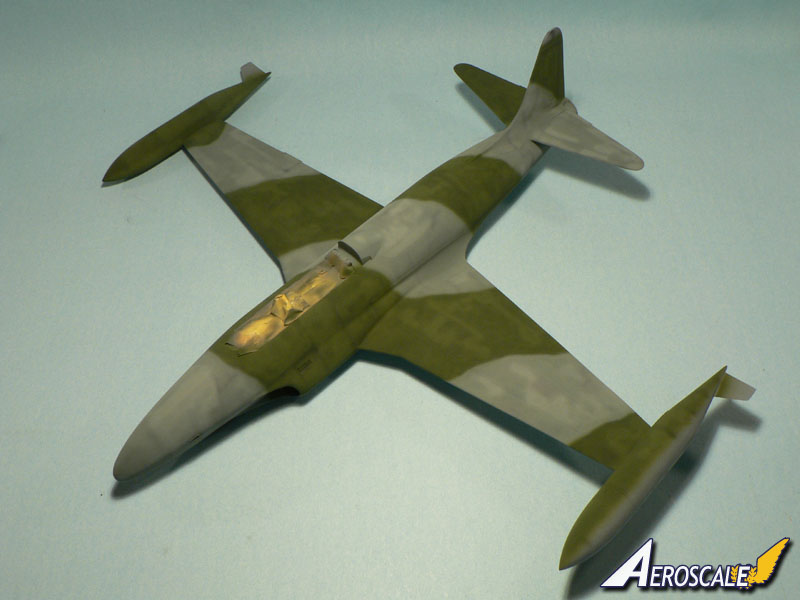
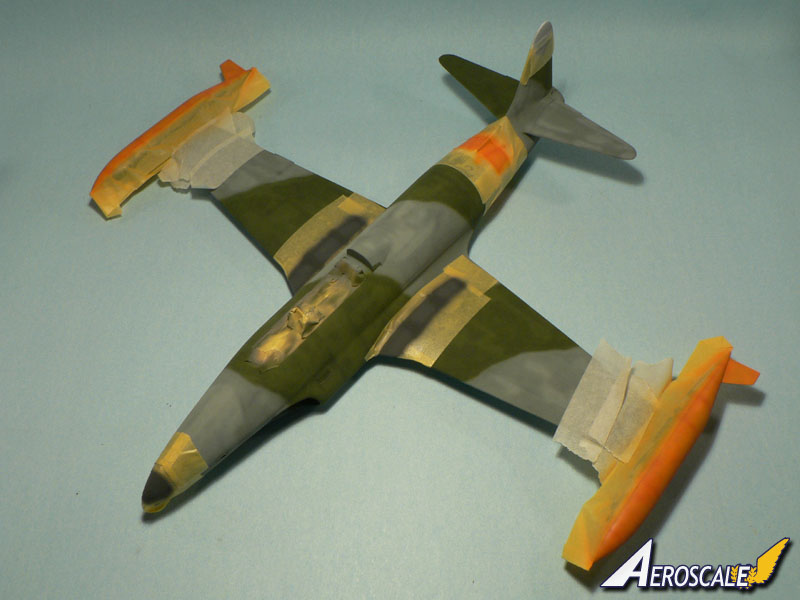
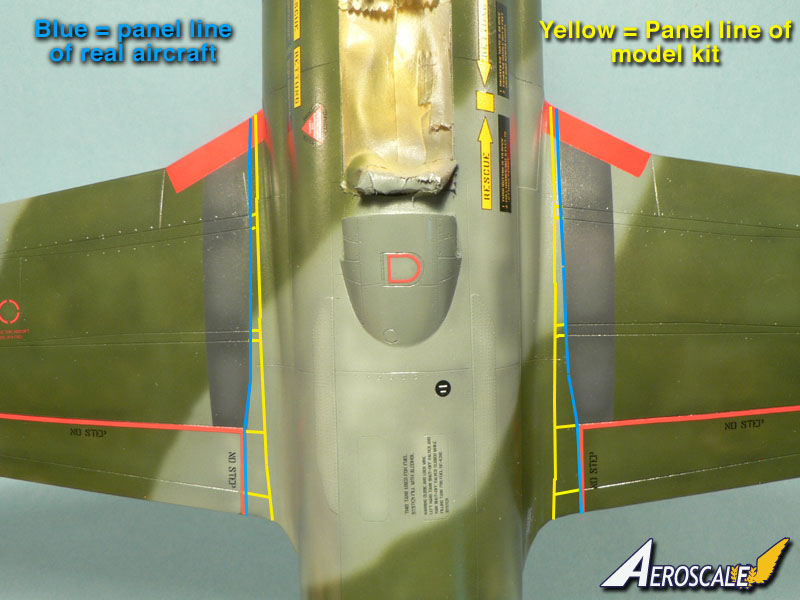
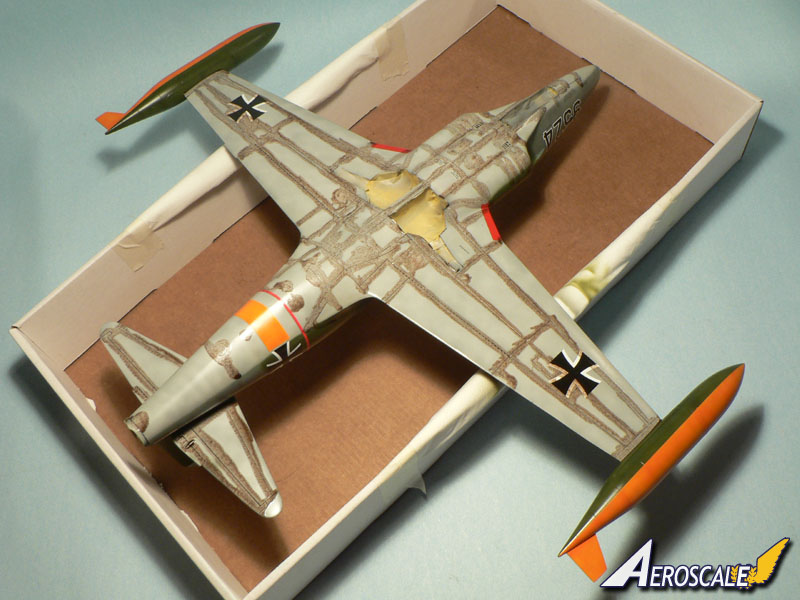
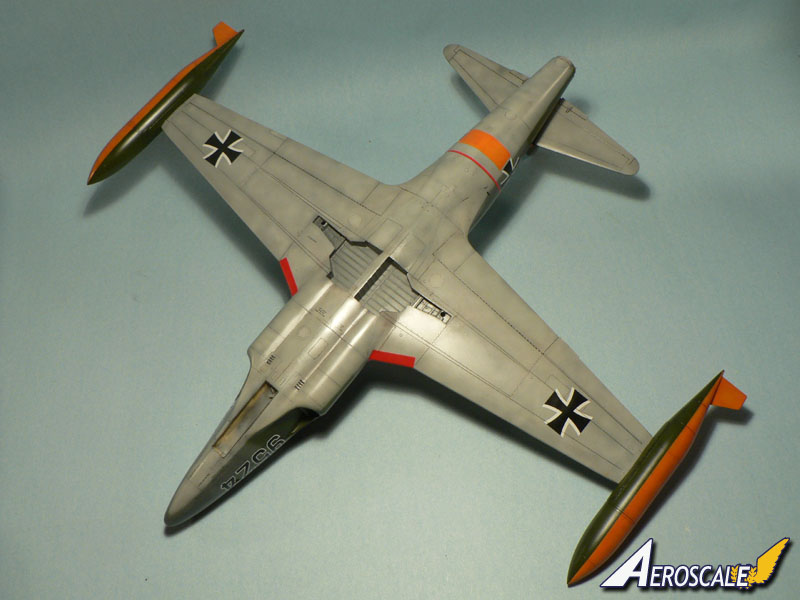
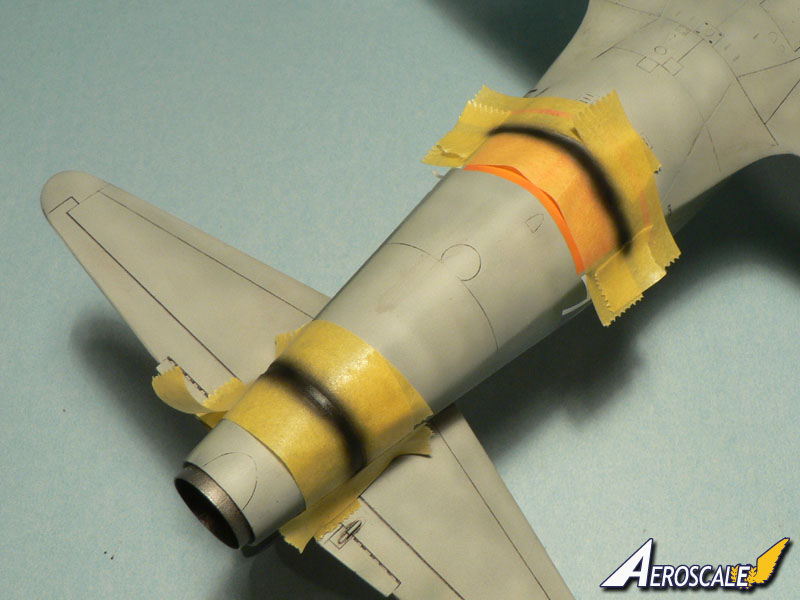
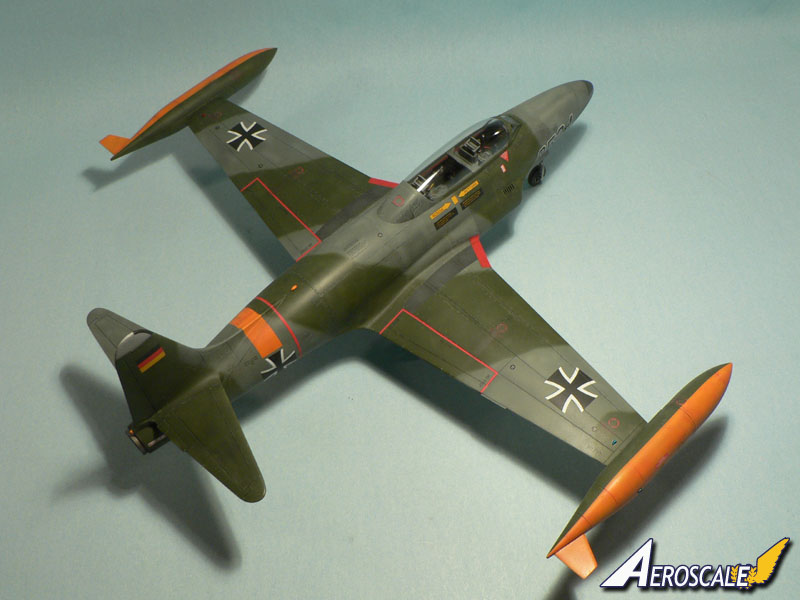
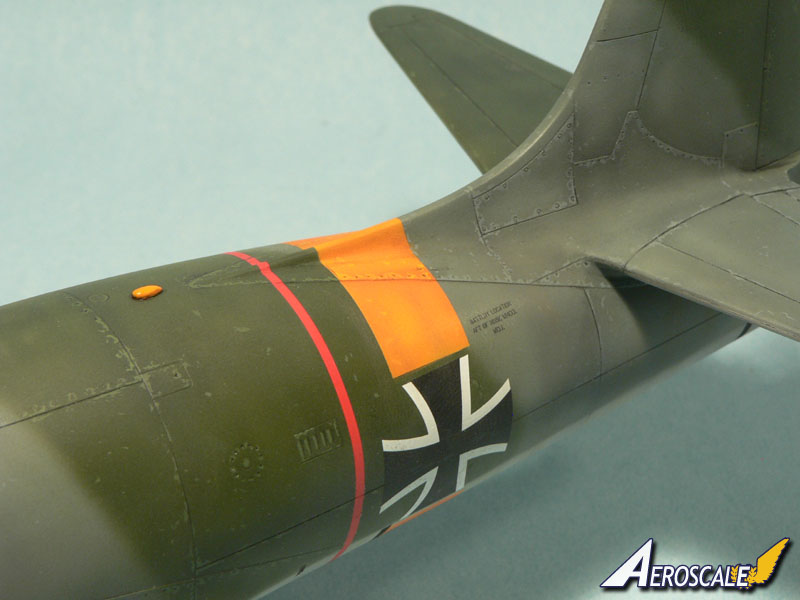
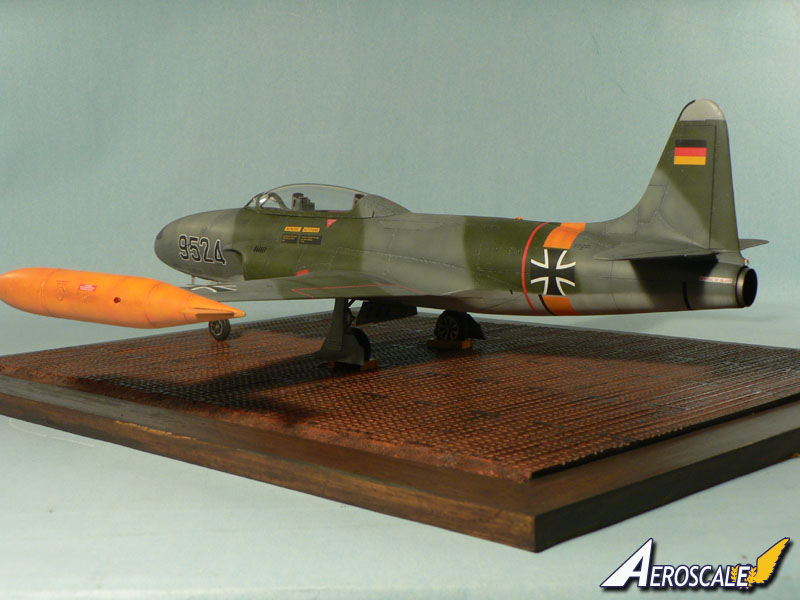
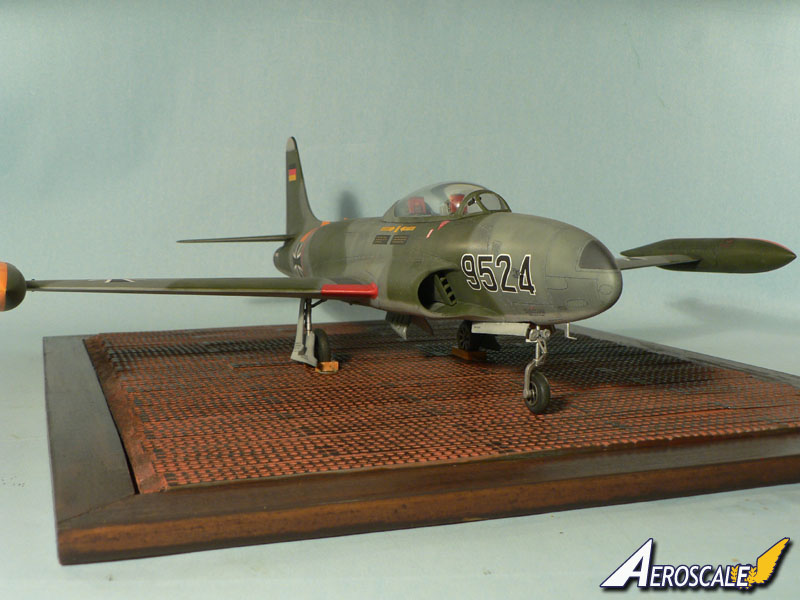
Before proceeding with the painting I wanted to see how the fit of the clear parts was. Fortunately it is very good. One only has to help a little at the rear were the hinge mechanism is located. The clear part must be thinned down and the fuselage area must be narrowed a little. I takes five minutes and the fit is almost perfect. Here's how I did the painting: first I did pre-shade all the model in black. Then I have applied the light grey on the underside (Tamiya XF-80 Royal Light Grey) and then the two tone upperside (XF-25 Light Sea Grey and XF-67 NATO Green). I have also applied a lighter and a darker shade of each color to give to the aircraft a patchy appearance like some I've seen on photos. Uhu Patafix was used for the demarcation between the underside and upper side colors. The two tone camouflage was done freehand. After having applied the basic camouflage I have masked the aircraft to apply the orange glow fuselage band and fuel tank halves (Tamiya X-6 Orange + XF-3 Yellow + X-21 Flat Base), the red wing root (XF-7 red), the dark grey walkways and fuselage nose (XF-24 Dark Grey) and the light grey rudder tip (White added to the previous color). The decals have been applied after two coats of Klir (Future) have been sprayed on the surface. The decaling went on without problems and I only needed some Mr. Mark softer for some of the smaller stencils. Now something I forgot to mention earlier. The wing root panel lines, if you leave them as they are on the kit, are wrong. I have noticed this on pictures of the real aircraft so I have filled the wrong ones (In yellow on the picture) and rescribed new ones (blue). This will also give the flaps' contours the right shape on the upper side. Funny is that I expected to have to modify the red "no step" line decals since they should have been too large after the modification but it wasn't the case. The decals printed by Cartograf just have the perfect size! To do the panel lines I have applied an oil wash with my now usual method: Dark Brown oil paint mixed with White Courtrai Drier on the underside and plain black on the upperside. After one hour the excess was eliminated with cotton buds moistened with Courtrai Drier. It worked like a charm. I have then sprayed a coat of mat varnish (GSI Hobby Color H20 + some Klir).finishing the build
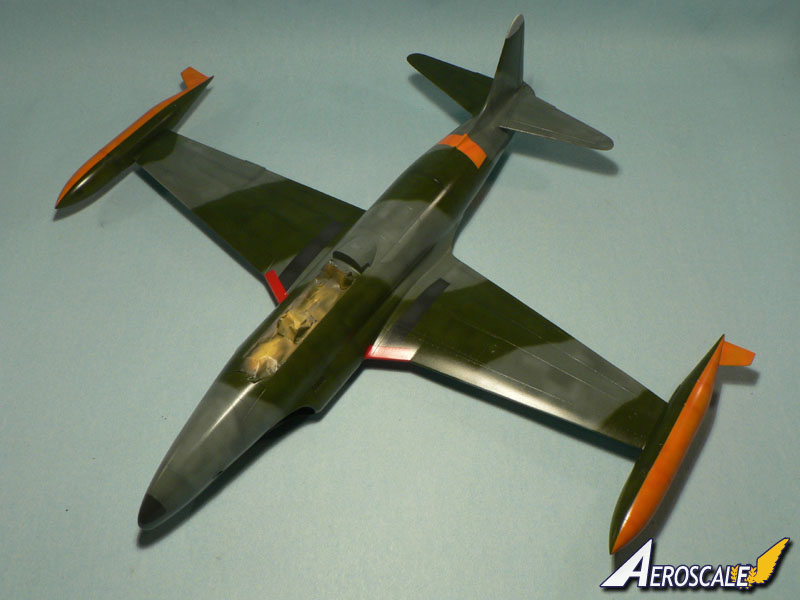
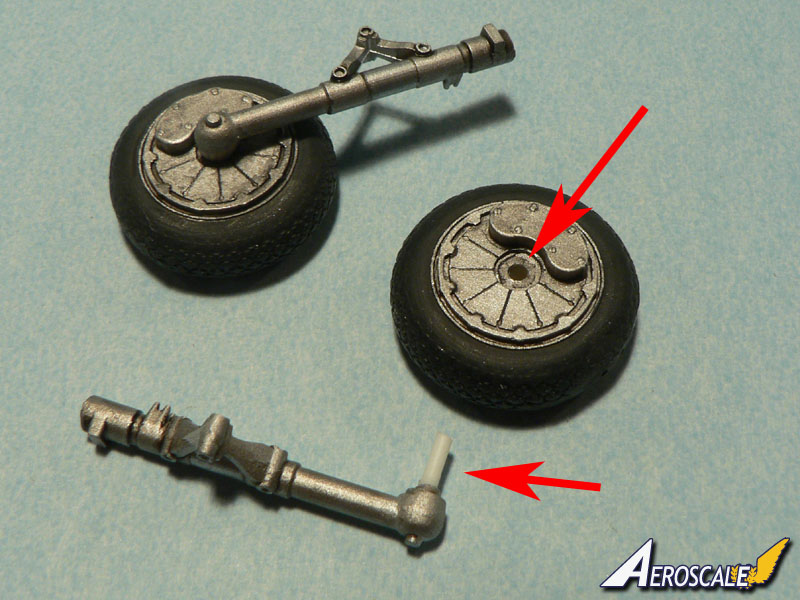
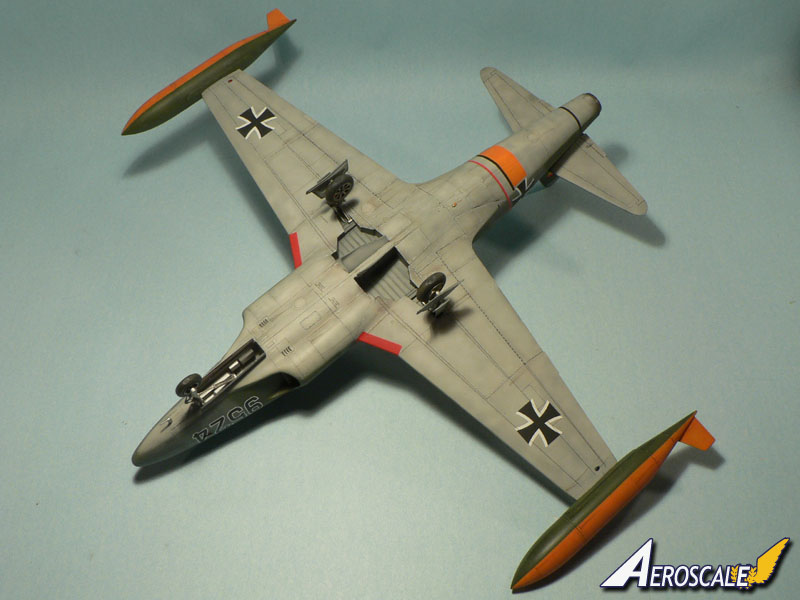
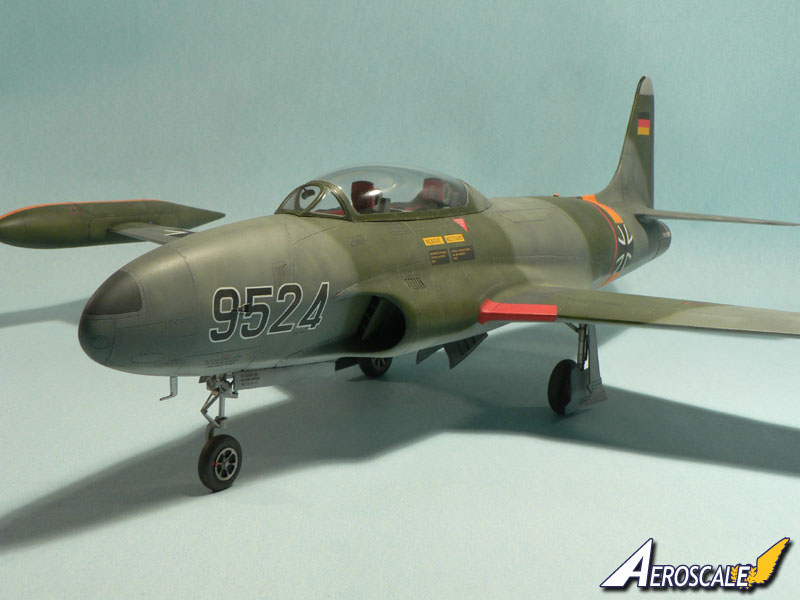
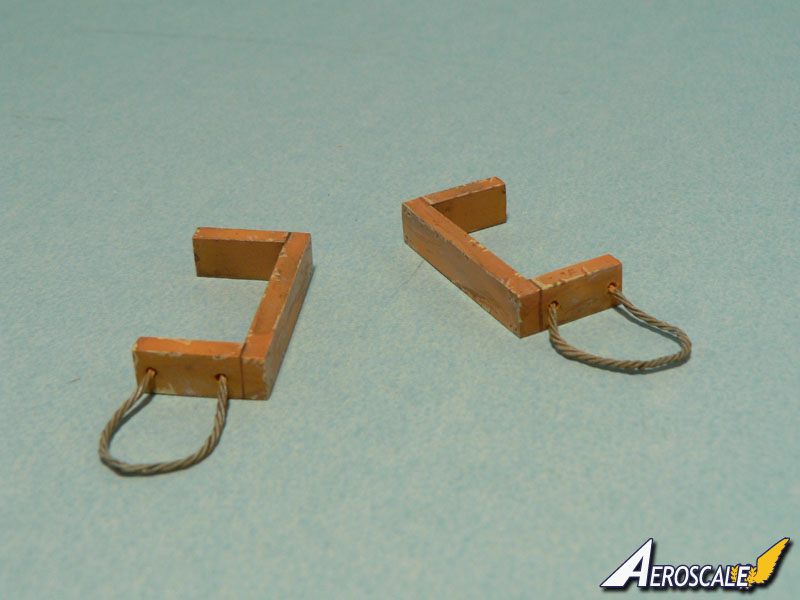
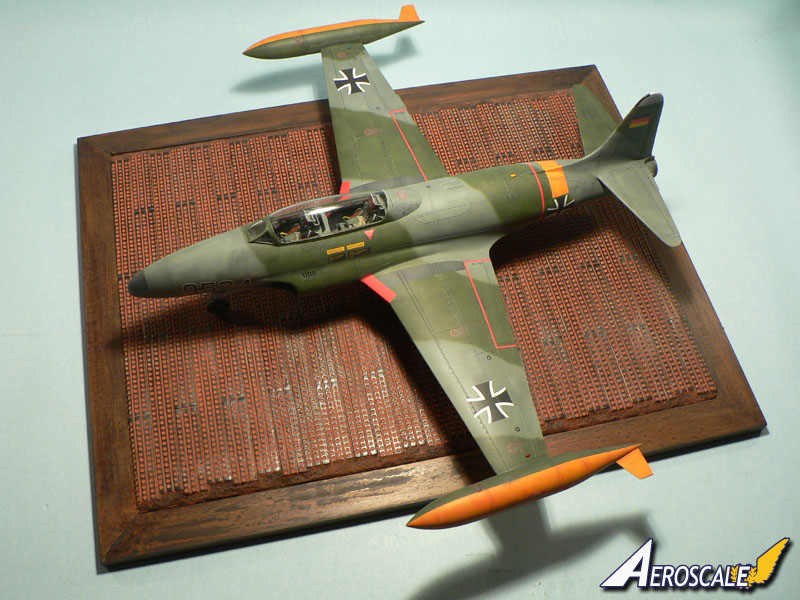
For the landing gears I have used the resin tyres, I had to drill a hole to be able to glue them to the legs. The later don't have an axle so I have made one with a plastic rod. The undercarriage was then glued in place and the T-33 was standing on it's feet for the first time. Though nothing was mentioned in the instructions, I have decided to place 20 gr of weight earlier to prevent the model to be a tail sitter. On the underside I have added two black lines that were missing on the decal sheet though they are clearly visible on the pictures of most Luftwaffe T-33s I've seen. Last pieces that were glued in place were the landing gear doors, the canopy and the small position lights. The one for the fuselage back had an odd shape so I've made a new one in teardrop shape and painted it in bright orange color. Final touch was to do some micro paint chipping with a triple 0 paint brush. These were done in lighter shades of each camouflage colors (light grey, dark grey and green). The effect on the model isn't very visible from a certain distance but when you a close it is noticeable. On the underside, some fluid leaks and oil staining were added using tinted Klir applied with a very fine brush. Finally, some pastel powder has been added for good measure. I have scratchbuilt some wheel chocks and made a base with a cheap picture frame and some PSP plates from Mark58 to have something to display the model on.Conclusion
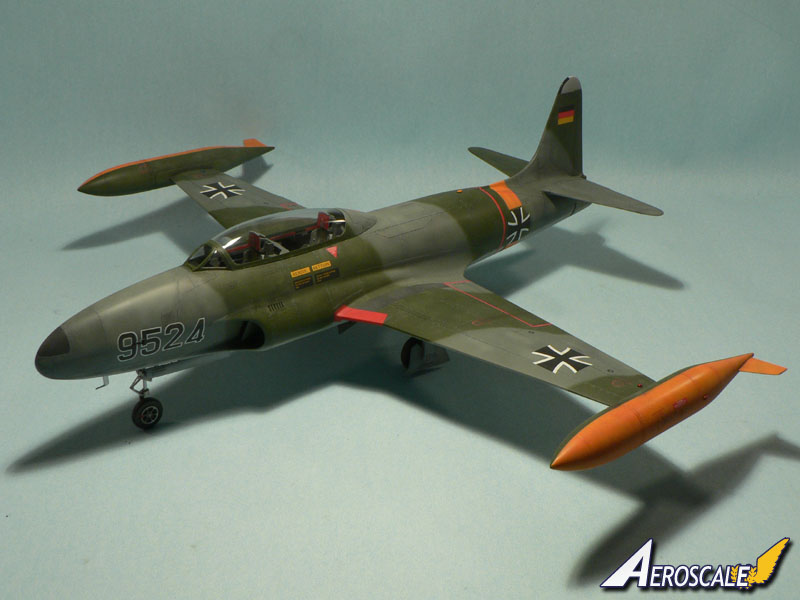
Czech Model's 1:32 scale T-33 kit isn't for the beginner. A lot of adjustments are needed to get a decent fit of the parts. However, the overall detail is very good (except for the landing gear bays) and the surface finish very nice, so I think a modeler with some experience with short run kits can turn it into a true masterpiece with the appropriate references. A big thank you to Squadron.com for the review sample!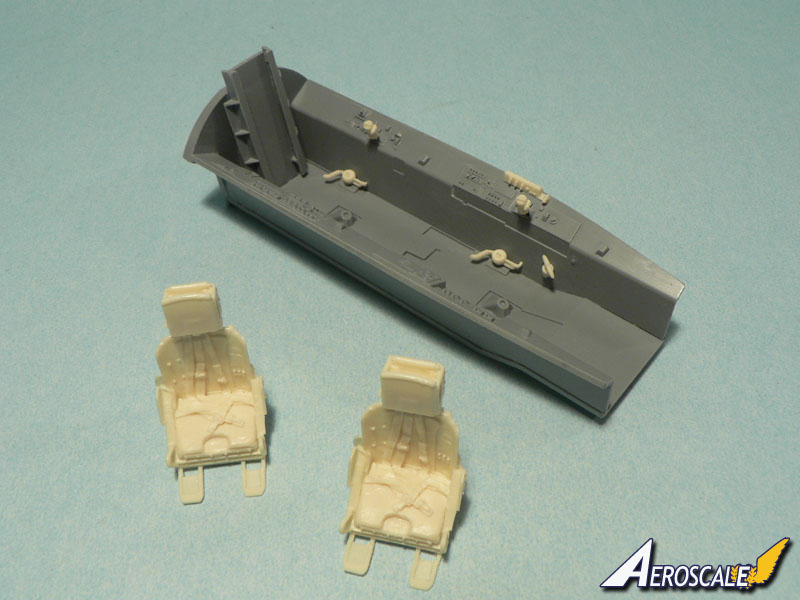


About the Author


FROM: MOSELLE, FRANCE
I'm mainly interested in WW2 aircraft and I build them in 1/48 scale.
Comments
I'm a real fan of Mr. Jean-Luc's modelling style
That's a really great model.
Only a question: How did you do this strange chipping in the tail
 Cheers Nick
Cheers Nick NOV 14, 2010 - 05:40 AM

Beautiful work, what materials were used for the base? looks like the pre fab they used to use for a runway?
NOV 14, 2010 - 01:26 PM


Hi all,
Sorry for the late rely...
For the paint chippings, that's what I wrote in the feature:
"Final touch was to do some micro paint chipping with a triple 0 paint brush. These were done in lighter shades of each camouflage colors (light grey, dark grey and green). The effect on the model isn't very visible from a certain distance but when you a close it is noticeable. "
The base are ready to use display bases available from Mark58
Jean-Luc
NOV 21, 2010 - 12:55 AM


Salut Jean-Luc,
it was more random that I found the article of this wonderful model. I made this morning a short visit in Heavy Plastic and found the Link by Edu`s T-33 work.
Your paintjob is worthy to be called masterpeace! The Weathering is great. I like particularly the little colour fadings at the panellines.
Lot of details with enourmous attention to the real machines.
Beau boulot et chapeau
Dirk
AUG 18, 2011 - 06:28 AM
Hi Dirk,
Thanks for the kind words... I think Edouard is doing the real masterpiece though!
This reminds me I have to check what he is doing!
Jean-Luc
AUG 18, 2011 - 09:49 AM
Copyright ©2021 by Jean-Luc Formery. Images also by copyright holder unless otherwise noted. The views and opinions expressed herein are solely the views and opinions of the authors and/or contributors to this Web site and do not necessarily represent the views and/or opinions of AeroScale, KitMaker Network, or Silver Star Enterrpises. Images also by copyright holder unless otherwise noted. Opinions expressed are those of the author(s) and not necessarily those of AeroScale. All rights reserved. Originally published on: 2010-11-14 00:00:00. Unique Reads: 16579

WEB HOSTING BY


Copyright ©2021 AeroScale and Kitmaker Network, a subsidiary of Silver Star Enterprises
All Rights Reserved. Please read our Conditions of Use and Privacy Policy.
All Rights Reserved. Please read our Conditions of Use and Privacy Policy.