

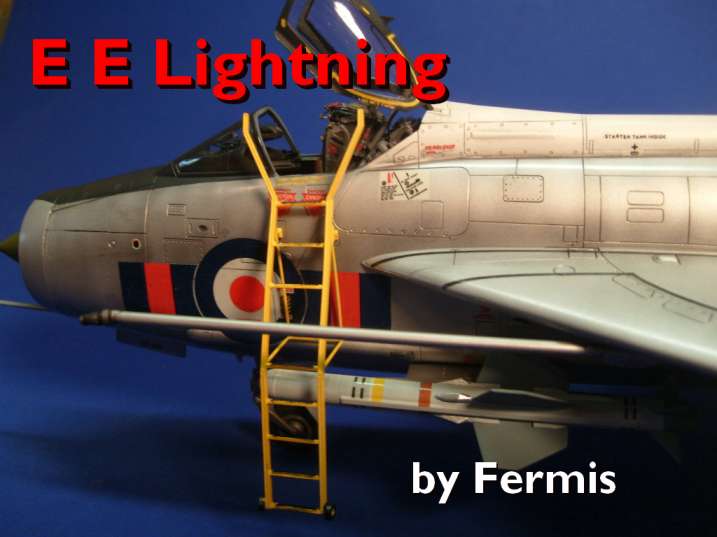
1⁄48E E Lightning
2
Comments
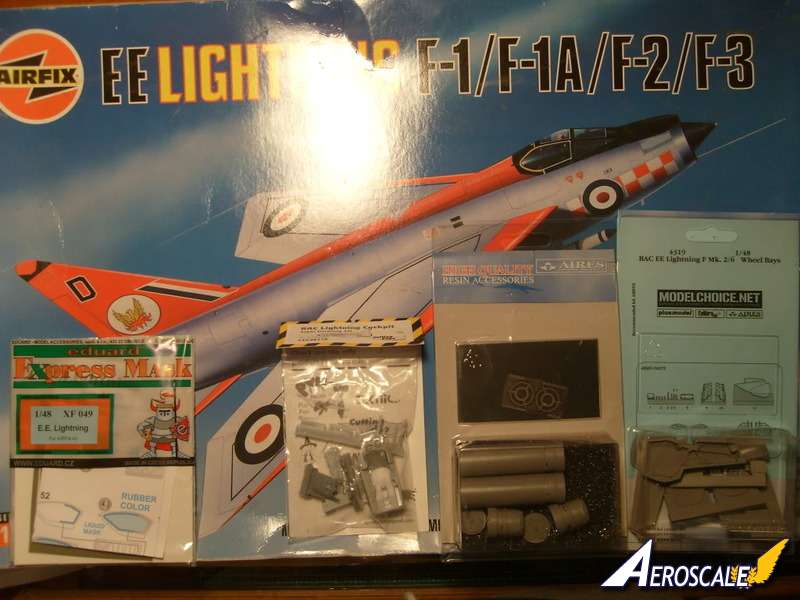
This 1/48 Airfix EE Lightning kit came to me, by way of a Secret Santa, with Cutting Edge cockpit, Aires exhausts, Modelchoice gear bays and Eduard masks(which I did not use). I whipped it out the kit in just a few days, trying a little something different with the finishing.
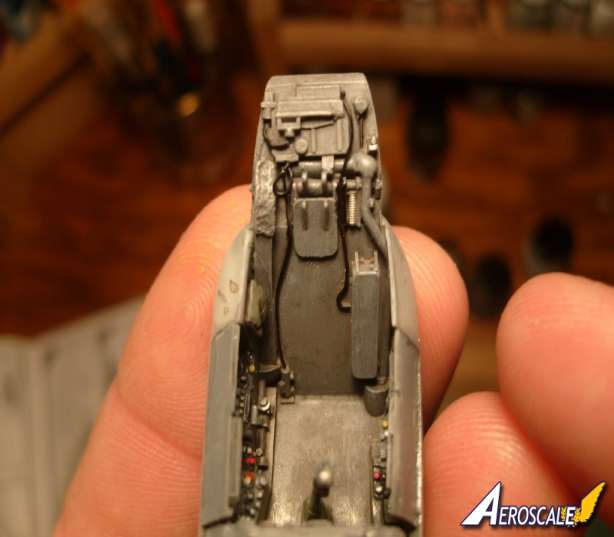
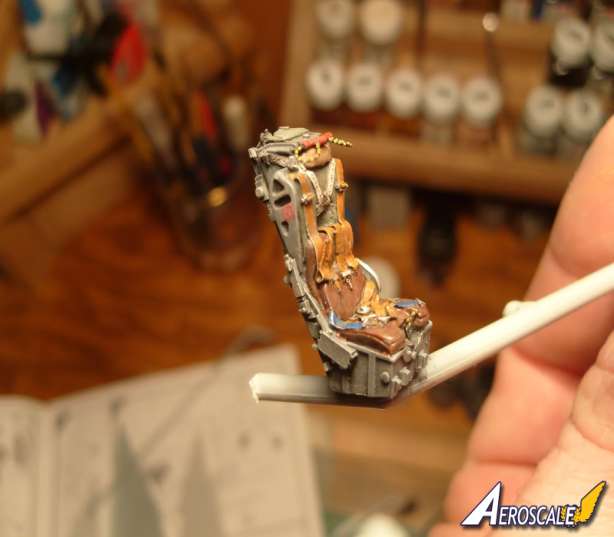
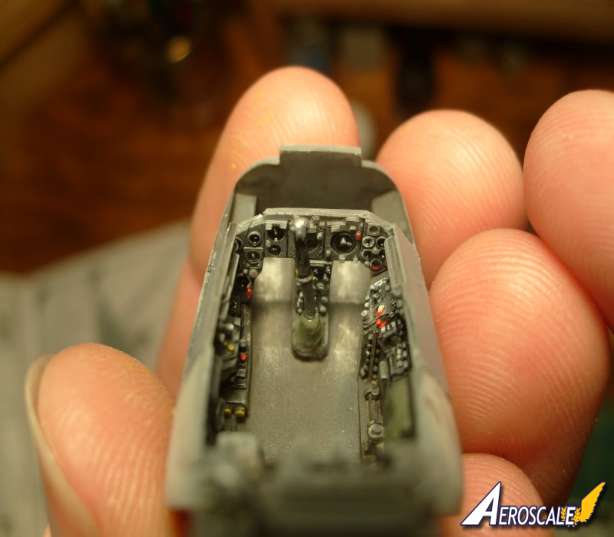
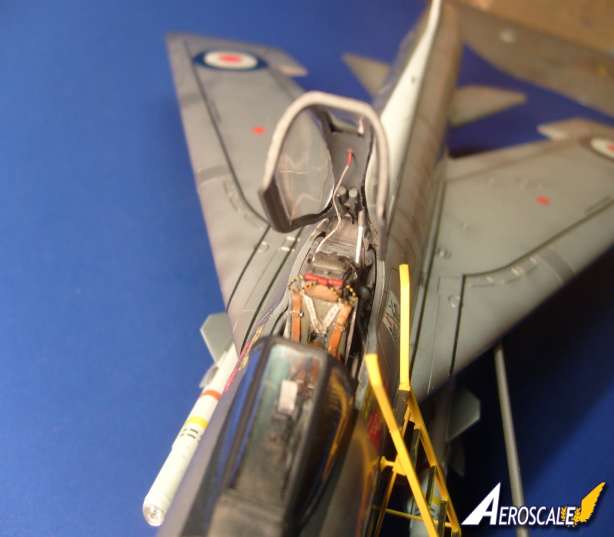
Day 1. I cut the main parts from their sprues and cleaned up the stubs and any minor flash. Painted and assembled the intake trunk and set it off to the side. Using "Google image", I found some good color photos of the cockpit. These were referenced often while painting and detailing the cockpit.
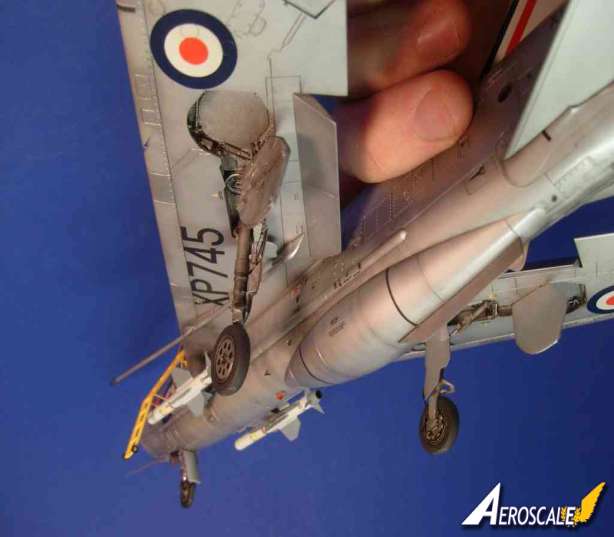
Day 2. With only a minor amount of grinding on the top of the intake trunk and front bottom corner of the cockpit tub, the parts fit into the fuselage nicely, and the fuselage was cemented together. That set aside, I set to work on the wings and gear bays. The gear bays were very deep, I had to grind the roof down to almost paper thin, along with having to grind down both wing parts until they were nearly transparent! Wings assembled.
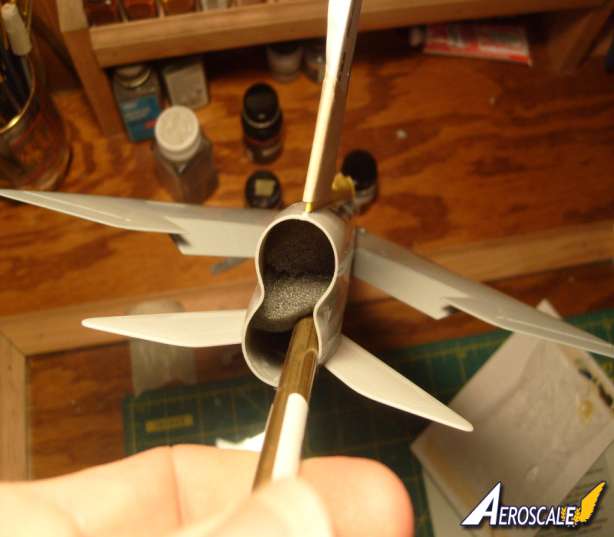
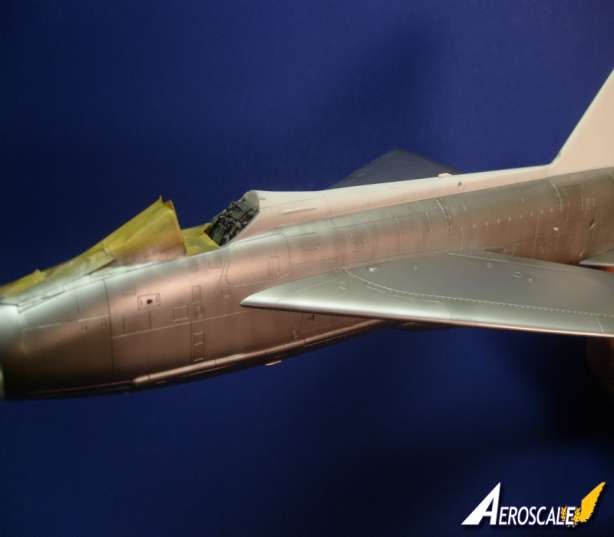
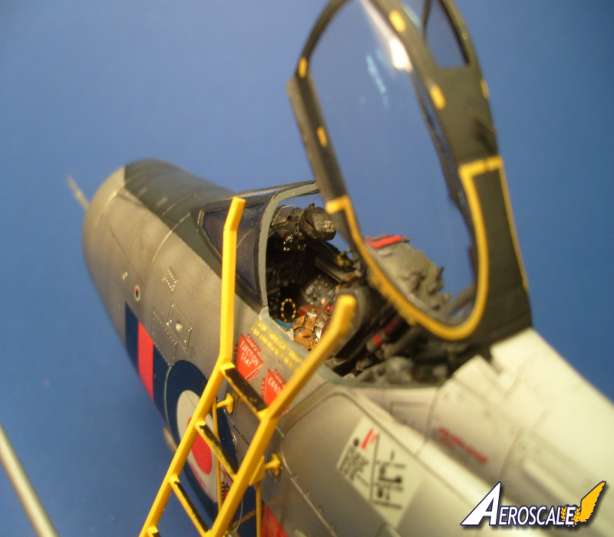
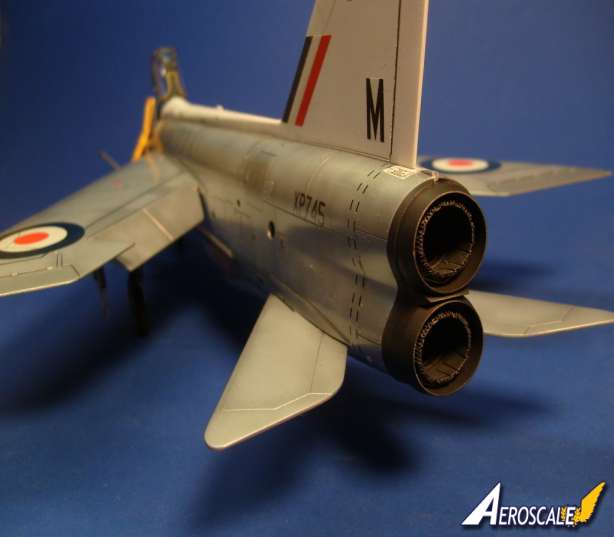
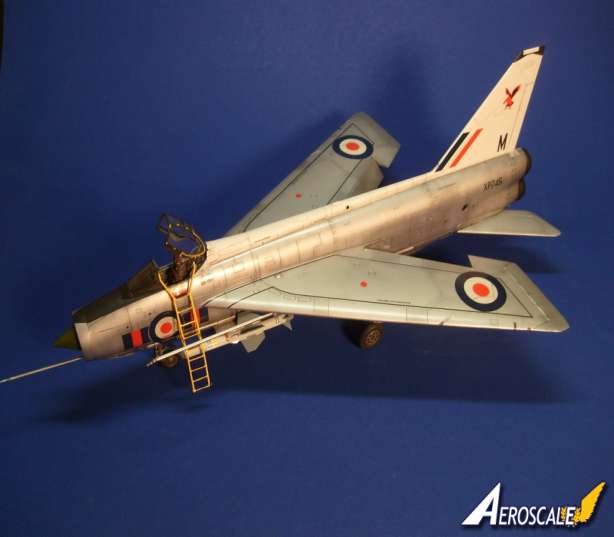
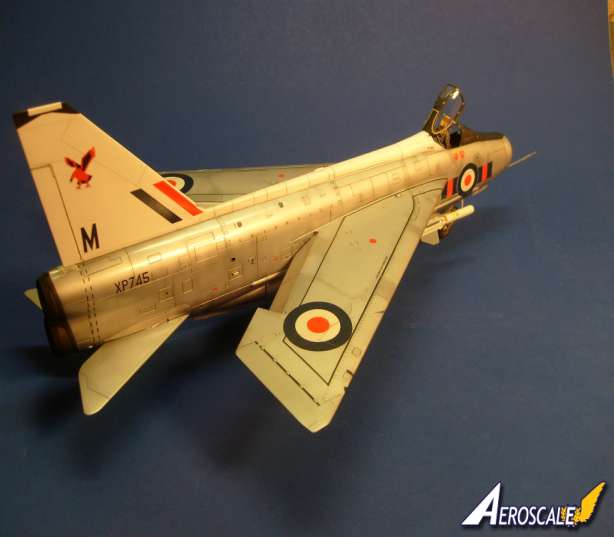
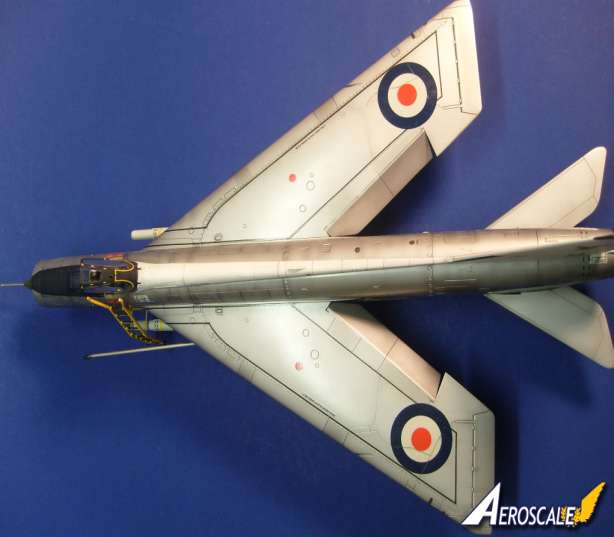
Day 3. The seams were cleaned up and the plastic was polished with a buffing wheel attached to a Dremel tool. I masked the canopy and attached the forward windscreen. To prep for painting, I masked off the cockpit opening and masked along the spine (can't have any paint where the natural metal finish is going to be). I sprayed the kit with Model Master (enamel) white, let it dry for about ten minutes, then sprayed the canopy and anti glare panel in a very dark (almost black) grey. While the paint dried, I cut all the smaller pieces from their sprues and cleaned them up. Then attached them all to scrap pieces of sprue with tiny dabs of super glue. I like to get as much painting done, as possible, in a single session. I then attached the wings, tail plane and flaps. For a painting handle, I used a brass rod, stuck in the tail and shoved in some packing foam to secure it in place. With the painted areas masked off, I headed back to the paint booth, armed with some Model Masters Metallizers! I first sprayed the exhausts with "Burnt Iron", then a bit of "Burnt Metal". For the main airframe, I started with "Aluminum"(non-buff) mixed with just a touch of "Burnt Metal" to darken it. This was sprayed over the entire airframe. Metallizers dry super fast, so there's no down time between colors, other than the time it takes to re-load with straight "Aluminum". Then the "Aluminum" was sprayed very randomly, with a fine spray, avoiding the panel lines. Once this step is done, it looks bad, bring the airbrush back away from the model and spray with a larger pattern to blend everything together! This was also given a Model Master clear gloss lacquer and set aside to dry overnight.
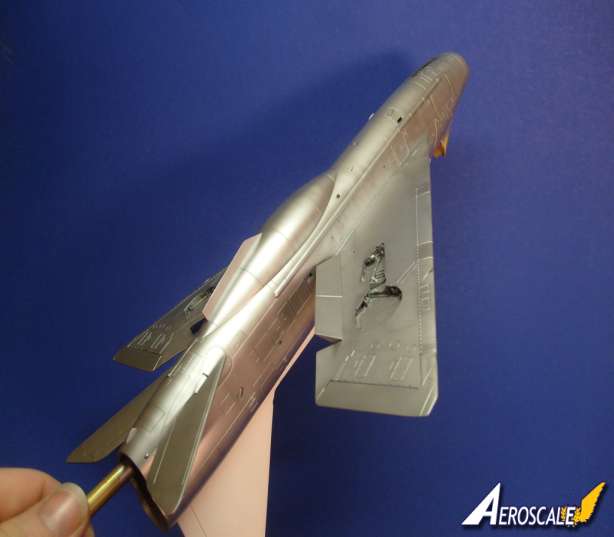
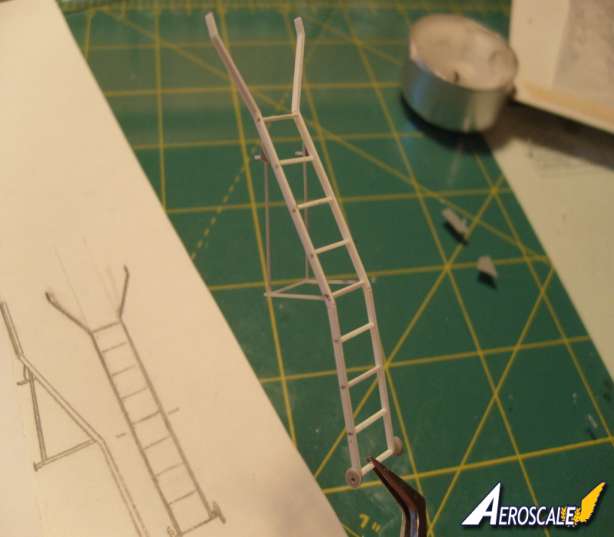
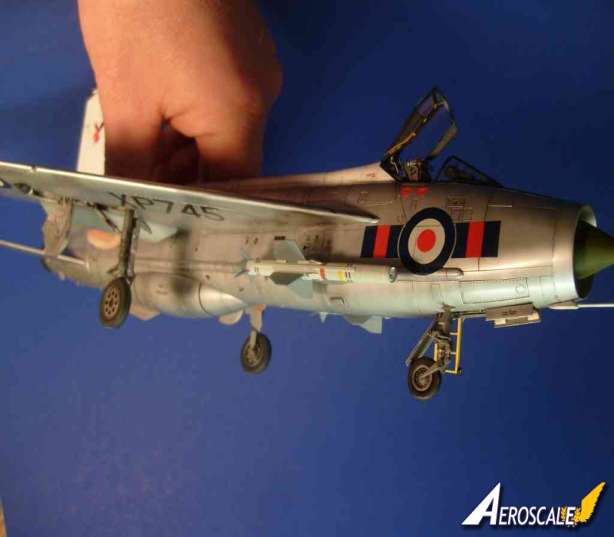
Day 4. Decals, decals and more decals dominated the marathon session! Another gloss coat sealed them in. While that was drying, I scratch built a boarding ladder and assembled and painted the Redtop missiles. I then did a Black acrylic craft paint wash, with a touch of Raw Umber, to bring out the panel detail. All the fiddly bits were then attached.
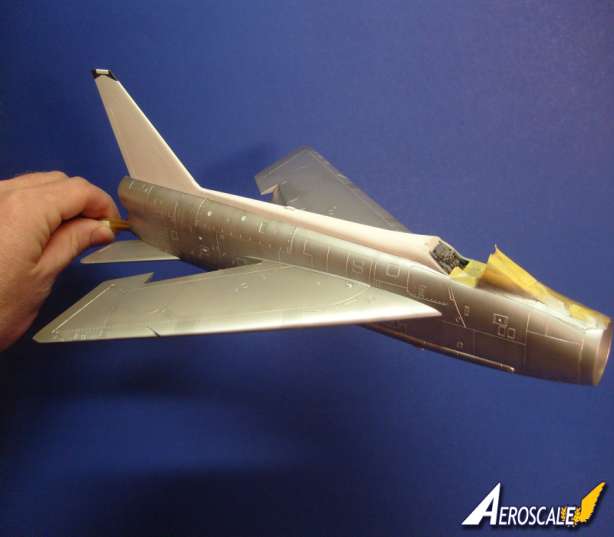
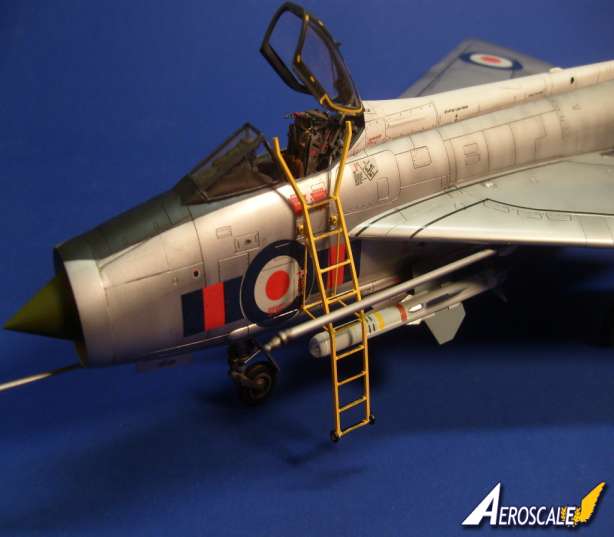
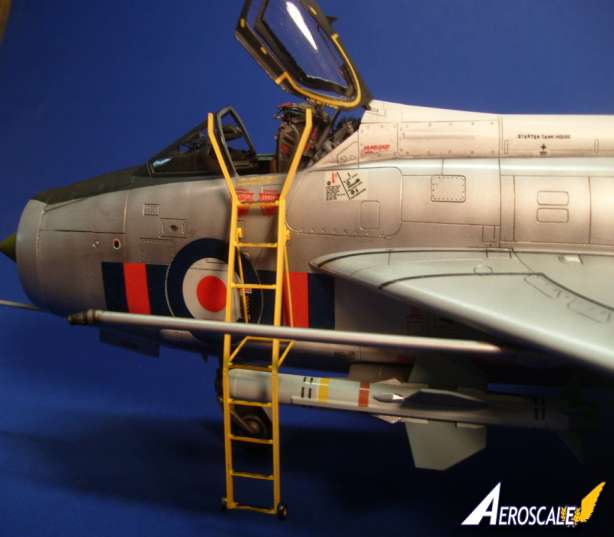
Day 5. Painted the ladder and missiles, applied the decals and finally a coat of gloss. DONE!!!
Day 1. I cut the main parts from their sprues and cleaned up the stubs and any minor flash. Painted and assembled the intake trunk and set it off to the side. Using "Google image", I found some good color photos of the cockpit. These were referenced often while painting and detailing the cockpit.
Day 2. With only a minor amount of grinding on the top of the intake trunk and front bottom corner of the cockpit tub, the parts fit into the fuselage nicely, and the fuselage was cemented together. That set aside, I set to work on the wings and gear bays. The gear bays were very deep, I had to grind the roof down to almost paper thin, along with having to grind down both wing parts until they were nearly transparent! Wings assembled.
Day 3. The seams were cleaned up and the plastic was polished with a buffing wheel attached to a Dremel tool. I masked the canopy and attached the forward windscreen. To prep for painting, I masked off the cockpit opening and masked along the spine (can't have any paint where the natural metal finish is going to be). I sprayed the kit with Model Master (enamel) white, let it dry for about ten minutes, then sprayed the canopy and anti glare panel in a very dark (almost black) grey. While the paint dried, I cut all the smaller pieces from their sprues and cleaned them up. Then attached them all to scrap pieces of sprue with tiny dabs of super glue. I like to get as much painting done, as possible, in a single session. I then attached the wings, tail plane and flaps. For a painting handle, I used a brass rod, stuck in the tail and shoved in some packing foam to secure it in place. With the painted areas masked off, I headed back to the paint booth, armed with some Model Masters Metallizers! I first sprayed the exhausts with "Burnt Iron", then a bit of "Burnt Metal". For the main airframe, I started with "Aluminum"(non-buff) mixed with just a touch of "Burnt Metal" to darken it. This was sprayed over the entire airframe. Metallizers dry super fast, so there's no down time between colors, other than the time it takes to re-load with straight "Aluminum". Then the "Aluminum" was sprayed very randomly, with a fine spray, avoiding the panel lines. Once this step is done, it looks bad, bring the airbrush back away from the model and spray with a larger pattern to blend everything together! This was also given a Model Master clear gloss lacquer and set aside to dry overnight.
Day 4. Decals, decals and more decals dominated the marathon session! Another gloss coat sealed them in. While that was drying, I scratch built a boarding ladder and assembled and painted the Redtop missiles. I then did a Black acrylic craft paint wash, with a touch of Raw Umber, to bring out the panel detail. All the fiddly bits were then attached.
Day 5. Painted the ladder and missiles, applied the decals and finally a coat of gloss. DONE!!!
About the Author


Comments
Nicely done Jeremy. One of my all time favorite aircraft and quite possibly one of the loudest I ever had the fortune/misfortune of hearing. Thanks for sharing your work. "Q"
FEB 18, 2011 - 08:43 AM

Copyright ©2021 by Jeremy Backlund . Images also by copyright holder unless otherwise noted. The views and opinions expressed herein are solely the views and opinions of the authors and/or contributors to this Web site and do not necessarily represent the views and/or opinions of AeroScale, KitMaker Network, or Silver Star Enterrpises. Images also by copyright holder unless otherwise noted. Opinions expressed are those of the author(s) and not necessarily those of AeroScale. All rights reserved. Originally published on: 2011-02-17 00:00:00. Unique Reads: 6023

WEB HOSTING BY


Copyright ©2021 AeroScale and Kitmaker Network, a subsidiary of Silver Star Enterprises
All Rights Reserved. Please read our Conditions of Use and Privacy Policy.
All Rights Reserved. Please read our Conditions of Use and Privacy Policy.