

1⁄35German Navy Floatplane & Catapult
2
Comments
A little history
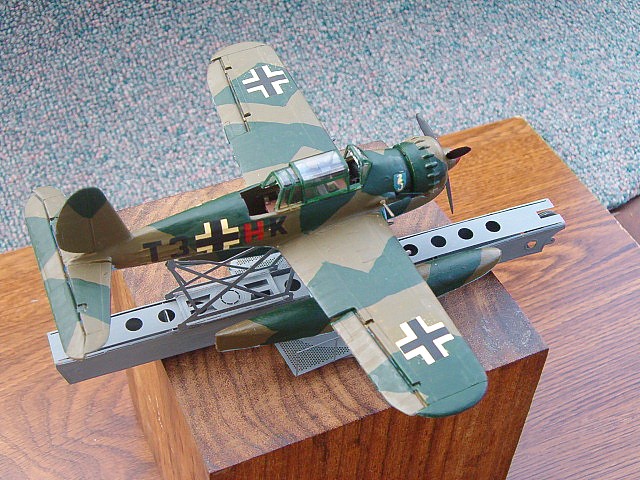
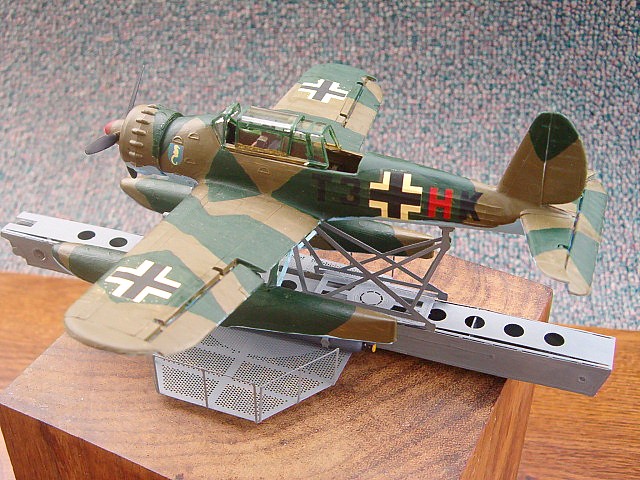
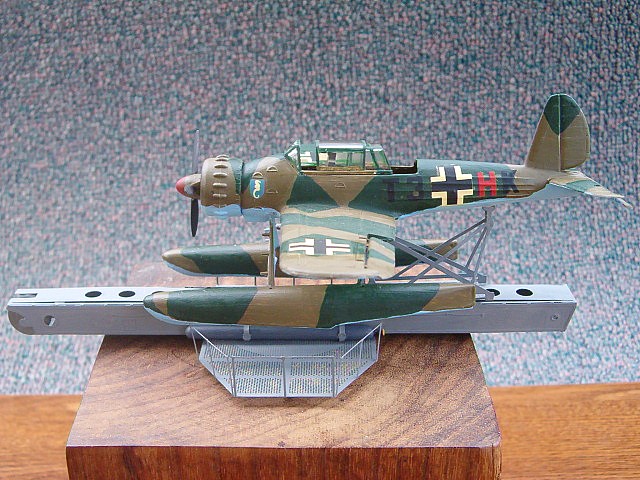
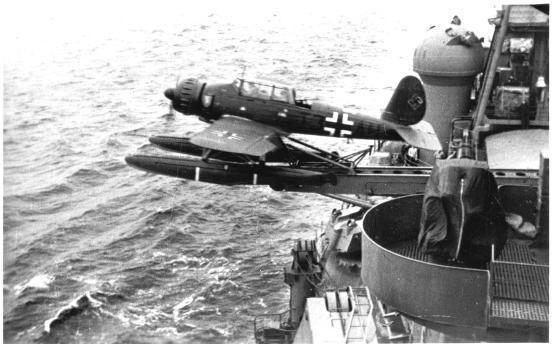
This float plane catapult was developed for use on board the DKM heavy cruisers of the Hipper class. This included the Hipper, Blutcher, and Prinz Eugen, just before and during WW-2.The float plane that this catapult was designed for was the Arado ar196 scout plane. A single engine, 2 person craft, equiped with pontoons for sea recovery. The role of this plane was to assist the warship in recon and scouting, plus observing shot fall from the ships guns to direct fire. The catapult was propelled by gas from 2 cylinders mounted on the catapult to launch the Arado off the catapult at high speed for flight. Cranes were used to lift the float plane out of the sea and back on the catapult. This catapult and the Arado 196 served the DKM throughout the war.
This was an interesting build, for something totally different. A photo etched model! This could open up a new line of model types.
The pe set arrived in a cardboard re-enforced envelope, typical of White Ensign Models' service. Included in the set is one fret of all the parts needed to build the catapult, plus 2 very well molded white metal gas cylinders, a parts layout sheet, and a instruction sheet.
The instructions are pretty complete, except for it not telling you how to attach the float plane to the cradle. More about this later. The Brass fret on this set seems quite a lot thicker than you would find on most 1/350 ship or 1/72 aircraft P-E sets - this is to hold up under the heavier load I'm sure.
Construction
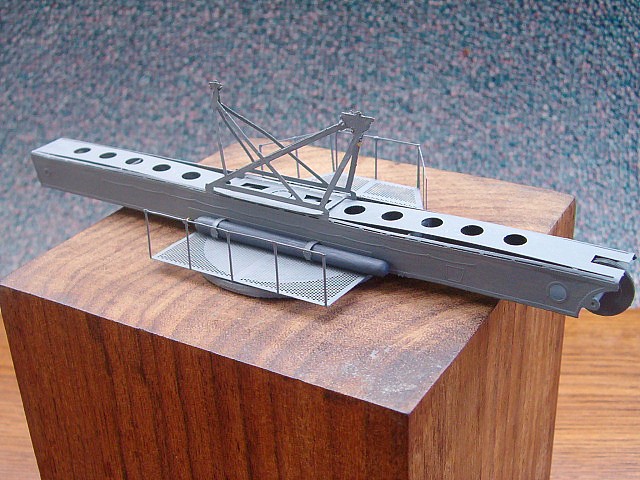
The first thing I did was to wash the fret with soapy water , followed up with a wash of thinner. This was to remove any oil or finger prints. My first step was to remove the main body of the catapult from the fret with a new sharp #11 knife blade.Then I folded the main catapult body . This was done with the help of a metal straight edge held against the folding lines and carefully folding the body into its U shape.
Next I removed the bottom catapult strip from the fret, this fits on the underside of the main catapult body. Measuring this strip, I found that it was about one inch too long for the catapult. I trimmed off the excess with a pair of sheers, then sanded the edge flush.
Next on the inside of this strip, there are two etched in lines. This is where the the two bulkhead partitions go. I used CA glue to attach the bulkheads in place. Now, before I went any further, I decided to paint the inside of each the main catapult body and the lower catapult strip and bulkheads. This is because after the two parts are glued together it would be impossible to paint the inside.
Next comes the assembly of the front and rear catapult pulleys. There are 3 parts to each pulley. The two pulley discs and a smaller spacer that fits in the middle between the two discs. There are no pulley axles provided with the set, so you will have to scratch build your own. The instructions call for plastic rod. But I used stretched sprue for my axles. The pulleys should be assembled with CA glue, and attached to the catapult before the two catapult sections are glued together. Once the pulley's are glued in place, then the lower catapult strip can be attached to the catapult body. Care should be taken here, as the top of the catapult body is unsupported in the center, making it bend and warp after the glue dries. I had a lot of trouble here!...and never did get all of the warp out of the top strip. So take care while gluing this together.
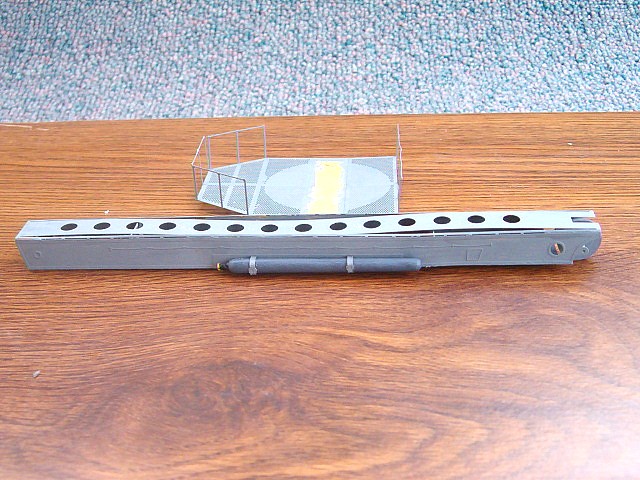
On to the Gas cylinders: The white metal gas cylinders have a mold seam down the center that I sanded flush. There are no painting instructions provided with the set, and I could not find any color references to go by. So I painted the cylinders with Model Masters gunship gray enamel for contrast. Then painted the cylinder valves with flat black, and the valve handles with yellow. Two brass straps are provided to hold each cylinder in place on the catapult sides. By straddling the cylinder with the straps, then inserting the strap ends through the slots in the catapult. CA glue can be used to hold the straps on the inside after they are bent over.
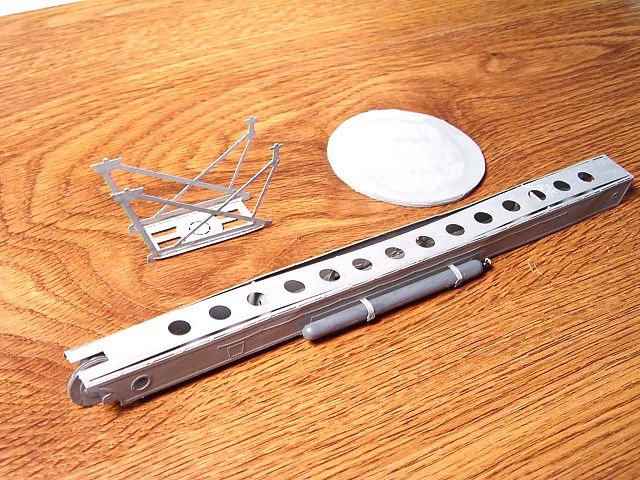
Next up is the Catapult platform with railing. I also painted this before I removed it from the fret. After the platform is removed from the fret I found it very easy to bend the railing to its upright position. By using my metal straight edge placed at the junction where the railing legs meet the platform, then bending the railing up . The set does not come with a catapult turntable base. You will have to make your own out of 1/8 inch plastic card cutout in a disc shape. This is then centered and glued to the bottom of the catapult platform. Next step, the catapult can be attached to the platform by centering and gluing with CA glue.
Now comes the aircraft launch cradle. This too is painted before removing from the fret. Once again the cradle was easy to bend into its proper shape with the straight edge. But here is where I ran into trouble! As stated before, the instructions were not clear on how to attach the cradle to the aircraft. I asked John Snyder of White Ensign where to attach the cradle to the Arado's fuselage - with his help and trial and error I finally figured it out.
The kit that the catapult was designed for is the Airfix 1/72 Arado 196, on this kit there is a slot on the bottom of the plane for a plastic stand. By bending and gluing the front two feet together, the larger front feet can be inserted and glued into this slot. For the smaller rear cradle feet, you will have to drill a hole to glue the feet in place.
After this, the Arado and cradle can be attached to the catapult at your desired location.
Painting
Most will want to paint this set with an airbrush, which is best! I do all of my painting by hand brushing. I just prefer to use the brush! I chose to use Model asters enamel dark gull gray to paint my catapult with. I have used this color for many DKM warships, so it just seemed fitting for this catapult. And as mentioned before, I used Model Masters gunship gray, flat black and flat yellow for the gas cylinders. Pretty straight forward painting.Conclusions
I like the P-E set! The main body of the catapult is tricky to assemble, as is the launch cradle. It takes some trial and error to get it fitted to the float plane. The set itself does not have a lot of detail to it. It is well designed and is a good look alike for the real thing. A scratch builder would have a ball with this set, making it a show winner! A lot of detail can be added on. I just built the set out of the box for this review.By adding pulley cables and hoses with fittings to the cylinders, it would really make the model stand out! I would recommend this set to any modeler with experience with handling pe brass.
I have not mentioned too much about the Airfix Arado 196 here, because I plan doing a separate review on this kit later. I will say that it turned out good! Despite being an old kit with fit problems and soft detailing. Plus the fact that my 5 year old broke it three times trying to fly it! But still, it is a worth while kit that builds into a nice model of the Arado.


About the Author


FROM: OREGON, UNITED STATES
Sadly Garry passed away on March 24, 2005. We will miss him greatly and honor him, his friendship, and his contribution to Armorama for as long as this site exists.
God speed Garry. ~ Jim Starkweather
Comments
Nice one gary, I wish this was done in 1/48 scale. I have the MPM Arado Ar196 part built and would love to disply it on a catapult
Mal
AUG 31, 2004 - 04:01 AM

Hi Mal,
First off good Job Garry!
I sent the kit to Garry and it's simple and would be a simple job ro use it as a guide to build one in 1/48. One thing's bugged me though since I first saw the photos but I hadn't found any photos till tonight. The 2 forward cradle supports appear to fit where the rear float supports connect to the fuselage-not at a single point as Garry has done. No biggie garry it's taken me a week to find the photos that show this but it should be an easy fix...Mike T
AUG 31, 2004 - 10:28 AM
Copyright ©2021 by Garry Beebe. Images also by copyright holder unless otherwise noted. The views and opinions expressed herein are solely the views and opinions of the authors and/or contributors to this Web site and do not necessarily represent the views and/or opinions of AeroScale, KitMaker Network, or Silver Star Enterrpises. Images also by copyright holder unless otherwise noted. Opinions expressed are those of the author(s) and not necessarily those of AeroScale. All rights reserved. Originally published on: 2004-08-30 00:00:00. Unique Reads: 18921

WEB HOSTING BY


Copyright ©2021 AeroScale and Kitmaker Network, a subsidiary of Silver Star Enterprises
All Rights Reserved. Please read our Conditions of Use and Privacy Policy.
All Rights Reserved. Please read our Conditions of Use and Privacy Policy.