

1⁄35Transforming a 60's Short Sunderland
9
Comments
History
The Short Sunderland was a workhorse of the RAF Coastal Command. The flying boat served with honor and distinction during the lengthy maritime patrols. Somewhat unsuited to the task in both armament and open sea performance, the Sunderland nevertheless achieved legendary status. While many crews spent entire deployments never sighting the enemy or firing guns in anger, many others lost their lives in mortal struggles with surfaced U-Boat crews in a desperate struggle for survival. The type served until well into the 1950s, proving its hardiness and longevity.The Kit
Airfixs 1/72 Sunderland kit first appeared in the 1960s, which I think was the vintage of my sample. You get appropriate detail for the time: raised surface detail and functioning parts such as sliding bomb racks and a retractable nose turret. The kits interior is almost absent with simple seats, floor and control columns provided. The moldings were flash-free with no warping and minimal sinkholes and ejector-pin marks. The level of detail is somewhat basic, with no separate engines, etc. The kit transparencies are thick and opaque. Decals are provided for a single RAF boat. Full beaching gear is provided; a nice touch for displaying a flying boat.The Detail Sets
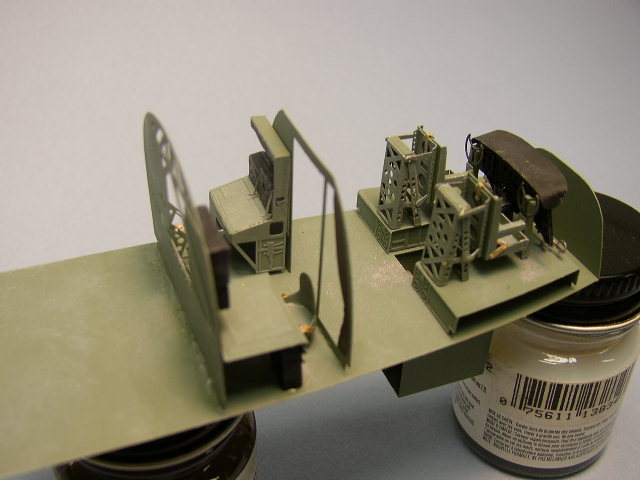
White Ensign Models has provided brass photo-etch details providing a much needed upgrade to the basic kit interior, although much of it will be hidden upon closing the fuselage halves.Three separate sets are available:
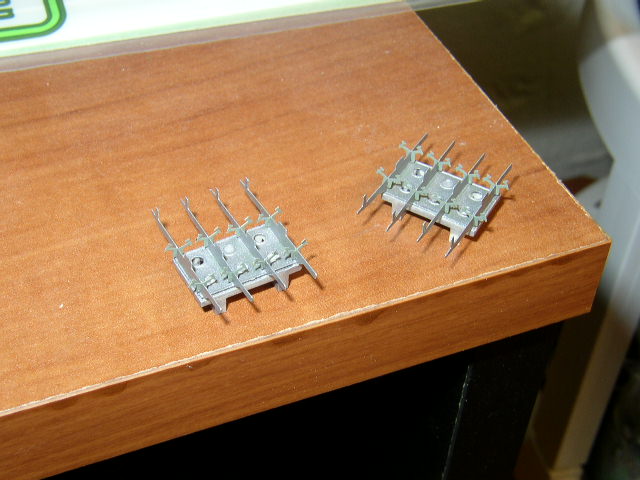
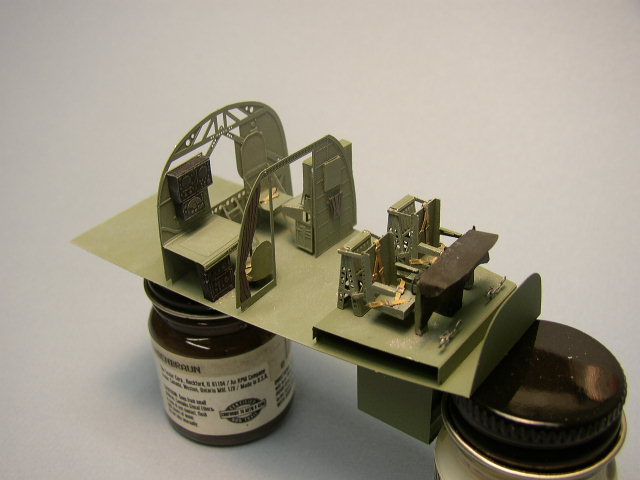
1. The interior detail set provides the builder with all the major bulkheads, seats, control columns, instrument panels and radio gear.
2. The bomb bay set provides bomb racks, shackles and the floor, roof, bulkheads and separate doors.
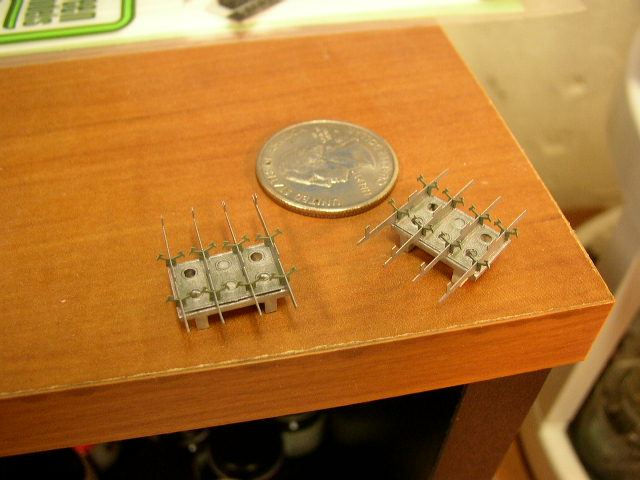
3. The exterior set provides all the Yagi antennae and a couple of bracing wires for the outrigger floats.
I also used Squadron vacu-form replacement canopies to better see the insides.
Construction
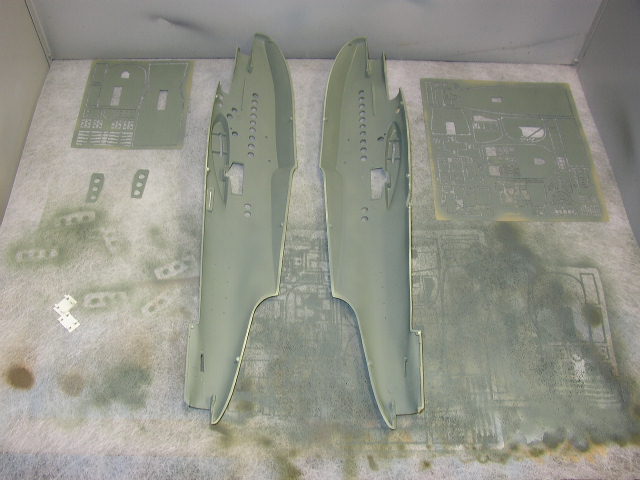
First, I removed all the major plastic parts of the kit and cleaned them of all flash and sprue-attachment remnants. I then assembled all the control surfaces, wings and tail. When they were dry I gently sanded all surfaces with 1000 grit-wet sandpaper to take down the raised surface detail. My goal was to knock it down, not eliminate it altogether. A gentle sanding removed the bumps, but left the impressions of the detail.I then soaked the photoetch frets in mineral spirits to remove all solvents and oils to allow better adherence of paints. I painted the interior of the kit and the interior photoetch set RAF Interior Green (Model Master Acryl). After the paint dried overnight, I painted all detail areas (control panels, radios, throttle quadrants, etc) of the interior. I dry-brushed with light gray to bring out the details and followed up with a dry brush of silver on highly worn areas on floors, ladders, etc.
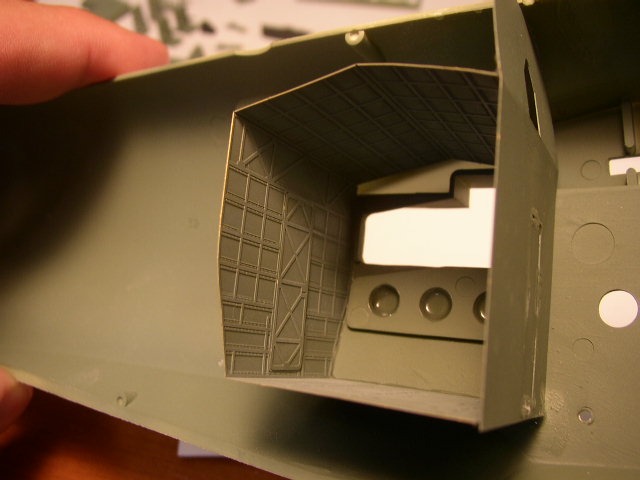
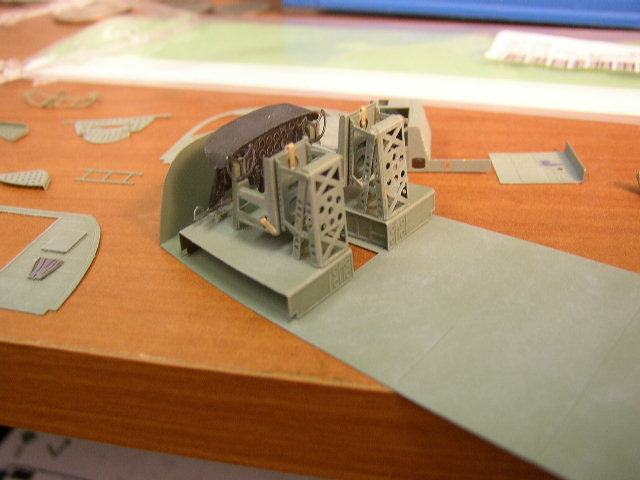
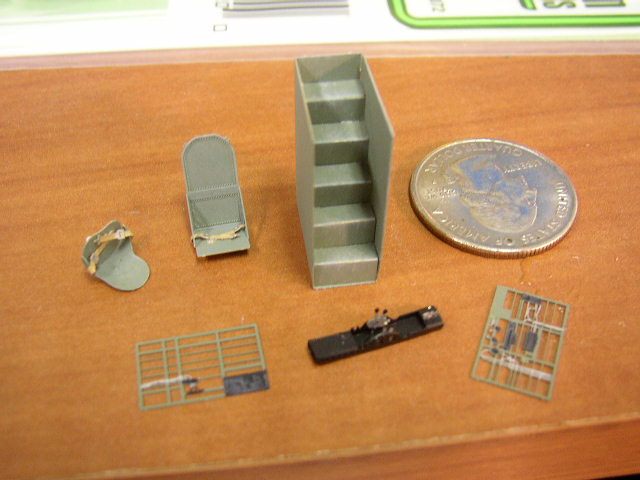
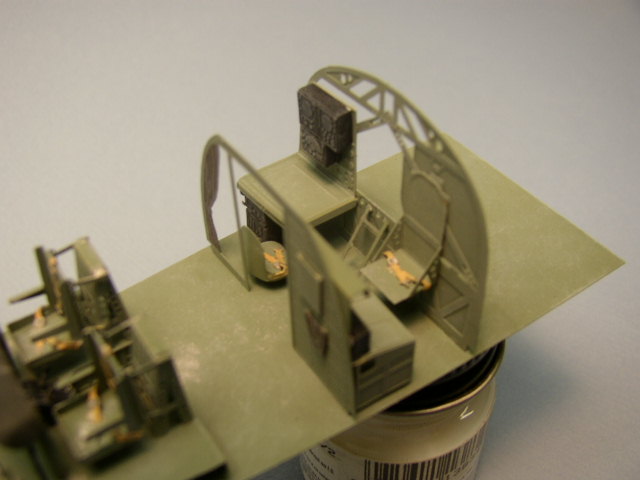
I then assembled the bomb bay per instructions and installed the completed bay in the fuselage half with super glue. I then assembled the interior per instructions. I found a problem with the instructions regarding the staircase to the lower level of the boat from the flight deck: Part 3 should be glued at the top of the staircase, not the bottom. All other stairs should be moved down accordingly. If you build it as shown, the top stair will be missing when looking though the opening in the cockpit. This appeared to be the only error in the comprehensive instructions. The brass is easily cut out with a sharp no. 11 blade and very easily bent to shape, as almost all bends are 90-degree angles. The throttle quadrant was difficult to bend to the curved shape, but take your time and youll be fine. The pilots seats and harness go together with no issues and look awesome when completed. The completed cockpit is convincing, but sadly will mostly disappear when the halves are closed.
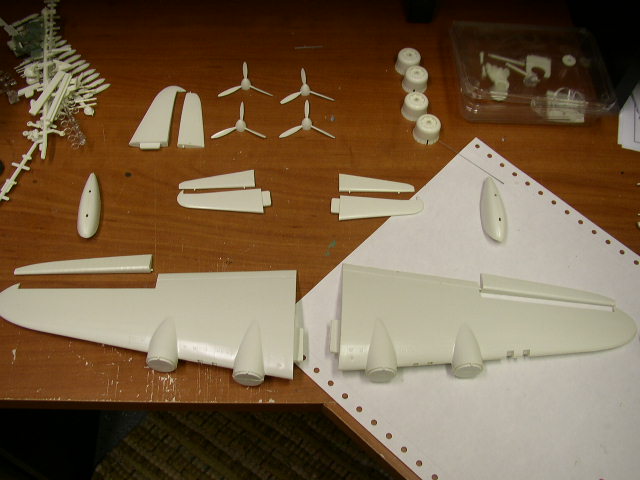
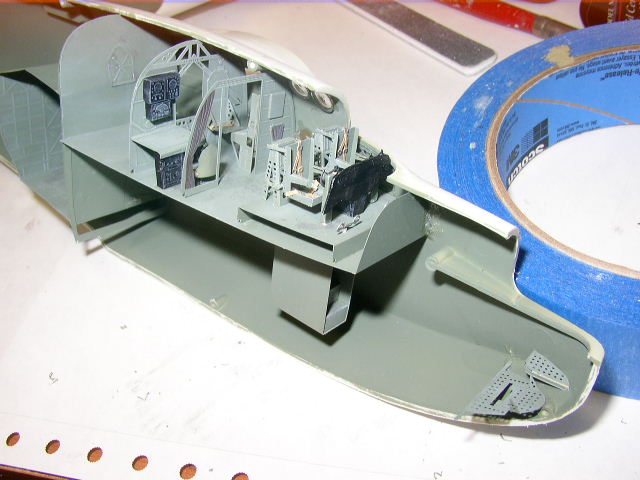
After installing the cockpit and footsteps for the retractable nose turret I closed the fuselage halves. All major sub-assemblies were added (wings, tail, horiz. Stabilizers). Dont forget to put the nose turret assembly in if you want it to retract. All seams were cleaned up and sanded. Since the aircraft I was doing did not have the mid-upper turret, I filled this hole with styrene stock and putty. I assembled the outrigger floats and added stretch sprue cables that were drilled into the wing and flat with a pin vise. The external photoetch cables between the float struts did not fit well, so I replaced them with stretch sprue. This was the only photo-etch part that did not fit. I installed the bomb racks on their rails and glued them in place. I final sanded the entire surface again to smooth out any scratches, etc. and off to the paint booth.


About the Author


FROM: TEXAS, UNITED STATES
I have been building plastic models since I was about 6 years old. I developed an interest in Luftwaffe planes since they were so distinctive in shape and color. As the years went on I aquired more references and kits of exclusively Luftwaffe stuff and have over 70 kits built with 120 in the stash...
Comments


Very very nicely done Bryan, looks superb. I remember the Airfix Sunderland, I am amazed at what you have been able to do with it.
Mal
OCT 01, 2004 - 03:16 AM

Thanks for all the kind words, everyone. I did forget one thing:
To thanks Mike Taylor for the review samples of the WEM detail sets! Thanks a ton Mike.
Again, thanks all!
Tuck
OCT 01, 2004 - 03:34 AM

i thought the cockpit detail looked great, no wonder you didnt fix the canopy on. one question though, why did the front turret retract? did the real plane do this or is it some sort of gimmick?
OCT 01, 2004 - 09:11 PM

A real blinder...
The old Airfix Sunderland is almost as old as I am...lol...and that's old.
In fact its the first BIG kit I ever made so what you've done is not only amazing but nostalgic too.
CheerPeter
:-)
OCT 01, 2004 - 09:23 PM


The model looks great and the WEM brass makes the old Airfix kit complete. Some of the old tooling really needs to be refined in a new kit to make it match the qulaity of new kits.
My only quibble withthe model is teh choice of white for the centre of the rondels. Even someone, like Dundas Bednall, who would paint his Sunderland black would not have permitted an RAF airplane to be outfitted in RAAF rondels! The centre of the RAF's SEAC rondel was light blue, and to my knowledge no Sunderland of No. 230 squardon was ever made out to appear to be an Australian airplane. The light blue was chosen to distinguish the Brits from the Aussies.
Trying to match colours from black and white photos is a mugs game at best. The film used then did not reproduce all colours evenly.
Just remember. You painted the airplane black, but in the photographs in the article published on the net, it appeasrs to have a greenish tint. That would not encourage me to go and paint my model green (even if I could justify it on the basis of the pictures I saw in the article)!
MAY 15, 2005 - 09:44 AM
Copyright ©2021 by Bryan Tucker. Images also by copyright holder unless otherwise noted. The views and opinions expressed herein are solely the views and opinions of the authors and/or contributors to this Web site and do not necessarily represent the views and/or opinions of AeroScale, KitMaker Network, or Silver Star Enterrpises. Images also by copyright holder unless otherwise noted. Opinions expressed are those of the author(s) and not necessarily those of AeroScale. All rights reserved. Originally published on: 2004-09-30 00:00:00. Unique Reads: 12141

WEB HOSTING BY


Copyright ©2021 AeroScale and Kitmaker Network, a subsidiary of Silver Star Enterprises
All Rights Reserved. Please read our Conditions of Use and Privacy Policy.
All Rights Reserved. Please read our Conditions of Use and Privacy Policy.