

1⁄48Northrop P-61A
15
Comments
Painting and weathering
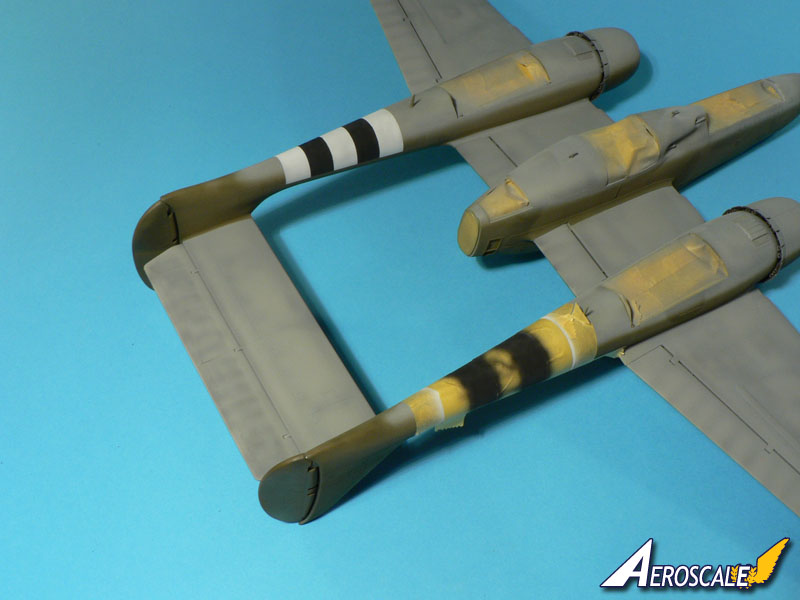
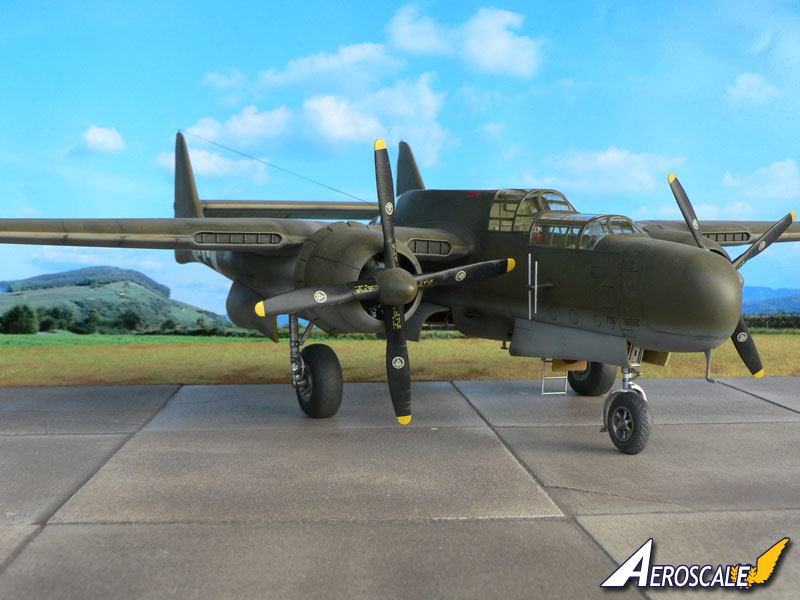
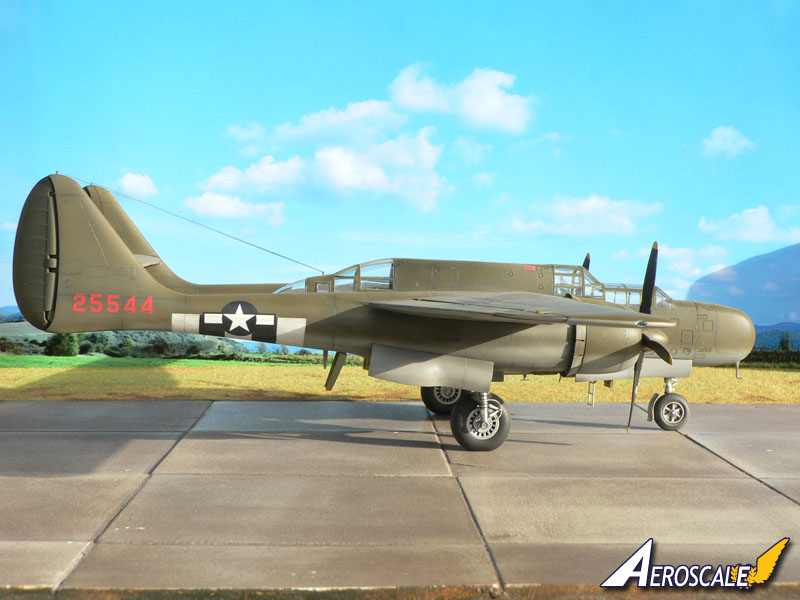
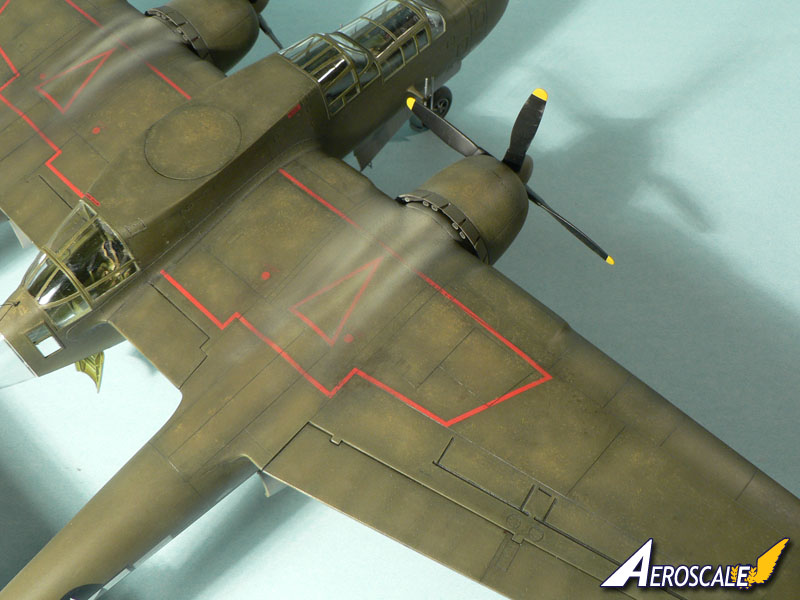
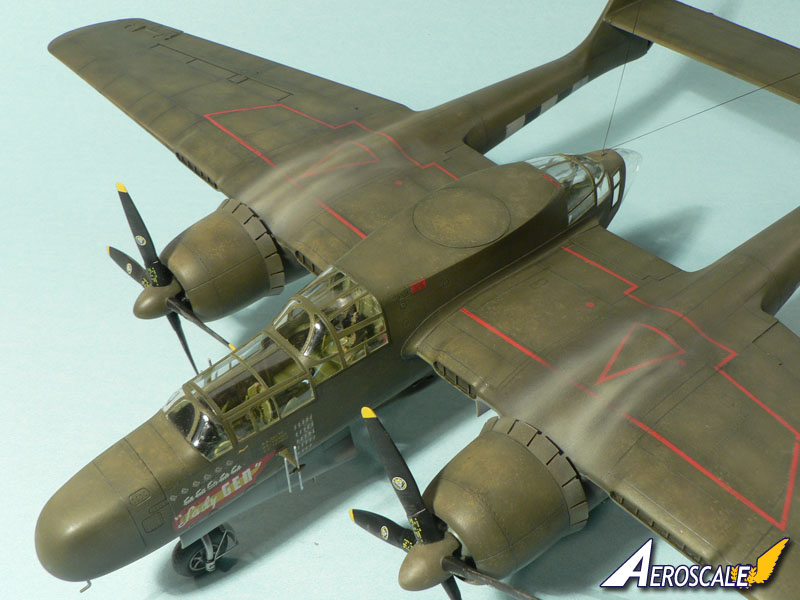
Painting proved to be easy because of the simple Olive Drab over Neutral Grey camouflage scheme. Only the Black and White invasion stripes required some work. I made them using masks. Both the top and bottom colors were applied over a pre-shading and the demarcations between the top and bottom colors were done using sausages of Uhu Tac. The surface of the model received several coats of Klir (French Future) and then the decals were applied. They performed well and a wash was applied into the engraved panel lines. Once completed I felt that the surface finish was too clean so I used an old brush to stipple some paint onto the surface using various lighter or darker shades of olive drab. After having sprayed one more coat of light olive drab to blend the effect the surface received a final coat of matt varnish (Gunze H20).During the final stages of the painting process, the panel lines on the top surfaces disappeared in some places so I used a 0,35 size mechanical pencil to redraw them. I did this before the matt coat and I found it a simple and efficient way to restore lost panel lines without going into the trouble of applying one more layer of Klir to add another wash.
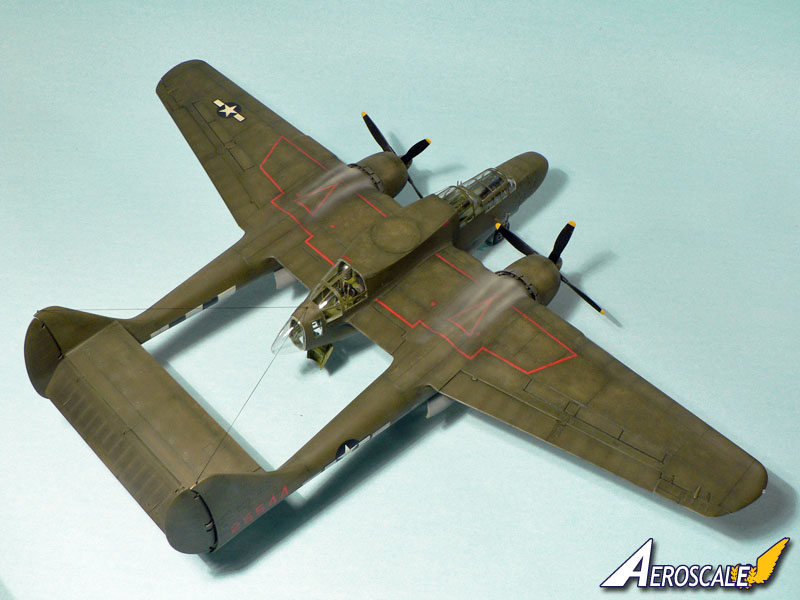
Weathering was done using Tamiya weathering pastels (wheels, propellers and machine guns) and the exhaust stains were done freehand with the airbrush (Dark Brown first and then Light Grey). The wing leading edge radiators openings received a dark wash to make them appear deeper than they are in reality on the model.
Final construction
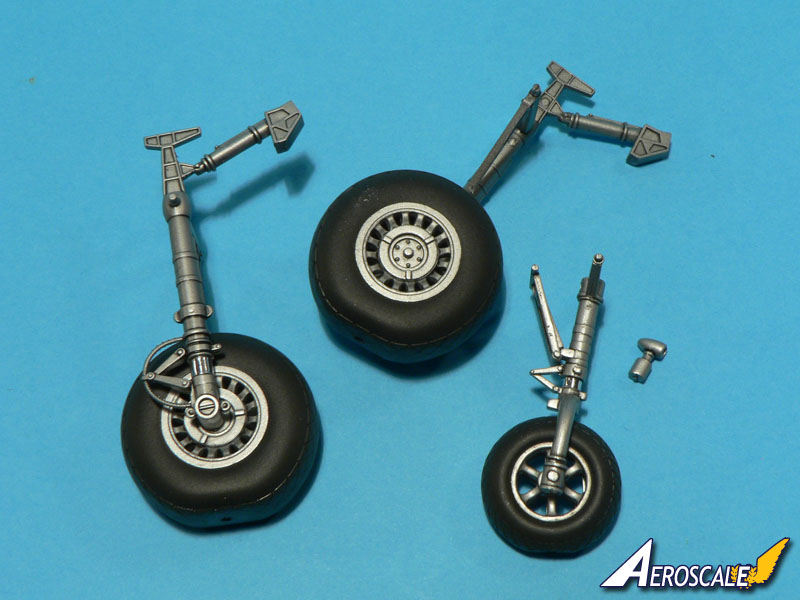
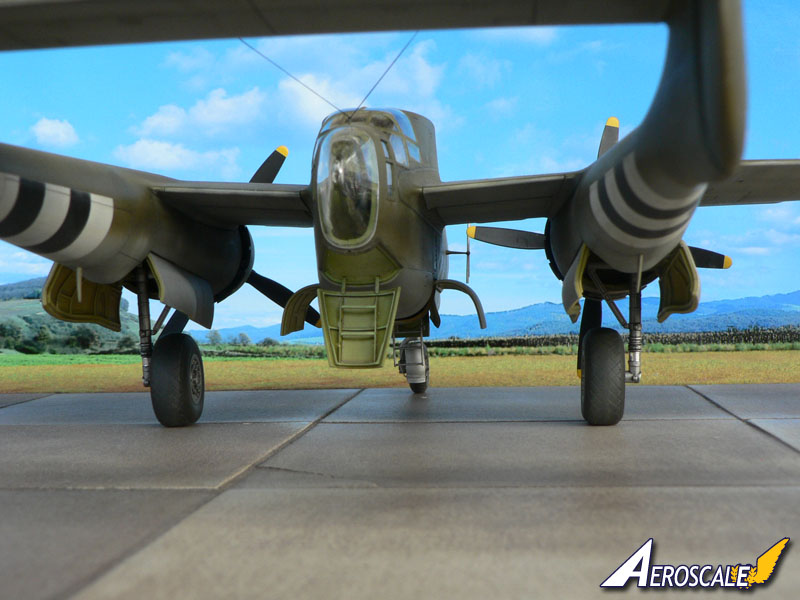
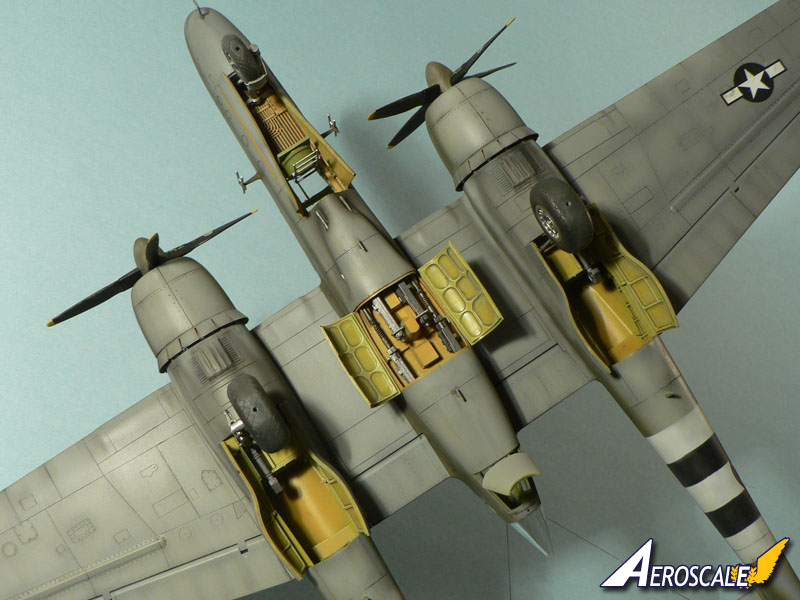
The landing gear was installed at this stage of the build. Both the legs and the wheels look very nice I must say and applying a silver paint followed by a dark wash was all what was needed to make them look the part. On the front leg one must remove the teardrop shaped landing light not present on this variant. Once on its feet, I've noticed that the nose of the model was slightly pointing down, as if the pilot just used the brakes. I don't believe that this quite reflects the sit of the real aircraft and if I ever build this model again (all in Black this time of course) I would lower the openings for the main landing gear legs' locators which are in the landing gear bays by one millimeter or two. The landing gear doors however were all very easy to put into place. This is not always the case even on modern kits.One can leave the front and rear crew access door open and that's what I did because they both look really nice. The rear one is even fitted with a small photo etched access ladder. Final bits such as the radar antennas, the aerial wires and the mud guard of the front wheel were attached at the very end because they are all very fragile parts.
Conclusion
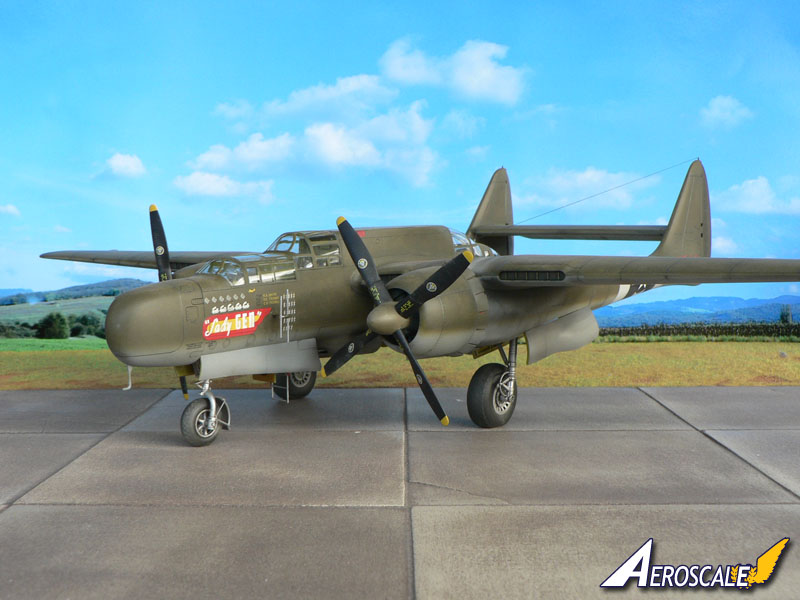
I think that the new 1:48 scale Great Wall Hobby kit will please everyone. Built from the box, the casual modeler will be able to produce a nice model which will indeed look like a P-61 Black Widow in the end. The purists, nitpickers, rivets counters, call them like you want, will be excited to reveal every inaccuracy made by the Chinese designers and may even buy one kit to find some more that they've missed from the early CAD images and test shot or review photos. The hardcore Monogram fans will be delighted to see that the new kit does not represent a quantum leap forward and can happily keep their vintage P-61 boxes in their stashes so they can gather a few more layers of dust. And finally the aftermarket producers will be happy too, because rarely a kit has proposed so many possibilities for improvement than the Great Wall Hobby kit. I have already seen some fantastic stuff coming from Vector (by the way, thanks to Sergey Kosachev for the valuable infos about the P-61 spread around on this website!), True Details (very attractive correction set for the cowlings, magnetos and propeller/spinner) and Eduard (Check the awesome photo etched sets prepared under the direction of Luboch Zach in their January 2012 Eduard Info issue mind-blowing!). In true this is probably the perfect kit for today's aircraft modeling world as there is something for everyone in it!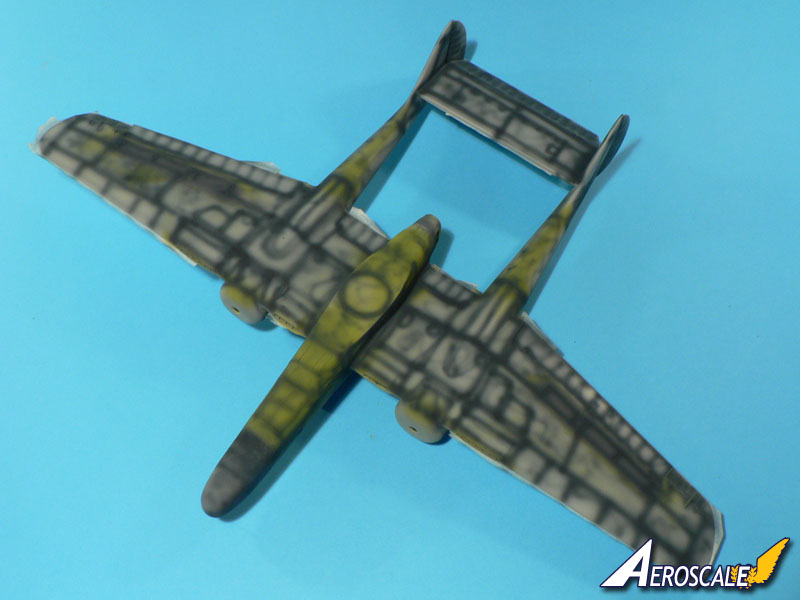
About the Author


FROM: MOSELLE, FRANCE
I'm mainly interested in WW2 aircraft and I build them in 1/48 scale.
Comments

Beautiful build J-L, very nicely done indeed, and a great review.
Cheers, D
JAN 14, 2012 - 10:42 AM

Beautiful build as always JL and nice review most excellent
JAN 14, 2012 - 12:00 PM

Jean-Luc,
Wow, you bring back some memories! This looks like a fine revision of the old classic. Great build.
JAN 14, 2012 - 01:53 PM

Well who would've thought that you would defend the "rivet counters". These are the people who lurk in hobby stores and at shows denigrating people's work without actually displaying any built work.
Gaston, well done on highjacking Jean Luc's review. Why don't you post your own review instead on taking over this thread.
As Jessie said it doesn't look fatally flawed to me, in fact it looks like a P-61.
JAN 15, 2012 - 10:15 AM
Thanks for the great build-up review and óutlining the shortcomings of the kit so clearly. While the maker, I certainly hope they will heed you advices to improve on future releases. I am glad to hear that the general fit makes lining up the airframe and booms so easy. I remember blood, sweat and tears when building my Monogram widow a decade ago. I hope I'll find some time to build the GWH kit sometime soon.
Your works keeps inspiring me greatly! Keep it up, mate!
Cheers,
Guido
JAN 16, 2012 - 04:05 AM

Hi all,
Thank you for your kind words about the model and the article.
Gaston, this looks like a fine work on the clear parts. If I tackle the P-61 in it's B variant, could you send me one of your vacu replacement part?
Guido, I'm looking forward to the Devastator. It looks very promising from what I have seen so far.
Torsten, I think we will find an occasion to compare our P-61. It will be interesting to have the Monogram and GWH models side by side.
Matt, no worries. I don't feel as if Gaston has highjacked my review. To the contrary. His input is always very interesting.
All the best,
Jean-Luc
JAN 16, 2012 - 08:14 AM

Jean Luc, an absolutely magnificant build! I think you did a great job on this kit even with it's flaws. So good in fact Gaston Maty hasn't even bombaded us with his typical rant. Great work and thanks so much for sharing. Take care :-)
Jim
JAN 16, 2012 - 12:06 PM

Thanks Jean-Luc,
I will see what I can do with the spare clear plastic pieces I have: The master often has a lot of primer on it to smooth flaws out, and this makes it susceptible to surface damage from the heat of the softened plastic after a few copies: It is very little damage however, so I should be able find, or complete, one more useable copy...
Gaston
JAN 17, 2012 - 06:38 AM
Copyright ©2021 by Jean-Luc Formery. Images also by copyright holder unless otherwise noted. The views and opinions expressed herein are solely the views and opinions of the authors and/or contributors to this Web site and do not necessarily represent the views and/or opinions of AeroScale, KitMaker Network, or Silver Star Enterrpises. Images also by copyright holder unless otherwise noted. Opinions expressed are those of the author(s) and not necessarily those of AeroScale. All rights reserved. Originally published on: 2012-01-14 00:00:00. Unique Reads: 17545

WEB HOSTING BY


Copyright ©2021 AeroScale and Kitmaker Network, a subsidiary of Silver Star Enterprises
All Rights Reserved. Please read our Conditions of Use and Privacy Policy.
All Rights Reserved. Please read our Conditions of Use and Privacy Policy.