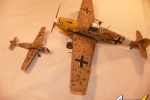
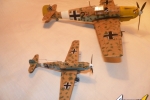
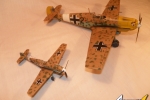
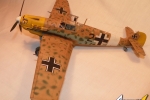
Emil und Emil: Bf 109 dual build
...
Post a Comment
Introduction
Arguably the most recognizable and, depending on your perspective, famous or infamous German fighter of World War II was the Messerschmitt Bf 109. Ultimately the aircraft developed into Models A through G with a seemingly endless assortment of variants and sub-variants. Because of the aircraft's already well documented history I am preparing only a short build report. I won't go into detail about the 109's development or combat history. Further, I am not a millimeter freak and thus made no attempt to make sure the manufacturers' molds were correct etcetera. That level of scrutiny takes the fun out of an otherwise relaxing hobby. Different strokes for different folks.HobbyBoss 1/72 Bf 109E-7 Trop
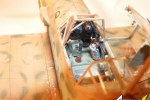
My dual build began with construction of HobbyBoss' quite nice 1/72 Bf 109E-7 Trop. I don't normally construct 1/72 scale aircraft kits but Squadron made me a deal I couldn't resist and so I took the plunge. I never regretted it. The HobbyBoss kit is very well detailed for a small scale kit however I did include True Details' Bf 109E Cockpit Set. The very excellent turned brass cannon barrels included in both the 1/72 and 1/32 builds were generously included with Kagero's Topdrawings Publication No. 4, Messerschmitt Bf 109 E-1 thru E-7 models as well as the decals I used for both. I managed to scratch-build radio antennae, radio wiring and the canopy arresting wire.Starting with the True Details set I was pleased with the construction instructions but for a beginner it may be a challenge due to some fit issues and lack of painting instructions. I do realize the resin upgrade is intended for a Hasegawa kit but please, they should be close. Quality of the resin castings was good however and made up for fit issues.
The fuselage buttons up quite nicely and with the wings/lower fuselage consisting of a single part, there was very little cosmetic repair to do after they were glued together. Actually, all components of this kit fit well, were neat and finely molded with elegant recessed details. I completed the gear, attached the tailplanes and my bird was ready to paint. That would have to wait however until I built this kit's big brother, the 1/32 Trumpeter kit. They will conveniently be painted concurrently.
Trumpeter 1/32 Bf 109E-7 Trop
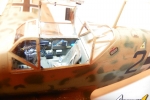
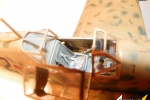
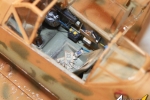
Construction of Trumpeter's 109 also started with the cockpit. Trumpeter does supply rudimentary photoetch (PE) parts for this kit however for the cockpit I elected to incorporate Eduard's excellent Bf 109E-3 color/self-adhesive Interior PE set. My logic was simple, other than the armored head rest, which is included in Eduard's E-3 fret for what would be field modified Emils, there should be no other significant differences between the E-3 and the E-7 model's cockpit. The kit parts and their PE replacements, as appropriate, went together quite nicely. Fit of the parts was good and they appeared accurate based on my references. I relied heavily on Squadron Signal Publication No. 34, "Walk Around, Messerschmitt Bf 109E. I omitted the model's oxygen tanks and radio gear as they were not intended for display on my model. The interior was painted RLM 02 overall with the details picked out and painted appropriately.Next comes incorporation of the cockpit into the fuselage and buttoning it up. Trumpeter does supply a reasonable rendition of the DB 601 engine however, as with the radio and oxygen equipment, I decided not to display it, leaving the cowl closed. You do need to include the block however as it gives the exhaust pipes a place to be secured to. It is important for the builder to also remember that the exhaust pipes and machine guns must be installed before the cowling is secured in place. Trumpeter's two cowl mounted 7.92 mm Rheinmetall-Borsig MG 17 machine guns are nicely molded with bored ends. Once the guts of the kit are in place and tail wheel installed the fuselage halves are glued together.
After the fuselage is buttoned up, construction proceeds quickly. Most of the kit was built straight from the box with one real exception. The sand screen peculiar to tropical 109s looked very bland as cast in plastic. Accordingly I decided to build some screens on my own. I used very fine gold mesh coffee filter screen as the screen material. After precisely measuring and cutting each individual segment they were affixed using superglue and painted gunmetal. The actuator was crafted from speaker wire and inserted into small drilled holes. I feel it all looks much more authentic than painted plastic.
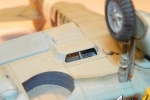
I chose to leave all control surfaces neutral with exception of the main flaps. The overall fit of the kit was excellent with the wings and wing/fuselage joints being no exception. Main landing gear was reasonably well detailed however I chose to cut the molded hydraulic line and include a small rubber hose more closely resembling that of the actual aircraft. I did use the kit supplied PE brake line clamps. Bare Metal Foil was applied to the oleo pistons for a more realistic look. The gear, inner side of the gear doors and wheel well were all painted Model Master RLM 02. The canvas cover was painted using Tamiya German Grey. The auxiliary fuel tank installed on the E-7 utilized the kit supplied PE strap. Lastly, I used light fishing tippet and scratchbuilt insulators and tensioning springs to simulate the radio antennae. These kit details were then set aside for final assembly after painting.
PAINTING AND MARKINGS
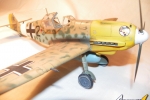
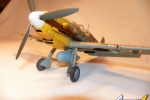
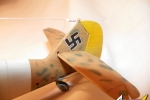
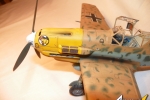
Both aircraft carry camouflage and markings for 109s of JG 27 serving in North Africa circa-1941. Black 2, my 1/32 rendition, represents an E-7 based in Libya in 1941. Markings for this aircraft were provided in Kagero's most excellent publication entitled "Messerschmitt Bf 109 E, E-1/E-3/E-4/E-7 Models".Markings for my 1/72 Emil are stock from the kit. Unfortunately all the information I have on "White 12" is its participation in the conflict with JG 27. Any input or further information would be greatly appreciated.
CONCLUSION
After painting and decals I finished final assembly thus concluding a very enjoyable project. I highly recommend both these kits to any Emil fans. Thank you for reading.Copyright ©2021 by Jim Whitbread. Images also by copyright holder unless otherwise noted. The views and opinions expressed herein are solely the views and opinions of the authors and/or contributors to this Web site and do not necessarily represent the views and/or opinions of AeroScale, KitMaker Network, or Silver Star Enterrpises. Images also by copyright holder unless otherwise noted. Opinions expressed are those of the author(s) and not necessarily those of AeroScale. All rights reserved. Originally published on: 2012-12-01 00:12:01. Unique Reads: 9776


