1⁄48How to: A Simple Float Jig
6
Comments
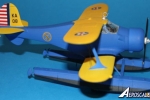
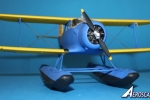
Roden Beechcraft SD17S Float Jig
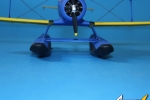
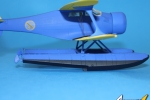
The Beechcraft Staggerwing uses a pair of N struts to support its floats. Once the floats are glued to each other by their cross members, the challenge is to attach them to the aircraft without the floats going off square. The solution to this challenge is to fabricate a simple jig to hold the struts at the proper angle while the glue dries.Tools required:-
- 1. Vernier Caliper;
- 2. Square;
- 3. Scriber
Materials required:-
- 1. 0.030" plastic sheet stock;
- 2. 0.062" plastic sheet stock;
- 3. 1/8" X 3/16" plastic flat stock;
- 4. 1/8" X 1/4" plastic sheet stock.
Step 1: Preliminary measurements and planning
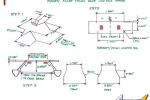
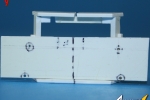
Measure the location points on the aircraft. In this example, we are using Roden's SD-17S Staggerwing. The attachment points on the aircraft at the tops of the float struts are 1.790" apart at the forward struts and 1.940" apart at the aft struts. The forward struts mount to the aircraft 0.60" ahead of the aft struts The struts do not sit straight upright, but angle outwards from their attachment points to the tops of the floats, where each strut attachment point is 2.250" apart in a perfect square.Picture 1 shows the jig design with all necessary measurements noted.
Step 2: Strut Locator Jig
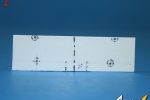
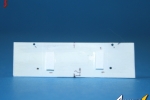
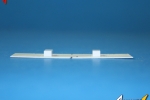
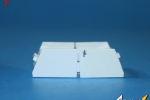
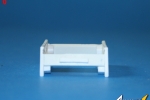
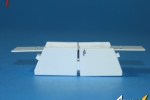
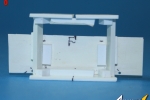
Lay out the measurements from the aircraft onto 0.030" sheet stock. See Picture 1, step 2. This will form a temporary jig to hold the upper ends of the struts as the lower ends are drying after being attached to the floats. Drill 0.040"dia holes (X4) in the locations indicated. Add side-to-side stops from .062" stock or similar scrap plastic. These will keep the upper ends of the struts properly centred in relation to the aircraft's centreline.Pictures 2, 3 and 4 show the Strut Locator Jig.
Dry fit the floats to aircraft (I used silly putty for this step) and measure the height from the float cross braces to the underside of aircraft. This will give you a height for the jig spacer of 0.550" .
Step 3:- Float spacer jig
Lay out ( X2) 0.550" high sides on 1/16" stock and cut to the shape shown in picture 1, step 3.Cut 1/8" X 1/4" stock 1 1/4" long to set the end frames the same distance as the float cross brace. Pictures 5 and 6 show the assembled jig. Pictures 7 through 9 show the two components of the jig ready to slip onto the floats and hold the struts in position. Do not glue the strut location jig to the float spacer jig! if you do that you will not be able to remove jig after gluing the pylons to the floats. Centre the Float Spacer Jig on the float cross braces and use masking tape to hold everything in place.
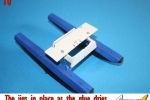
Glue the struts to the floats and keep the strut locator jig on top until the glue dries. Picture 10 shows the completed jig holding the struts in positon as the glue dries. If your floats require rigging, the jig may be used to hold the struts steady while the rigging lines are applied. In this example no rigging was required.
Step 4:- final assembly
When the glue has set remove the jig.Support the model in an upside down position and drill 0.04" dia holes at the location points on the aircraft. This will give a larger gluing area for the struts. Use the strut locator jig to mark the drill holes. Glue the float pylons to aircraft and support them in place until the glue sets.
Conclusion
This simple jig gives stability to the complicated float struts while the glue sets and makes for a straight and true assembly. Similar jigs may be made for any float equipped aircraft with just a little planning and measuring.Comments
It took longer for me to write the feature than to build the jig LOL! A big thankyou goes out to Jessica for all the work on the final layout of the feature.
DEC 08, 2012 - 01:01 AM
Hi Richard
That is excellent! I'll definitely remember the article for my next floatplane. I wish I'd had it to refer to when tackling Azur's Latecoere 298 - I made a balsa jig for that, but still had trouble. Your method is much more precise.
All the best
Rowan
DEC 08, 2012 - 08:16 AM
Copyright ©2021 by Richard Tonge. Images also by copyright holder unless otherwise noted. The views and opinions expressed herein are solely the views and opinions of the authors and/or contributors to this Web site and do not necessarily represent the views and/or opinions of AeroScale, KitMaker Network, or Silver Star Enterrpises. Images also by copyright holder unless otherwise noted. Opinions expressed are those of the author(s) and not necessarily those of AeroScale. All rights reserved. Originally published on: 2012-12-08 01:11:09. Unique Reads: 10905


