

1⁄35Scribing Made Eezee?
5
Comments
The problems and solutions
I have read of many ways to scribe and all of them work, for me though the time and effort involved was a big turn off. I always found myself getting bored and putting the job on hold, for years in some cases.The first problem to overcome is the position of the panel line. Well, you can consult drawings but the EEZEE way is to except that the lines you are going to remove are fairly accurately positioned, this is what I do. So this is not a problem, until you remove them. My first solution to this problem was to make an indentation, with my pointy scribing tool, at the two ends of a line, remove the line, by sanding, then join the two indentations, by scribing, great. However this introduces two new problems; one, sanding off the line may remove other detail and it is quite cumbersome to achieve a good result. And two, because of the compound curvature of the aircraft fuselage or other parts, the line between the two points can not always be joined by a rigid straight edge.
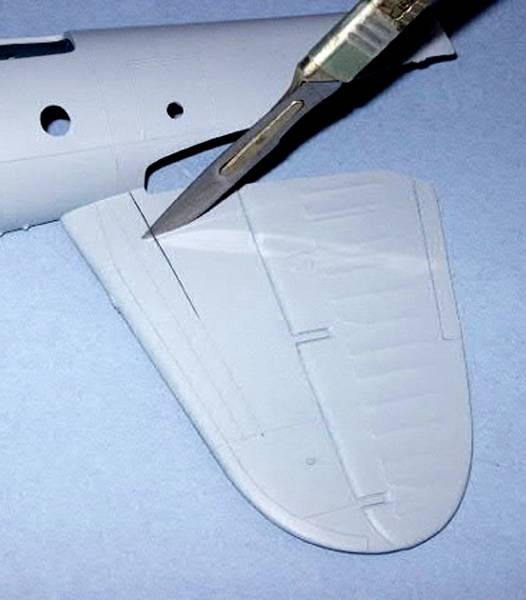
So I stopped sanding and, using a number 10, scalpel blade scraped the lines off, this works great. The problem still remains of where the line actually goes. You can put a straight edge up to it, before removing it, to see if its straight. But, if it isnt, once youve removed it you dont know its correct route.
This was one of those bolt out of the blue solutions, that come to you when you arent even thinking about the problem. Spray the parts, to be scribed, with a contrasting colour. I use auto plastic primer, for priming my models, so on the Marauder I used the grey, on the dark olive plastic. Now when you scrape off the panel lines you can see the route. You might think that you will scrape away paint around the line as well but, done carefully, this is not the case.
Before removing the line you can check to see if it can be joined by a straight edge. If it can then once it is removed simply scribe between the two indentations, made before removing the line. Place the point of the scriber in one of the indentations, position the straight edge alongside it. Move the scriber to the other indentation, adjust the straight edge. Check a couple of more times, that the straight edge is accurately positioned and gently scribe the line.
Do this by first of all lightly drawing the scriber along the straight edge. The weight of the scriber should provide enough pressure for the first 1 or 2 passes, a good scriber will remove a hair of plastic. 2 to 4 passes are usually enough, with a little more pressure being applied but this is a judgement call. You can always come back and remove some more, you cant replace any. The indentations made earlier will be removed during the scribing process unless you have made them to deep.
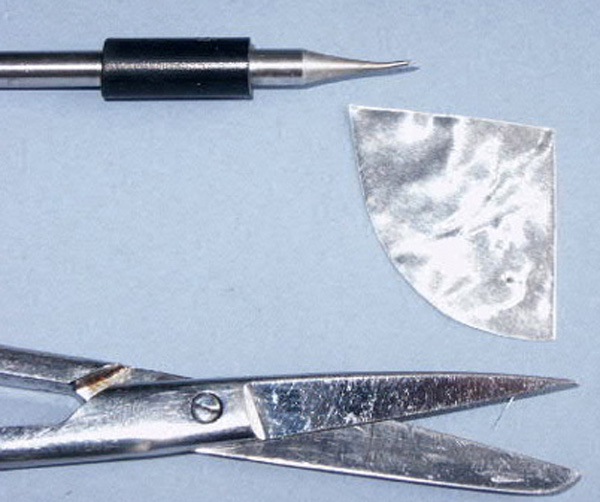
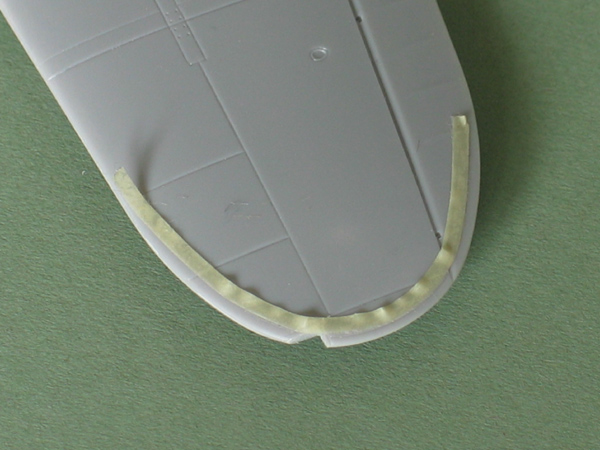
The real problem with re-scribing is when scribing on a compound curve. The same problem confronts decal manufacturers when they have to produce a band around an aircraft fuselage. You will usually see them on decal sheets with a curved edge but when they are positioned correctly they look straight. I have gotten over this problem, in the past, by making a flexible straight edge out of the thick foil found sealing cans of instant coffee. The main drawback with this method is that it takes an age to position and it can move.
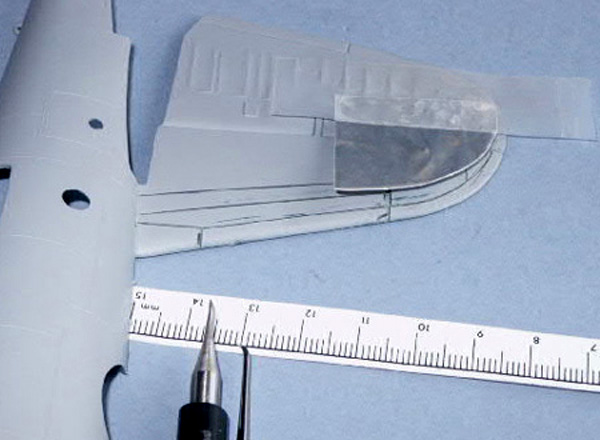
This material is ideal for quickly making a template to scribe against, such as for the panel line around the tip of the fin. The fin was laid on the sealing foil and the shape was traced into it. This was then cut out and when taped on the fin, in the correct position, could be used to guide the scriber.
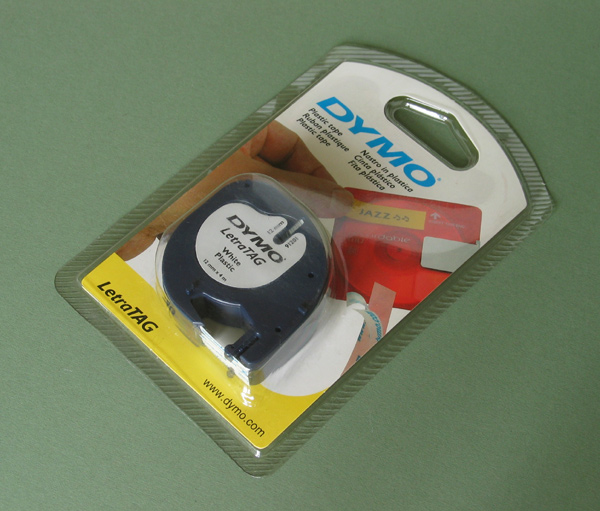
When scribing detail and for long straight lines it is a good idea to tape the template, or straight edge in position, using low tack tape. I thought I had found the solution to my scribing problems when I discovered Dymo tape (the plastic tape that is embossed using a dial gun). It is rigid enough to act as a straight edge and has an adhesive back, which keeps it in position. Its good for straight lines and particularly for re-instating panel lines after sanding.
It does have several drawbacks though; the adhesive is not designed to be re-positioned, so after a couple of lines you need a new piece. It might take several attempts to position it correctly, by which time theres no appreciable adhesive left and this can get very frustrating. It is too thick and rigid to follow compound curves, to try and combat this problem you can try cutting thinner pieces. If it is cut thin enough to be able to follow the correct path, it will be so thin that there isnt enough adhesive on it to stick and it will be to small to be able to hold it in position.


About the Author


FROM: ENGLAND - SOUTH WEST, UNITED KINGDOM
Hi, my name is Mal Mayfield and I have been modelling seriously for about 25 years. My main interest is 1/48 scale second world war. I build all types and all combatants. I have built 1/35 scale "targets" and 1/72 scale modern aircraft, plus a couple of cars. I have also dabbled with figure painting...
Comments

Nice article, Mal....
and now I know what to do with the small collection of glue needle applicators, collected over the years.
JAN 06, 2005 - 03:39 PM

Great stuff Mal.
I am currently in the process of rescribing a 1/72 hasegawa hellcat. I work on it a little, put it away for a month, pull it out again, etc. Maybe this easier method will help me finish it before my death .
Thanks for doing the leg work on this one.
Leon
JAN 07, 2005 - 02:40 AM
Yes dave everything has it's uses, eventually. Leon, I have a Monogram F105, which I have had for many years. It was the first thing I tried scribing and managed about 3 lines. It has many more than the A-26 but I feel confident, at last, that I might actually get it finished.
Mal
JAN 08, 2005 - 03:27 AM

Hi Mal
There are a couple of other types of tape which I use for scribing. Both are plastic, so they may be a bit more robust than Tamiya masking tape.
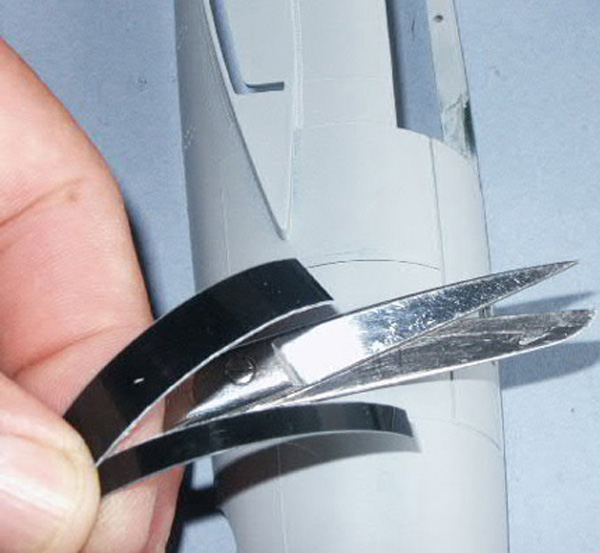
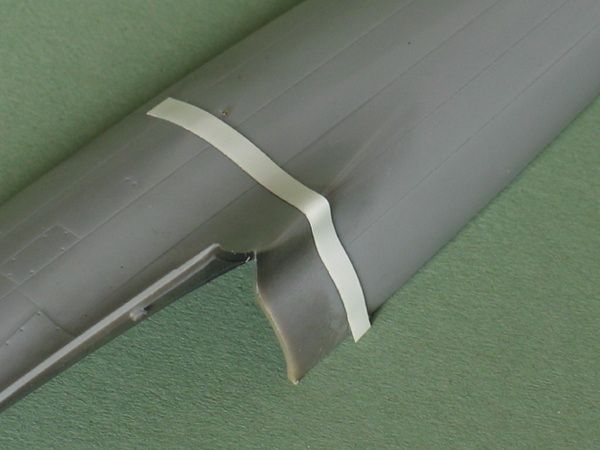
The first is by Pactra and is available in model shops - this stuff is really flexible as you can see:
 The second is a different type of Dymo tape. It's used to print (rather than punch) labels and is thinner and so more flexible than the normal stuff - but not as flexible as the Pactra tape:
 I've also used litho-tape, available from art shops. Again it's plastic, but it's nice and flexible.
Thanks for an excellent article and I hope these suggestions are helpful.
All the best
Rowan
I've also used litho-tape, available from art shops. Again it's plastic, but it's nice and flexible.
Thanks for an excellent article and I hope these suggestions are helpful.
All the best
Rowan
The second is a different type of Dymo tape. It's used to print (rather than punch) labels and is thinner and so more flexible than the normal stuff - but not as flexible as the Pactra tape:
I've also used litho-tape, available from art shops. Again it's plastic, but it's nice and flexible.
Thanks for an excellent article and I hope these suggestions are helpful.
All the best
Rowan JAN 09, 2005 - 05:15 AM
Wow great stuff Rowan, a tape that is thicker than Tamiya tape and is plastic, but is as flexible would be even better.
Mal
JAN 09, 2005 - 06:12 AM
Copyright ©2021 by Mal Mayfield. Images also by copyright holder unless otherwise noted. The views and opinions expressed herein are solely the views and opinions of the authors and/or contributors to this Web site and do not necessarily represent the views and/or opinions of AeroScale, KitMaker Network, or Silver Star Enterrpises. Images also by copyright holder unless otherwise noted. Opinions expressed are those of the author(s) and not necessarily those of AeroScale. All rights reserved. Originally published on: 2005-01-06 00:00:00. Unique Reads: 26480

WEB HOSTING BY


Copyright ©2021 AeroScale and Kitmaker Network, a subsidiary of Silver Star Enterprises
All Rights Reserved. Please read our Conditions of Use and Privacy Policy.
All Rights Reserved. Please read our Conditions of Use and Privacy Policy.