

1⁄32Albatros D.III
4
Comments
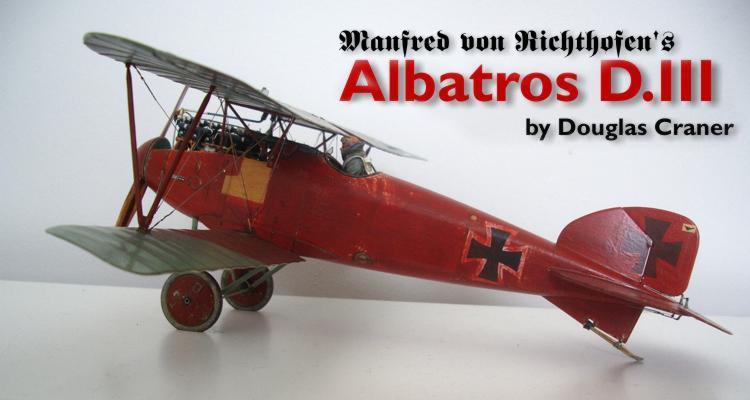
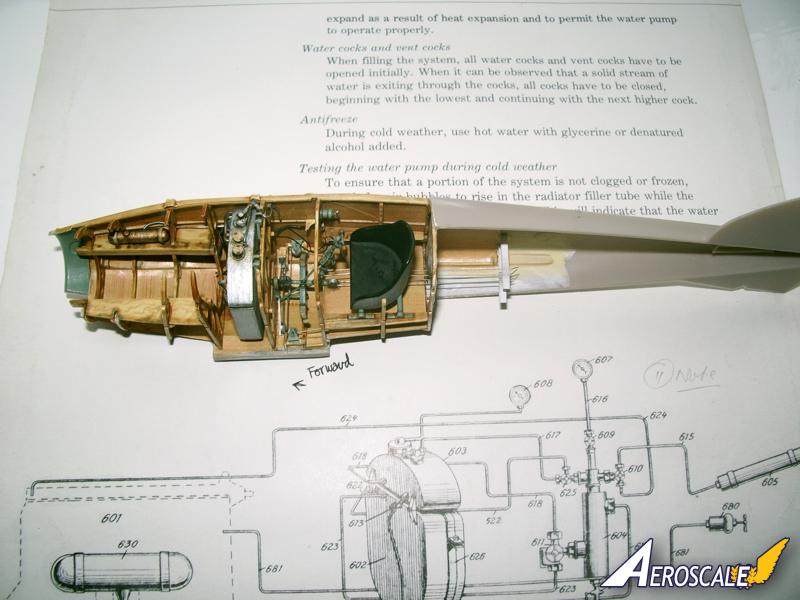
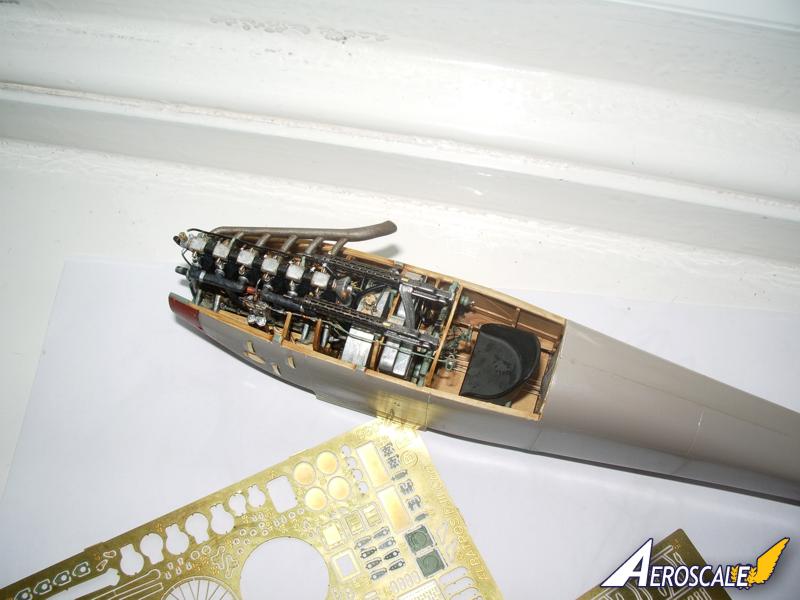
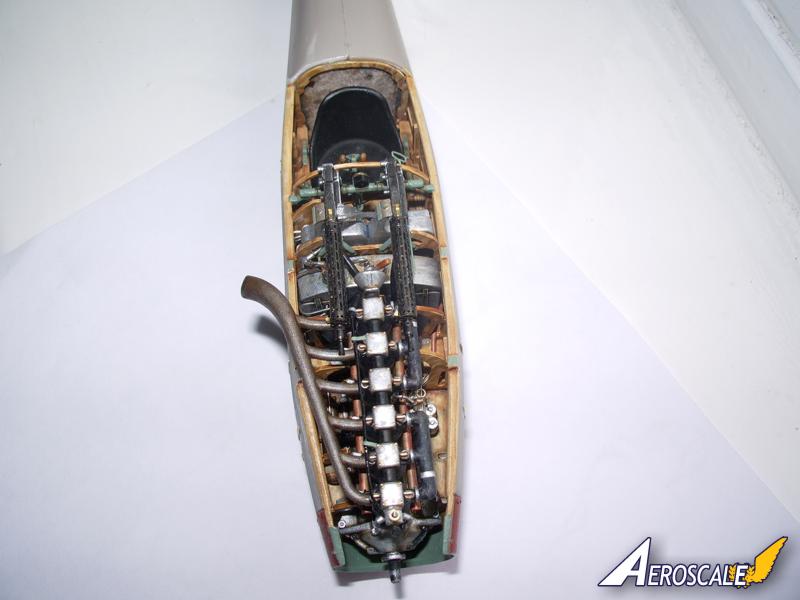
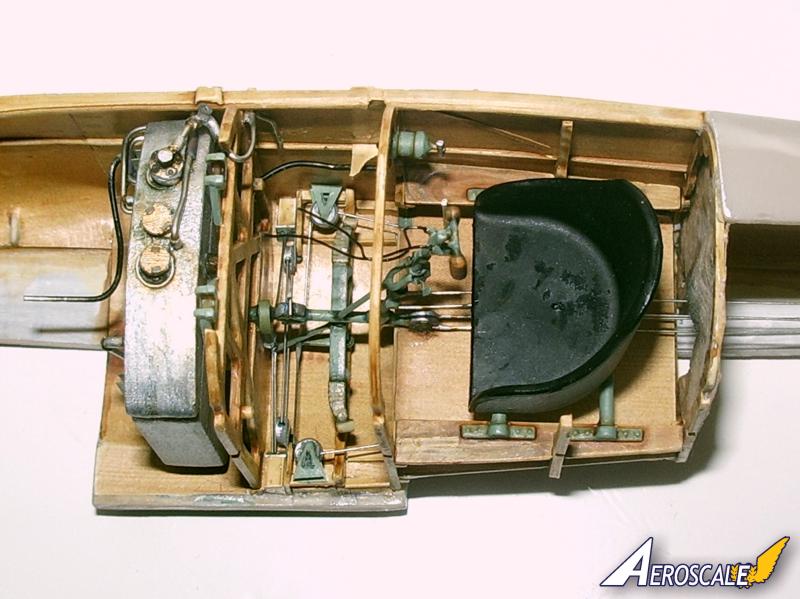
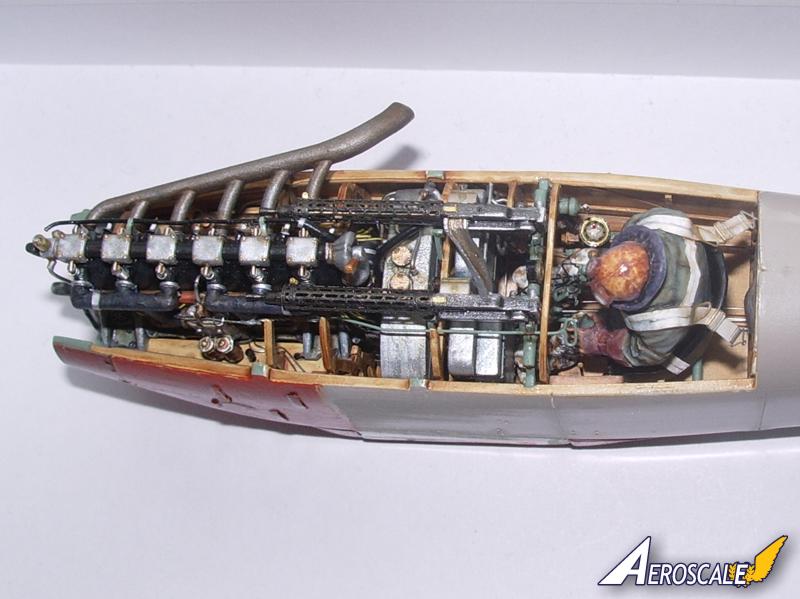
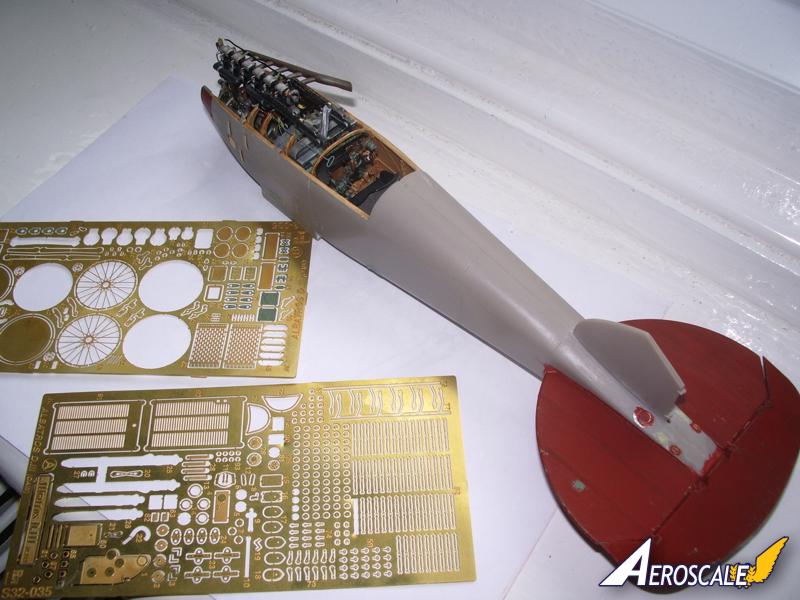
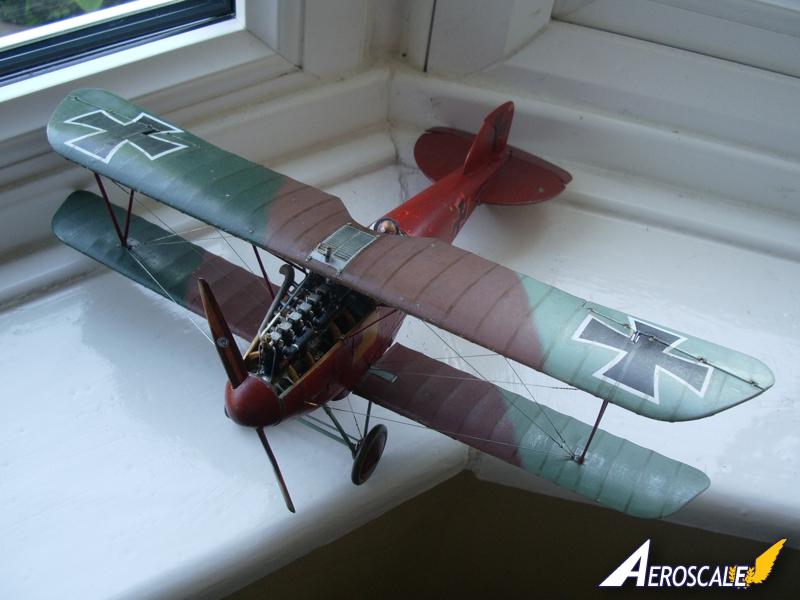
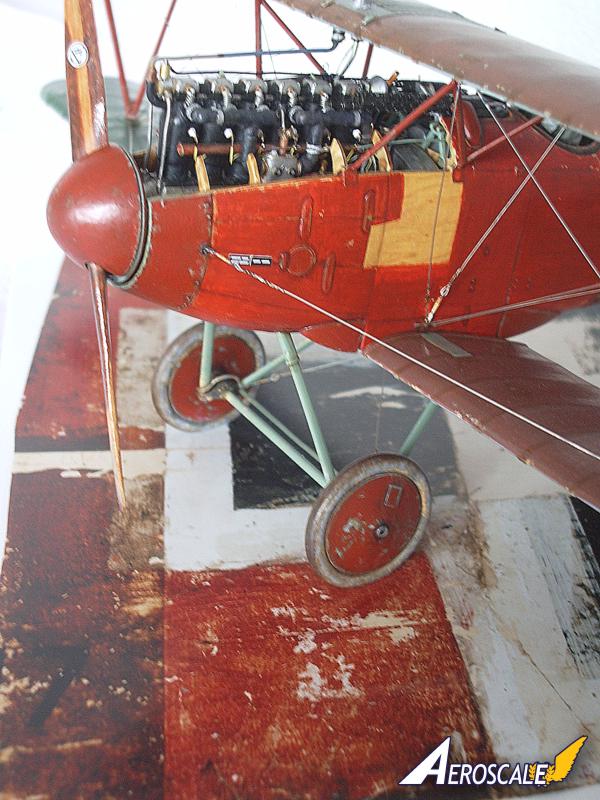
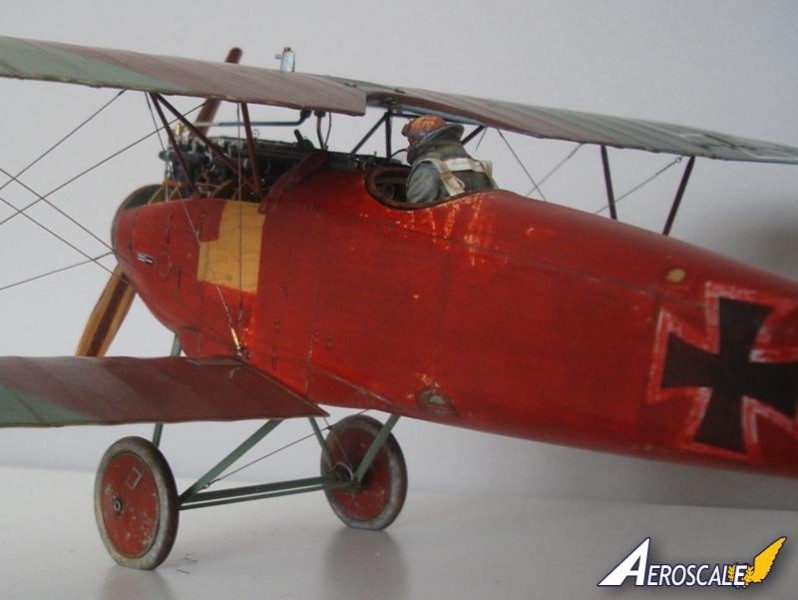
This is a commission to build Manfred Von Richthofen's Albatros D.III, around April 1917 vintage (control wires still to fit). I scratched new plumbing from fuse wire, the longer water pipe appears to have been partly clad, scratched spark plugs from brass tube,wire and PE nuts, new rocker springs..fuse wire wound round a pin, then pushed together and cut into desired lengths whilst on the pin. Extra plumbing on the Merc 160hp, including two new brass taps, with butterfly wings. I used the kit radiator, but removed the moulded wire and drilled through the rad to take a wire, which would be taped to the smaller water pipe. The "V" struts were drilled at the base to take a steel pin,and I drilled right through the lower wing so this pin would hold the weight of the upper wing, along with the small water pipe.
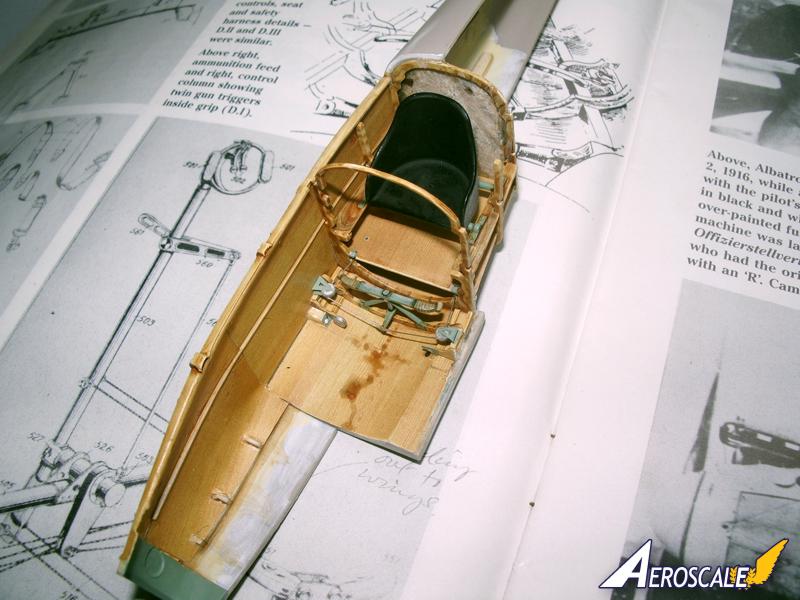
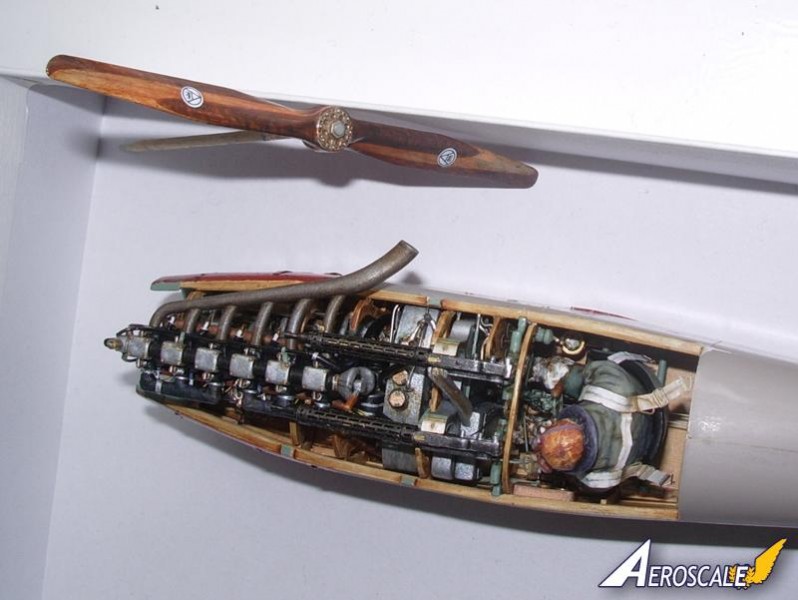
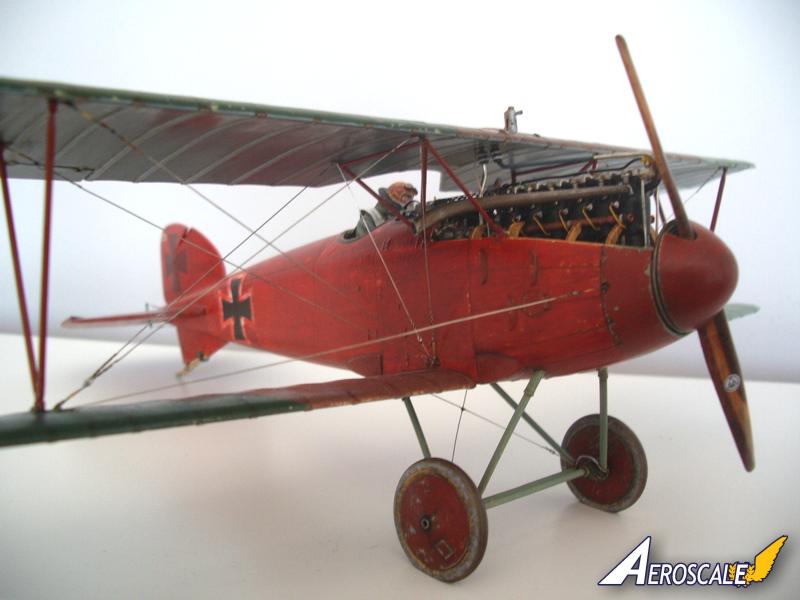
The pilot was sculpted from Milliput over a wire frame, the goggles are "smash moulded" from clear plastic and painted with pre-painted paper straps. Often I will paint the portrait/face in first, then set the goggles in place with varnish so you can see his eyes. If it is the face of a real person, I shrink a typical photo to 1/32 and the B/W image will show the light and shade, that made them unique.
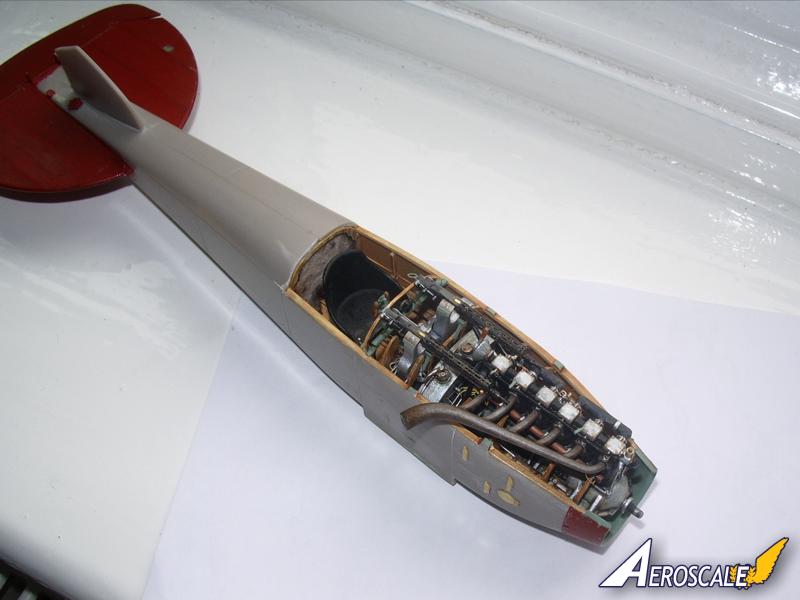
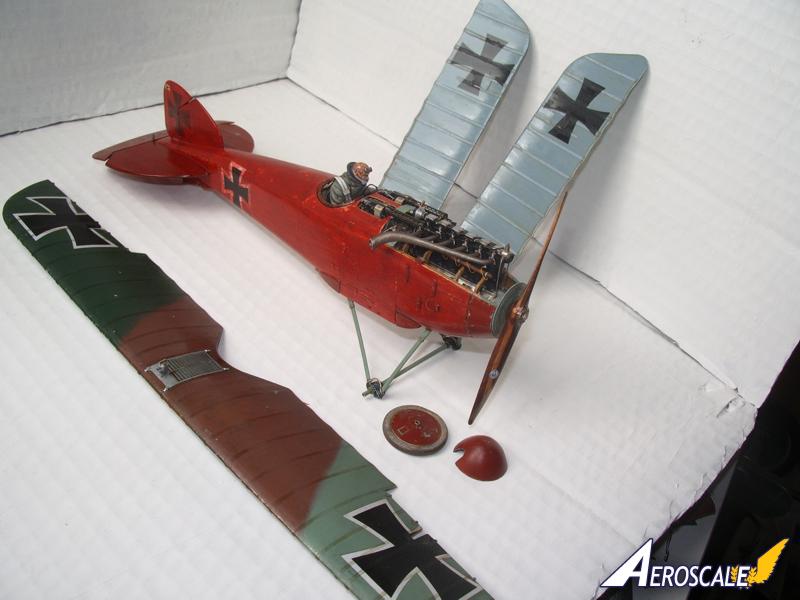
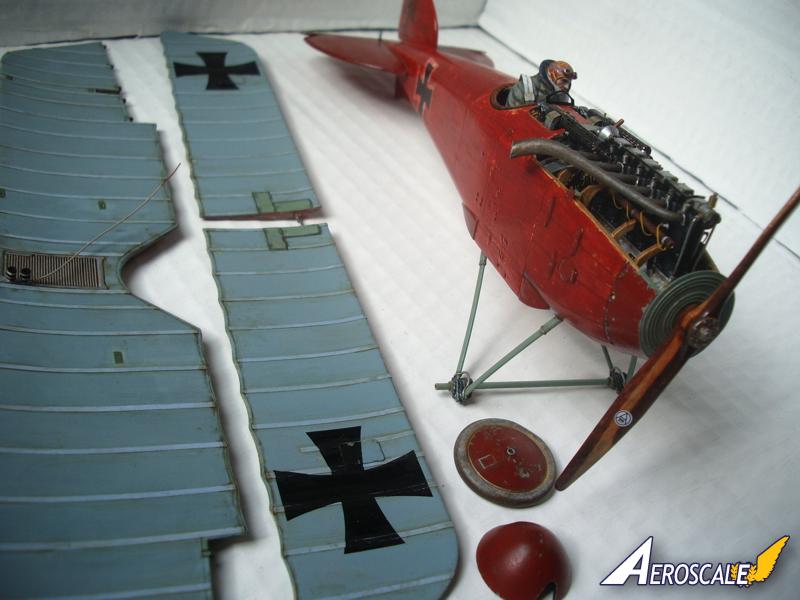
The model was finished in standard factory scheme, varnished plywood fuselage, with camouflaged wings/tailplane, grey-green/red-brown/black-green. Most sourced from paint-chips found in Windsock over the years, from various intelligence reports etc. The red I matched from a museum photo of a piece of fabric taken from MvR's DR1 in Australia, I realize this probably has no relationship to the colour of Jasta 11's early Albitri, but it's as close as we'are going to get! Close examination of this paint, in contemporary photo's, show it to have little sticking-power! And I wanted to replicate this, by chipping and scratching it off.
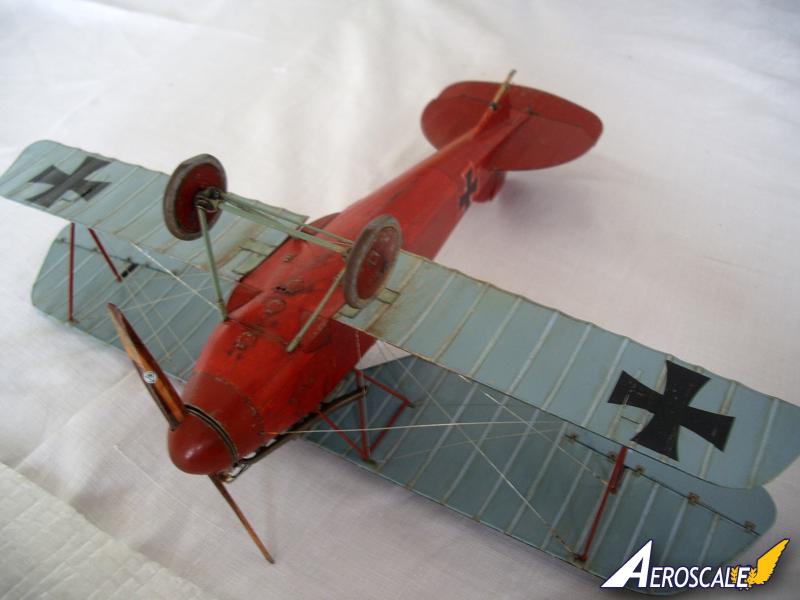
The Roden kit's fuselage was painted with enamel to simulate the plywood body, the grey-green used by Albatros on metal areas was also enamel over an Alumium base. The red used was a very thin acrylic, this red would change hue depending on what was beneath, light on the wooden areas, dark on the grey-green. On the wheels you can see scratches etc. through the grey-green and the red. Also on the fuselage the plywood colour can be seen under the red. Likewise the tailplane was factory finished in two greens/brown above and light blue below (from crash reports) and weathered with these colours showing through. When dry I use a satin enamel varnish to flatten and seal.
The undercarriage on the original is not red!... very pale... It look's like it could be a replacement so I've painted it in Albatros factory grey-green. The bungee is round elastic and covered in cotton, that came off a clothing label, which I dyed in black ink. The axle is brass, again for strength.. All metal panels, undercarriage "spreader" etc. are PE parts. Also the windscreen is very small, and looks like it could of come off a Fokker E.III... Hence it's been painted black. The red was sampled from a museum photo of some fabric from MVR's Fokker DR1 held in Australia.
The pilot was sculpted from Milliput over a wire frame, the goggles are "smash moulded" from clear plastic and painted with pre-painted paper straps. Often I will paint the portrait/face in first, then set the goggles in place with varnish so you can see his eyes. If it is the face of a real person, I shrink a typical photo to 1/32 and the B/W image will show the light and shade, that made them unique.
The model was finished in standard factory scheme, varnished plywood fuselage, with camouflaged wings/tailplane, grey-green/red-brown/black-green. Most sourced from paint-chips found in Windsock over the years, from various intelligence reports etc. The red I matched from a museum photo of a piece of fabric taken from MvR's DR1 in Australia, I realize this probably has no relationship to the colour of Jasta 11's early Albitri, but it's as close as we'are going to get! Close examination of this paint, in contemporary photo's, show it to have little sticking-power! And I wanted to replicate this, by chipping and scratching it off.
The Roden kit's fuselage was painted with enamel to simulate the plywood body, the grey-green used by Albatros on metal areas was also enamel over an Alumium base. The red used was a very thin acrylic, this red would change hue depending on what was beneath, light on the wooden areas, dark on the grey-green. On the wheels you can see scratches etc. through the grey-green and the red. Also on the fuselage the plywood colour can be seen under the red. Likewise the tailplane was factory finished in two greens/brown above and light blue below (from crash reports) and weathered with these colours showing through. When dry I use a satin enamel varnish to flatten and seal.
The undercarriage on the original is not red!... very pale... It look's like it could be a replacement so I've painted it in Albatros factory grey-green. The bungee is round elastic and covered in cotton, that came off a clothing label, which I dyed in black ink. The axle is brass, again for strength.. All metal panels, undercarriage "spreader" etc. are PE parts. Also the windscreen is very small, and looks like it could of come off a Fokker E.III... Hence it's been painted black. The red was sampled from a museum photo of some fabric from MVR's Fokker DR1 held in Australia.
About the Author


Comments

I rarely get too colourful with superlatives. Excellent craftsmanship and a good insight to this subject makes it a real winner in my eyes. This is a fine example of detail oriented modeling I have seen on a Roden 1:32 Albatros D.III. Model On Please!
JAN 19, 2013 - 06:05 AM

Very nice work, particularly like the "wear and tear" on the fuselage paint. The interior work and engine are outstanding; I've built this kit and there's been a great deal of effort put in on this one.
Well done!
Cheers,
Lance
JAN 19, 2013 - 12:00 PM

I agree with the above comments.
Plus it goes to show just what a gem the original Roden Kit is, Their Albatros series I think is possibly the best they produced. I havent built any of their Nieuports sadly so can't comment on them.
Yes their Albie kits have several known flaws but build into a nice kit OOB, this build shows what can be done with effort
Excellent work
Keith
JAN 20, 2013 - 04:59 AM

Copyright ©2021 by Douglas Craner. Images also by copyright holder unless otherwise noted. The views and opinions expressed herein are solely the views and opinions of the authors and/or contributors to this Web site and do not necessarily represent the views and/or opinions of AeroScale, KitMaker Network, or Silver Star Enterrpises. Images also by copyright holder unless otherwise noted. Opinions expressed are those of the author(s) and not necessarily those of AeroScale. All rights reserved. Originally published on: 2013-01-19 10:52:41. Unique Reads: 8277

WEB HOSTING BY


Copyright ©2021 AeroScale and Kitmaker Network, a subsidiary of Silver Star Enterprises
All Rights Reserved. Please read our Conditions of Use and Privacy Policy.
All Rights Reserved. Please read our Conditions of Use and Privacy Policy.