1⁄72November MOM winner
2
Comments
History
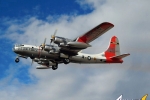
Evolving from the famous B-29 atomic bomber and following a long line of B-50 varieties, the B-50D was the definitive bomber. The underwing tanks introduced on the B-50B were now jettessionable. 4000Lbs of weapons could be carried in place of the tanks. The new moulded Plexiglass nose featured a much larger and more steeply raked flat bombardier’s panel. B-50D eliminated the retractable tail skid which was a feature of the series since early B-29s.Lockheed Air Services in Ontario,California modified 36 B-50Ds into WB-50Ds to replace the WB-29s in the weather reconnaissance and atmospheric nuclear sampling roles. In addition to meteorological sensors WB-50Ds carried an improved air sampling collector in its dorsal “bug catcher”. WB-50s had all armament deleted and carried the air sampling pod mounted on top. Internally the bomb bay housed a jettisonable bladder fuel tank capable of holding 10,000 gallons 0f fuel.
WB-50Ds were attached to the 53rd weather reconnaissance squadron. Initially they were based at Burtonwood, Lancshire, England. A typical Falcon Delta mission consisted of flying out of their base at 7.00am daily. The track was 3,686 miles long and extended from Liverpool to a point 250 miles north of the Azores, then turns north along the 30th Meridian to a point 420 miles Southeast of Greenland and finally turned East towards Burtonwood. The mission had an average flight time of some 15 hours and weather observations being made at fixed points 150 miles apart.
Their missions moved out of Burtonwood on the 22nd April 1959 and upon completng its last mission a WB-50D landed at RAF Alcombury, Huntingdonshire and became the new home base for the 53rd WRS. On 10th August 1959 it moved to nearby RAF Mildenhall. Flights out of England were discontinued on 18th March 1960.
The kits
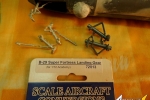
Airfix B-29 and Airmodel conversion reissue kit No 186, Scale: 1/72Notes: The Airfix B-29 was built in combination with the Airmodel conversion set. There were a number of shortcomings with the Airmodel vac-form kit as will be seen during the construction. Other item sets used were the SAC metal undercarriage set 72013 and Xtradecal sheet X032-72.
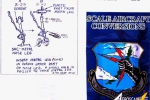
The Airfix B-29 provided the basic kit needed to make the kit conversion into a B-50. The Airmodel instructions appeared inadequate to follow as even the sketch of the B-50 drawn on the front page of the instructions showed the engine exhaust on starboard side of engine cowling instead of port and the fork antenna located on the nose cap is drawn the wrong way round. Even so scale plans are not provided .
Construction
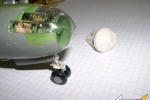
The Airfix kit fuselage was first prepared for the initial assembly. Three positions where the turrets are located were blanked with 6 semi circle plastic cards which were also slightly bent to take the shape of the fuselage section. These were fixed using liquid glue. The fuselage interior was then assembled to kit instructions. A compartment was also added at the back of the crew office which will contain a piece of lead 1.5” diameter by 0.25” thick. This will ensure that the model is not a tail sitter. Fuselage interior was painted dark green zinc chromate which includes the cockpit interior. Printed paper instruments attached to the consoles, control wheels and seats added and additional front detail also added inside the nose compartment. These took the form of junction boxes added close to the floor.At this stage I modified the Scale Aircraft Conversion SAC B-29 metal nose gear so that I could utilise it on the B-50 model. The B-50 introduced hydraulically-powered nose wheel steering which had a horseshoe drive located just above the wheels. The sketch attached shows the upper Airfix plastic kit part which hinges into the nose and a hole drilled at centre to take the modified SAC leg. This was a robust kit modification which could definitely benefit from the sturdy metal undercarriage. The nose leg was therefore modified to conform to the B-50 type, adding the horseshoe mechanism and two vertical landing and taxiing lights. The fuselage halves was then closed and glued together with the nose leg in place.
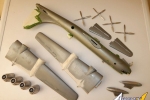
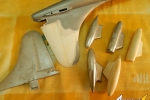
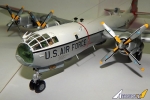
The B-50 vertical tail was 5 feet taller than that on the B-29 due to increase in power provided by the new engines. I was not quite happy with the shape of the vacform tail and this I corrected using part from the B-29 tail itself. Airfix fin and rudder were removed using razor saw and the vacform larger vertical tail added. The B-50 shape has started to emerge. Common on all WB-50D was the dual ADF “rugby ball” installations on top of forward fuselage. While the rudder was setting I made a scale drawing of the FOIL “bug catcher”or so called “dog house” air sampler fitted on fuselage aft spine. This I scratch built from plastic card. The B-50 nose glazing was the new style that became standard. This was moulded out of clear acetate after a male was prepared taking the new form clear nose cap….See photo.
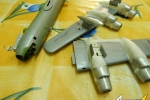
Turning to the wing construction this had several areas that differ completely from the B-29 wings. Airmodel nacelles were separated from backing plastic. The inboard nacelles were made so that the lower portion of Airmodel rear part was mated with the Airfix upper portion already on the upper wing half. The outboard nacelle was in two halves and were positioned at that same place as the B-29 outboard engines. The trailing edge of the B-50 wing was slightly different than those on the B-29, so two new wing trailing edge fillets were fashioned from scrap plastic and added on. Horizontal tailplanes added in the end and aligned correctly with the fuselage and with respect to the main planes as viewed from front.
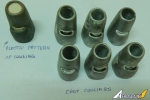
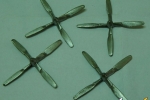
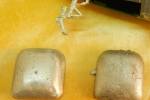
The Airmodel front engine cowlings had an incorrect shape of air intake and I had no option but to discard them. I made a plastic pattern of one cowling from bits of aircraft spare parts and cast 4 in number aluminium cowlings, this time with the correct shape of cowls. After fettling and cleaning I also added two tiny plastic brackets in each of the air intakes. While I was in the process of casting I also cast two underwing fuel tanks and the rectangular radome that is positioned between the bomb bays. Four propellers were also cast and polished as these were completely different from the ones mounted on a B-29. The hemispherical radome that was attached to the forward fuselage was made out of putty and shaped in place. All of the parts were now fitted on their respective place on the fuselage and wings using super glue. Four exhaust pipes were shaped from sprue piece and drilled on the inside and attached to the port side of each engine. Cowling gills detail were scratch built from thin plastic card cut in small squares and attached to each of the engines. When the kit was now all in one piece, ever sensors and antennas added to the fuselage as well as two wire antennas from the vertical fin.
colour and markings
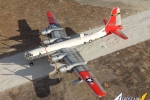
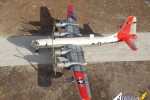
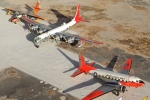
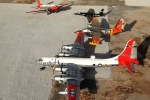
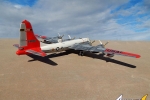
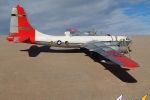
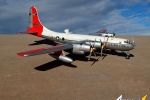
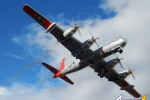
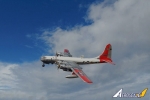
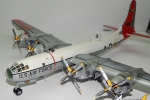
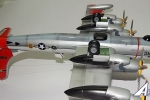
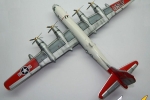
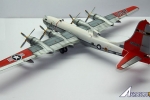
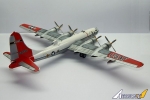
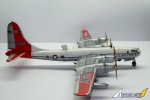
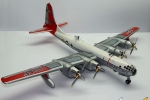
The B-50 was one of the first large military aircraft to serve for an extended period of time, giving rise to a wide variety of paint appearance and changes that were necessary to identify the aircraft. I made my pick of WD-50D from the book “Fighting colours USAF Europe Volume 2 1947-63 in colour” by Robert Robinson. There is a colour side view of the WB-50D belonging to the 53rd Weather Reconnaissance Squadron (WRS) that was based at Alcombury, Hunts during 1959. I visited Alcombury twice but that was back in 1969 and there were RF-4C Phantoms based there then, all in ADC grey just before they started to wear SEA camouflage. The B-50s were long gone by then.I made good use of Xtradecal sheet XO32-72 that contained a WB-50D of 53rd WRS 1956 with a difference that I made a later version of the WB-50D, which had more sensors and slightly different colour scheme. My Alcombury based model had the sides in overall natural metal with an insignia white fuselage crown. This was to mitigate the cabin heating due to solar radiation. Part of the vertical tail was also painted white. There is a black fuselage cheat line that extends as far forward as the nose perspex. The fin and wing tips were painted International orange FS12197. Underside of fuselage was ADC grey.
Further to the colours the control surfaces were protected by aluminized paint. Upper wing surfaces were natural metal while wing walk ways were grey and outlined in black. The lower fuselage, nose gear, bay doors were aircraft grey. Protective area around and aft of combustion heaters on the vertical fin were also aircraft grey. Lower portion of engine nacelle gloss black but not the main gear doors which were silver. The blue fin stripe with yellow border and ‘Weather’ in white came from the same decal sheet. The decal markings had the 3” aluminium outline to USAF legend and around national insignia. A new tail radio call sign I picked from my spare decal box and this was placed on a silver background. Leading edges of landing gear doors were red. Wheel wells were dark green-tinted zinc chromate.
Conclusion
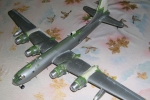
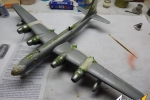
The completed model certainly captures the vivid rugged and massive look of the WB-50D that gave a stalwart service to America’s air power throughout the 50s. I cannot say it was an easy build but in the absence of an Academy kit of the B-50 I had no alternative but to make one my way. The conversion was challenging but enjoyable too, and took me the best of past two and a half weeks.Carmel J Attard
Ref: Squadron/Signals Publication USAF Europe Vol2.
Aero Modeler No5 History text on B-50 by Geoff Hays and Jack Morris.
Comments
Carmel,
An absolutely impressive build. Certainly not for the neophyte, as you had to create your own molds for some metal castings. The overall finish is just superb, especially the NMF with its varied toned & weathered panels.
My only question is that in your conclusion, you said that the conversion took just 2 1/2 weeks. Was that to make the major changes to the fuselage and wings, or for the entire build?
Joel
DEC 14, 2013 - 02:01 PM
That is correct, it took me two and a half weeks to complete the conversion totally. That was during the summer time. After summer went back to our winter home at Mosta where I could do all the airbrush work which took another week of paintwork. I do not take the compressor with me to summer house at St Paul's Bay.
DEC 14, 2013 - 11:02 PM
Copyright ©2021 by Carmel John Attard. Images also by copyright holder unless otherwise noted. The views and opinions expressed herein are solely the views and opinions of the authors and/or contributors to this Web site and do not necessarily represent the views and/or opinions of AeroScale, KitMaker Network, or Silver Star Enterrpises. Images also by copyright holder unless otherwise noted. Opinions expressed are those of the author(s) and not necessarily those of AeroScale. All rights reserved. Originally published on: 2013-12-14 02:20:57. Unique Reads: 5660


