

1⁄32Hannover CL.II
14
Comments
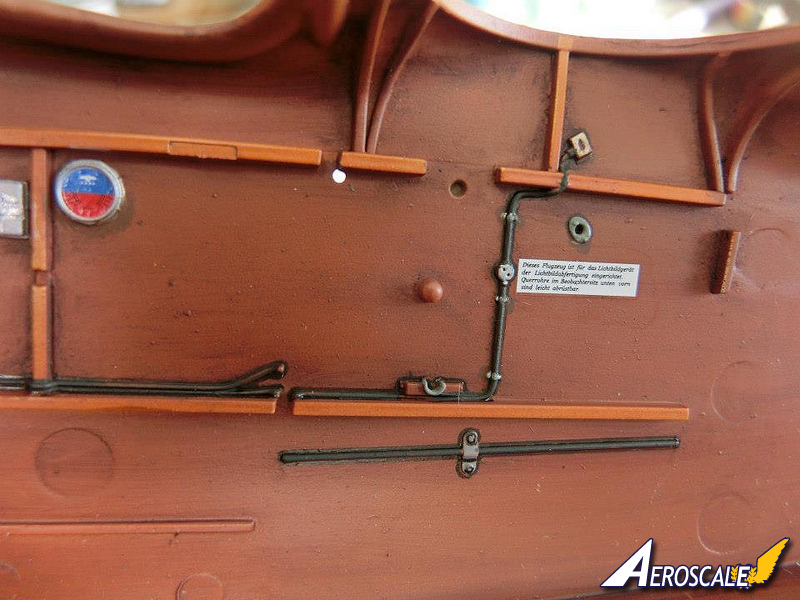
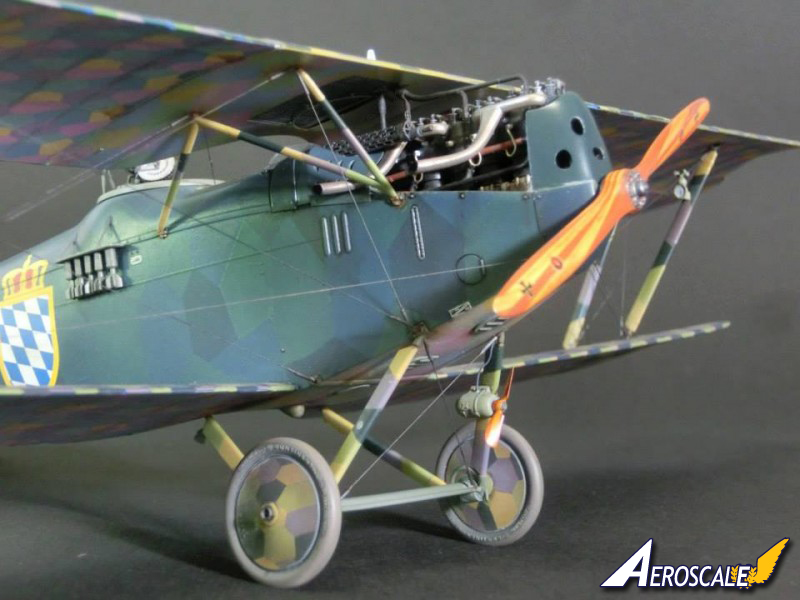
As with any WNW offering, the Hannover Cl.II kit is detailed and sufficiently well engineered so you can build into a spectacular piece straight OOB. In my case, I added the following detailing:
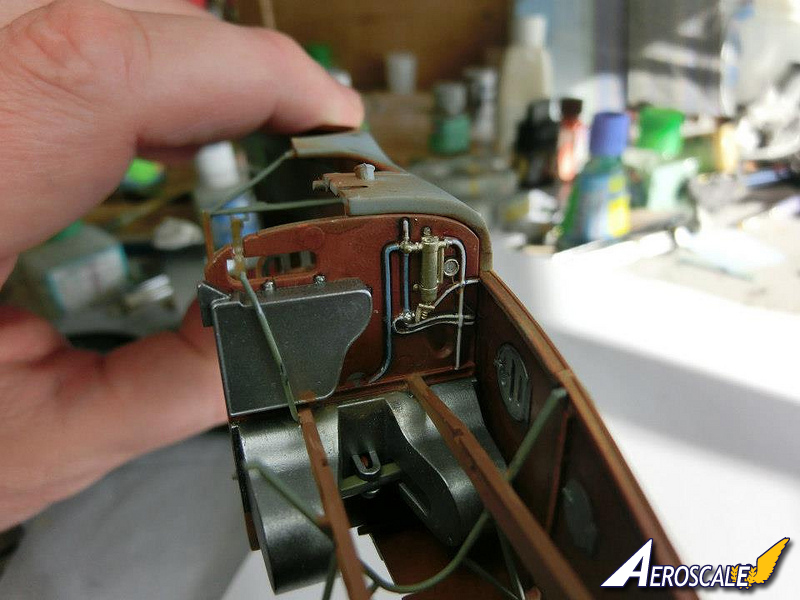
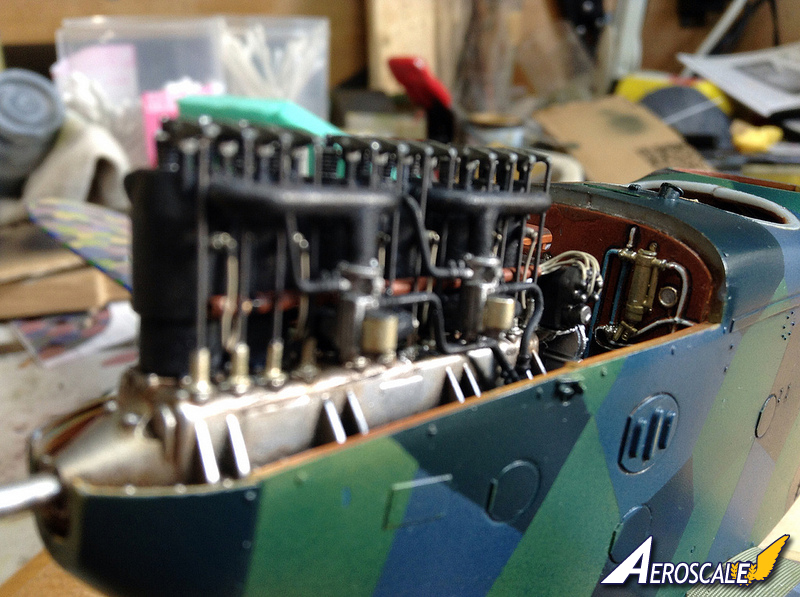
Engine
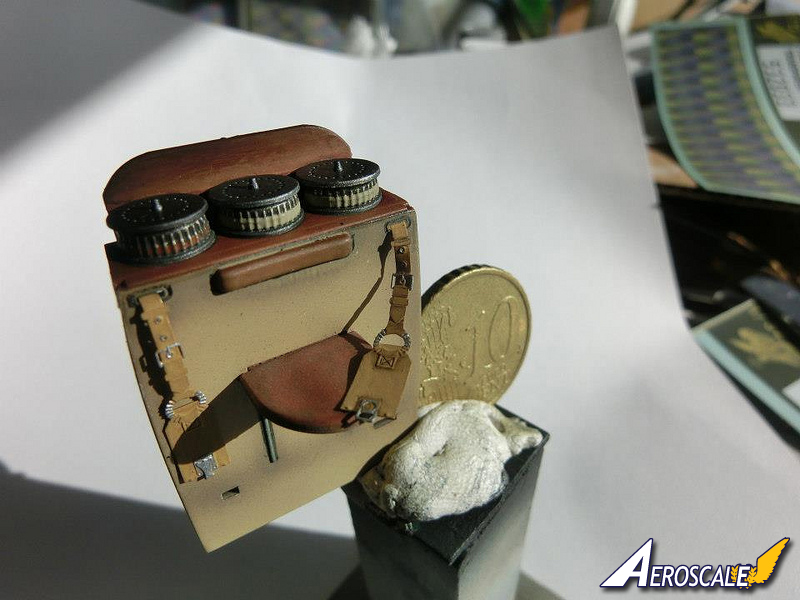
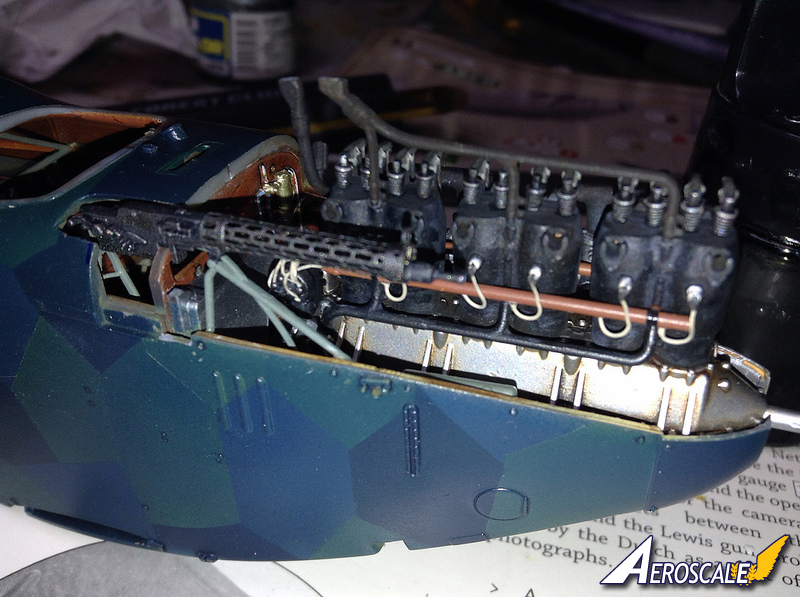
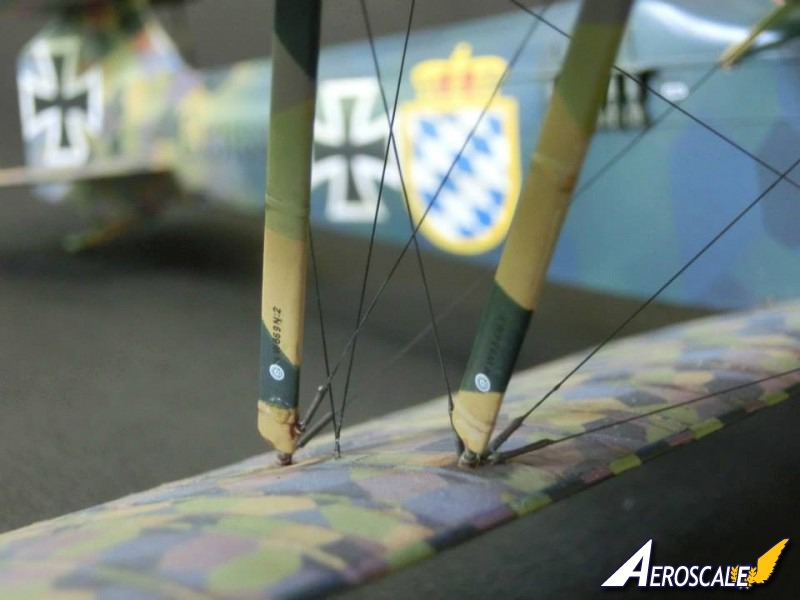
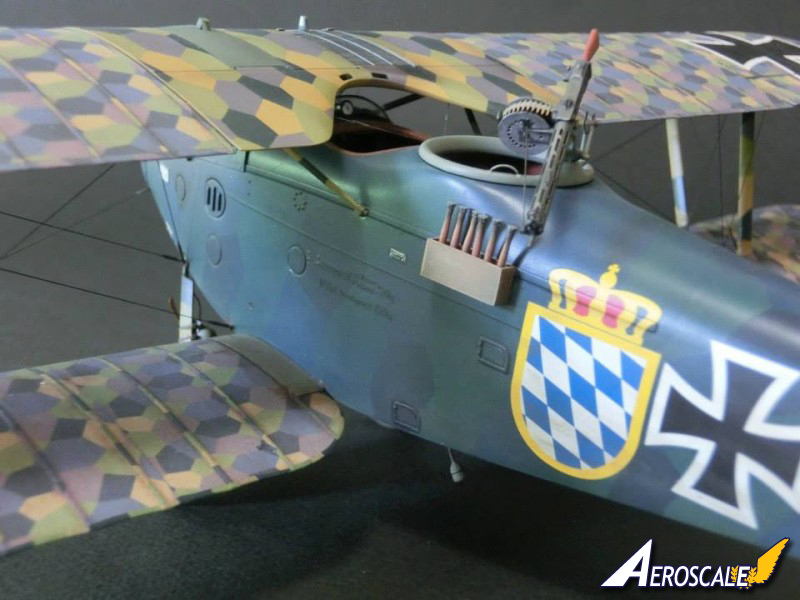
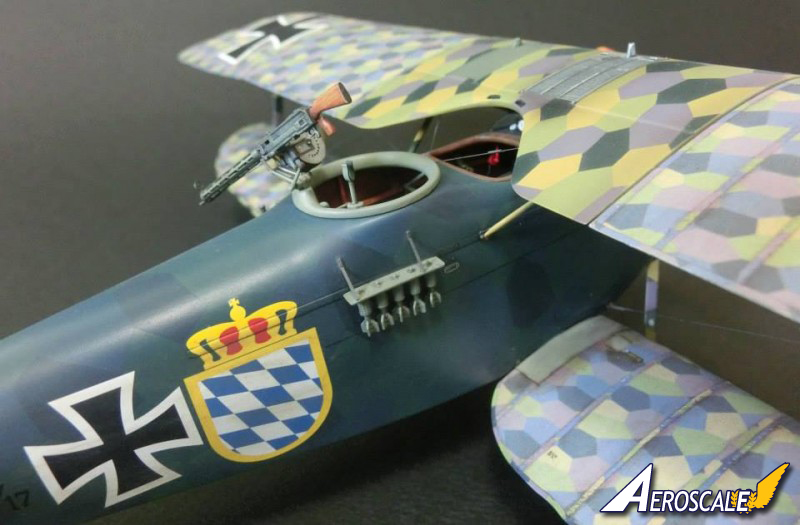
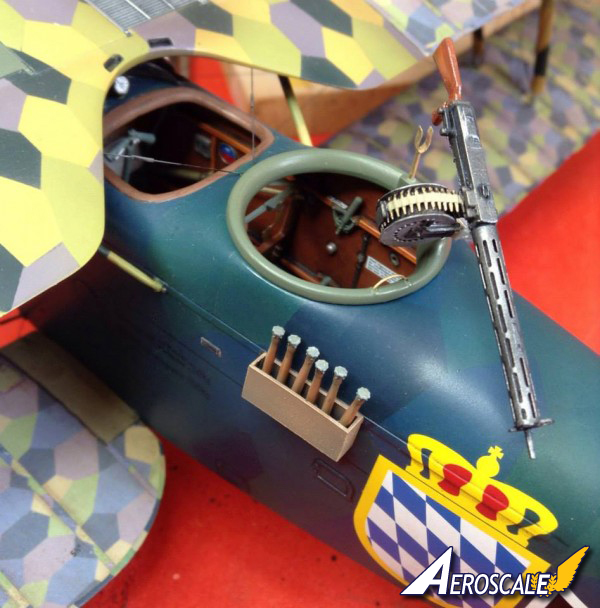
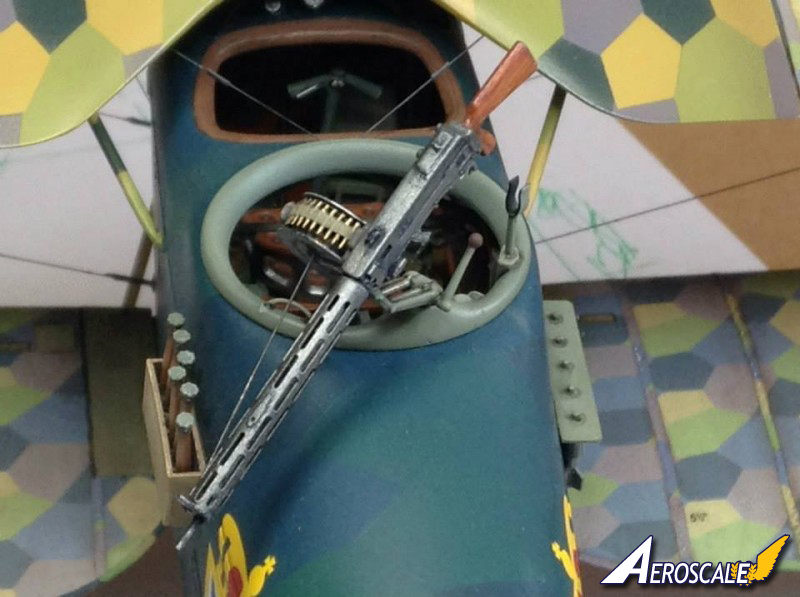
I added cylinder pushrods from 0.5mm steel wire; ignition wiring from 0.3mm soldering wire; and cylinder spark plug-to-magneto wiring pipes from brass tubing, made replacement reinforcement struts for the biplane tail arrangements (I snapped one of the delicate kit pieces, requiring me to make replacements out of flattened brass tubing), some minor modifications to the Parabellum machinegun (I sanded down and beveled the inside surfaces of the walls of the spool ammo magazine to give the illusion of scale thinness the actual item appears to be stamped out of sheet aluminum and used painted decal film to simulate the cloth portion of the ammo belt); and scratchbuilding a potato masher grenade box on the port side of the rear gunners cockpit; and rigging from Magic Marker and metallic dry-brushed 0.8 gauge monofilament fishing wire, with turnbuckles made from stainless steel surgical wire loops and heat-stretched plastic tube sleeves (I use the handles of ChupaChups lollipops as my stock for this very economical, as well as tasty).Flying Surfaces Lozenge
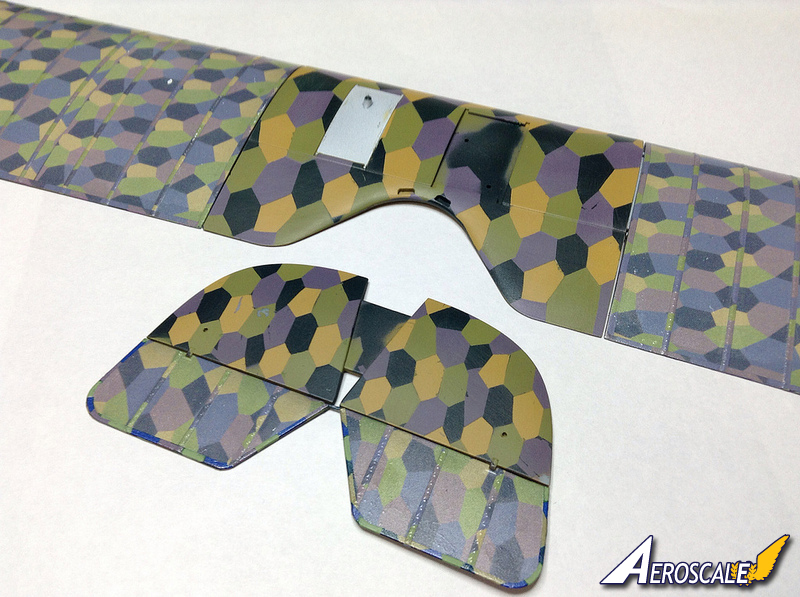
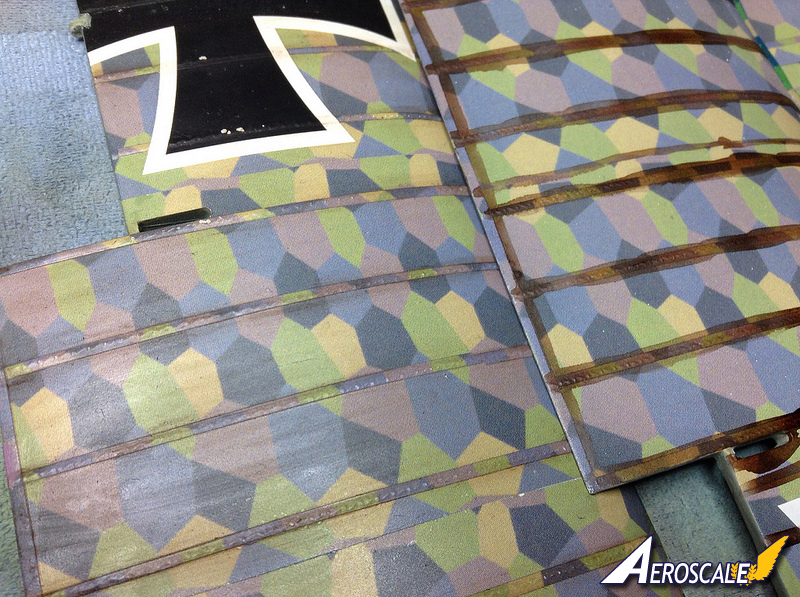
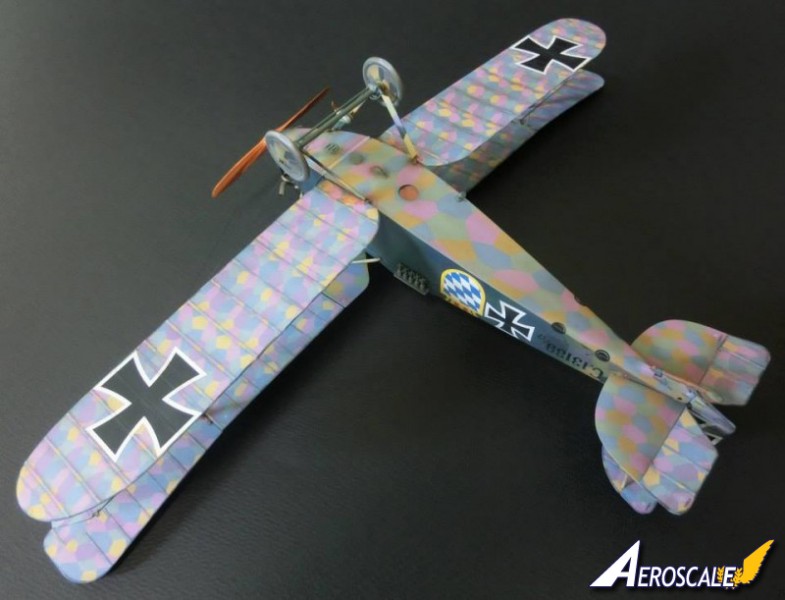
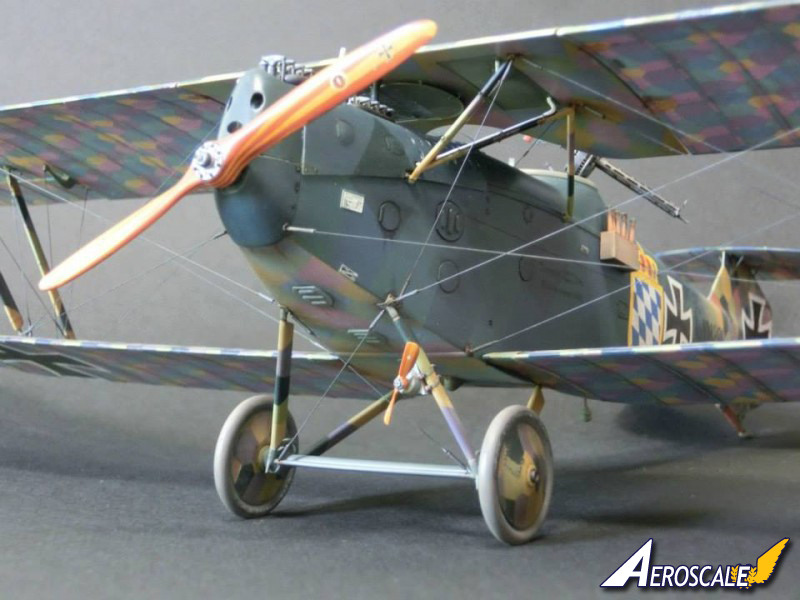
Like many other modelers, I have real misgivings about the vivid hues of the colors in the WNW kit-supplied lozenge decals. In place of these, I used HGW faded five color lozenge upper and lower (clear carrier decal film) and ribtapes (white base decal film). Where possible, I also used this ribtape material for forward and trailing edge tape. I found this was impractical in one area, such as in tightly-cornered spots on wingtips, etc. I cut off the necessary curved tape lengths from the kit decals and applied them to the wing/flying surface edges to use as a guide for direct hand-painting. After applying the national markings decals and shooting the wings and flying surfaces with a Tamiya flat overspray, I used varying mixtures of Dr. Ph. Martins concentrated watercolor Sepia and Black (VERY workable and forgiving medium) as a dirty wash on these areas, paying attention especially to the rib tapes, then sealed this weathering in with another flat overspray.Fuselage and Center Wing Section Lozenge
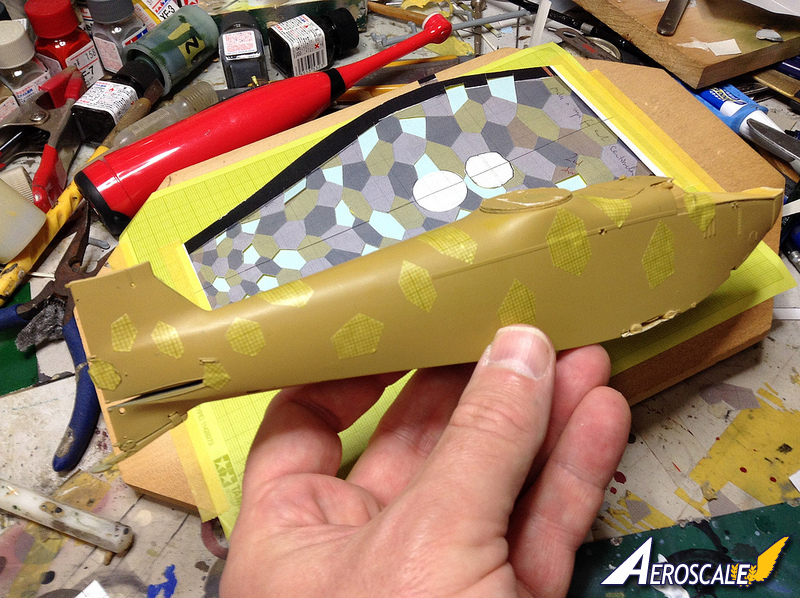
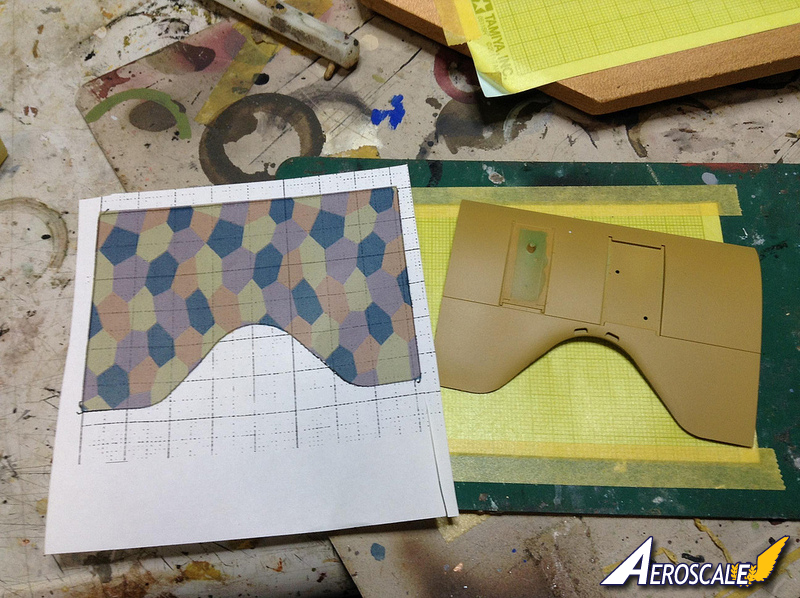
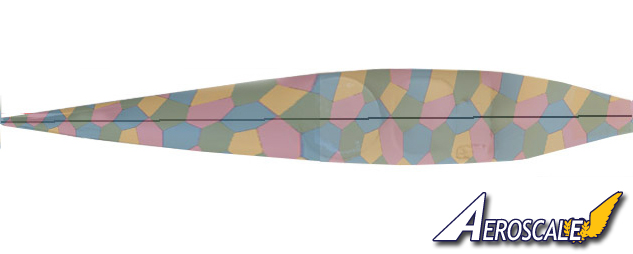
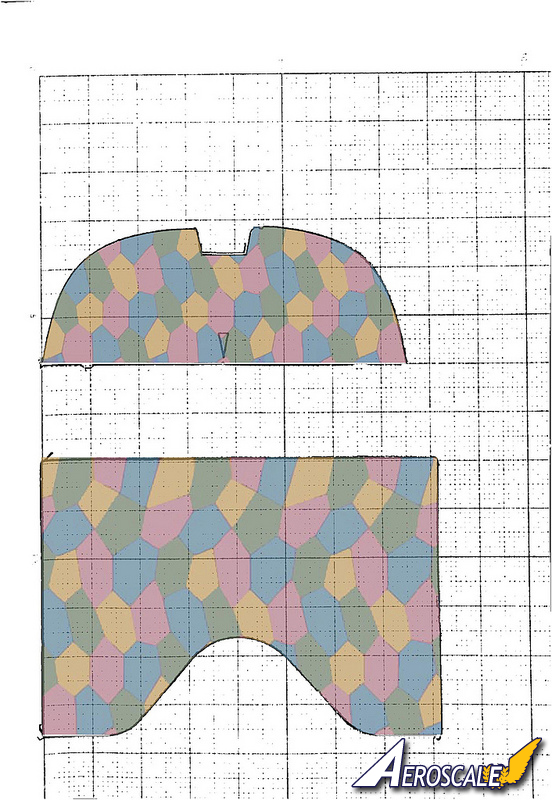
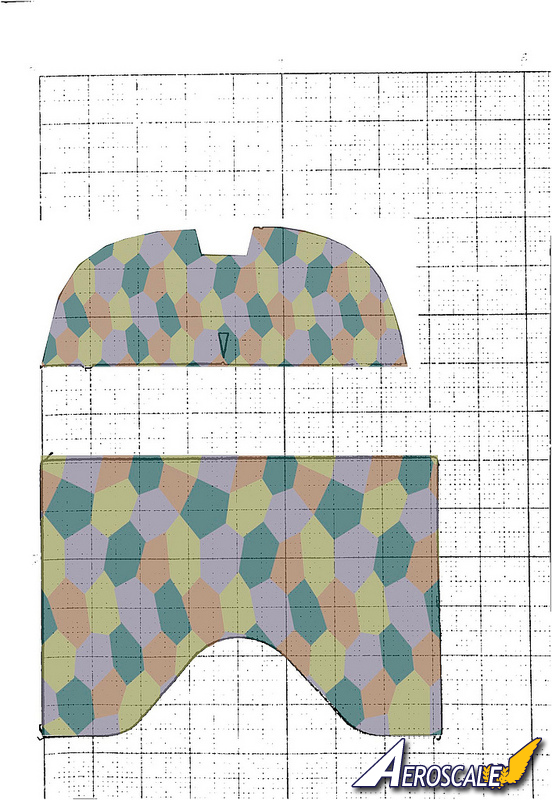
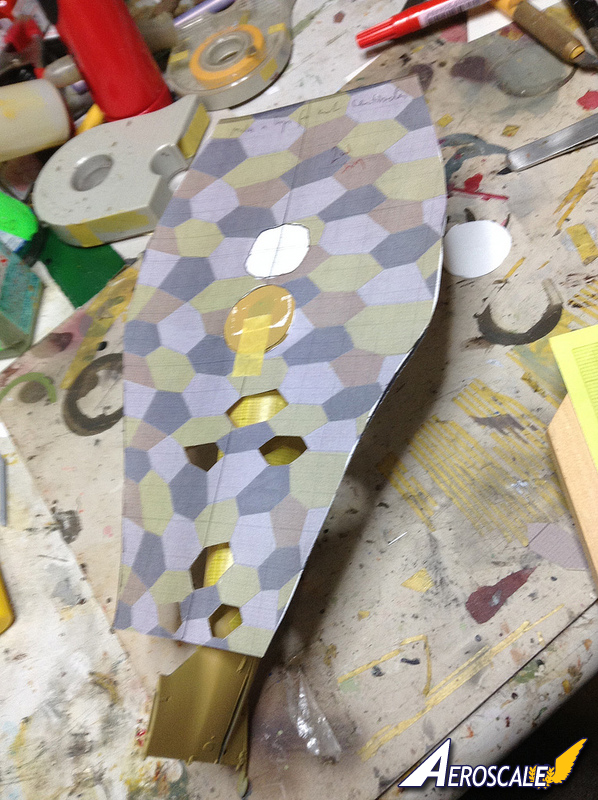
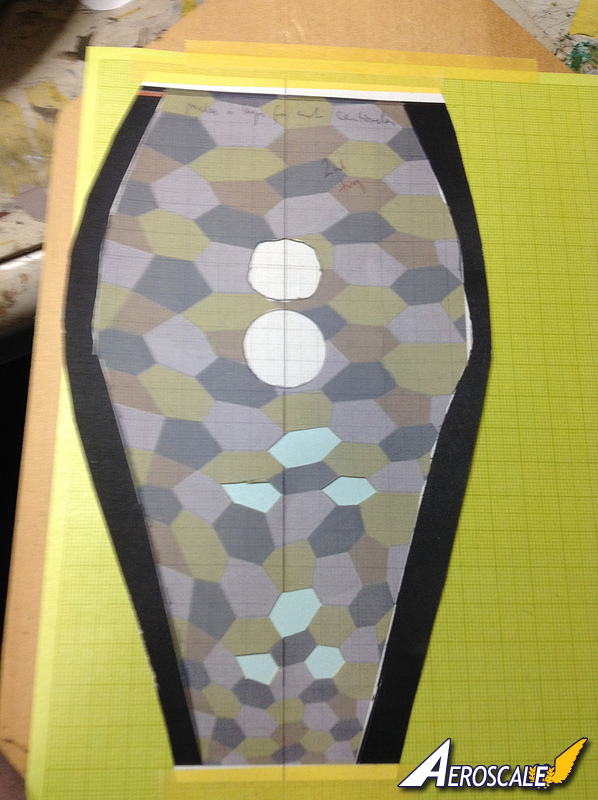
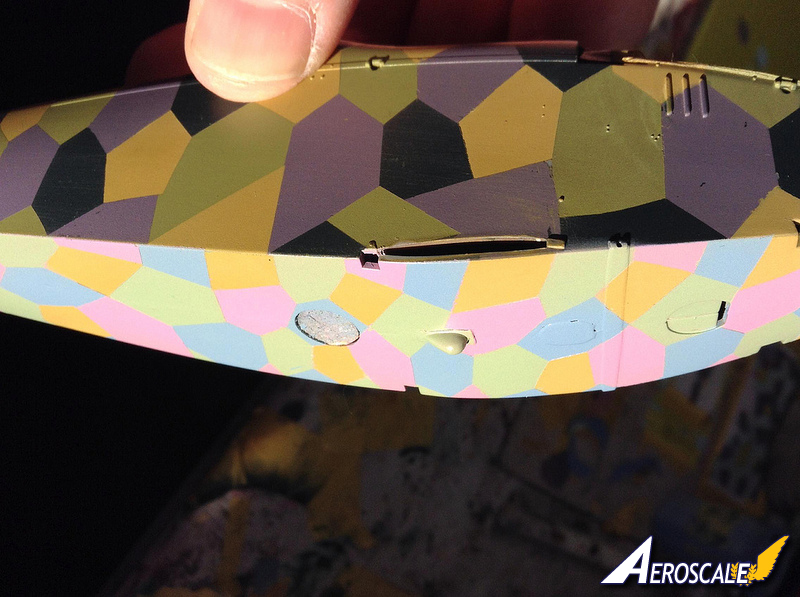
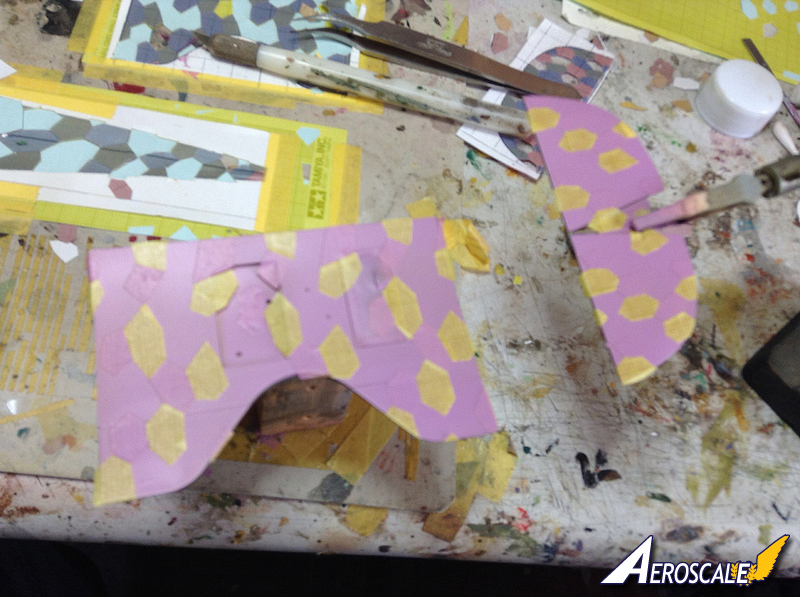
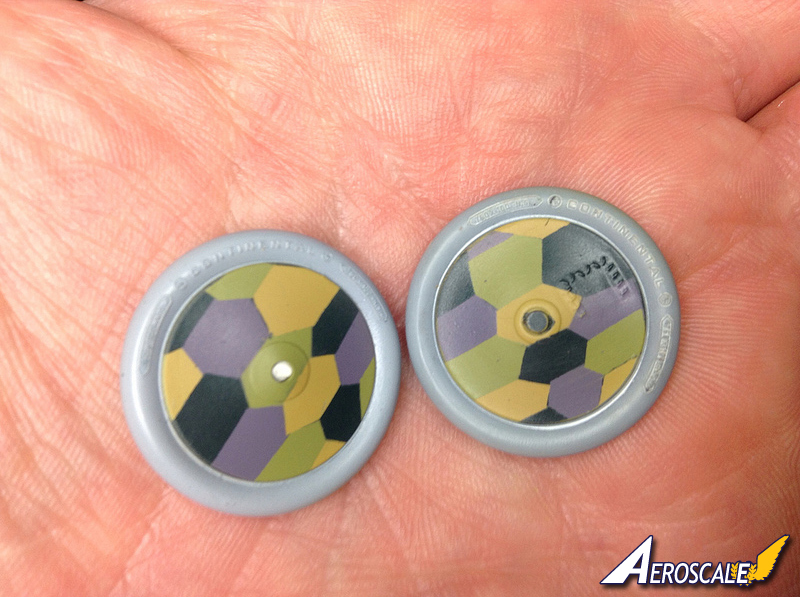
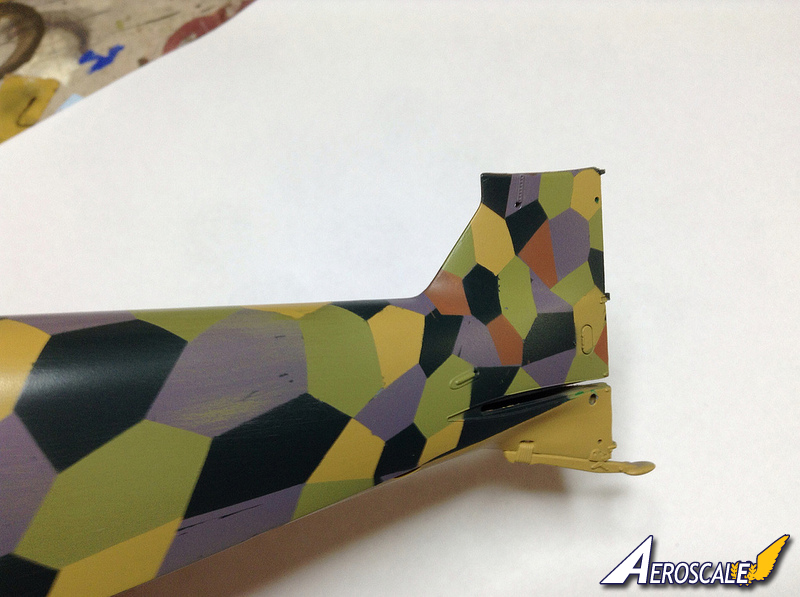
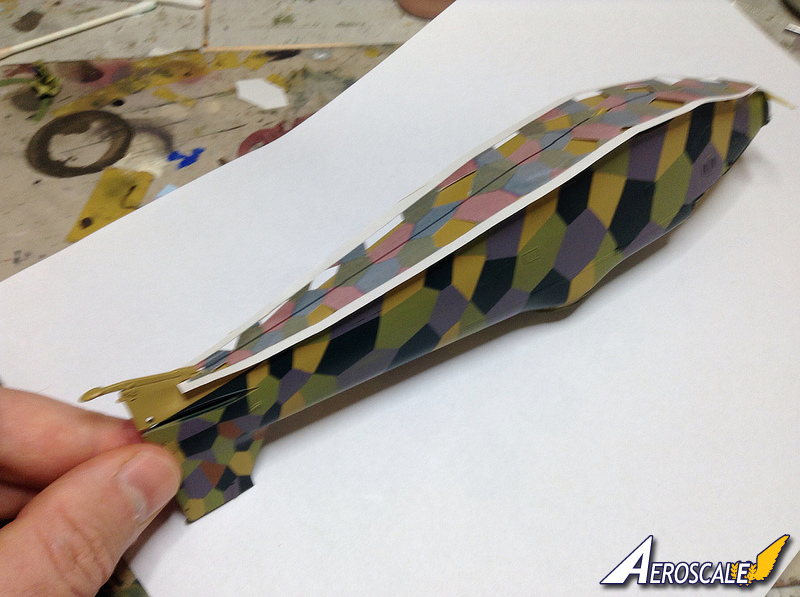
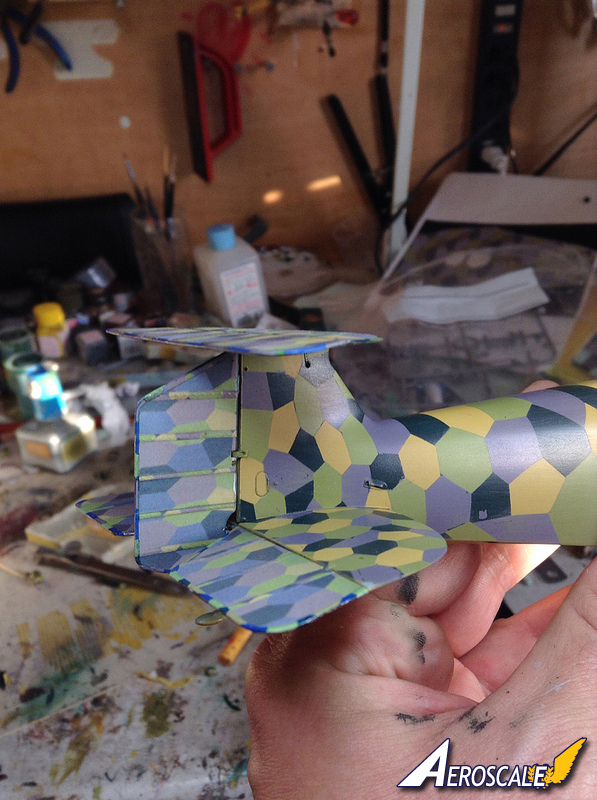
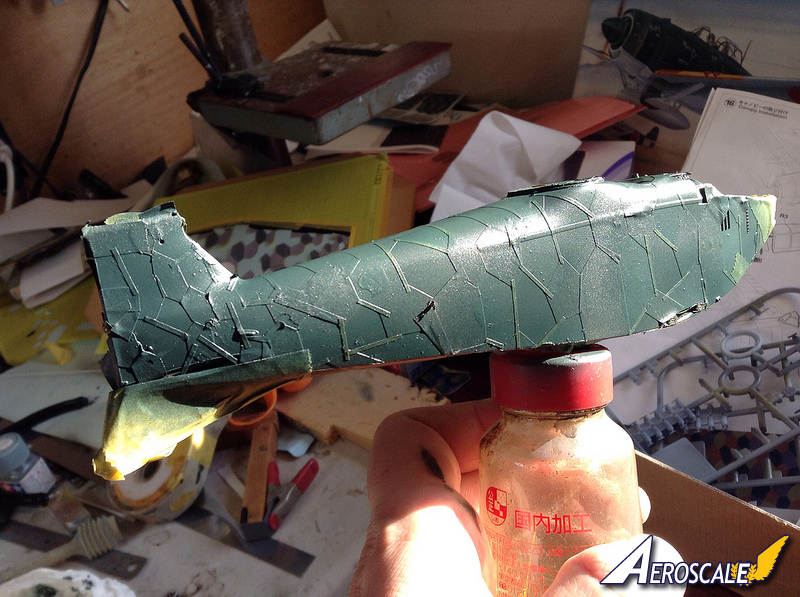
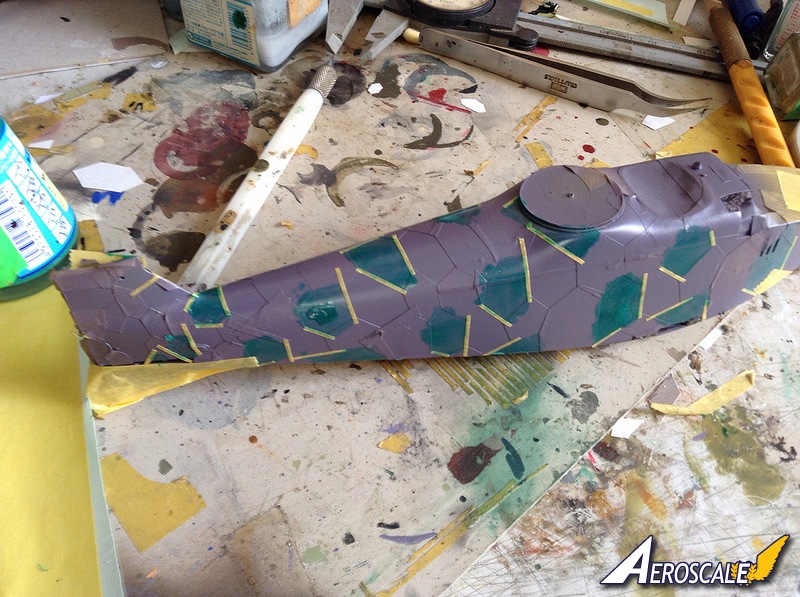
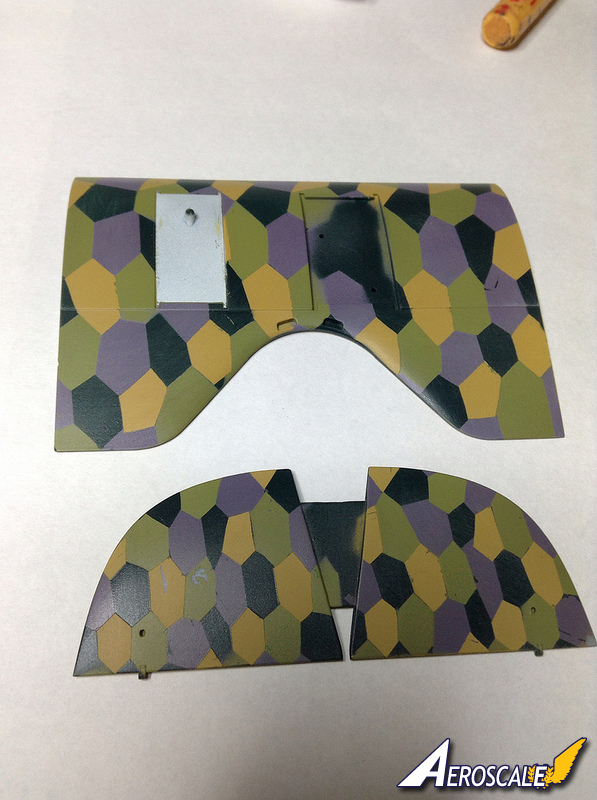
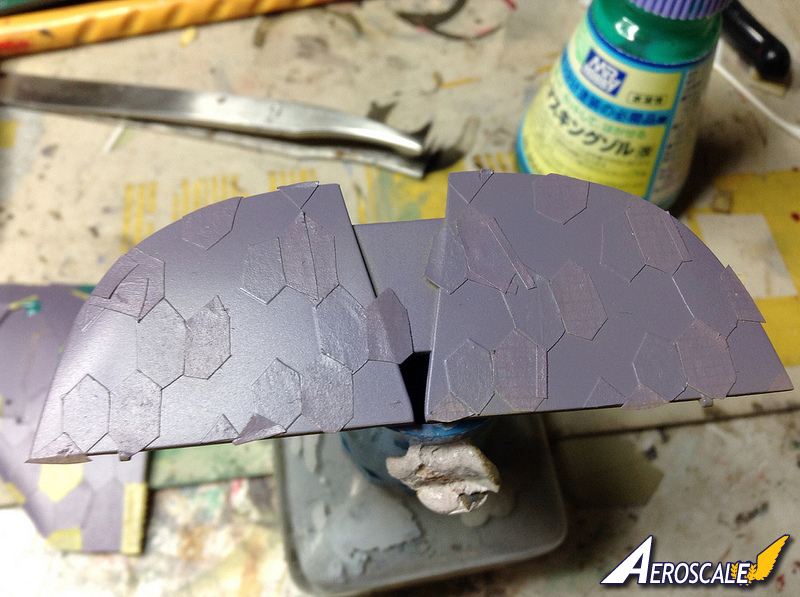
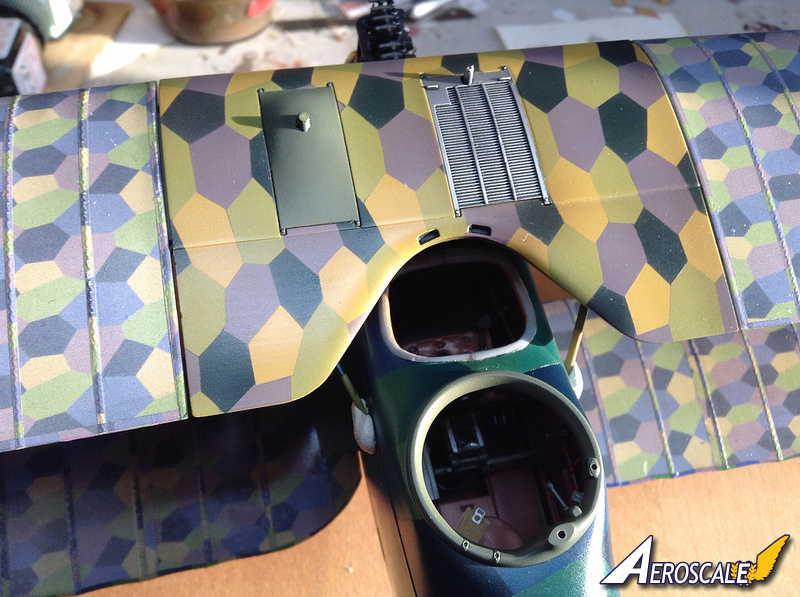
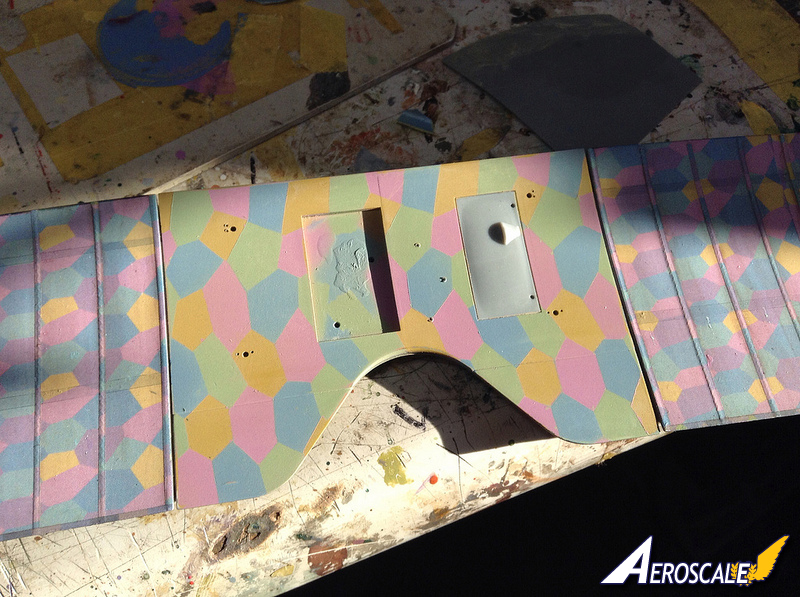
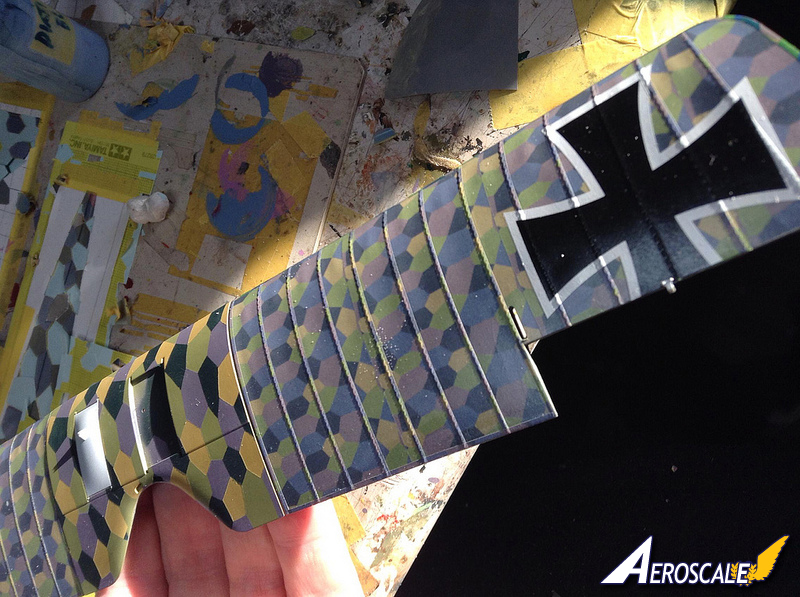
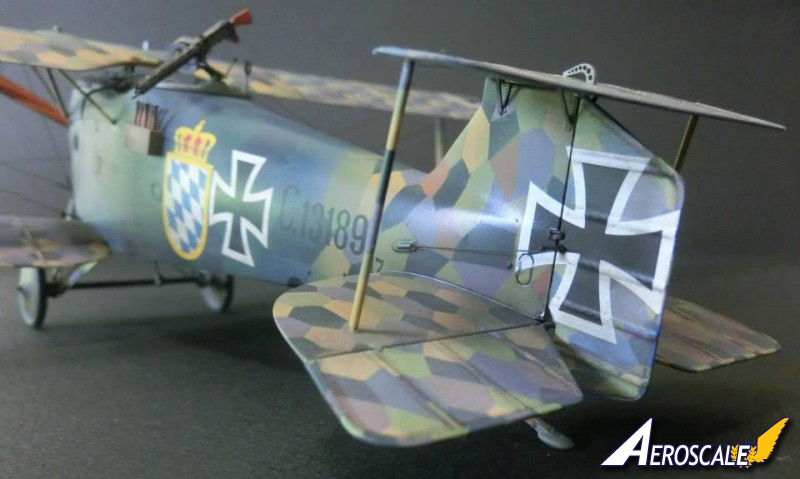
Even though the flying surfaces are covered in five-color lozenge, I decided to use a four-color scheme for the areas that were supposed to have been hand-painted on the actual Hannover fuselages (not sure if this was factory work or done in the field). I used colors that seemed good matches for the overall color impression of the flying surfaces. For upper surfaces, the colors were dark and light green, pale violet, and dark yellow; for undersurfaces, I used dark yellow, pink, powder blue, and a very light minty green. Plotting out the loz scheme on the undersurfaces as well as the flat areas both upper and lower on the center wing section, horizontal stabilizer and the wheel covers was a fairly straightforward process of following the standard German four color lozenge pattern as a guide to cut out masking tape lozenges to paint the various colors. In both cases of upper and lower, I started off with a base of dark yellow, masked off the dark yellow lozenge areas, then sprayed next-lightest color next, masked that off, etc. By the time I got to the last color, however, a gradual overall skewing of what Id drawn on the computer as my masking guide and what was actually happening on the surface of the model meant that I had to use thin strips of masking tape and slather on liquid mask to prep for the last color coat. This was especially true on the comparatively irregular surfaces and tough compound curves of the fuselage upper lozenge pattern. Masking out the fuselage upper lozenge pattern involved a pretty tedious preparation stage. Ronny Bars artwork in the kit instructions as well as actual photo evidence appears to show the size of the pattern lozenges shrinking to stay fairly proportional to the shrinking cross-section and surface area of the fuselage itself as it tapers from fore to aft. The taper becomes very pronounced aft of the rear gunner station and towards the vertical stabilizer in the tail, where it morphs into some pretty complicated compound curves. For the fuselage forward of the vertical stabilizer, I measured the combined height and width of the fuselage sides and top at one centimeter and plotted this out into Photoshop (the resultant shape was distinctly flounder-like!) I then overlaid a half-transparent (so I could see the outline underneath) standard German four-color lozenge pattern on top of this and tweaked it around in Photoshop until I was happy with the taper. I then printed this out, and used it as my mask guide. A similar and much simpler process was used for the fuselage undersurface. Lacking the technical (and probably intellectual!) chops to repeat this process for the vertical stabilizer, I was forced to pretty much eyeball the masking and spraying here. When I got to the fourth and final color painting stage here, I realized just as I had feared that my distribution of colors was flawed in that there were spots where two dark green lozenges were adjacent to each other. This forced me to bring in a fifth color I went with a sort of terra cotta to break these up. As traditional box and instruction art for Hannover kits (Airfix and Eduard come to mind here) often depict this lozenge cheat on the tail area, I dont feel so bad about it. Who knows? It may even be legit. Then, after all of this toil and trouble, I ended up basically hiding almost all of the results under the heavy overspray of dulled semi-transparent Prussian blue the scheme calls for on the fuselage forward of the tail section. Oh, the sacrifices our hobby sometimes calls upon us to make.Foul-ups, Bleeps and Blunders
When I glued the fuse halves together, the tail area join was skewed by a fraction of a millimeter. However, with WNW's legendary tolerances, this totally threw off the angle of the slot where the single-piece horizontal stabilizer is supposed to go in. This forced me to gouge the slot out on one side and eyeball it into the correct angle. This, in turn, threw off the exacting tolerances of the stabilizer struts (again, resulting in me snapping one of them trying to get them to fit, forcing me to make brass replacements). Another SNAFU for me was the radiator pipe that comes from the upper wing and goes all the way to the bottom of the engine sump. I snapped it off at the sump connection point when trying to align the pipe into its slot in the upper wing center section. Of course, the fuse was already joined by this point, so accessing this area was going to be a fairly nightmarish prospect. Eventually, I hit upon a solution in which I reamed out two of the fuse bottom access port areas (luckily, the hatches were not glued in yet), shone a bright light into one, and used the other to tweezer and glue the pipe end back into place. I really could have used a nurse mopping my brow during that "operation". Third major muff-up was snapping off one of the wing strut connector points (these are thin, delicate, and complicatedly angled, so I just KNEW that was going to happen). I reattached it with a tiny length of .3mm piano wire. This greatly strengthened the connector, and it gave me some flexibility to work with while I tried to get the damn thing into its slot in the upper wing.Conclusion
The Hannover Cl.II was my fourth go at a Wingnut Wings kit, it definitely has to go down in my experience not only as my most enjoyable WNW build so far, but also as one of the most enjoyable builds, period, of a modeling career that stretches back (with dry spells here and there) to the LBJ Administration.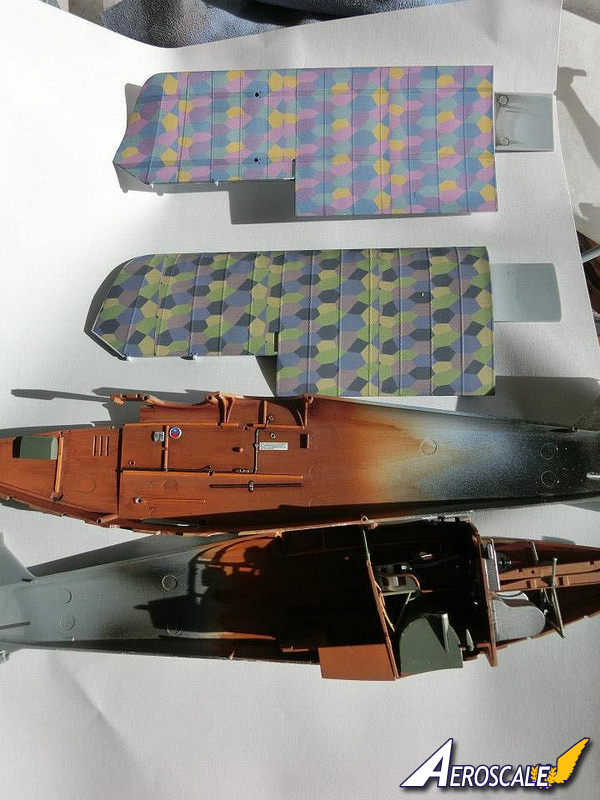


About the Author


Comments

Thanks for comments, all. JPTRR, the header photo is my first experiment with greenscreening on Photoshop.
JAN 20, 2014 - 02:08 AM
Shot the model against the most honkingly radioactive lime green colored construction paper I could find at the stationery store. Then I Googled, literally, "open field" and this pic of a nice English moor (Marston, IIRC) came up as a hit in Wikipedia Commons.
JAN 20, 2014 - 02:12 AM
Very nice build and feature - it's a complex subject and I think you've represented it beautifully.
I'm starting a WnW Hannover CL.II myself and the info you are providing for the build ahead is very welcome and I'm studying it before I go any further... I'm building an early No.2 - scheme "A".
Only comments / suggestions I have is on the Photoshop work:
- when separating the model from the solid color background, turn off feathering / anti-alias feature on the tool you are using (magic wand, lasso etc). This will get rid of the halo effect - you want the pixels sharp on/off along your cut edge.
- Photoshop has tendency to lighten files it opens (so do a lot of view tools) by about 10%. Test your files by dropping them directly into a browser of your choice if your goal is internet publishing - this should give you a better idea of end result.
JAN 20, 2014 - 06:54 AM

Simply magnificent work, this is one superb bit of modelling. Well done Sir!!
Cheers,
Lance
JAN 20, 2014 - 07:22 AM

Stunning work! Its a major job to paint at this scale, I don't know how I'm going to do it on my little Airfix Hannover. Your build has given me a lot of inspiration to get that out. I may look for a simpler colour scheme though.
JAN 20, 2014 - 10:22 AM
Bucky, what an outstanding build. I still can't believe you actually made your own five-color lozenges. It just amazes me. Thanks for sharing with us.
Joel
JAN 21, 2014 - 06:37 AM


Bucky,
A well deserved feature! Your attention to detail and level of work is better than ever!
RAGIII
JAN 23, 2014 - 12:16 PM
Copyright ©2021 by Bucky Sheftall. Images also by copyright holder unless otherwise noted. The views and opinions expressed herein are solely the views and opinions of the authors and/or contributors to this Web site and do not necessarily represent the views and/or opinions of AeroScale, KitMaker Network, or Silver Star Enterrpises. Images also by copyright holder unless otherwise noted. Opinions expressed are those of the author(s) and not necessarily those of AeroScale. All rights reserved. Originally published on: 2014-01-19 00:00:00. Unique Reads: 4578

WEB HOSTING BY


Copyright ©2021 AeroScale and Kitmaker Network, a subsidiary of Silver Star Enterprises
All Rights Reserved. Please read our Conditions of Use and Privacy Policy.
All Rights Reserved. Please read our Conditions of Use and Privacy Policy.