

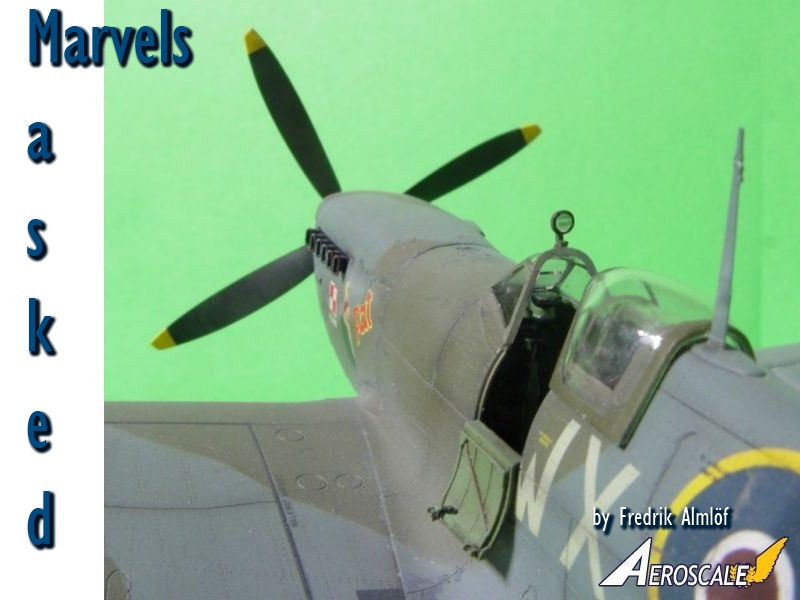
1⁄48Masked Marvels
6
Comments
History
With the appearance of the German Focke-Wulf 190 in September 1941, the RAF found itself in a situation where they had to cancel operations during the winter of 1941 and spring of 1942.In response to this crisis the British pushed for new developments of the Spitfire, but the ones already underway, Mk.VII and VIII using a new and more powerful Merlin powerplant, were still some time away and so the stop-gap solution became that of adding the Merlin 61 to the existing and readily available airframes of the Spitfire Mk.V. With some modifications to the airframe, the first prototype Mk.IX was ready to fly in late March 1942 and squadron service could begin already in July the same year; the RAF now possessed a fighter that could match the Fw 190.
Constructed as a stop-gap, the Mk.IX proved its worth and became the second most produced version of the Spitfire and it continued in service with the RAF until the very end of the war and with some other air forces it stayed in service for quite some time after 1945.
The kit(s)
Eduard released their first Spitfire Mk.IX kit (Eduard 8281, Mk.IX late) in April 2013. It was duly reviewed in a number of magazines and on a number of internet sites, AeroScale included, and the verdict was very positive. Brett Green of Hyperscale wrote in his review that;The curse has been lifted. This is the 1/48 scale Spitfire Mk.IX that many of us have been hoping for. In my opinion, Eduard has delivered easily the best late mark Merlin Spitfire available in 1/48 scale. The kit is fundamentally accurate, well detailed, with state-of-the-art surface textures and lots of useful options.
While Jean-Luc Formery in his review here at AeroScale, wrote that This review may appear a little overly praiseful but I stand by it. Searching for flaws would be nitpicking. Eduard's new Spitfire Mk.IX kit is really excellent and clearly the best in 1/48 scale now.
And I agree with them, its a beautiful model kit and it builds like a dream, even if there are a few things you need to think about when building. Well come to that later. Inside the box you will find several sprues of grey plastic, each inside its own plastic bag, as well a one clear sprue and a set of paint masks for the cockpit frames and a fret of pre-coloured etch.
Since April 2013 Eduard has released a few more versions of the Spitfire; an early Mk.IXc, as well as a Mk.IXe. Of course there has also been the Royal Class boxing, although that one contained the same variants as mentioned above. I havent built any of those, but I expect them to be equally good.
Building
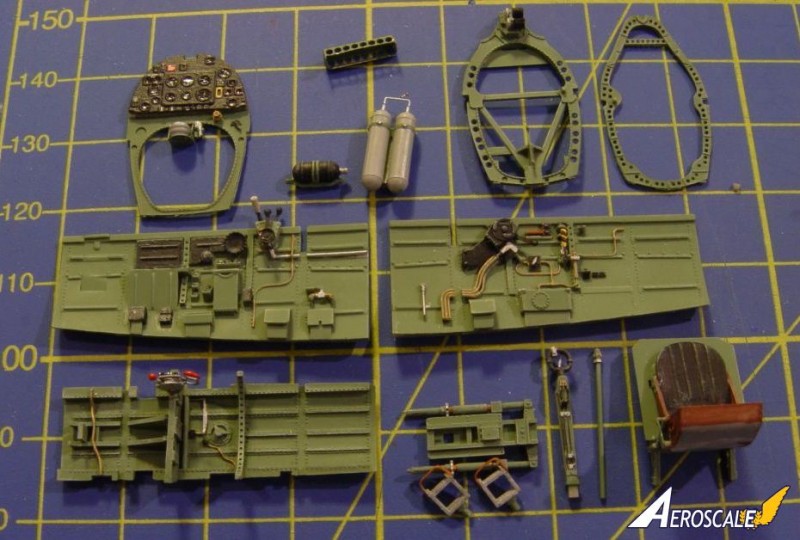
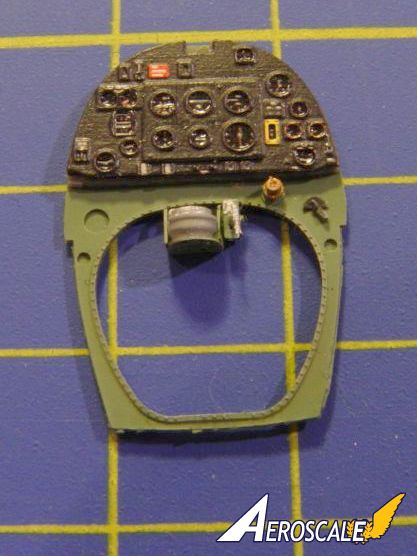
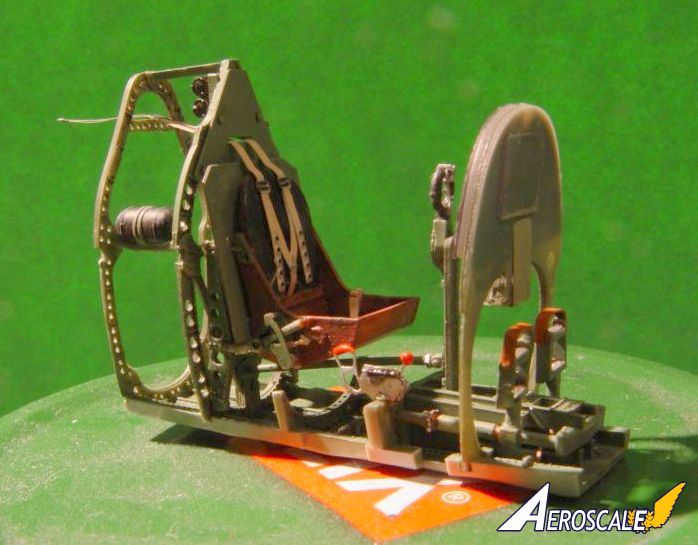
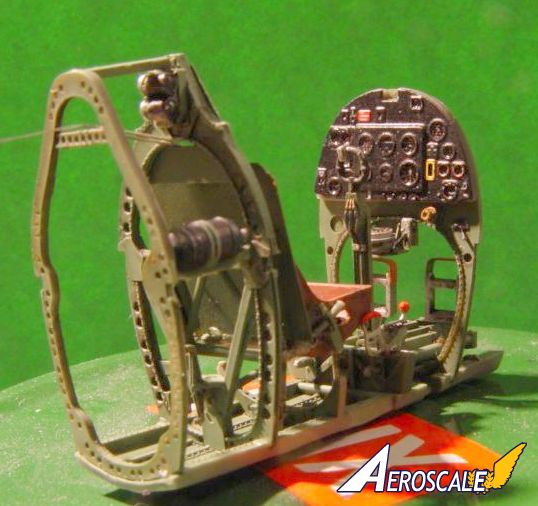
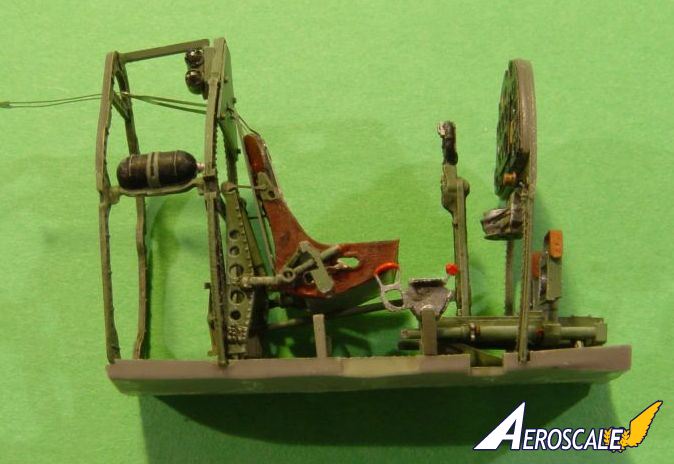
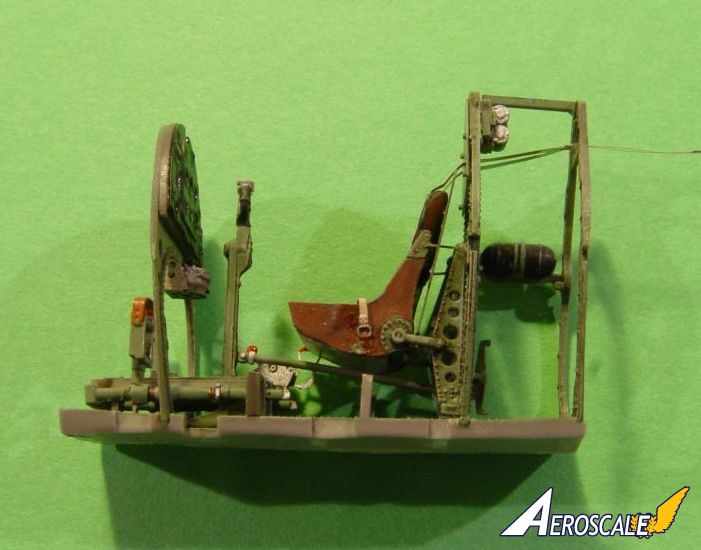
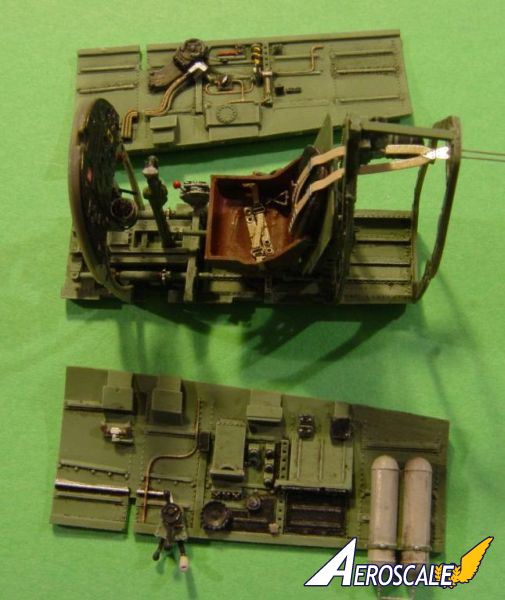
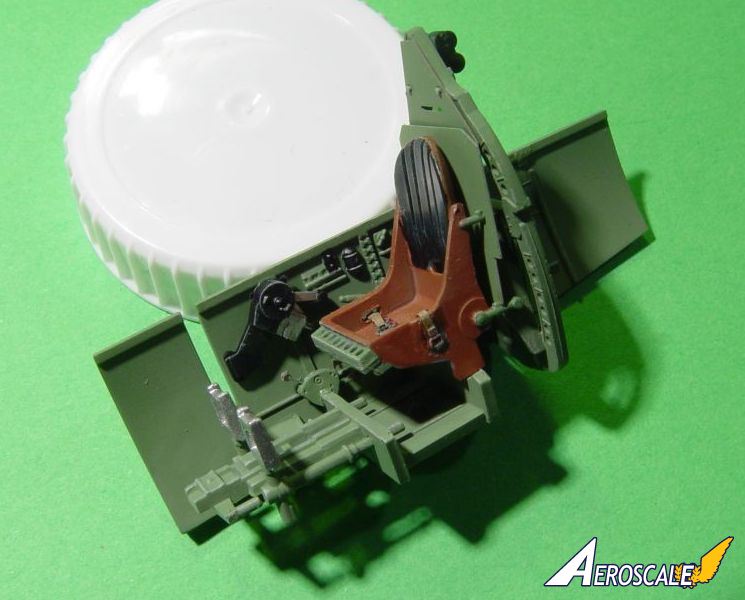
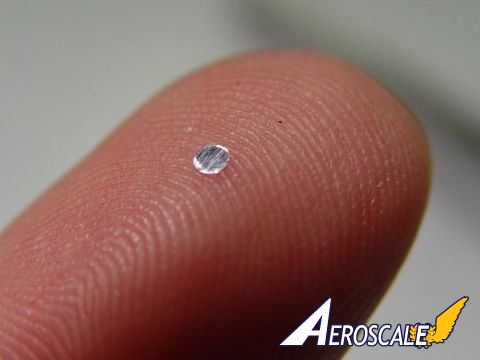
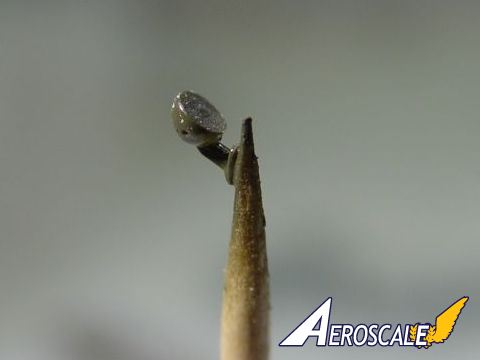
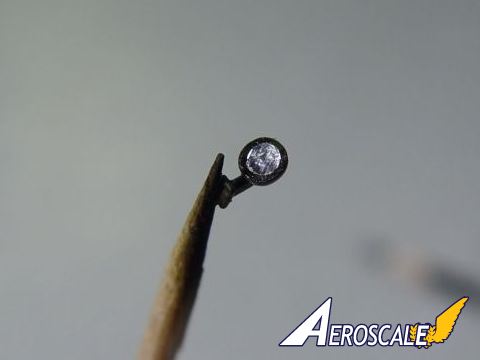
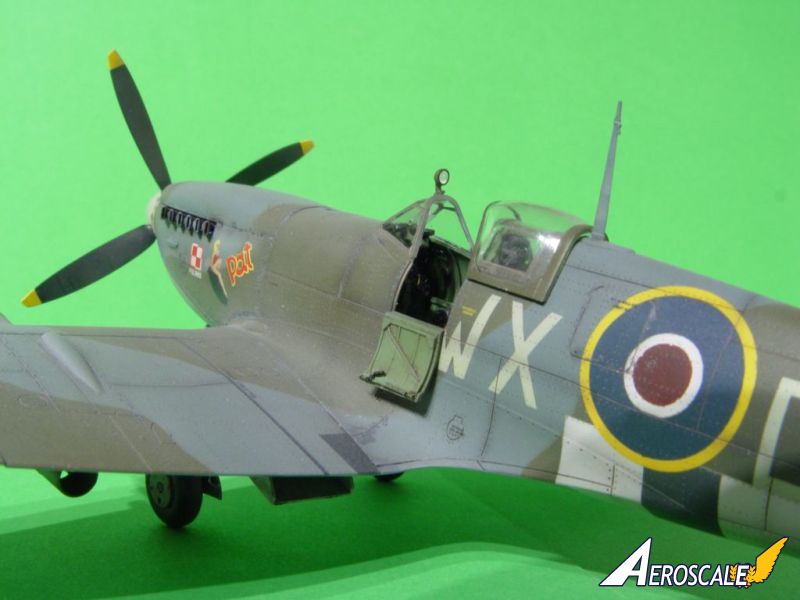
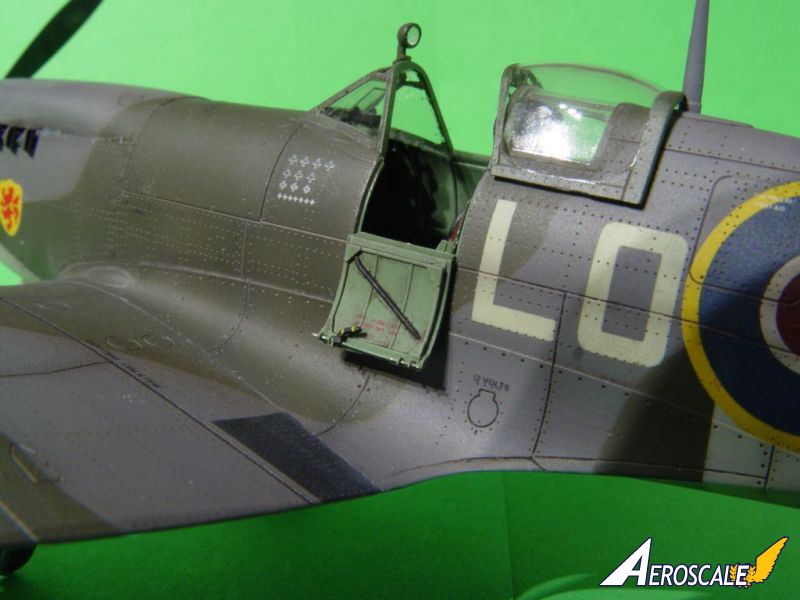
When I started posting images of this build, it was because I was going to use Mal Mayfields paint masks for the first time. Because of this there arent that many pictures from the building process, but I will point out a few of the areas where those of you who havent built your kit yet should take extra care. Generally, and I think this is true for many Eduard kits, the fit is excellent, but you have to be meticulous in test-fitting and aligning your pieces of plastic before you apply glue. If you do this, you should have an easy build process and end up with a beautiful finished model.As with most aircraft models, building the model started with the construction of the cockpit. The in-box supplied parts make up a very good cockpit, but if you want to there is always Eduards Brassin cockpit and it is one step up compared to the inbox-variant. The first two pictures show the inbox cockpit and the following pictures show the Brassin variant.
There is, as far as I can remember, nothing tricky in the construction of the cockpit. The only thing I would recommend is to spray the pre-painted etched parts with some varnish of your choice, so that the sheen of these parts matches the rest of your cockpit. I myself prefer a matt varnish to match my otherwise matt colouring in the cockpit.
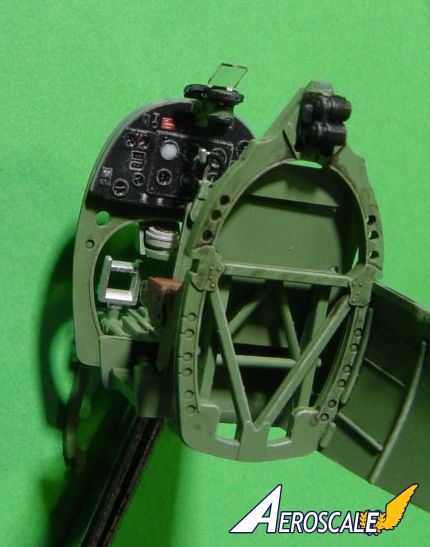
The Brassin cockpit had a strange problem to it. The sidewalls turned out to be slightly longer than the floor-section. This caused a slight fit problem when the cockpit was to be installed into the fuselage. After some minor surgery, this minor issue was overcome and everything was neatly tucked away inside the fuselage halves.
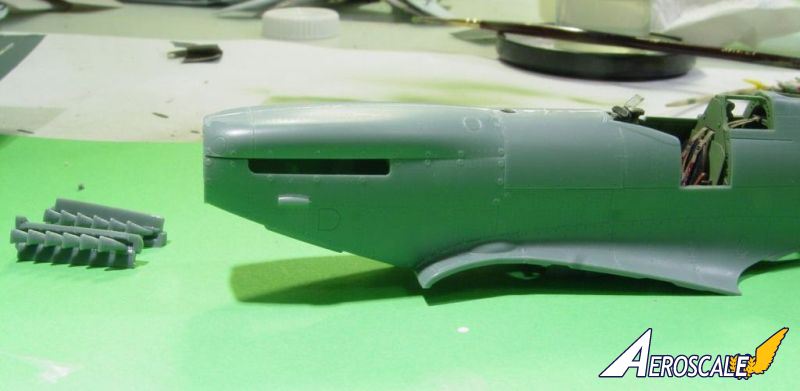
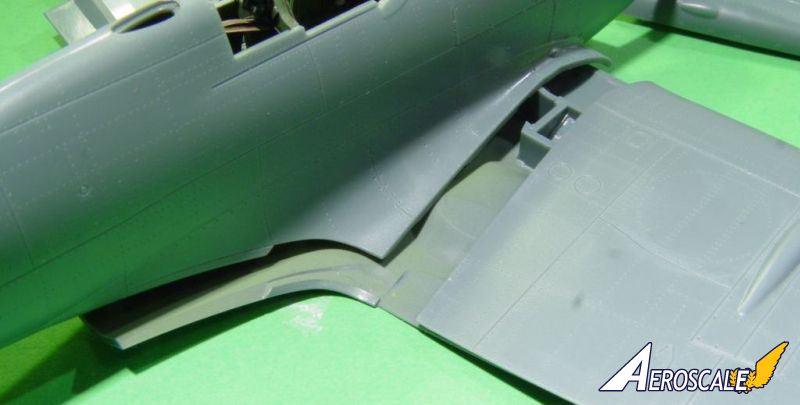
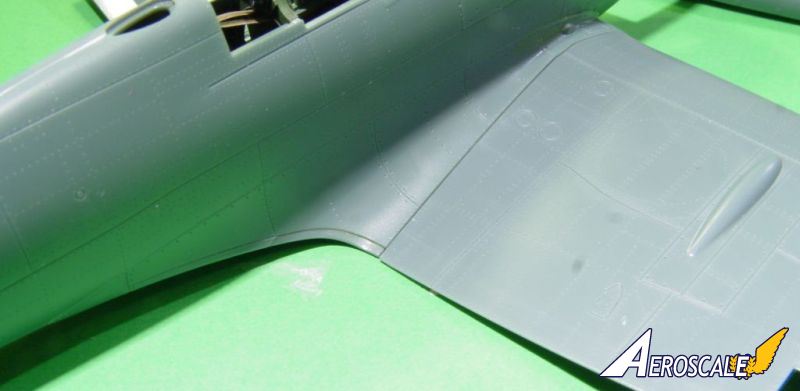
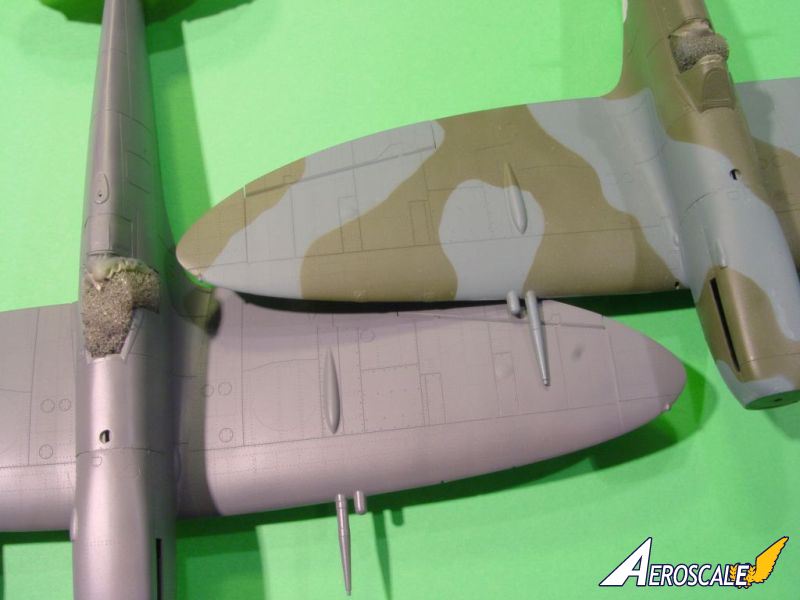
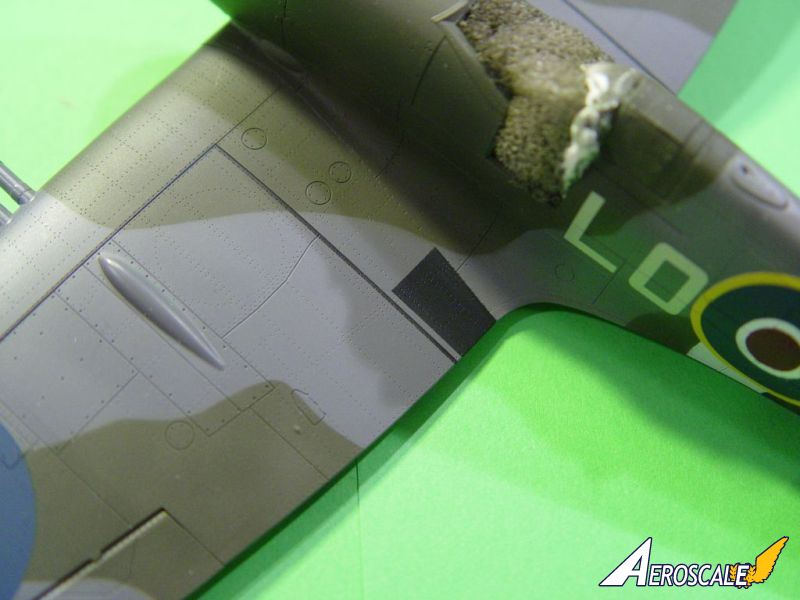
When you continue with the build, there are three steps where it pays off to be particularly careful. The first one is when you fit the fuselage to the wing. In both of my builds there was a small fit problem where the fuselage should meet the inner trailing edge of the wing. You can see this area in a few of the pictures, although nothing has been glued down yet. I think Eduard has come up with a very clever idea here; moving the actual joint forward from the very end of the wing. This should ensure a very good fit and it looks like it in my pictures, which is why I took them and what I wanted to show. However, when I was trying to fit the fuselage to the wing and had two sides to deal with at once, there was some pinching in this area, i.e. the fuselage seemed to be slightly wider than was allowed by the wing, and consequently this area had to be clamped and that in turn caused some damage that had to be dealt with.
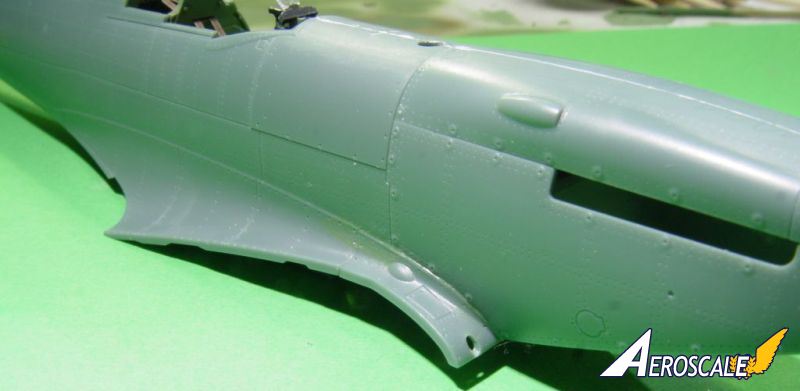
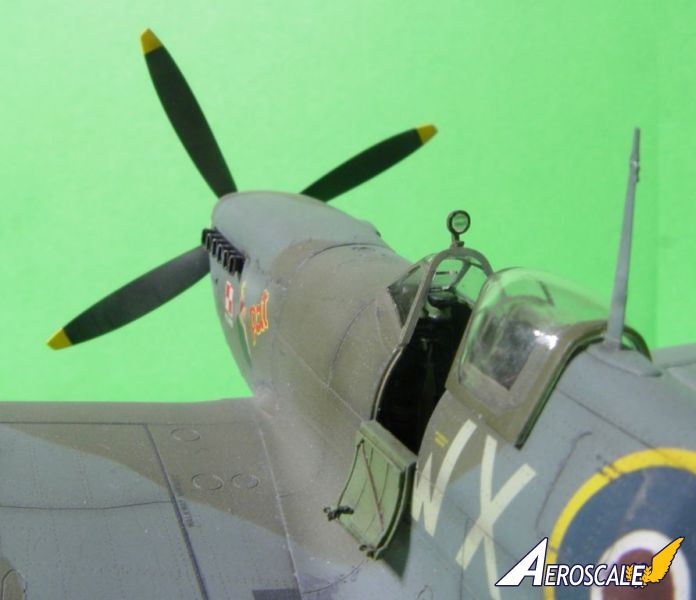
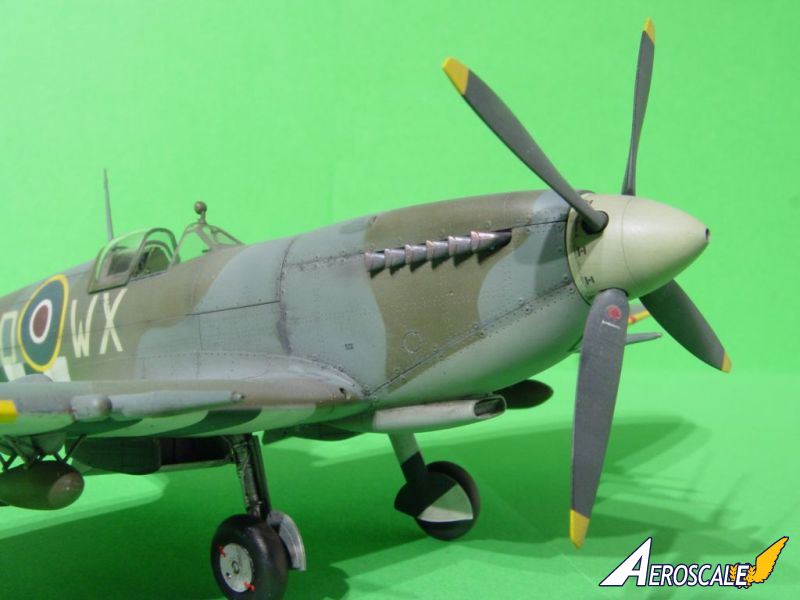
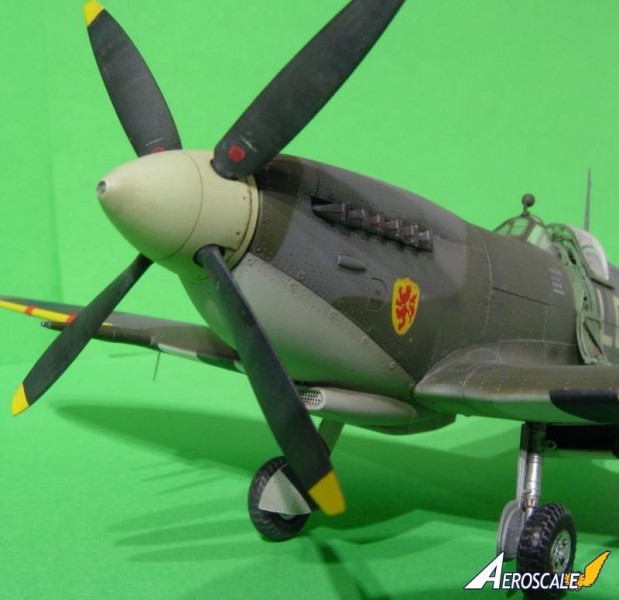
The second area is when you assemble the two parts that make up the top cover for the engine. The fact that it is made up of two parts create a joint which you would want to eliminate later, as there should be one here. With a very careful alignment and some equally careful application of liquid glue, you shouldnt have to do too much sanding in this area.
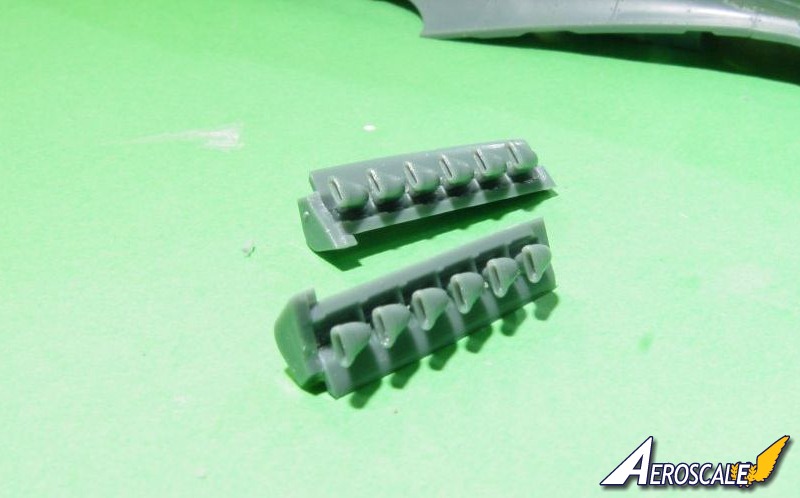
The third and final area is the construction of the under-wing radiators. In Eduards version, each radiator casing is made up of three parts; two side-walls and one bottom. This, Im sure, is good for the look of the radiator, but it was rather tricky to mate the three pieces together. I didnt really get the nice flush fit I wanted and had to sand the corners which led to loss of detail and more work. When fitting the radiators to the underside of the wing I also had to sand away quite a lot to make them fit the way I wanted them to fit.
Oh, a last thing about the build. You can leave the exhausts off until everything else has been painted, assuming that you dont glue the top-cowling to the fuselage. This fact makes the painting a lot easier.
Painting
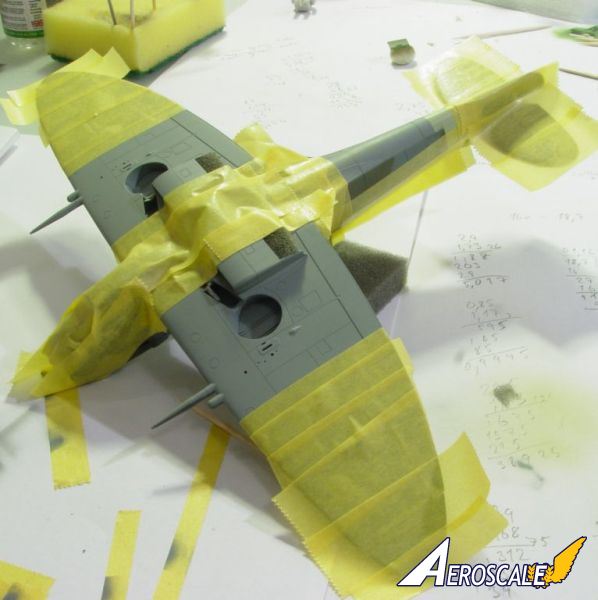
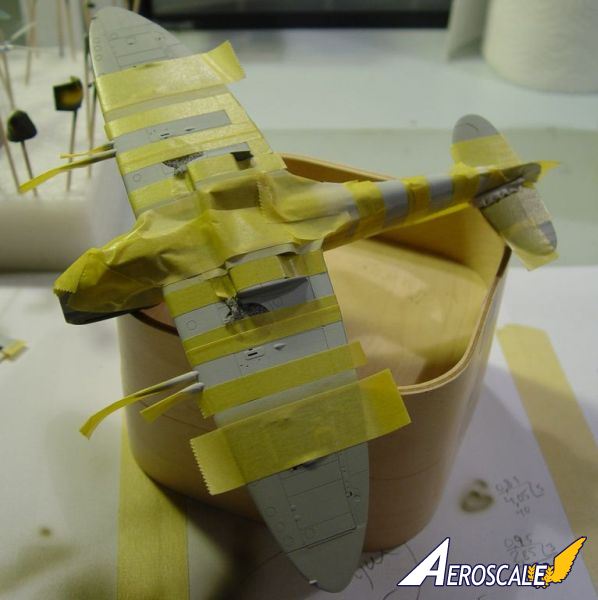
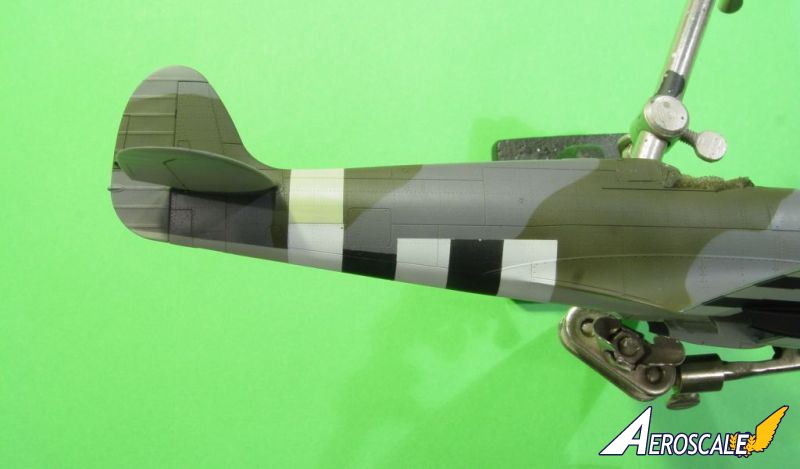
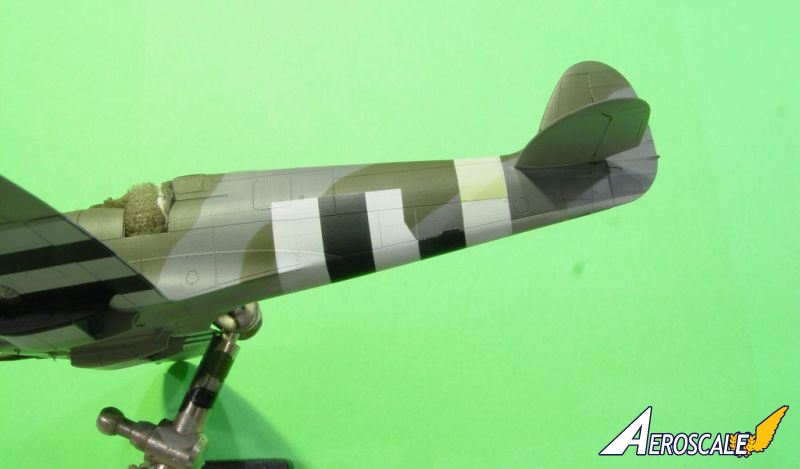
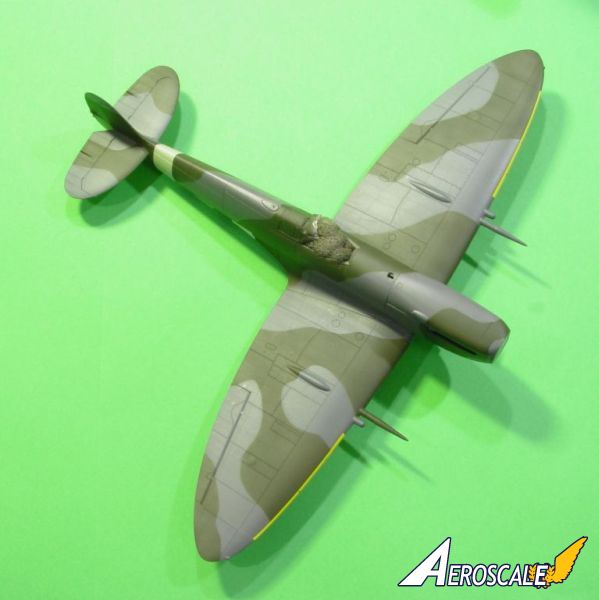
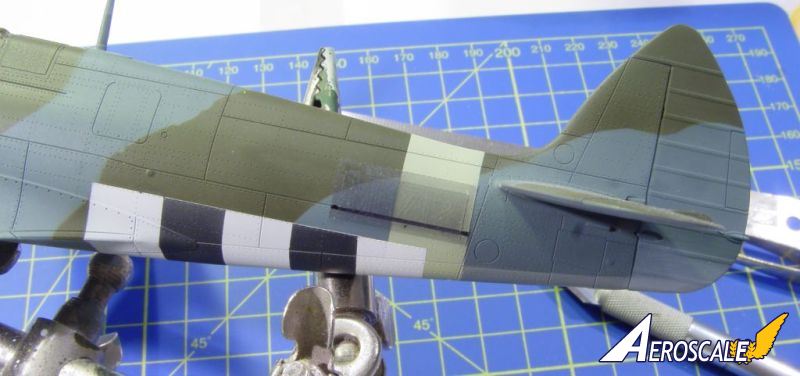
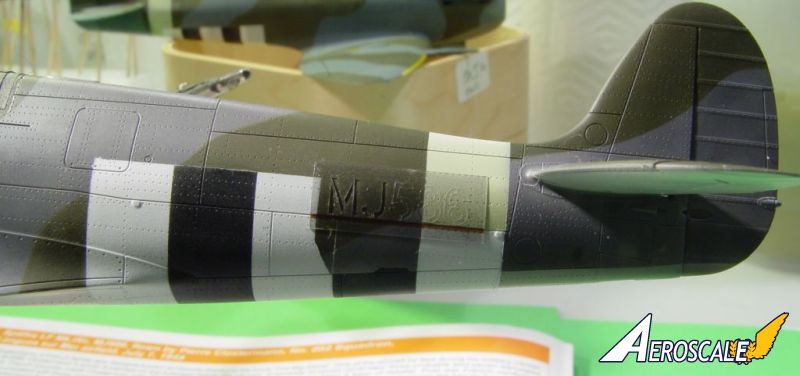
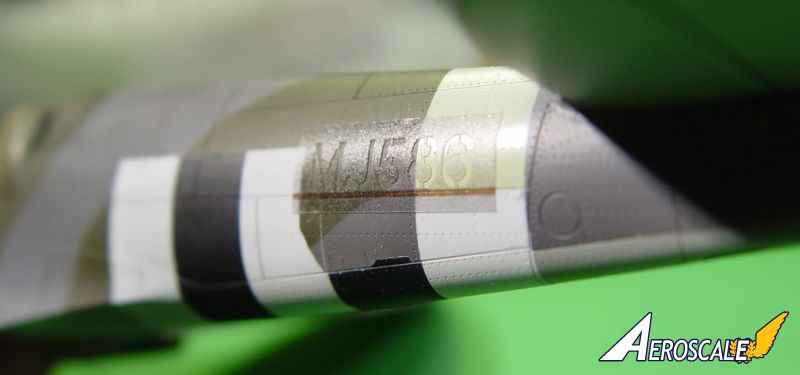
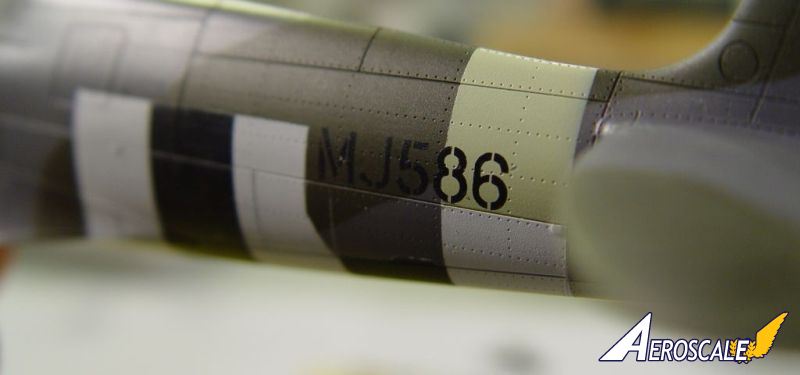
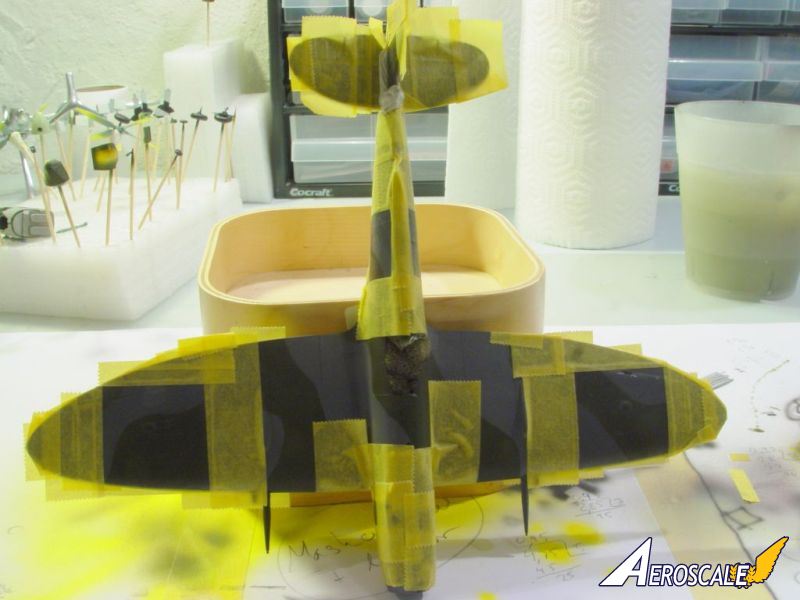
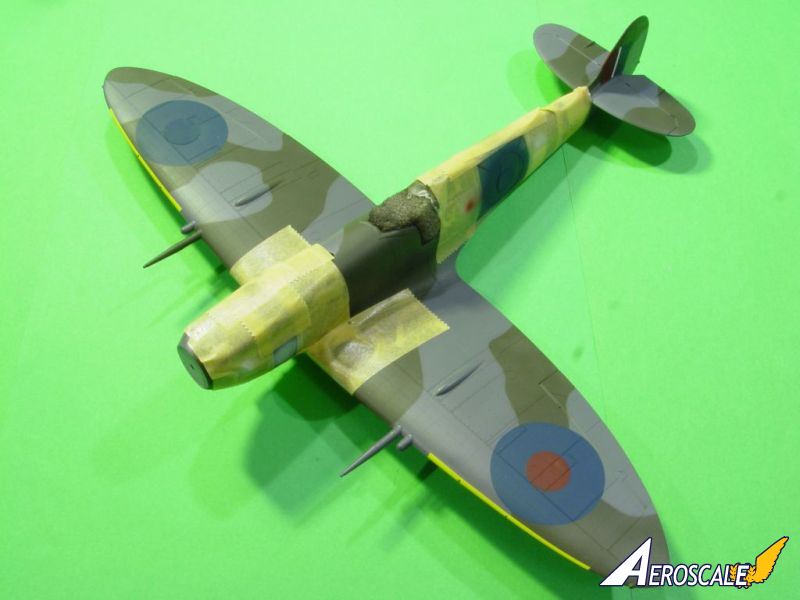
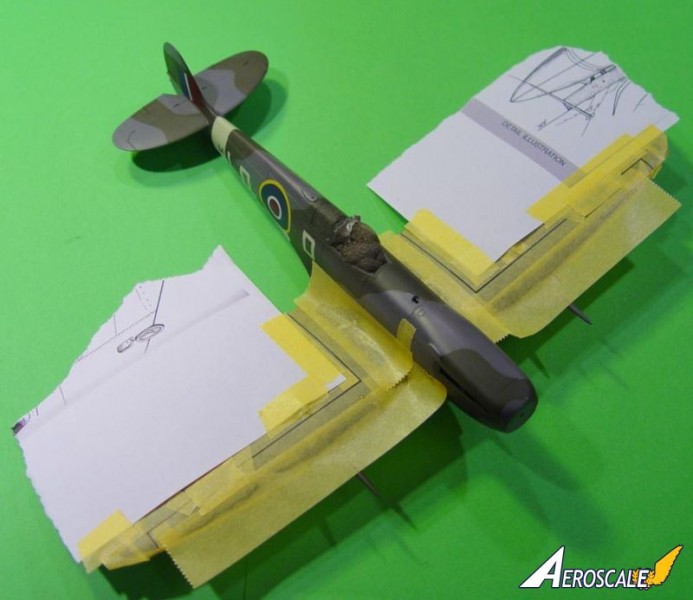
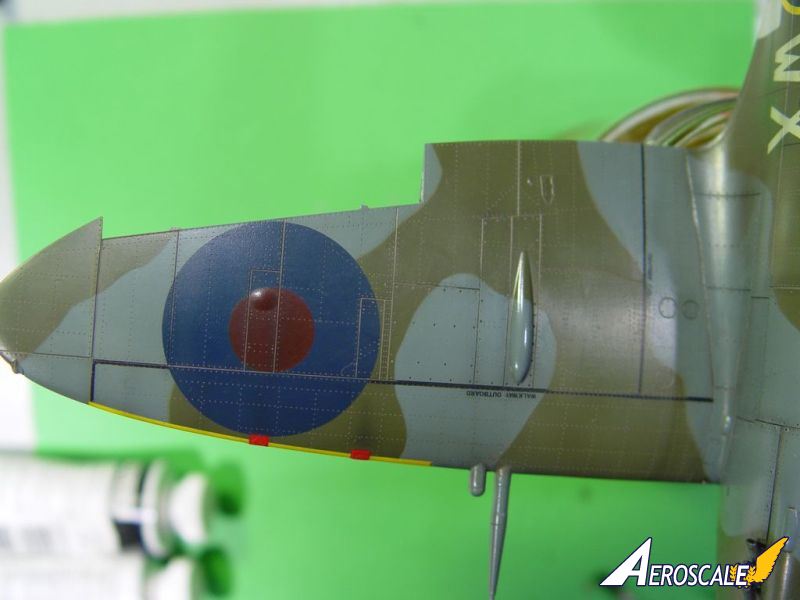
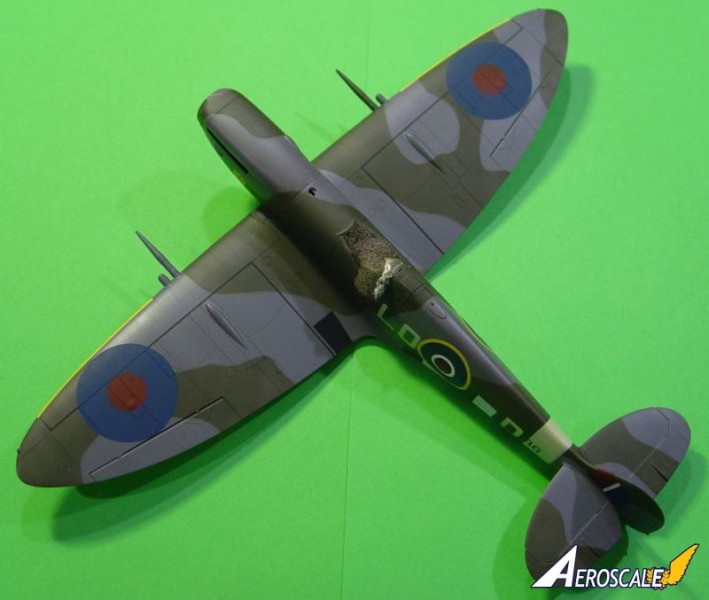
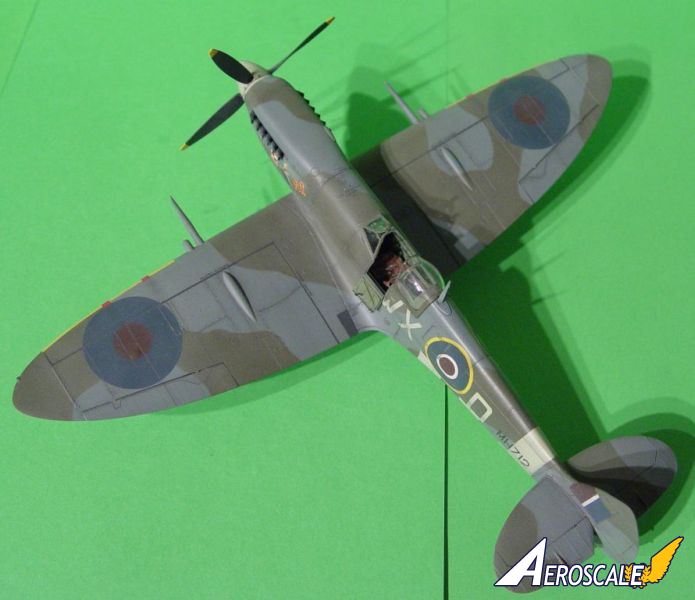
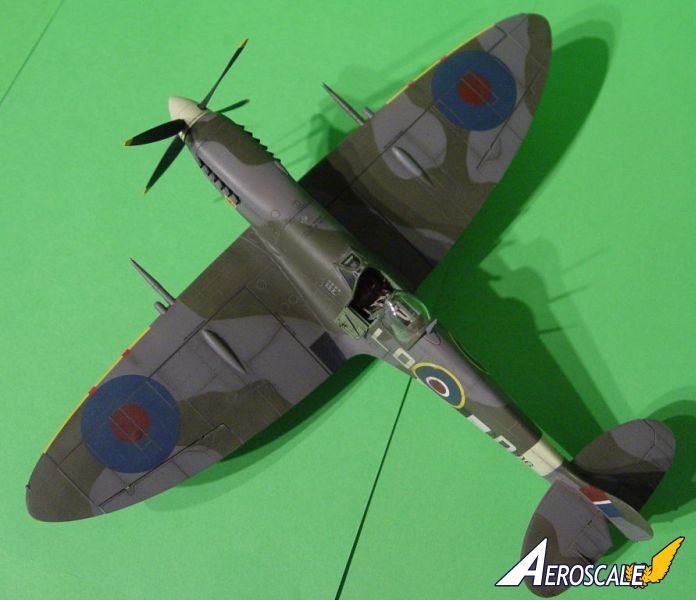
One main goal for these builds was to try out Mal Mayfields Miracle Masks and the main part of this section will deal with them.First out was painting the camouflage and I started out painting the kit grey. Then I scaled up and copied the profile as given by Eduard. This was then cut out and used as masks in anticipation of the green colour. After having laid down the basic camouflage colours, you would proceed as you would if you were going to use normal decals. You have to paint all the other things that the decals would go on top of. In this case that meant that I had to paint the fuselage band and the invasions stripes before I could go on and use the masks. I also made simple masks so that I could paint the yellow leading edges.
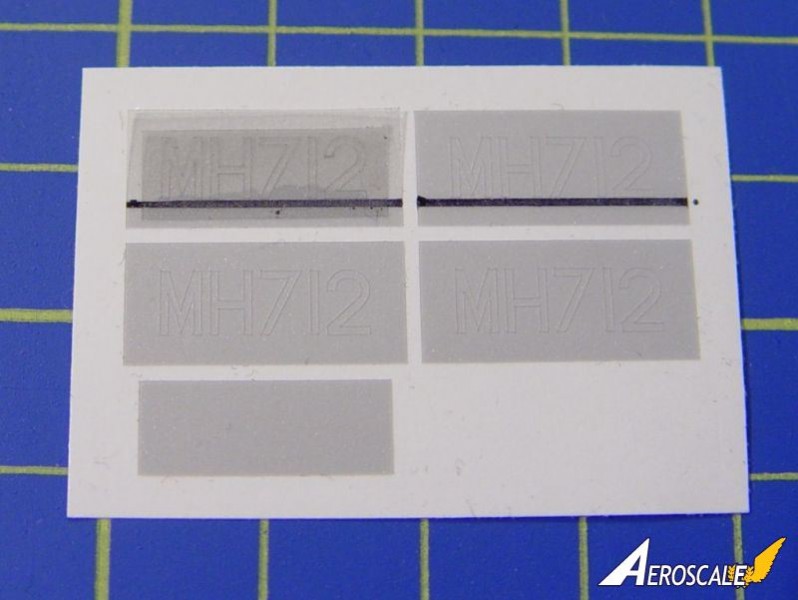
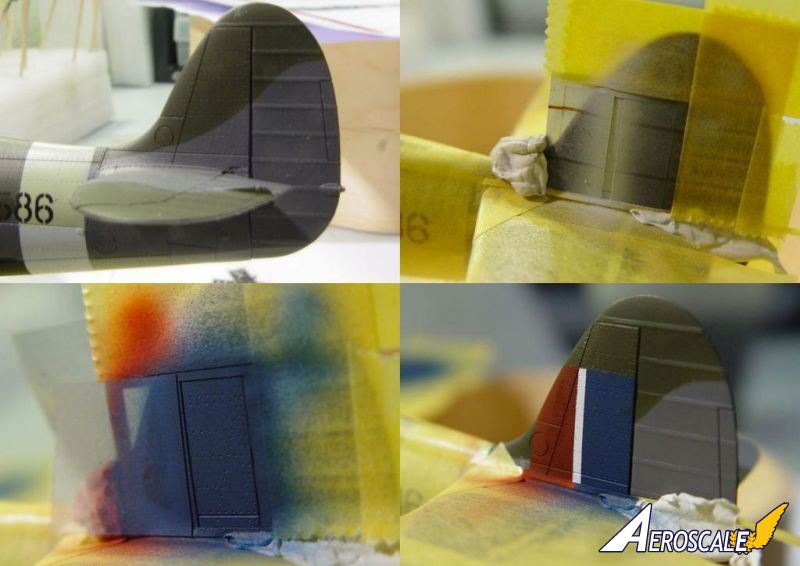
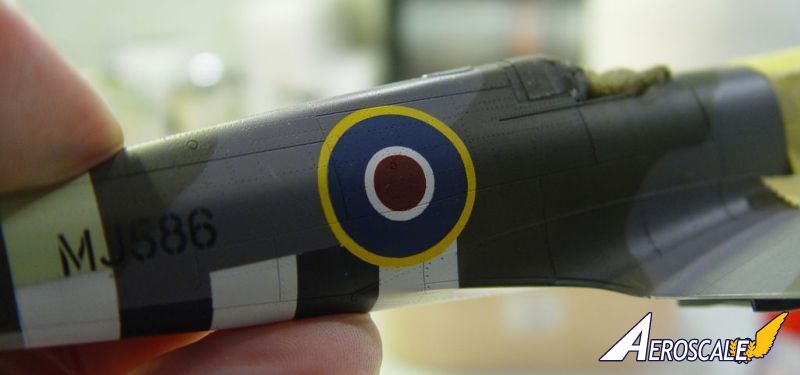
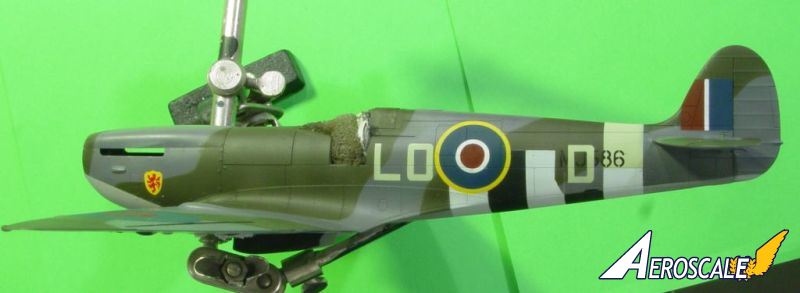
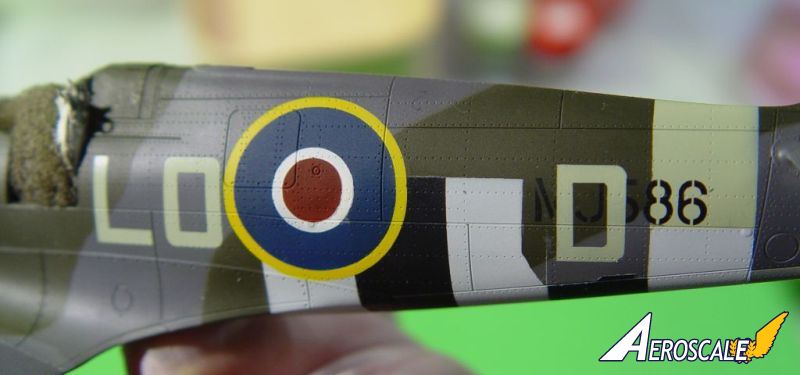
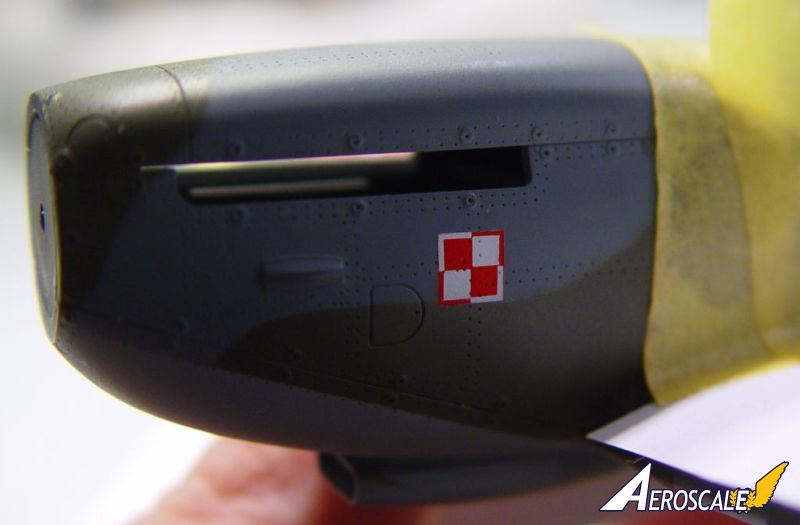
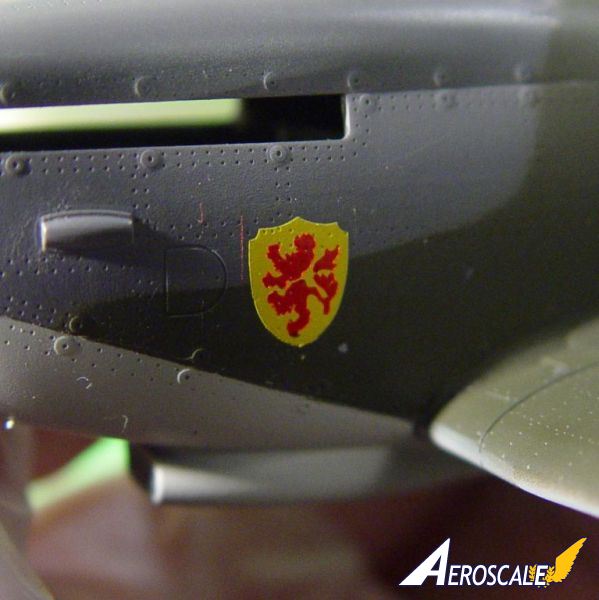
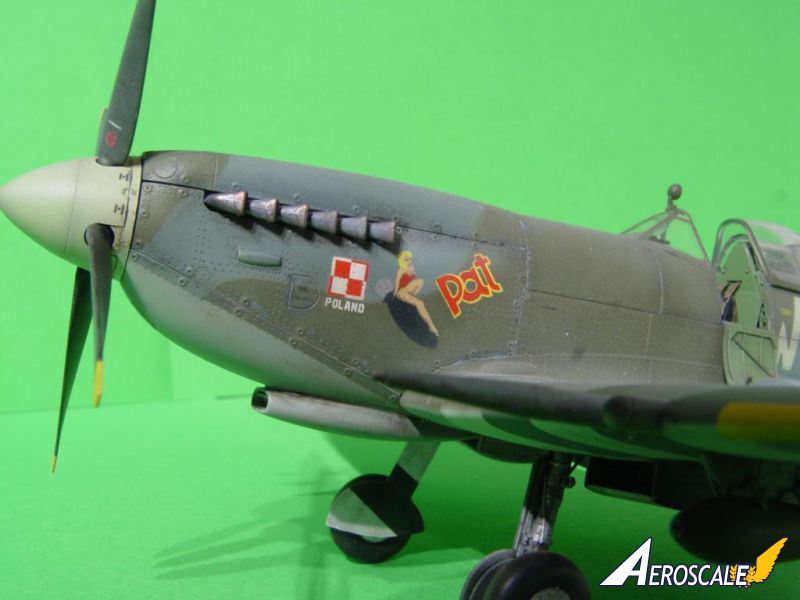
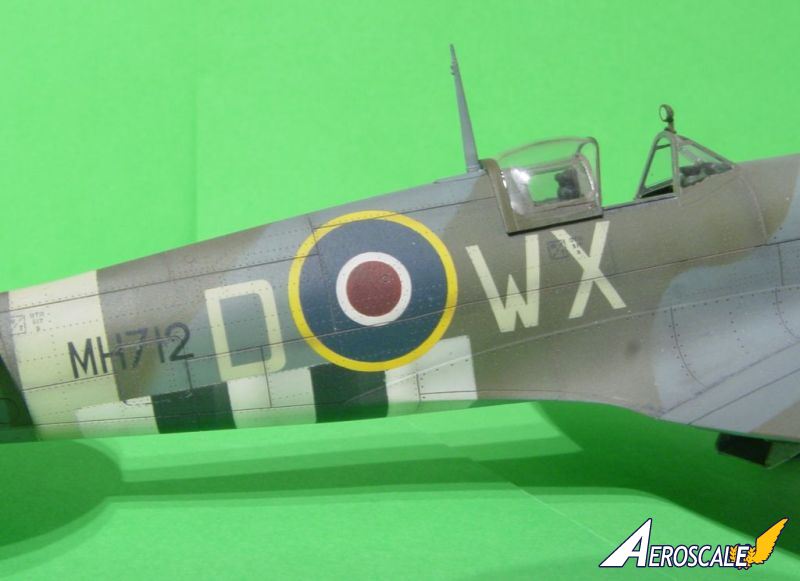
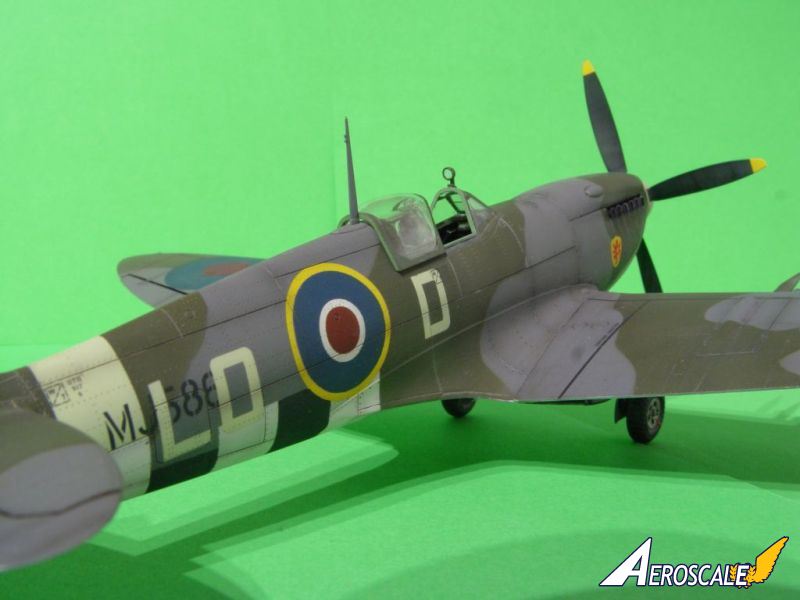
The Miracle Masks I bought from Mal were two promotion sets he created when Eduard released this particular kit and the two sets are replacements for two of the decal options given by Eduard; one set is for Spitfire MH712 which has a Polish chequerboard and a lovely girl called Pat on its nose and one set is of Pierre Clostermanns Spitfire MJ586 which has a coat of arms on its nose. In both sets you get multiple sets of each element so that you, in case of unexpected problems, can go at it again. Having said that; I didnt use many of the extra sets and the reason was simply that the masks are really easy to use if you take it nice and easy.
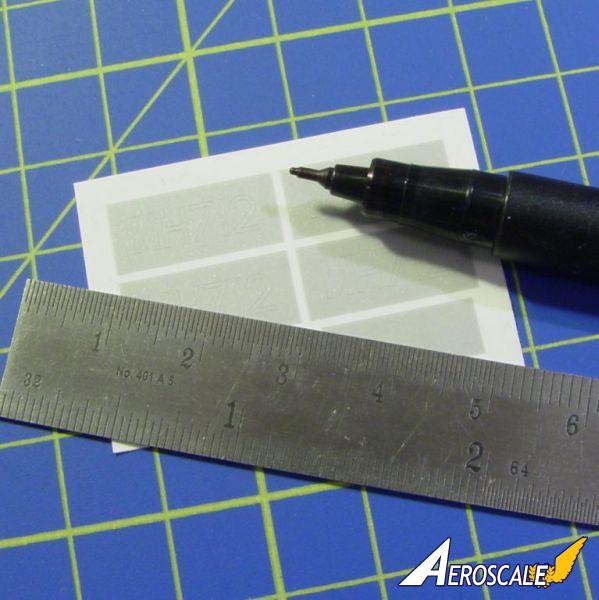
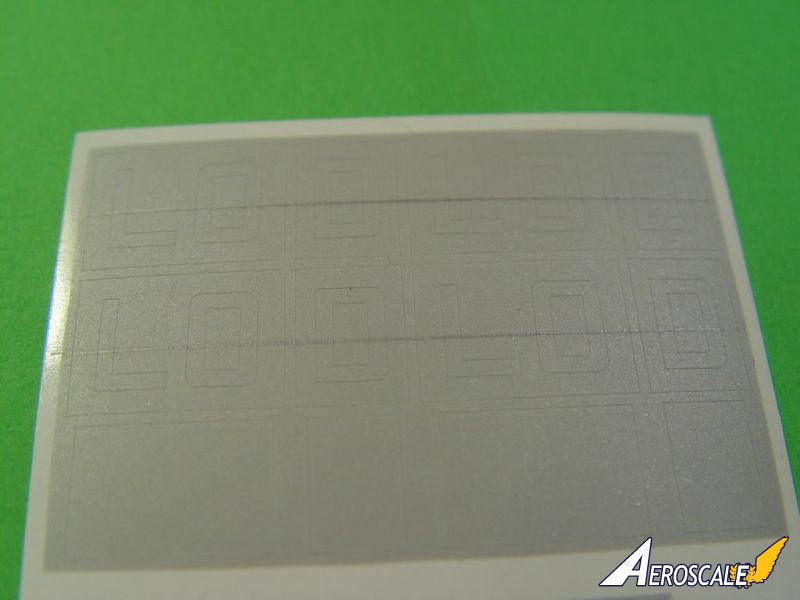
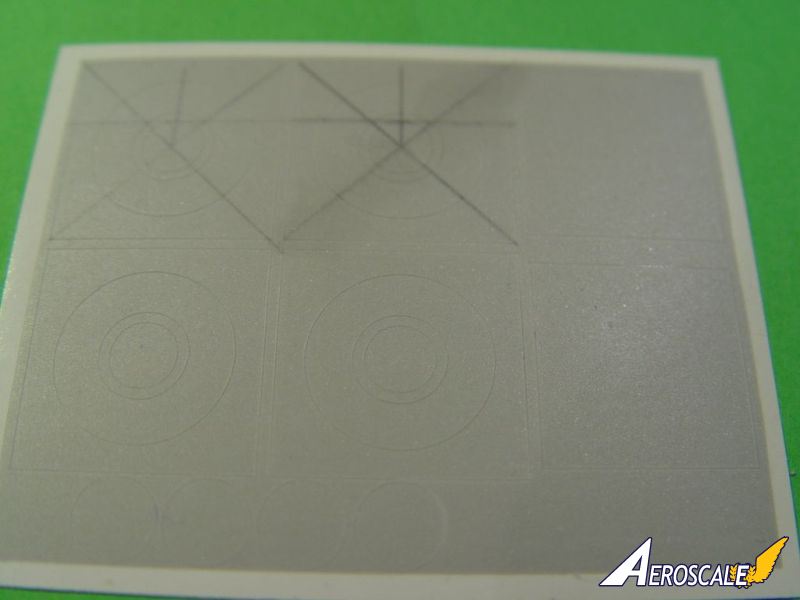
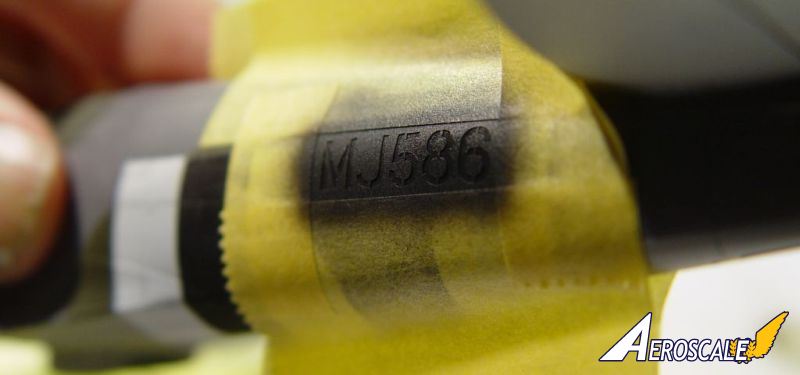
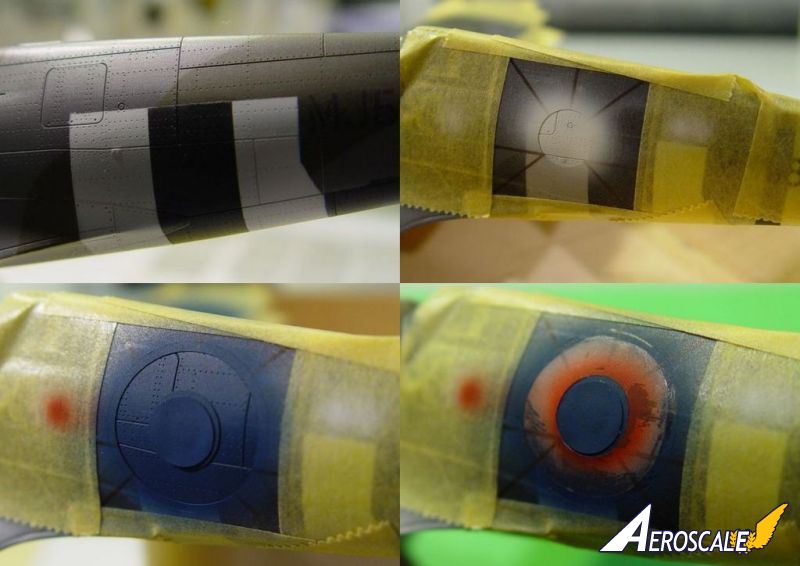
When you order masks from Mal, you get multiple sets of each mask, e.g. four fuselage roundels, not just two, as well as detailed and easy to follow instructions for each of the different masks. And if you just follow the instructions and possibly try one set out on a scrap model or piece of plasticard, then there really shouldnt be any problems with them. The real trick is, as will all other aspects of model building, to take it easy and be careful. This is especially important when it comes to placing the masks in the first place. Placing one mask is not a problem, but when you are placing the second of a pair you really want it to end up in the same position as the first one. Mal suggests a method for drawing guidelines onto the masks before you place them on the model and I suggest you do this if you are using the masks for the first time. As you grow more accustomed to the masks and the different stages of using them, you might not have to draw these lines on all masks. Some lines will be useful for replacing mask elements after you have painted one of the colours; some lines are helpful when placing the mask on the model. In the first case I drew the lines using a permanent marker, the kind you used to use on overhead films or to write on CDs or DVDs. Even the finest of these markers leave a pretty thick and visible line that will continue to be visible even after you have sprayed some of the colours of a mask on top of them. In the second case I used a very fine pencil to produce a line which only had to be visible when placing the mask on the kit.
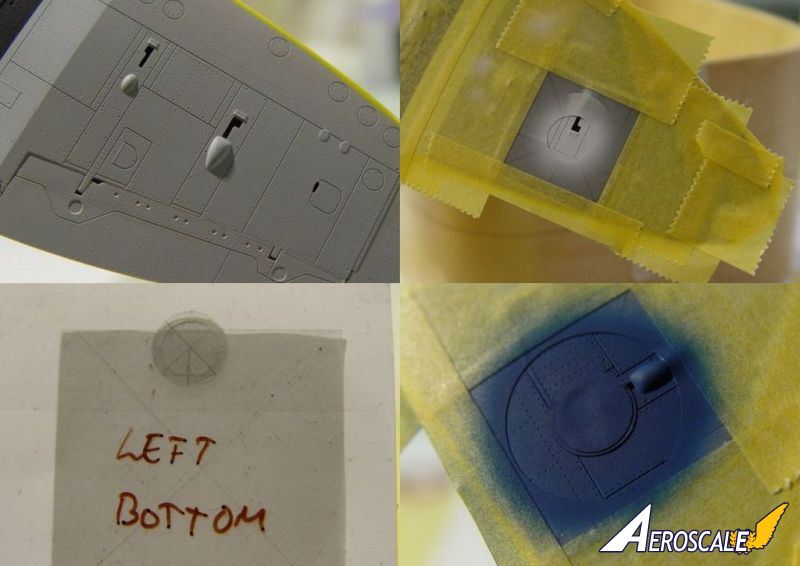
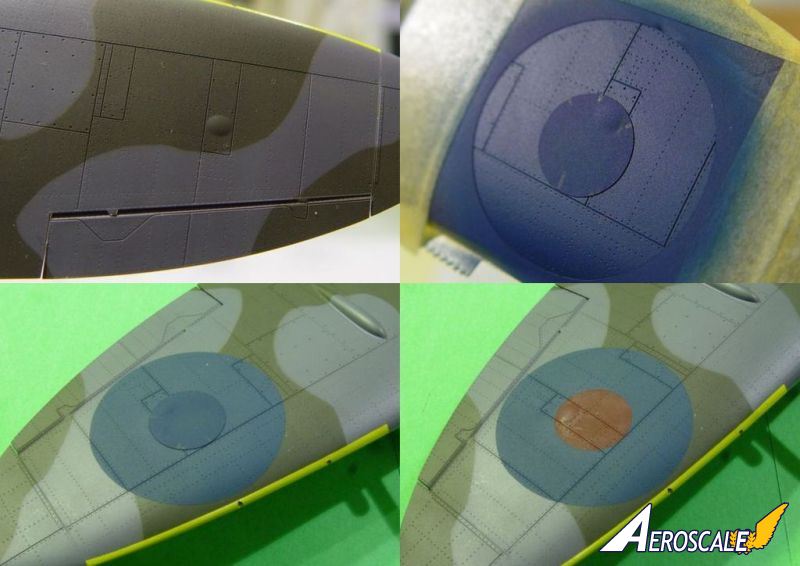
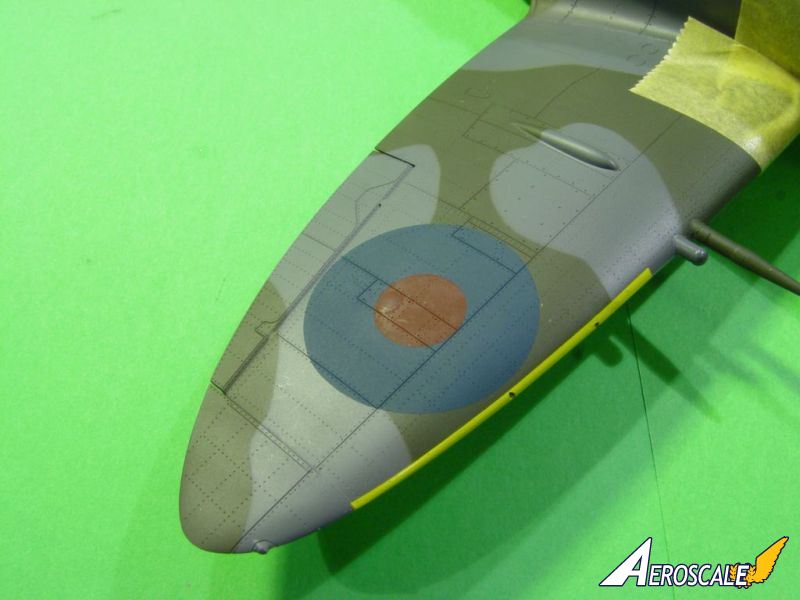
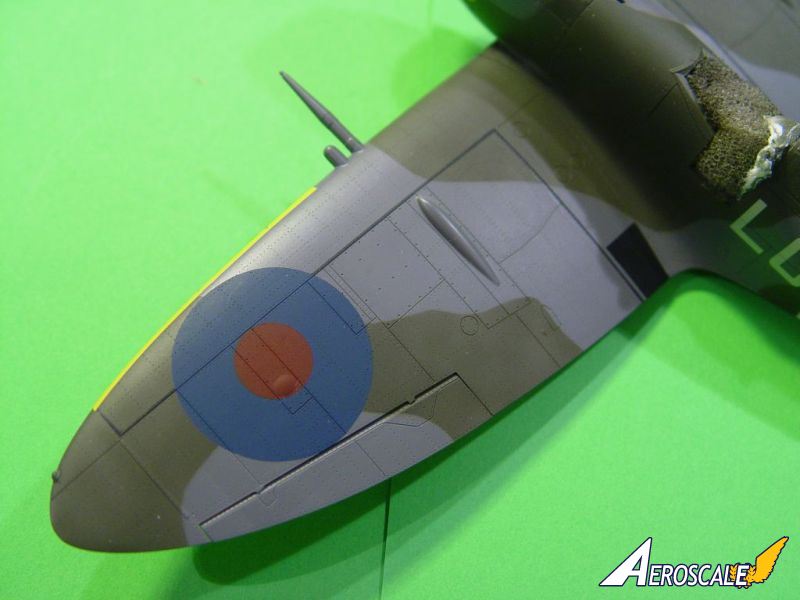
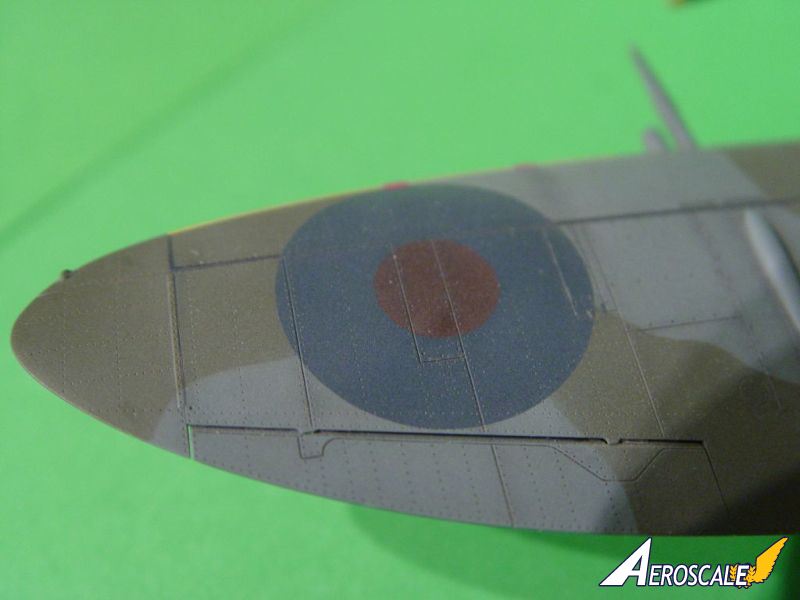
As with the guidelines that you draw onto the masks before placing them, you will have to experiment a little with how to actually move the mask from the backing paper and onto the model. Mal has designed a very clever way of doing this; using a part of the masking material descriptively called transfer tape and place it on top of the actual paint mask. Then you can lift the mask in one piece and place it where you want it. I found it to be easier to move the complete masks than to remove certain parts before the transfer and to remove the mask elements that should be removed afterwards instead. A complete mask is much more stable than one which has had, possibly large, pieces removed from it. One example of this found in the pictures is the underside wing roundel. When you paint the roundel you start with the white, so you remove the inner two sections of the mask. Then you replace the middle section in order to protect the white band and paint the inner red circle. Removing these two sections is not very problematic, but when replacing the middle section, which is fairly thin and flimsy and that technically speaking has a big hole in it, will be much easier if you remove the two sections together and replace them together and then remove the inner section again before you spray the red centre.
Since you have to paint the camouflage and any other markings before you use the masks, it is possible that there will be colour differences shining through the markings. This is of course the way it would have been in reality as well and it isnt a massive problem as most of the colours have good coverage. However, in those instances where yellow was to go on top of camouflage or white and black stripes, and knowing how poorly yellow usually covers, I chose to spray a thin layer of white first and then yellow on top of that.
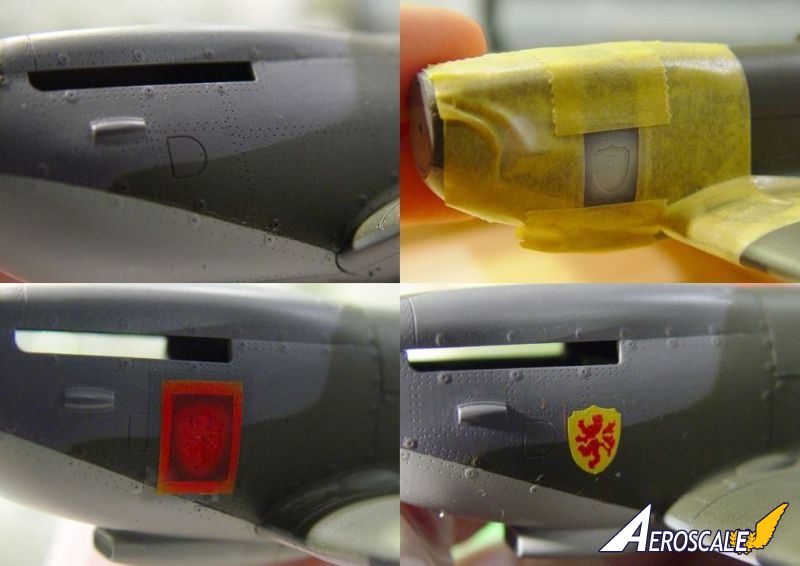
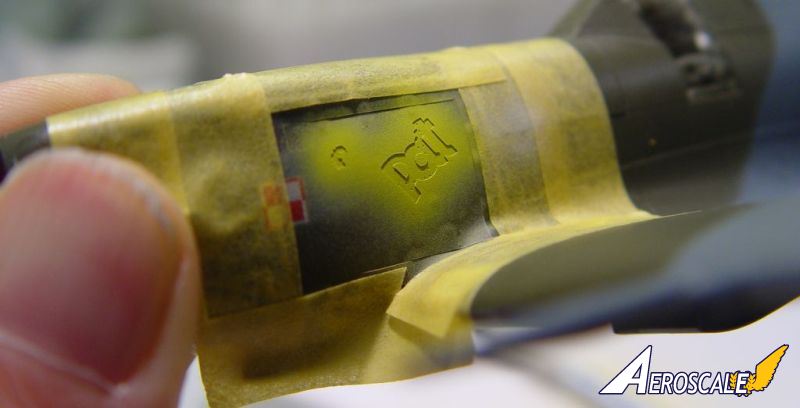
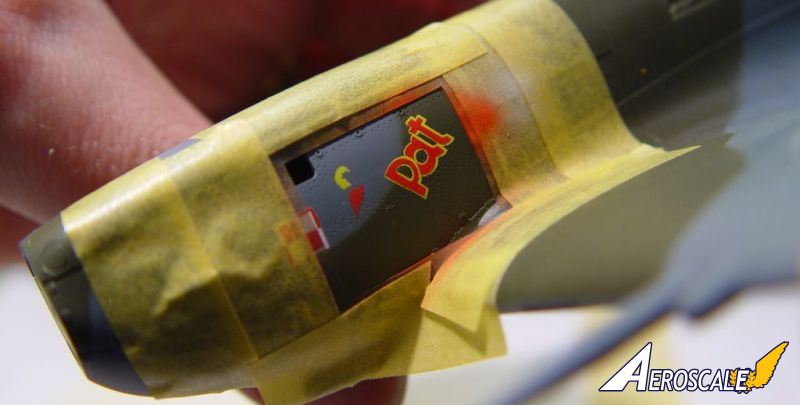
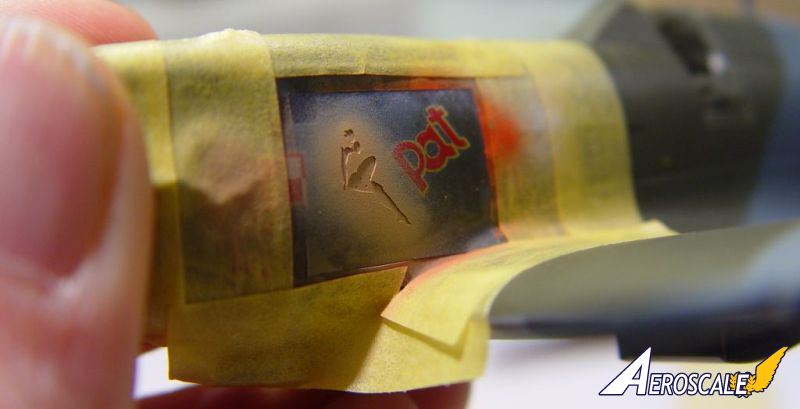
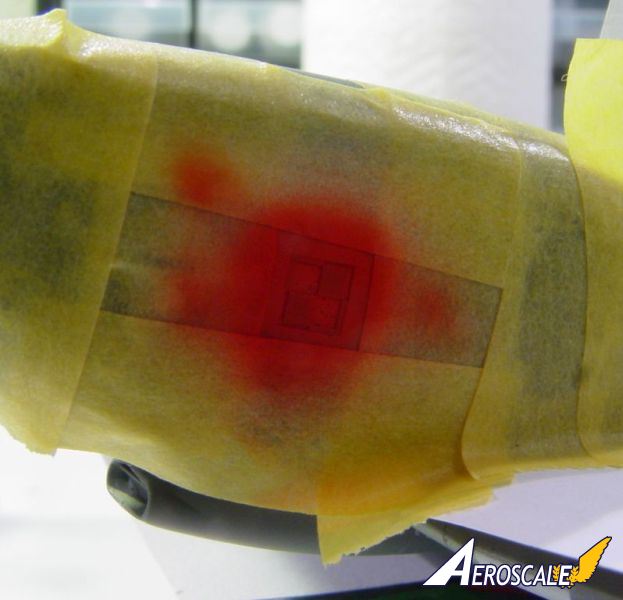
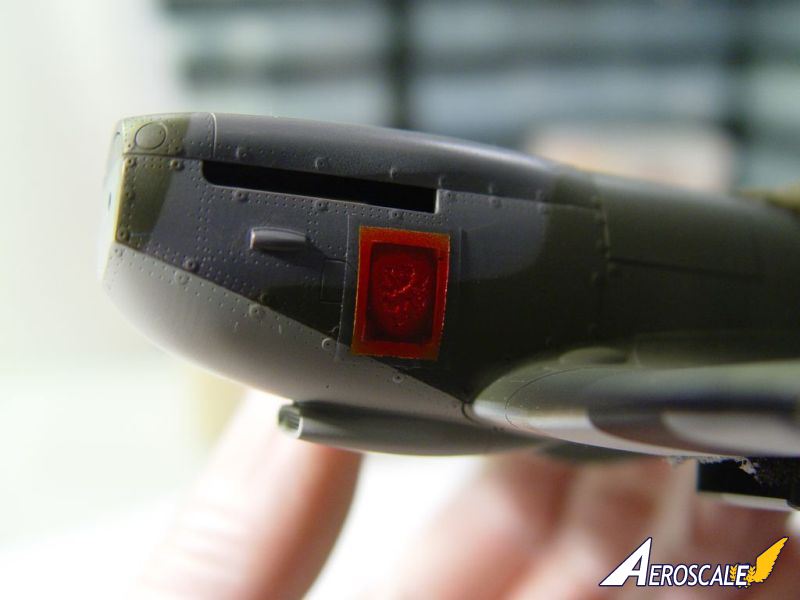
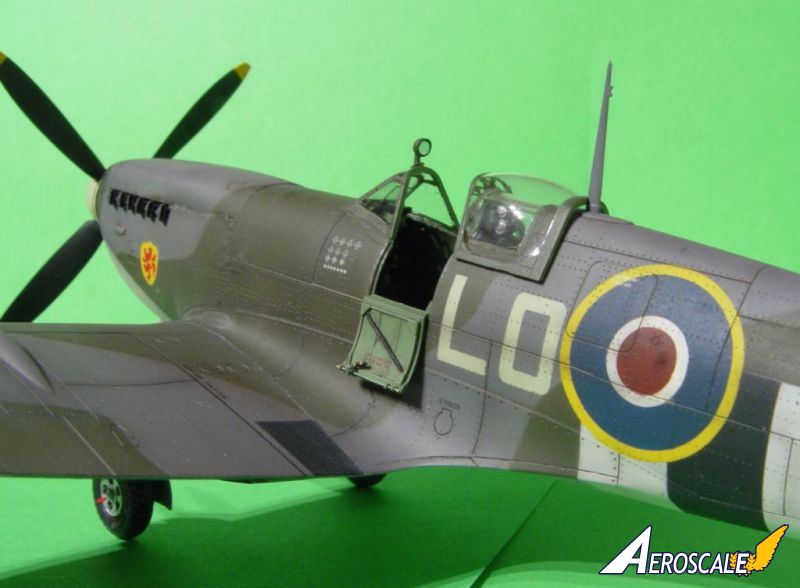
When all the national markings had been painted I masked and painted the walkway lines. This time I didnt use a mask from Mal, but Mal produces masks for both walkways and leading edges if you should want them. When all of these markings had been attention was directed to the more delicate masks used for painting the Polish checkerboard and Pat on one model and the Lion shield on the other. Even though all of the masks that had been used up to this point worked just fine and no one could ask more of them or of Mals instructions for using them, the remaining masks, with their increased complexity, show just how fantastic Mals masks are.
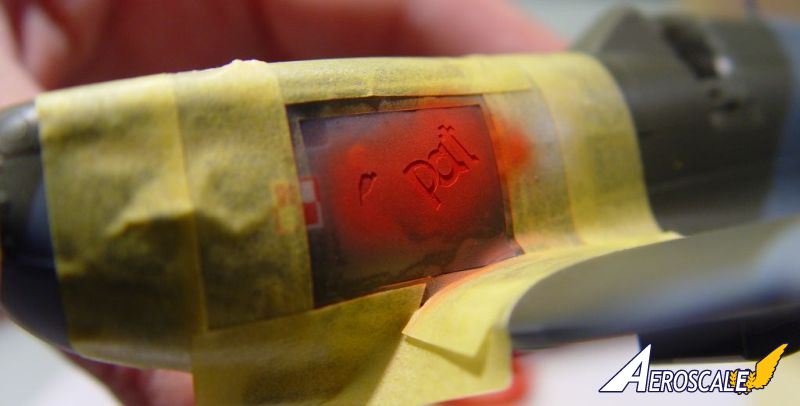
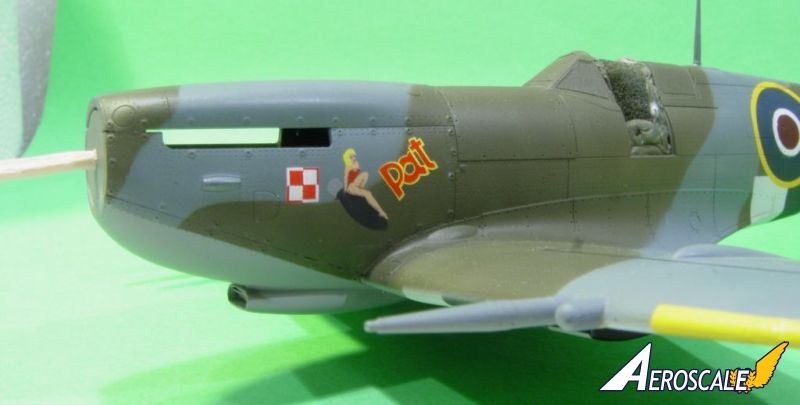
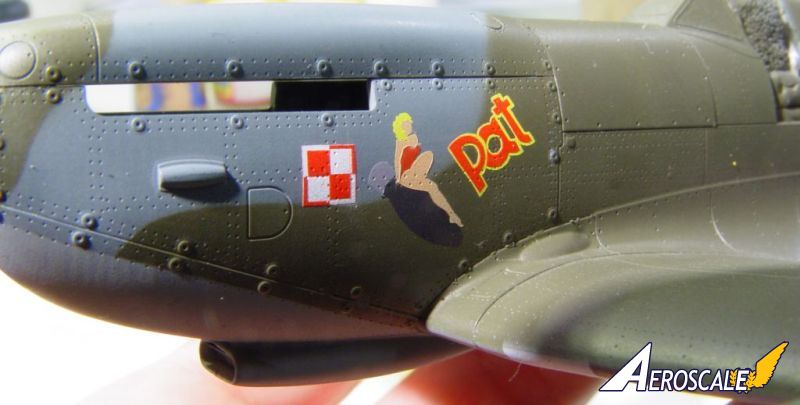
This point is best illustrated by the masks designed for painting the Pat nose art. Painting the nose art is done in five steps (yellow paint, red paint, skin colour, black bomb, grey fins on bomb) and this requires that each new mask is positioned so precisely that no gaps occur between the different elements. Mals work here is outstanding and I am totally in awe at the precision with which the masks have been engineered and cut. One of these clever engineering details is the construction of an outer box that goes on with the first mask. This box provides the following masks with positive alignment and makes sure that the end result is perfect. After the five steps have been completed, Pat still needs a bit of definition. Mal suggests that this should be done using paint and a fine brush. This was far beyond my painting skills and I used a very pointy pencil instead.
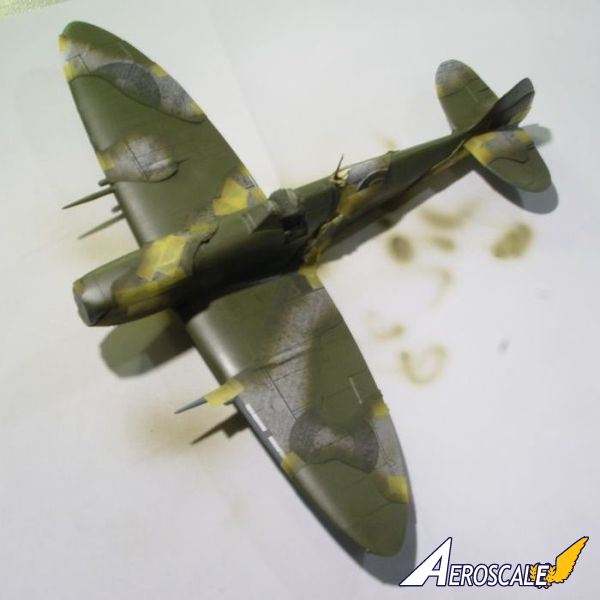
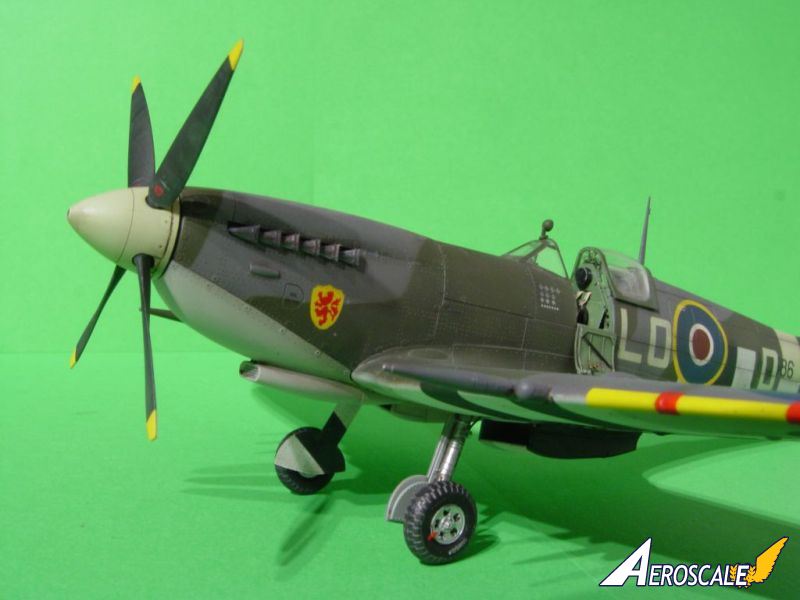
When all masks had been used, both aircraft were given a gloss coat before a few smaller decals were added as well as all of the stencils. And after this, another gloss coat went on providing a good equal base for the oil washes. I used one dark wash on the lighter areas and one brownish wash on the darker areas, as I like both the contrast this gives and the fact that it doesnt create one single kind of rivet or panel line look. To finish the builds a final layer of matt varnish was sprayed. Unfortunately the first varnish had a white tone to it, that destroyed the finish that I wanted. Luckily the other varnish (Winsor&Newton UV Matt Varnish) gave me exactly the look I wanted.
Conclusion
Eduards Spitfire is a beautiful kit! There are no massive problems that you have to overcome when building it and I would love to see Eduard expand its family of Spitfires in 1/48th scale.The Miracle Masks used proved to be really easy to use and in many cases easier to use than the corresponding decals would have been (although I cant really be sure of that since I never used those decals ). I will definitely be using Miracle Masks again, maybe even for every build from now on.
There are some obvious benefits of using masks and paint instead of decals. One is that you get a truly painted on look and that you get markings that respond to your weathering techniques the same way as the rest of the model. Another benefit is that there will be no silvering and no clear carrier film that might be visible. One particular benefit connected to the Miracle Masks, is the fact that Mal make them to order. So, as long as you can provide good references, you can have masks replacing the decal options already given in a kit or masks for that special model that only you have thought of building. Good luck!


About the Author


FROM: UPPSALA, SWEDEN
Hi, my name is Fredrk Almlöf and I, as so many others, am a returnee to the hobby. I mainly build German and British aircraft related to WWII, and within that field I have a special thing for aircraft related to the Battle of Britain. In my normal life I teach history (mainly) at an upper-secondary ...
Comments

Hi Fredrik,
A fantastic build and a great article.
Between your build and paint job and Mals masks I'd be happy if anything I did was even half as good.
looking forward to your next build.
Cheers
Chris
MAY 30, 2014 - 07:08 PM

If I'm not entirely wrong I judged those aircraft at the recent IPMS Stockholm competition. They are as good as they look in the photos!
MAY 31, 2014 - 07:31 AM
Fredrik,
A really rock solid build of an excellent kit. I really enjoyed, and learned quite a lot about masks from your feature story.
Thanks for taking the time to share it with us.
Joel
MAY 31, 2014 - 11:28 AM

Thank you guys! I personally prefer to read articles and build blogs that aim at helping others develop their own skills, whether they put them to use on the same model or another one. I hope I managed to write such an article.
And Magnus, you're not wrong and I'm still wrestling with your advice after the show...
JUN 03, 2014 - 07:35 AM

Copyright ©2021 by Fredrik Almlöf. Images also by copyright holder unless otherwise noted. The views and opinions expressed herein are solely the views and opinions of the authors and/or contributors to this Web site and do not necessarily represent the views and/or opinions of AeroScale, KitMaker Network, or Silver Star Enterrpises. Images also by copyright holder unless otherwise noted. Opinions expressed are those of the author(s) and not necessarily those of AeroScale. All rights reserved. Originally published on: 2014-05-31 05:30:30. Unique Reads: 5008

WEB HOSTING BY


Copyright ©2021 AeroScale and Kitmaker Network, a subsidiary of Silver Star Enterprises
All Rights Reserved. Please read our Conditions of Use and Privacy Policy.
All Rights Reserved. Please read our Conditions of Use and Privacy Policy.