

1⁄35Junkers Ju 87D-5
5
Comments
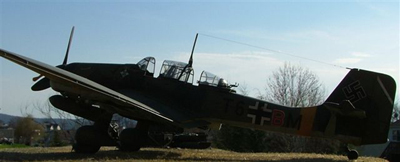
I chose to build the Ju 87 Stuka on looks alone. It is my favorite aircraft of WW2. They have this look about them that says something terrible is about to happen. Please don't misunderstand, I'm not for war, but when it comes down to it, the Stuka has an image all its own.
I used Hasegawa's Ju 87 D-5 kit. I wonder why Tamiya doesn't make the Stuka in kit form.
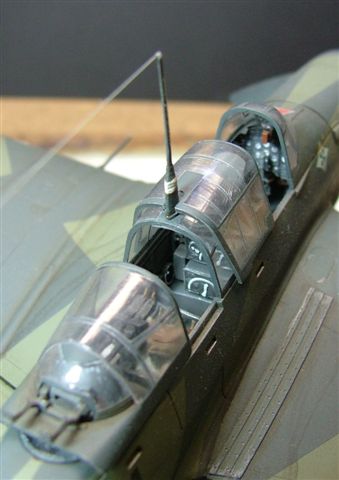
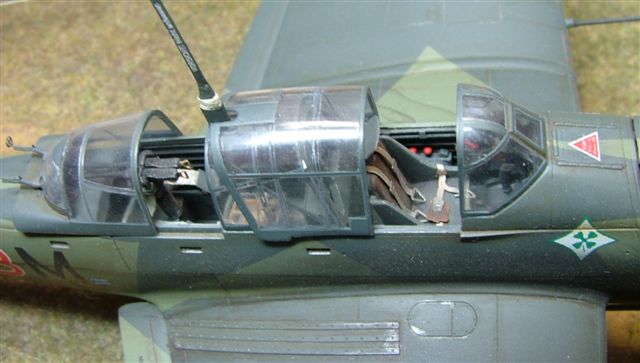
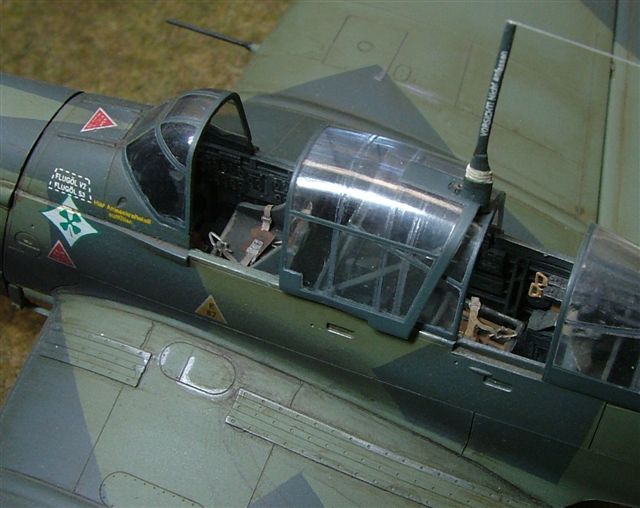
In the cockpit I used Eduard's photo-etch parts for the sidewalls, floor and pilots seat. The seatbelts are photo-etch items from Eduard. I used hypodermic needles to replace the rear machine guns with photo-etch gunsights from Eduard. I used ModelMaster EuroGray in the cockpit with a raw umber wash.
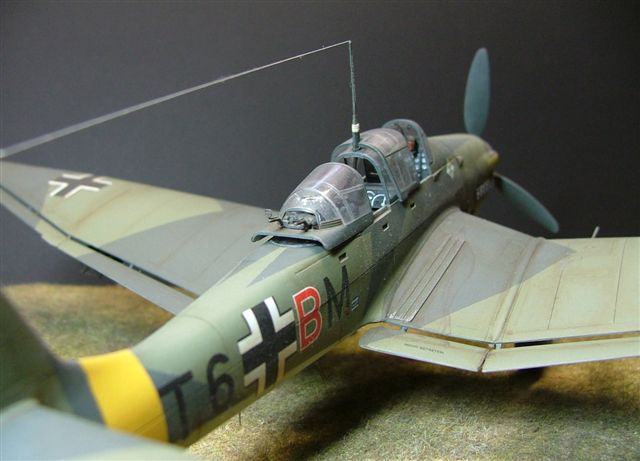
The canopy was masked with Bare Metal foil and painted. I used Aeromaster canopy framing decal sheet to replicate the interior framing of the canopy. This is one big sheet of RLM66. The strips were individually cut and laid into the inside of the canopy. It's work but it's well worth it.
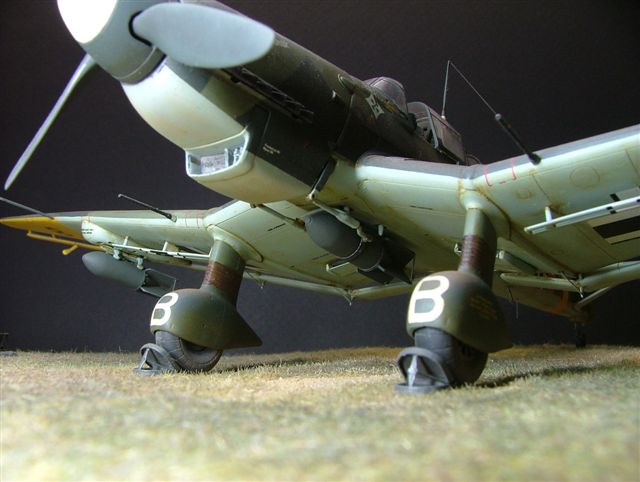
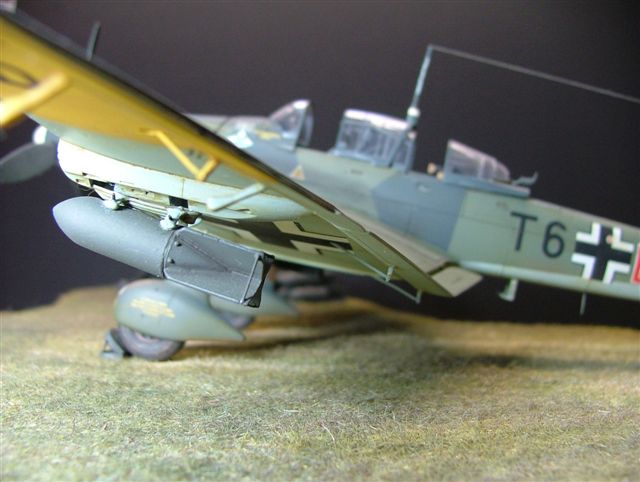
The flap actuators on the wings were way over done and were removed and replaced with photo-etch items from Eduard. The actuators on the real plane went into a hole on the bottom of the wing. I drilled holes in the areas where the kit actuators were located and filed them to shape,[kinda like an oval]. I installed a length of stretched sprue across the inside of the holes to replicate the rod that the actuator connects to. The kits wing cannons were removed and replaced with hypodermic needles. The light on the leading edge of the wing was made using clear sprue that was polished and attached to the wing. I used a small piece of clear mylar to replicate the glass over the light. The non-slip walking strips on the wings are photo-etch items from Eduard.
Painting started with a couple rounds of primer until all the blemishes were removed. ModelMaster RLM65 was airbrushed on the underside and left to dry. I applied yellow to the rear fuselage and the underside of both wingtips and when they were dry, I masked those areas before moving on to the two top colors. ModelMaster RLM71 was first airbrushed onto the topside, but only after masking was applied to the underside to protect the RLM65. To get the hard edge camo scheme I used that outstanding invention, TAMIYA MASKING TAPE. I love this stuff. I started masking the areas that were to be protected and airbrushed ModelMaster RLM70. The wheel spats were masked and ModelMaster leather was applied to the oleo covers. I used Aeromaster's Stuka Bombers part 2 decals. A wash of raw umber artist oils was applied to the topside and a mix of raw umber and yellow ocher was applied to the underside of the plane. Exhaust stains were applied using a mix of dark brown and black pastel chalks. The spilled fuel stains were made using acrylic paint diluted with water. I used a mix ModelMaster chrome silver with some raw umber artist oil paint to wear away the paint.
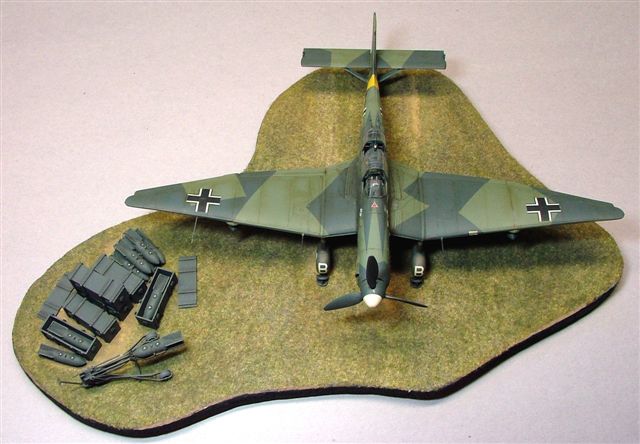
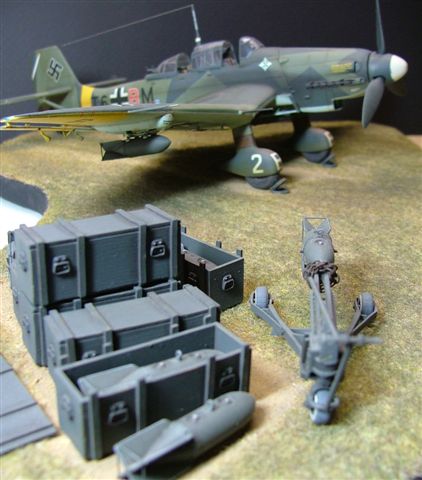
The bombs and crates are resin items from Verlinden. I used masking tape to replicate the metal band that wraps around the bomb itself. I used small bits of stretched sprue for the pins that hold the bomb to the cradle. Stretched sprue was used for the fin braces. I can't remember who made the bomb cart, but it is a resin item. I used a circle template to create the whitewalls on the tires. The wheel chocks were scratchbuilt using styrene sheet, masking tape and spare photo-etch parts from the spares box.
The base was made by cutting a piece of old ceiling tile to shape and the edges sanded smooth. Dark brown paint was applied to the top of the base with real dirt was added to the worn out areas with white glue. Verlinden static grass was then applied over a coat of white glue. The edges of the base were then painted flat black.
I used Hasegawa's Ju 87 D-5 kit. I wonder why Tamiya doesn't make the Stuka in kit form.
In the cockpit I used Eduard's photo-etch parts for the sidewalls, floor and pilots seat. The seatbelts are photo-etch items from Eduard. I used hypodermic needles to replace the rear machine guns with photo-etch gunsights from Eduard. I used ModelMaster EuroGray in the cockpit with a raw umber wash.
The canopy was masked with Bare Metal foil and painted. I used Aeromaster canopy framing decal sheet to replicate the interior framing of the canopy. This is one big sheet of RLM66. The strips were individually cut and laid into the inside of the canopy. It's work but it's well worth it.
The flap actuators on the wings were way over done and were removed and replaced with photo-etch items from Eduard. The actuators on the real plane went into a hole on the bottom of the wing. I drilled holes in the areas where the kit actuators were located and filed them to shape,[kinda like an oval]. I installed a length of stretched sprue across the inside of the holes to replicate the rod that the actuator connects to. The kits wing cannons were removed and replaced with hypodermic needles. The light on the leading edge of the wing was made using clear sprue that was polished and attached to the wing. I used a small piece of clear mylar to replicate the glass over the light. The non-slip walking strips on the wings are photo-etch items from Eduard.
Painting started with a couple rounds of primer until all the blemishes were removed. ModelMaster RLM65 was airbrushed on the underside and left to dry. I applied yellow to the rear fuselage and the underside of both wingtips and when they were dry, I masked those areas before moving on to the two top colors. ModelMaster RLM71 was first airbrushed onto the topside, but only after masking was applied to the underside to protect the RLM65. To get the hard edge camo scheme I used that outstanding invention, TAMIYA MASKING TAPE. I love this stuff. I started masking the areas that were to be protected and airbrushed ModelMaster RLM70. The wheel spats were masked and ModelMaster leather was applied to the oleo covers. I used Aeromaster's Stuka Bombers part 2 decals. A wash of raw umber artist oils was applied to the topside and a mix of raw umber and yellow ocher was applied to the underside of the plane. Exhaust stains were applied using a mix of dark brown and black pastel chalks. The spilled fuel stains were made using acrylic paint diluted with water. I used a mix ModelMaster chrome silver with some raw umber artist oil paint to wear away the paint.
The bombs and crates are resin items from Verlinden. I used masking tape to replicate the metal band that wraps around the bomb itself. I used small bits of stretched sprue for the pins that hold the bomb to the cradle. Stretched sprue was used for the fin braces. I can't remember who made the bomb cart, but it is a resin item. I used a circle template to create the whitewalls on the tires. The wheel chocks were scratchbuilt using styrene sheet, masking tape and spare photo-etch parts from the spares box.
The base was made by cutting a piece of old ceiling tile to shape and the edges sanded smooth. Dark brown paint was applied to the top of the base with real dirt was added to the worn out areas with white glue. Verlinden static grass was then applied over a coat of white glue. The edges of the base were then painted flat black.
About the Author


FROM: PENNSYLVANIA, UNITED STATES
I used to model aircraft when I was very young, my dad would hang my planes from the ceiling and put round clear plastic discs to act as a spinning prop. I dropped out of modelling for a long time then got back into it by way of an accident I had at work. I recieved burns on my arm, face and back. I...
Comments

THANKS guys. It's an honor to have been picked for MOM, it's also an honor to be a part of such an excellent model site. Looks like another great set of entries for this months selections,Wingman out.
APR 11, 2005 - 09:27 AM


Blimey! Now that's some serious modelling. Congratulations Michael, very inspiring. Hmmm, wonder if E&M Model's have a Ju87 in stock?
APR 16, 2005 - 11:12 AM
Copyright ©2021 by Michael Wolfe. Images also by copyright holder unless otherwise noted. The views and opinions expressed herein are solely the views and opinions of the authors and/or contributors to this Web site and do not necessarily represent the views and/or opinions of AeroScale, KitMaker Network, or Silver Star Enterrpises. Images also by copyright holder unless otherwise noted. Opinions expressed are those of the author(s) and not necessarily those of AeroScale. All rights reserved. Originally published on: 2005-04-09 00:00:00. Unique Reads: 13516

WEB HOSTING BY


Copyright ©2021 AeroScale and Kitmaker Network, a subsidiary of Silver Star Enterprises
All Rights Reserved. Please read our Conditions of Use and Privacy Policy.
All Rights Reserved. Please read our Conditions of Use and Privacy Policy.