How To: An Easy Sander for Small Places
5
Comments
introduction
Ejector pin markings. A necessary evil of the injection molding process. Some manufacturers place them carefully and creatively in areas that aren't seen (the inside of a wing for example), others have more subtle pin marks and some are just downright dreadful. I've made an electric sander specifically for them. It's an old idea - but it's my first attempt. I've documented it here for those of you who have never come across this idea and for those who aren't sure how to build it.I needed something that worked quickly, could cover a decent area - or a lot of marks - but at the same time could get into tight spaces.
I present my take on the electric toothbrush sander
the problem
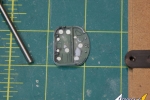
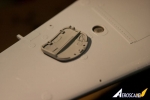
I was working on the Airfix 1/24th Mosquito and it was driving me insane. I have never seen so many ejector pin markings - all in horrible spots.The straw that broke the camel's back was the interior of the crew access door. This was to be modeled open, so these NINE ejector pin marks had to go.
THE TOOL
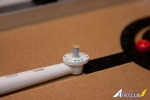
It's a simple enough idea. You take the head of an electric toothbrush that works with a rotating action and make an old head into a sander.I didn't want to have to run to the store to grab some dowel. I dug into the Mosquito's box and found some sprues of different diameters. I chose a medium diameter piece, but the beauty of this tool is that you can have as many heads as you want - we all go through them, so just stash them instead of trashing them. You can have as many diameters as you want and you can have each diameter in different grits.
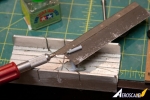
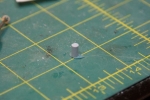
Using a miter box I cut the sprue at right angles on both ends so I ended up with a small cylinder.
Just to be sure the two ends of the styrene dowel were parallel to each other and as close to 90 degrees as possible I used my The True Sander (a must have from NWSL.com)
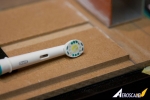
Now that my dowel was all trued up it was time to move onto the head. This is the heart of the sander. I have an Oral-B and it works perfectly for this project. It even has a feature which is intended to brush less aggressively if you apply too much pressure. This has the added benefit of working well for this particular application.
I always just assumed I would cut all of the bristles off with a modelling saw - this proved painfully difficult. Remember the head itself rotates - that's the action we want, but it makes sawing back and forth really unproductive. I ended up chucking a cutting disk in my dremel tool and cutting them off in one pass. It melts them into plastic blobs, but then you can clean up the face with the surface of the cutting disk. Lastly I used my True Sander to square up the face of the head as best I could.
The home stretch
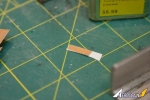
I grabbed some sand paper and some sheet styrene, cut it to the width of the plastic dowel.I glued them together - I thought the sandpaper might not be substantial enough on its own to effectively punch well shaped disks out of. It turned out this was unnecessary. When I punched them, the sandpaper and styrene separated - I elected to glue them back together because I think it will be easier to replace the sandpaper once it gets worn if I can pry the styrene disk off of the rod. Alternatively I may just glue more disks on top.
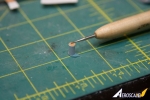
I LOVE sticky-tack. I use it to hold everything small. P/E, plastic - you name it. I put a tiny blob on the end of my smallest burnishing tool and I can place parts at will. Here it is here. (It's the same idea as the RB sticky pencil)
In the next photo you can see the sanding disk and its styrene backing.
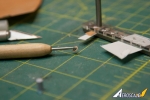
Because the disk was the exact same size as the dowel, and it had to be quick and neat, I used more sticky-tack to hold the dowel up and in place. A drop of CA and then place the sanding disk. A second or two and the bond with the glue is stronger than the sticky tack and you can pull the tool away without shifting your piece.
I rested the burnisher on top (with the other end elevated so the tool was level) to keep the disk pressed against the dowel to ensure it dried level. I also used a thin CA for the same reason.
Et Voila! A battery operated orbital sander the perfect size for ejector pin marks. You can make as many as you have spare heads - and when the sandpaper wears out, you can simply glue a new disk overtop.
conclusion
I've been meaning to make this for eons. I'm glad I have it now. If nothing else, it will encourage me not to skip these small imperfections on future builds. It really does make a quick job of them - unless they're as deep as these.If you don't have a brush, pick up a used one off of Kijiji - you're not going to be putting it in your mouth so who cares?
The rest is all technique. You can see the marks in the crew access door were numerous, and deep enough to be filled with disks of styrene. Then it was just a matter of sanding out all the traces of the marks.
Comments
Thanks Bill. I wish I could remember where i hear the idea from to begin with so I could give credit where credit is due.
NOV 09, 2014 - 08:11 AM
I have used this method myself but have never gone down to such a small size, I suppose it is a good idea to have different sizes to hand.
NOV 09, 2014 - 12:12 PM
CMOT - that's the beauty of it - you don't need a collection, you can cut it off and change the size every five minutes if you wanted!
NOV 10, 2014 - 02:58 AM
Copyright ©2021 by Matt Odom. Images also by copyright holder unless otherwise noted. The views and opinions expressed herein are solely the views and opinions of the authors and/or contributors to this Web site and do not necessarily represent the views and/or opinions of AeroScale, KitMaker Network, or Silver Star Enterrpises. Images also by copyright holder unless otherwise noted. Opinions expressed are those of the author(s) and not necessarily those of AeroScale. All rights reserved. Originally published on: 2014-11-01 03:43:59. Unique Reads: 7822


