

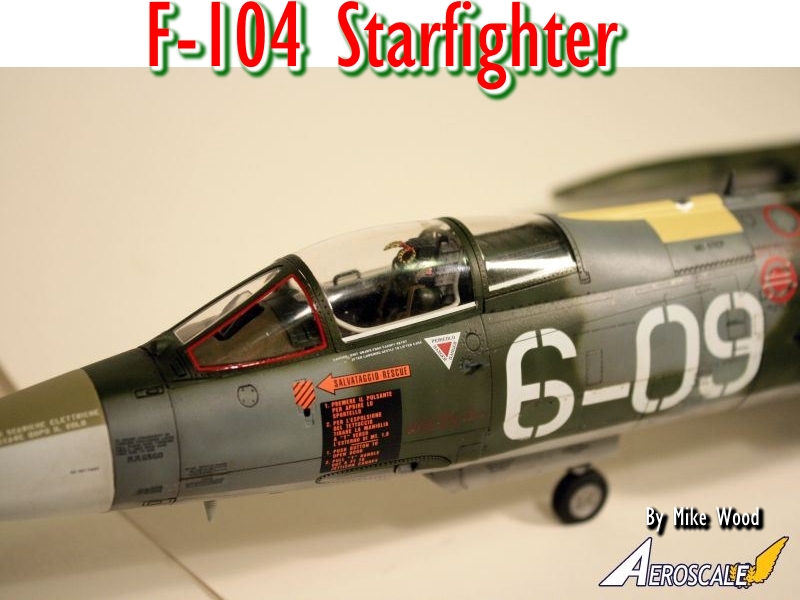
1⁄1F-104 Starfighter
4
Comments
history
The Lockheed F-104 Starfighter is a single-engine, supersonic interceptor aircraft originally developed by Lockheed for the United States Air Force (USAF). One of the Century Series of aircraft, it was operated by the air forces of more than a dozen nations from 1958 to 2004.In the Italian Air Force, the F-104 was a mainstay from the early 1960s until the end of the 20th century. The first flight for an Italian F-104G was a Lockheed-built aircraft, MM6501, on 9 June 1962; however, the first Fiat/Aeritalia-built example flew two years later on 5 October 1962. Italy initially received a total of 105 F-104G, 24 TF-104G and 20 RF-104Gs, becoming operational in March 1963. This fleet was later increased by the addition of 205 built under license by Aeritalia F-104S aircraft and six ex-Luftwaffe TF-104Gs bringing the total number of aircraft operated to 360. In 1986 the AMI was the largest operator with eleven units flying the Starfighter operationally. Up to 1997, Italy lost 137 (38%) of its F-104s in 928,000 flying hours (14.7 aircraft every 100,000 hrs). The F-104 was officially retired from AMI service during a large ceremony at Pratica di Mare in 2004.
the model
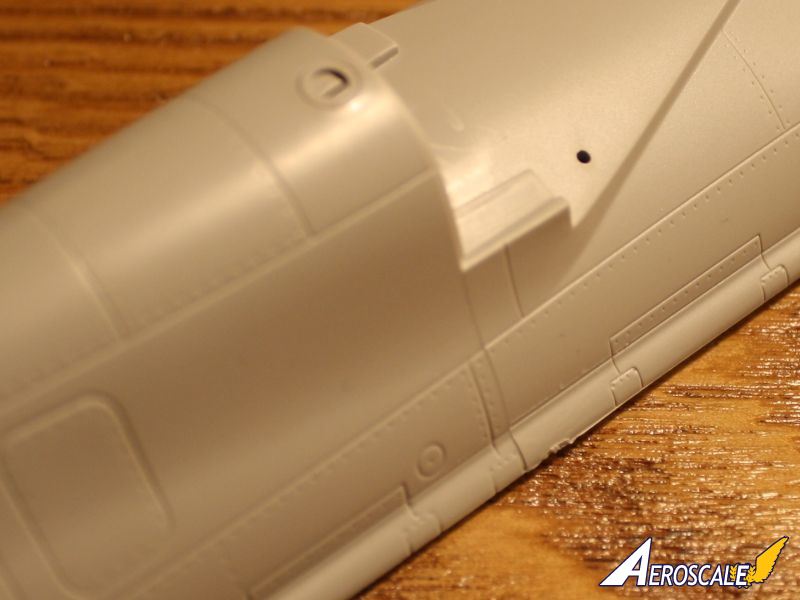
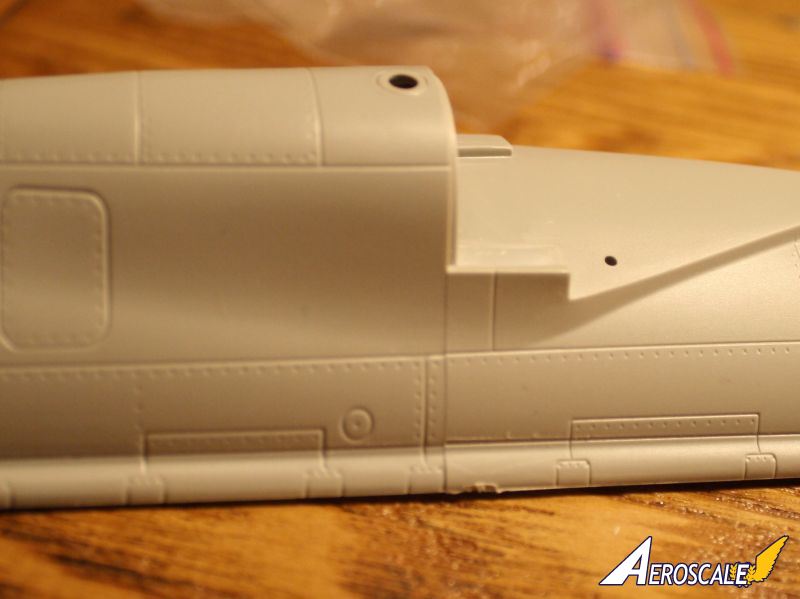
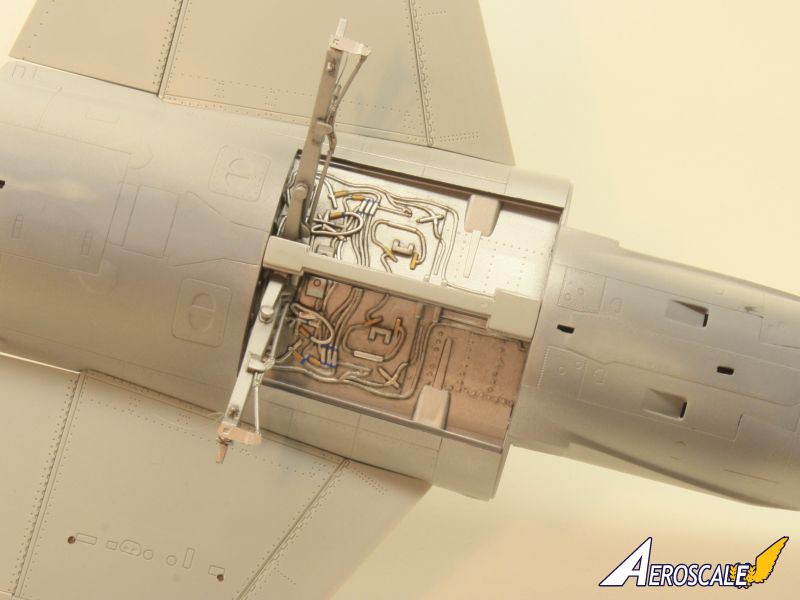
On receiving this big box in the post, I had a quick perusal of the contents. This is quite an expensive kit so the big question is:- is it worth the money? This is always going to be dependent on how badly you want a new tool F-104. The photo etch provided for the instrument panels is, to put it bluntly, rubbish, but the plastic instrument panel parts look like they will paint up nicely. The 2 decal sheets are printed by Cartograph and look fantastic. The cockpit floor is wrong but little of it will be seen. Eduard have designed a number of P.E. sets intended to dress up the interior and Aeries have released some nice resin for the cockpit and wheel bays, the kit wheel bays being a little disappointing. You do get a full engine, which would benefit from some extra detailing, and a pilots access ladder and stands for the engine and tail. Some of the detail is soft but does open the door to scratchbuilding your own, again, if you feel so inclined. The avionics bay aft of the cockpit and the M61 Vulcan cannon bay can be posed open, but will also require extra work.I also noticed some anomalies regarding the surface detail. That on the port fuselage half seems softer than on the starboard. There is a mold seam which runs vertically from the intake attachment point up to the spine, which seems to be mis-aligned. You can see where the panel lines are skewed. The offending seam will have to be sanded flat and detail restored, I expect. The panel lines to the front of this seam are OK but those behind, are soft.Hopefully, this is a 'one off' mould imperfection and should even out under paint. The surface detail on the wings and elsewhere is, in contrast, very sharp and well defined. So, it's not without its vices but it certainly looks as if it will go together OK, on test fitting the parts and will definitely look like a Starfighter when done.
okay, get to work
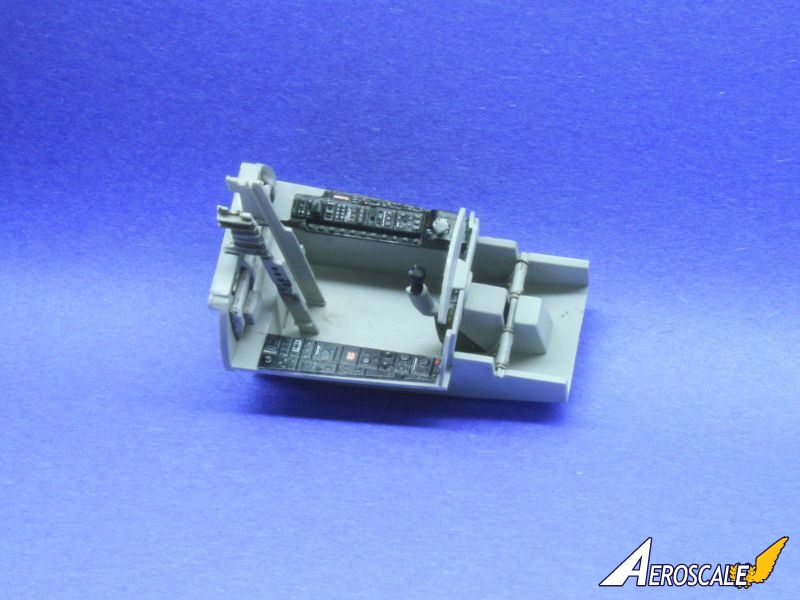
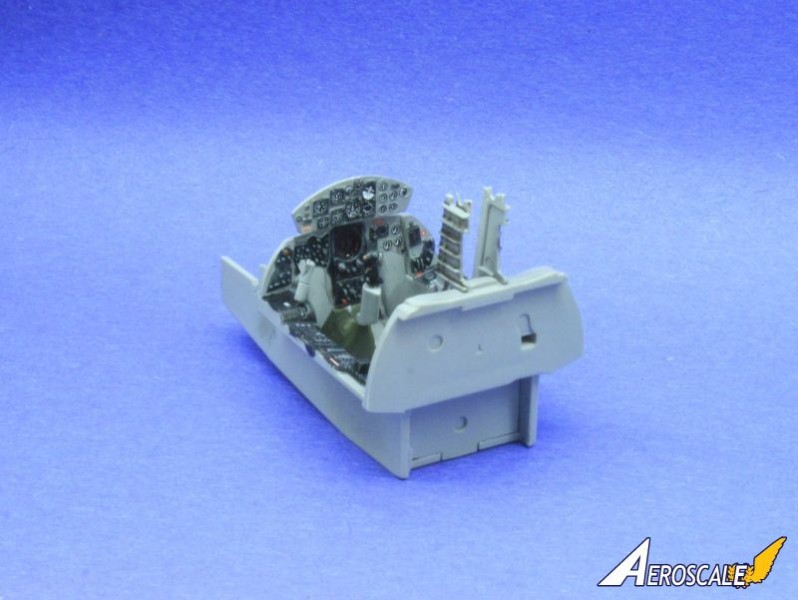
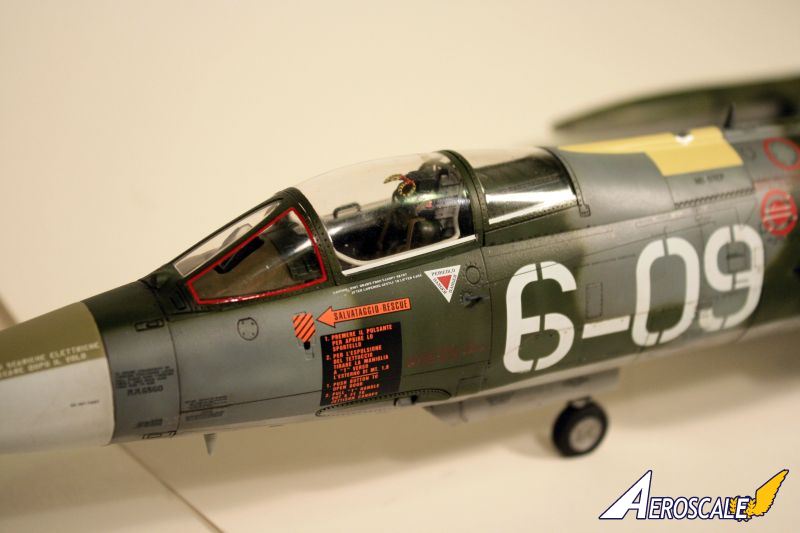
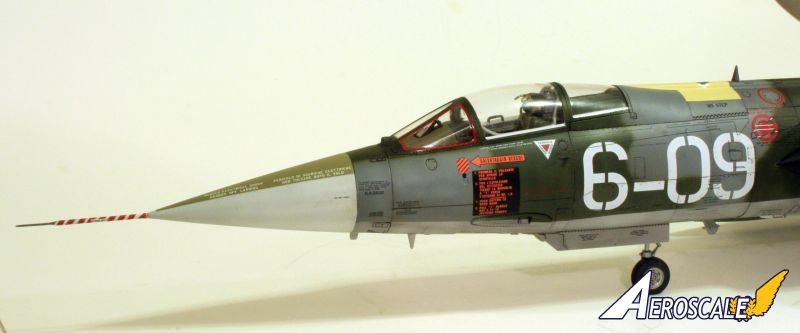
Work commenced with the interior (where else). The cockpit tub went together without incident.There are two large but not too deep ejector pin marks on the cockpit sidewalls which were filled with the un-mixed goo from the bottom of a bottle of Mr. Surfacer and then sanded down.The interior was base coated with XF19, sky grey, then the various instrument panels and bezels were picked out in black.As mentioned above, there are photo etched alternatives supplied for the various instrument panels which seem pointless to me, as the detail is flat and one-dimensional. These were not used. Instead, the raised detail on the plastic instrument panels was drybrushed using Xtracolour enamel RLM 02 and then different colours were used to pick out various knobs and switches.The panels were then glossed ready for decals. I began by cutting off the six instruments to the far right of the panel. I realised while applying these, that the dials do not line up with their corresponding raised bezels. The decal, though printed exceptionally well (the numbers can be read on the dials), fits poorly with some dials being too big or out of position. I found this to be the case with many of the decals meant for other parts of the airframe as well. I decided to punch out the remaining dials and apply them individually. The overall effect is quite nice. I used placards from Airscale to dress up the panels. These were 1/48 scale in fact, but look OK in this context. I added the prominent canopy release lever from scratch.
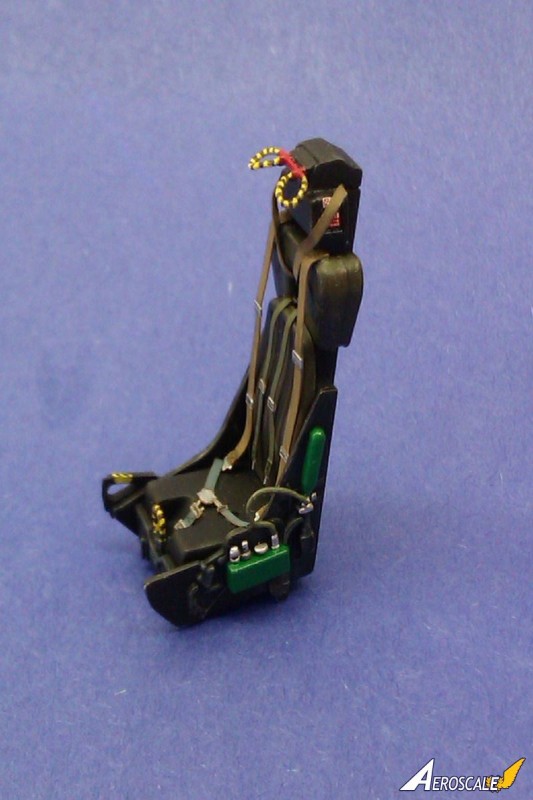
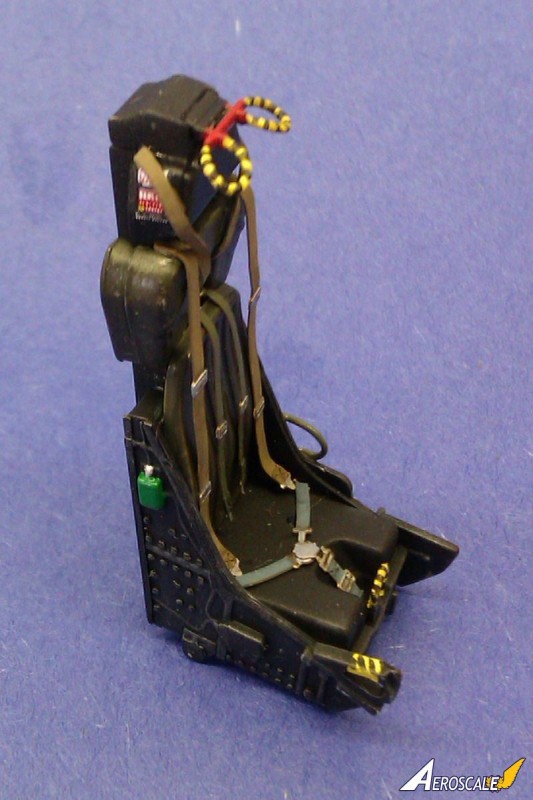
I found the construction of the bang seat to be fiddly and awkward to align, due to poor engineering on Italeris part. After construction, the seat was base coated in black and then dry brushed, again with RLM02. I painted the pull cords on the bang seat in a bright yellow then carefully painted the black stripes using a fine brush.The oxygen bottle was painted bright green. The kits photo etch straps arent really up to much, so I added some extra straps from lead foil, and an oxygen hose from wire, just to busy it up a bit. I have decided to close up the canopy, so not much of this will be seen anyway.
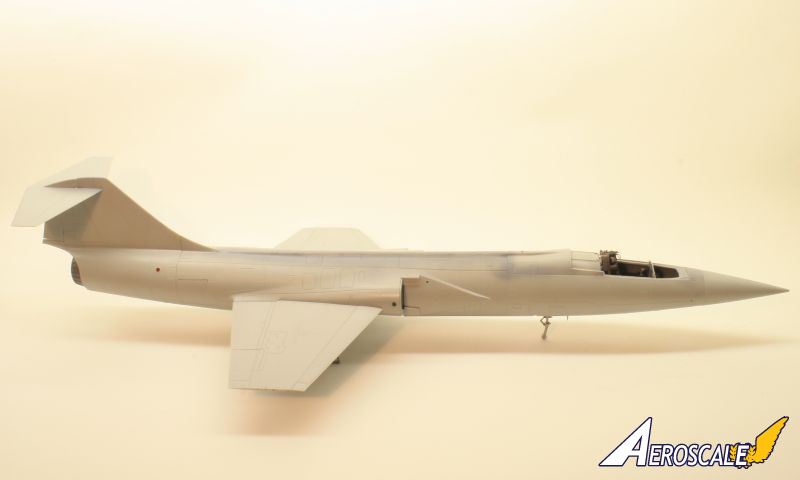
With the cockpit complete, the intake trunking and main gear bay were constructed and then all these parts were sandwiched between the two forward fuselage halves and all glued into place. As I mentioned before, the detail on this kit really is a mixed bag, exquisitely sharp in some areas but soft and mushy in others. I already spoke about the mismatch between fuselage halves and this is very apparent when you marry the two together. The F104 has an abundance of small inspection panels on the spine, which straddle the centre line seam. These all had to be rescribed on the port side, to match the consistency of the starboard side. In places, the detail disappeared altogether. I used a pin chucked in (what else!) a pin vice to replace rivets and my trusty UMM scriber to do the initial pass followed up by the RB productions etched tool. After polishing the seam, I brushed a little Tamiya extra thin into each rescribed line and shot some primer along its length to check for discrepancies.
I made the decision to close up the avionics bays and speed brakes as more detail is required here and I don't have the references to do it justice. I also decided to keep the weapons bay closed, so as not to spoil the sleek lines of the model.
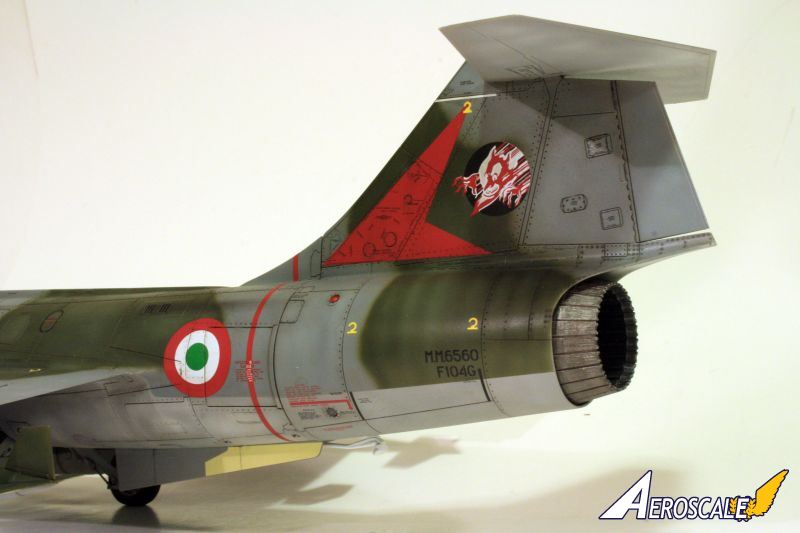
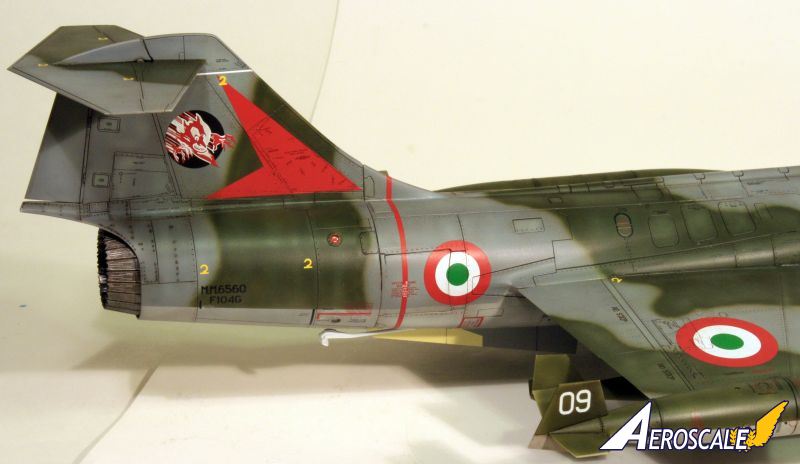
As the engine was not going to be displayed, the only part of it which needed painting was the nozzle. This was sprayed with Gunze Burnt Iron and dry brushed with silver enamel. A Mig Productions Dark Wash was then applied, before attaching it and the tail section to the main fuselage.
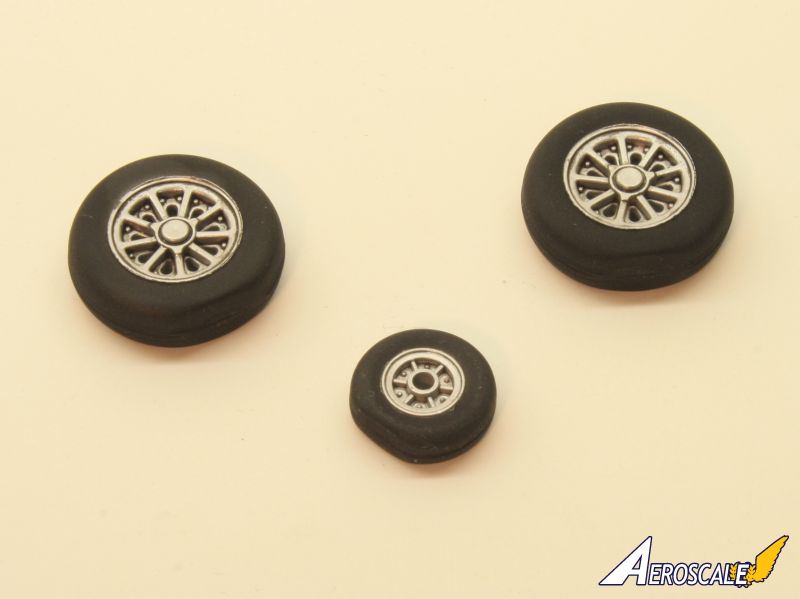
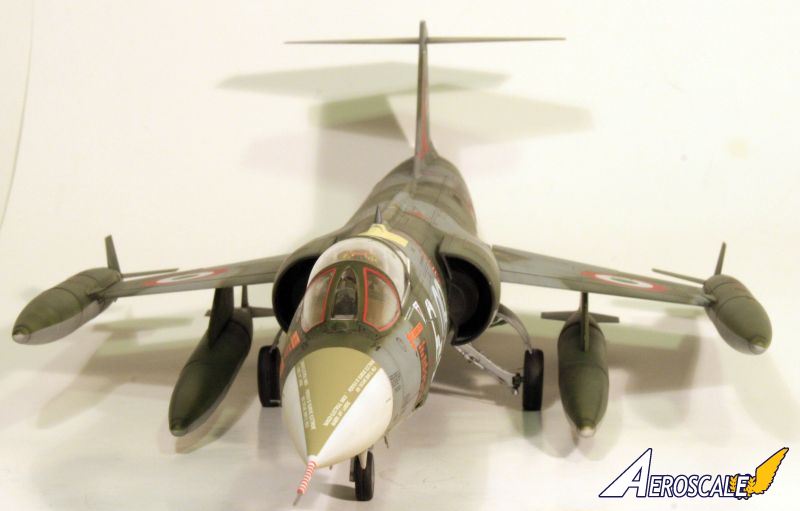
The gear legs were then assembled and test fitted before adding some hydraulic lines from fuse wire and painting with Alcladalluminium. I painted the wheelhubswith the same colour, then cut masks using an Olfa circle cutter for the main gear. As the circle cutters minimum diameter is too large for the nose wheel, I placed tape over the hub then cut round it carefully using a fresh blade to form the mask. The tyres were then sprayed matt black before removing the masks. These wereweathered further with light dust pigment.
With the gear doors in place, not much of the innards of the wheel wells will be visible, so I decided to just paint the moulded on detail. After painting the interior of the well in Alclad alluminium, I used a dark wash to accentuate the detail and then picked out some of the pipework in silver enamel. I used brass to paint the couplings and joints and blue to represent the seals on these couplings. The nose wheel well was given the same treatment.
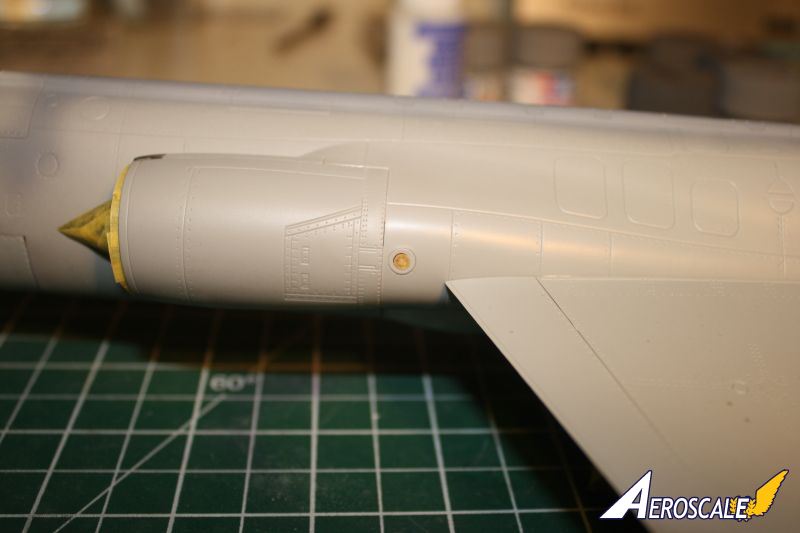
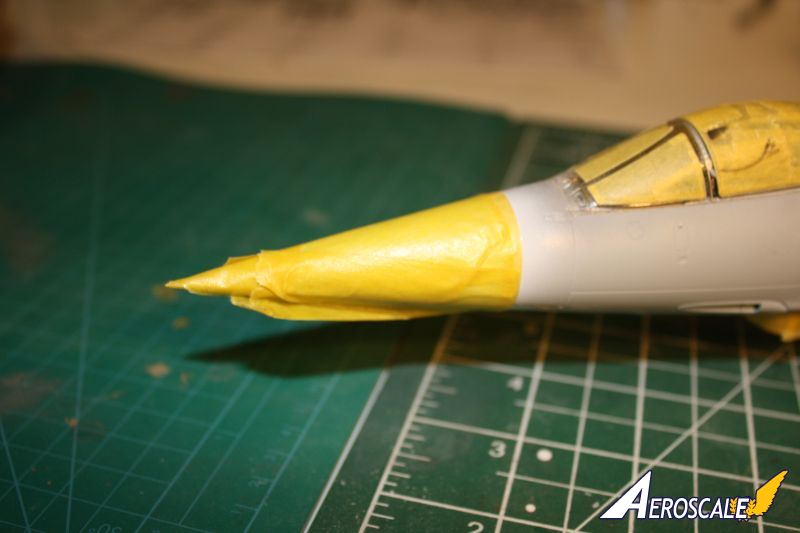
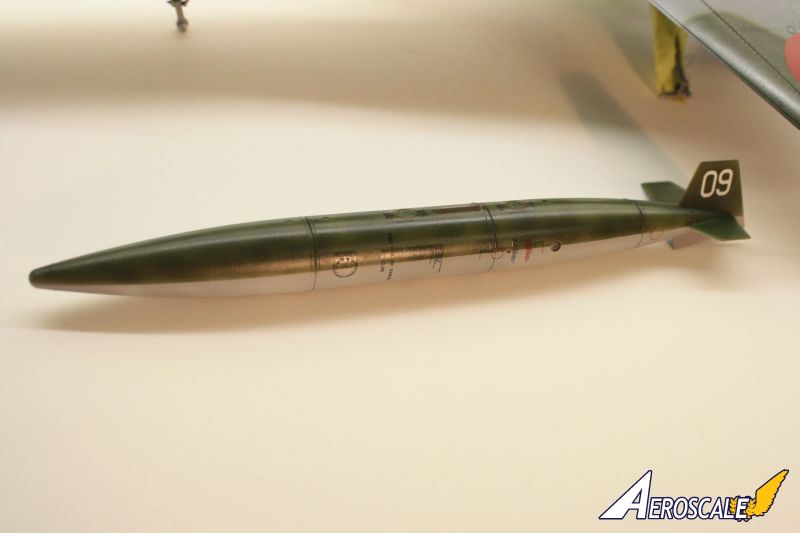
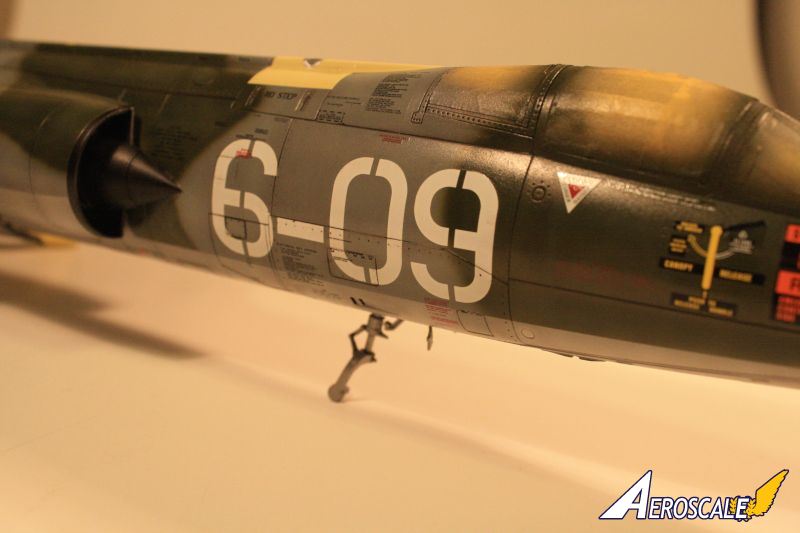
Balancing the model on the main gear proved that this would be a tail sitter, so ballast was added to the nose cone by means of fishing weights epoxied in place. After attaching to the model, the nose cone was given an intentionally thin coat of white paint, allowing the grey plastic colour to show through and resulting in a very light grey / off-white.I also painted the inside of the intakes and the shock cones before assembling and attaching the intakes. I figured this would be easier than painting after assembly. These, the nose cone and the canopy were then masked.
masking and painting
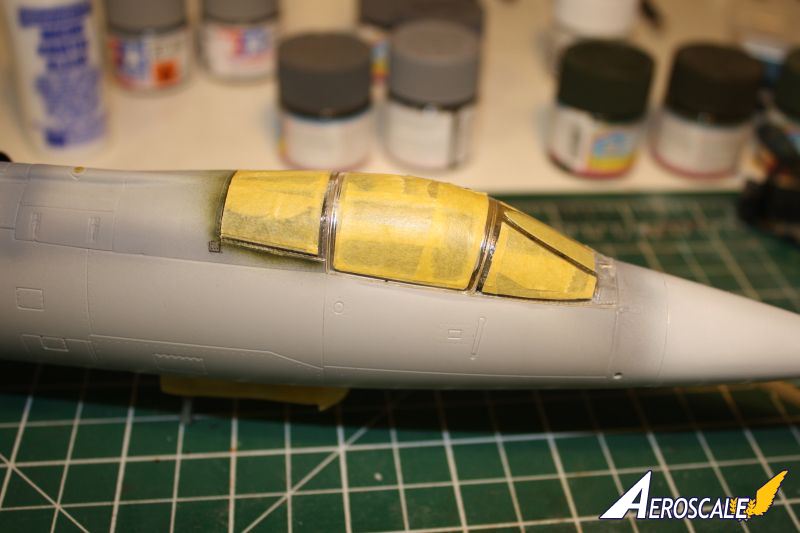
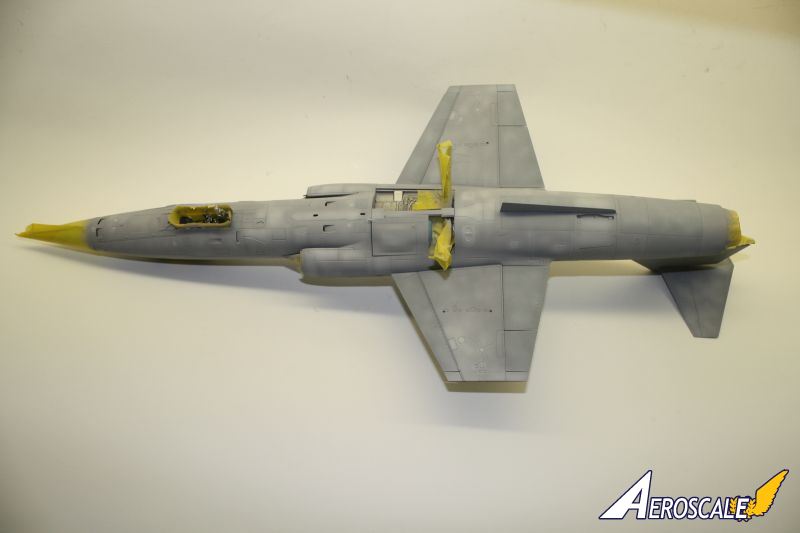
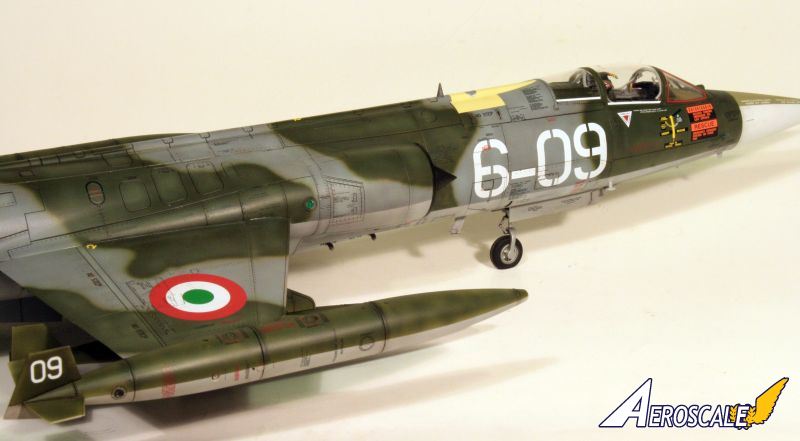
The opening part of the canopy has some rounded corners and to mask these, I stuck some Tamiya tape onto thin card and then punched out small circles before removing the tape and attaching it to the corners. I used thin strips of tape to join the dots and filled in the centre with some scrap tape from the cutting mat. The windscreen was masked by pressing tape into the frames, a bit like brass rubbing, and then following the contours with a sharp blade. The frames are well defined here so this method worked well.I also punched out small discs of tape to mask the various inspection windows and lights.The painting guide calls for the underside to be painted bare alluminium but this finish was actually painted on and faded to a dull grey after some time.Following the application of a base coat of Tamiya Sky Grey, I began the weathering on the underside by masking off several panels and spraying a darkened shade of the base colour. After removing the masking, the base colour was lightened and applied in random mottles and also on select panels. This lightened grey was then misted over the underside to pull things together.
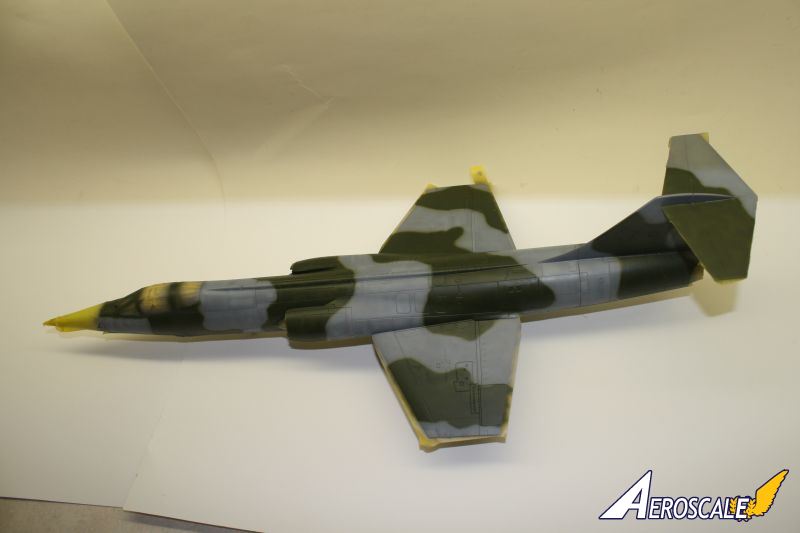
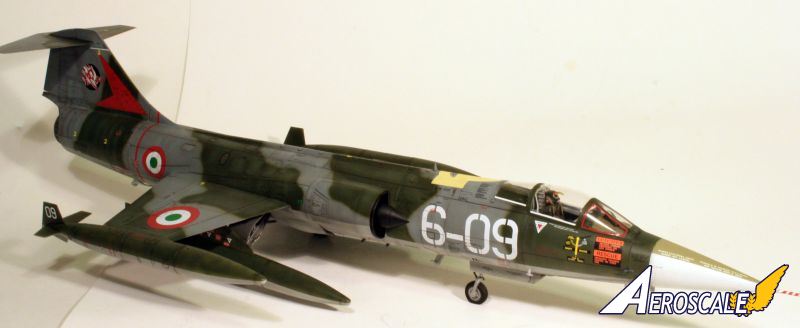
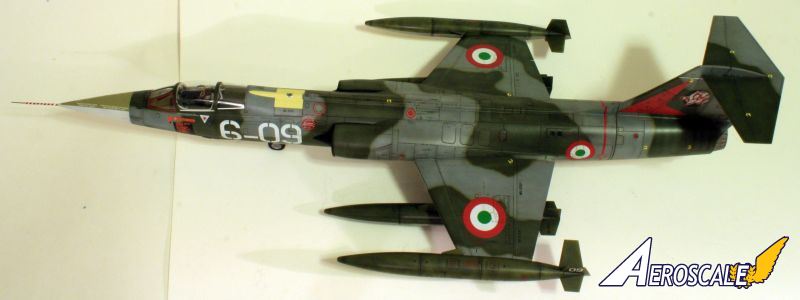
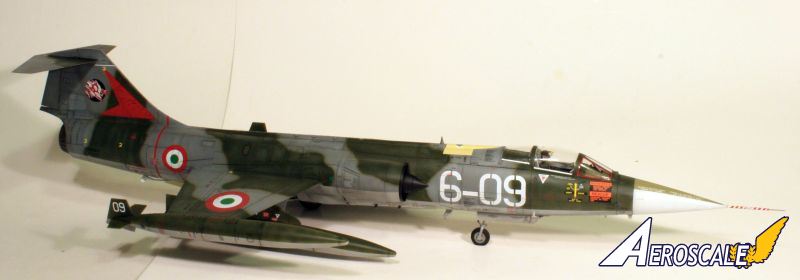
My reference photos show lots of fading and staining on the upper surfaces so I sprayed a base coat of Tamiya neutral grey followed by a heavily thinned mottle of sky grey. This was applied in random blotches, on certain panels and along select rivet and panel lines. I also randomly streaked the lighter grey. I decided it was time to try out some freehand airbrushing so I loaded up with Gunze khaki green and set to work, keeping the nozzle close up and drawing in the green. The paint was applied unevenly to simulate wear and fading. I followed up the green with a mottle of a lighter shade and then removed the masking. I was happy to see nice clean demarcation lines between upper and lower colours.
on to the decals
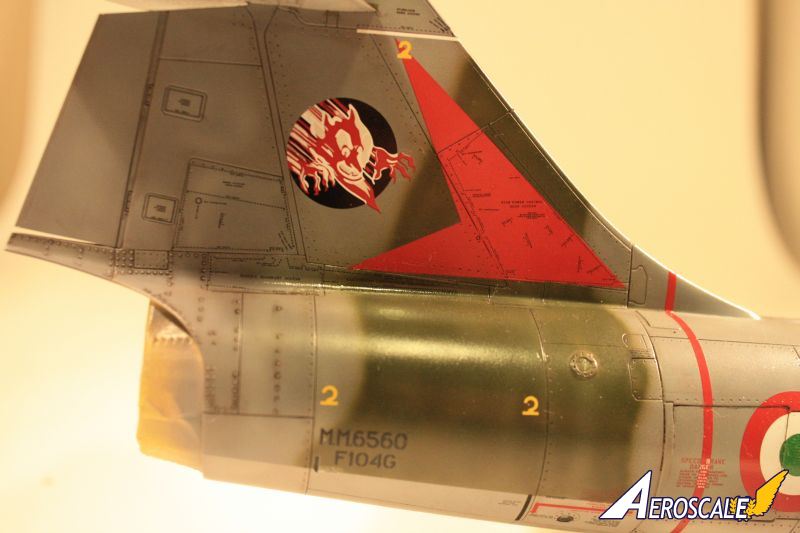
For the gloss coat, I used Klear, cut with Simple Green as I heard this gives a good shine and this certainly proved to be the case. I commenced decalling with the national insignia. The Cartograph decals are a thing of beauty, being accurately printed and opaque with very little carrier film. They are also very thin, but with care, go down very nicely. If only all decals could be like this. I almost managed, by sheer cack-handedness, to screw up one of the stencil decals on the wing tank pylons as they folded up on me while trying to reposition them. I had to carefully cut it into sections while it was off the backing paper and then manoeuver into place. I used Micro Set / Sol to bed them down but decided touse only water on the complex stencils as even the application of Microset, rendered them too soft due to the thin carrier film. Once on the model I hit them with the Microsol to bed them in. The stencils proved to be a long and arduous task but really add to the realism of the finished model.final details and finishing
With all the stencils applied, it was time for a wash to enhance panels and raised detail.As I was going for a grubby bird, I sloshed Mig dark wash quite liberally onto the model and let it dry over night. The next day, I went over the airframe with a Q-tip and half rubbed off, half worked in the semi dried wash. I spent a fair bit of time on this, using mineral spirit to remove the more stubborn areas, until a kind of dirty filter was left as well as defined panel lines. My reference photos show a good deal of grime toward the rear of the aircraft and so this filter was more concentrated in this area as well as around the raised rivet detail.Once the wash was dry, I flat coated with Testors Dullcote. All the remaining masking was then removed.I applied the decals for the canopy glass seals but was concerned about how the side windscreens would turn out as the centre is filled with carrier film. As it turned out, these settled down nicely over the clear part and the carrier film is now invisible, so I needn't have worried.
Having previously finished and weathered the gear doors, these were now attached. The attachment point for these is a bit tenuous so care must be taken aligning and tweaking them into place. The wing tip tanks were then attached followed by the underwing tanks. I then attached and painted all the many antennae. The pitot tube was painted white and dipped in Future ready for applying the spiral red stripe decal. This was a bit fiddly but was helped along with Microset / sol. I touched up either end with red paint and painted the tip steel. And with that, the build was done.
conclusion
I think that this kit builds into a nice model despite the fairly minor niggles encountered. For the money, I would have expected sharper detail and a bit more finesse in this scale but the decals and marking options are pretty awesome. All in all, an enjoyable build which has resulted in a pretty spectacular model.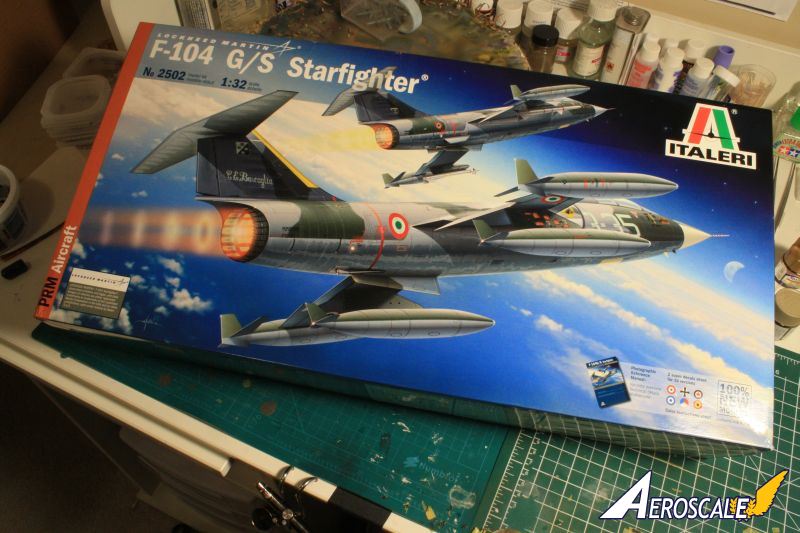


About the Author

FROM: ONTARIO, CANADA
I have always been fascinated by aircraft. My father being in the Fleet Air Arm afforded me the opportunity to get up close and personal with the real thing. We would attend the annual 'Air Day' at my Dads base, HMS Daedalus, where you could sit in actual operational aircraft. I remember being inst...
Comments


Mike, simply an outstanding build, with an exceptional camo paint scheme.
JAN 05, 2015 - 01:27 AM

Copyright ©2021 by Mike Wood. Images also by copyright holder unless otherwise noted. The views and opinions expressed herein are solely the views and opinions of the authors and/or contributors to this Web site and do not necessarily represent the views and/or opinions of AeroScale, KitMaker Network, or Silver Star Enterrpises. Images also by copyright holder unless otherwise noted. Opinions expressed are those of the author(s) and not necessarily those of AeroScale. All rights reserved. Originally published on: 2015-01-02 19:26:37. Unique Reads: 8412

WEB HOSTING BY


Copyright ©2021 AeroScale and Kitmaker Network, a subsidiary of Silver Star Enterprises
All Rights Reserved. Please read our Conditions of Use and Privacy Policy.
All Rights Reserved. Please read our Conditions of Use and Privacy Policy.