1⁄35Building the Classic Airframes 1/48 Polikarpov I-153
10
Comments
History
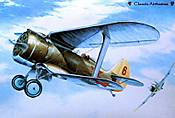
The Polikarpov I-153 "Chaika" (Gull) first flew in 1938 and evolved from the original I-15. The main difference was the rearward-retracting undercarriage.The I-153 was extremely maneuvrable and was employed extensively by the VVS (Russian Air Force), the Chinese Air Force and also by the Finnish air Force which captured several samples during the Winter War.
At the start of Operation Barbarossa in 1941, large numbers of I-153's were destroyed by the Luftwaffe, the "Chaika" beeing an anachronism against the Messerschmitt Bf 109!
The kit
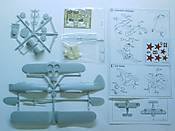
The Classic airframes kit comes in a little box with two sprues of grey plastic, one bag with resin parts, a photo etched fret, two vacuformed windscreens (one spare), as well as some instructions, painting guide and decals.(See pictures 00 & 01)
The build
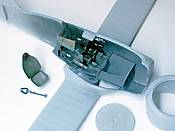
The cockpit is mainly made of PE (Photo Etched) parts and did not cause much problem. The seat is beautifully molded in resin and... very thin! so take care while handling it. I have put some white glue on the PE levers to gave them a more realistic look. The part representing the floor, when glued in place, is partially closing the wheel bay by figuring the fuel tank. The problems were, when following the instructions, that the control stick would have been hidden behind the PE instruments panel, the rudder pedals would have been to far for the poor pilot's feet and there would have been a gap under the pilot's seat! So I first decided to make new rudder pedals with spare parts and styrene (the original one weren't convincing). Second, I glued the control stick in a better position and third, I added a floor where it was missing. Last step was to add the four resin gun "dummies" which were painted in gun metal.The whole cockpit was painted in dark grey as mentioned in the instructions and the two fuselage halves put together. I didn't glued the seat at this time as it could be placed at a later stage.
(See pictures 02 & 03)
The next step was to prepare the sub-assemblies for painting. And that gave me Headache!
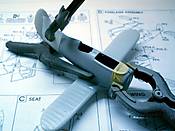
Usually, when you do a biplane, you can paint the upper wing separately. Not on the "Chaika"! The gull wing design won't let you do that! Or if you do, it will leave an unaesthetic seam on the upper wing/fuselage fairing! My choice was radical and I cut the upper wing in three pieces along existing panel lines! This allowed me to glue the centre section of the wing in place and add putty on the resulting seam. After sanding and re-scribing, the fairing looked as on the real one: smooth!
Maybe it's not the simplest way to build the kit, but I wanted to have easy access on the model for painting and rigging later!
(See picture 04)
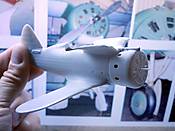
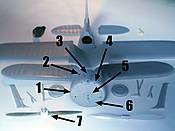
The further step was to make some modifications to better match the real plane: 1 - Sanding down the cowling to make it rounder. 2 - Drilling holes for the exhausts and closing them from the inside with styrene. 3 - Completely reshaping the air intake (it was too squarish) 4 - Drilling out the gun holes. 5 - Drilling out the holes on the front cowling. 6 - Re-scribing all the panel lines 7 - Making a new, more detailed and more accurate propeller.
(See picture 05)
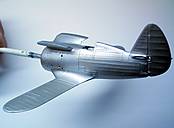
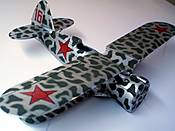
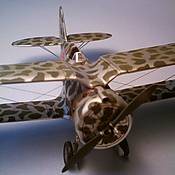
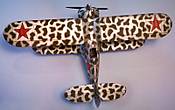
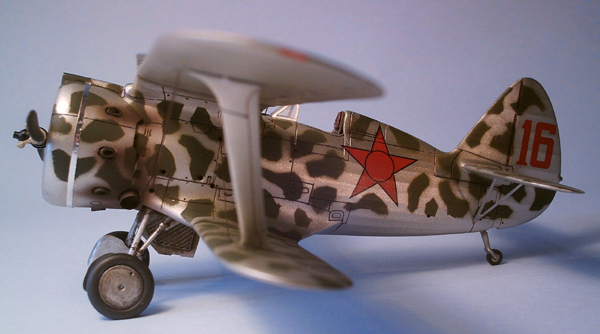
It was then time to paint the model. I chose the eye-catching aluminium/green camouflage instead of the more conventional blue/green one that was proposed on the kit's painting guide. I'm not sure if the real plane did carry such a "Giraffe-like" pattern and the green may have been brush painted or washed on the real thing. Anyway, I found the plane would look cool with such a paint scheme! So I decided to match the more artistic "Wanaka" interpretation.
I first applied coats of medium grey (I used only Tamiya acrylics for this build) to reveal the imperfections, then several coats of aluminium and titanium shades to prepare the model for the complex camouflage.
(See picture 06)
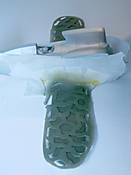
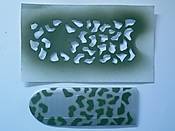
Painting these kind of mottling patterns can be very hazardous! Not wanting to take any risk, I decided to cut paper masks for the various parts of the plane. This was certainly a bit more work, but at the end it was a safe method and I had no bad surprises with my airbrush randomly spitting green paint on my aluminium base and ruining my previous work!
(See pictures 07 & 08)
Knowing that the decals where translucent (thanks to Bill Lachance alias Pixelater for the info!), I decided the green paint would go around the stars and the tail numbers. I then applied the red markings which went on very well on the aluminium paint. I didn't applied Future/Klear as usual on my models. I found that the contrast between the shiny metallic paint and the matt green was very convincing as it was! I only put a dark wash in the previously re-scribed panel lines.
(See picture 09)
Last step was to add the rigging (several holes have to be drilled out in the fuselage, so check your references), mount the complex undercarriage (with PE gear doors which you have to bend to the right shape), glue the windscreen (don't forget to drill two holes just aft of it), put the exhausts made of plastic rods in place (oval shaped), add the PE tail struts (previously painted with white glue so they don't look too flat) and don't forget the pilot's seat (with the PE seat belts)! Voilą! c'est fini! Euh! No... I forget to mention the weathering in form of dark brown exhaust stain around the cowling and the aluminium ring made of foil which goes around it! Ouf! Cette fois c'est bien la fin!
(See pictures 11 to 15)
Conclusion
Overall, this is a very nice kit! Not too easy, not too difficult! Just the perfect kit for someone wanting to tackle the challenge of building a short-run multi-media biplane for the first time! And with such an eye-catching camo scheme, this little Russian fighter will be the favourite of the ladies! In my girlfriend's opinion, it's the most lovely plane in my collection so far!Comments
Nice informative article Jean-Luc and a wonderful model. Well done and thanks for sharing.
Mal
JUN 26, 2005 - 04:51 AM
Hi all!
Just wanted to say thanks to all! I sure will make some other features now the first step is done!
Jean-Luc
JUN 27, 2005 - 10:10 AM
Jean-Luc
I can't wait to see what you come up with next!
All the best
Rowan
JUN 27, 2005 - 10:43 AM
Thanks Rowan and Mal!
I could say it was VERY difficult and painful to write an article so you would all complain me and say some nice words but... it was pretty easy in fact! In all, I spend just a few hours on it... the time for cement to dry! Then I "zipped" it and send it to the "Magician" et voilą!
My next project will be the build of two important planes of aviation history: the Heinkel He 178 and the Gloster Pionner. I will build them both strictly out of the box from the Condor and Special Hobby 1/48 kits.
I will then write a He 178 Vs Pionner building review and we will see wich one is the best!
My Bugatti 100P build could also be a good subject for an article, but this one will have to wait!
Thanks to all who took the time to read the "Russia's gull" article!
Jean-Luc
JUN 28, 2005 - 08:59 AM
Hi Jean-Luc
I look forward to seeing the Pioneer - I reviewed it when it first appeared, but have never got round to building it. With my reputation... surprise, surprise!
All the best
Rowan
JUN 29, 2005 - 09:58 AM
Copyright ©2021 by Jean-Luc Formery. Images also by copyright holder unless otherwise noted. The views and opinions expressed herein are solely the views and opinions of the authors and/or contributors to this Web site and do not necessarily represent the views and/or opinions of AeroScale, KitMaker Network, or Silver Star Enterrpises. Images also by copyright holder unless otherwise noted. Opinions expressed are those of the author(s) and not necessarily those of AeroScale. All rights reserved. Originally published on: 2005-06-25 00:00:00. Unique Reads: 23027


