

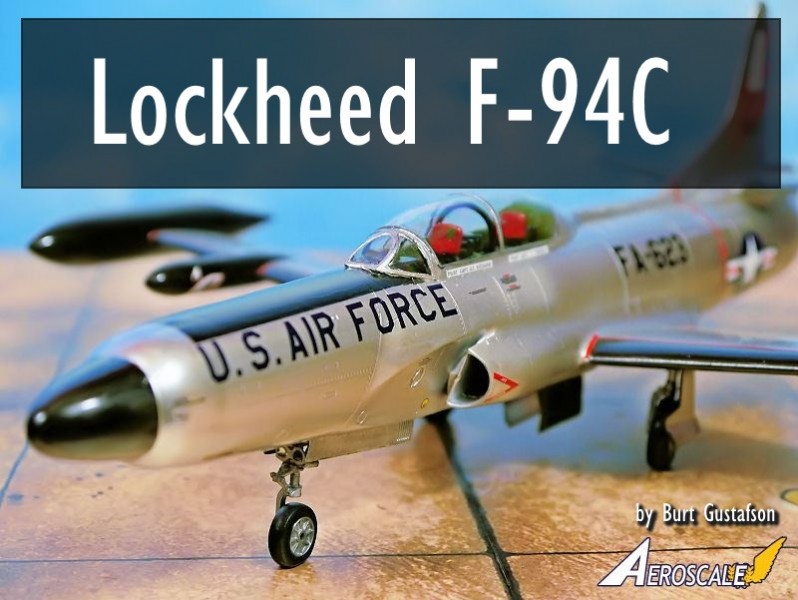
1⁄48Lockheed F-94C
3
Comments
History
The Lockheed F-94 Starfire was a two seat single engine fighter interceptor. It was also a first-generation jet aircraft of the USAF. It was developed from the twin-seat Lockheed T-33 Shooting Star in the late 1940s as an all-weather, day/night interceptor. The aircraft became operational in May 1950 with Air Defense Command, replacing the propeller-driven North American F-82 Twin Mustang in the all-weather interceptor role.The F-94 was the first operational USAF fighter equipped with an afterburner and was the first jet-powered all-weather fighter to enter combat during the Korean War. However, it had a relatively brief operational life and was replaced in the mid-1950s by the Northrop F-89 Scorpion and North American F-86D Sabre.
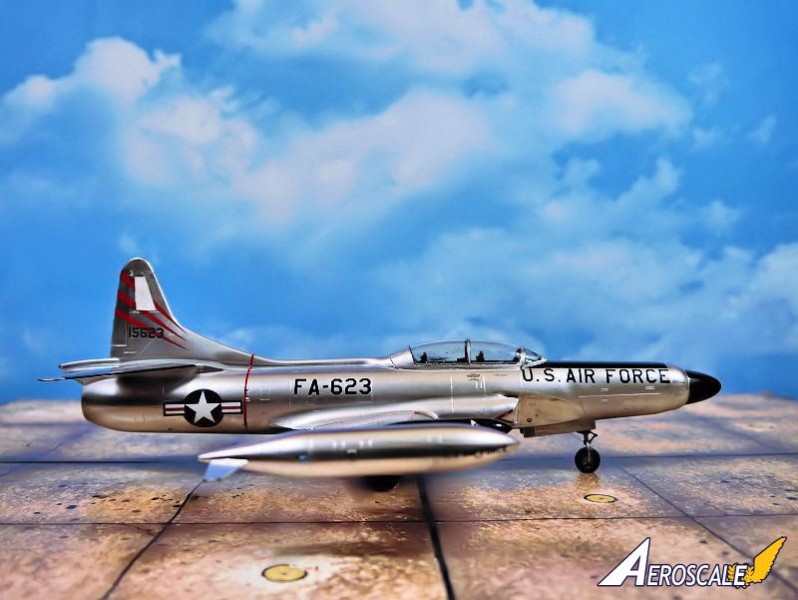
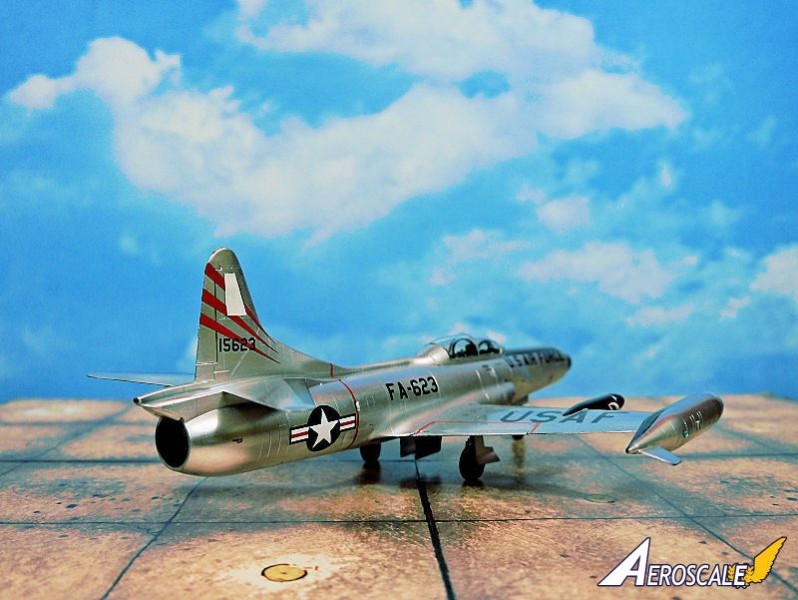
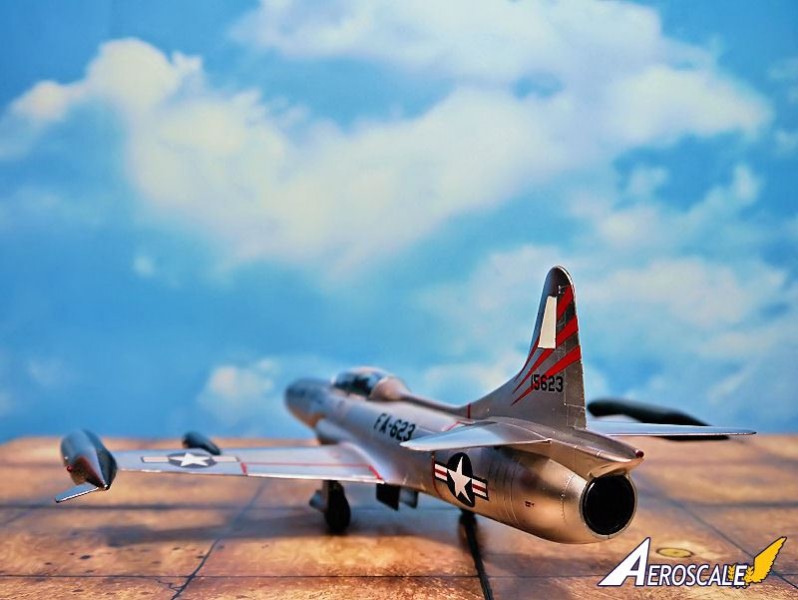
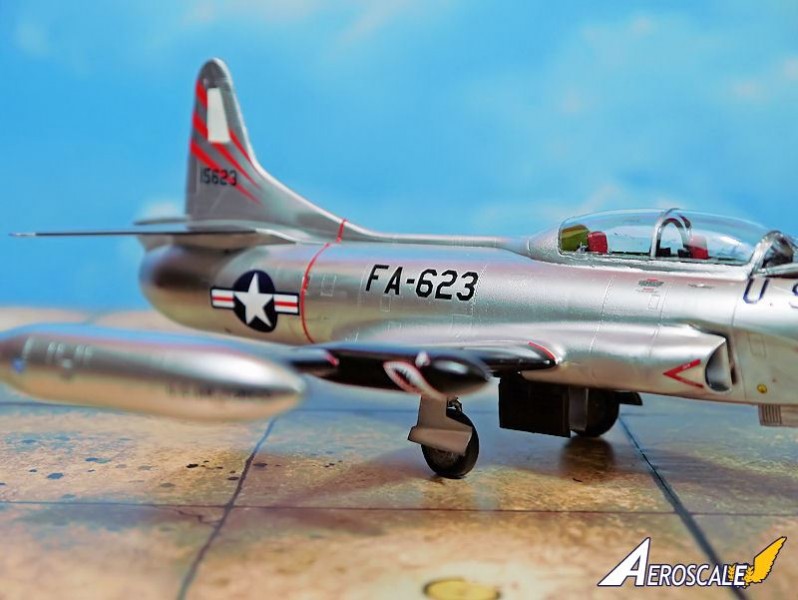
The F-94C Starfire was extensively modified from the early F-94 variants. It was initially designated F-97, but it was ultimately decided to treat it as a new version of the F-94. The F-94C had one mission, the interception and destruction of Soviet nuclear bombers coming over the north pole to attack North America. While in service, a large problem was discovered with the nose-mounted rockets. The smoke and fire from the rockets blinded the crew. Additionally, there was a severe problem associated with firing the nose-mounted rockets. The exhaust from the rockets could cause a flameout of the jet engine, which could lead to loss of the aircraft. Mid-wing fuel and rocket pods were added, each holding 12 rockets. Most of the time, the nose rockets were not installed, and the mid-wing pod rockets were the sole armament. Despite its mediocre performance, the F-94C served as a first-line interceptor for six years.
The Kit
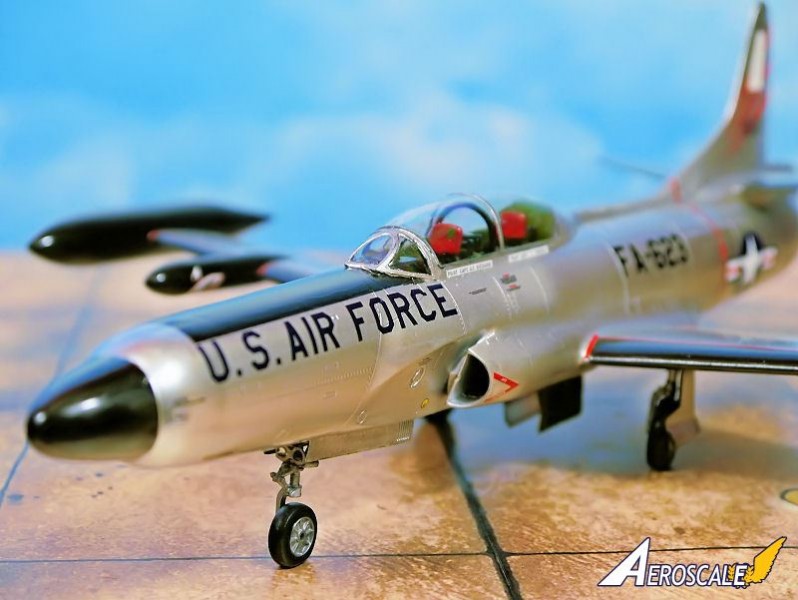
The Kitty Hawk F-94C kit is made up of three light gray sprues, and a single sprue for clear parts. The kit also includes a PE fret, a decal sheet with markings for two aircraft, and a 12 page instruction guide. The last two pages of the guide are painting guides in color for two aircraft.Construction
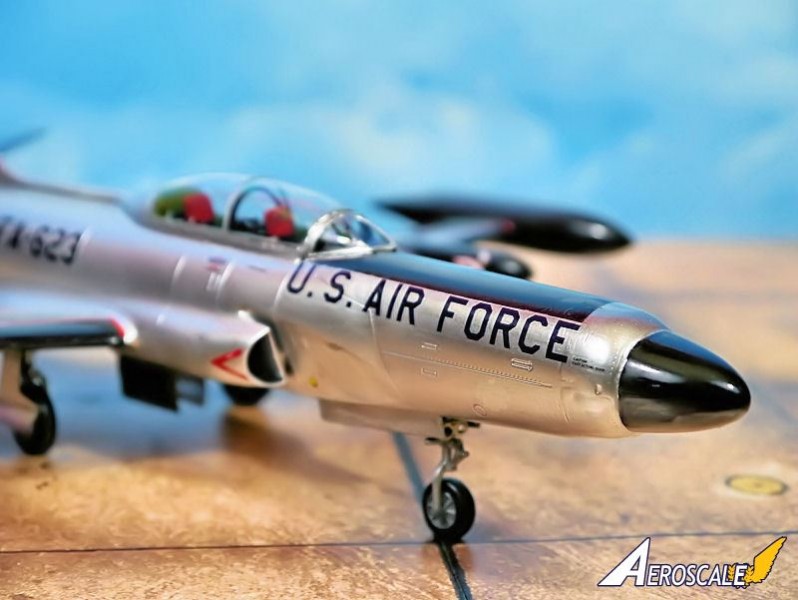
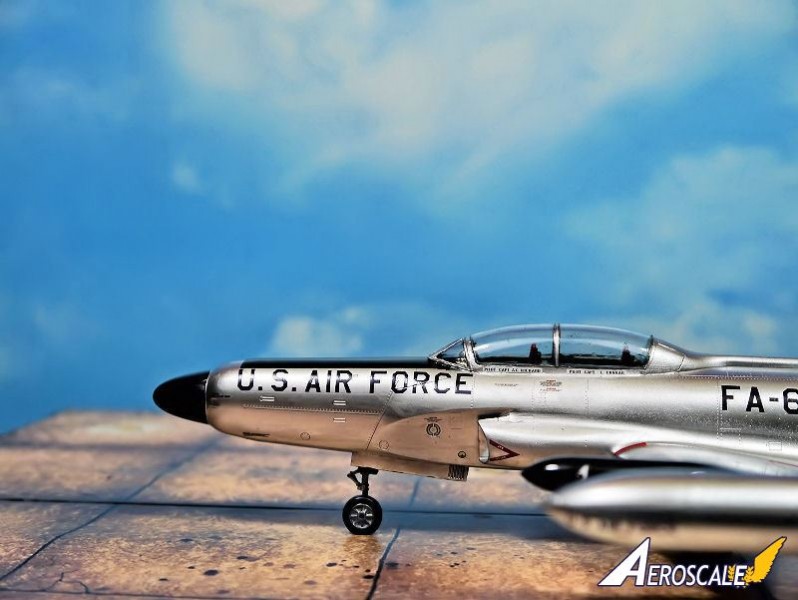
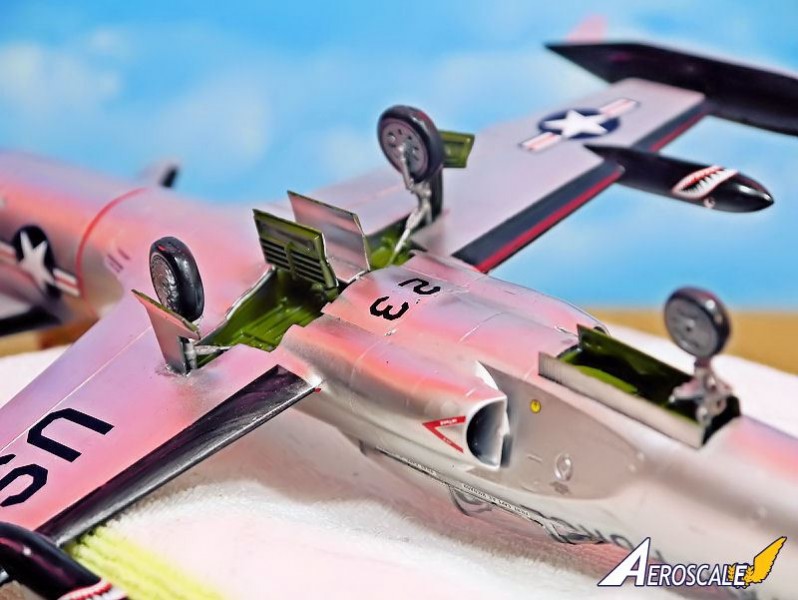
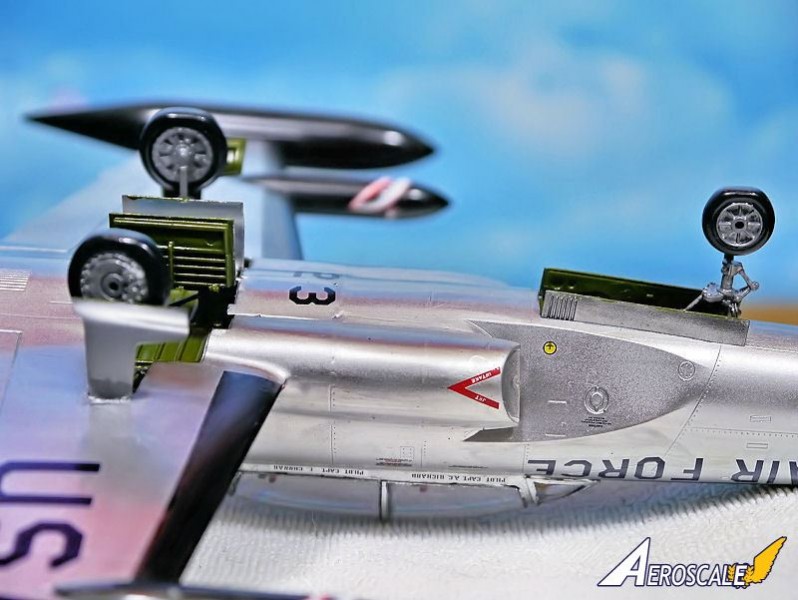
This was an out of box build, no after market parts were used. Construction began with the cockpit that went together nicely. The side instrument panels are PE parts that required painting. You have the option of using a PE pilot front panel or a decal. I chose to use the decal. For the ejection seats the kit provides PE seat belts. The completed cockpit attaches to the nose gear assembly, and the assembly tightly fits into the right half of the fuselage. I did a lot of dry fitting to get the assemblies seated correctly.The kit provides three brass balls for weight. I used two of them and a small lead weight. I thought this would be enough weight to prevent tail sitting. I was wrong, and had to add a lead weight to the nose gear wheel bay to prevent tail sitting.
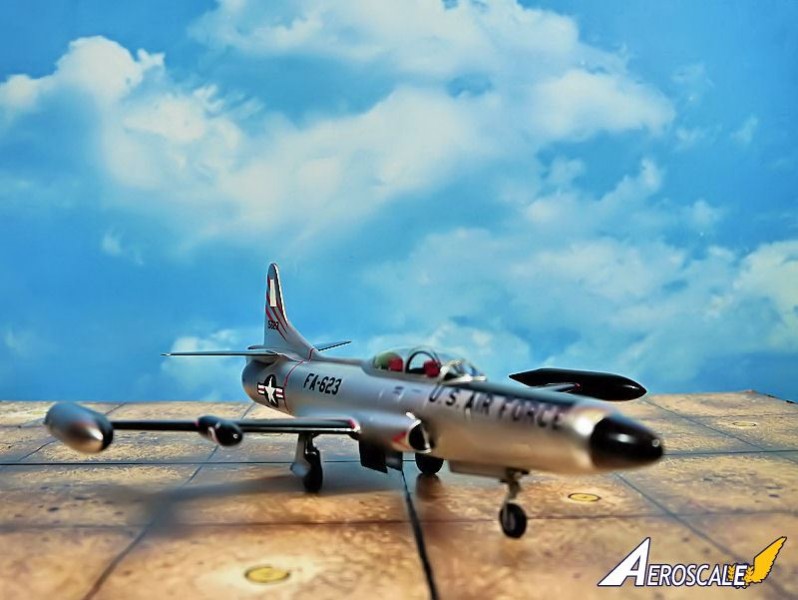
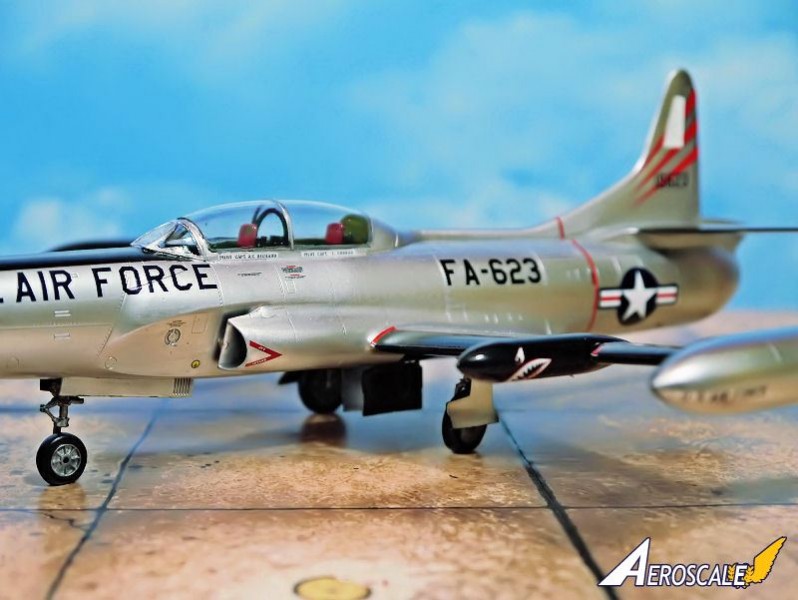
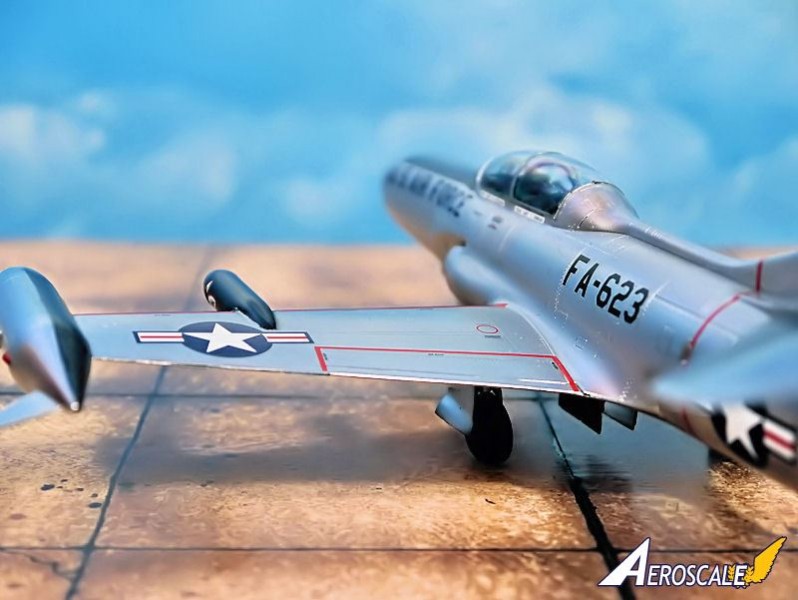
The parts fit for this model was good except for the air brakes. Obviously the air brakes were designed to be open. However, I wanted them closed. The parts fit for closed air brakes was terrible. I had to do a lot of sanding and filling to get them to look closed. The rest of the kit went together without much trouble except for the main landing gear installation. The oleo struts came in two tiny pieces that I could not manipulate, and left them off.
Painting
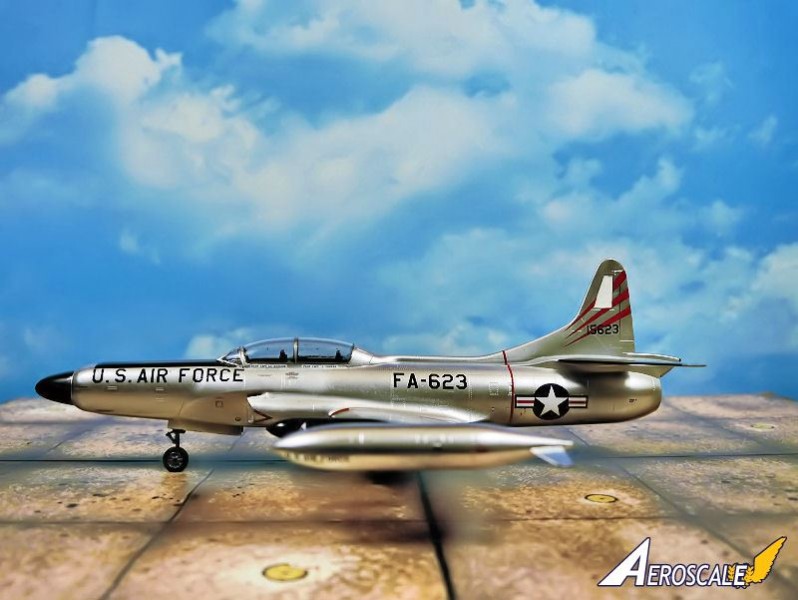
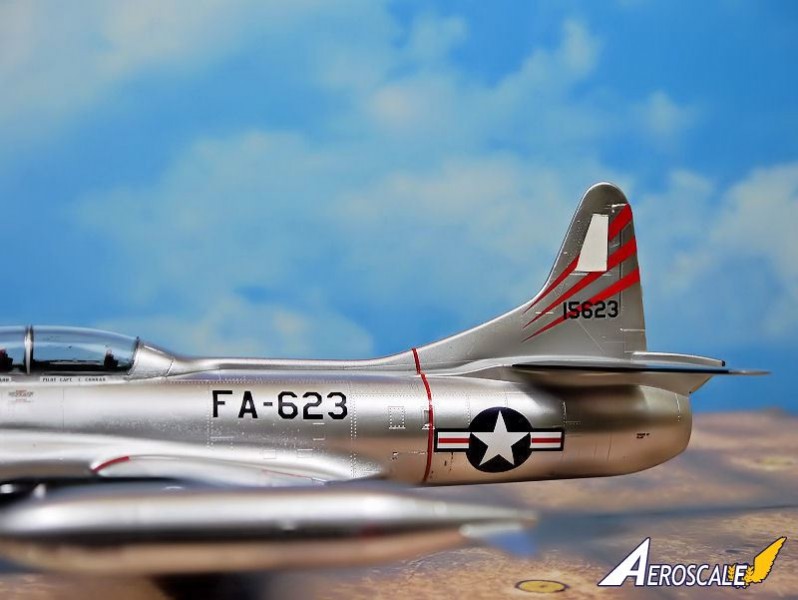
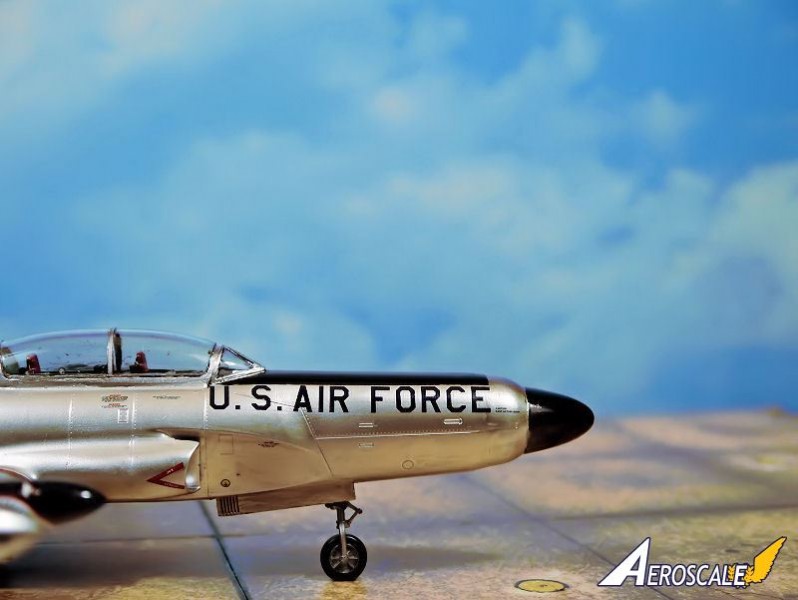
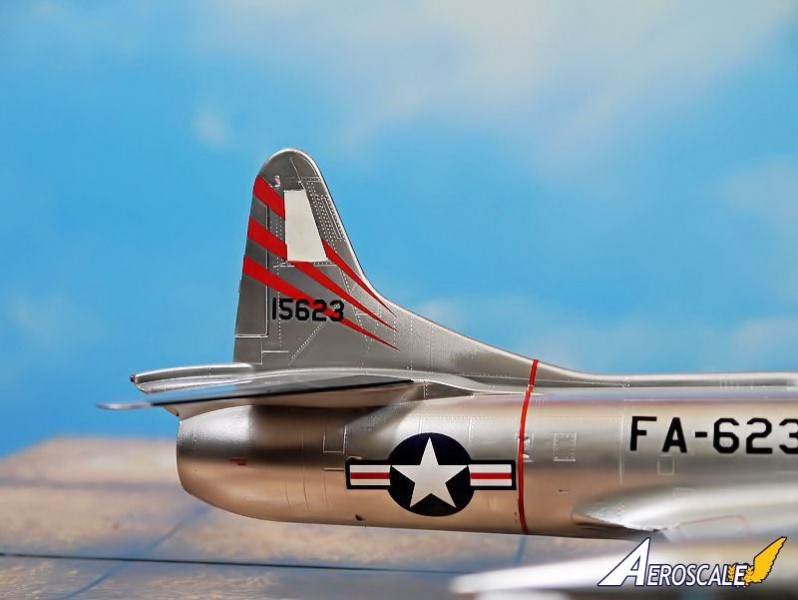
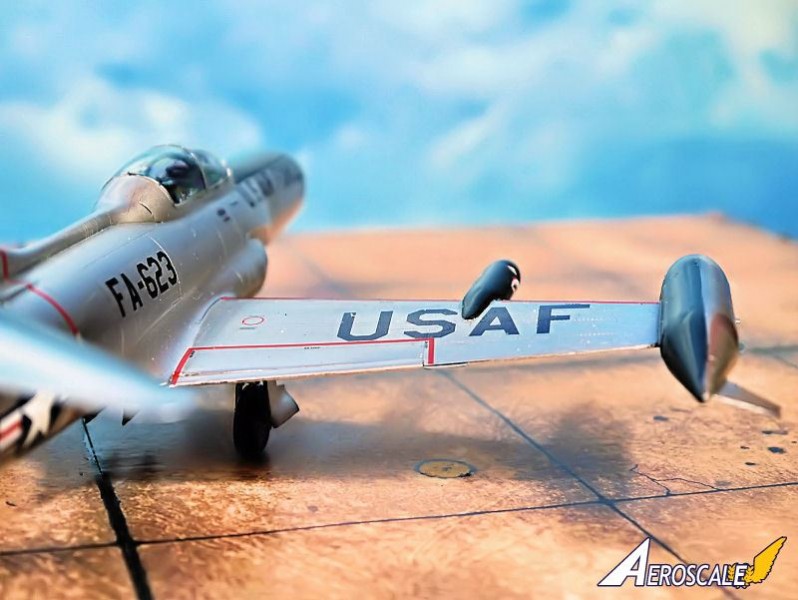
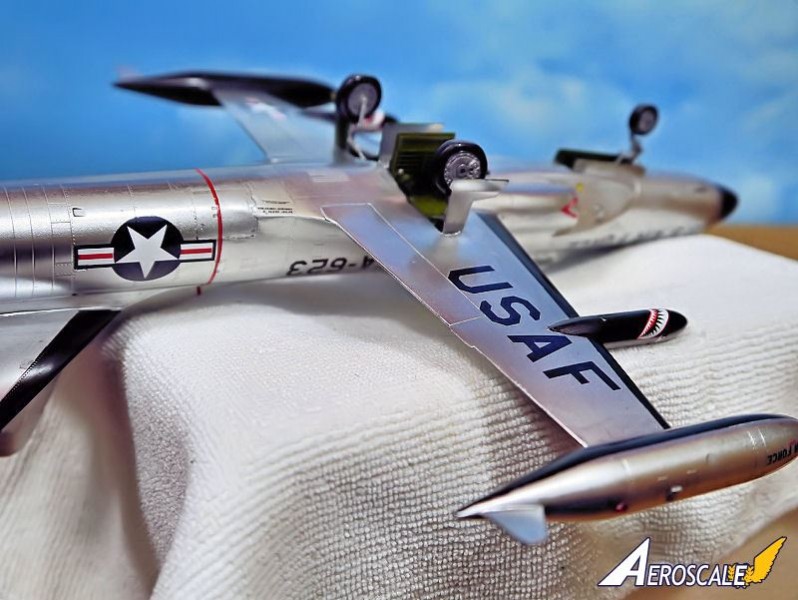
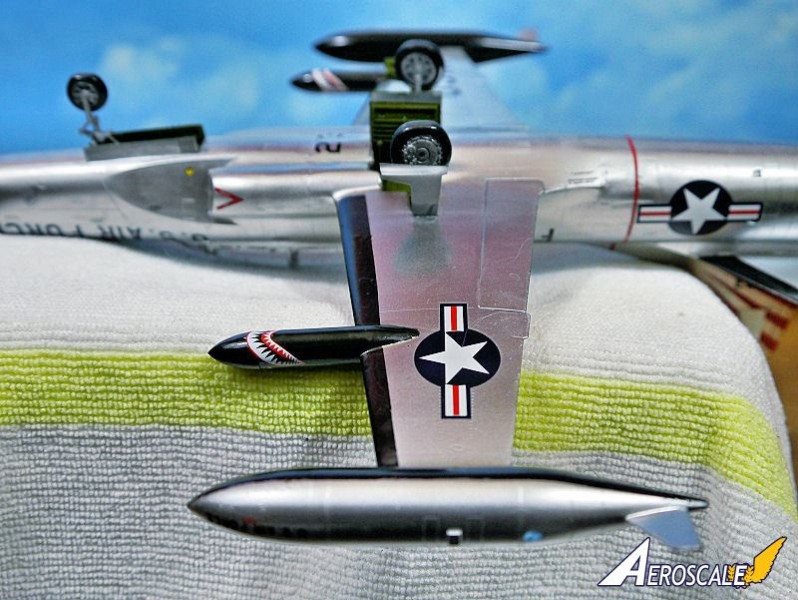
Painting the F-94C was a relatively easy task. The landing gears were painted with Floquil Bright Silver. Wheel Bays and the inside of the wheel bay doors were painted with MM Interior Green. Since the F-94C had a bare metal finish, I first primed the overall model with MM Gloss Black. After the Gloss Black dried and cured, I masked the areas that had to remain black. I then air brushed the model with Alclad Polished Aluminum.Decals
Decalling my F-94C did not go so well. My intention was to use the markings for aircraft number 15623. However, the decals were very thin and very difficult to position on the model. This led to my ruining several of the larger decals. To make up for the loss, I improvised and used the decals for aircraft numbers 01054 and 15623. In the end the model looks halfway decent.Conclusion
To sum up, this was a good build, although a difficult one for me; too many tiny pieces and PE parts. The parts fit is good and the external detail is also good. The only negative part of the build was the decals. Even with the decal problems and the small parts, I am pleased with the finished model.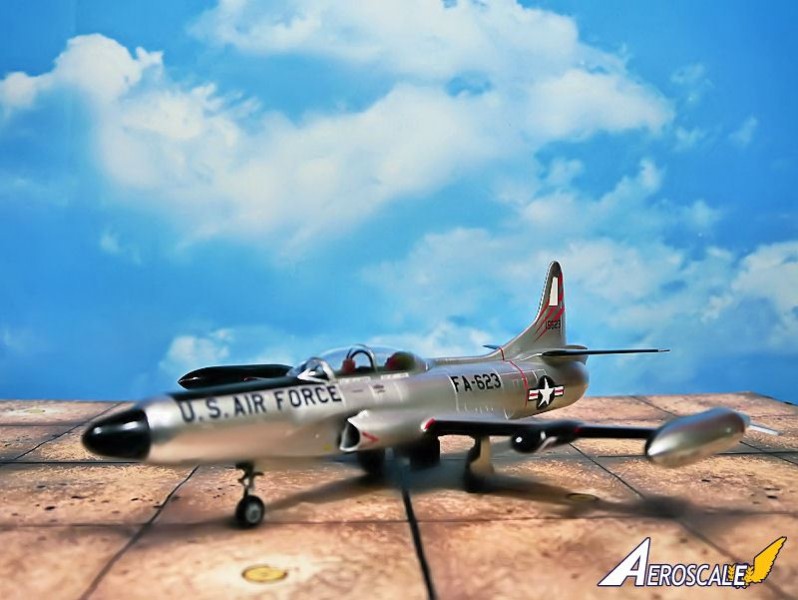
About the Author


Comments
Burt,
A very nice OOB build of one of the USAAF early so so operational aircraft. Your NMF came out very well, and looks quite realistic.
I bought and sold this kit when it 1st came out, and like others found that the plastic had a rather rough texture to it that concerned me as to how the final NMF would look. Doesn't seem to have been much of an issue from your pictures.
Joel
FEB 17, 2016 - 08:48 PM

Very impressive! The NMF looks good. A well done NMF like this is always impressive to me.
FEB 19, 2016 - 02:09 AM

Copyright ©2021 by Burt Gustafson. Images also by copyright holder unless otherwise noted. The views and opinions expressed herein are solely the views and opinions of the authors and/or contributors to this Web site and do not necessarily represent the views and/or opinions of AeroScale, KitMaker Network, or Silver Star Enterrpises. Images also by copyright holder unless otherwise noted. Opinions expressed are those of the author(s) and not necessarily those of AeroScale. All rights reserved. Originally published on: 2016-02-13 13:30:40. Unique Reads: 5170

WEB HOSTING BY


Copyright ©2021 AeroScale and Kitmaker Network, a subsidiary of Silver Star Enterprises
All Rights Reserved. Please read our Conditions of Use and Privacy Policy.
All Rights Reserved. Please read our Conditions of Use and Privacy Policy.