

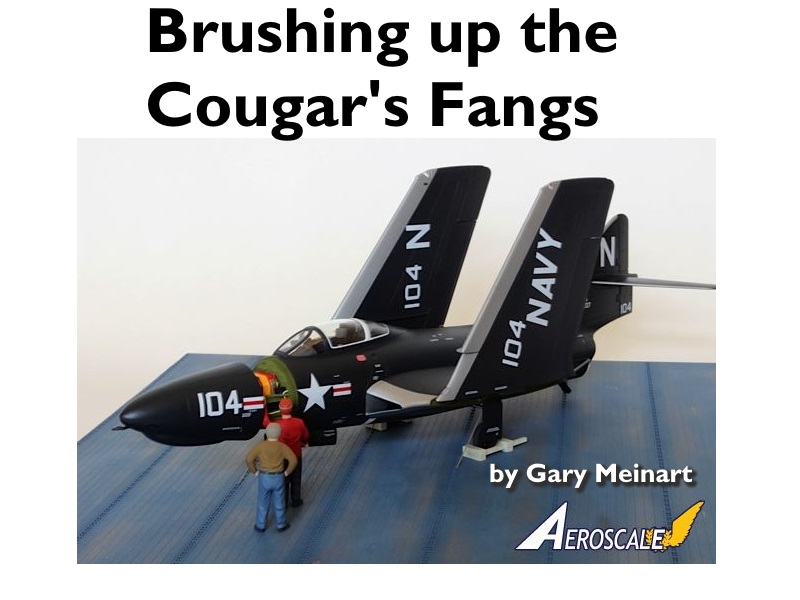
1⁄48Brushing up the Cougar's Fangs
History
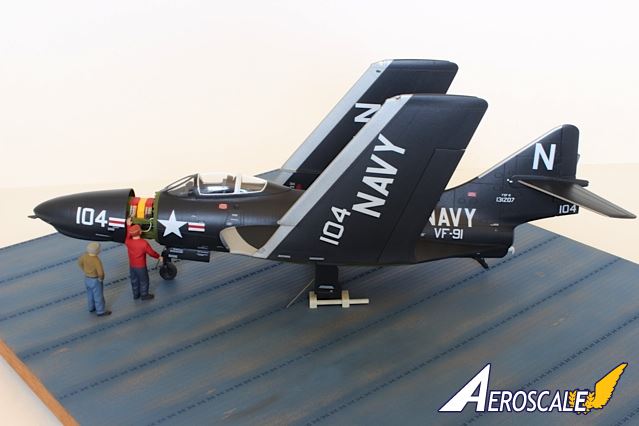
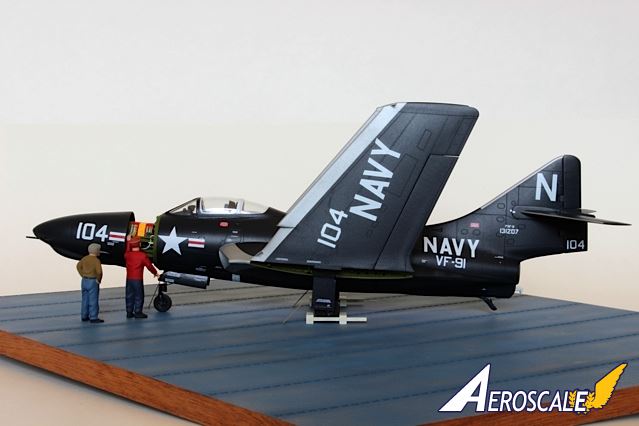
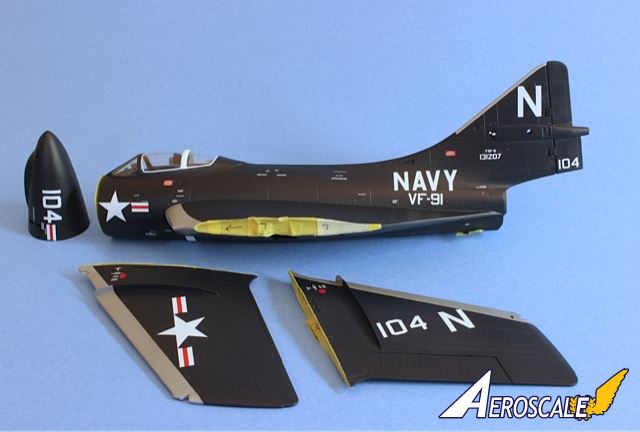
The Grumman F9F/F-9 Cougar was an aircraft carrier-based fighter aircraft for the United States Navy. Based on Grumman's earlier F9F Panther, the Cougar replaced the Panther's straight wing with a more modern swept wing. Thrust was also increased significantly. The Navy considered the Cougar an updated version of the Panther, despite having a different official name, and thus Cougars started off from F9F-6 upward.Because the Kitty Hawk kit is not well-engineered, the build was a difficult one with numerous fit problems. Also, the kit contains many errors, even though Detail & Scale worked with Kitty Hawk on the kit development. Detail & Scale provides a sheet in the kit listing the errors and how to correct them. (I discovered additional errors not listed on the sheet.) One of the most glaring errors is that the nose landing-gear assembly is too short because it is compressed. I replaced it with a modified gear containing the correct oleo to produce the proper aircraft stance.
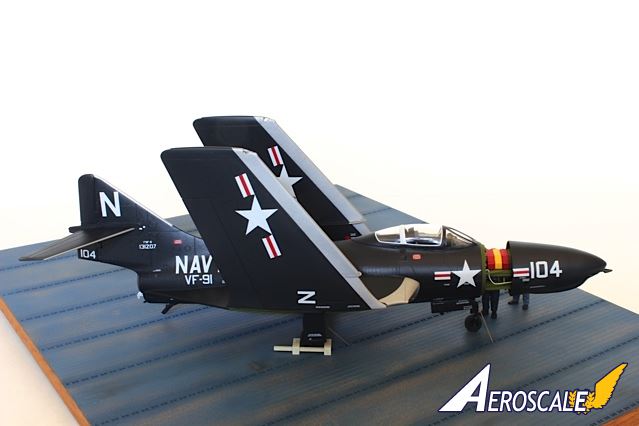
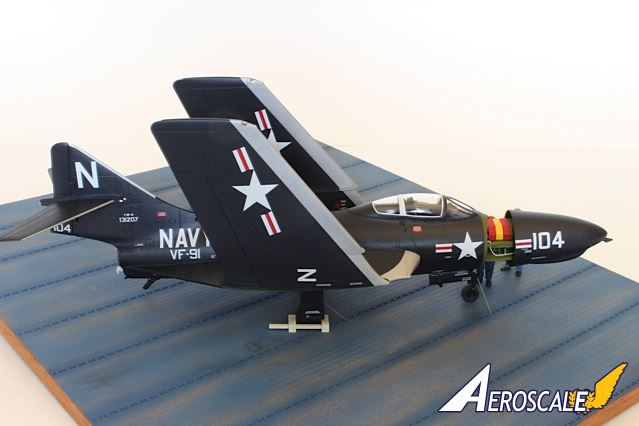
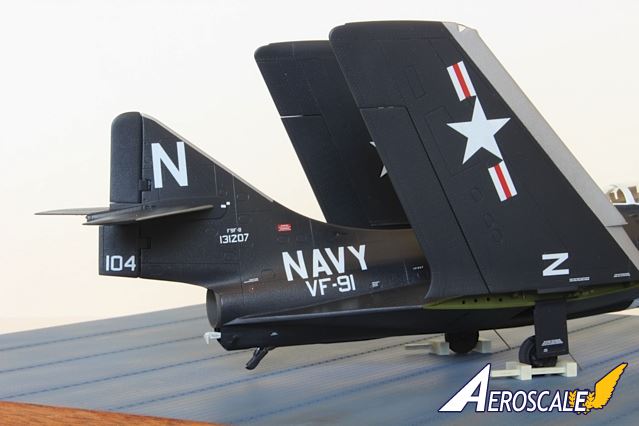
I used none of the kit decals other than those for the instrument panel and consoles. The excellent Furball /Detail & Scale Sea Blue Cougars sheet had most of the decals I needed for this project.
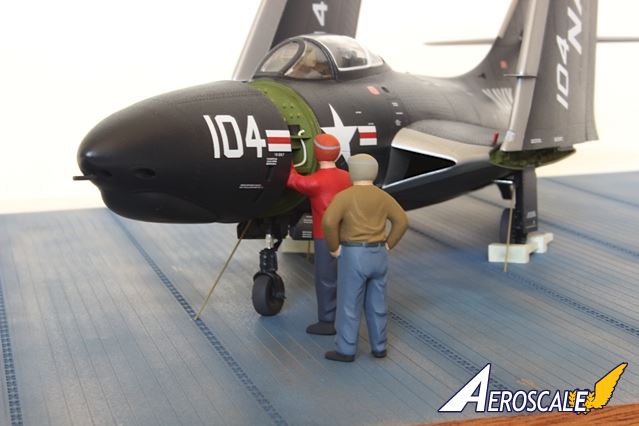
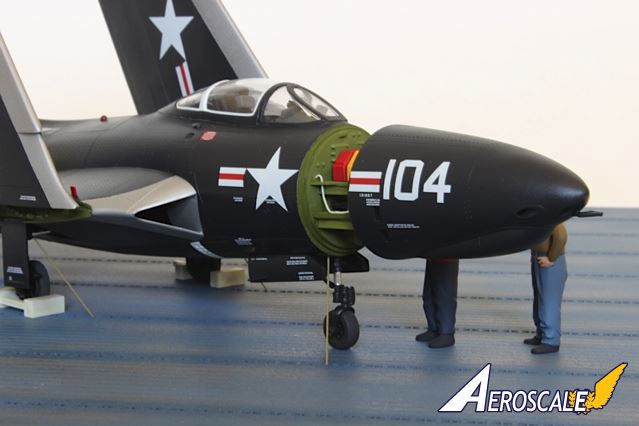
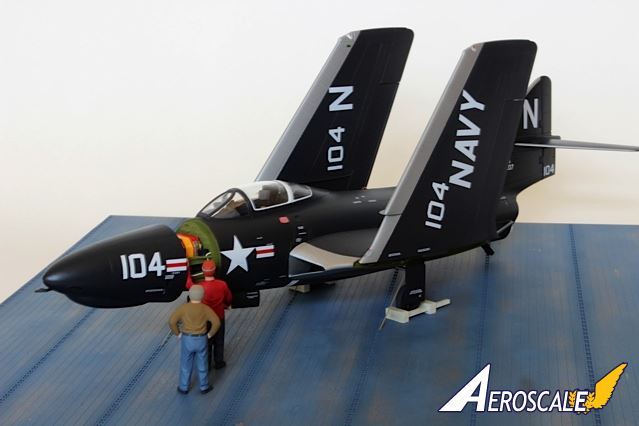
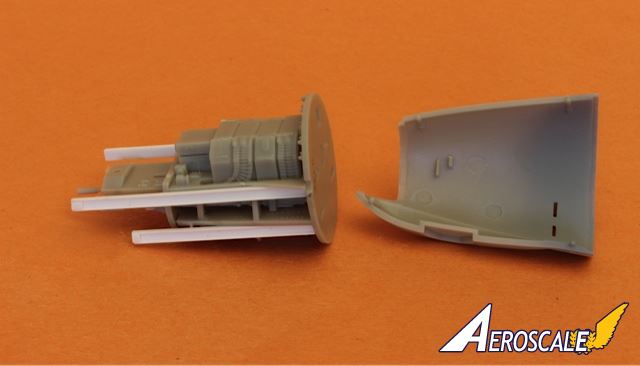
Returning to the diorama, one major challenge was how to display the open gun compartment. The kit provides reasonable detail in this area but no way to show it other than to leave the nose completely off. On the real aircraft, the nose section slides forward on rails, and I was able to duplicate this by using styrene channel strips. (The nose is supported entirely by the two upper channel pieces.) I added a few scratch-built detail bits to the gun bay.
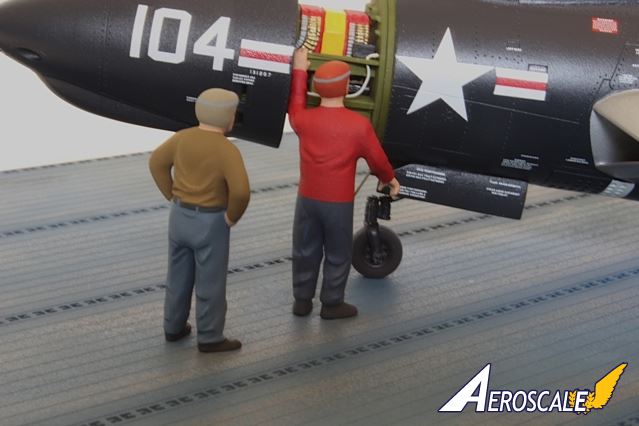
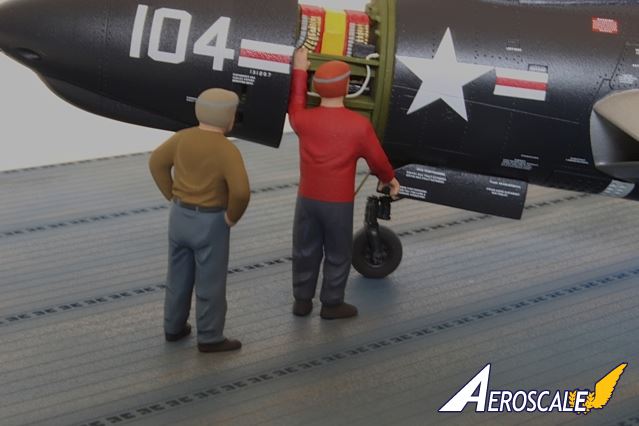
The other big problem was finding suitable deck-crew figures. I gave up in frustration and had to resort to kit-bashing my own figures from multiple sources. My two figures have modified Eduard bodies with Monogram heads. One of them has Hasegawa arms. Truly they are franken figures.
To complete the diorama, I added chocks made from styrene strip and ropes made from wire. The final step was to place the figures in the correct positions. The impatient plane captain(brown shirt) waits for the ordnance man(red shirt) to finish his inspection of the gun bay. Another day in Cougar land.
About the Author


Copyright ©2021 by Gary Meinart. Images also by copyright holder unless otherwise noted. The views and opinions expressed herein are solely the views and opinions of the authors and/or contributors to this Web site and do not necessarily represent the views and/or opinions of AeroScale, KitMaker Network, or Silver Star Enterrpises. Images also by copyright holder unless otherwise noted. Opinions expressed are those of the author(s) and not necessarily those of AeroScale. All rights reserved. Originally published on: 2016-06-19 00:00:00. Unique Reads: 5044

WEB HOSTING BY


Copyright ©2021 AeroScale and Kitmaker Network, a subsidiary of Silver Star Enterprises
All Rights Reserved. Please read our Conditions of Use and Privacy Policy.
All Rights Reserved. Please read our Conditions of Use and Privacy Policy.