

1⁄35FL 282 V-6 Kolibri
5
Comments
Build
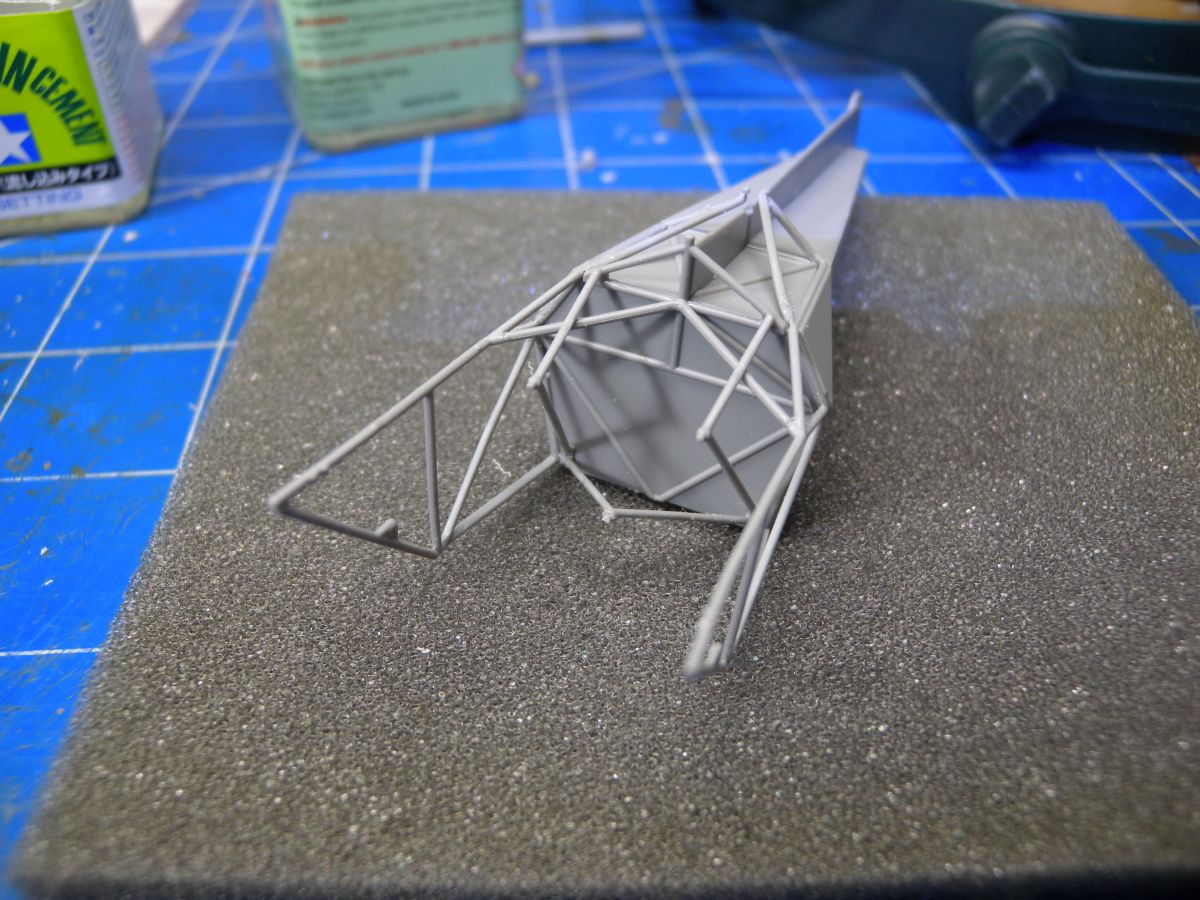
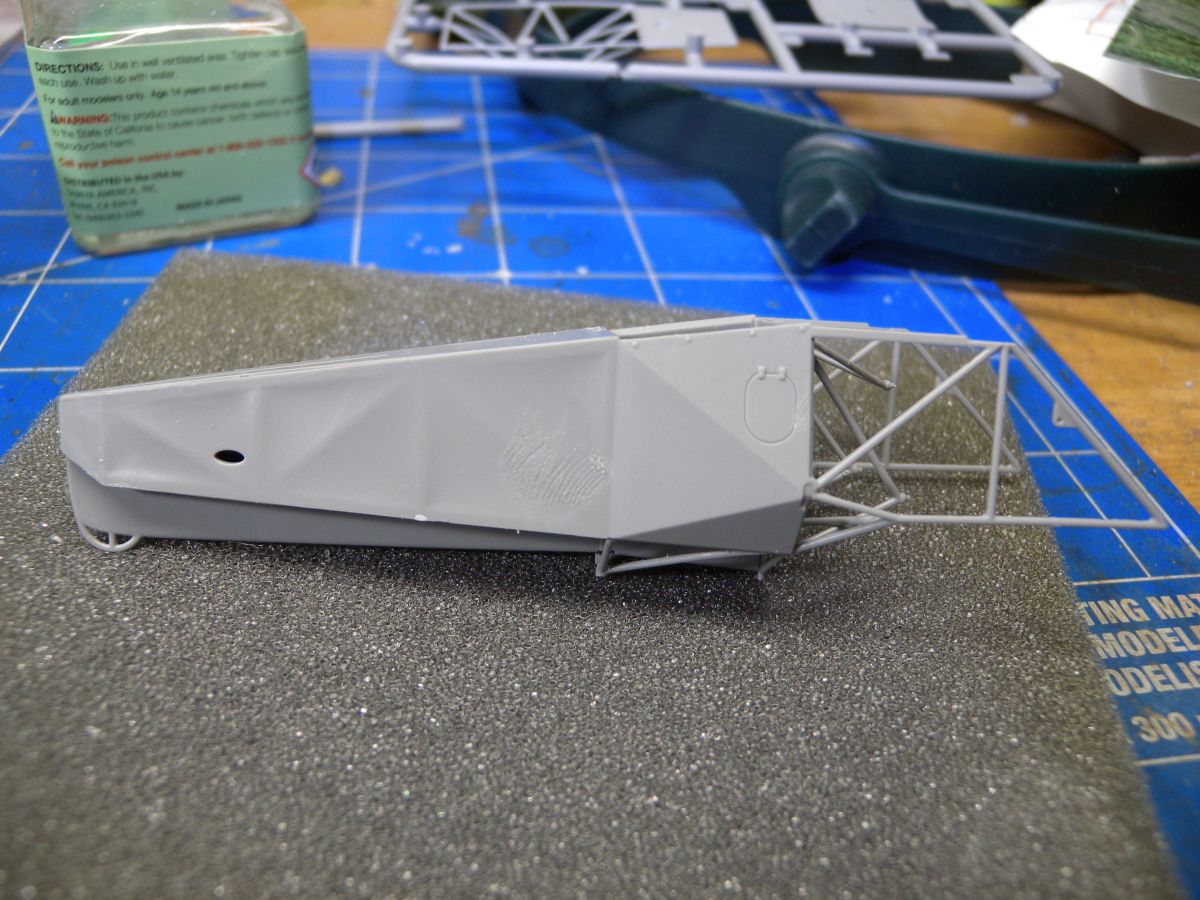
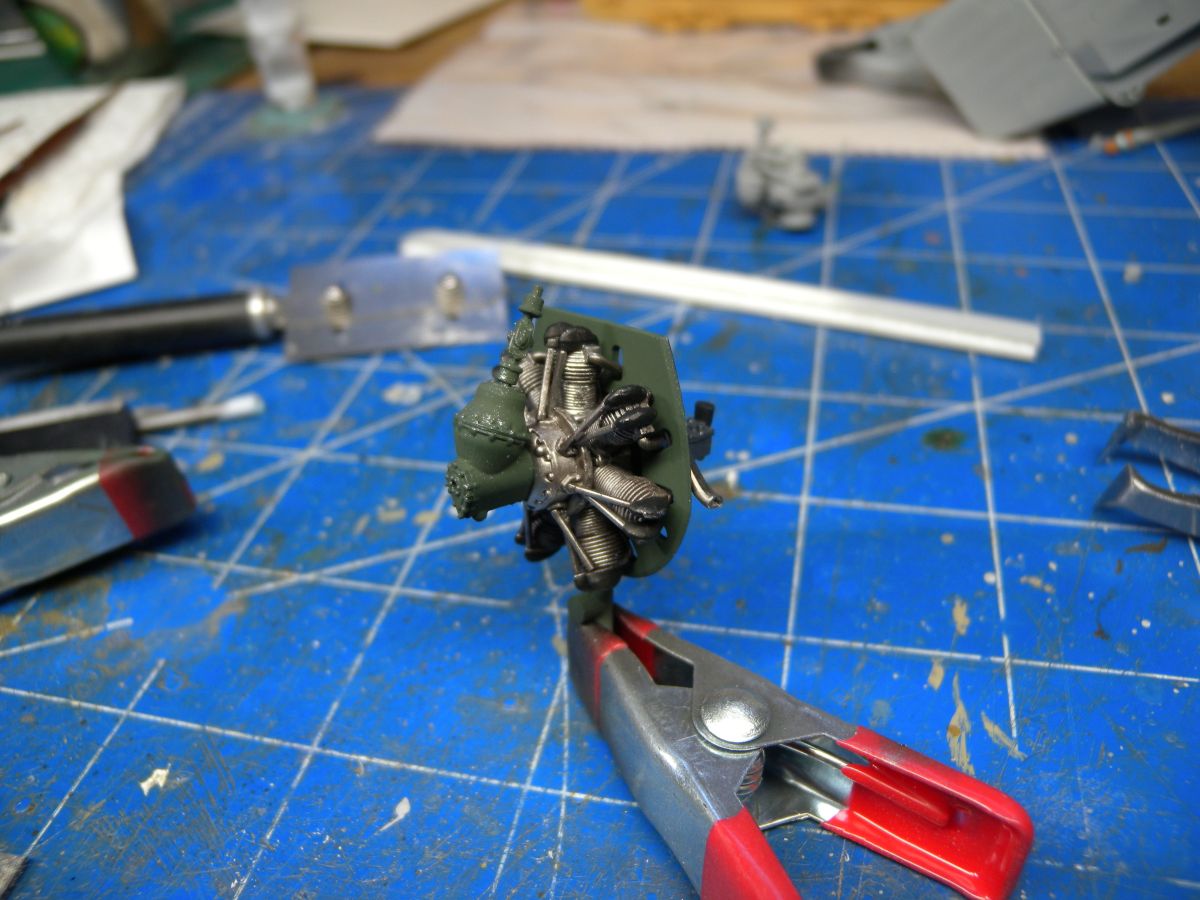
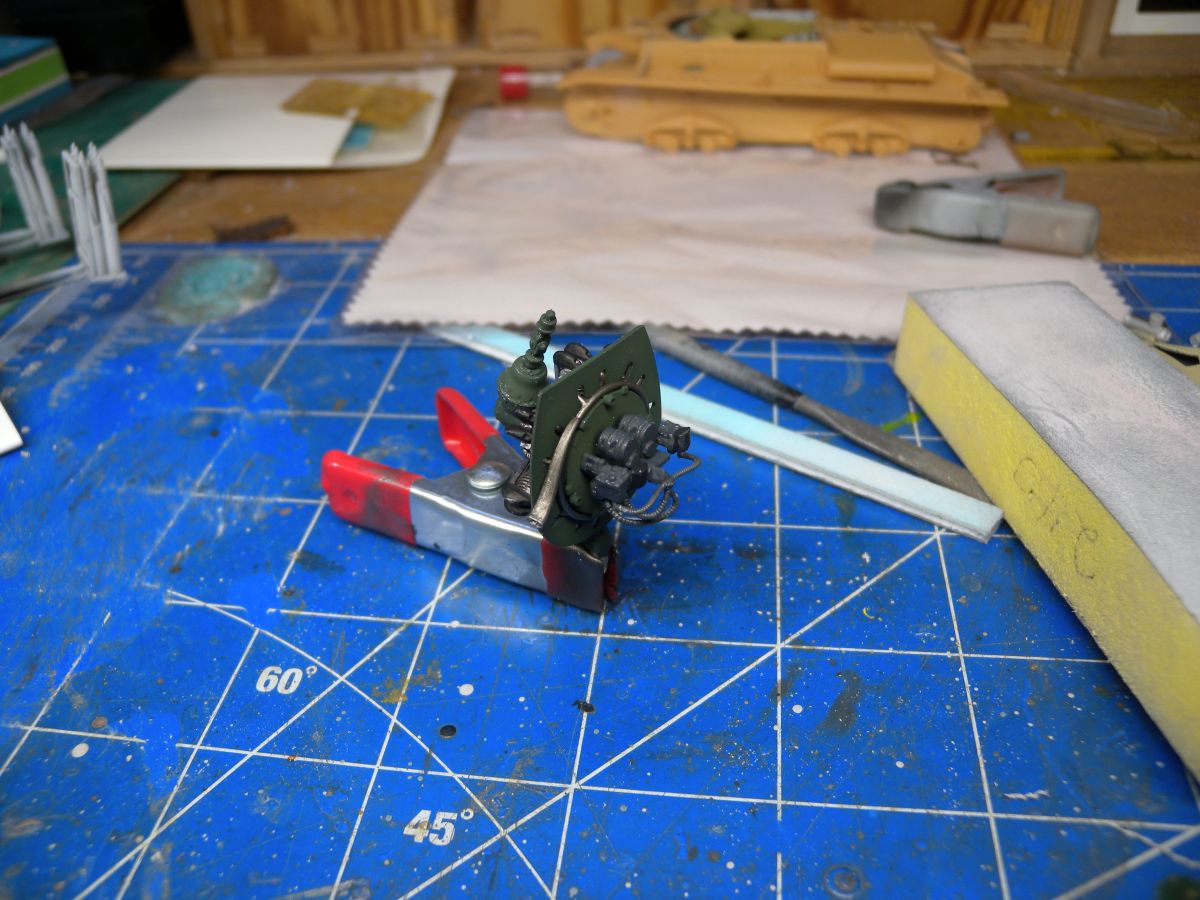
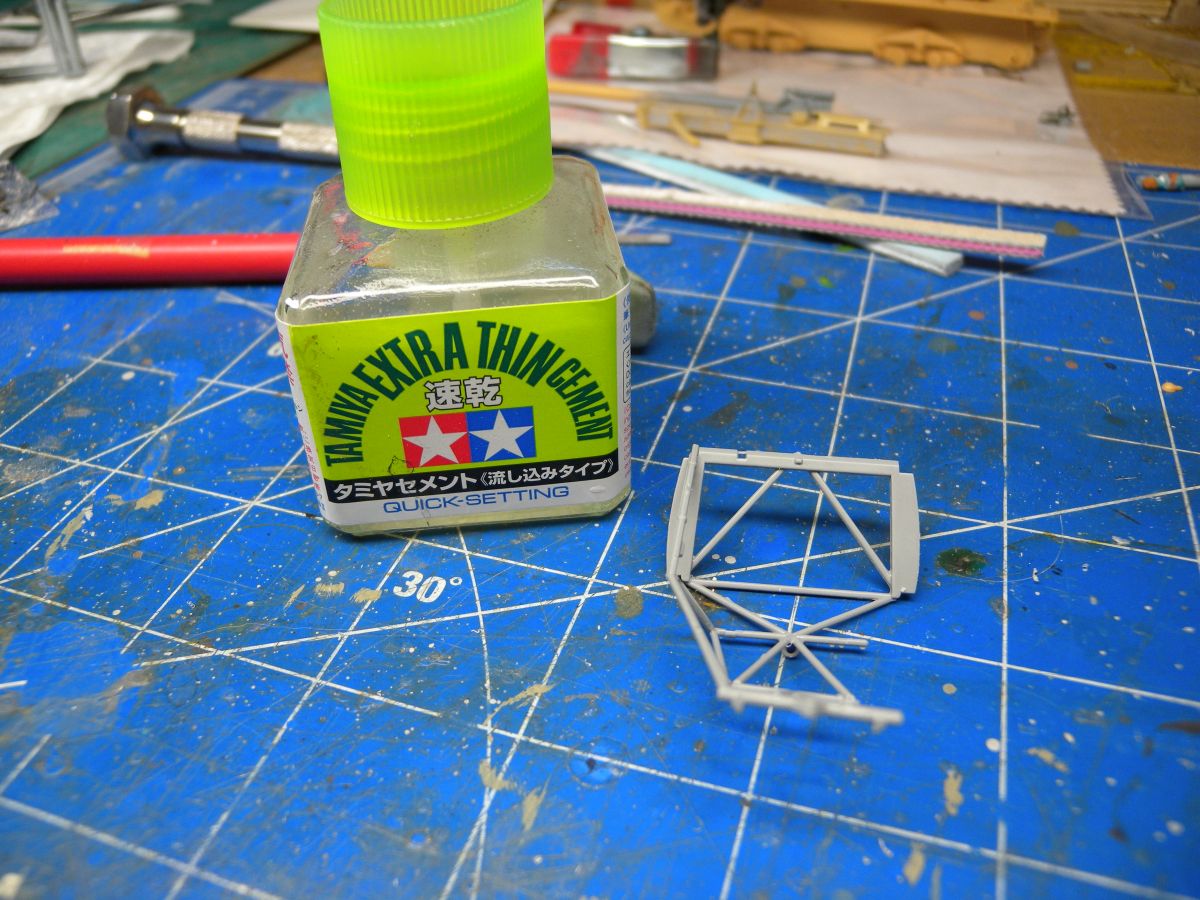
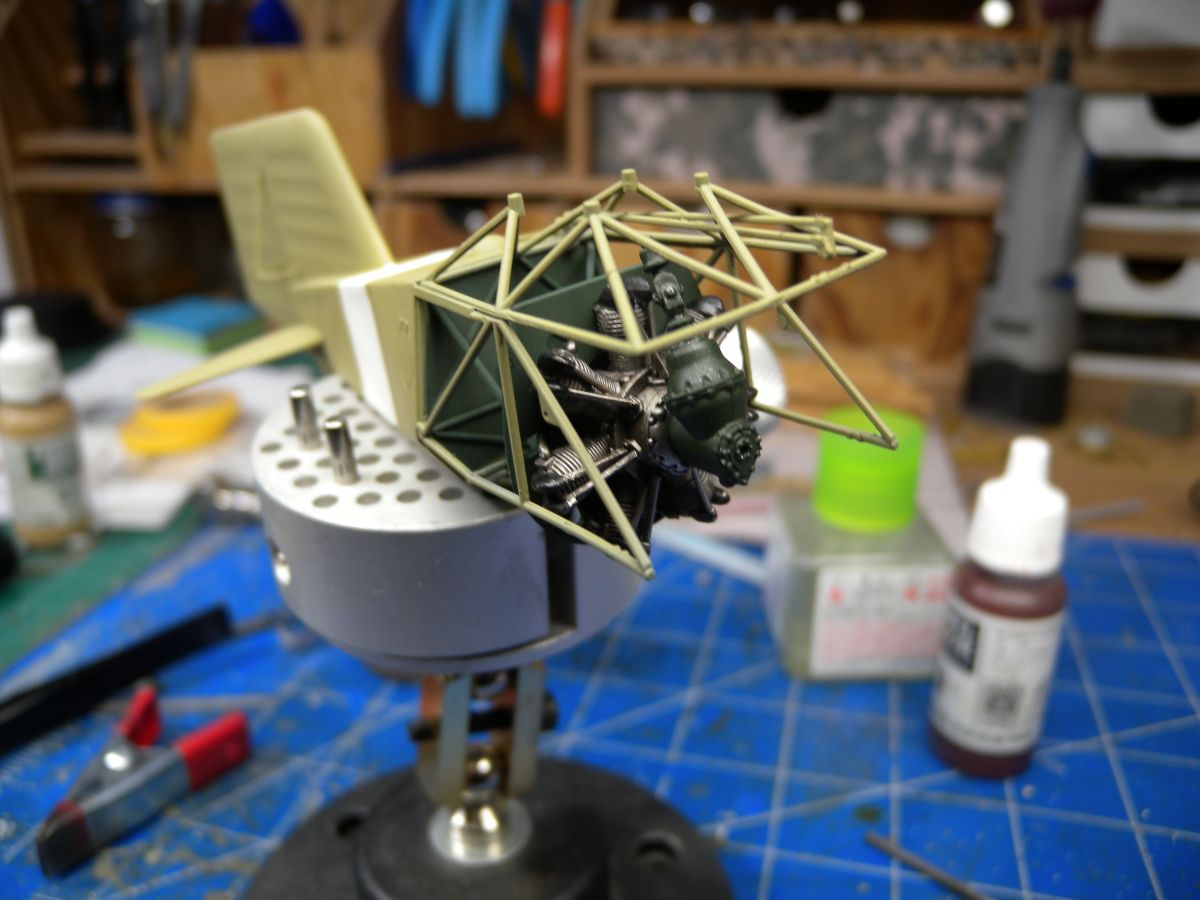
As mentioned the size and number of sprues are a little deceiving, there are many small fine parts to the assembly. But the first couple of steps use the biggest parts in the kit, the rear fuselage. Of which does go together relatively easy, but I left off the tail fin and lower skid runner, until I had all four wall of the fuselage together with the finer frame parts before I added these on. I did find it made it easier to handle for the finer parts up front.Next I assembled the engine, which does also go together very well, just a little time consuming cleaning up the seam in the piston ribs. Prior to mounting, I did paint the rear fuselage, framing, engine and engine plate. This was done with the new AK Interactive Real Colors using Dark Green and German Navy Grey.
As this was a quick build out of the box, I did not add any extras, but there is plenty of room to add plumbing and wiring to really detail this out if desired.
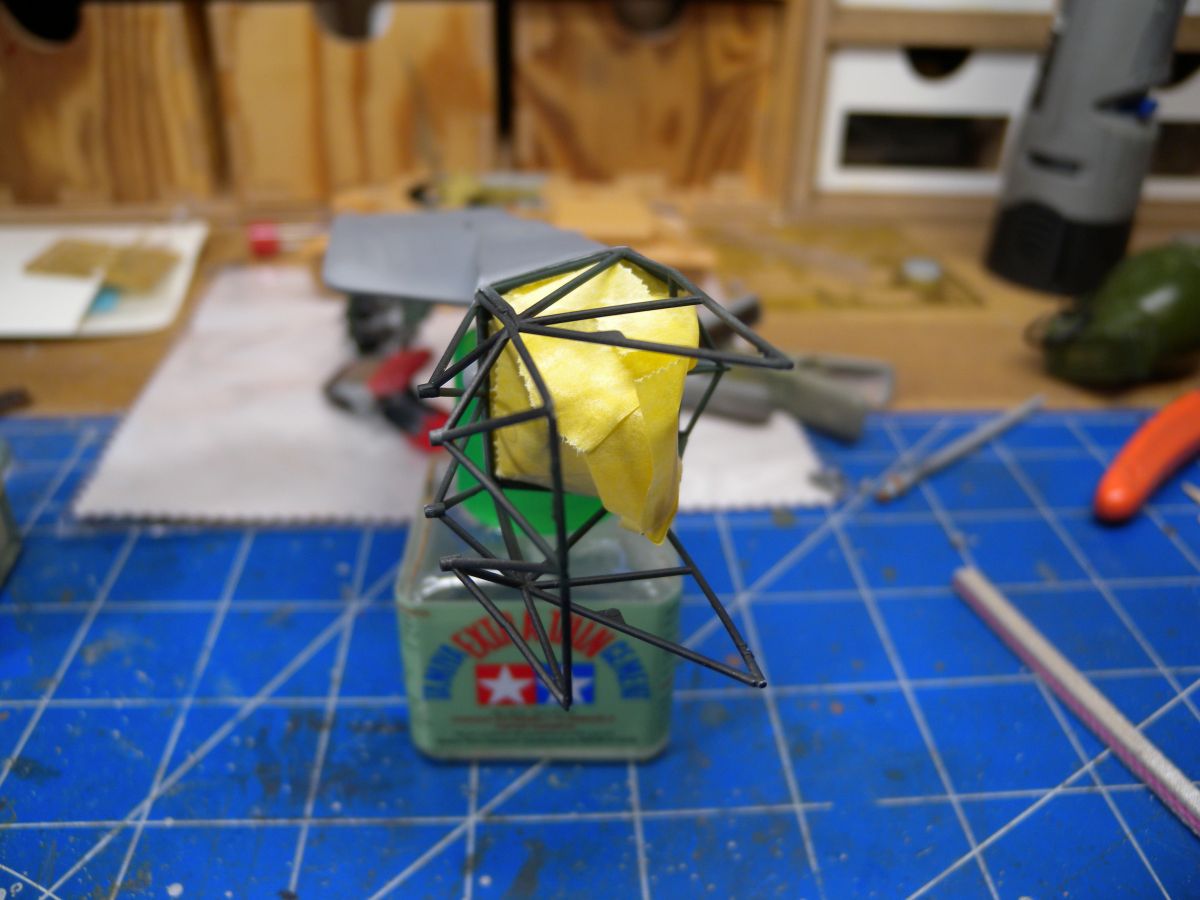
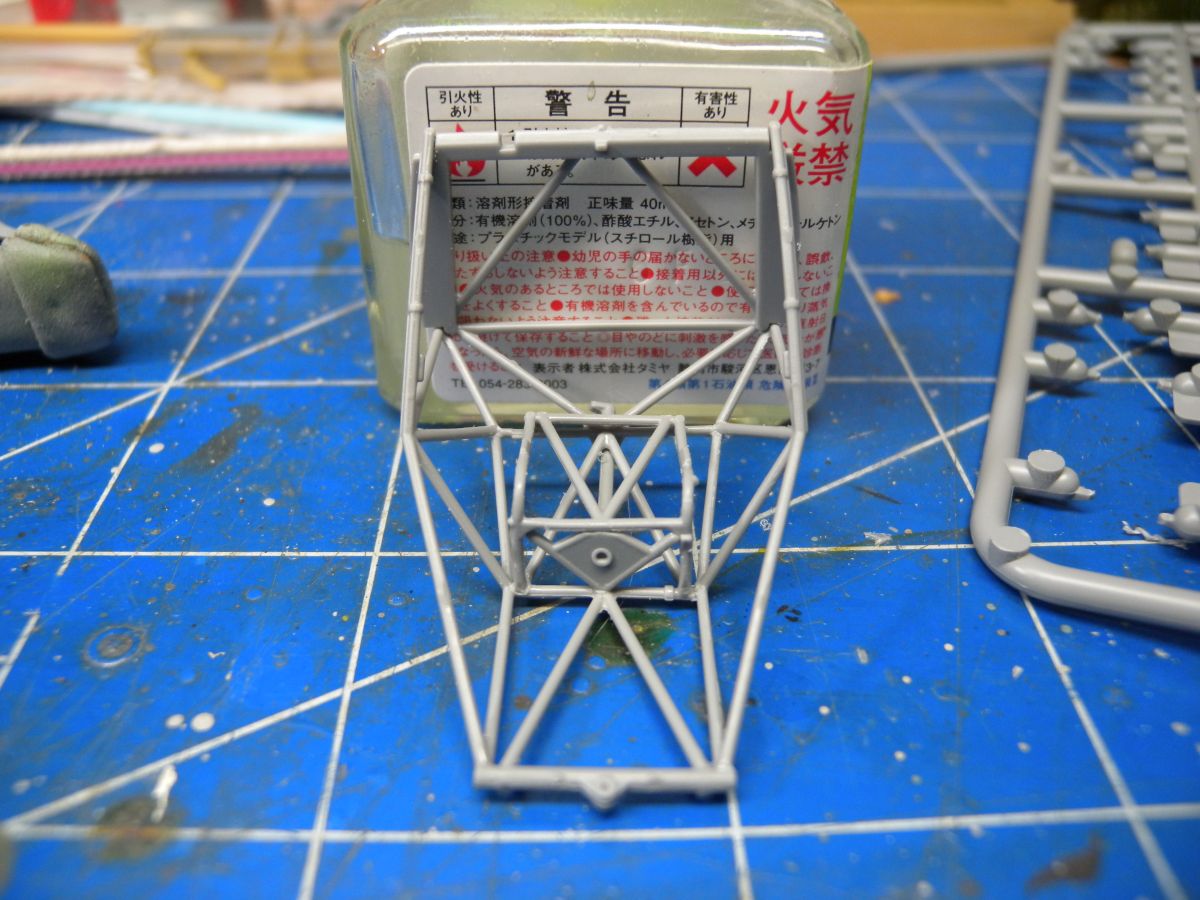
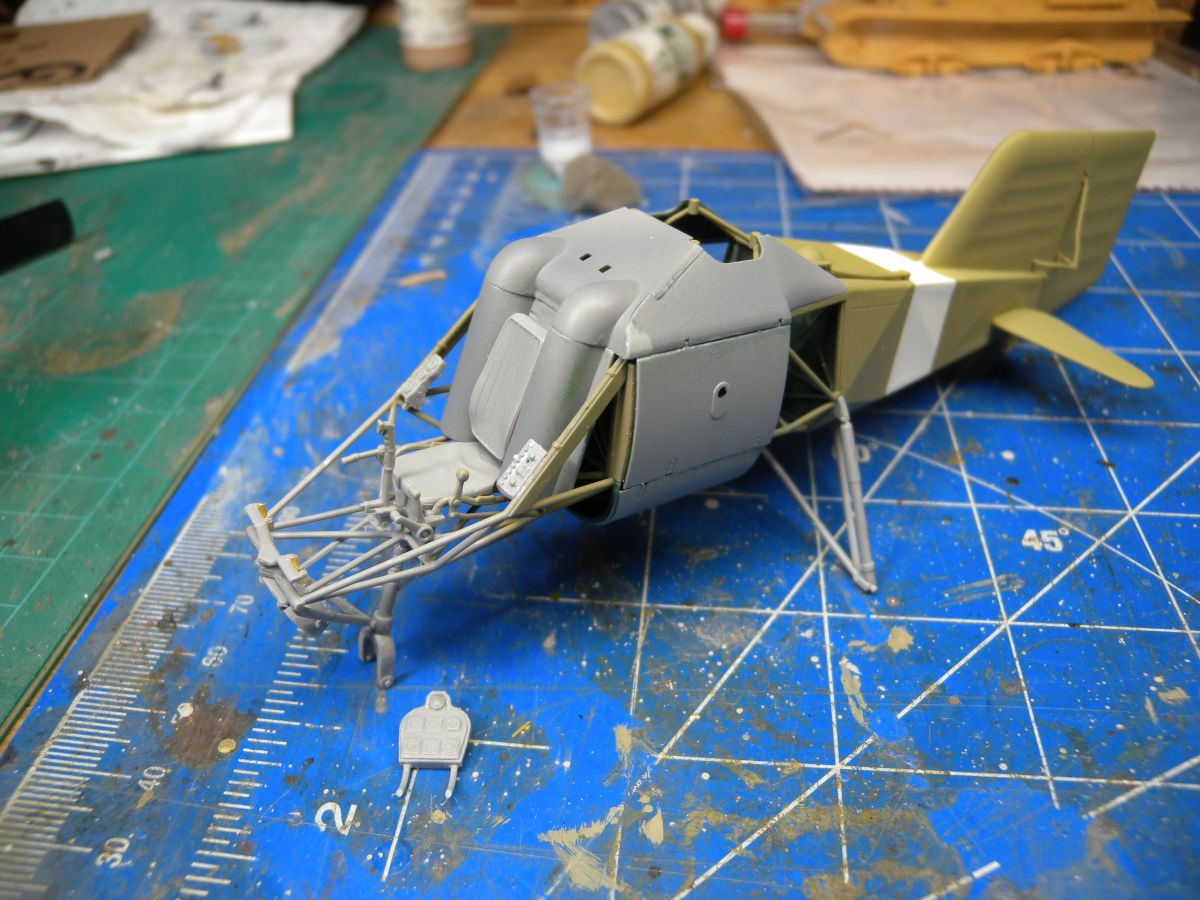
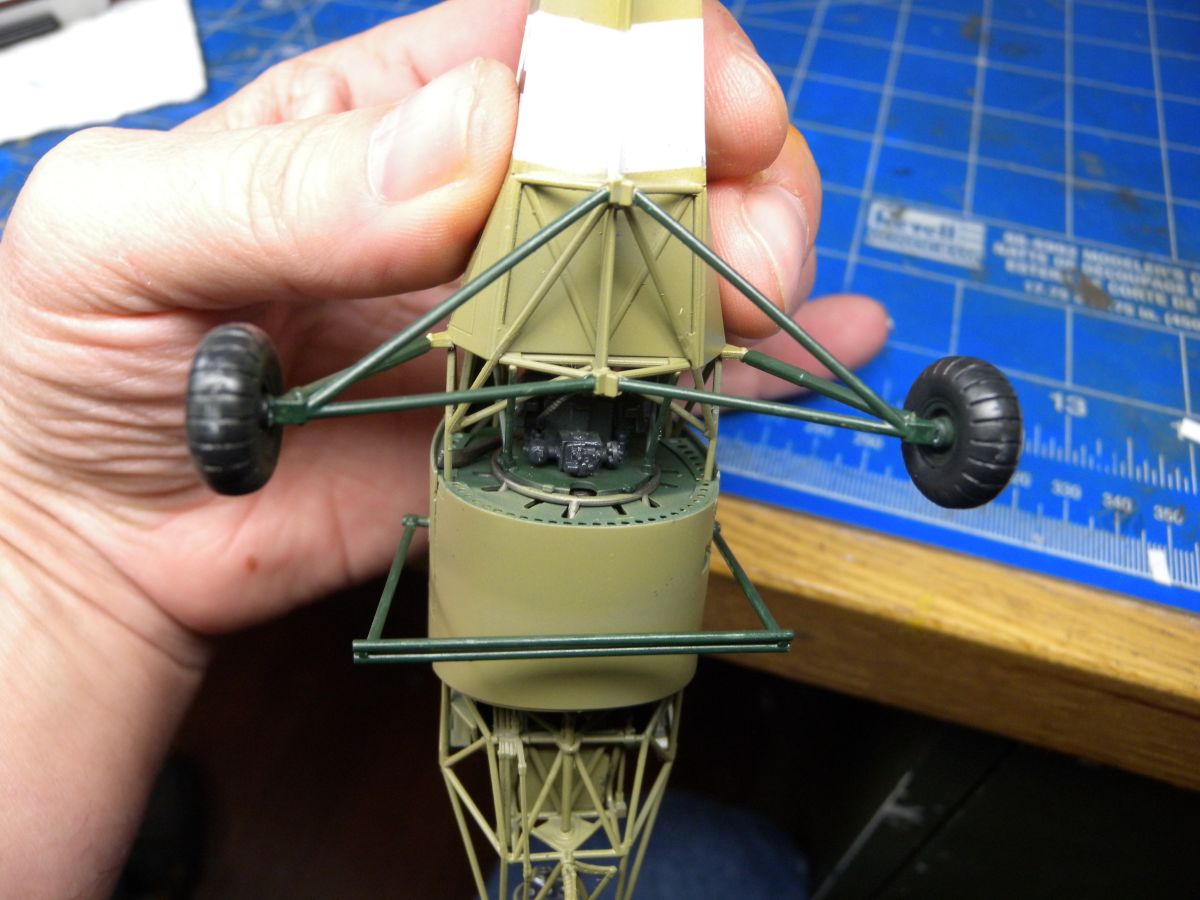
It was then onto the framing for the pilot section. This area really needs patience and checking. While it is time comsuming cleaning the seams on the all the 'tubes', great care is needed to ensure that is goes together square and true. I used the Tamiya Extra Thin Quick setting glue here, as most of the joints are small, and I want to it to set up quicker. It is helpful at this stage to check each addition that it is still true, as I ended up with a slight distortion. But this was rectified when I joined it to the main body.
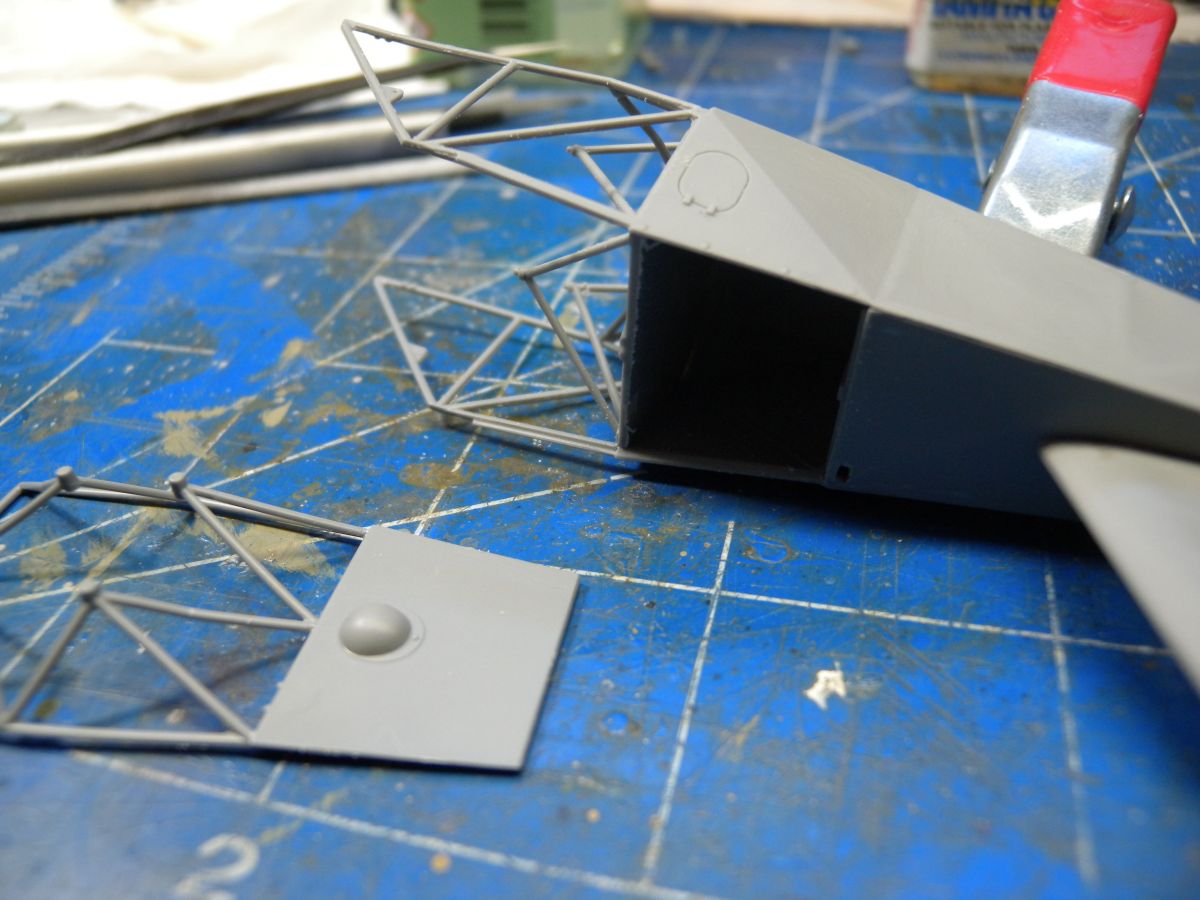
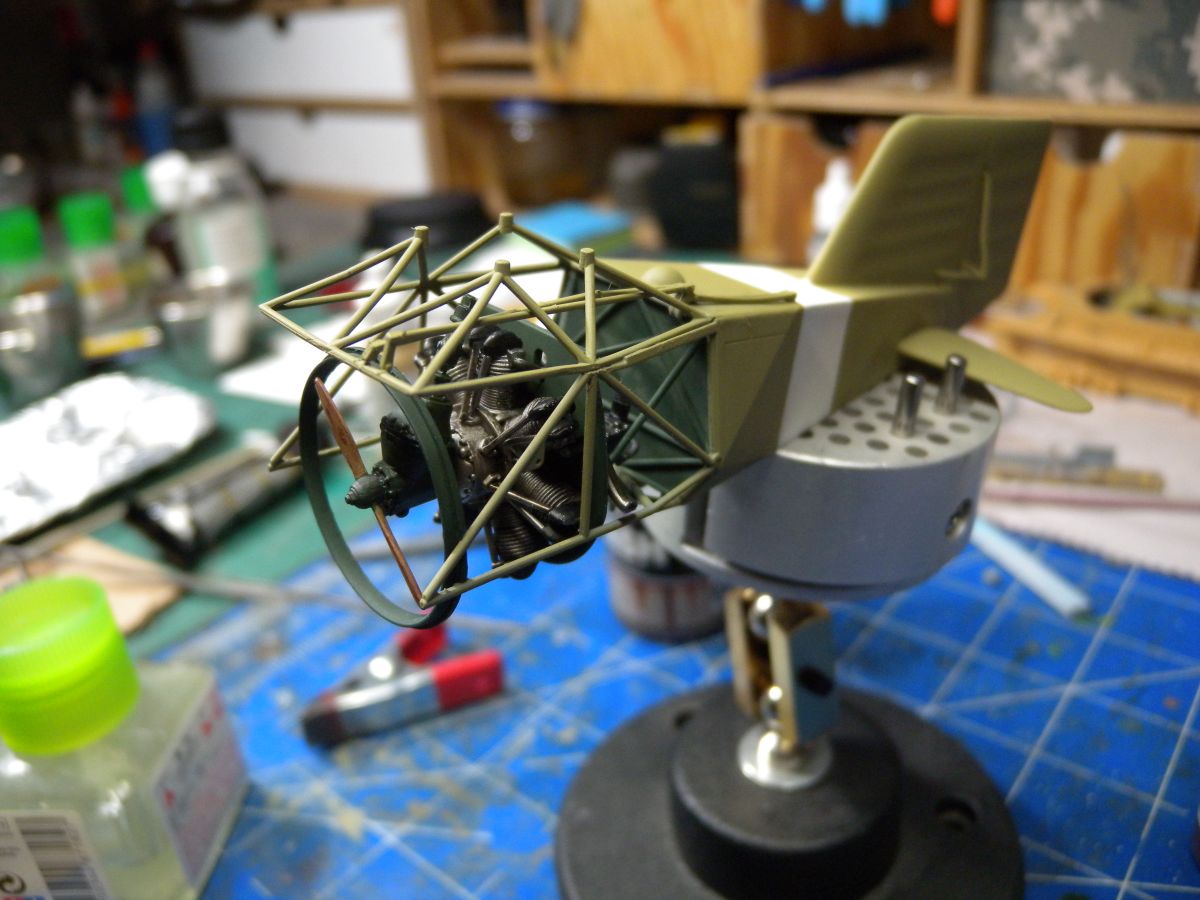
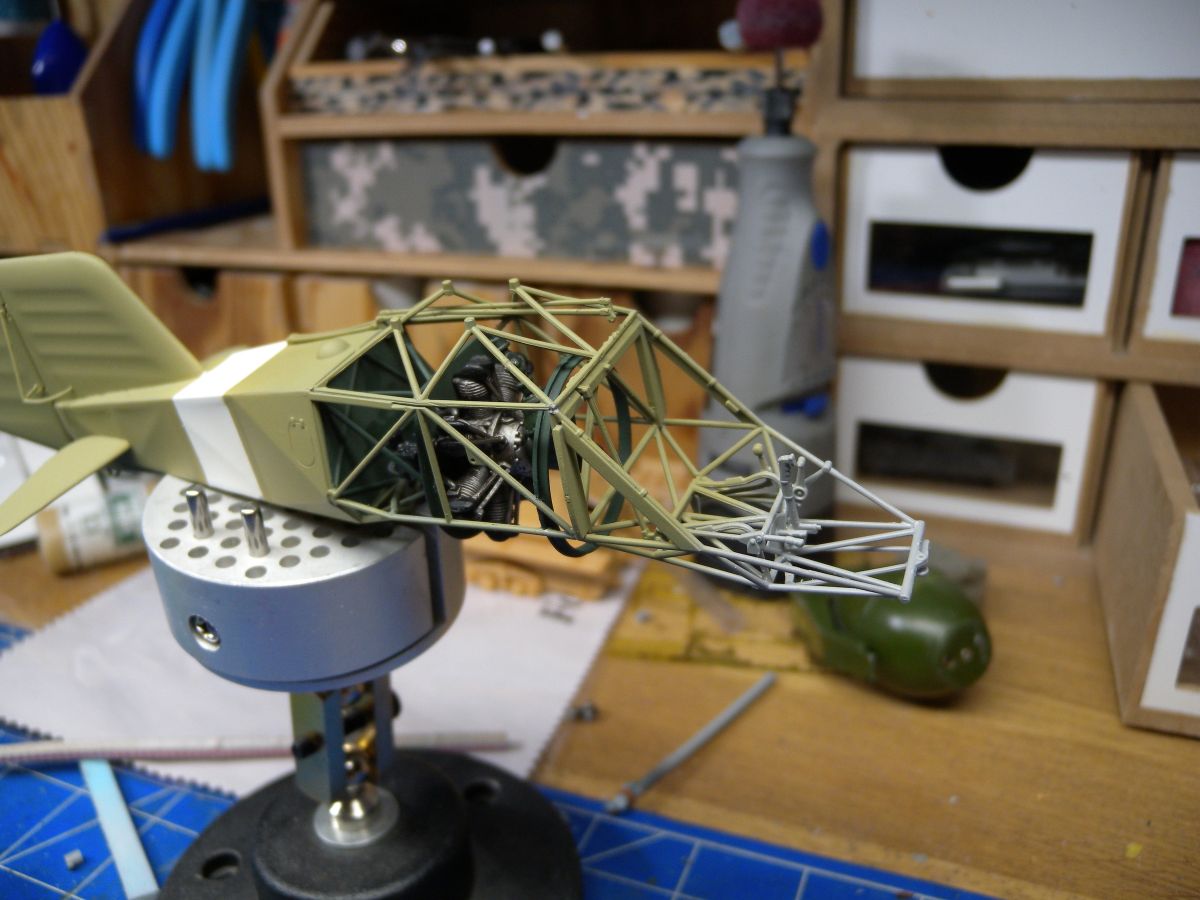
I did mask of the engine and prepainted some of the framing closer to the engine and cowling interiors prior to adding them. Again care is needed to ensure you done break the fine framing at this point. I did have to sand the cowling hinges to get a better. This was set aside to dry for a couple of days to ensure the best bonding.
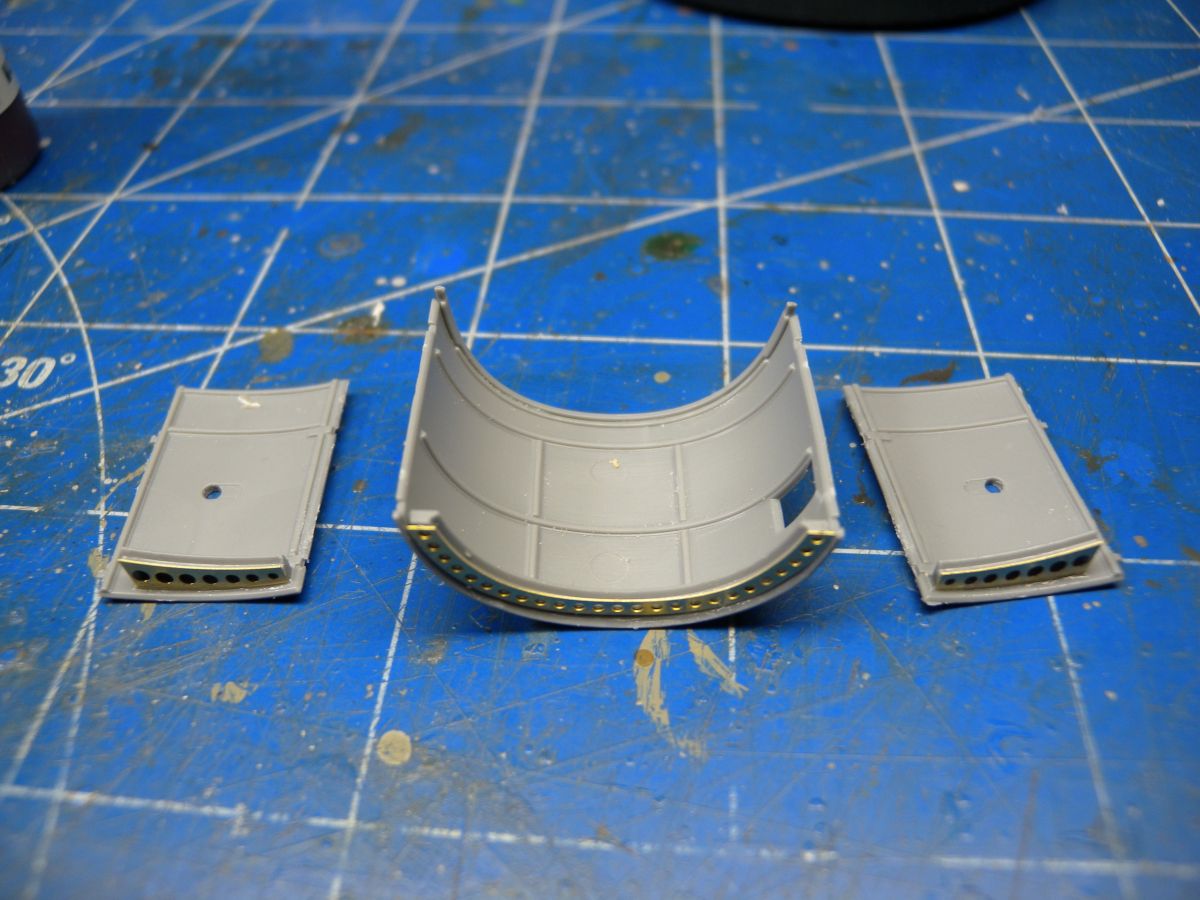
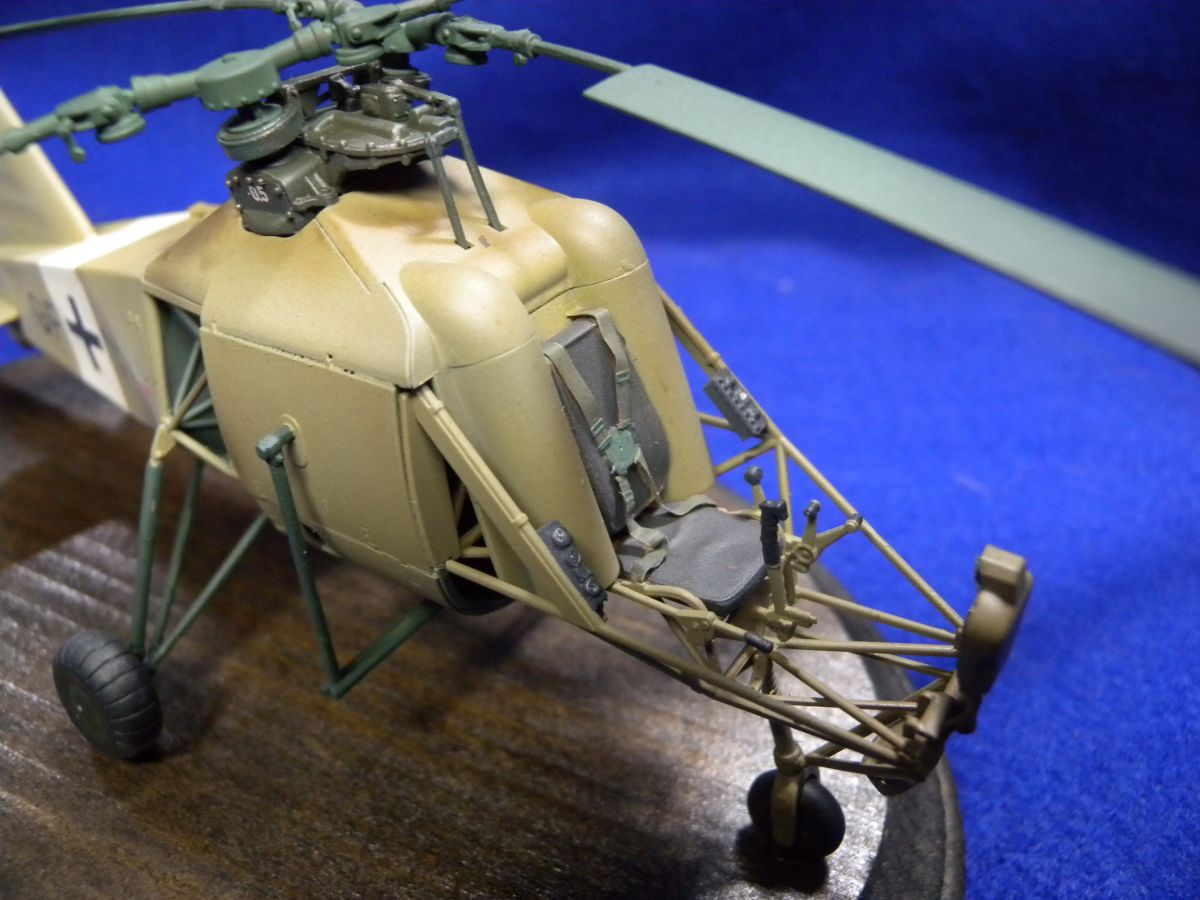
The seat and remaining front details were added prior to the final masking and painting. I did find the photo-etched at little thick and hard to work with for the seat belt, and am thinking I should of annealed it prior to soften it up.
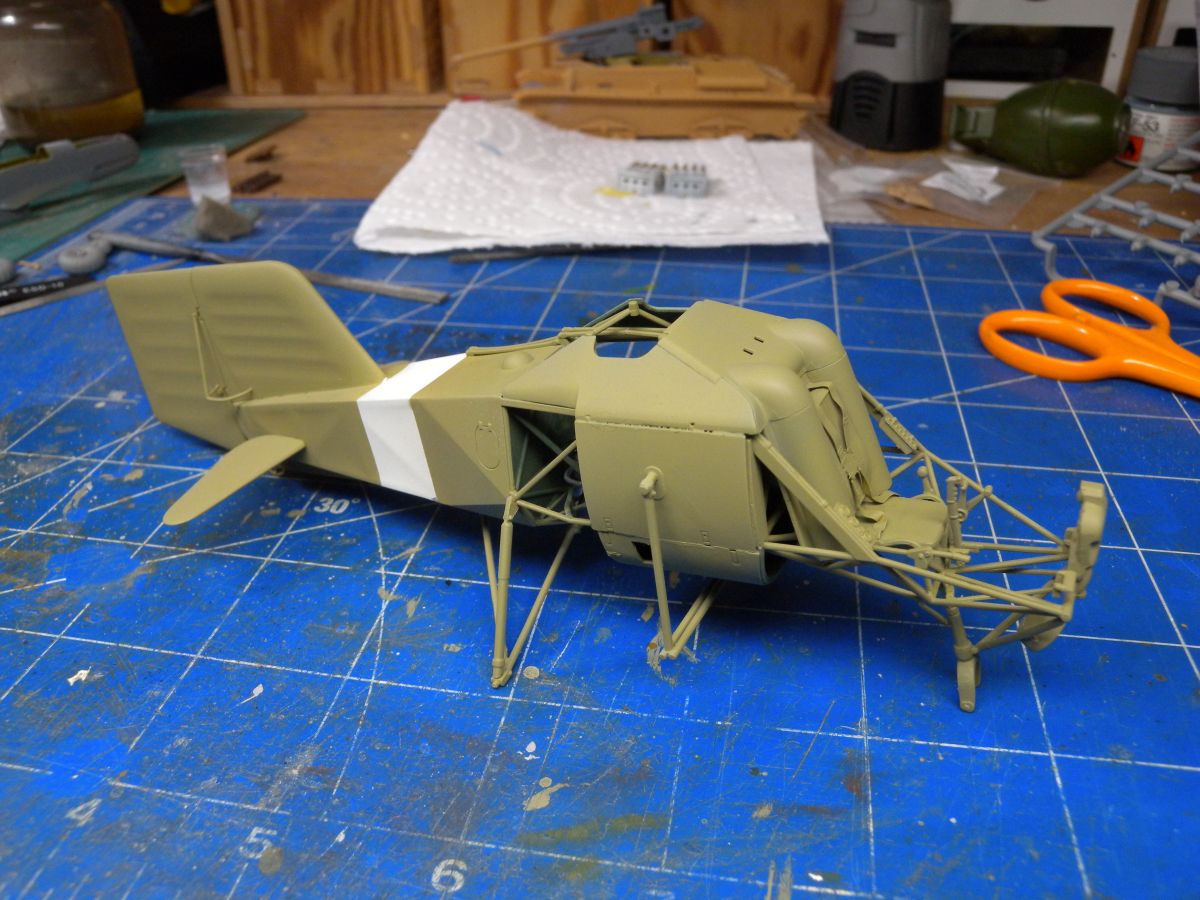
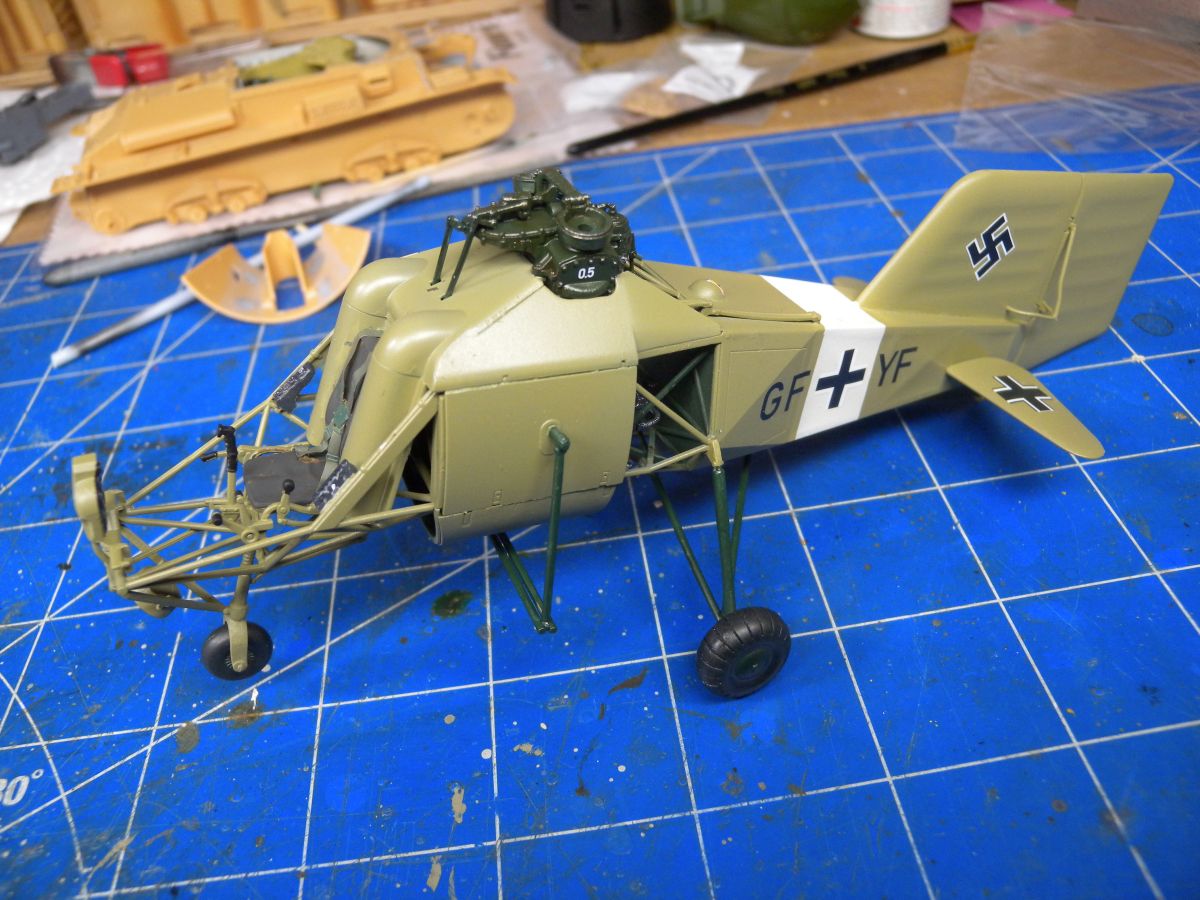
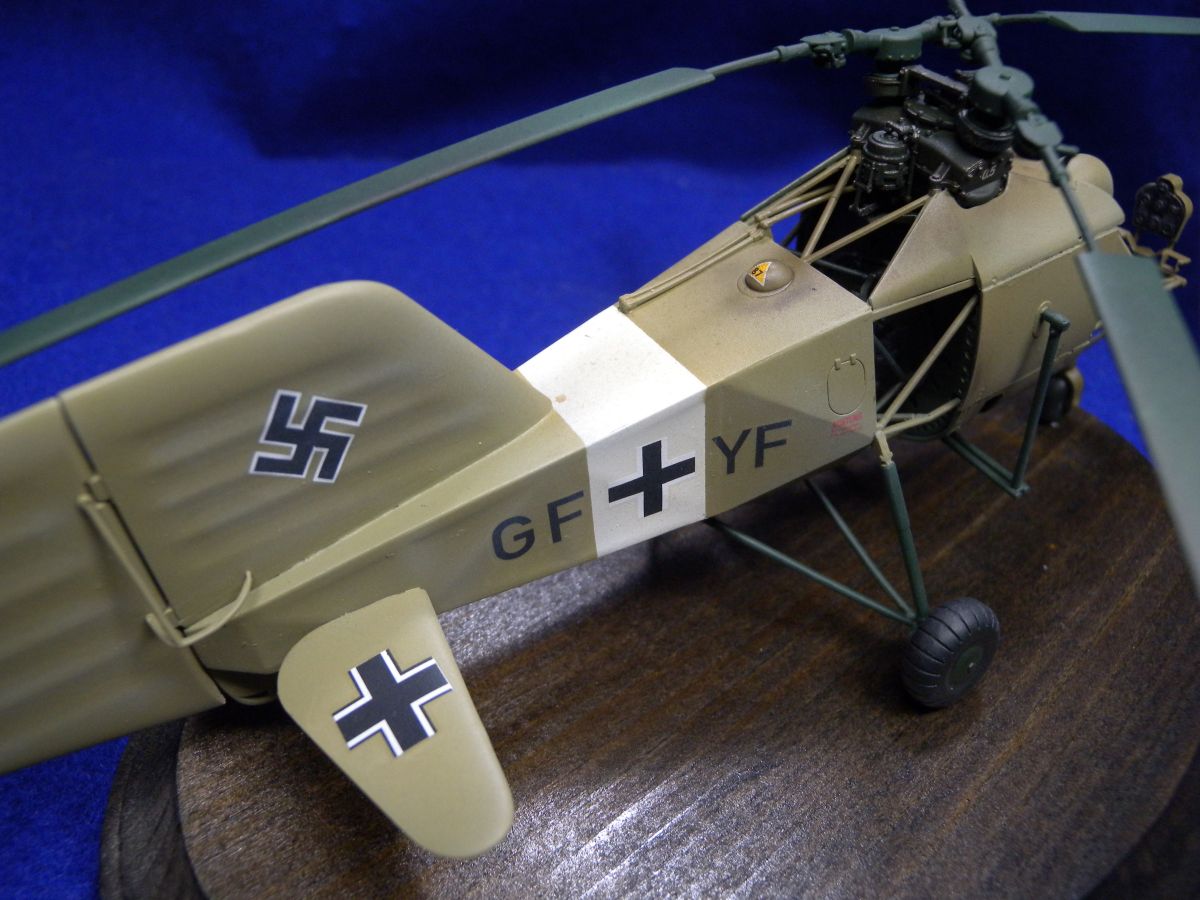
The decals for the instrument panel go on nice, and a little SolvaSet sat them right down in place. The rest of the marking went on very well as well.
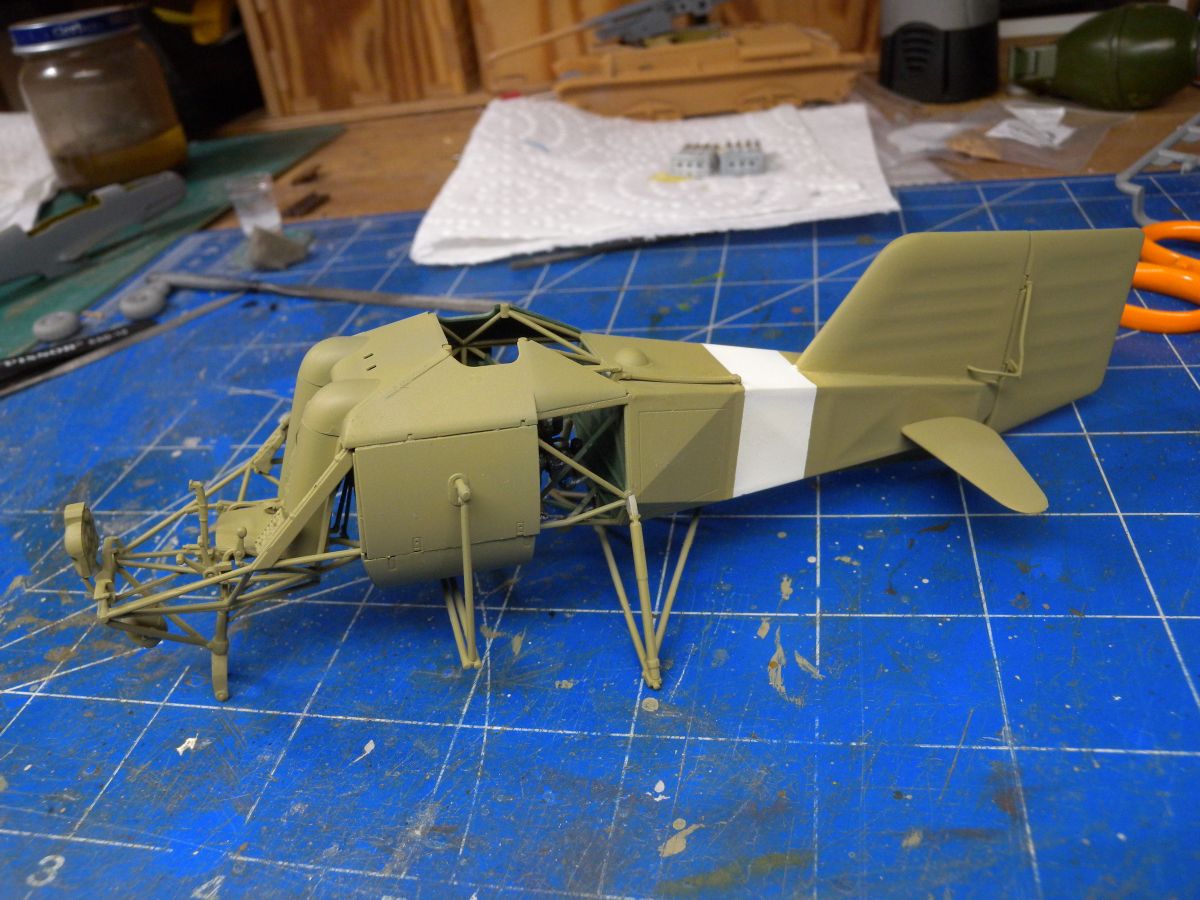
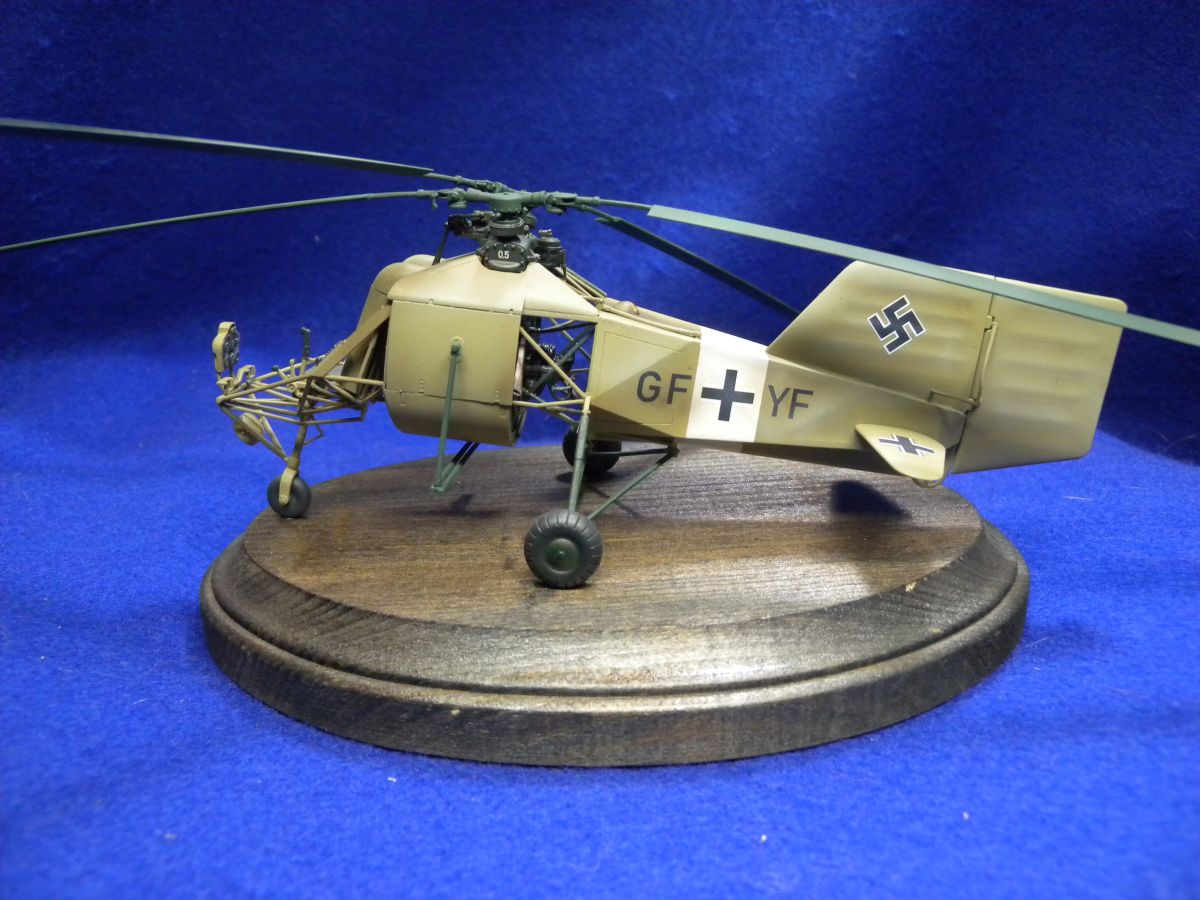
Once done, you will notice it is a big "tail sitter", as there is no where to add weight in the front, the best option I found was to glue it down.
Overview
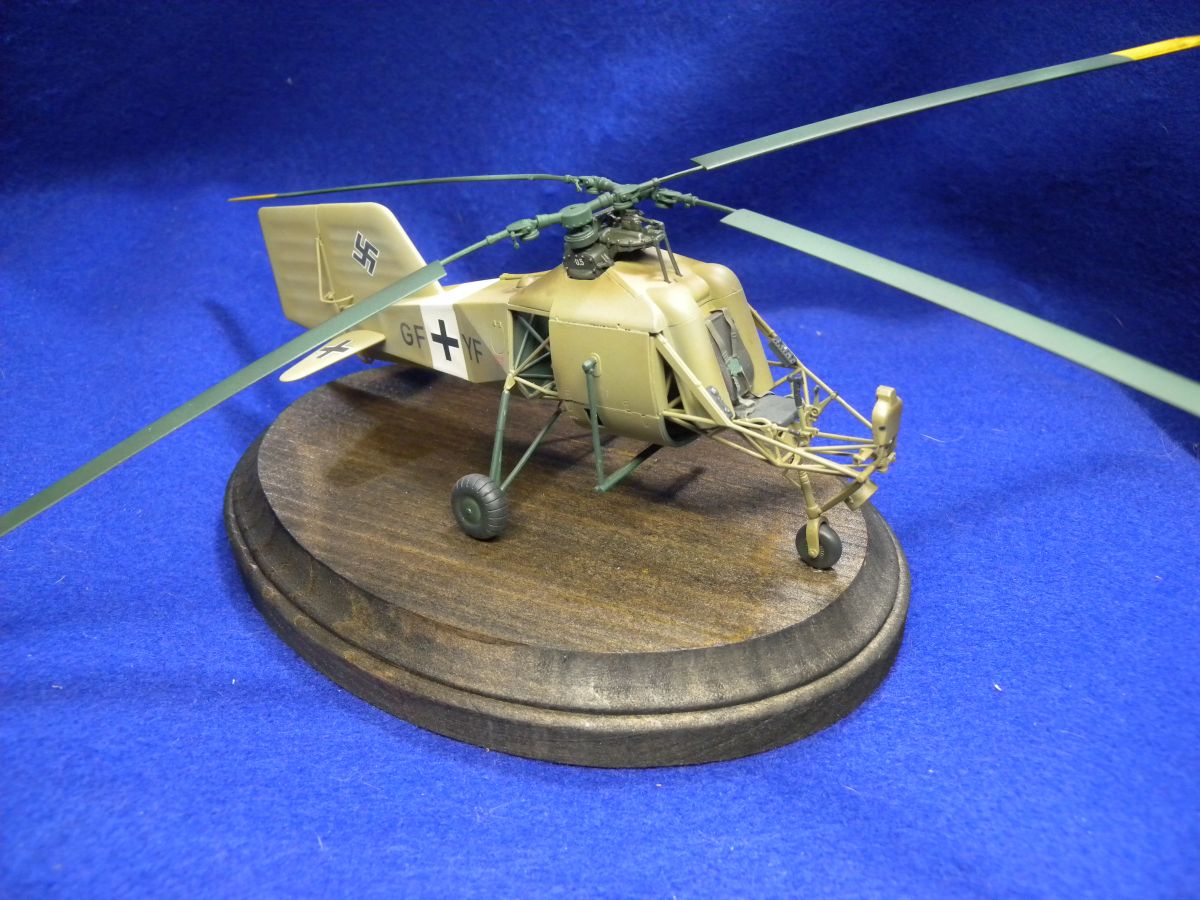
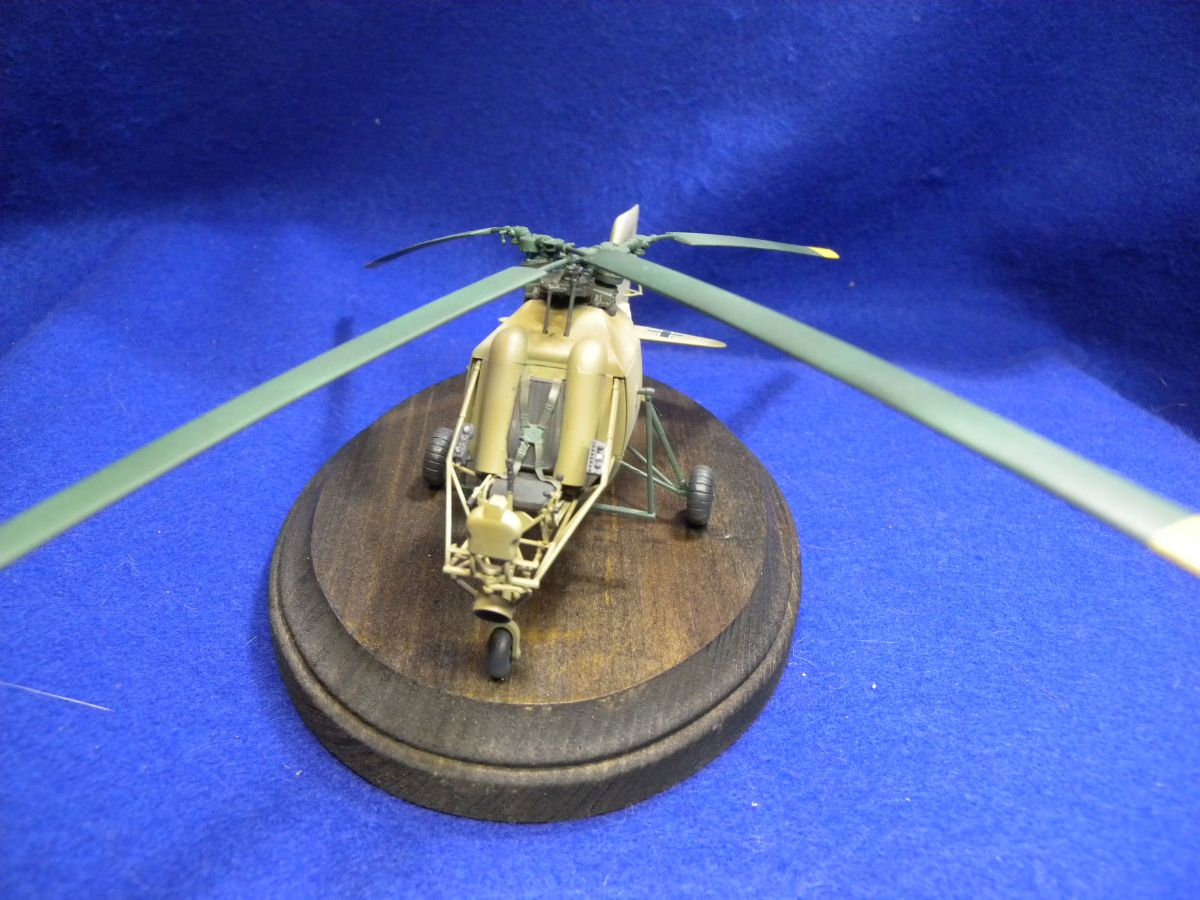
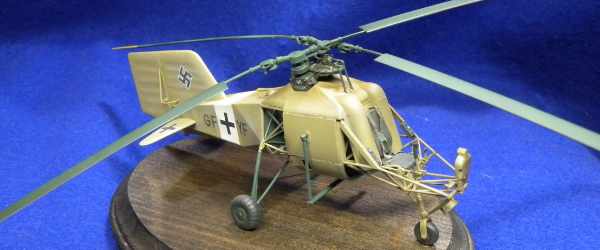
Overall this is a nice kit from MiniArt, especially a great subject. The overall moldings of the kit are decent, with the exception of some of the tube framing with some seams that will take care and patience to clean up. The detailed engine looks good, the open cockpit looks great, and there is pretty good fit all around. The big caution is to watch out for trueness in the build, with all the frame assembly, it would be easy to get out of square easy. I would definitely recommend this kit, and there is some extra room for some great looking details, if the builder would like to add them.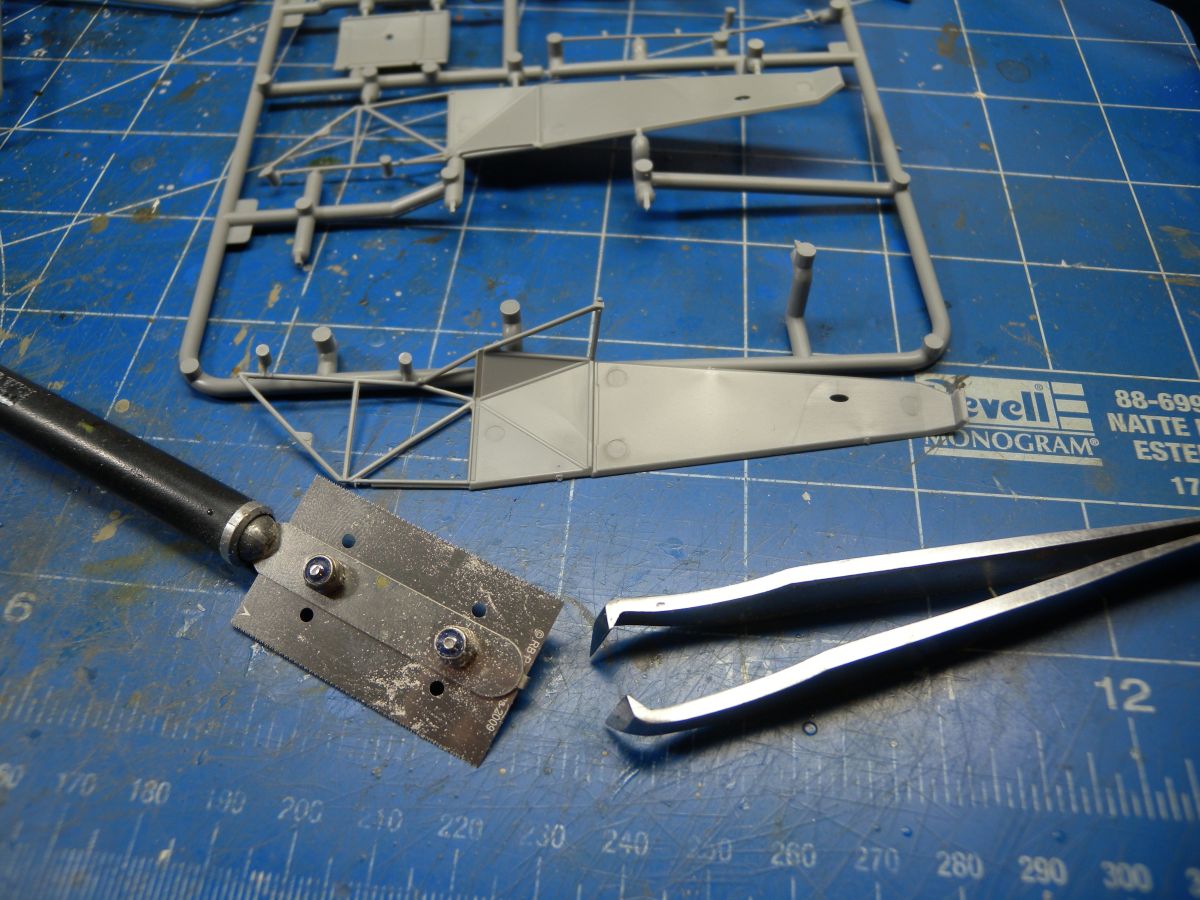

About the Author


FROM: ONTARIO, CANADA
I am an IT Consultant and father, with a passion for plastic models. I mostly prefer 1/35 Armor and 1/48 Aircraft. My main interests are anything Canadian, as well as WW2 German and British Armor and Aircraft. I have been building models since I was a young kid, got away from it for awhile, but r...
Comments

Good looking model. Very interested in this model. I hope more 1/35 aviation subjects are forthcoming.
JUN 02, 2018 - 02:16 PM


Nice build, Kevin!
I'm glad to see that manufacturers like MiniArt and HobbyBoss find very interesting subjects while others seem to suffer from "exhausted inspiration".
The scale is also a good choice and will be a godsend for diorama / vignette modelers.
Judging by the kit number, this one must be first from a new series by MiniArt and let's hope they will keep their good habit in listening to critics and constantly improving the quality of their kits.
Thank you for the informative review!
Cheers!
Gabriel
JUN 03, 2018 - 12:05 PM

Just noticed today that MiniArt has reported images from the article as well as adding a link.
Great publicity for AeroScale.
AUG 15, 2018 - 03:36 AM
Copyright ©2021 by Kevin Brant. Images also by copyright holder unless otherwise noted. The views and opinions expressed herein are solely the views and opinions of the authors and/or contributors to this Web site and do not necessarily represent the views and/or opinions of AeroScale, KitMaker Network, or Silver Star Enterrpises. Images also by copyright holder unless otherwise noted. Opinions expressed are those of the author(s) and not necessarily those of AeroScale. All rights reserved. Originally published on: 2018-06-02 00:00:00. Unique Reads: 14500

WEB HOSTING BY


Copyright ©2021 AeroScale and Kitmaker Network, a subsidiary of Silver Star Enterprises
All Rights Reserved. Please read our Conditions of Use and Privacy Policy.
All Rights Reserved. Please read our Conditions of Use and Privacy Policy.