

1⁄727701
4
Comments
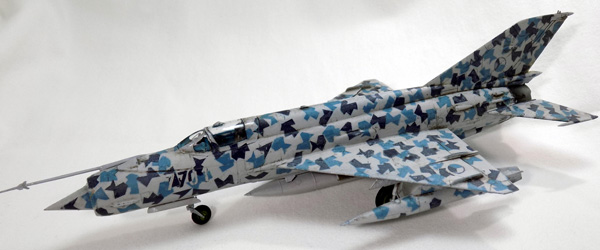
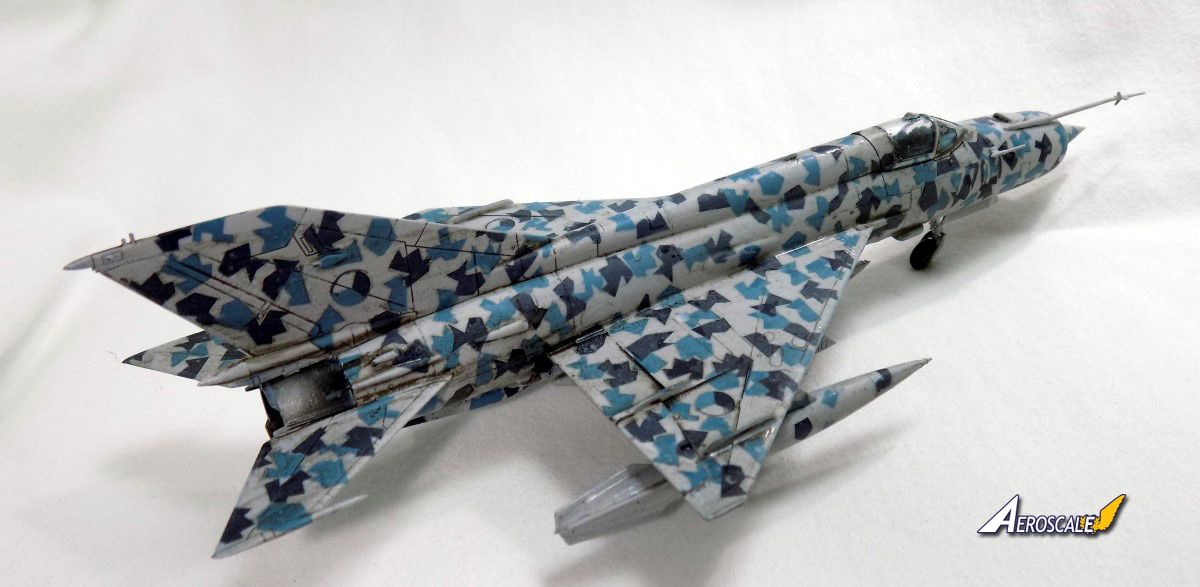
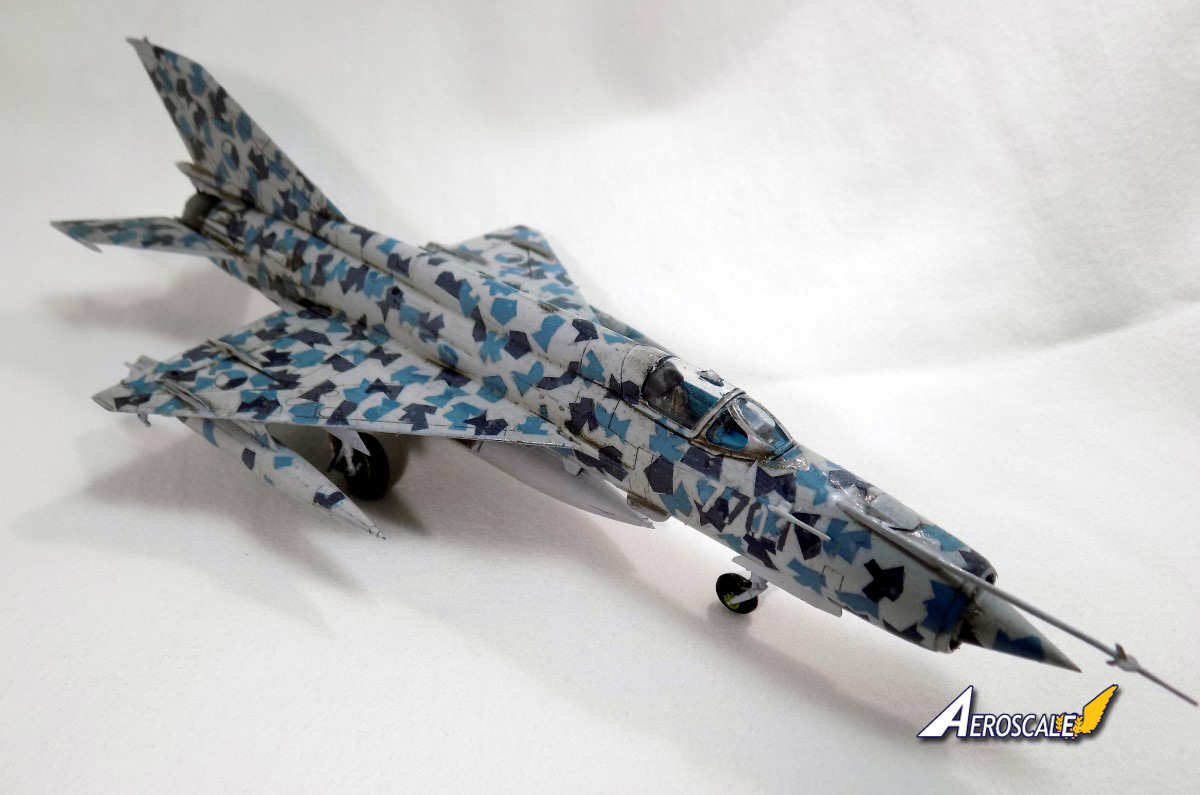
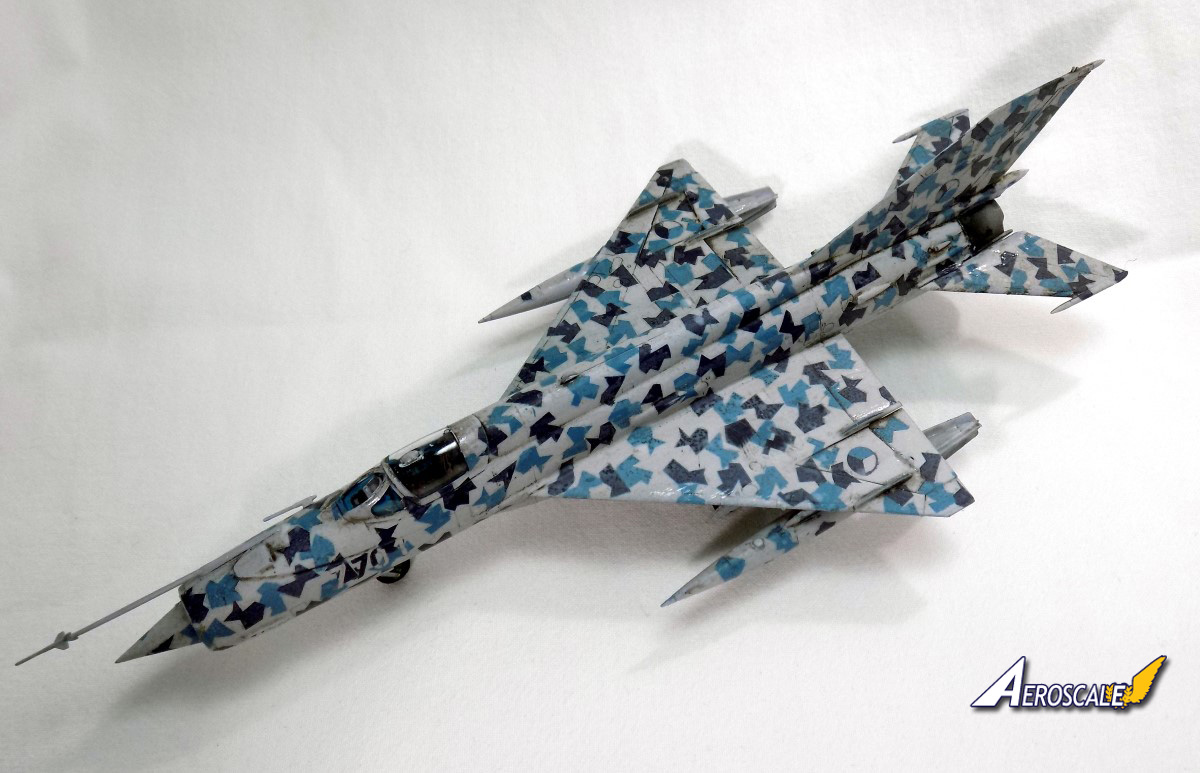
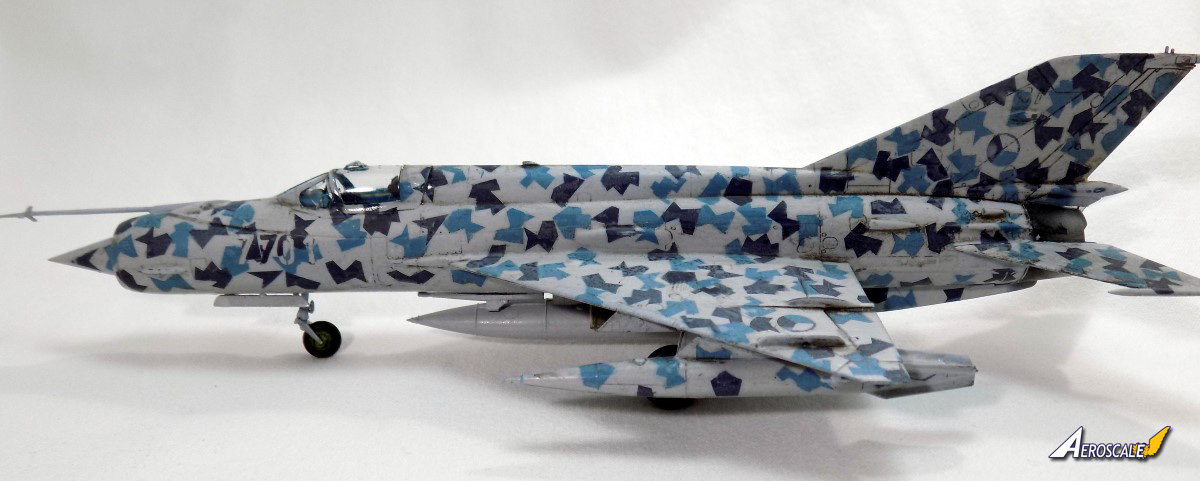
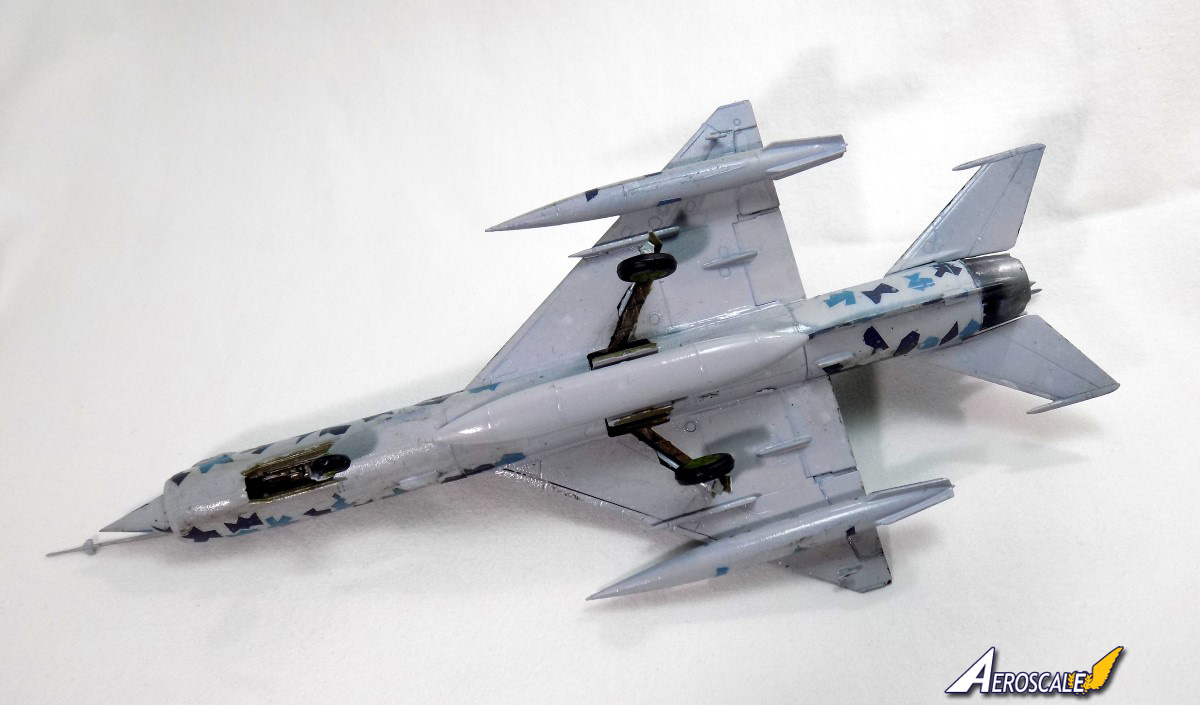
DN Models produce a range of masks for painting the canopy, wheels and camo patterns on aircraft and armour, and one of thier latest releases is a very interesting Splinter camo scheme for the MiG-21MF in Czech service. This aircraft has the Air Force number "7701" and it was flown mostly at Air Shows by the Czech Air Force.
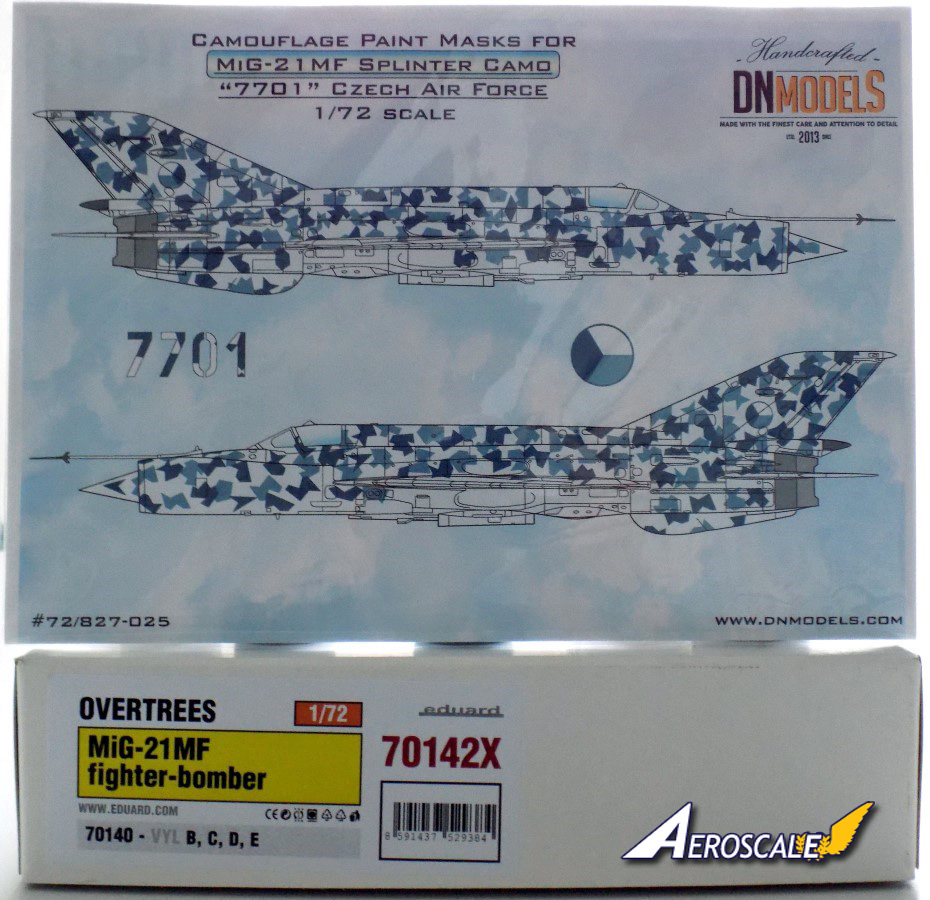
Now DN Models have released this set in three scales, 1/48th, 1/72nd and a Limited edition set in 1/144th. For this build I opted for the 1/72nd set.
The kit favoured for the set is Eduard's superb 1/72nd MiG-21MF. I will be using the Overtrees boxing, as I will not need the decals, and I had a photo etch set for the cockpit left over from an earlier build, which can be found here.
Item No -72/827-025
Price -$17.99
Link to item -Czech Splinter #7701
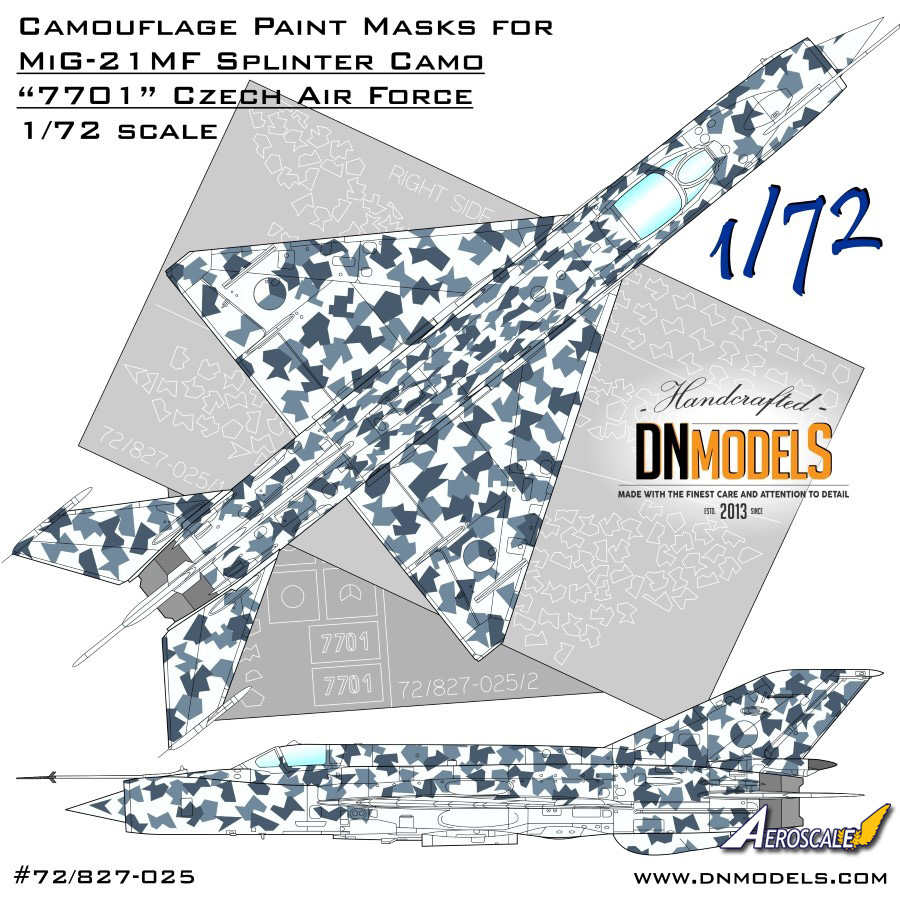
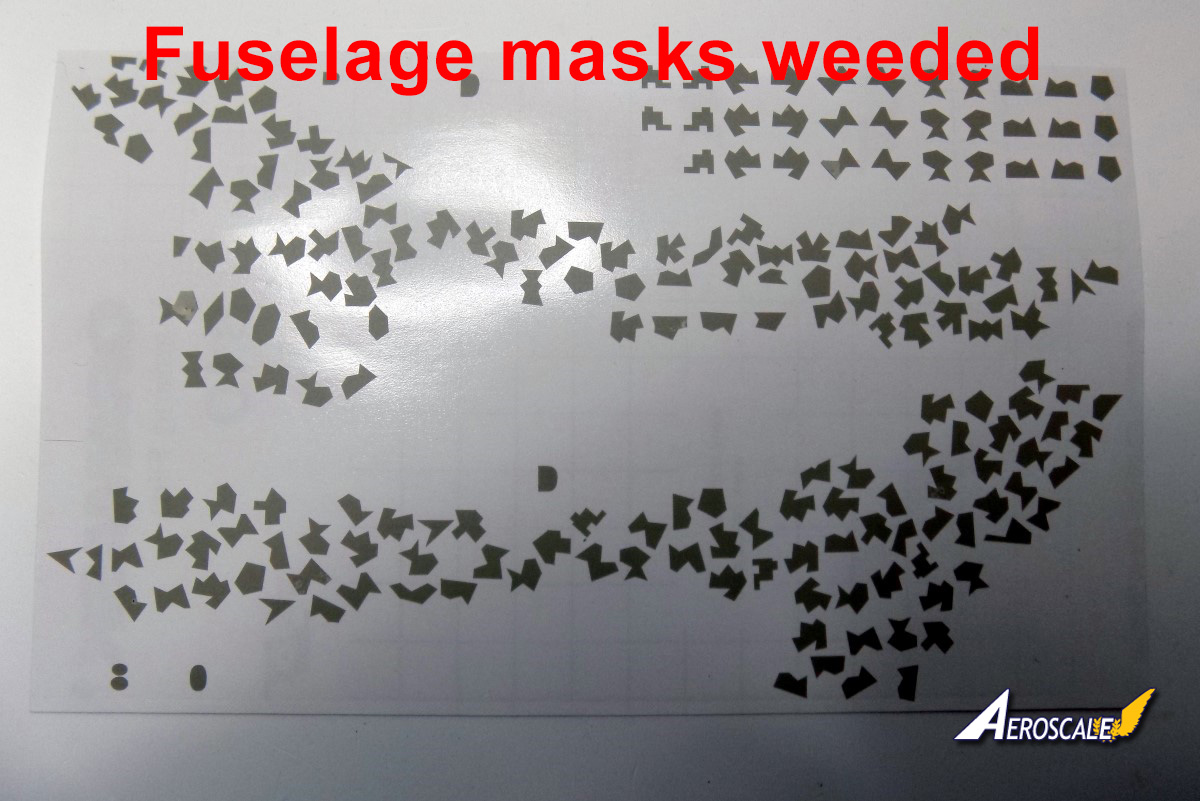
The masks themselves are made of a very thin plastic and are a translucent grey colour. The mask set which holds the camo pattern are on two sheets.
The first sheet holds the fuselage masks, which is split into right and left sides. Also on this sheet is some spare spots as there is basically six different shapes which make up the camo scheme.
The second sheet holds the wings, fuel tanks, the insignia and the aircraft numbers.
The first stage is too weed the masks, (take out the unused parts, so you can see the masks needed a lot easier).
The masks are not over sticky, so they can be peeled off if you place them in the wrong position. Two placement sheets are supplied for attaching the masks to the aircraft.
The exhaust was spayed with AK's Xtreme Metal Gun Metal, and a light coat of Jet Exhaust. Once this was dry this area was masked off.
The canopy was attached and also masked.
Now with this camo scheme the colours will need to be sprayed dark to light, which is the opposite of how things are normally done, but its the only way of doing this camo.
Once dry the first coat was sprayed on. For the base coat I used Vallejo ModelAir 71 005 Intermediate Blue.
The underwing fuel tanks were also sprayed as they also have the camo scheme applied to them. Now comes the first part of the masking process. At first glance is looks rather daunting, but once started it isn't that hard, just a bit time consuming.
The easiest way I found of doing it, was hitting one part at a time, I started with the left wing attaching the masks to cover the darker colour, and making sure I marked off the spots applied to the aircraft on the placement sheet.
The right wing followed, with the fuselage left to last. At some points it does get a bit confusing as you end up see spots everywhere, but taking a short break and backtracking soon sorts it out.
The national insignia was also applied as the Czech roundel is in three parts, with two masks needed for the two darkest colours. Thankfully the roundels are the same colours as the camo scheme.
Once all the dark camo spots were on, a coat of ModelAir 71 318 Greyish Blue was sprayed over. The rest of the spots can be applied.
Most of the spots stick well to the aircraft, but some do have a little trouble conforming to the curves of the aircraft, even with applying more pressure so they stick.
With all the spots on the last coat of the camo scheme is applied, which was a white with a little grey mixed in.
The last section of the roundel needs a border around the lighter colour, and this was achieved by placing the last mask slightly off center and hand brushing a thin line around the edge.
The fuel tanks and pylons for under the wings were painted and masked at the same time as the rest of the aircraft.
I left the MiG to dry for a day or so before the unveiling of the camo by removing the masks.
I started with the wings and peeled off the masks one by one, making sure all the masks were taken off.
After the masks were removed there was a little build up of paint around the edges of the spots, but a quick pass with some 2000 grit sandpaper removed the raised edges.
A little painting was required around some of the spots, as some paint had leaked under the masks from the panel lines and where the masks had not quite stuck down.
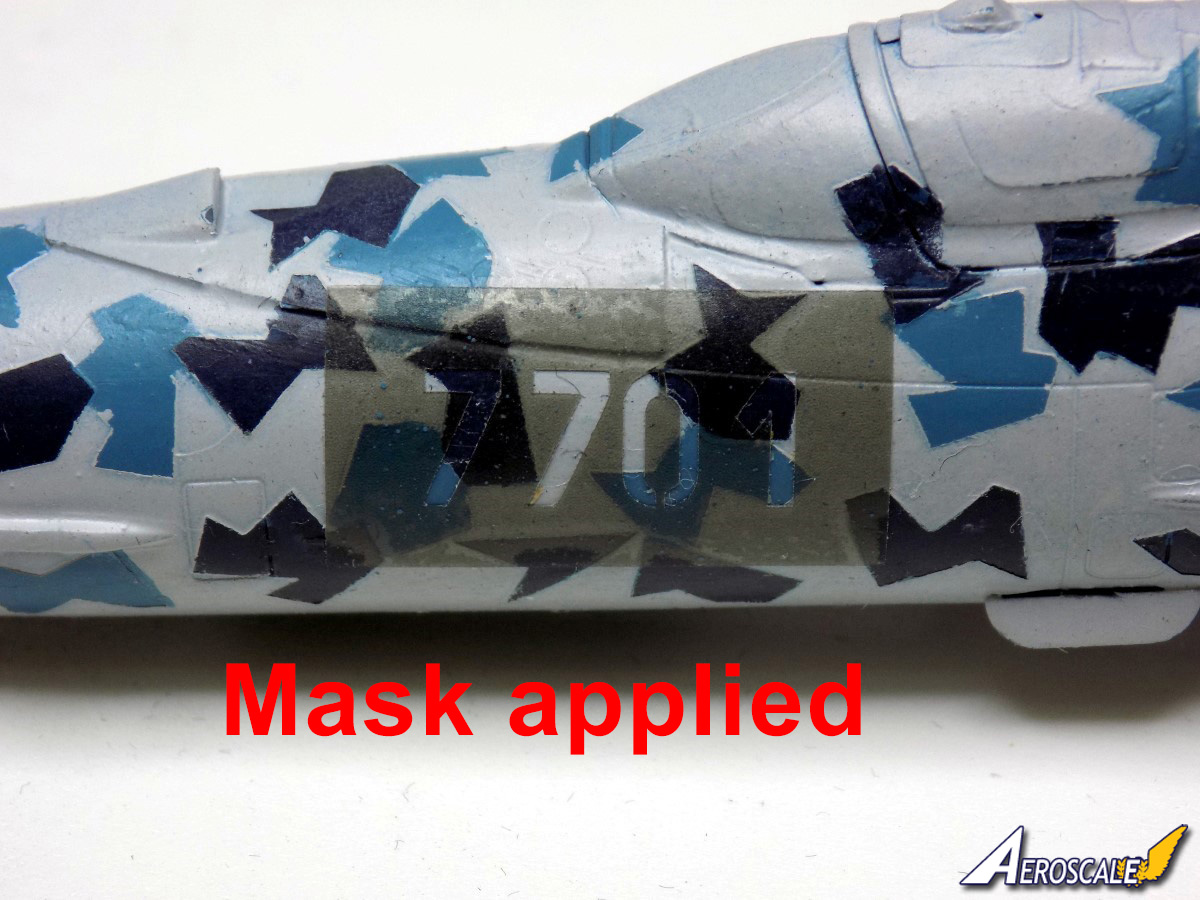
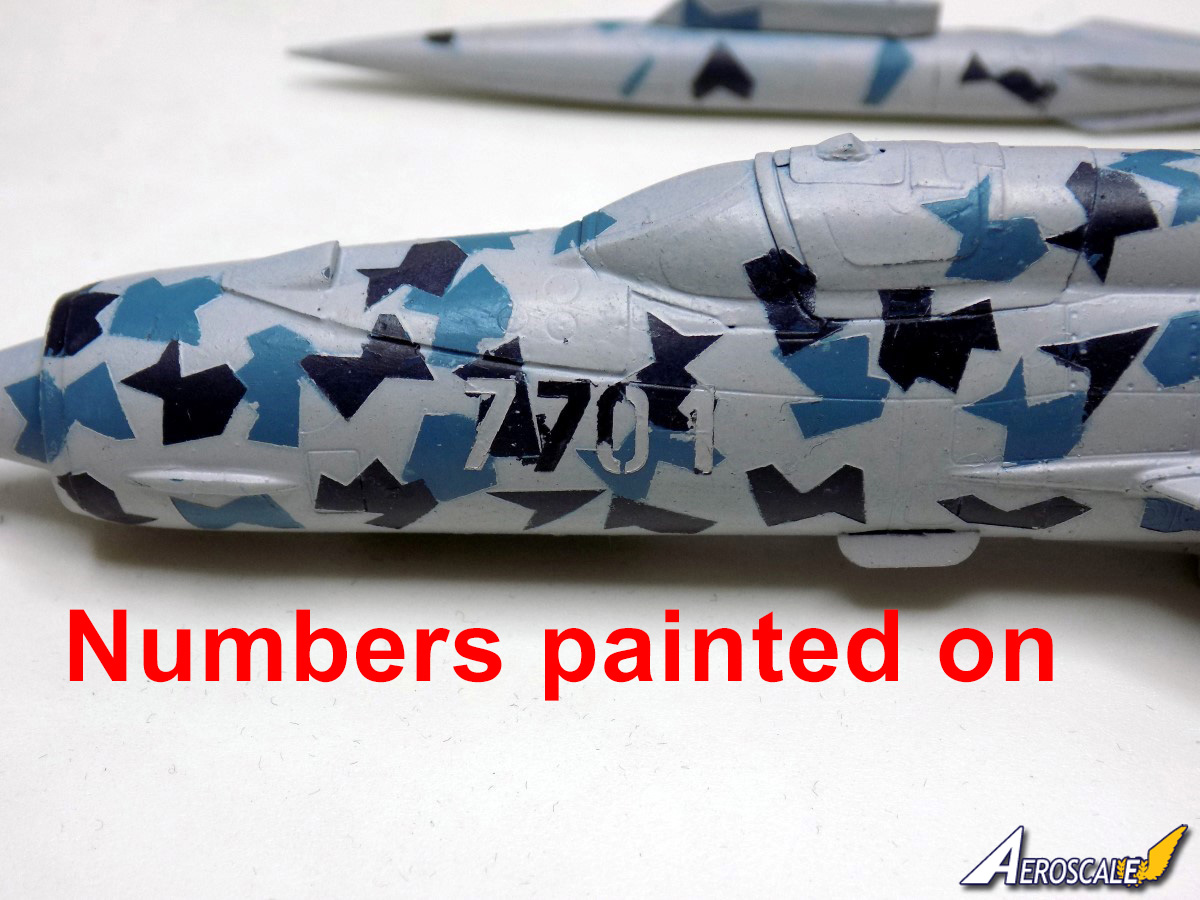
Now I haven't done the aircraft numbers as I wasn't sure of the best way to tackle this part as its a multi coloured part with each number having one or two colours to go over the top of the camo scheme.
The number has its own mask, but I went the other way and used the part you would normally "weed" off as the mask. I didn't bother spraying as its only small and pretty thin, so I hand painted the two colours needed.
The last part of the process was to coat the aircraft in a nice gloss coat. Vallejo (yeah them again, its my go too paints as my local hobby shop stocks them) gloss was sprayed over and once dry looked really s@#t, so I dull coated the aircraft instead, which gives it a better look.
A light panel line wash was added to the panel lines, before the undercarriage, and the other parts were added.
The last part was to add the underwing fuel tanks and belly tank.
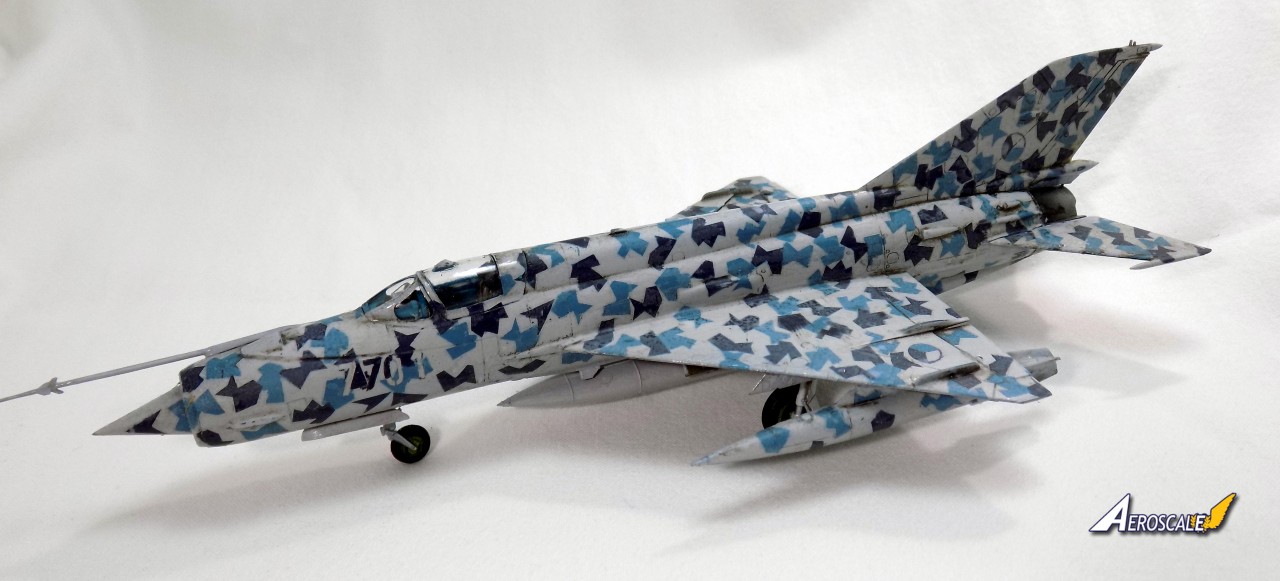
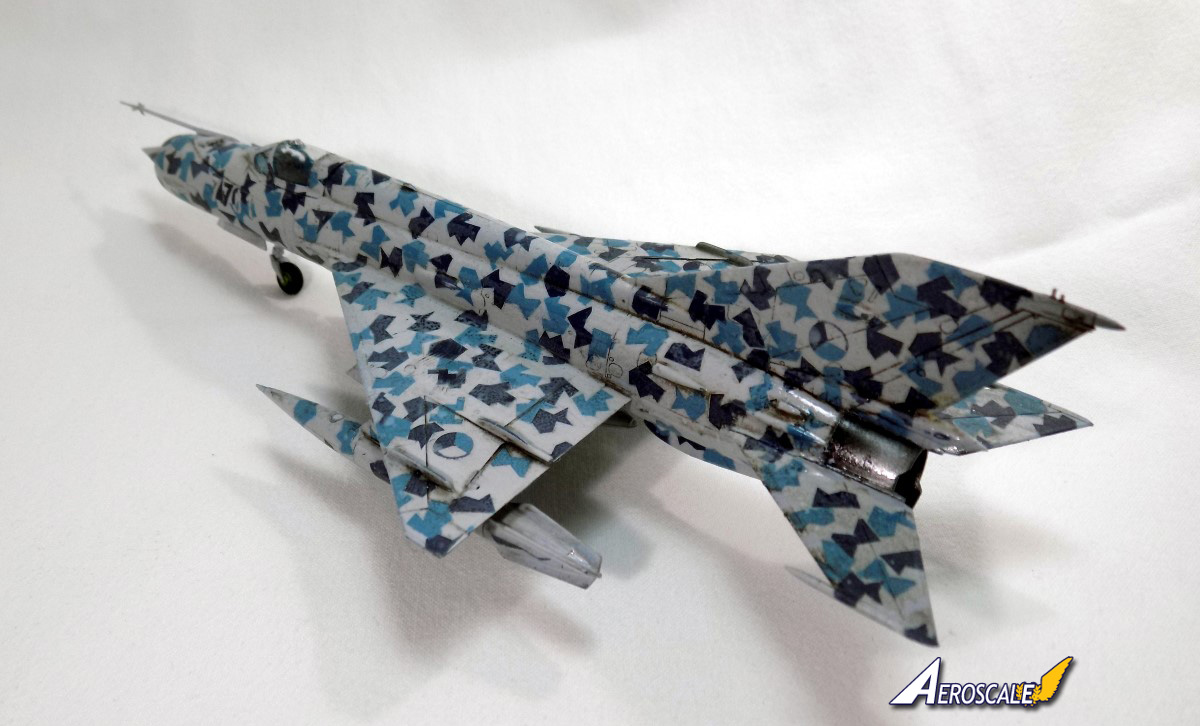
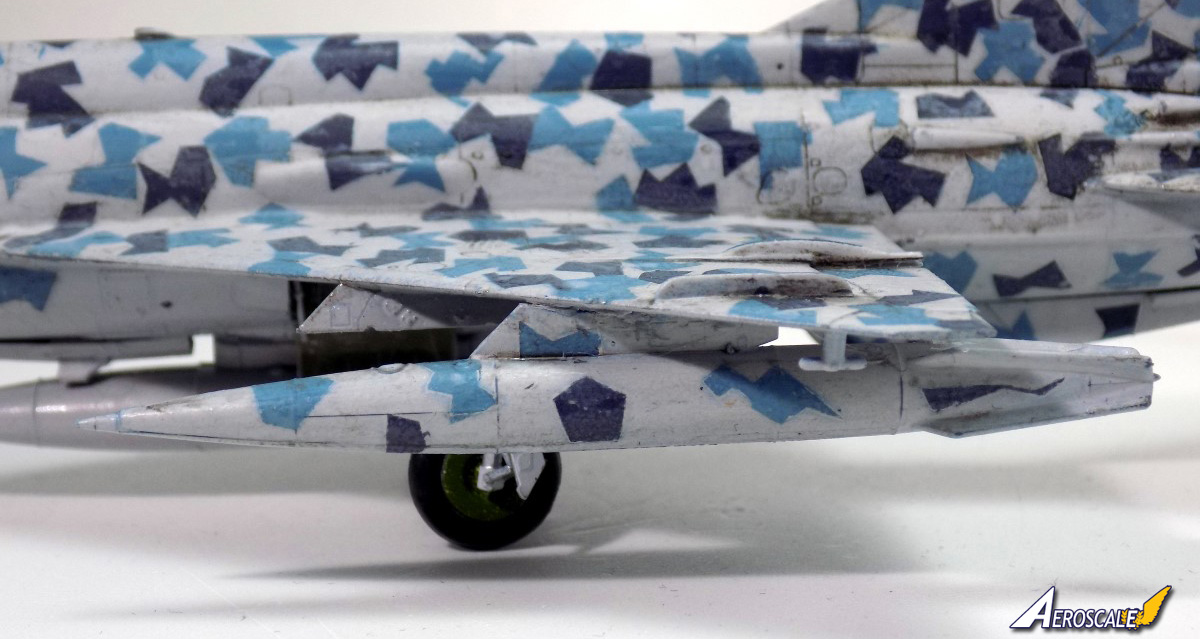
The masks perform extremely well and you end up with a nice sharp hard edge camo scheme.
Please remember, when contacting retailers or manufacturers, to mention that you saw their products highlighted here - on AEROSCALE
The kit favoured for the set is Eduard's superb 1/72nd MiG-21MF. I will be using the Overtrees boxing, as I will not need the decals, and I had a photo etch set for the cockpit left over from an earlier build, which can be found here.
The mask set
Name -Czech Splinter #7701 Camouflage Paint Masks for MiG-21Item No -72/827-025
Price -$17.99
Link to item -Czech Splinter #7701
The masks themselves are made of a very thin plastic and are a translucent grey colour. The mask set which holds the camo pattern are on two sheets.
The first sheet holds the fuselage masks, which is split into right and left sides. Also on this sheet is some spare spots as there is basically six different shapes which make up the camo scheme.
The second sheet holds the wings, fuel tanks, the insignia and the aircraft numbers.
The first stage is too weed the masks, (take out the unused parts, so you can see the masks needed a lot easier).
The masks are not over sticky, so they can be peeled off if you place them in the wrong position. Two placement sheets are supplied for attaching the masks to the aircraft.
Painting
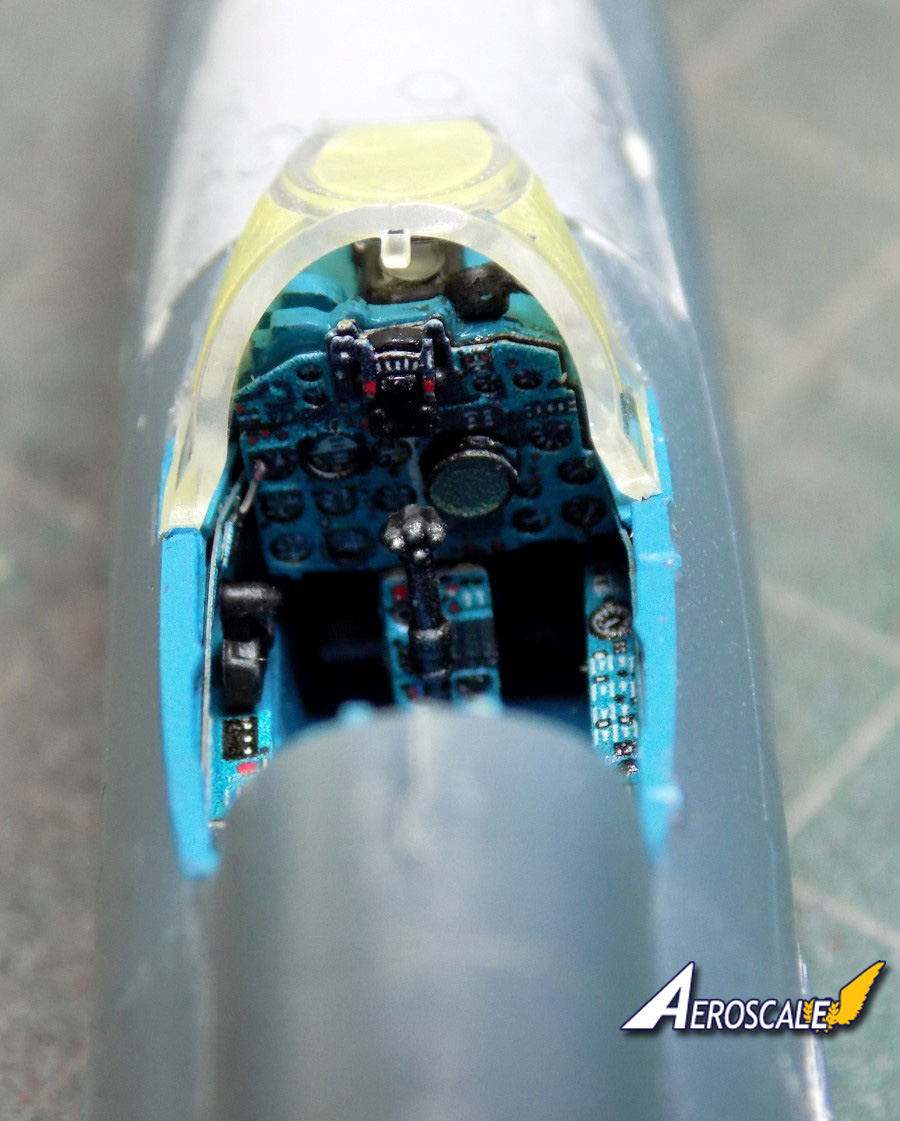
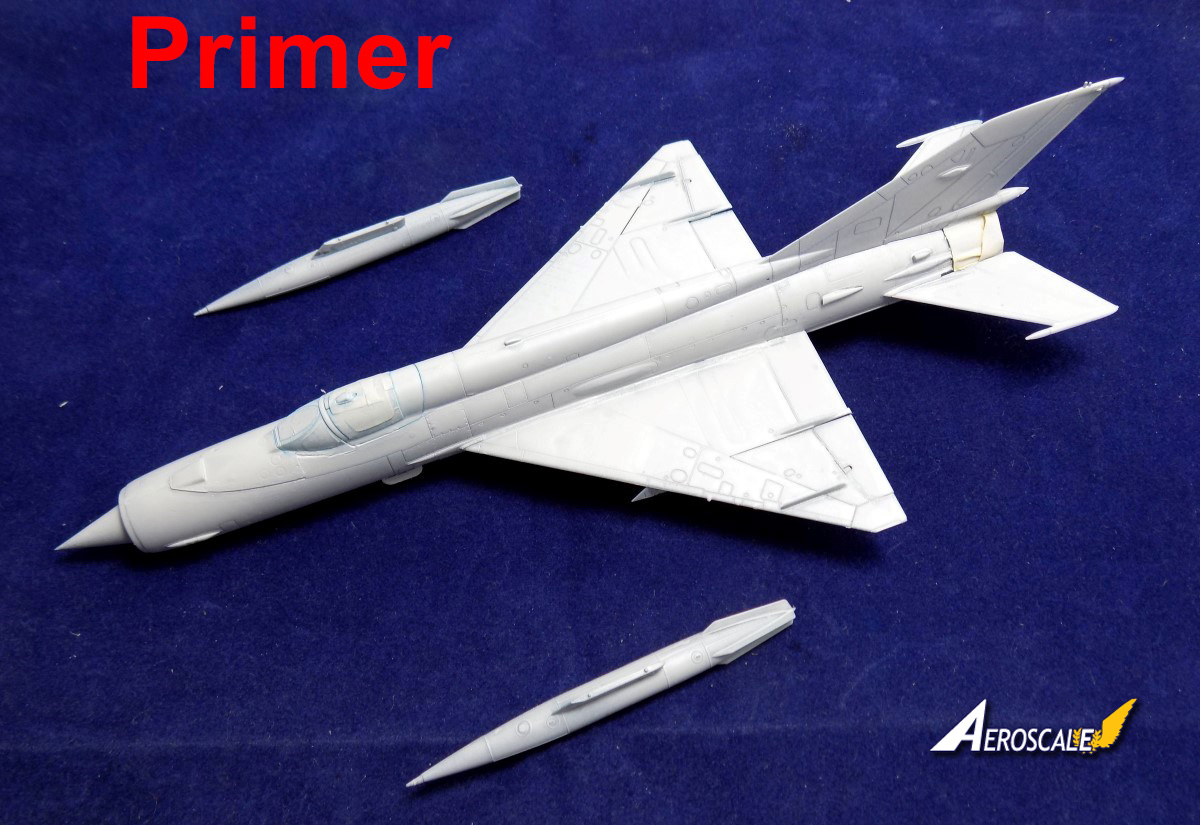
With the majority of the kit built, minus the nose pitot tube and the dangly bits, the aircraft was primed.The exhaust was spayed with AK's Xtreme Metal Gun Metal, and a light coat of Jet Exhaust. Once this was dry this area was masked off.
The canopy was attached and also masked.
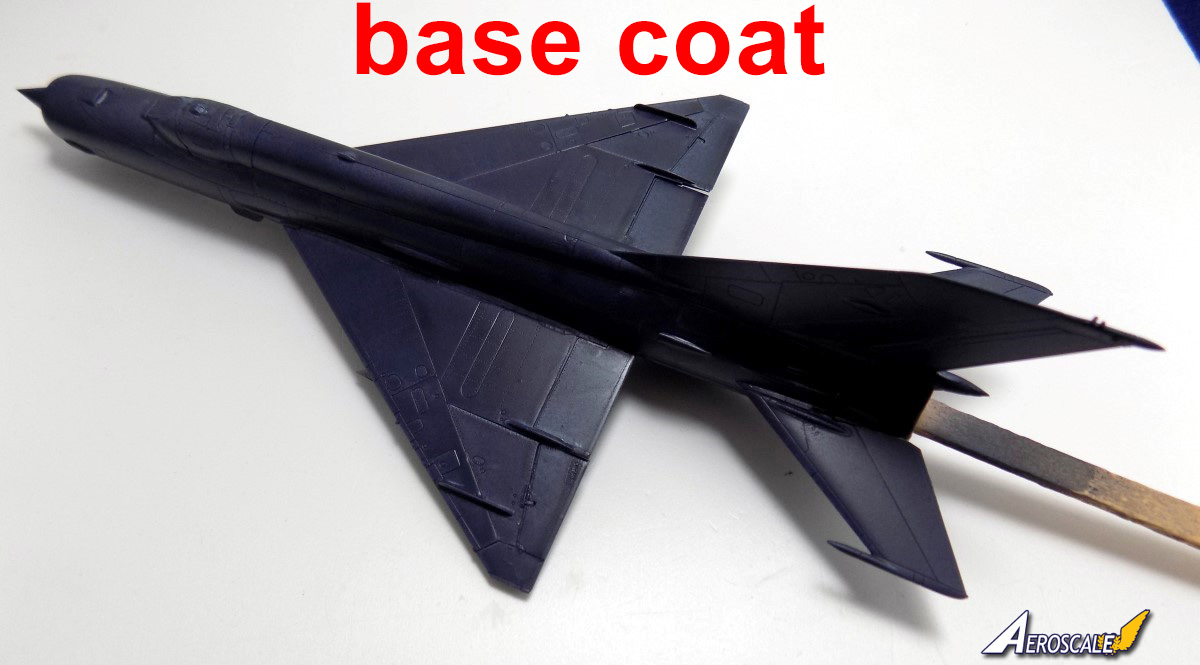
Now with this camo scheme the colours will need to be sprayed dark to light, which is the opposite of how things are normally done, but its the only way of doing this camo.
Once dry the first coat was sprayed on. For the base coat I used Vallejo ModelAir 71 005 Intermediate Blue.
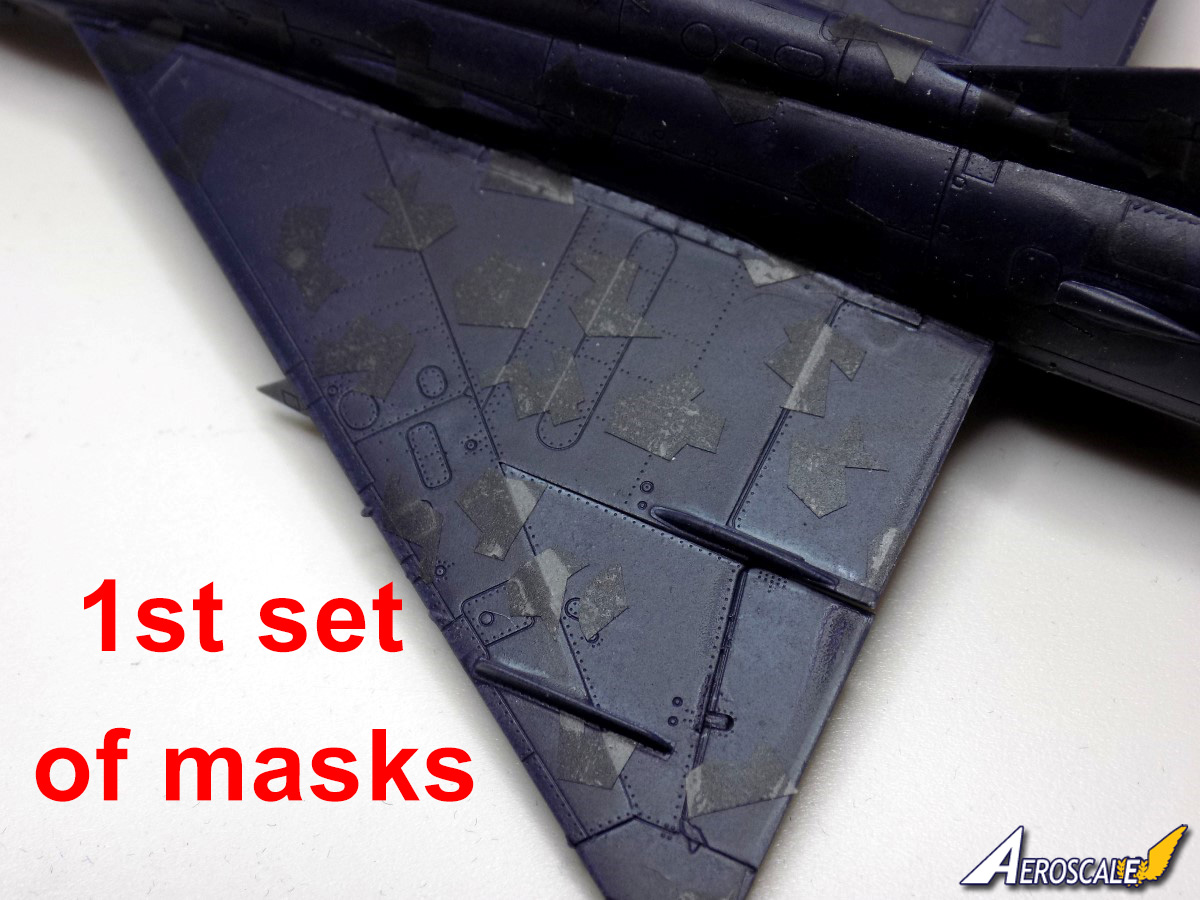
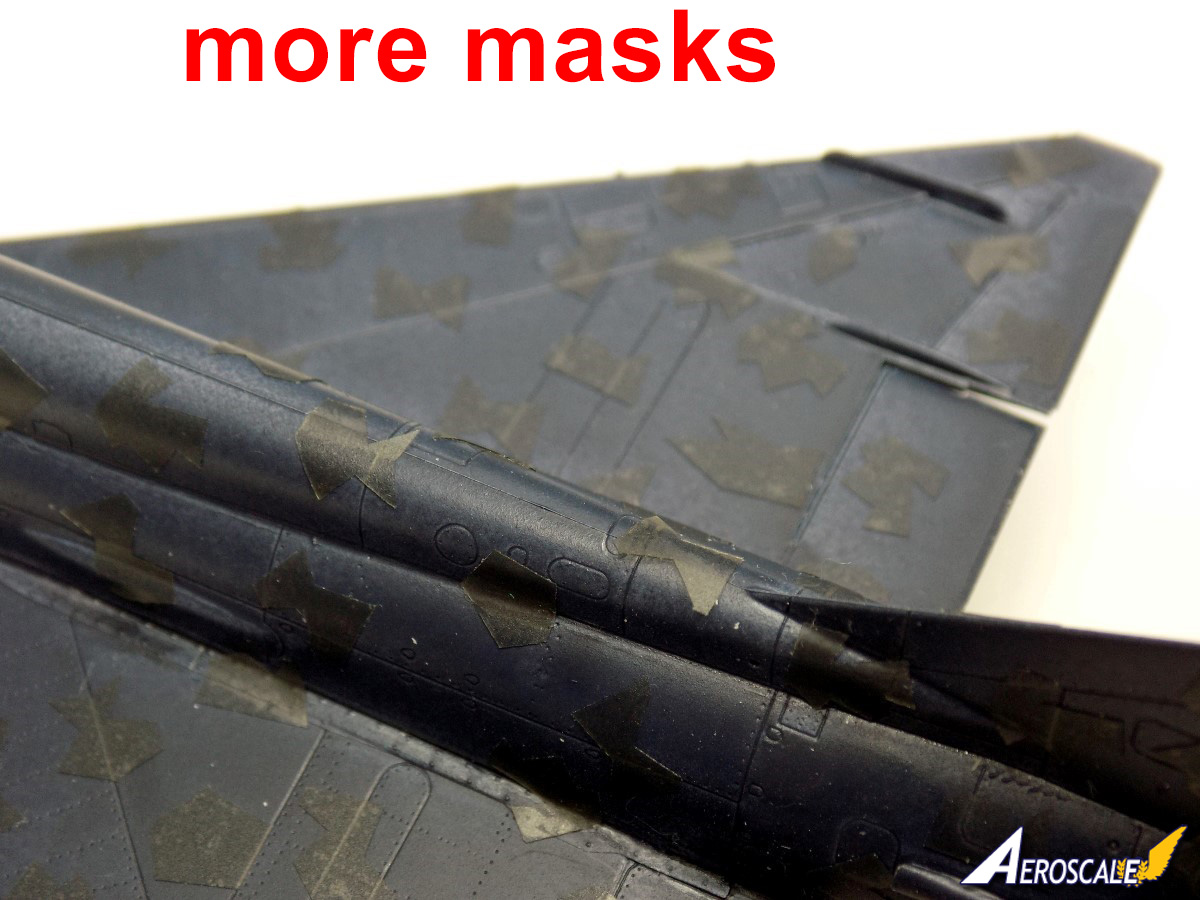
The underwing fuel tanks were also sprayed as they also have the camo scheme applied to them. Now comes the first part of the masking process. At first glance is looks rather daunting, but once started it isn't that hard, just a bit time consuming.
The easiest way I found of doing it, was hitting one part at a time, I started with the left wing attaching the masks to cover the darker colour, and making sure I marked off the spots applied to the aircraft on the placement sheet.
The right wing followed, with the fuselage left to last. At some points it does get a bit confusing as you end up see spots everywhere, but taking a short break and backtracking soon sorts it out.
The national insignia was also applied as the Czech roundel is in three parts, with two masks needed for the two darkest colours. Thankfully the roundels are the same colours as the camo scheme.
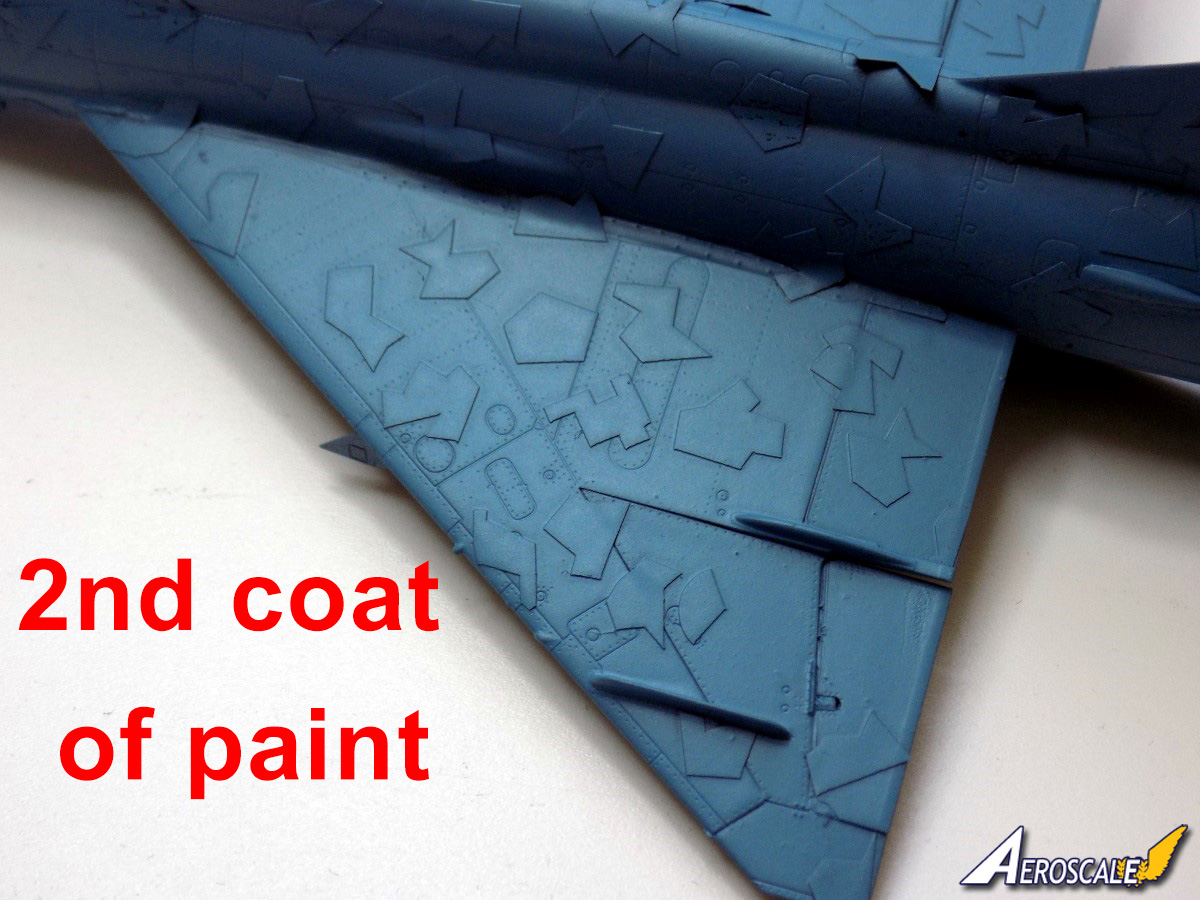
Once all the dark camo spots were on, a coat of ModelAir 71 318 Greyish Blue was sprayed over. The rest of the spots can be applied.
Most of the spots stick well to the aircraft, but some do have a little trouble conforming to the curves of the aircraft, even with applying more pressure so they stick.
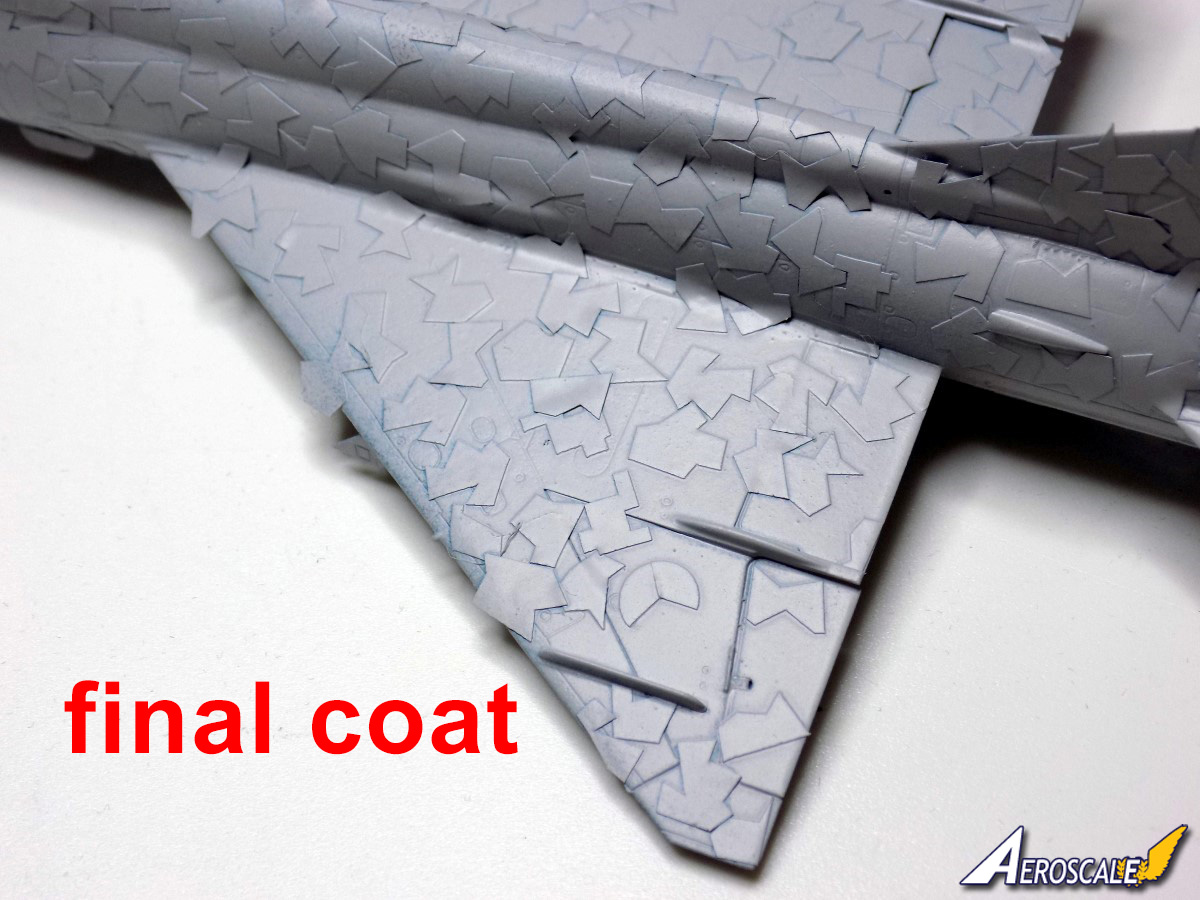
With all the spots on the last coat of the camo scheme is applied, which was a white with a little grey mixed in.
The last section of the roundel needs a border around the lighter colour, and this was achieved by placing the last mask slightly off center and hand brushing a thin line around the edge.
The fuel tanks and pylons for under the wings were painted and masked at the same time as the rest of the aircraft.
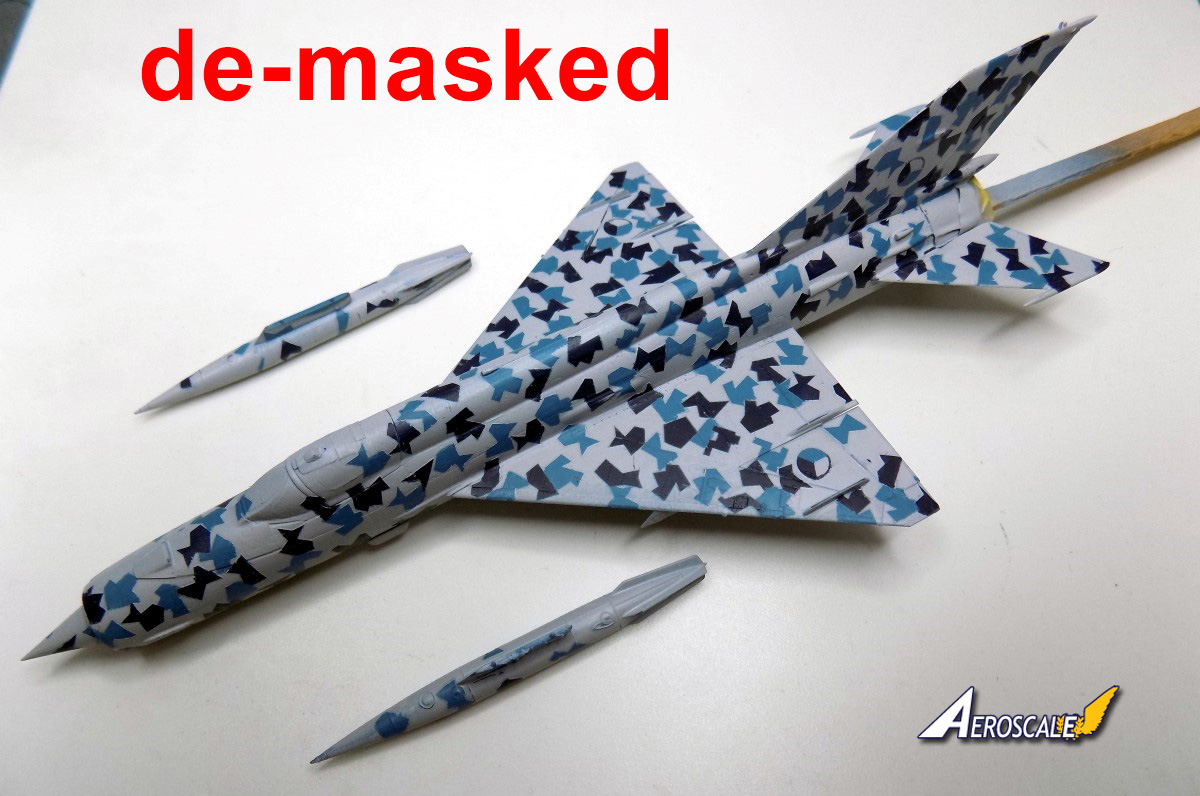
I left the MiG to dry for a day or so before the unveiling of the camo by removing the masks.
I started with the wings and peeled off the masks one by one, making sure all the masks were taken off.
After the masks were removed there was a little build up of paint around the edges of the spots, but a quick pass with some 2000 grit sandpaper removed the raised edges.
A little painting was required around some of the spots, as some paint had leaked under the masks from the panel lines and where the masks had not quite stuck down.
Now I haven't done the aircraft numbers as I wasn't sure of the best way to tackle this part as its a multi coloured part with each number having one or two colours to go over the top of the camo scheme.
The number has its own mask, but I went the other way and used the part you would normally "weed" off as the mask. I didn't bother spraying as its only small and pretty thin, so I hand painted the two colours needed.
The last part of the process was to coat the aircraft in a nice gloss coat. Vallejo (yeah them again, its my go too paints as my local hobby shop stocks them) gloss was sprayed over and once dry looked really s@#t, so I dull coated the aircraft instead, which gives it a better look.
A light panel line wash was added to the panel lines, before the undercarriage, and the other parts were added.
The last part was to add the underwing fuel tanks and belly tank.
Conclusion
This mask set from DN Models is scary to look at with so many masks to apply, but once you start its quite easy to do.The masks perform extremely well and you end up with a nice sharp hard edge camo scheme.
Please remember, when contacting retailers or manufacturers, to mention that you saw their products highlighted here - on AEROSCALE

About the Author


FROM: ENGLAND - SOUTH EAST, UNITED KINGDOM
I started modelling in the 70's with my Dad building Airfix aircraft kits. The memory of my Dad and I building and painting a Avro Lancaster on the kitchen table will always be with me. I then found a friend who enjoyed building models, and between us I think we built the entire range of 1/72 Airfi...
Comments

Very impressive set. Well done, Andy!
Interesting scheme - very Viggenesque. Any information about when they tried this scheme?
OCT 06, 2018 - 04:03 PM

Thanks Fred.
As far as I now it was used in the early 90s as an evaluation scheme, but wasn't followed up and ended up as a Airshow special scheme. The airframe is now not used and rotting away in a knackers yard.
Andy
OCT 07, 2018 - 09:07 AM

Great job Andy!
That is some truly impressive masking! More than I think I've ever done on a kit.
As Fred says - very Viggenesque. I really must check to see if DN Models do a set for the Tarangus/Special Hobby 1:48 Viggens - I intend to build the recent 2-seater and ready-made masks would save hours and hours of work...
All the best
Rowan
OCT 08, 2018 - 07:05 AM
Copyright ©2021 by Andy Brazier. Images also by copyright holder unless otherwise noted. The views and opinions expressed herein are solely the views and opinions of the authors and/or contributors to this Web site and do not necessarily represent the views and/or opinions of AeroScale, KitMaker Network, or Silver Star Enterrpises. Images also by copyright holder unless otherwise noted. Opinions expressed are those of the author(s) and not necessarily those of AeroScale. All rights reserved. Originally published on: 2018-10-06 17:14:02. Unique Reads: 13213

WEB HOSTING BY


Copyright ©2021 AeroScale and Kitmaker Network, a subsidiary of Silver Star Enterprises
All Rights Reserved. Please read our Conditions of Use and Privacy Policy.
All Rights Reserved. Please read our Conditions of Use and Privacy Policy.