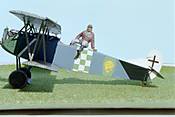
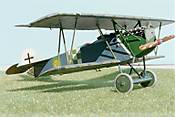
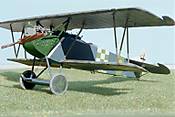
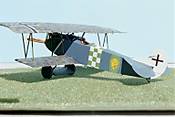
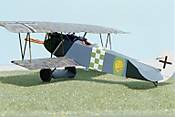
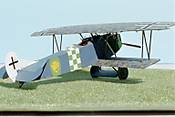
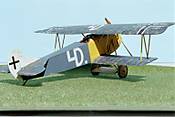
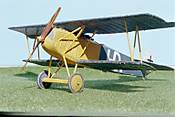
1⁄35The Spotted Nosed Thoroughbred
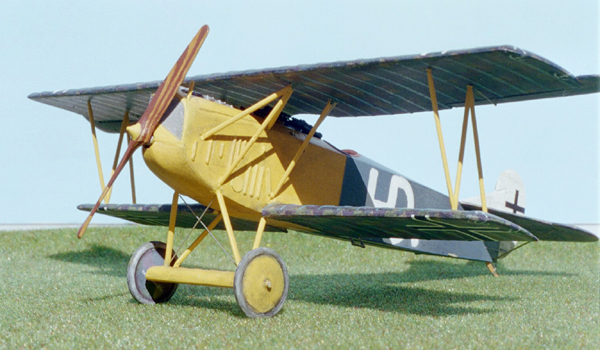
An aged hand spreads techno-dust over the bubbling liquid styrene it holds. In the eerie half light of the whirring, hissing and crackling machinery, switches are thrown and the hoist strains to pick up the boiling vat. Slowly it moves to a spot directly over their newest mold. Magic wands are waved and the cauldron slowly tips on edge, pouring the thick tan soup into the mold voids. Then, a thin, pale, half crazed figure in a medical smock steps up to the mold and holds his stethoscope up to the outer casing as he listens he commands, “..silence !!” One of the wizards reaches with a boney hand for the volume knob on the 1923 Philco radio and turns down the blasts of Edgar Winter’s "Frankenstein.” Moments later, suddenly the doctor cries out, “Its Alive!!! . . . its alive!!! Thus another scale wonder is born...
Page 3. Legend, parts map and colour references. Before beginning, wash your kit plastic in mild dish soap & water, dry completely, then pre-drill and clean up all rigging and strut locator holes.
Page 4. The inline motor assembly is a generic representation that has pieces for the Mercedes D.IIIaü 180hp (PP B 5, 6, 8, 14 - C 4, 13, 34 ) or the BMW IIIa 185 hp assembly (PP B 5, 6, 8, 13 - C 4, 13, 34 .) Truthfully, most non WWI modelers won’t know the difference. Check the references provided for some keynote differences in the types installed. The cylinder jackets of both engines were the color of “blued metal.” The BMW sat higher in the compartment so about 3/8" more of the cylinders could be seen. Its air induction pipes ( PP B 13) were unified where the Mercedes (PP B 14 )was divided. The immediate visual difference in the early Mercedes D.III 160hp / D.IIIa 170hp and its progeny the D.IIIaü 180hp or D.IIIav 200hp are in the rocker boxes above the cylinder jacket heads. On the early D.III and D.IIIa motors the rocker springs are centered on the sides of the rocker box covers. On the D.IIIaü and D.IIIav motor the springs are located on the forward leading edge of the same covers. They were also that way on the BMW IIIa 185hp. The rest is below the cowling and not readily visible.
Several good manufacturers ( specifically ‘Roden’) note the difference and have two distinct castings. The Mercedes D.III160hp was outclassed by 1917. The Mercedes D.IIIaü 180hp was the standard engine in both of the Albatros late built D.V and all D.Va types starting in late 1917 and then the Fokker D.VII through 1918. Then in early 1918 came the Mercedes D.IIIav 200hp. The BMW IIIa 185hp was highly prized by pilots. Many, many D. III and IIIa type motors were rebuilt to the D.IIIaü specs at the airparks as the war progressed. That is why some captured examples had motors with the i.d. designation of D.III 160hp cast into their crankcases. This has caused the misconception that the standard 160hp and 170 hp were used in 1918 at a time when they had become obsolete. Often these were referred to as “160hp over-compressed engines.” Note that the reference to Büchner’s late version OAW having a BMW engine is not supported by any photos that I have seen. Also Ltn. von Wedel's D.VII is depicted on the box art and the instruction images as having a Mercedes but in this section it advises giving it a BMW for this profile.
Next the cockpit flooring (PP A 7 ) The rudder bar ( PP C 33 ) inserted through the flooring (PP A 7) and needs a vertical bar attached centrally. Like the DML Fokker Dr.I set up, this vertical column should angle back and up behind the ammunition box (PP A 16.) On the control column (PP C 27) note the throttle lever has one handle We also have photos where two are present. Check your references. Set the rudder bar (PP C 33 ) to the desired position to compliment the attitude you have chosen for the rudder. Scratchbuild an aileron control “V” for cables and attach the “V” at the front end of the lower control bar molded to the cockpit flooring (PP A 7) . Also add the compass ( PP C 14 & PE 10.) Also here, add bent and shaped brass wire for the throttle and the cables for the Spandau machine guns. Later you will have to add all the control rigging material to the elevator control column(PP C 27 ) and the rudder bar column (PP C 33 ) when the cockpit rear bulkhead / screen (PP A 11) is added. Some of these cables need to go through holes that you need to cut in the rear bulkhead / screen (PP A 11 .) Check your references for the various cables and wiring that are attached to these units.
Page 5. The seat (PP B 12 & 15 ) sets into its supports that are to be built up in a box frame and attached to the rear cockpit bulkhead / screen (PP A 11.) I trimmed down the inside surfaces of the seat ( (PP B 12.) It was known to be covered in fabric that was held by attaching it to eyelets in the seat’s outer rim. As parachutes had come into use the seat was made deeper to accommodate the chute pack as a cushion. In the cockpit rear bulkhead / screen (PP A 11) note there needs to be holes for the rudder control cables to pass through. Next remember the rudder control cables that will be added between the bar and the stirrups will need to go through these holes. Whatever the fuselage covering use the same covering on the bulkhead/screen (PP A 11.) In this case of 4 or 5 colour lozenge. The pilot’s shoulder harness belts (PE 1) are attached behind the screen (PP a 11) not to the seat (PP B 12.) Shows the location for the fuel pressure hand pump ( PP C 10.) You my want to add a half loop of painted brass wire to simulate the air hose leading toward the front of the cockpit strapped to the framework.
Page 6. You can replace the molded cockpit structure in the fuselage halves (PP D 1- 4 ) with painted brass rod sections Note that the factory printed lozenge pattern fabric used on the Fokker D.VII showed through the interior of the cockpit sides in reverse in lighter shades. The clear carrier film on the ‘Eagle Strike’ lozenge decals allows them to be easily reversed. Just apply a little decal Sol & Set. There is no main fuel, reserve fuel & oil tank assembly. Then we see the method of attachment of the engine and the typical Eduard bearing shelf to the raised edges within the engine compartment. Note Eduard has provided for a vertical installation of the Firewall (PP A 8.) This is incorrect. This should have a slight incline toward the engine department. To do it right you will have to erase the forward most, lower locating ridges. Then line the rear face of the firewall up on the outside of the forward most, upper locating ridges. On the mid-production OAW fuselage (PP D 1 & 2) with the cup shaped louvres its not too noticeable. Out of the box the pilot's right side upper engine cowling has scallops for the cylinders and closes up that area tight. On the Late style OAW version (PP D 3 & 4)out of the box the cowling opening for the engine cylinders is larger and easier to see the firewall is too far back.
Concerning the instrument panel (PP A 14 or PE 14 & 15 ), I will usually paint Fokker company instrument panels black and give OAW or Albatros types a varnished wood look. Eduard has given the modeler a great set of photoetch instrument panel parts and fuel gauges there as well. I also added a hand crank spare part as a handle to magneto and flip levers (PE 25 X 4) to fuel and air controls. I also add the tachometer (PE 11) dial to the machine gun rear brace (PP C 28.) Finally they discuss the engine compartment assemblies. This would be typical of a machine in mid to late ( June - Nov)1918. As mentioned earlier cowling side panels are a known hallmark in determining the parentage of your D.VII. But in mid-summer these items upper cowlings would be removed during flight operations.
Page 7. Assembles the Fuselage halves (PP D 1- 4)with its internal component assemblies. Also here we assemble the lower wing parts (PP A 2 & 3, B 1.) One could actually insert spars held in place with double sided tape or glued in place. This type of wing assembly is great for the modeler who wants to simulate damage. By thinning down the inner surfaces, internal structure is easy to replicate. Also, before putting the lower wing together sand the vertical edge of the lower wing at the roots of all three lower wing components (PP A 2 & 3, B 1.) The unmodified fit between the lower wing an fuselage is tight and cause anhedral just like the Roden kit. This fix will eliminate the fit problem. Do Not narrow the whole fuselage by taking away from the center union area.
Page 8. The radiators (PP D 6 & 7) have plain internal faces and no shutter assembly. Eduard chose completely enclosed cowling types. The early front line versions were known to have upper cowling panels removed in the summer months different models installed. Check your references. You may need to alter the rear face of the radiator (PP D 6 & 7) before you attach it. By scribing some crisscross lines in the rear face of the radiator for better simulation. After painting or decal applications, assemble the horizontal stabilizer (PP A 10.) Eduard has given the modeler an easy way to deal with the undersurface fuselage fabric seam (PP C 21.) A first for WWI aviation modelers.
Page 9. For the exhaust (PP D 8 ) Pete Grosz tells me that there were at least six manufacturers putting out these exhausts. The instructions take this time to discuss the application of its lozenge. For me it seems that this should have taken place a page back before assembling the major components. See the rear cover of the instructions for more. Next comes the rudder (PP A 12) and stabilizer fin (PP A 15 ) and control horns ( PP C 3 X 2.) On the original aircraft these items were covered in normal fabric (either plain or lozenge depending on the batch) and the white areas were then painted in place. Next, werke numbers, OAW factory serials and rudder cross were applied. I would now add the control horns (PP C 11 X 4) and let dry. As this begins to dry set the attitude of the elevators (PP A 17) that you wish to reflect.
Page 10. The Spandau machine guns (PP A 5 X 2 ) are entirely plastic. But Eduard gives you etched metal the fretted jackets and other details (PE 6, 20, 21, 23 X 2.) The empty belt chutes (PP C 2 & 7) attach next. The completed Spandau machine guns should be painted in semi gloss black. All German issue Spandau and Parabellum machine guns came from the factory with the outer surfaces covered in a baked on black enamel. Some highlighting in gun metal colouring maybe appropriate.
Page 11. The Eduard top wing assembly (PP A 1, 4, 9 B 2) does not have the mold casting problem found in most of the DML / Dragon kits. By this time I have painted and added decals to all completed wing surfaces and they are thoroughly dry. As mentioned earlier his type of wing assembly is great for the modeler who wants to simulate damage. By thinning down the inner surfaces, portions of internal structure is easy to replicate. For those of you with AMS - a strip of 20 thou strip could be added between the cabane attachment points out to the leading edge mating surfaces of the top wing. It helps the Eduard wing match the wing thickness shown in Anthology 3. Otherwise the wing will be too thin seen from the front. Even with this easy mod, it's still not as deep as the Roden wing, but that may item be on the too thick side. Add the control horns (PP C 11 X 2) next. More is discussed here about the Lozenge placement. See the rear cover of the instructions for more.
Page 12. To bring the fuselage and top wing assemblies together I use children’s “Lego” blocks. to form a jig to keep everything level and square. Then add the interplane (PP C 5 X 2 ) struts first, then the cabane (PP C 9, 15 30 & 31) struts. The plastic struts are commendably thin and clean up quite nicely. My own opinion is that metal etched or white metal load-bearing struts or supports gives a build a much greater longevity. Note that some of the images are incomplete but Eduard has added a section view / insert to the instructions but you have to figure out where and what page their appropriate to.
Page 13. Continues the cabane strut (PP C 9, 15 30 & 31) attachment details. Next the horizontal tail unit stabilizer struts (PP C 20 X 2 ) and the tail skid (PP C 12.) I did replace this item with a modified brass rod for strength. It seems in the beginning Eduard forgot two control horns. (PP C 11 X 2?.) There were originally only six total and you need eight. Eduard discovered this and added four items to the sides of existing sprue arms.
Page 14. Is the axle wing (PP B 4, 7, 9 ) and wheel (PP B 11 X 2) assemblies. With the wing axle mid section (PP B 7) I routed out the plastic axle and replaced it with a brass rod of appropriate diameter. Next add the landing gear legs (PP C 23-26 ) to the wing axle (PP B 4,7 & 9.) There are four propellers of two types offered by the kit. Axial (PP B 16 ) and Heine (PP B 17) and note that Eduard has referenced the right application to the profile provide in the kit decals. The problem is that the Heine propellers (PP B 17) are far too short for inline six cylinder engines and should be closer in length to the Axial (PP B 16) types provided. Two of the four kit propellers with the cones on the bosses are quick release items seen on some BMW engine variants only. It is the pitch and length of a propeller that determines the engine application. The paddle profile was the company hallmark.
Page 15. The half moon strut attachment plates(PE 26 X 8) that Eduard include as photoetch are for the underside of the top wing assembly are a nice touch to add as well. Rigging paths are shown in thin red lines. Eduard really went overboard here and gave you a total of 58 strut attachment plates.
Pages 18 -19. The green and white striped tail unit on Ltn. Franz Büchner Jasta 13 machine is unconfirmed by any photos I have seen on the subject. It was probably the same blue as the fuselage. But he may have had more than one machine painted in this scheme. This late model OAW built machine is seen after the war. Wingless and without its horizontal or vertical tail units. Its blue seemed much lighter than other images of Jasta 13 examples that are available. Note as mentioned before, the reference to Büchner’s late version OAW having a BMW engine is not supported by any photos that I have seen.
Pages 20 - 21. For the scheme of Ltn. Rudolf Stark Eduard provides a colour plan view of his final version. Note that the mauve/lilac chevron/band are not included by design. This gives the builder the chance to thoroughly use one type of their paint to match the whole scheme. If Eduard had given us the lilac band it’s a good bet the paint we used would not match their decals. The light blue rib tapes are typical for OAW machines. While Eduard was showing some forethought, consider that Stark’s D.4523/17 scheme was NOT completed in a short period of time. Having the Lilac painted locations not completely match, may be more accurate.
Pages 22 - 23. Recent studies of Jasta 58 machines say that orange may be an alternative to the black area of the tail. A highly colourful scheme recently done by Aeromaster as an aftermarket decals sheet. The lozenge has intermittent black and tan microdots unevenly spaced over the all surfaces to attempt weathering...not convincing. Note also that the lozenge has two colours assigned to the wrong lozenge shapes. But their new four colour lozenge camouflage has its strong points and prove that Eduard is finally moving in the right direction. Though I like my version of weathering better than theirs, they are trying to improve. If Eagle Strike is an A+++ then Eduard's is a B-.
Eduard has rightly used the same colour rib tapes on top and bottom of the wings. The examples we have in the Lafayette Foundation show that the rib tape was used in one piece on the whole wing rib profile. In general, from the factory Fokker used lozenge strips, OAW used light blue and lozenge and Albatros used salmon pink and lozenge. Check which profile you intend on doing. Note also that there are cases where whole wing components were mixed at the unit level as replacements. That is the lower wings were one component and the top wing was another.
Combat Colours #14 The Fokker D.VII by P. Cooksley, Airfix Magazine. Date unknown.
Details & Colours Windsock Intl. Vol.3 #3 Summer 1987.
Fliegertruppen #2 by A.Ferko, Privately Published, Salem Ohio, 1987. (photocopies may be obtained by contacting the University of Texas at Dallas through the special aviation collection.)
Flight Report Cross & Cockade Great Britain, Vol. 2 # 4.
Fokker D.VII pt. I DML - Grooming a Thoroughbred' Model Aircraft Monthly Jan. 2003.
Fokker D.VII pt. II Jager, A Horse of a Different Colour’ Model Aircraft Monthly Nov. 2003.
Fokker D.VII by Egon Kreuger, Profile Pub. Ltd. 1962.
Fokker D.VII by P. Grosz, Albatros Pub. Ltd, Datafile #9. 1989, 1993, & 1994.
Fokker D. VII Aces of WWI, pt. I by Franks & Van Wyngarden. Osprey pub. 2003.
Fokker D. VII Aces of WWI, pt. II by Franks & Van Wyngarden. Osprey pub. 2004.
Fokker D.VII Anthology 1 by R.Rimell, Albatros Pub. Ltd. 1997.
Fokker D.VII Anthology 2 by R.Rimell, Albatros Pub. Ltd. 2000.
Fokker D.VII Anthology 3 by R.Rimell, Albatros Pub. Ltd. 2002.
Fokker D.VII Kit Survey by R.Rimell, Albatros Ltd. Windsock Vol 13, #4 1997.
Fokker D.VII Covering Practices by Dan-San Abbott, WWI Aero #102, Pp.22-33. 1984.
Fokker D.VII Detail Marking and Finish of Fokker-built D.VII Aircraft by Dan San Abbott, WWI Aero #107, 1985.
Fokker Fighters of WWI by A. Imrie, Osprey, Vintage Warbirds #6 Pp.41-64 1986.
Fokker’s Last Deadly Scourge by M. O’Leary, Air Combat, Pp. 18-26. 1975.
Forgotten Fokker by P Cooksley, Cross & Cockade GB Vol.4, #2,Pp.84-86. 1973.
That Fokker’s an Albatros! By Wally Tripp, WWI Aero, #102 , Pp.14-21. 1984.
Udet’s Fokker D.VII Fighters by Dan-San Abbott, Windsock Vol.4, Spring 1989.
German Army Air Service in WWI by R.Rimell, Osprey, Vintage Warbirds #2, Photos 42-44, 1985.
Germany’s Last Knight of the Air by C. Degelow, William Kimber Pub. London, 1979.
Wings of War by R. Stark, Arms & Armour Press. 1973.
Detailed evaluation of the Eduard Fokker D.VII
Pages 1-2. Text and history As has been noted here previously Eduard unfortunately perpetuates the misconception that Reinhold Platz was the designer at the Fokker Werke at Schwerin, Germany. Historian, Peter Grosz has thoroughly debunked this and other myths fostered by the Weyl biography on Anthony Fokker. Herr Platz' title was “werkemeister”. He was the foreman of the welding unit. He had no aerodynamics background. This was left to the Fokker design team.Page 3. Legend, parts map and colour references. Before beginning, wash your kit plastic in mild dish soap & water, dry completely, then pre-drill and clean up all rigging and strut locator holes.
Page 4. The inline motor assembly is a generic representation that has pieces for the Mercedes D.IIIaü 180hp (PP B 5, 6, 8, 14 - C 4, 13, 34 ) or the BMW IIIa 185 hp assembly (PP B 5, 6, 8, 13 - C 4, 13, 34 .) Truthfully, most non WWI modelers won’t know the difference. Check the references provided for some keynote differences in the types installed. The cylinder jackets of both engines were the color of “blued metal.” The BMW sat higher in the compartment so about 3/8" more of the cylinders could be seen. Its air induction pipes ( PP B 13) were unified where the Mercedes (PP B 14 )was divided. The immediate visual difference in the early Mercedes D.III 160hp / D.IIIa 170hp and its progeny the D.IIIaü 180hp or D.IIIav 200hp are in the rocker boxes above the cylinder jacket heads. On the early D.III and D.IIIa motors the rocker springs are centered on the sides of the rocker box covers. On the D.IIIaü and D.IIIav motor the springs are located on the forward leading edge of the same covers. They were also that way on the BMW IIIa 185hp. The rest is below the cowling and not readily visible.
Several good manufacturers ( specifically ‘Roden’) note the difference and have two distinct castings. The Mercedes D.III160hp was outclassed by 1917. The Mercedes D.IIIaü 180hp was the standard engine in both of the Albatros late built D.V and all D.Va types starting in late 1917 and then the Fokker D.VII through 1918. Then in early 1918 came the Mercedes D.IIIav 200hp. The BMW IIIa 185hp was highly prized by pilots. Many, many D. III and IIIa type motors were rebuilt to the D.IIIaü specs at the airparks as the war progressed. That is why some captured examples had motors with the i.d. designation of D.III 160hp cast into their crankcases. This has caused the misconception that the standard 160hp and 170 hp were used in 1918 at a time when they had become obsolete. Often these were referred to as “160hp over-compressed engines.” Note that the reference to Büchner’s late version OAW having a BMW engine is not supported by any photos that I have seen. Also Ltn. von Wedel's D.VII is depicted on the box art and the instruction images as having a Mercedes but in this section it advises giving it a BMW for this profile.
Next the cockpit flooring (PP A 7 ) The rudder bar ( PP C 33 ) inserted through the flooring (PP A 7) and needs a vertical bar attached centrally. Like the DML Fokker Dr.I set up, this vertical column should angle back and up behind the ammunition box (PP A 16.) On the control column (PP C 27) note the throttle lever has one handle We also have photos where two are present. Check your references. Set the rudder bar (PP C 33 ) to the desired position to compliment the attitude you have chosen for the rudder. Scratchbuild an aileron control “V” for cables and attach the “V” at the front end of the lower control bar molded to the cockpit flooring (PP A 7) . Also add the compass ( PP C 14 & PE 10.) Also here, add bent and shaped brass wire for the throttle and the cables for the Spandau machine guns. Later you will have to add all the control rigging material to the elevator control column(PP C 27 ) and the rudder bar column (PP C 33 ) when the cockpit rear bulkhead / screen (PP A 11) is added. Some of these cables need to go through holes that you need to cut in the rear bulkhead / screen (PP A 11 .) Check your references for the various cables and wiring that are attached to these units.
Page 5. The seat (PP B 12 & 15 ) sets into its supports that are to be built up in a box frame and attached to the rear cockpit bulkhead / screen (PP A 11.) I trimmed down the inside surfaces of the seat ( (PP B 12.) It was known to be covered in fabric that was held by attaching it to eyelets in the seat’s outer rim. As parachutes had come into use the seat was made deeper to accommodate the chute pack as a cushion. In the cockpit rear bulkhead / screen (PP A 11) note there needs to be holes for the rudder control cables to pass through. Next remember the rudder control cables that will be added between the bar and the stirrups will need to go through these holes. Whatever the fuselage covering use the same covering on the bulkhead/screen (PP A 11.) In this case of 4 or 5 colour lozenge. The pilot’s shoulder harness belts (PE 1) are attached behind the screen (PP a 11) not to the seat (PP B 12.) Shows the location for the fuel pressure hand pump ( PP C 10.) You my want to add a half loop of painted brass wire to simulate the air hose leading toward the front of the cockpit strapped to the framework.
Page 6. You can replace the molded cockpit structure in the fuselage halves (PP D 1- 4 ) with painted brass rod sections Note that the factory printed lozenge pattern fabric used on the Fokker D.VII showed through the interior of the cockpit sides in reverse in lighter shades. The clear carrier film on the ‘Eagle Strike’ lozenge decals allows them to be easily reversed. Just apply a little decal Sol & Set. There is no main fuel, reserve fuel & oil tank assembly. Then we see the method of attachment of the engine and the typical Eduard bearing shelf to the raised edges within the engine compartment. Note Eduard has provided for a vertical installation of the Firewall (PP A 8.) This is incorrect. This should have a slight incline toward the engine department. To do it right you will have to erase the forward most, lower locating ridges. Then line the rear face of the firewall up on the outside of the forward most, upper locating ridges. On the mid-production OAW fuselage (PP D 1 & 2) with the cup shaped louvres its not too noticeable. Out of the box the pilot's right side upper engine cowling has scallops for the cylinders and closes up that area tight. On the Late style OAW version (PP D 3 & 4)out of the box the cowling opening for the engine cylinders is larger and easier to see the firewall is too far back.
Concerning the instrument panel (PP A 14 or PE 14 & 15 ), I will usually paint Fokker company instrument panels black and give OAW or Albatros types a varnished wood look. Eduard has given the modeler a great set of photoetch instrument panel parts and fuel gauges there as well. I also added a hand crank spare part as a handle to magneto and flip levers (PE 25 X 4) to fuel and air controls. I also add the tachometer (PE 11) dial to the machine gun rear brace (PP C 28.) Finally they discuss the engine compartment assemblies. This would be typical of a machine in mid to late ( June - Nov)1918. As mentioned earlier cowling side panels are a known hallmark in determining the parentage of your D.VII. But in mid-summer these items upper cowlings would be removed during flight operations.
Page 7. Assembles the Fuselage halves (PP D 1- 4)with its internal component assemblies. Also here we assemble the lower wing parts (PP A 2 & 3, B 1.) One could actually insert spars held in place with double sided tape or glued in place. This type of wing assembly is great for the modeler who wants to simulate damage. By thinning down the inner surfaces, internal structure is easy to replicate. Also, before putting the lower wing together sand the vertical edge of the lower wing at the roots of all three lower wing components (PP A 2 & 3, B 1.) The unmodified fit between the lower wing an fuselage is tight and cause anhedral just like the Roden kit. This fix will eliminate the fit problem. Do Not narrow the whole fuselage by taking away from the center union area.
Page 8. The radiators (PP D 6 & 7) have plain internal faces and no shutter assembly. Eduard chose completely enclosed cowling types. The early front line versions were known to have upper cowling panels removed in the summer months different models installed. Check your references. You may need to alter the rear face of the radiator (PP D 6 & 7) before you attach it. By scribing some crisscross lines in the rear face of the radiator for better simulation. After painting or decal applications, assemble the horizontal stabilizer (PP A 10.) Eduard has given the modeler an easy way to deal with the undersurface fuselage fabric seam (PP C 21.) A first for WWI aviation modelers.
Page 9. For the exhaust (PP D 8 ) Pete Grosz tells me that there were at least six manufacturers putting out these exhausts. The instructions take this time to discuss the application of its lozenge. For me it seems that this should have taken place a page back before assembling the major components. See the rear cover of the instructions for more. Next comes the rudder (PP A 12) and stabilizer fin (PP A 15 ) and control horns ( PP C 3 X 2.) On the original aircraft these items were covered in normal fabric (either plain or lozenge depending on the batch) and the white areas were then painted in place. Next, werke numbers, OAW factory serials and rudder cross were applied. I would now add the control horns (PP C 11 X 4) and let dry. As this begins to dry set the attitude of the elevators (PP A 17) that you wish to reflect.
Page 10. The Spandau machine guns (PP A 5 X 2 ) are entirely plastic. But Eduard gives you etched metal the fretted jackets and other details (PE 6, 20, 21, 23 X 2.) The empty belt chutes (PP C 2 & 7) attach next. The completed Spandau machine guns should be painted in semi gloss black. All German issue Spandau and Parabellum machine guns came from the factory with the outer surfaces covered in a baked on black enamel. Some highlighting in gun metal colouring maybe appropriate.
Page 11. The Eduard top wing assembly (PP A 1, 4, 9 B 2) does not have the mold casting problem found in most of the DML / Dragon kits. By this time I have painted and added decals to all completed wing surfaces and they are thoroughly dry. As mentioned earlier his type of wing assembly is great for the modeler who wants to simulate damage. By thinning down the inner surfaces, portions of internal structure is easy to replicate. For those of you with AMS - a strip of 20 thou strip could be added between the cabane attachment points out to the leading edge mating surfaces of the top wing. It helps the Eduard wing match the wing thickness shown in Anthology 3. Otherwise the wing will be too thin seen from the front. Even with this easy mod, it's still not as deep as the Roden wing, but that may item be on the too thick side. Add the control horns (PP C 11 X 2) next. More is discussed here about the Lozenge placement. See the rear cover of the instructions for more.
Page 12. To bring the fuselage and top wing assemblies together I use children’s “Lego” blocks. to form a jig to keep everything level and square. Then add the interplane (PP C 5 X 2 ) struts first, then the cabane (PP C 9, 15 30 & 31) struts. The plastic struts are commendably thin and clean up quite nicely. My own opinion is that metal etched or white metal load-bearing struts or supports gives a build a much greater longevity. Note that some of the images are incomplete but Eduard has added a section view / insert to the instructions but you have to figure out where and what page their appropriate to.
Page 13. Continues the cabane strut (PP C 9, 15 30 & 31) attachment details. Next the horizontal tail unit stabilizer struts (PP C 20 X 2 ) and the tail skid (PP C 12.) I did replace this item with a modified brass rod for strength. It seems in the beginning Eduard forgot two control horns. (PP C 11 X 2?.) There were originally only six total and you need eight. Eduard discovered this and added four items to the sides of existing sprue arms.
Page 14. Is the axle wing (PP B 4, 7, 9 ) and wheel (PP B 11 X 2) assemblies. With the wing axle mid section (PP B 7) I routed out the plastic axle and replaced it with a brass rod of appropriate diameter. Next add the landing gear legs (PP C 23-26 ) to the wing axle (PP B 4,7 & 9.) There are four propellers of two types offered by the kit. Axial (PP B 16 ) and Heine (PP B 17) and note that Eduard has referenced the right application to the profile provide in the kit decals. The problem is that the Heine propellers (PP B 17) are far too short for inline six cylinder engines and should be closer in length to the Axial (PP B 16) types provided. Two of the four kit propellers with the cones on the bosses are quick release items seen on some BMW engine variants only. It is the pitch and length of a propeller that determines the engine application. The paddle profile was the company hallmark.
Page 15. The half moon strut attachment plates(PE 26 X 8) that Eduard include as photoetch are for the underside of the top wing assembly are a nice touch to add as well. Rigging paths are shown in thin red lines. Eduard really went overboard here and gave you a total of 58 strut attachment plates.
Decals
Pages 16 - 17. Ltn. Ltn Hasso von Wedel was commander of Jasta 24s not 23s.Also all wing mounted national crosses do or should all have white borders. Decals do have these its just an omission of the instructions. Most authoritative sources say that this machine was covered in 5 colour lozenge fabric. But only one image of this machine has ever been published that I know of. Most of that image is von Wedel and the Richtrad, his personal marking and his family coat of arms. This dates back to medieval times when his family were judges in the low-court. The Richtrad was a wagon wheel was used as a torture device to which the broken arms and legs of the condemned were woven through the spokes and nailed in place. Then the wheel was up-righted on its rim and a grease tipped pole with a retainer boss was inserted through the hub. Then the pole was dropped into a hole and wooden wedges were hammered inplace at its base to keep it up-right. When the pole was dropped into its ground socket the opposite end pushed through to the retainer boss. It was of sufficient length at its protrusion to break the back of the accused. Then ropes that were already attached to the rim were left to hang loose. So that the occasional passer-by could give the wheel a good spin. When note used for torture the device was used in spring celebrations as ...the May pole.Pages 18 -19. The green and white striped tail unit on Ltn. Franz Büchner Jasta 13 machine is unconfirmed by any photos I have seen on the subject. It was probably the same blue as the fuselage. But he may have had more than one machine painted in this scheme. This late model OAW built machine is seen after the war. Wingless and without its horizontal or vertical tail units. Its blue seemed much lighter than other images of Jasta 13 examples that are available. Note as mentioned before, the reference to Büchner’s late version OAW having a BMW engine is not supported by any photos that I have seen.
Pages 20 - 21. For the scheme of Ltn. Rudolf Stark Eduard provides a colour plan view of his final version. Note that the mauve/lilac chevron/band are not included by design. This gives the builder the chance to thoroughly use one type of their paint to match the whole scheme. If Eduard had given us the lilac band it’s a good bet the paint we used would not match their decals. The light blue rib tapes are typical for OAW machines. While Eduard was showing some forethought, consider that Stark’s D.4523/17 scheme was NOT completed in a short period of time. Having the Lilac painted locations not completely match, may be more accurate.
Pages 22 - 23. Recent studies of Jasta 58 machines say that orange may be an alternative to the black area of the tail. A highly colourful scheme recently done by Aeromaster as an aftermarket decals sheet. The lozenge has intermittent black and tan microdots unevenly spaced over the all surfaces to attempt weathering...not convincing. Note also that the lozenge has two colours assigned to the wrong lozenge shapes. But their new four colour lozenge camouflage has its strong points and prove that Eduard is finally moving in the right direction. Though I like my version of weathering better than theirs, they are trying to improve. If Eagle Strike is an A+++ then Eduard's is a B-.
Eduard has rightly used the same colour rib tapes on top and bottom of the wings. The examples we have in the Lafayette Foundation show that the rib tape was used in one piece on the whole wing rib profile. In general, from the factory Fokker used lozenge strips, OAW used light blue and lozenge and Albatros used salmon pink and lozenge. Check which profile you intend on doing. Note also that there are cases where whole wing components were mixed at the unit level as replacements. That is the lower wings were one component and the top wing was another.
Comments
In my opinion, The new Eduard kit is a finely cut mold. The new generation exploded view instructions are great. There is even an errata leaflet in current issues my first two kits did not have. The rest of the kit is well tooled and will become a standard. The average modeler can pick this kit up and get very decent results. It fills the void in the Fokker D.VII line up left by Jager’s demise. Then it exceeds our expectations when we consider a kit that has everything the modeler wants in one box. That is great plastic with two options for variants, optional photoetch and precut decal lozenge and a comprehensive slick paper magazine for instructions. The key here is information. What is your WWI aviation library like? If you have one or two of the references listed above, the Eduard kit is fine. For an old bone like me with more library than sense, if it came to a choice between the Roden or the Eduard. I would choose the Roden for its highly detailed engine, open cowling possibilities and is less expensive.References
Albatros D.Va German Fighter of World War I by R. Mikesh, Smithsonian Inst. Press, Pp. 48-53, 1980.(great engine details.)Combat Colours #14 The Fokker D.VII by P. Cooksley, Airfix Magazine. Date unknown.
Details & Colours Windsock Intl. Vol.3 #3 Summer 1987.
Fliegertruppen #2 by A.Ferko, Privately Published, Salem Ohio, 1987. (photocopies may be obtained by contacting the University of Texas at Dallas through the special aviation collection.)
Flight Report Cross & Cockade Great Britain, Vol. 2 # 4.
Fokker D.VII pt. I DML - Grooming a Thoroughbred' Model Aircraft Monthly Jan. 2003.
Fokker D.VII pt. II Jager, A Horse of a Different Colour’ Model Aircraft Monthly Nov. 2003.
Fokker D.VII by Egon Kreuger, Profile Pub. Ltd. 1962.
Fokker D.VII by P. Grosz, Albatros Pub. Ltd, Datafile #9. 1989, 1993, & 1994.
Fokker D. VII Aces of WWI, pt. I by Franks & Van Wyngarden. Osprey pub. 2003.
Fokker D. VII Aces of WWI, pt. II by Franks & Van Wyngarden. Osprey pub. 2004.
Fokker D.VII Anthology 1 by R.Rimell, Albatros Pub. Ltd. 1997.
Fokker D.VII Anthology 2 by R.Rimell, Albatros Pub. Ltd. 2000.
Fokker D.VII Anthology 3 by R.Rimell, Albatros Pub. Ltd. 2002.
Fokker D.VII Kit Survey by R.Rimell, Albatros Ltd. Windsock Vol 13, #4 1997.
Fokker D.VII Covering Practices by Dan-San Abbott, WWI Aero #102, Pp.22-33. 1984.
Fokker D.VII Detail Marking and Finish of Fokker-built D.VII Aircraft by Dan San Abbott, WWI Aero #107, 1985.
Fokker Fighters of WWI by A. Imrie, Osprey, Vintage Warbirds #6 Pp.41-64 1986.
Fokker’s Last Deadly Scourge by M. O’Leary, Air Combat, Pp. 18-26. 1975.
Forgotten Fokker by P Cooksley, Cross & Cockade GB Vol.4, #2,Pp.84-86. 1973.
That Fokker’s an Albatros! By Wally Tripp, WWI Aero, #102 , Pp.14-21. 1984.
Udet’s Fokker D.VII Fighters by Dan-San Abbott, Windsock Vol.4, Spring 1989.
German Army Air Service in WWI by R.Rimell, Osprey, Vintage Warbirds #2, Photos 42-44, 1985.
Germany’s Last Knight of the Air by C. Degelow, William Kimber Pub. London, 1979.
Wings of War by R. Stark, Arms & Armour Press. 1973.
Copyright ©2021 by Stephen Lawson. Images also by copyright holder unless otherwise noted. The views and opinions expressed herein are solely the views and opinions of the authors and/or contributors to this Web site and do not necessarily represent the views and/or opinions of AeroScale, KitMaker Network, or Silver Star Enterrpises. Images also by copyright holder unless otherwise noted. Opinions expressed are those of the author(s) and not necessarily those of AeroScale. All rights reserved. Originally published on: 2005-11-23 00:00:00. Unique Reads: 16417


