_GOTOBOTTOM
World War II: Soviet Union
Russian aircraft of WWII
Hosted by Rowan Baylis
Italeri Il-2 type 3 Shturmovik (1/48)
alpha_tango
_VISITCOMMUNITY
Germany
Joined: September 07, 2005
KitMaker: 5,609 posts
AeroScale: 5,231 posts
Posted: Thursday, June 07, 2007 - 12:21 AM UTC
Hello

Grega's nice build tread of his Eduard version of the Accurate Miniatures kit has convinced me to build my Italeri kit and using lots of AM stuff.


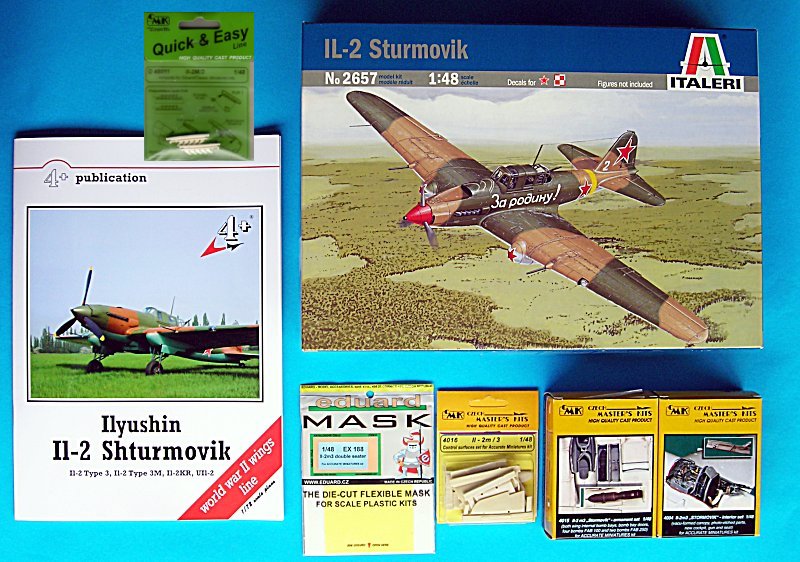
Well, this is the easy part. But finding a nice (confirmed) camo sheme is difficult ... and there are people who say Lw colours are difficult. i tried my luck on the forum of the "Soviet VVS Modelling" site where lots of knowledgeable poeple share there thoughts ... As I could get spare AccMin decals from a friend for V.I. Mykhliks a/c (twice HSU) I wanted to do this a/c .... and so the fun begins .. please read the Forum entries of the above mentioned site .....

To me the picture in +4 looks like an arrowed wing and thus I will stick to that (although Erik Pilawski has a different opinion ... I already have the kit and all stuff, so I am comitted). What I could imagine is, that the wing made of wood, so maybe I'll change it according to the drawings in the +4 booklet. For the colours I will follow Eriks profile, he kindly provided as the June feature of the VVS site.

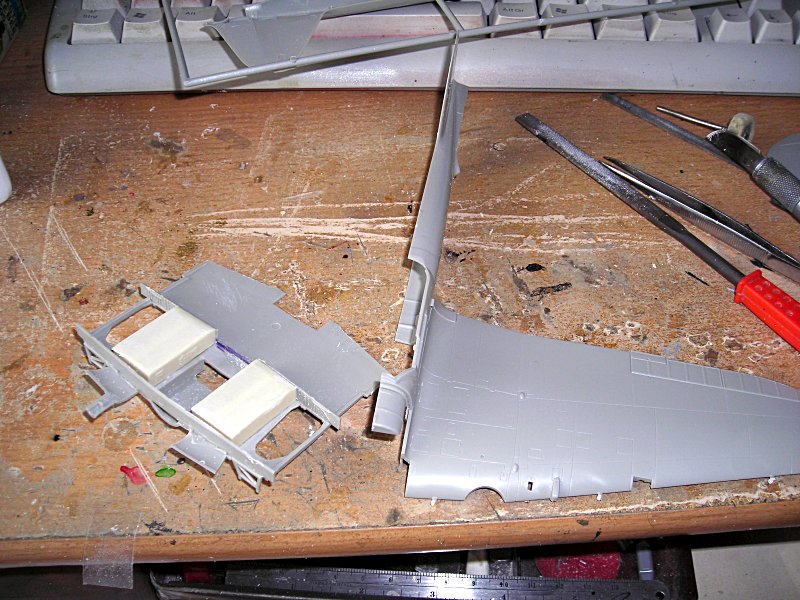
The interior colour was the next difficult guess, but thankfully Alex Secularac (hope I wrote that correct) gave me an educated guess using ALG-5 primer, which I will do.

I am progressing really slow this time, but I hope I can focus on this build long enough to get everything closed up. I was dry fitting and sanding the cockpit area for a few days, but I have achieved a nice tight fit .. now to add the details and dig the air gun out ... Here are 2 further pix from 2 days ago.


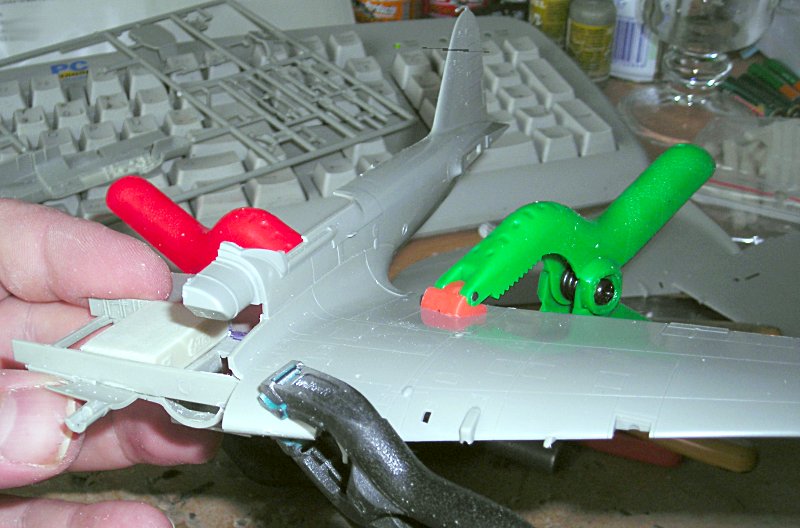
More to come (hopefully) ...

Thanks to Grega for the motivation and the nice guys from the VVS board for their help (Alex, Erik, Sergey, DGM .. hope I did not miss one)!!!

best wishes

Steffen
Merlin
Staff MemberSenior Editor
AEROSCALE
#017
_VISITCOMMUNITY
United Kingdom
Joined: June 11, 2003
KitMaker: 17,582 posts
AeroScale: 12,795 posts
Posted: Thursday, June 07, 2007 - 12:37 AM UTC
Nice one Steffen!

You don't fancy writing a quick Review for the Italeri re-box, do you? I was looking at it in my LHS the other week, but (for once) I thought I couldn't justify buying it - I've already got so many Il-2s in the stash! It's not often I get out of a model shop empty-handed...

All the best

Rowan
alpha_tango
_VISITCOMMUNITY
Germany
Joined: September 07, 2005
KitMaker: 5,609 posts
AeroScale: 5,231 posts
Posted: Thursday, June 07, 2007 - 01:17 AM UTC

Quoted Text

You don't fancy writing a quick Review for the Italeri re-box, do you?


Errrrrr, no! ..


Rowan, you know I have to maintain my own site and for that I have to write some reviews myself (I am really slow at this) the Italeri kit is on this list as Hasegawas Mitsubishi F-2A, Trumpeters Sea Hawk FGA.6 and another one, which escapes me for the moment (Revell Ar 234 Nachtigall).

Furthermore I want to write short "/reviews" for the AM stuff I bought for the Il-2 .. mind you all in German .. and then i want to rewrite my Fw 190 F-1 posts .. so you do not have to wait too long ..

besides getting a job would not be that bad either ... ( in case you do not notice, there is a very bitter undertone in this remark)

so you see I am occupied, you can imagine that if it takes me days to write a German review ... how long would an English take?

For this posts I can "forget" orthography and grammar .. though it really bugs me when re-reading my posts after 24 h....

whine mode off

Hmm, what was your question?

best wishes

Steffen
Merlin
Staff MemberSenior Editor
AEROSCALE
#017
_VISITCOMMUNITY
United Kingdom
Joined: June 11, 2003
KitMaker: 17,582 posts
AeroScale: 12,795 posts
Posted: Thursday, June 07, 2007 - 01:49 AM UTC
Hi Steffen

Well, it's my job to try!


Quoted Text

...you know I have to maintain my own site and for that I have to write some reviews myself


That's exactly why I hoped you might have one up your sleeve.

All the best

Rowan
gregax
_VISITCOMMUNITY
Slovenia
Joined: May 11, 2005
KitMaker: 124 posts
AeroScale: 118 posts
Posted: Thursday, June 07, 2007 - 02:36 AM UTC
It's nice to see another "cementbomber" here. I will follow the progress and i'll try to help you with the "fitting" problems. With all the resin extras, you can't avoid it.
alpha_tango
_VISITCOMMUNITY
Germany
Joined: September 07, 2005
KitMaker: 5,609 posts
AeroScale: 5,231 posts
Posted: Thursday, June 07, 2007 - 03:29 AM UTC
Hi Grega

many thanks! I have already put many thoughts, dryfitting and sanding into the model and believe me .. .the fit is good now for the fuselage (with resin pit!) and wings (without outer wings and wheel bays)

BTW I went this way:

- wing center bomb covers removed
- wing spars installed (one modified as per CMK instructions)
- bomb bays installed ... dryfitting and sanding .. but was o.k. in an hour or so (including sawing with the motor tool)

- in the fuselages side wall detail removed
- glueing resin side walls into the fuselage halfs
- dryfitting pit (no joy)
- gluing upper wings to fuselages for good fit
- sanding plastic side walls of the fuselage (inside with motor tool, file and sanding sticks .. about 1/2mm each side no problem)
- fitting fuselage halfs to lower center wing (continuous dryfitting and sanding)
- gluing lhe left fuselage to lower center wing (lots of pressure to keep it straight, essential to clamp the inside -red clamp in pic above - worked quite well)
- waiting until dry ... waiting ... waiting ... waiting .... you get the picture
- dryfitting pit .. oxegene bottle interferes ...
- milling a hole in the side wall (sure not the easies solution, but I wanted to show the painted bottle and not the flexed of bottle ) -- it will be covered by the fuel tank
- more dryfitting - I did not remove the forward plastic beams - as you did Grega -, because they help me to get everything together .. just thinned a little (really!)
- built in the oil cooler in the center wing as I feared to forget it.
- covered with resin piece (had to be sanded to shape)
- I did not touch the resin pit! just some sanding on the plastic side walls
- everything fits like a glove now (which will probably require some paint removing after cockpit painting)

BTW did I ever tell you that I do not like building/painting cockpits .. nothing to be seen afterwards, but I know every mistake ...

one fit problem at the moment: the resin elevators are thinner than the plastic "roots" ... I am not sure how to fix that , but maybe I'll align it to the top and sand it to shape on the lower side

thats all for now

cheers

Steffen
 _GOTOTOP