Here I go again.
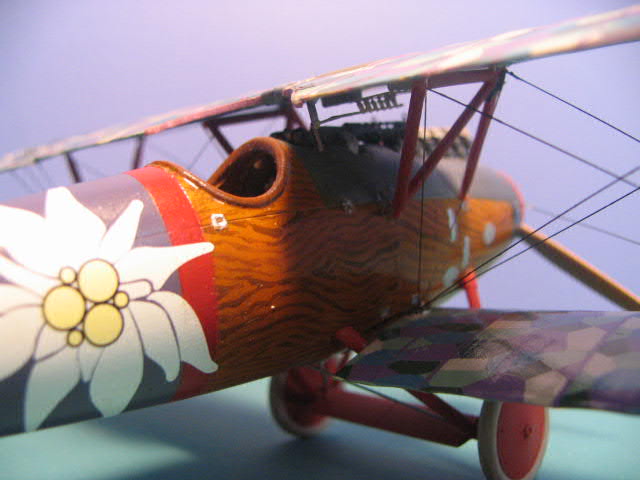
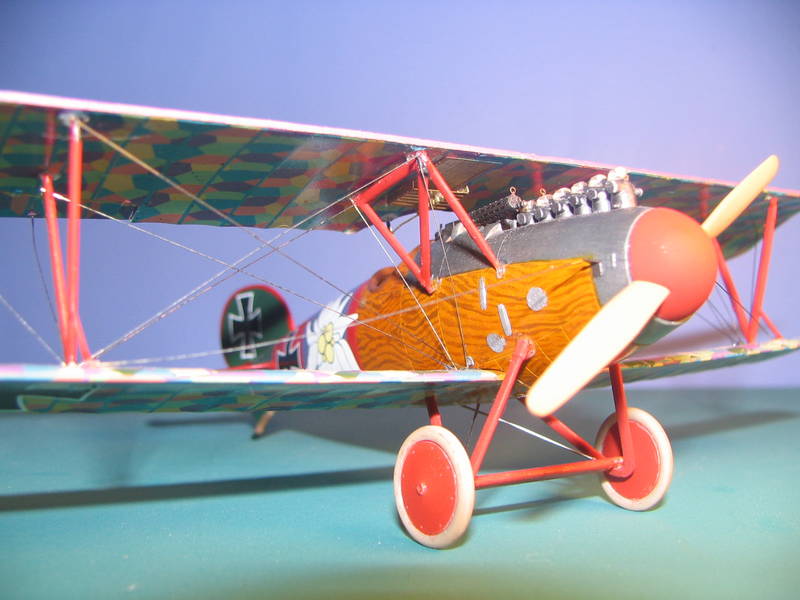
I wanted to make the wood on the fuselage look more like plywood. I have marveled at the look some modelers have attained in simulating wood, but was never satisfied that it was quite right. After some experimentation, I was able to mimic plywood.
It is real important to make sure the grain on the wood is random. I have seen models built where the wood grain goes from horizontal to diagonal with a few verticle panels thrown in. To me, this does not fit with the German Engineering. I made my panels all run in the same direction.
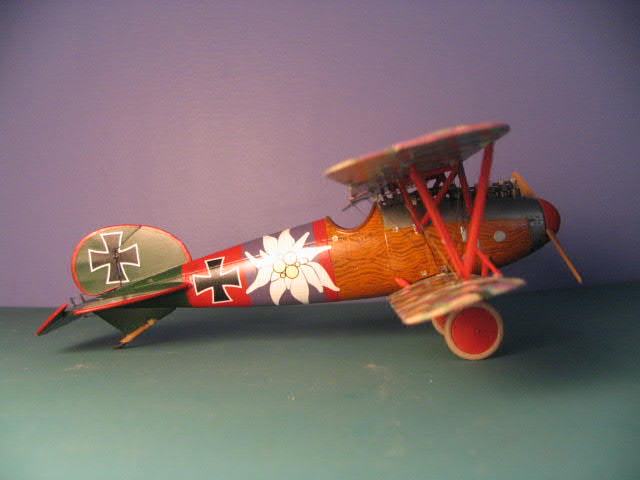
Jasta 5 colors. The rest of the scheme is loosely based on an actual plane in Jasta 5. There is some artistic license taken to make this a colorful example of the Flying Circus.
Early Aviation
Discuss World War I and the early years of aviation thru 1934.
Hosted by Jim Starkweather
Another Albatros
CaptainA
Indiana, United States
Joined: May 14, 2007
KitMaker: 3,117 posts
AeroScale: 2,270 posts
Joined: May 14, 2007
KitMaker: 3,117 posts
AeroScale: 2,270 posts
Posted: Friday, July 20, 2007 - 07:46 AM UTC
CaptainA
Indiana, United States
Joined: May 14, 2007
KitMaker: 3,117 posts
AeroScale: 2,270 posts
Joined: May 14, 2007
KitMaker: 3,117 posts
AeroScale: 2,270 posts
Posted: Friday, July 20, 2007 - 08:12 AM UTC
The rigging took the better part of two days. Check out those Spandaus.
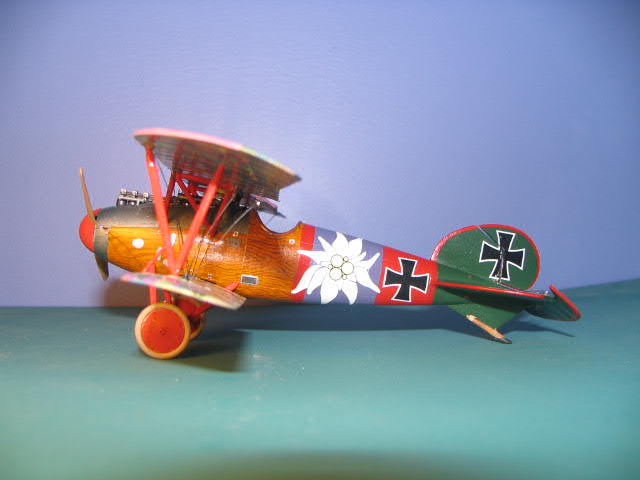
Port side is just as colorful. The insignia and Edelweiss are decals. All the other colors on the fuselage were masked and sprayed. Yes it was nerve wracking.
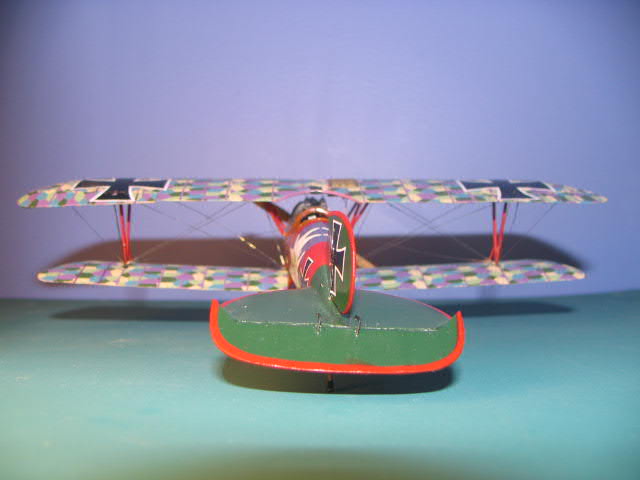
The five color scheme on the wings were decals I found in my box of decals. I dont know for sure whre they came from, but I thenk they are Eduards. You can really see the rigging on this shot.
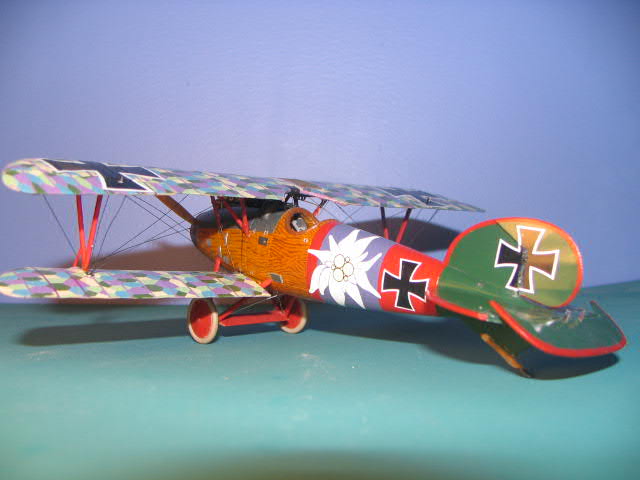
It is an Eduard 1/48th scale kit made OOB except for the decals and seatbelts. I dropped the elevators and offset the rudder and Ailerons.
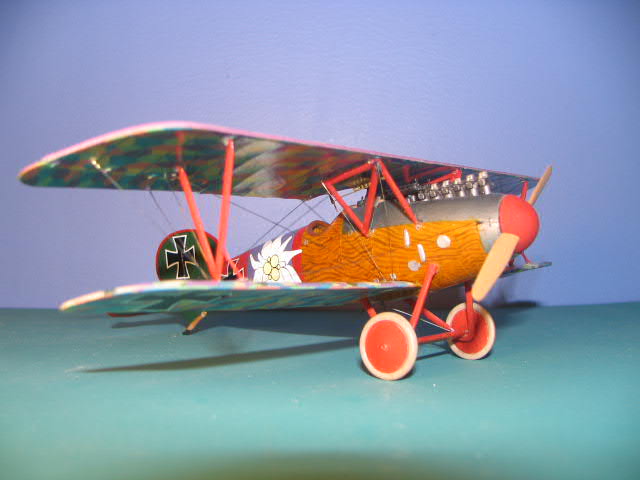
That wood effect really adds some character to this guy.
The wood effect was achieved with a base coat of wood enamel. Then I created the grain with a mud colored accrylic and a very fine brush. It took a few days to do the entire fuselage. Last was a coat of Tamiya clear yellow/clear orange mix. Future and decals followed.
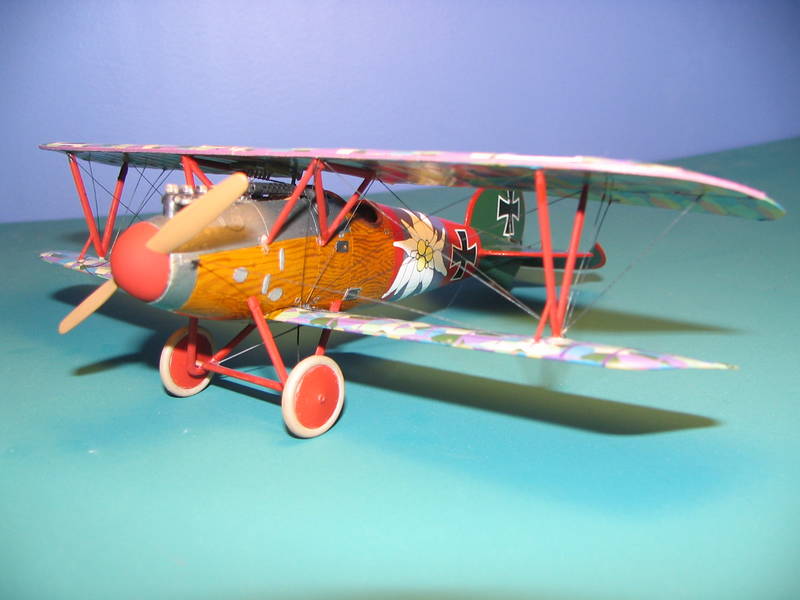
Jasta 5 aircraft were identified by their green tails. The metal engine shroud was done in aluminum, with a light mist of light gray to tone down the metalic look.
Sunset at the aerodrome.
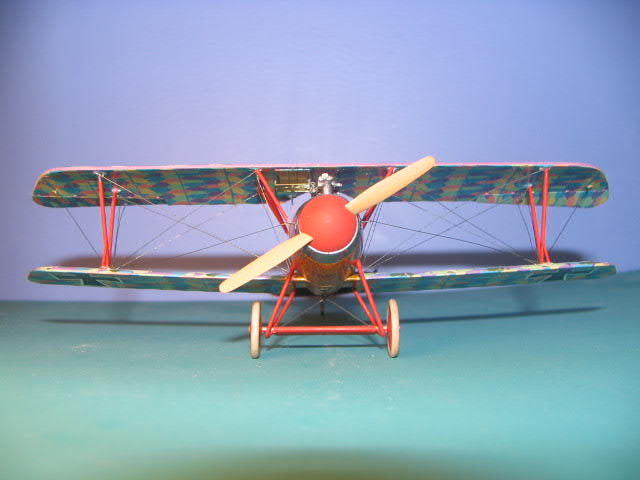
Front view. The rigging is a real bear on a small aircraft like this. It was done in brass wire painted steel.
Business end shot. You need to pay some attention to the engine compartment. I used the same wood painting technique inside the fuselage. Dont those PE jackets on the Spandaus look good?
Sun is setting so it is time to close out this post.
I will be entering this bird in the MoM. I would appreciate comments. I would also appreciate it if you modelers would help me choose which photos to use for the MoM. I need one photo for the actual entry, and 3 photos for the MoM thread. Your choices.
airwarrior
New Jersey, United States
Joined: November 21, 2002
KitMaker: 2,085 posts
AeroScale: 217 posts
Joined: November 21, 2002
KitMaker: 2,085 posts
AeroScale: 217 posts
Posted: Friday, July 20, 2007 - 09:29 AM UTC
Cool paint job. It is deffinitely something out of the ordinary. It looks like your horizontal stab and elevator aren't square though. While it may not matter to you, (and that's all that really matters) it hurts the model to me.
BradCancian
Queensland, Australia
Joined: August 30, 2006
KitMaker: 285 posts
AeroScale: 281 posts
Joined: August 30, 2006
KitMaker: 285 posts
AeroScale: 281 posts
Posted: Friday, July 20, 2007 - 01:11 PM UTC
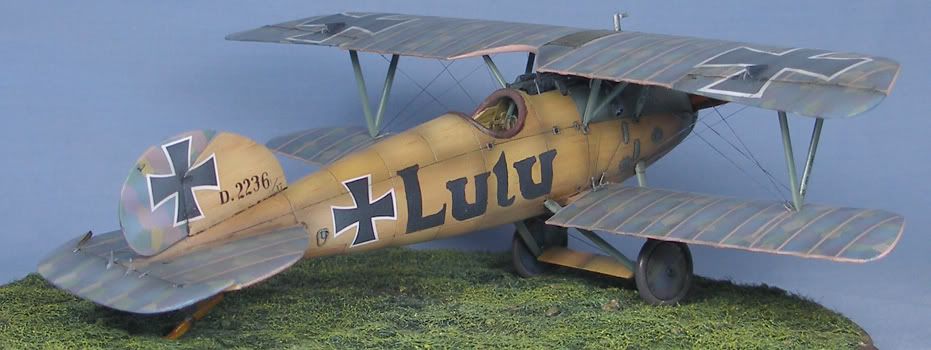
Hello Carl - nice Albatros you have there - quite a striking paint scheme. Good luck with the MoM entry and congrats on your Roden Albie (I am currently building the same kit at the moment).
Not trying to hijack your thread, but plywood is always difficult to replicate and everyone has their own interpretation. Personally, I prefer a more subtle wood grain - I did this one using oil paints.
I agree that the grains have to go in the same direction on Albatros aircraft, due simply to the requirement to bend the plywood over the frames!
Again, nice work.
BC
CaptainA
Indiana, United States
Joined: May 14, 2007
KitMaker: 3,117 posts
AeroScale: 2,270 posts
Joined: May 14, 2007
KitMaker: 3,117 posts
AeroScale: 2,270 posts
Posted: Saturday, July 21, 2007 - 12:28 AM UTC
Quoted Text
Cool paint job. It is deffinitely something out of the ordinary. It looks like your horizontal stab and elevator aren't square though. While it may not matter to you, (and that's all that really matters) it hurts the model to me.
I noticed that when I posted the pictures. I will surrgically remove it and straighten it out. Yes it does matter to me. That is why I posted pictures. I need the advice and criticism of experts who are not emotionally involved in the build. That is the best way to improve. I welcome your comments.
So which pictures should I use?
CaptainA
Indiana, United States
Joined: May 14, 2007
KitMaker: 3,117 posts
AeroScale: 2,270 posts
Joined: May 14, 2007
KitMaker: 3,117 posts
AeroScale: 2,270 posts
Posted: Saturday, July 21, 2007 - 12:53 AM UTC
Quoted Text
Not trying to hijack your thread, but plywood is always difficult to replicate and everyone has their own interpretation. Personally, I prefer a more subtle wood grain - I did this one using oil paints.
I agree that the grains have to go in the same direction on Albatros aircraft, due simply to the requirement to bend the plywood over the frames!
BC
I am hoping Stephen Lawson will fly in here and drop some good advice and tidbits of knowledge. But here goes.
The Germans covered their Albatros with three plys of wood, one at a time. The most likely way was the first with a horizontal grain orientation, second vertically, and third horizontally again. It is my understanding they had the ability to do this in the field. When the plys were completed they would usually stain and varnish it. Sometimes they would skip the stain, which IMHO just added weight. We know the varnish would give the wood a golden hue. So, as modelers, our goal is to replicate the wood grain and everybody has their own ideas. (BTW, I think your pic really captures wood grain in a fantastic way. The subtle shades, and even knots, it is fantastic.) It is important to remember that all wood is different. Some wood will have a fine grain and some will have wavy. Now that I think about it, they may have even had a special type the prefered to use for aviation for either added strength or reduced weight. I dont even know fore sure what type of wood was used, which would aslo affect how the wood grain looked. Well this is where people with more expertise than I should chime in with the much desired wealth of knowledge.
What paint scheme are you going to do? It would be a shame to cover up to much of that nice wood effect finish. Beware the kit decals.
I have another Roden D.III. I am toying around with the idea of using actual thin ply wood for the fuselage panels. The ultimate wood finish... real wood.
Posted: Saturday, July 21, 2007 - 01:04 AM UTC
Quoted Text
I need the advice and criticism of experts who are not emotionally involved in the build. That is the best way to improve. I welcome your comments.
So which pictures should I use?
Hi Carl
Well said - constructive criticism is important to us all and I'd go as far as to say it's at the heart of why we have a Forum at all.
I'd say you should show both sets of pics as a sort of "before & after"- the fix in itself is something to learn from.
All the best
Rowan
CaptainA
Indiana, United States
Joined: May 14, 2007
KitMaker: 3,117 posts
AeroScale: 2,270 posts
Joined: May 14, 2007
KitMaker: 3,117 posts
AeroScale: 2,270 posts
Posted: Saturday, July 21, 2007 - 01:57 AM UTC
Quoted Text
I'd say you should show both sets of pics as a sort of "before & after"- the fix in itself is something to learn from.
Too much like work
As for the fix, brute force is a skill better not taught or learned.
I need to sit down and figure out how to fix it. I will post it as you are 100% correct.
Posted: Saturday, July 21, 2007 - 03:02 AM UTC
Quoted Text
...brute force is a skill better not taught or learned.
Hi Carl
Ahhh! There's nothing like the tender attentions of a pair of pliers!
All the best
Rowan
BradCancian
Queensland, Australia
Joined: August 30, 2006
KitMaker: 285 posts
AeroScale: 281 posts
Joined: August 30, 2006
KitMaker: 285 posts
AeroScale: 281 posts
Posted: Saturday, July 21, 2007 - 04:07 AM UTC
G'day Carl - thanks for the kind words - my 1/48 Albie was completed a while ago - here is the finished product.
I might have to find where this Model of the Month thing lives...
BC
I might have to find where this Model of the Month thing lives...
BC
rolf
Washington, United States
Joined: August 17, 2004
KitMaker: 301 posts
AeroScale: 26 posts
Joined: August 17, 2004
KitMaker: 301 posts
AeroScale: 26 posts
Posted: Tuesday, July 24, 2007 - 03:12 AM UTC
These are some fantastic looking Albatroses. Great job all of you.
Roy
Roy