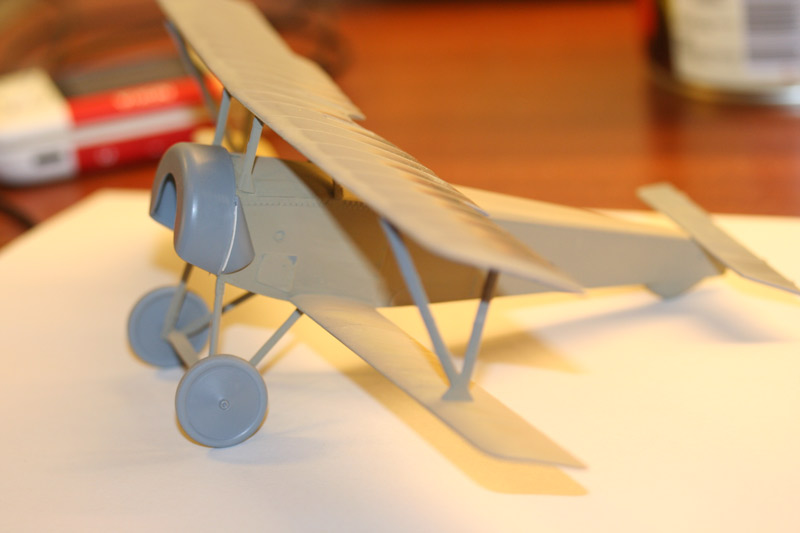
Just got this little Baby
But before I can show my build, I have to know if this area (red arrow) was wood or painted clear dope
Anyone?
Best from Norway
Olve Dybvig
Early Aviation
Discuss World War I and the early years of aviation thru 1934.
Hosted by Jim Starkweather
Special Hobby Nieuport 11 1/32
odybvig
Joined: June 03, 2007
KitMaker: 22 posts
AeroScale: 18 posts
KitMaker: 22 posts
AeroScale: 18 posts
Posted: Monday, August 20, 2007 - 10:29 AM UTC
odybvig
Joined: June 03, 2007
KitMaker: 22 posts
AeroScale: 18 posts
KitMaker: 22 posts
AeroScale: 18 posts
Posted: Monday, August 20, 2007 - 11:28 AM UTC
Interior parts (wood parts already paintet)
Cross bars made by me
More tomorrow
Olve
Cross bars made by me
More tomorrow
Olve
JackFlash
Colorado, United States
Joined: January 25, 2004
KitMaker: 11,669 posts
AeroScale: 11,011 posts
Joined: January 25, 2004
KitMaker: 11,669 posts
AeroScale: 11,011 posts
Posted: Monday, August 20, 2007 - 01:54 PM UTC
Very interesting. I look forward to the build!
JackFlash
Colorado, United States
Joined: January 25, 2004
KitMaker: 11,669 posts
AeroScale: 11,011 posts
Joined: January 25, 2004
KitMaker: 11,669 posts
AeroScale: 11,011 posts
Posted: Monday, August 20, 2007 - 08:54 PM UTC
There is a small group of Modelers that have a set of decals for this kit. I'll see if they'll let me post some images.
odybvig
Joined: June 03, 2007
KitMaker: 22 posts
AeroScale: 18 posts
KitMaker: 22 posts
AeroScale: 18 posts
Posted: Monday, August 20, 2007 - 09:33 PM UTC
Are you thinking of Spada Decals ?
http://www.spada-decals.com/cariboost1/crbst_2.html
They have decals for French, Belgian, Russian and Italien Nieuport 11
Olve
http://www.spada-decals.com/cariboost1/crbst_2.html
They have decals for French, Belgian, Russian and Italien Nieuport 11
Olve
Repainted
Östergötland, Sweden
Joined: April 04, 2006
KitMaker: 1,058 posts
AeroScale: 1,004 posts
Joined: April 04, 2006
KitMaker: 1,058 posts
AeroScale: 1,004 posts
Posted: Tuesday, August 21, 2007 - 02:10 AM UTC
Nice and clean paintjob neigbour. i´d like it so far.I´ve have this one on my bench to, so this is interesting to follow your work.If I don´t remember it all wrong you have to drill some tiny holes in the back of the seat.Perhaps I´m wrong, but I´ll will check it up.What kind of paint do you use Humbrol, Tamyias ect ?
Keep it comming/ snyggt jobbat
Lars from Sweden
Keep it comming/ snyggt jobbat
Lars from Sweden
odybvig
Joined: June 03, 2007
KitMaker: 22 posts
AeroScale: 18 posts
KitMaker: 22 posts
AeroScale: 18 posts
Posted: Tuesday, August 21, 2007 - 05:06 AM UTC
Hello Lars
I have seen a photo (somewhere) of a Nieu 11 with plywood covered cockpit. So I go for that
The inside is painted with Gunze Sangyo H85 Sail Color but any tan color will do
Forward parts was painted with Burnt Sienna Oil color
Then removed with a clean cloth
Then a Wood Effect decal from Spada Decals
(http://www.spada-decals.com/cariboost1/crbst_2.html)
And a photo with the inside frame
The frame is painted with Tamiya TS 46 Light Sand, then with Burnt Sienna Oil color, then removed with a dry pensel and finally a cote of Tamiya X-26 Clear Orange. But it seems that my fingers have removed some of the color during handling
Olve
Repainted
Östergötland, Sweden
Joined: April 04, 2006
KitMaker: 1,058 posts
AeroScale: 1,004 posts
Joined: April 04, 2006
KitMaker: 1,058 posts
AeroScale: 1,004 posts
Posted: Wednesday, August 22, 2007 - 06:11 AM UTC
Hi Olve
I must say that your work is one of the nicest I´ve seen for a long time on the net. Keep it come.
Hälsningar
Lars
I must say that your work is one of the nicest I´ve seen for a long time on the net. Keep it come.
Hälsningar
Lars
odybvig
Joined: June 03, 2007
KitMaker: 22 posts
AeroScale: 18 posts
KitMaker: 22 posts
AeroScale: 18 posts
Posted: Wednesday, August 22, 2007 - 10:07 AM UTC
Hello again
The inside looks something like this (minus the seat):
But when you close the airframe, little is seen
All for now
Olve
The inside looks something like this (minus the seat):
But when you close the airframe, little is seen
All for now
Olve
Posted: Wednesday, August 22, 2007 - 10:10 AM UTC
Losing that nice paint job is a great pity.
odybvig
Joined: June 03, 2007
KitMaker: 22 posts
AeroScale: 18 posts
KitMaker: 22 posts
AeroScale: 18 posts
Posted: Friday, August 24, 2007 - 04:24 AM UTC
Some progress
Somewhat puny compared to the Albatros
Next engine
Best
Olve
Somewhat puny compared to the Albatros
Next engine
Best
Olve
Rittersbach
Texas, United States
Joined: August 16, 2007
KitMaker: 83 posts
AeroScale: 80 posts
Joined: August 16, 2007
KitMaker: 83 posts
AeroScale: 80 posts
Posted: Saturday, September 01, 2007 - 02:54 PM UTC
Olve,
Nice work, great attention to detail. I love what I see so far. Cant wait for more build pictures. Thank you, I learn from your skill.
Jeff
Nice work, great attention to detail. I love what I see so far. Cant wait for more build pictures. Thank you, I learn from your skill.
Jeff
MerlinV
Victoria, Australia
Joined: November 26, 2006
KitMaker: 608 posts
AeroScale: 602 posts
Joined: November 26, 2006
KitMaker: 608 posts
AeroScale: 602 posts
Posted: Saturday, September 01, 2007 - 03:30 PM UTC
Hi Olve,
Have been following this build and that of your Albatros closely. VEry interested to see how you are doing your Bare timber. Very effective.
Keep up the great work!
Cheers,
Hugh
Have been following this build and that of your Albatros closely. VEry interested to see how you are doing your Bare timber. Very effective.
Keep up the great work!
Cheers,
Hugh
odybvig
Joined: June 03, 2007
KitMaker: 22 posts
AeroScale: 18 posts
KitMaker: 22 posts
AeroScale: 18 posts
Posted: Sunday, September 02, 2007 - 08:16 AM UTC
Some update
Engine:
Trying to get the wings straight:
This is how I want it
Olvis
Engine:
Trying to get the wings straight:
This is how I want it
Olvis
Repainted
Östergötland, Sweden
Joined: April 04, 2006
KitMaker: 1,058 posts
AeroScale: 1,004 posts
Joined: April 04, 2006
KitMaker: 1,058 posts
AeroScale: 1,004 posts
Posted: Friday, September 07, 2007 - 03:08 AM UTC
It´s looking sharp my friend. I just like your clean and sharp photo´s, and the build is just awsome. Keep it come.
Lars
Lars
odybvig
Joined: June 03, 2007
KitMaker: 22 posts
AeroScale: 18 posts
KitMaker: 22 posts
AeroScale: 18 posts
Posted: Friday, September 07, 2007 - 08:04 AM UTC
First cote of paint
Best
Olve
Best
Olve