Post your 3 pictures for the October Model of the Month competition Here.
Post your, single, picture for voting purposes here
Rules for the new Model of the Month. Please read before posting
1. Entries must be of your own work.
2. The model must be of an aircraft.
3. The model can be in any scale and in any medium.
4. The model can be “out of the box”, scratch built, or anything in between.
5. The model must be finished within the month for which it is entered. The model could have been started some time before the MOM for which it is entered, it is the month in which it is actually finished that counts. So if it isn't finished this month it may be ready for next month or the month after
6. 1 picture is to be uploaded into the relevant gallery and titled with what the model is of, I.E. VS Spitfire Mk Vc. No composites. This picture must be of just the model, no base. (For a model posed in the "in Flight" configuration" a small stand is allowed which can be used to either support the model or as a counter weight. A beaching dolly can be used for a float plane.
7. A thread will be opened in the general aircraft forum in which you MUST add up to 3 further pictures and you MAY add details about the build. The model can appear on a base or even in a diorama in this thread. Pictures must not be larger than 700 pixels wide, in either the gallery or the information thread. If you wish to post further pictures then open your own thread.
8. Pictures of models can be placed in the gallery from the first of the month until the penultimate day of the month (the next to last day) (see “5” above). (This is to avoid the time zone difference, I'm working on GMT)
9. Voting will take place over the first half of the next month, closing on the 16th. (This will be between 18.00 and 00.01 GMT)
10. Dragon are sponsoring this from June 2007.
11. Staff members of the Kitmaker group of sites cannot enter.
12. The rules will be added to when and if it is deemed necessary.
13. Any none complience with these rules may result in disqualification.
14. Ignorance of these rules is not an excuse for not abiding by them.
Link to MOM gallery area(choose October 07)
Mal
Hosted by Jim Starkweather
October MOM contest thread.
Posted: Monday, October 01, 2007 - 06:46 AM UTC
Posted: Sunday, October 07, 2007 - 07:19 AM UTC
Here's my entry for this month it's Tamiya's 1/72 F-84 Thunderjet built oob and finished in Alclad Aluminium. More pictures can be seenhere.
Also i will be taking the model to the Newark model show next sunday so some of you might be able to see it there.
csch
Buenos Aires, Argentina
Joined: December 27, 2002
KitMaker: 1,941 posts
AeroScale: 1,040 posts
Joined: December 27, 2002
KitMaker: 1,941 posts
AeroScale: 1,040 posts
Posted: Monday, October 15, 2007 - 10:41 AM UTC
Hi all:
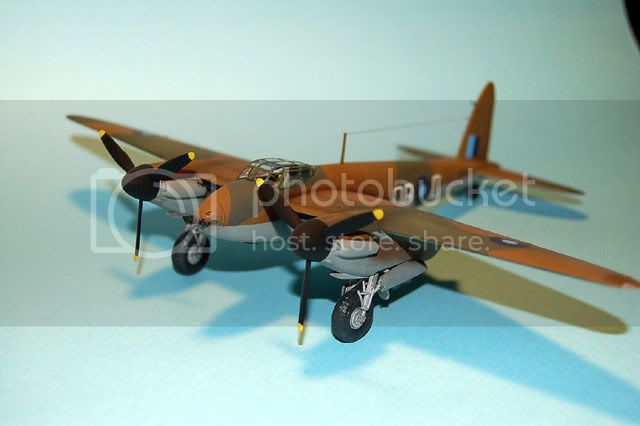
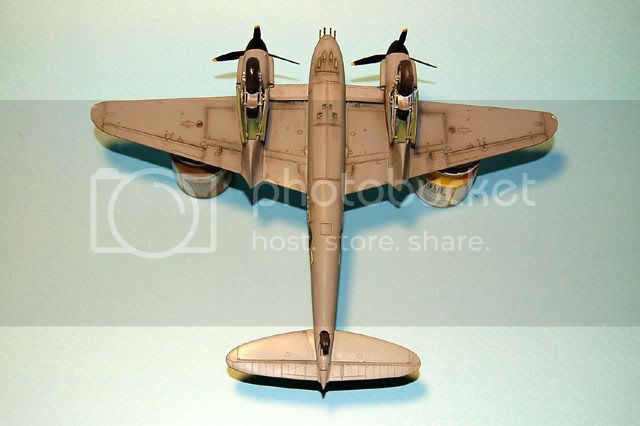
This is the kit I have finished for the Rumble in the East asian Sky. It´s a Mosquito FB Mk VI - Tamiya 1/72. The kit is fantastic, it´s a joy to build.
Here are some pics:
This is the kit I have finished for the Rumble in the East asian Sky. It´s a Mosquito FB Mk VI - Tamiya 1/72. The kit is fantastic, it´s a joy to build.
Here are some pics:
Roxter
Rigas, Latvia
Joined: July 04, 2007
KitMaker: 268 posts
AeroScale: 245 posts
Joined: July 04, 2007
KitMaker: 268 posts
AeroScale: 245 posts
Posted: Wednesday, October 17, 2007 - 03:08 AM UTC
I also would like to participate. Here're some pics of the model I've finished this month. It's Tamiya's 1/48 FW-190A-3 modified to A-4.
The kit features aftermarket decals and aftermarket P/E belts from Part.
Here's what I've added to the kit:
1. IFF antena on the fuselage and antena cable between canopy and tail tip
2. Brake lines on the landing gear + small red langing gear indicators on the upper side of the wing
3. Revi gunsight was modified little bit as the one from the kit was too basic
4. All gun barrels and pitot tube have been replaced by brace tubes and plastic ones from Hasegawa kits (looked more realistic)
5. Ejection chutes holes on the lower surface of the wing were scratchbuilt
6. Balkenkreuz'es (excluding ones the lower surface of the wings) and stripes on the engine cowl were masked and airbrushed on.
7. Langing gear wheels have been modified little to appear more flatten
Hope you'll like and let me know if the text too big
FalkeEins
England - South East, United Kingdom
Joined: March 07, 2005
KitMaker: 868 posts
AeroScale: 690 posts
Joined: March 07, 2005
KitMaker: 868 posts
AeroScale: 690 posts
Posted: Friday, October 19, 2007 - 12:28 AM UTC
...I have absolutely no business posting in this thread but what the heck....I've finished one this month so here's my entry ....Italeri's Stuka (D-5) in 72nd scale....sorry my photography is hopeless (as well, I can hear you say.!!.). tried something new with this ..the exhaust/weathering is drybrushed with oils as were the 'pre-shaded' panel lines, the white-wash finish is Halford Primer....thanks for looking ..
cheers
cheers
caanbash
Ankara, Turkey / Türkçe
Joined: May 30, 2003
KitMaker: 1,093 posts
AeroScale: 50 posts
Joined: May 30, 2003
KitMaker: 1,093 posts
AeroScale: 50 posts
Posted: Monday, October 22, 2007 - 08:57 AM UTC
Hi all,
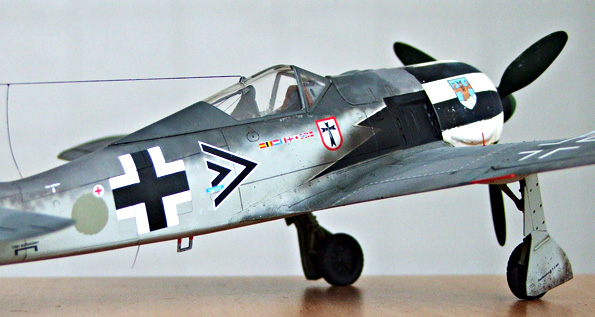
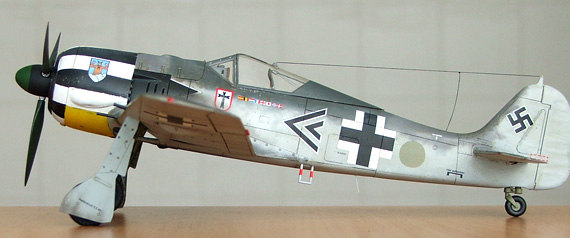
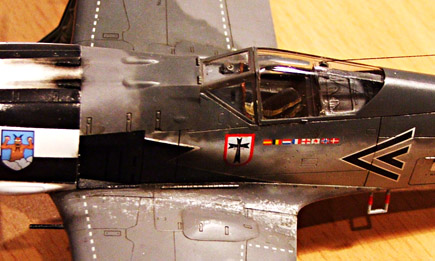
This is my Focke-Wulf A4, converted from Tamita A3 model. It is the airplane that Kurt Buhlingen used in Tunisia. The information regarding the profile can be found here:
http://www.ipmsstockholm.org/magazine/2004/08/stuff_eng_profile_fw190a4.htm
I painted the model with enamels and acrylics, and there are some technical issues I feel I have to tell:
1.“1” and “-“, forward and aft of the Balkenkreuz were masked and painted.
2.Flaps are scratchbuilt from plastic sheet and carbon-fiber rod.
3.Using the information from the explanations in IPMS Stockholm article, the outer MG’s and corresponding details under the wing were removed. Panel lines under the removed details under the wing were rescribed.
4.Remaining wing armament barrels were replaced with syringes.
5.The A3 antenna has been converted to A4 antenna on the vertical stabilizer.
6.Cables and hydraulic lines on the main gears were made with copper wire.
7.The springs on the main gear actuator rods were made with copper wire.
8.The elevators were cut and reattached at up position.
9.Eduard Zoom set was used for the cockpit front panel, various cockpit and landing gear parts.
10.Some front and side panel details, cables in the cabin were scratchbuilt.
11.The glass of the Revi sight was replaced with acetate.
Here are some photos:
Thanks for watching and happy modelling!
Best regards.
Cagin
CaptainA
Indiana, United States
Joined: May 14, 2007
KitMaker: 3,117 posts
AeroScale: 2,270 posts
Joined: May 14, 2007
KitMaker: 3,117 posts
AeroScale: 2,270 posts
Posted: Saturday, October 27, 2007 - 09:24 AM UTC
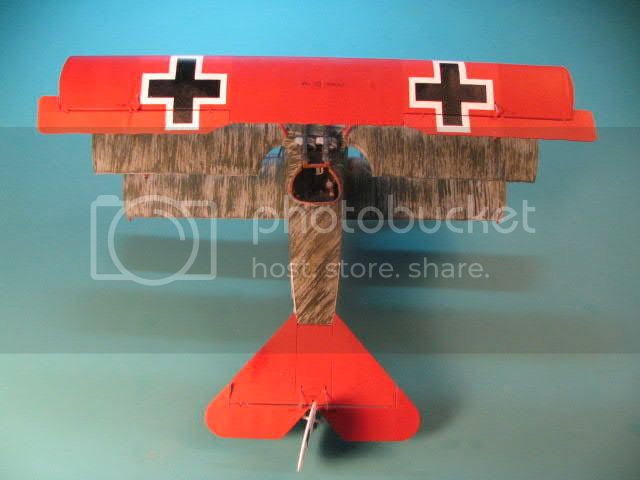
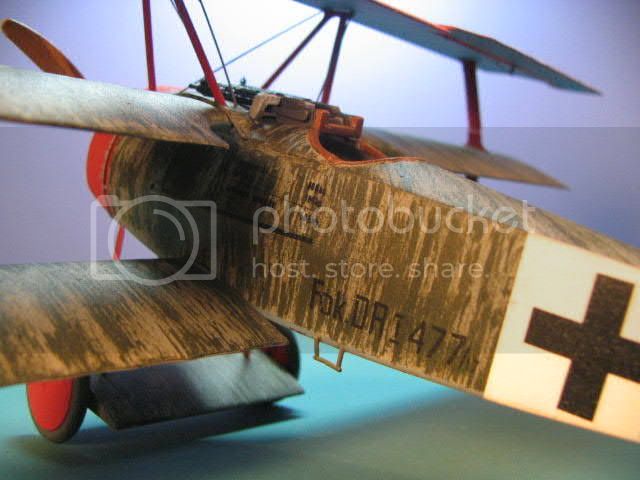
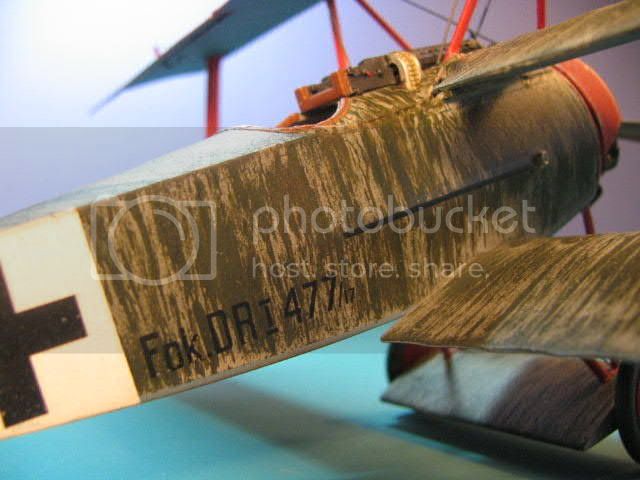
This is my build of Rodens 1/32 Fokker Dr.I. It was a fun build. I used PE for the seatbelts and Spandau jackets. I also added some extra PE dials where appropriate. The entire interior framework was scrattch built from metal rod of various sizes. The seat and floorboard were scratched from wood veneer. AM decals were added to compliment the kit decals.
It was finished as Manfred von Richthoffen's 477/17 in Fokkers streaked finish. I also used thin metal wire for the braces.
This was a very nice kit and a pleasant build. It really makes into a nice representation of MvR's aircraft. I reccomend it to modelers.
m_buchler
California, United States
Joined: March 20, 2007
KitMaker: 137 posts
AeroScale: 103 posts
Joined: March 20, 2007
KitMaker: 137 posts
AeroScale: 103 posts
Posted: Sunday, October 28, 2007 - 05:09 PM UTC
Greetings-
Here is my October entry - the ancient and most troublesome 1:50 scale Tamiya F1M2 Type O "Pete" seaplane. A truly horrible kit. Built mostly out of the box. Except for the scratchbuilt seats, which you cannot see in the photos!
Thanks for looking-
Here is my October entry - the ancient and most troublesome 1:50 scale Tamiya F1M2 Type O "Pete" seaplane. A truly horrible kit. Built mostly out of the box. Except for the scratchbuilt seats, which you cannot see in the photos!
Thanks for looking-
BigPeteUK
England - North West, United Kingdom
Joined: September 15, 2006
KitMaker: 61 posts
AeroScale: 49 posts
Joined: September 15, 2006
KitMaker: 61 posts
AeroScale: 49 posts
Posted: Wednesday, October 31, 2007 - 04:23 AM UTC
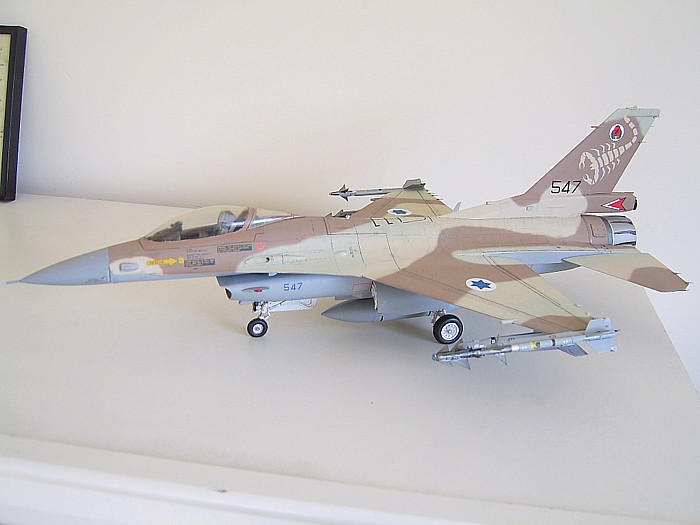
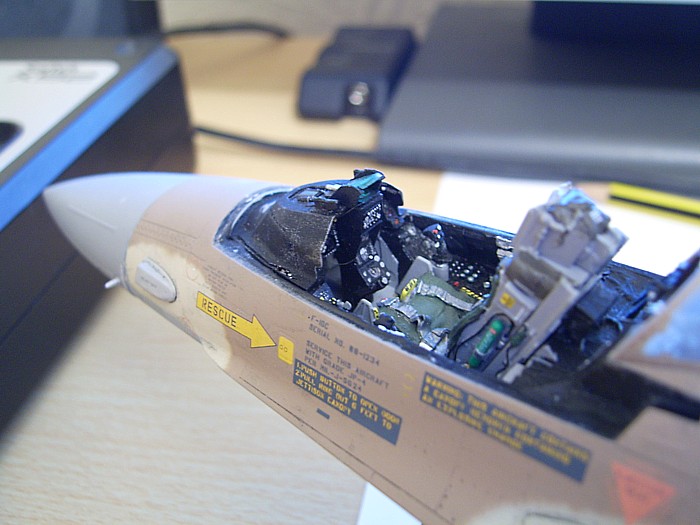
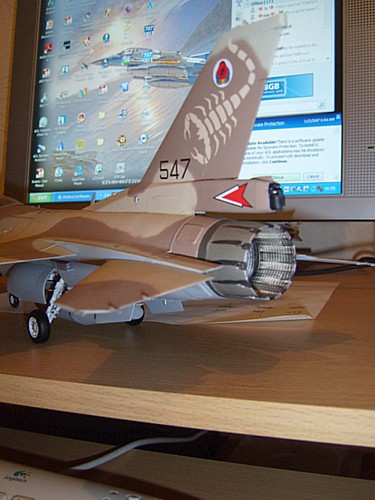
This is my first foray into MOM
The Academy 1/32 F16C Block 40/50.
Converted to an IDF Block 40 using a conversion set by Isracast.
Wheel wells and cockpit tub From Aires
Isradecal decals
Painted with Xtracolor enamels.
Weapons come from Cutting Edge for the 'winders and IsraCast for the Python 4s'
Never have been much of a weatherer so it was left relatively clean and flat coated using Vallejo rattle can acrylic varnish.
Sadly, my photography doesnt really do this finished article justice so i'll be limiting myself to just the one image. For future entries, i will add more as i find better techniques.