Greetings all;
There is evidently a concern about using the early Roden lozenge - water slide decals provided in their Fokker D.VII kit. Let me discuss this briefly with you.
1. it employs typical modern ink based colours on a flexible carrier.
a. These can be brittle and tough around compound curves.
The trick is
1. Clear coat with semi gloss and let dry thoroughly. Cut needed pieces from sheet.
2. Use water that is "hot" to dip the decals in. - USE TWEEZERS !!! Do not scald yourself. Apply immediately.
3. Apply to a surface that has been clear coated in lacquer.
4. Use liberal amounts of Micro sol and set. (Or typical hobby solutions for this activity) Model Rail Road supplies have similar products.
By using hot water this softens the decal to the point that it will conform easily. But touch up may be needed as the inks can fracture.
Early Aviation
Discuss World War I and the early years of aviation thru 1934.
Hosted by Jim Starkweather
Roden Lozenge
JackFlash
Colorado, United States
Joined: January 25, 2004
KitMaker: 11,669 posts
AeroScale: 11,011 posts
Joined: January 25, 2004
KitMaker: 11,669 posts
AeroScale: 11,011 posts
Posted: Tuesday, October 02, 2007 - 10:11 AM UTC
MerlinV
Victoria, Australia
Joined: November 26, 2006
KitMaker: 608 posts
AeroScale: 602 posts
Joined: November 26, 2006
KitMaker: 608 posts
AeroScale: 602 posts
Posted: Tuesday, October 02, 2007 - 10:26 AM UTC
Does this mean, that even having swapped all my aftermarket lozenge decal sheets for a kit, I can still build the Roden Fokker D VII?
Mind you, that kit is sooooooo far down my build list so as to make the whole matter irrelevent.
I must say that the decals that I have used from the BE2c kit (Only the serial numbers and the centres of the fuselage roundels) have settled down real nice with NO silvering. I did prime the surface first with a gloss coat and a puddle of Micro Sol.
Note that Roden decals are not very forgiving for placement adjustment. You rally have to make sure that you have placed it correctly first go. Once it is down, there is NO shifting it.
Cheers,
Hugh
CMOT70
Victoria, Australia
Joined: August 23, 2007
KitMaker: 629 posts
AeroScale: 539 posts
Joined: August 23, 2007
KitMaker: 629 posts
AeroScale: 539 posts
Posted: Tuesday, October 02, 2007 - 12:18 PM UTC
I've built 3 of the Roden DVII's so far, 2 of which i used the kit supplied lozenge. Both lozenge builds were OAW kits and supposedly had the same lozenge decals...and they did look the same.
But they performed differently. The first kit i got the decals too work ok, but they were troublesome...mostly due to the decals crumbling at the edges when dry.
When i began putting the lozenge on the later model i began by using the left overs from the first kit- with the same issues. So i began using the newer kits identical looking decals and they were fine. I've used MUCH worse decals than Roden ones before!
So it seems that either 1. The manufacturer of those OAW lozenge decals for improved their quality for later printings or 2. they age badly- i feel the second OAW kit was quite new compared to the first one. I'm guessing the inks go brittle fast.
Anyway, i applied them in pretty much the same way as mentioned in the intitail post...with the addition of using Tamiya X-22 to seal the edges down t0 prevent the fracturing problem. X-22 also seems to help them conform around curves much better too- something i also noticed using some recent ICM decals that gave me bad problems.
Topic unrelated...am i the only one that thinks the older Roden DVII's still look more like a DVII than the Eduard kits? Something about the top wing looks wrong (thickness and front view shape) on the Eduard kit to me.
Andrew
JackFlash
Colorado, United States
Joined: January 25, 2004
KitMaker: 11,669 posts
AeroScale: 11,011 posts
Joined: January 25, 2004
KitMaker: 11,669 posts
AeroScale: 11,011 posts
Posted: Tuesday, October 02, 2007 - 03:17 PM UTC
Andrew you have a keen eye.
CaptainA
Indiana, United States
Joined: May 14, 2007
KitMaker: 3,117 posts
AeroScale: 2,270 posts
Joined: May 14, 2007
KitMaker: 3,117 posts
AeroScale: 2,270 posts
Posted: Wednesday, October 03, 2007 - 10:11 AM UTC
The last one I built went on great. No problems at all, unless you count the stray cat hair that showed through fantastically.
BradCancian
Queensland, Australia
Joined: August 30, 2006
KitMaker: 285 posts
AeroScale: 281 posts
Joined: August 30, 2006
KitMaker: 285 posts
AeroScale: 281 posts
Posted: Wednesday, October 03, 2007 - 08:39 PM UTC
Gotta agree with Hugh on this one given recent experience with their 1/32 Albatros D.III decals - lots of water required to float them into position. Once there though no worries!
I think the bigger issue with Roden lozenge is the colours. To be fair, Eduard are no better...
BC
I think the bigger issue with Roden lozenge is the colours. To be fair, Eduard are no better...
BC
JackFlash
Colorado, United States
Joined: January 25, 2004
KitMaker: 11,669 posts
AeroScale: 11,011 posts
Joined: January 25, 2004
KitMaker: 11,669 posts
AeroScale: 11,011 posts
Posted: Wednesday, October 03, 2007 - 09:01 PM UTC
Long Live Eagle Strike. Is the king dead?
MerlinV
Victoria, Australia
Joined: November 26, 2006
KitMaker: 608 posts
AeroScale: 602 posts
Joined: November 26, 2006
KitMaker: 608 posts
AeroScale: 602 posts
Posted: Thursday, October 04, 2007 - 10:00 AM UTC
Brad,
can only agree regarding the colours of both Eduard and Roden Decals. That's the reason I decided to mask and spray the roundels on my BE2c. And to be honest, now that I have done that once, I think it will be the way I go in the future too.
Cheers,
Hugh
can only agree regarding the colours of both Eduard and Roden Decals. That's the reason I decided to mask and spray the roundels on my BE2c. And to be honest, now that I have done that once, I think it will be the way I go in the future too.
Cheers,
Hugh
CaptainA
Indiana, United States
Joined: May 14, 2007
KitMaker: 3,117 posts
AeroScale: 2,270 posts
Joined: May 14, 2007
KitMaker: 3,117 posts
AeroScale: 2,270 posts
Posted: Saturday, October 06, 2007 - 05:37 AM UTC
That really looks good. I am to the point where I think my skills will allow me to begin making my own crosses and cockades. I had a really good experience with painting daffodiles in the past. I think I need to rely less on decals and start taking responsibility for my own insignia.
That said, does anybody know how to do a good 5 color lozenge?
BradCancian
Queensland, Australia
Joined: August 30, 2006
KitMaker: 285 posts
AeroScale: 281 posts
Joined: August 30, 2006
KitMaker: 285 posts
AeroScale: 281 posts
Posted: Saturday, October 06, 2007 - 01:19 PM UTC
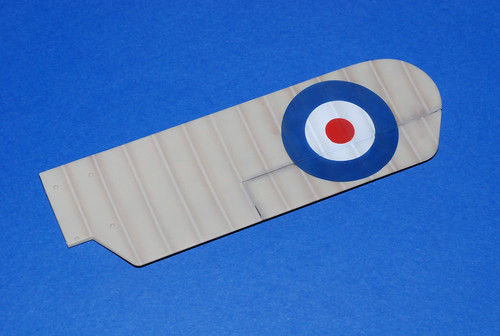
How do you guys go about cutting and making masks for roundels? I never seem to be able to get good circles....
BC
BC
JackFlash
Colorado, United States
Joined: January 25, 2004
KitMaker: 11,669 posts
AeroScale: 11,011 posts
Joined: January 25, 2004
KitMaker: 11,669 posts
AeroScale: 11,011 posts
Posted: Saturday, October 06, 2007 - 01:34 PM UTC
Quoted Text
Brad, can only agree regarding the colours of both Eduard and Roden Decals. That's the reason I decided to mask and spray the roundels on my BE2c. And to be honest, now that I have done that once, I think it will be the way I go in the future too. . .Hugh
I am hoping you will volunteer to do a feature on your technique.
MerlinV
Victoria, Australia
Joined: November 26, 2006
KitMaker: 608 posts
AeroScale: 602 posts
Joined: November 26, 2006
KitMaker: 608 posts
AeroScale: 602 posts
Posted: Saturday, October 06, 2007 - 09:26 PM UTC
Greetings good fellows,
I will gladly do a tute on this technique... Just not this week.
My wife and I just spent today moving all our horses and all the gear needed to sustain them (Feed etc.). Circumstances have conspired to require that we find alternative accomodation for ourselves as well. That should all happen this week. As soon as it has done so, and My new Moddeling room is settled down, I will do so with alacrity.
In short Brad, I have an old bow compass that I inherited from my grandfather, the nib section in which I have clamped a small blade. I will elaborate in my tute when it gets written.
thanks for the encouragement.
Hugh
Roxter
Rigas, Latvia
Joined: July 04, 2007
KitMaker: 268 posts
AeroScale: 245 posts
Joined: July 04, 2007
KitMaker: 268 posts
AeroScale: 245 posts
Posted: Sunday, October 07, 2007 - 11:38 PM UTC
I had troubles with Roden decals too. Although it was some 6-7 years ago with their 1/72 Fokker D.VII (I guess that was Alb late verson) lozenge decals. Of course, I tried different methods and techniques trying to make those decals stick to the surface...
What I did was that:
1. Made mixture of white glue (PVA) and warm water with ratio 50/50
2. Dipped decals in that mixture and applied them on the wings surface
3. Removed the mixture from decals upper surface with Q-tip
Can't say that the result was totally satisfying, but after all the decals were on the wings and I'm happy although the process wasn't easy.