_GOTOBOTTOM
Early Aviation
Discuss World War I and the early years of aviation thru 1934.
Roden Fokker Dr.I
CaptainA
_VISITCOMMUNITY
Indiana, United States
Joined: May 14, 2007
KitMaker: 3,117 posts
AeroScale: 2,270 posts
Posted: Tuesday, October 23, 2007 - 08:03 AM UTC
Here are some in progress photos. It is raining and gloomy here in Southern Indiana, so there is not a lot of light to shoot photos with. So please excuse the poor quality photos.

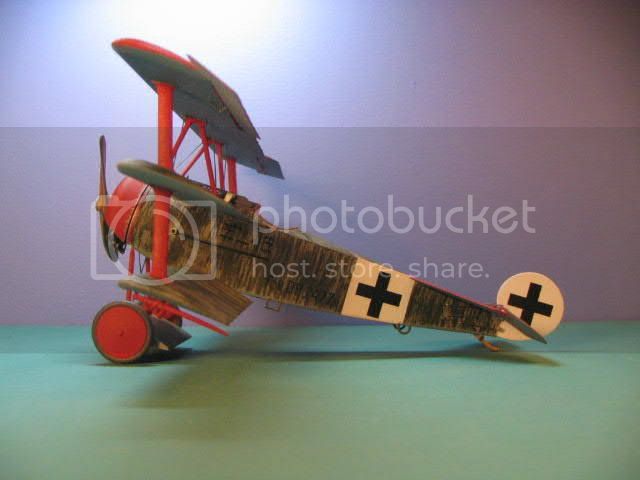
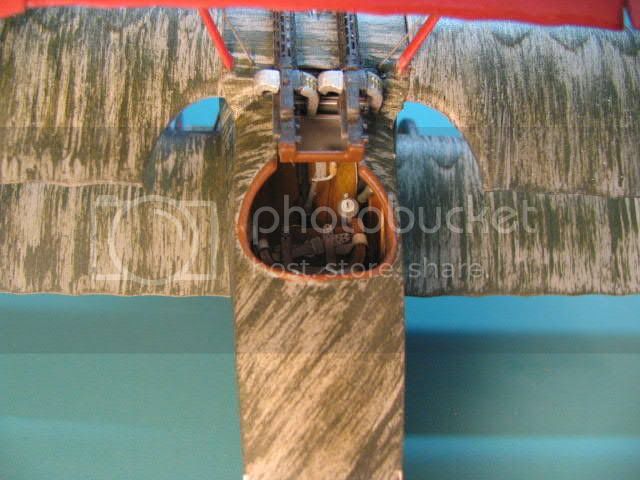
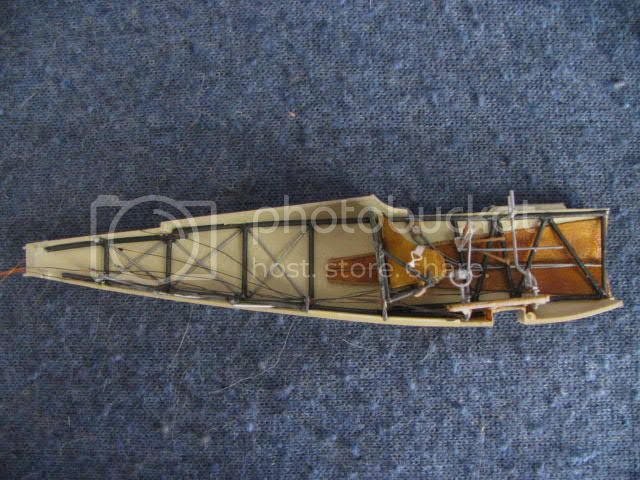
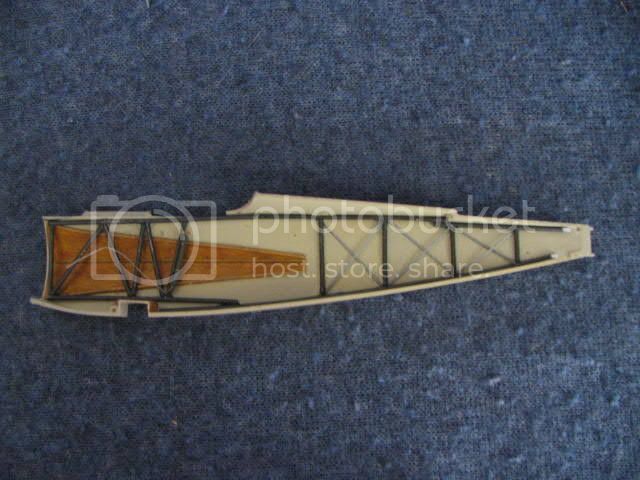
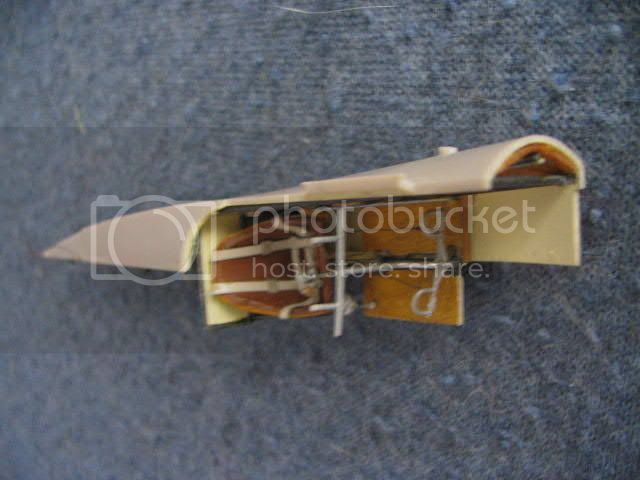
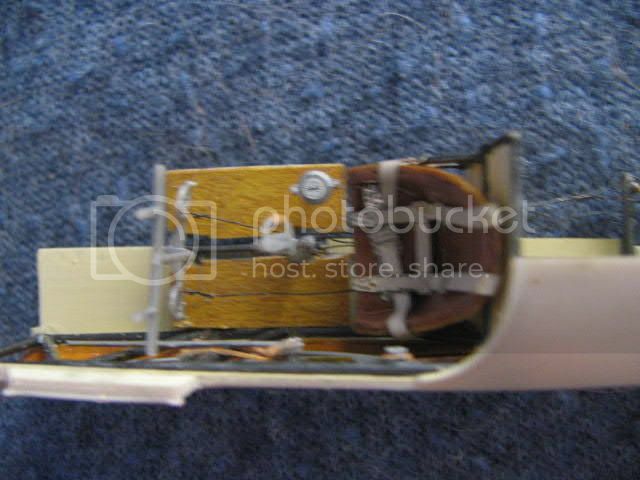
This is the Roden Fokker Dr.I kit in 1/32. I decided to scratch build all the steel structural framing in the fuselage. I also put in the cross bracing. The cockpit floor, wood side fairing panel and seat are made from real wood to add a warmer feel to the cockpit. Seatbelts are from Eduard.
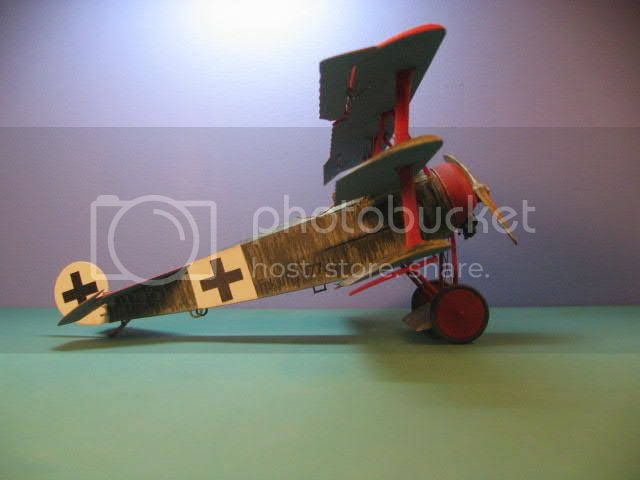


The starrbord side


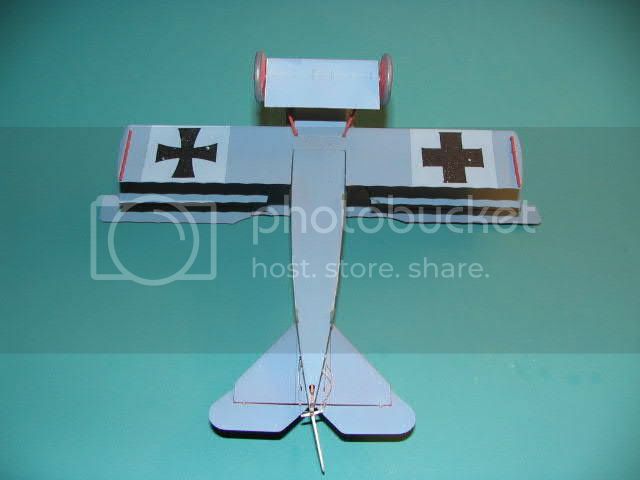
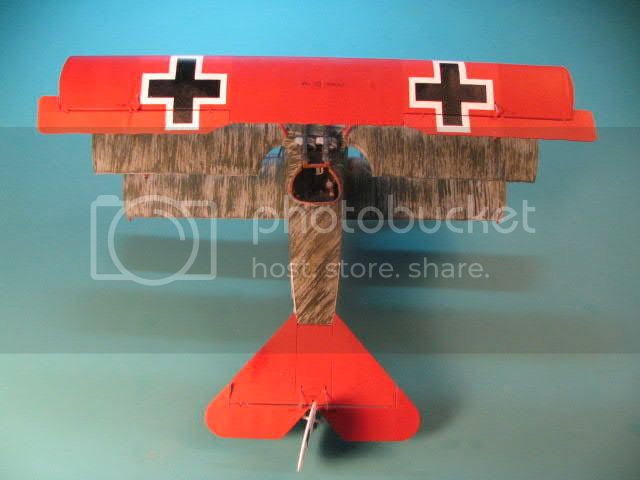
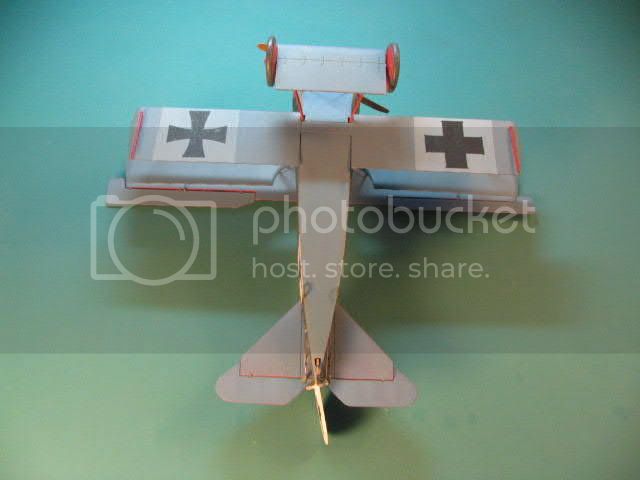
No that is not a mistake. The insignia are supposed to be different.


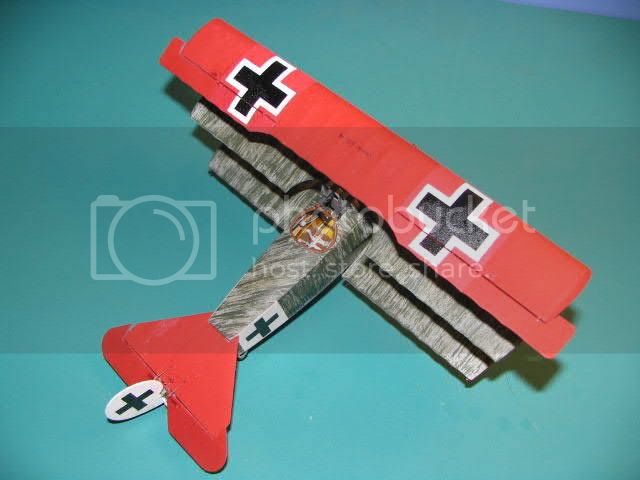
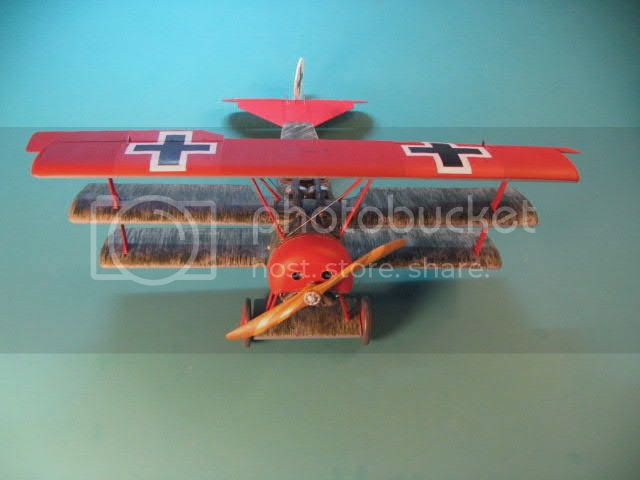
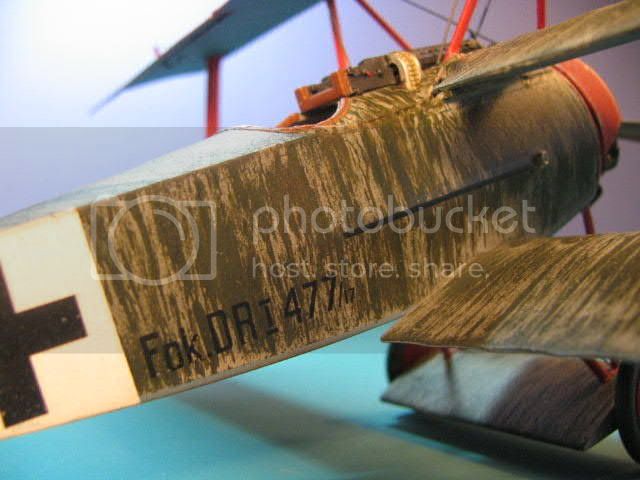
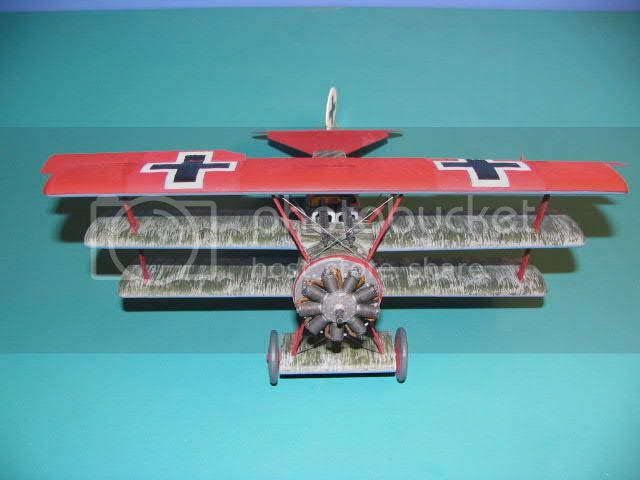
I am aging and weathering now. I will most likely laminate some wood and carve the propeller. This is going to be one of MvRs aircraft. Should be finished in a day or two. Great kit. Comments welcome.
Dwaynewilly
_VISITCOMMUNITY
New York, United States
Joined: December 15, 2006
KitMaker: 365 posts
AeroScale: 344 posts
Posted: Tuesday, October 23, 2007 - 09:44 AM UTC
Carl,

Looking very nice indeed. How did you do the Fokker finish?

Dwayne
CaptainA
_VISITCOMMUNITY
Indiana, United States
Joined: May 14, 2007
KitMaker: 3,117 posts
AeroScale: 2,270 posts
Posted: Wednesday, October 24, 2007 - 07:57 AM UTC

Quoted Text

Carl,

Looking very nice indeed. How did you do the Fokker finish?

Dwayne


I sprayed a very light gray (Tamiya Sky Gray) and when it was dried hard, I used a very stiff brush, and dragged Fokker Green across it. I made sure the paint brush didn't have much paint on it. The idea is to allow only a few of the stiff bristles to drag a small amount of paint. I used masking tape to mask off sections, and keep the lines straight. It doesn't photograph well in rainy, gloomy, low light conditions conditions.
CaptainA
_VISITCOMMUNITY
Indiana, United States
Joined: May 14, 2007
KitMaker: 3,117 posts
AeroScale: 2,270 posts
Posted: Saturday, October 27, 2007 - 09:10 AM UTC
It's finished. Comments welcome.


CMOT70
_VISITCOMMUNITY
Victoria, Australia
Joined: August 23, 2007
KitMaker: 629 posts
AeroScale: 539 posts
Posted: Saturday, October 27, 2007 - 02:06 PM UTC
Great Work!

I'd really like to build all these 1/32 Roden kits. But i'm forcing myself to stick to 1/48 for space reasons. So i'm waiting for the Eduard Dr1.

Andrew
RAGIII
_VISITCOMMUNITY
North Carolina, United States
Joined: June 19, 2007
KitMaker: 604 posts
AeroScale: 600 posts
Posted: Saturday, October 27, 2007 - 02:34 PM UTC
That is a WELL DONE interior! I like the overall model but I have a personal preference for Artists Tube Oils for streaking. Longer drying time but the control and RE-DO ability outweighs the drying time in my opinion. Nice work,
RAGIII
CaptainA
_VISITCOMMUNITY
Indiana, United States
Joined: May 14, 2007
KitMaker: 3,117 posts
AeroScale: 2,270 posts
Posted: Sunday, October 28, 2007 - 02:42 AM UTC

Quoted Text

Great Work!

I'd really like to build all these 1/32 Roden kits. But i'm forcing myself to stick to 1/48 for space reasons. So i'm waiting for the Eduard Dr1.

Andrew


Andrew, Thanks for the very kind words. I am going to get a few more of these Dr.Is and a few more of the Albatri to have in my stash. I will probably also get another of their Pfalz'. I really love these Roden Aircraft in 1/32.

I will also get 4 or 5 of the Dr.Is when Eduard releases them. If they are anything like the D.VIIs, they will be a big hit.
CaptainA
_VISITCOMMUNITY
Indiana, United States
Joined: May 14, 2007
KitMaker: 3,117 posts
AeroScale: 2,270 posts
Posted: Sunday, October 28, 2007 - 02:50 AM UTC

Quoted Text

That is a WELL DONE interior! I like the overall model but I have a personal preference for Artists Tube Oils for streaking. Longer drying time but the control and RE-DO ability outweighs the drying time in my opinion. Nice work,
RAGIII


Rag. I thank you for your comments. The heart of this build has to be the engine though. It was simple to build, and looks absolutely fantastic. I wish the cowling would fit over the finished engine though. I was seriously thinking about artists oils. But I have never tried them before, and didn't want to experiment on this big ole guy.

This is a very nice kit, and I will add at least one more to my stash.

My question to all you stringbaggers out there is... When will we see a 1/32 Albatros D.V?
JackFlash
_VISITCOMMUNITY
Colorado, United States
Joined: January 25, 2004
KitMaker: 11,669 posts
AeroScale: 11,011 posts
Posted: Sunday, October 28, 2007 - 02:00 PM UTC
Greetings Carl;
Nice build. Interesting choice on the colours for the camouflage. Tell us about any fit problems you encountered. Also there is a master ready on the 1/32 Albatros D.V / V.a by Hi-Tech but it has been over a year and I am afraid that it won't be released anytime soon. I have been told that the manufacturer is having financial difficulties.
CaptainA
_VISITCOMMUNITY
Indiana, United States
Joined: May 14, 2007
KitMaker: 3,117 posts
AeroScale: 2,270 posts
Posted: Monday, October 29, 2007 - 04:46 AM UTC

Quoted Text

Greetings Carl;
Nice build. Interesting choice on the colours for the camouflage. Tell us about any fit problems you encountered. Also there is a master ready on the 1/32 Albatros D.V / V.a by Hi-Tech but it has been over a year and I am afraid that it won't be released anytime soon. I have been told that the manufacturer is having financial difficulties.


The only real fit problems were the interplane struts that did not want to line up. The finished engine doesn't really fit within the cowling. I don't know about the interior because most of mine was scratched. The wings fit real good.

As for the Albatros, mine has been on preorder for over a year I believe. I am hinting to the Roden Forum Watchers there is a real market for the D.V/D.Va's. They already have the molds for the Top Wing, Engine and other parts. All they really need to do is the Fuselage, bottom wings and some colorful decals.
 _GOTOTOP