_GOTOBOTTOM
World War II
Discuss WWII and the era directly before and after the war from 1935-1949.
Hosted by Rowan Baylis
AICHI D3A1 (val) reconstruction
dimitrios
_VISITCOMMUNITY
Attica, Greece / Ελλάδα
Joined: July 18, 2006
KitMaker: 29 posts
AeroScale: 17 posts
Posted: Saturday, November 10, 2007 - 03:48 AM UTC

Iam sory for the language but I dont know good English .


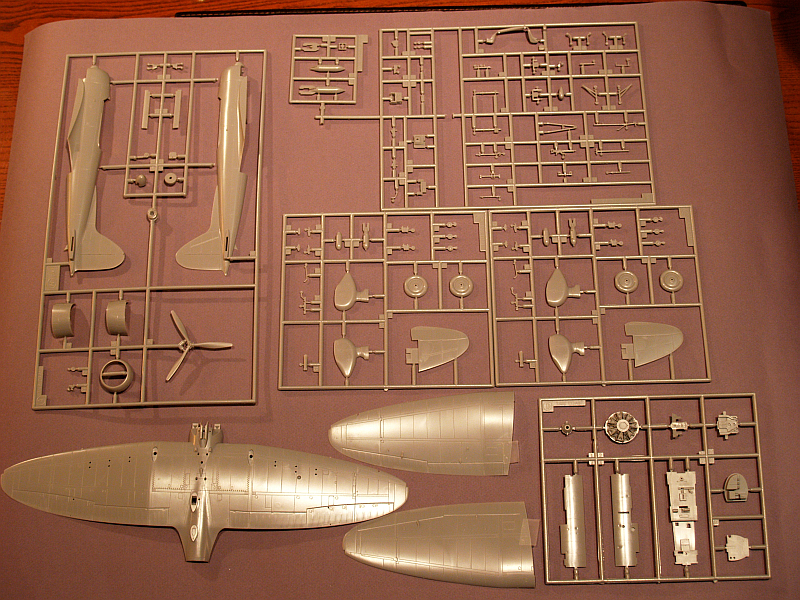
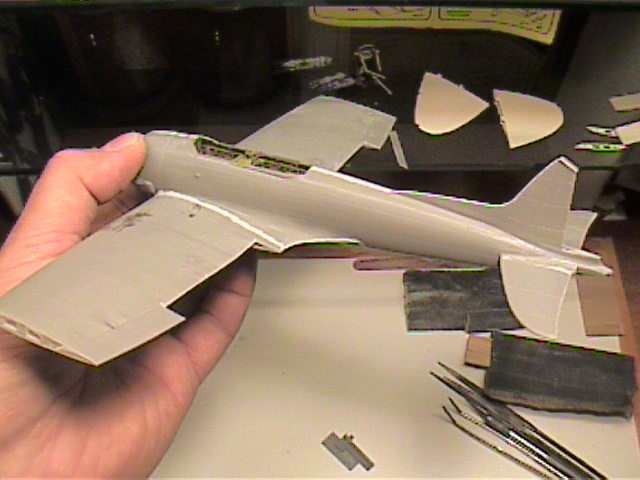
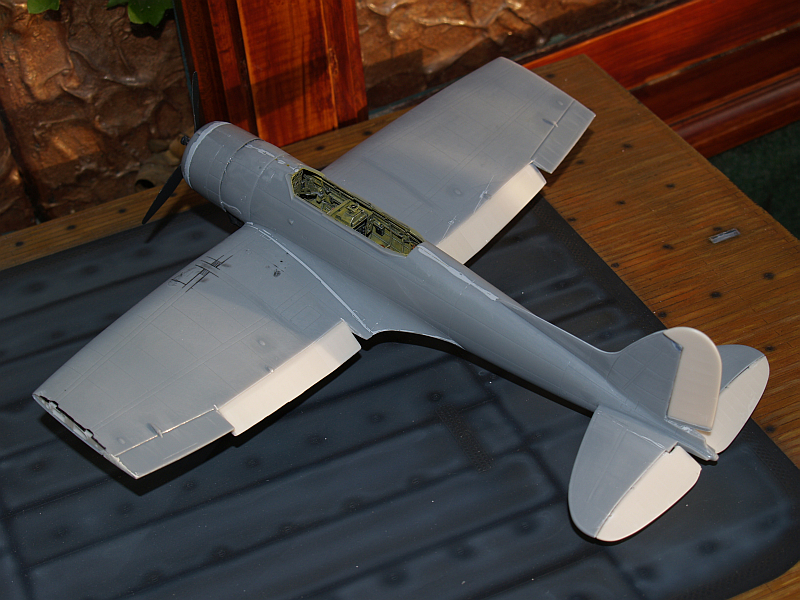
Hi dear friends modelers , I present you my last work . Its my first aeroplane after 15 years . I try very hard because if ....dont work on it , then forget it.

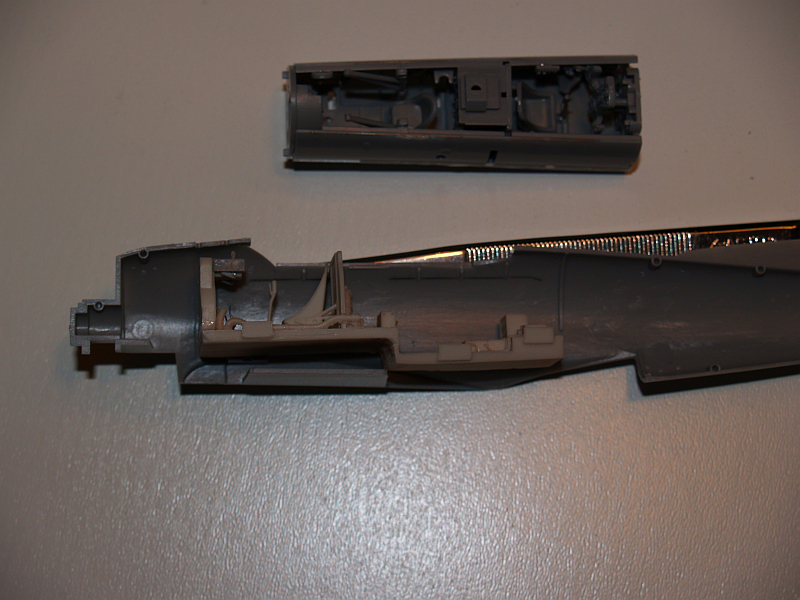
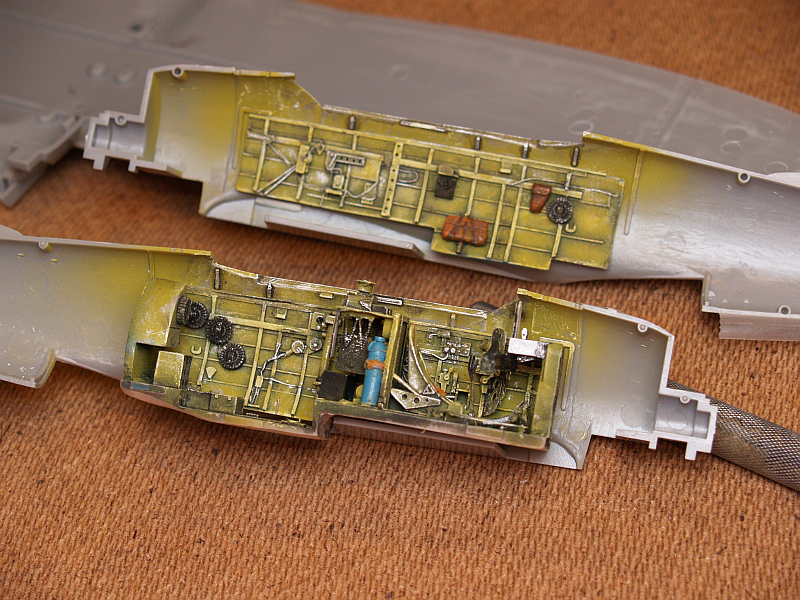
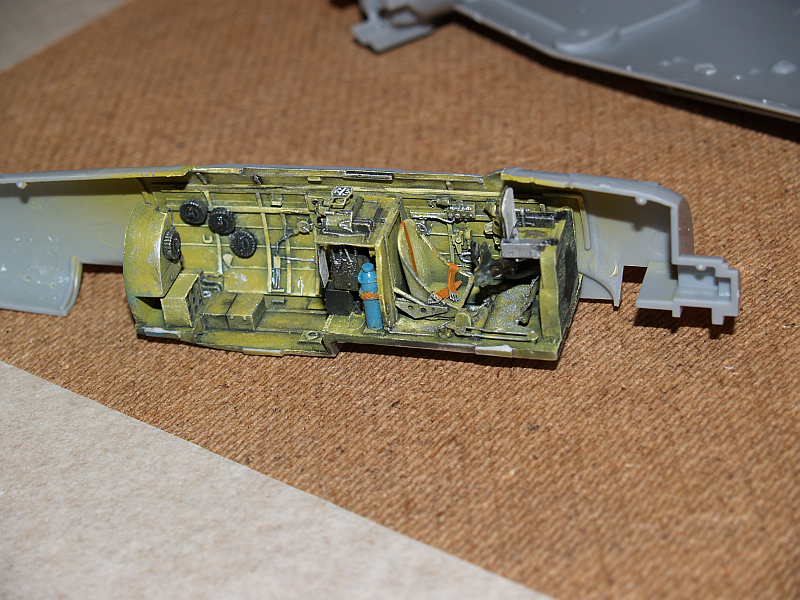
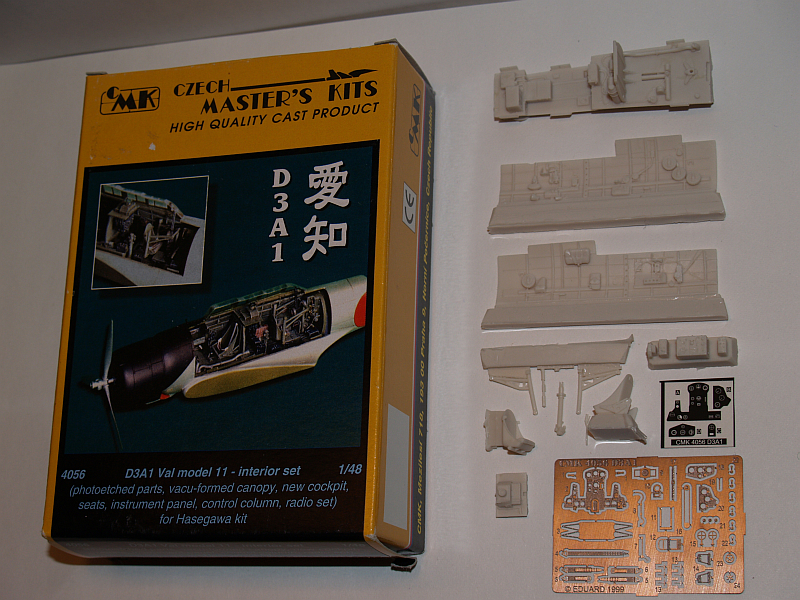
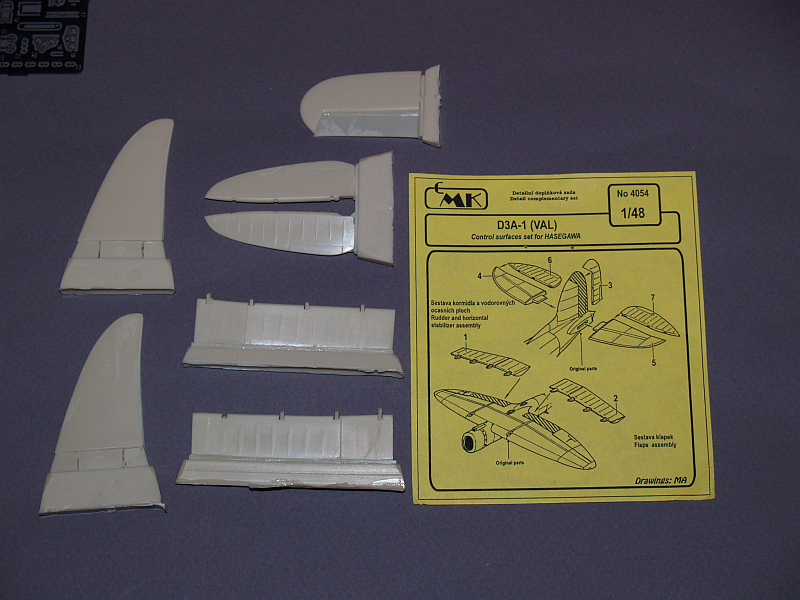
I use three different sets to upgrate the kit.
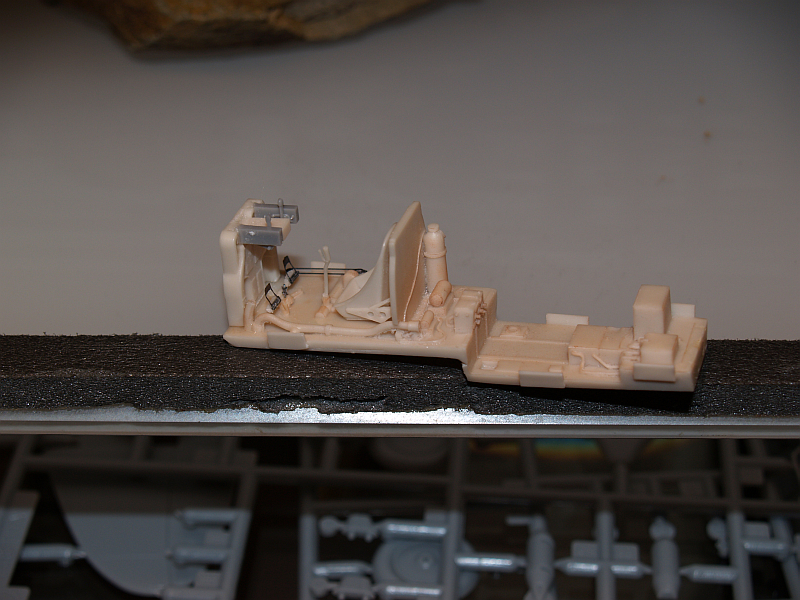
1 for the cokpit interior.
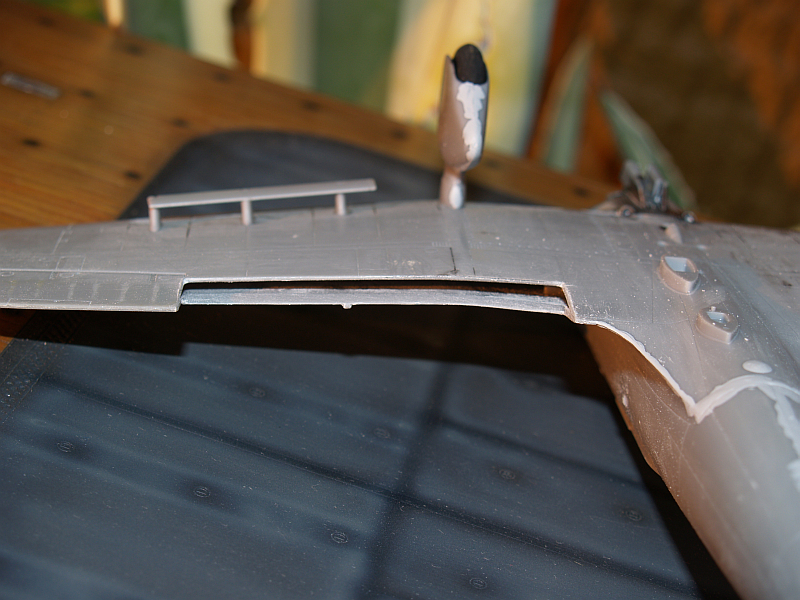
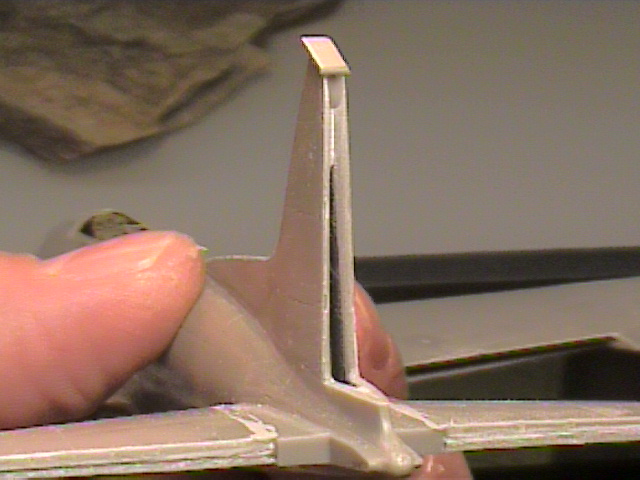
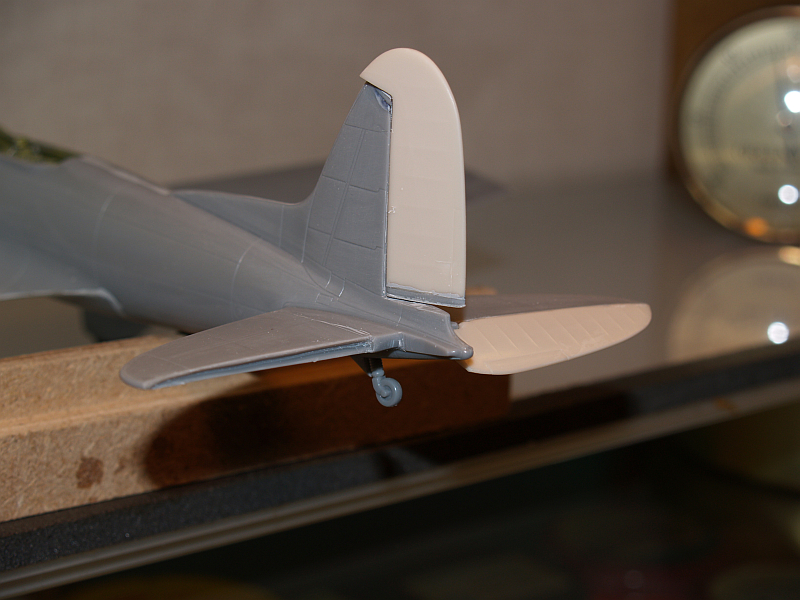
2 for the control surfaces.
3 for the open / closed wings.
All these cost about 100 euro (including the EDUARD's base)
dimitrios
_VISITCOMMUNITY
Attica, Greece / Ελλάδα
Joined: July 18, 2006
KitMaker: 29 posts
AeroScale: 17 posts
Posted: Saturday, November 10, 2007 - 03:57 AM UTC
These are the parts of Hasegawa kit.

The decals are rabish. When I put them in water, broke in several pieces. You can see the extra thin canopy of CMK interior set.

The aircraft carrier deck is EDUARD 's. And here I'm doing the first basic paint.

Paintinting different colours for more realism.


dimitrios
_VISITCOMMUNITY
Attica, Greece / Ελλάδα
Joined: July 18, 2006
KitMaker: 29 posts
AeroScale: 17 posts
Posted: Saturday, November 10, 2007 - 04:07 AM UTC
Until finish the cutting i was very scared , its to easy to broke the floor of cockpit since cutting.

The machines guns are from kit . Its better from resins

I assembled first the plastic cockpit , to take measures for place who set the resin cockpit.


dimitrios
_VISITCOMMUNITY
Attica, Greece / Ελλάδα
Joined: July 18, 2006
KitMaker: 29 posts
AeroScale: 17 posts
Posted: Saturday, November 10, 2007 - 04:23 AM UTC
I made holes in exhausts with dremel tool.

You can see the different betwen the left bomb and the right after rubbing.

And now...... begin the Odyssey....... Cuting , rubing, and filing ..... And rubing again and again.

THE FIRST BLOOD

I cut the wing and filing for many hours until the interior have the same shape with resin part wich would be setted

The great moment is close........

At least , i setted the interior !!!!! After many , many tests.

The same work but now on flap's position

Filing with feeling...... I didn't except this to be so bored.

The form of ruder is diferent from the resin part and I add a plastic with different angle.

The resin part of ruder is sort and I put a piece of plastic from under.
It was necessary to made a ploughing, for the ruder fitting.
dimitrios
_VISITCOMMUNITY
Attica, Greece / Ελλάδα
Joined: July 18, 2006
KitMaker: 29 posts
AeroScale: 17 posts
Posted: Saturday, November 10, 2007 - 04:29 AM UTC
The under surfaces weren't matched well. I put lot of putty.

Ready to set the resin parts.

All parts in their positions. I don't believe it I started the painting !!!!!!!!
dimitrios
_VISITCOMMUNITY
Attica, Greece / Ελλάδα
Joined: July 18, 2006
KitMaker: 29 posts
AeroScale: 17 posts
Posted: Saturday, November 10, 2007 - 04:39 AM UTC
Except the number 9-222 on ruder all the national insingia (hinomaru) the stripes on vessel and wings , are painted. Because the decals are trash.


Percheron
_VISITCOMMUNITY
Washington, United States
Joined: September 23, 2006
KitMaker: 432 posts
AeroScale: 360 posts
Posted: Saturday, November 10, 2007 - 06:58 AM UTC
Dimitrios,

Wonderful job! I have not done a resin interior kit yet, but you made it look easy. I look forward to seeing more of your models.

-Derek
TedMamere
_VISITCOMMUNITY
Moselle, France
Joined: May 15, 2005
KitMaker: 5,653 posts
AeroScale: 4,347 posts
Posted: Saturday, November 10, 2007 - 10:57 AM UTC
Hi Dimitrios!

Fantastic model! The pictures look great too! Congratulations and thanks for sharing...

Jean-Luc
glamdring
Joined: May 21, 2007
KitMaker: 77 posts
AeroScale: 76 posts
Posted: Saturday, November 10, 2007 - 02:08 PM UTC
Dimitrios,

Very nice build and good presentation with the carrier deck. I enjoy looking at all of the in progress pictures. Thanks for sharing them.

Allen
dimitrios
_VISITCOMMUNITY
Attica, Greece / Ελλάδα
Joined: July 18, 2006
KitMaker: 29 posts
AeroScale: 17 posts
Posted: Sunday, November 11, 2007 - 07:31 AM UTC
Thanks all of you,
After many years this is a first attempt to make a nice aeroplane.It's not so perfect but when you start sth the difficulties are many.Now I have more confidence and I hope my next try for making an aeroplane will have a better result.
When you make dioramas and vehicles a trying of make an aeroplane is something completely new.I am disapointed from the quality of photos and I'm wondering why did they liked to you.I'll be back very soon with an other 1/48 scale aeroplane.
Thank you very much again


P.S:
Jean Luc I saw your work and...I cannot close my mouth.
Maxidad
_VISITCOMMUNITY
England - South East, United Kingdom
Joined: August 18, 2006
KitMaker: 11 posts
AeroScale: 9 posts
Posted: Monday, November 12, 2007 - 01:25 AM UTC
You are too modest. It's a beautiful build - congratulations. I am sure with every build there is some detail which we would like to have done differently - one is never 100% satisfied. But I think you should be 99% satisfied!

I look forward to seeing your next project.
mpalao
_VISITCOMMUNITY
Madrid, Spain / Espaņa
Joined: June 19, 2005
KitMaker: 243 posts
AeroScale: 70 posts
Posted: Tuesday, November 13, 2007 - 02:13 AM UTC
Hi to everybody.
Great job Dimitrios. Very nice building process and the paint over the model is fantastic too. I have some questions for you, about the Wing tip position lights (red and green colour). The lights were made from clear sprue or these pieces are original plastic painted over.
When I tried to make these lights with clear sprue, I need to shape them, working too much.
You could send information about this.
Fantastic job, congratulations.
Chao

dimitrios
_VISITCOMMUNITY
Attica, Greece / Ελλάδα
Joined: July 18, 2006
KitMaker: 29 posts
AeroScale: 17 posts
Posted: Tuesday, November 13, 2007 - 06:00 AM UTC
Hi fellow Miguel

The clear plastic for lights are including in kits clear parts.
If you want to make lights use clear plastick and after rubing paint it with ( HUMBROL clearfix).
Other modelers make molds with polyester, but this method need much more work.
My friend I am not an expert , I dont know many techniques. This is my 1st airplane after almost 15 years.
Usual I made vehicles and dioramas from ww ii period. But now I turn to ww ii airplanes.
Sory fellow modeler Miguel .
SGTJKJ
#041
_VISITCOMMUNITY
Kobenhavn, Denmark
Joined: July 20, 2006
KitMaker: 10,069 posts
AeroScale: 3,788 posts
Posted: Tuesday, November 13, 2007 - 09:50 PM UTC
Fantastic job, Dimitrios! You should be very proud of this one. Both the Val and the carrier deck is beautifully made.

Thanks for sharing - hope to see more of your work in the future
mpalao
_VISITCOMMUNITY
Madrid, Spain / Espaņa
Joined: June 19, 2005
KitMaker: 243 posts
AeroScale: 70 posts
Posted: Tuesday, November 13, 2007 - 10:44 PM UTC
Thank you Dimitrios, I take note about the Humbrol Clear fix, I donīt know it. I suppose that this product will work well gluing the clear parts with plastic model. I need to buy it. Before I have used clear coat of varnish in order to glue clear parts with plastic.
Another question is the paint process of the position lights. I think that you have used Clear Green and Clear Red paints in your process , but... my question is if the paint was applied on the inner area of the clear part or you have painted the lights on the outside surface. Other solution is to paint on the wing tip and later to glue the position light over.

Let me know your comments, please.

Thank you very much in advance.

Chao
dimitrios
_VISITCOMMUNITY
Attica, Greece / Ελλάδα
Joined: July 18, 2006
KitMaker: 29 posts
AeroScale: 17 posts
Posted: Thursday, November 15, 2007 - 08:30 AM UTC
Don't worry about this subject.
First I stuck the clear parts in normal plastic area with polysterene cement, in my case I use the extra thin cement of TAMIYA . Then I painted the lights or anything else clear plastic with TAMIYA clear colours. Only outside , there's no need to paint them from inside.
Greetings , I hope that my suggestion will help you.

mpalao
_VISITCOMMUNITY
Madrid, Spain / Espaņa
Joined: June 19, 2005
KitMaker: 243 posts
AeroScale: 70 posts
Posted: Thursday, November 15, 2007 - 07:07 PM UTC
Thank you very much, Dimitrios. I understand you. Of course, it is a good method. Your paint job is amazing. I think that the clear paint, the red and black colour applied on the aircraft is very good. Please let me know in more detail your paint process on the aircraft. The paint type, the colour effects, your technique,...... and everything that you think are very interesting. Thanks in advance and thanks to help me.

Chao.
 _GOTOTOP