_GOTOBOTTOM
Pre-Flight Check
Constructive critique of your finished or in-progress photos.
Mig-21F-13 (Mark Sharpe campaign build)
Emeritus
_VISITCOMMUNITY
Uusimaa, Finland
Joined: March 30, 2004
KitMaker: 2,845 posts
AeroScale: 1,564 posts
Posted: Friday, November 16, 2007 - 05:23 AM UTC
"And now for something completely different"
That Monty Python quote couldn't be more fitting here, as I can't remember when I last built a jet, let alone a modern one. Must have been several years since I even worked on a jet.
But here we go again, back to the 'future'.
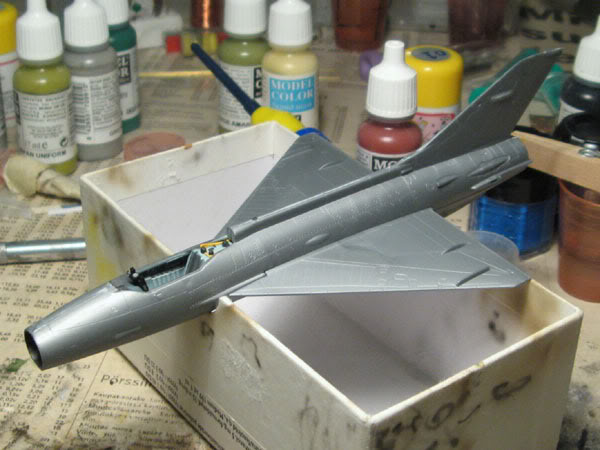
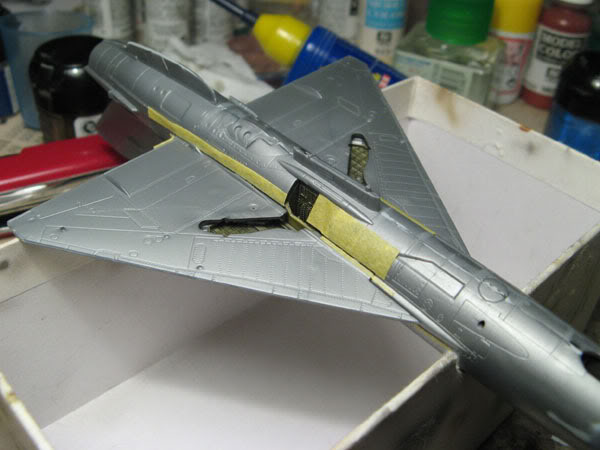
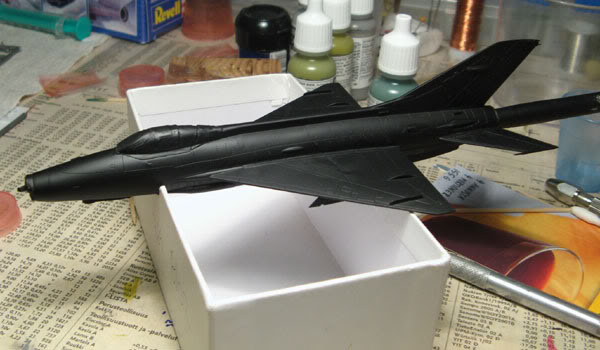
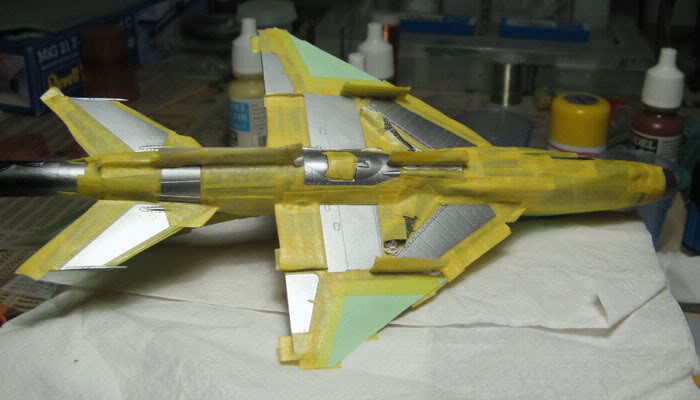
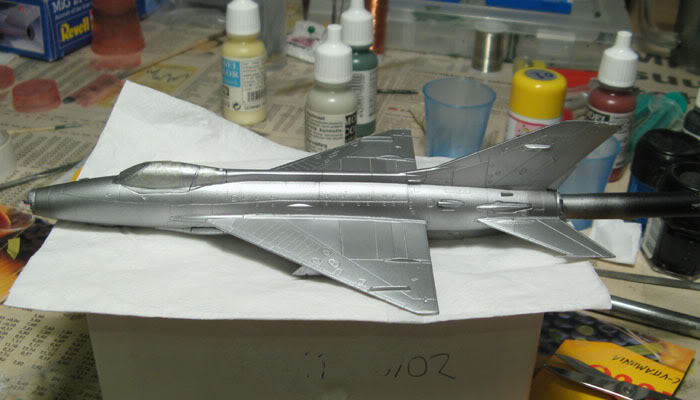
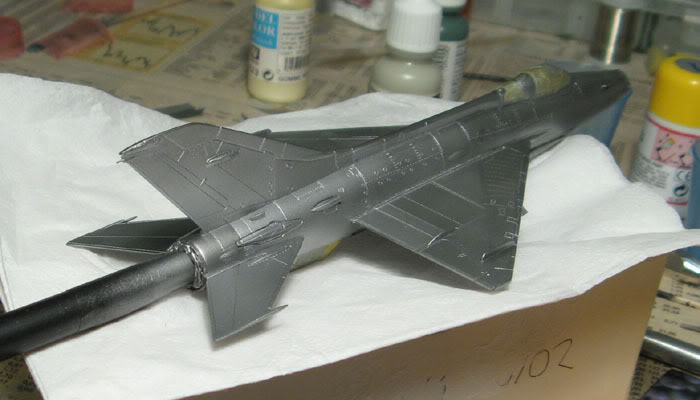
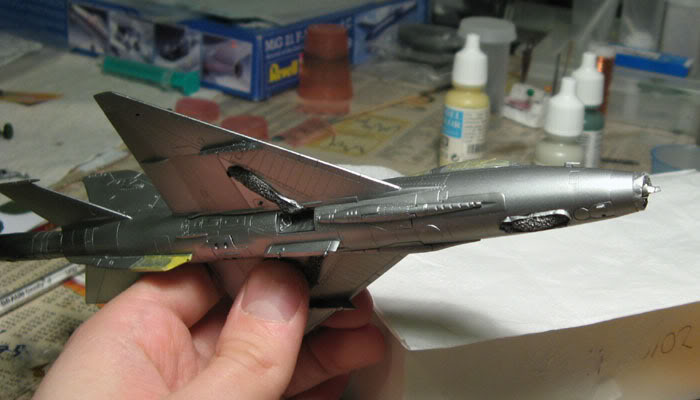
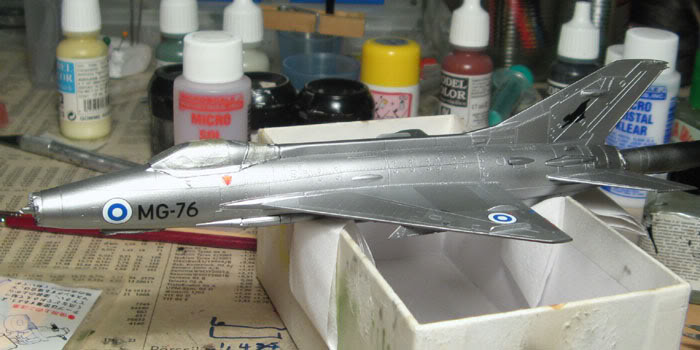
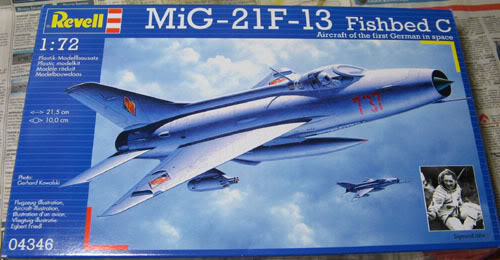
As my entry to the Mark Sharpe memorial campaign, I'll be building Revell's new (well, it's a couple of years old now) Mig-21F-13 in 1:72 scale.


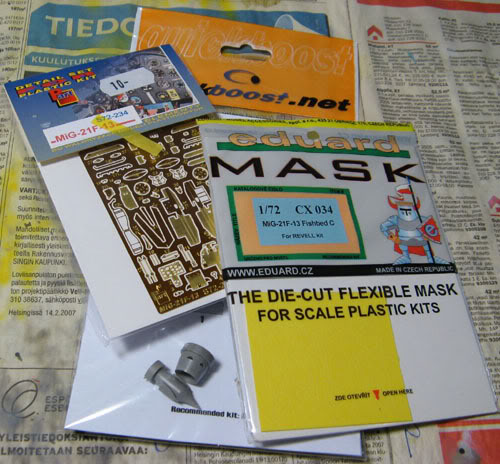
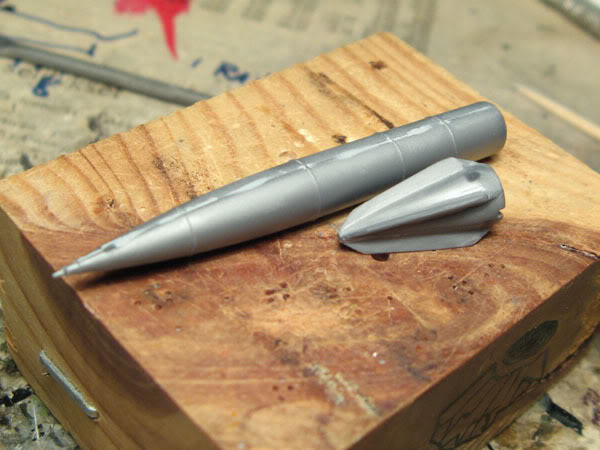
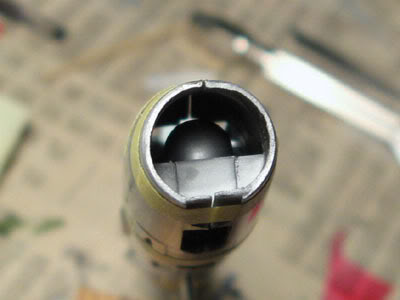
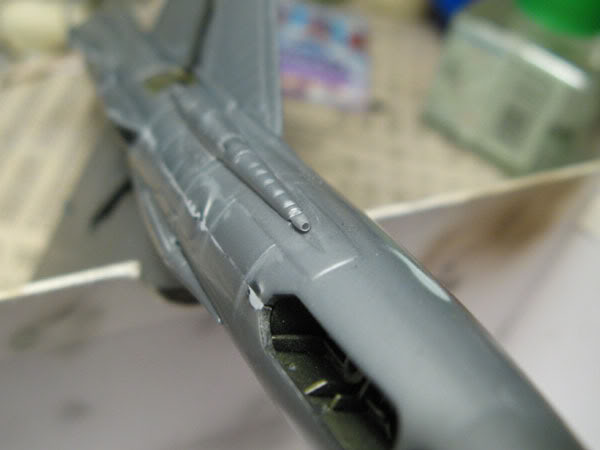
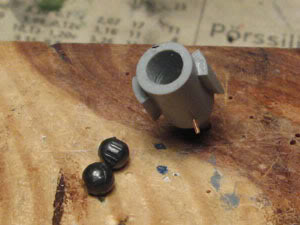
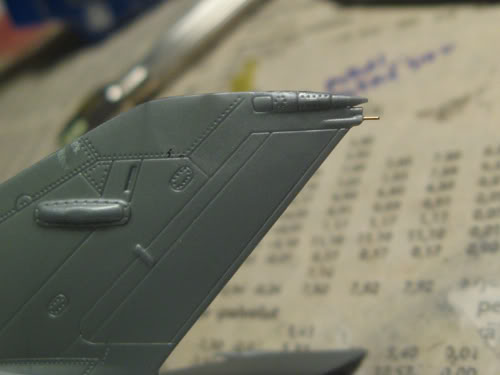
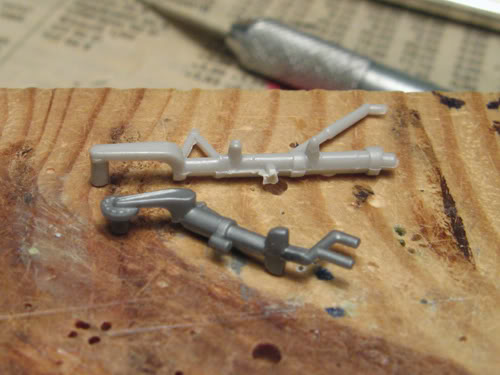
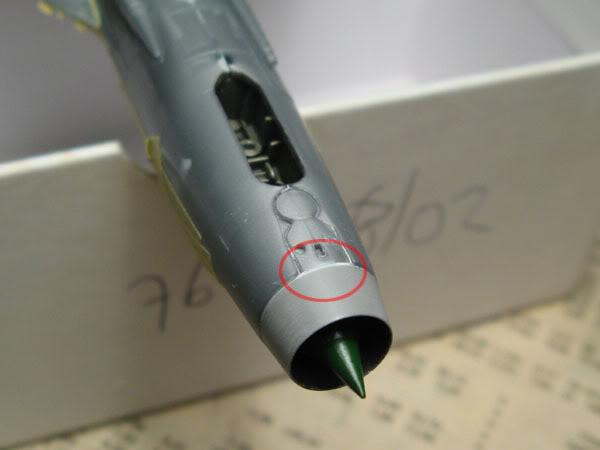
I couldn't resist adding some aftermarket parts, I got a PE set by Part and Quickboost's nose ring and exhaust cone.

It's been in progress for about two weeks now, here's what I've done so far.


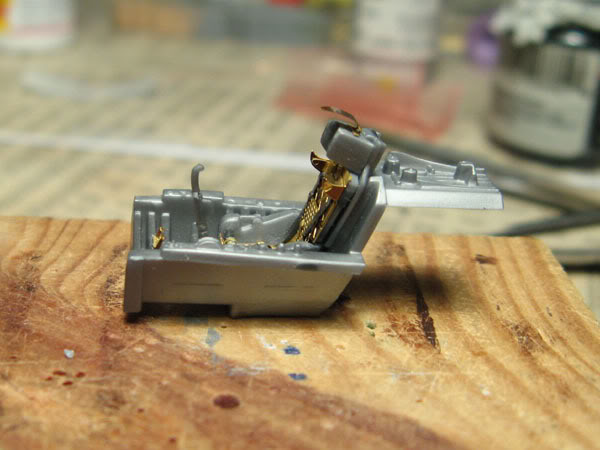
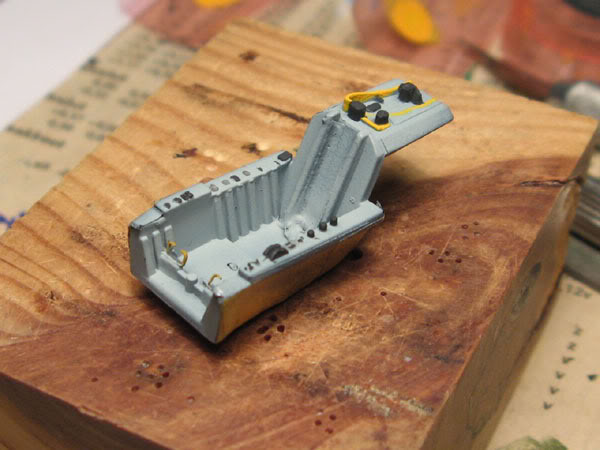
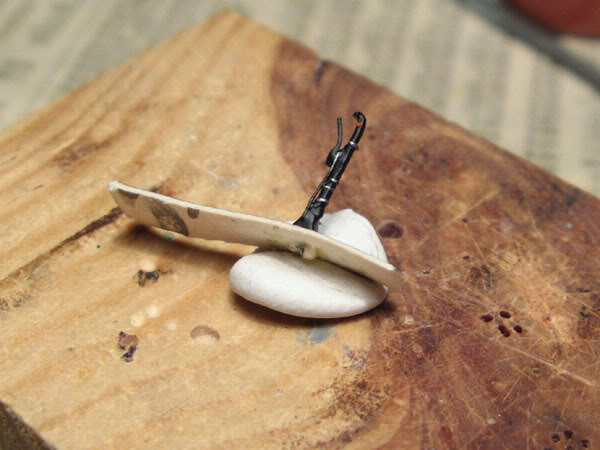
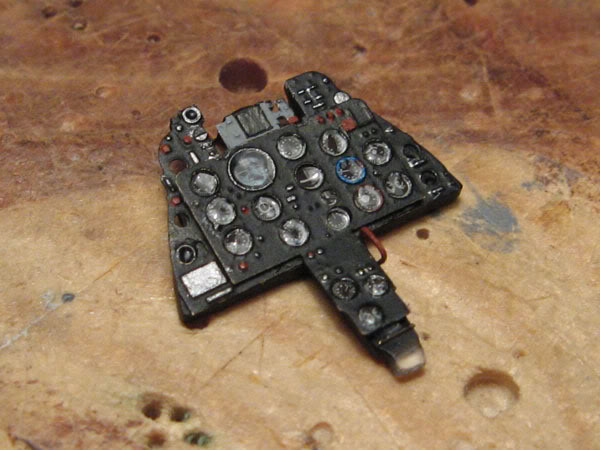
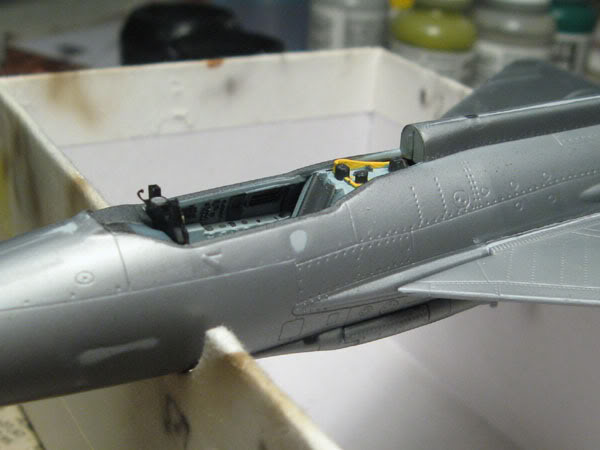
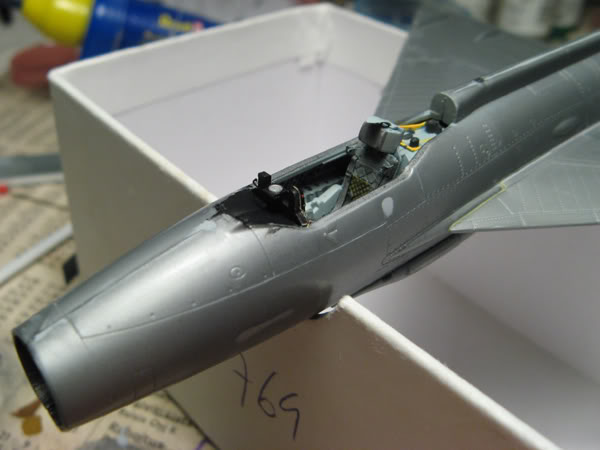
The cockpit tub didn't get much PE, just the straps to the rudder pedals. The ejection seat has some of the parts in place and is being dryfitted to the tub. The locator hole for the seat was enlarged a bit to allow the seat to sit snuggly without clamping when adding the seat later in the build.


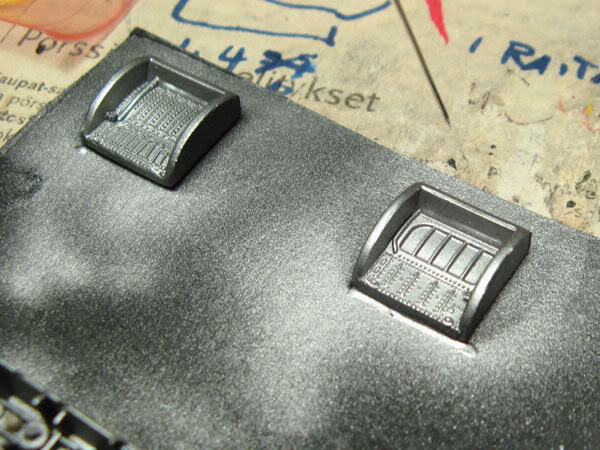
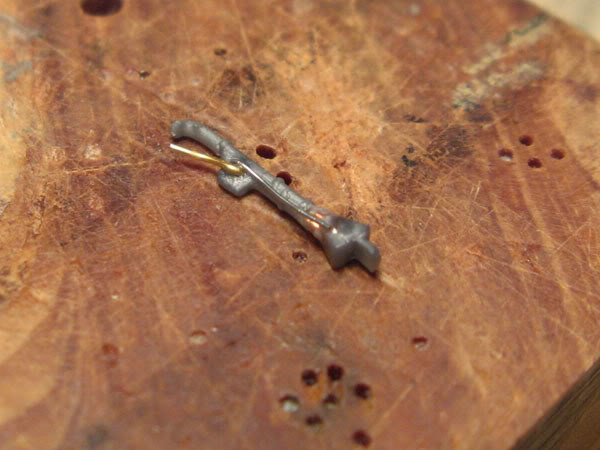
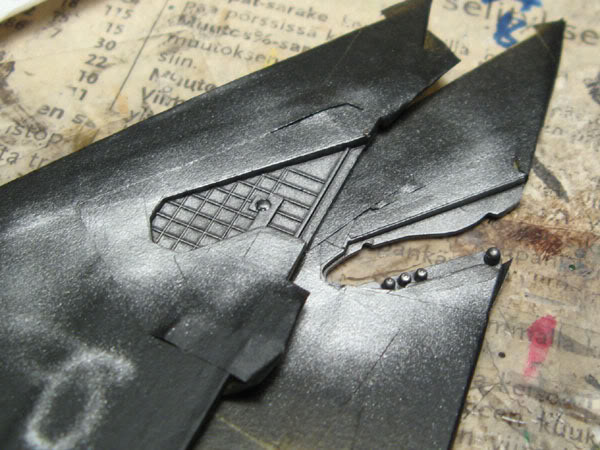
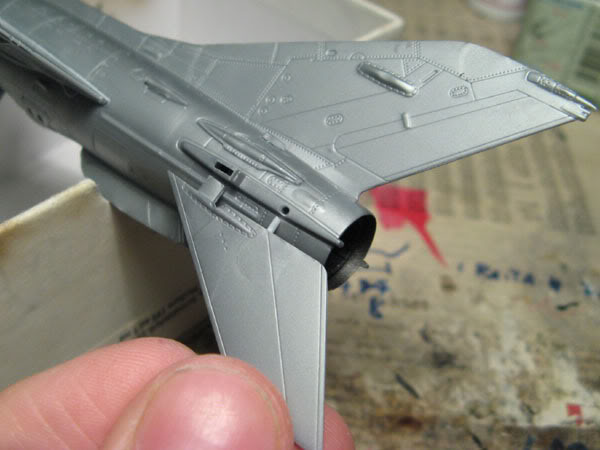
Here's the landing gear doors assembled and the first attempt to fill the incorrect recessed details in the tires with Mr. Surfacer. All the tires had strange, quite heavy side detail, while my references showed the tires being smooth. The recesses were too heavy for mr. surfacer, it would have required many application to fill the holes. I opted for milliput.


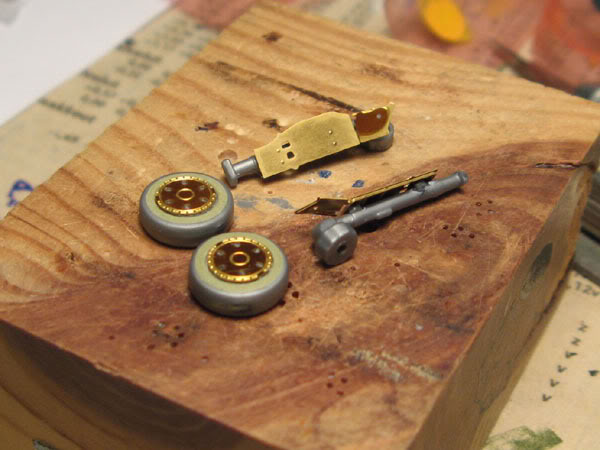
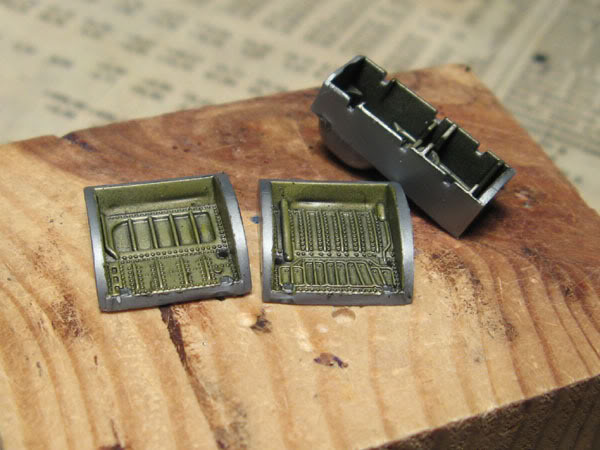
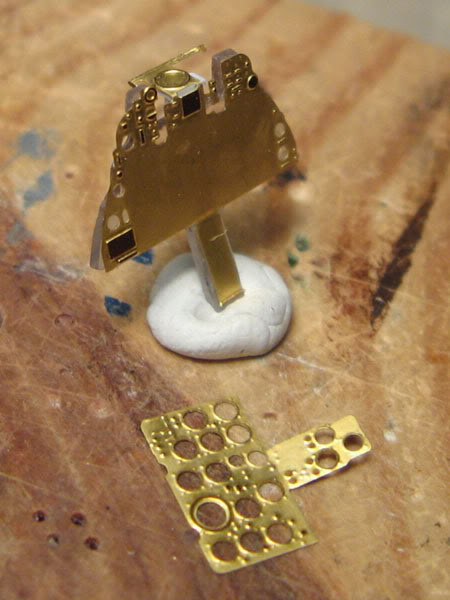
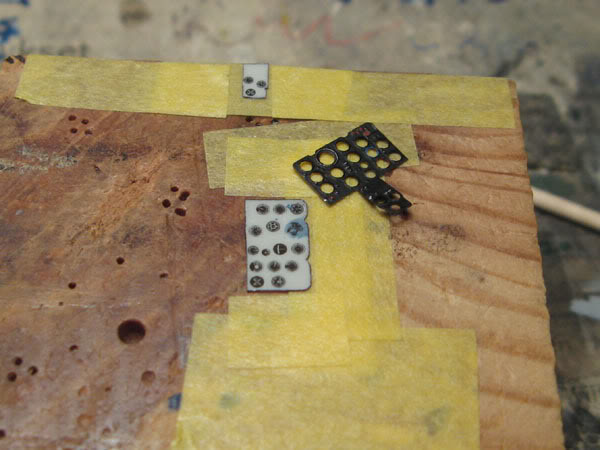
Here's the wheels after applying Milliput to fill the side details, with the wheel hub PE parts already cut from the fret.


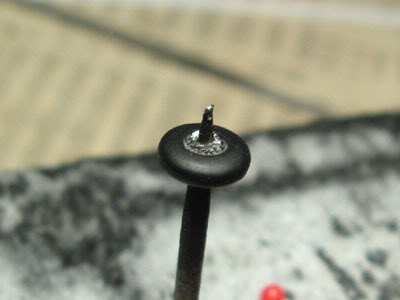
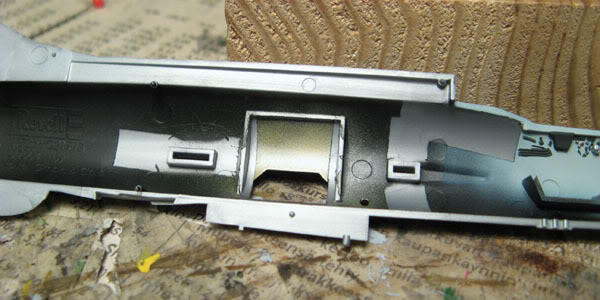
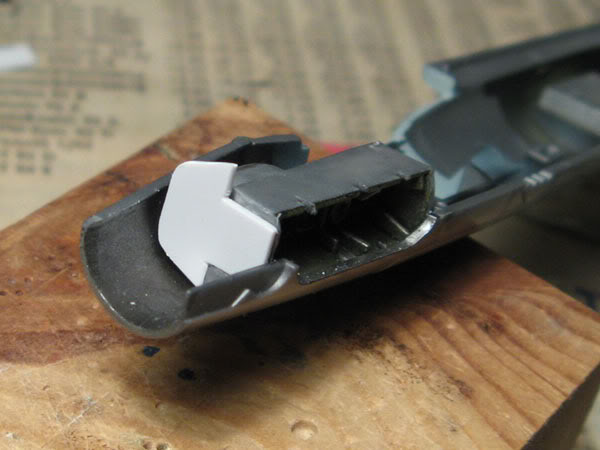
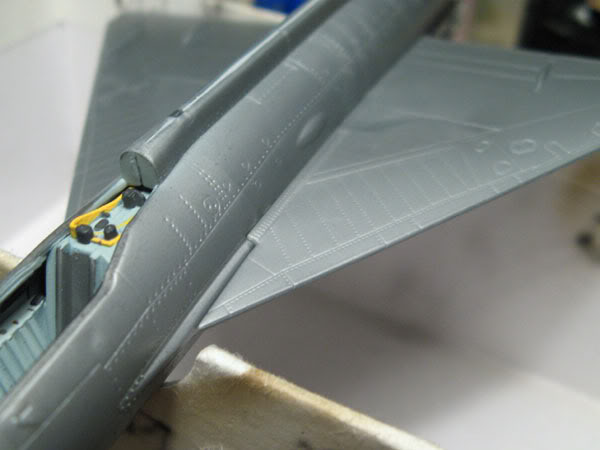
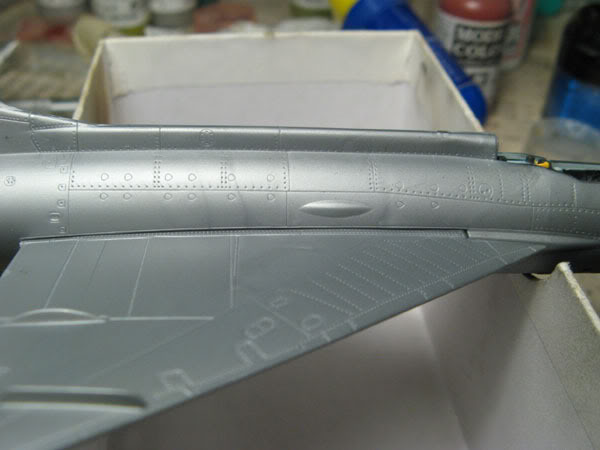
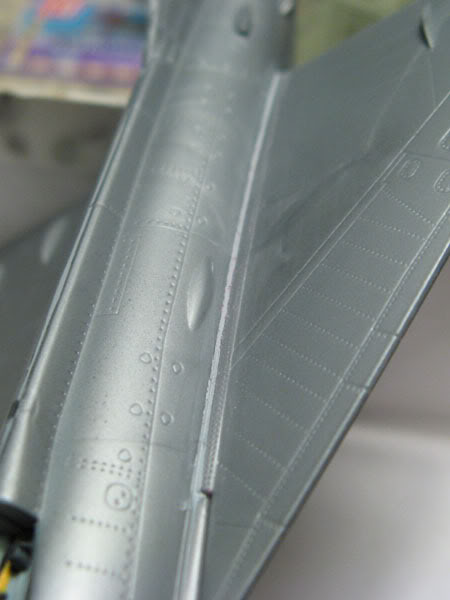
While the plastic parts seem to be mostly well moulded, the prominent locators and shelves for the cockpit and front landing gear bay in the fuselage halves resulted in some minor sink marks in the outside. Not a big issue, a single application of mr. surfacer and sanding took care of them.


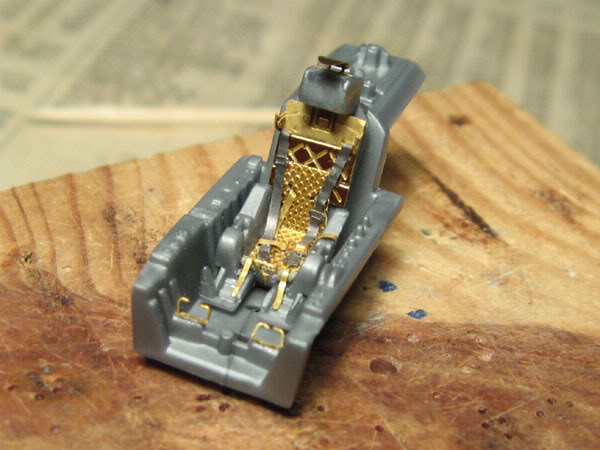
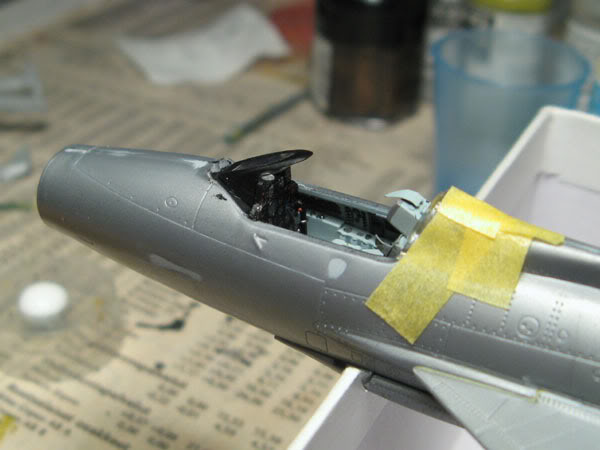
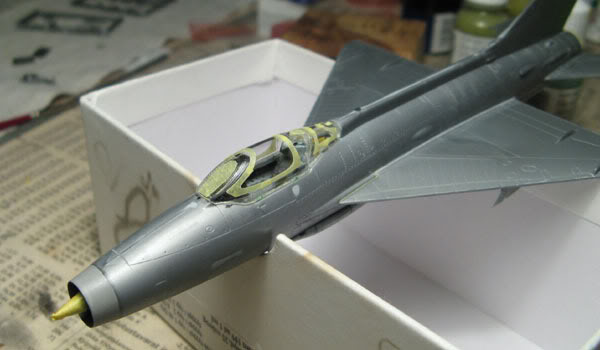
There's the cockpit tub with the seat dryfitted again, this time the seat being finished.
The reference photos I managed to find indicated the Part seatbelts being somewhat incorrect (at least for the version this is), but I didn't bother and proceeced with the PE provided. Since I lost one of the shoulder belts, I replaced both with left-over parts from some eduard PE set, since the parts were a bit wider than Part's belts, this way it's not that noticable.
Emeritus
_VISITCOMMUNITY
Uusimaa, Finland
Joined: March 30, 2004
KitMaker: 2,845 posts
AeroScale: 1,564 posts
Posted: Sunday, November 18, 2007 - 04:03 AM UTC
A small update for today.


The original tail part of the fuel tank I managed to ruin while trying to get the etched fins to fit, but fortunately I got a new part from a fellow modeler who didn't use the tank on his kit.
I couldn't leave the new tail part untouched, so I filed and sanded the fins a little thinner and shaped them a little to better match my reference photos.
The seams in the tank required care because of the raised details, but mr. surfacer and careful sanding did the job at eliminating the seam and preserving the details.


Why do these thing always happen to me?
I wasn't careful enough while cutting the sprue connectors and managed to mess up the edges.
Looks like I have to close the canopy since I doubt putty will stick to the thin edges and withstand the sanding that would follow.
magnusf
_VISITCOMMUNITY
Stockholm, Sweden
Joined: May 02, 2006
KitMaker: 1,953 posts
AeroScale: 1,902 posts
Posted: Sunday, November 18, 2007 - 07:37 AM UTC

Quoted Text


I wasn't careful enough while cutting the sprue connectors and managed to mess up the edges.
Looks like I have to close the canopy since I doubt putty will stick to the thin edges and withstand the sanding that would follow.


You could try very carefully to apply super glue (cyanoacrylate) where you have broken away the plastic. Build up the missing material in thin layers, using accelerator to speed up the process. Super glue is very much like plastic in itself and will stick for sure. As for the dreaded Super Glue fogging: This just affects the surface and can be wiped away since you have access to both the outside and the inside of it before you mount it on the kit!

And by the way: You are not alone. For some reason I always manages to mess something important up. I scrapped three Meteor canopies for instance...

Regards

Magnus
Emeritus
_VISITCOMMUNITY
Uusimaa, Finland
Joined: March 30, 2004
KitMaker: 2,845 posts
AeroScale: 1,564 posts
Posted: Thursday, November 22, 2007 - 09:18 PM UTC
Thanks, I'll consider that for fixing the canopy cracks.

I've made some progress too.
While working with the cockpit, I noiticed the control stick ends up pointing backwards if built OOB.
Like this:

Just gluing it on the other way won't work so I had to cut the stick from the base, file a different angle to it and put it back together. Just to be sure the joint holds, I drilled holes to each part and used copper wire for pinning. After this, there's still a couple of details to add, I'll post pics of the finished item when I'm done with it.

I started painting too. Quite obviously the first things getting some paint where the parts going inside the fuselage. I started off by painting the metallic parts inside the fuselage and wings.


After making paint samples on some cardboard with metallics from my paint stash, I decided to give citadel acrylics a try. Although vallejos model air metallics looked quite nice, they came right off with water after a couple of days drying. Citadels seemed to stay put properly so I proceeced with them. Following my references, the wheel wells in the fuselage and wings will recieve a light transparent yellowish, probably an anti-corrosive or other kind of protective coating.


Not much to say, the nosewheel after being sprayed black to check if it requires further puttying. Not much, if any, is required.


The cockpit components I airbrushed with RLM76, which seemed like a close enough match to the light blue grey interior color of the first Finnish Migs.
TedMamere
_VISITCOMMUNITY
Moselle, France
Joined: May 15, 2005
KitMaker: 5,653 posts
AeroScale: 4,347 posts
Posted: Thursday, November 22, 2007 - 10:05 PM UTC
Hi Eetu!

Looks very good so far!

Have you tried to repair the canopy? For these kind of things I use Tamiya filler and add CA glue to it for more strenght. It works fine usually.

Anyway, I'm looking forward to see more.

Jean-Luc
Emeritus
_VISITCOMMUNITY
Uusimaa, Finland
Joined: March 30, 2004
KitMaker: 2,845 posts
AeroScale: 1,564 posts
Posted: Thursday, November 22, 2007 - 10:43 PM UTC
Thanks.

I haven't tried repairing the canopy yet, I'm not sure yet if I'll try to repair it so it could be posed open, or glue it on and sculpt some milliput on the edges.
You mean you mix superglue with regular putty (I presume tamiya's putty is "regular" stuff, like squadron's green) before you apply it?
I'm not sure if the cracks are too large for using just superglue. If they're not too big, I think repeated applications of superglue, probably with a kicker, could work. In that case, protecting the transparent portions with tape on both sides would be an absolute must, as I'm not interested of getting vapor fog on the part.
magnusf
_VISITCOMMUNITY
Stockholm, Sweden
Joined: May 02, 2006
KitMaker: 1,953 posts
AeroScale: 1,902 posts
Posted: Friday, November 23, 2007 - 07:08 AM UTC
Hi!

Superglue fog can be wiped away after the glue has set so that is nothing to worry about in this situation. The problems arise when you use superglue to attach the canopy to the model and get the fogon the inside...

Good to hear that there are more than me who have found the Citadel metallic colours! Just as good as Tamiya Titanium Silver but without that yellow tint.

Vallejo has two kinds of metallics: One is thinned with alcohol and is prone to come off after drying, I don't know why. The ones that come in the ordinary bottles give a nice metallic effect but they are very fragile as well...

That seat looks really good!

Regards

Magnus
TedMamere
_VISITCOMMUNITY
Moselle, France
Joined: May 15, 2005
KitMaker: 5,653 posts
AeroScale: 4,347 posts
Posted: Friday, November 23, 2007 - 07:46 AM UTC

Quoted Text

You mean you mix superglue with regular putty (I presume tamiya's putty is "regular" stuff, like squadron's green) before you apply it?


Hi Eetu!

I first apply the putty and when it is dry I add the superglue. The putty absorbs the glue and is a lot more stronger but not as hard as CA glue alone. I use this method to restore very small areas or when I have to do a thin edge.

Jean-Luc
Emeritus
_VISITCOMMUNITY
Uusimaa, Finland
Joined: March 30, 2004
KitMaker: 2,845 posts
AeroScale: 1,564 posts
Posted: Friday, November 23, 2007 - 07:53 AM UTC
What do you wipe the superglue fog with? I thought it occurs mostly when the vapor is trapped inside and decides to get funky with the insides of the canopy. Sometimes this happens in open areas as well, but these have always occurred in spots were I've used loads of CA for reinforcing a joint that won't be visible when finished, or will be treated later.

Oh yes, I've been aware of Citadel acrylics being good, I just haven't tried them for airbrushing yet.
I think vallejo makes not two, but three kind of metallic paints.
There's the usual model color range, which seems to stay put, but which doesn't really have a proper metallic appearance. They look ok in the bottle, but dry to a flat finish with the metallic flakes quite visible.
Then there's the alcohol-based metallic paints which I have no experience of. I remember hearing that there being discontinued because of some dumb EU chemical laws or something. (Same with tamiya acrylics. Since they're labelled as modeling supplies when imported, they're considered toys and get huge taxes as a sort of punishment for being unhealthy and toxic. No problems when importing highly toxic car paint for example...)
The third is the model air metallics, which I discovered coming off really easily while I did paint samples for this build. Actually, they didn't "come off", but dissolved when exposed to water almost two days after painting. I don't know if this was because I handbrushed the samples. I'd doubt it, though.
Emeritus
_VISITCOMMUNITY
Uusimaa, Finland
Joined: March 30, 2004
KitMaker: 2,845 posts
AeroScale: 1,564 posts
Posted: Tuesday, November 27, 2007 - 12:44 AM UTC
I got started with the cockpit painting.


I was already making the missing throttle handle from styrene rod when I was surprised to find it already molded on to the sidewall detail in the fuselage half.


I managed to break the control stick once again while handling, this time above the pinned joint. With the CA and copper involded, I couldn't use styrene cement so I stuck it back together with mroe superglue and hoped for the best.
The missing brake handle and cable were added from thin brass rod and wire.

And there's the main landing gear components, ready for painting.

Emeritus
_VISITCOMMUNITY
Uusimaa, Finland
Joined: March 30, 2004
KitMaker: 2,845 posts
AeroScale: 1,564 posts
Posted: Friday, November 30, 2007 - 01:02 AM UTC
This one's coming along pretty nicely. Now I only need to finish and paint the intstrument panel to the cockpit and paint the exhaust pipe and I can put the fuselage together.


Starting off small, here's the finished control stick. Luckily, the seam hasn't given upt he ghost yet, and I hope it won't do that anymore.


There's the wing and fuselage landing gear compartments, after a black wash, prior to the transparent yellow coating.


Going to the same category, the intake and exhaust areas on the fuselage were blackened by spraying on the same black wash I used on the gear wells, applying a heavier coating to the exhaust area. I forgot to fill the ejector pin mark around the exhaust, but it will be impossible to see in the fnished model so I don't sweat it. The metallic paint is citadel's 'chain mail'.


Finally, there's the landing gear areas after the yellow coating. The coating is yellow green acrylic, first diluted for airbrushing, then mixed with future to make a transparent shade. It took several coats to make the right effect, but it matches my references nicely.

Next objective: Finishing the cockpit and exhaust pipe so I can put the fuselage together.
magnusf
_VISITCOMMUNITY
Stockholm, Sweden
Joined: May 02, 2006
KitMaker: 1,953 posts
AeroScale: 1,902 posts
Posted: Friday, November 30, 2007 - 02:45 AM UTC
Your MiG is coming together nicely! I follow this build with great interest.

That stick was a nice little model in itself. May I suggest that you mount it on a base plate and add a simpler item to your cockpit since it will be hard to appreciate in there

Regards

Magnus
Emeritus
_VISITCOMMUNITY
Uusimaa, Finland
Joined: March 30, 2004
KitMaker: 2,845 posts
AeroScale: 1,564 posts
Posted: Tuesday, December 04, 2007 - 09:49 AM UTC
Well, I got the canopy fixed. I first applied some green putty to the cracks, then filled the rest with superglue hardened with accelerator. Protecting the rest of the canopy with masking paid, the clear parts were unharmed when I removed the tape.
After a dip in future, I think it looks fine:


That's for the good news. First of all, I seem to have lost the separate nose landing gear fork half... The particular part (no pun intended) was already off the sprue when I first opened the kit. Then, thinking it would get lost really easily, I put it in a zip-lock bag to keep it safe. It was, until I started building. I have no recollection of washing the loose part with the rest, so I think it must have been in the bag. My searches were fruitless, the part was nowhere to be found. Damn.

Now for some little better news. Attaching of the quickboost intake cone and nose ring seems to be tricky. And aligning the parts, to be precise. The intake cone doesn't have much in the way of alignment aids. It needs to be centered and the nose ring glued to the fuselage afterwars, the cone being larger than the ring.
I think I'll use two types of glue. First stick on the intake cone with some medium or slow setting epoxy, then attach the nose ring with superglue, taking care to align it properly. Then there's still time to align the position of the intake cone.

That head-on view of the dryfitted fuselage shows the modified nose ready for the resin parts (a locator pin & hole device has been removed and the nose area sanded thinner), as well as another thing needing improvement. OOB, the only gluing surfaces for the intake cone are the locators for the front wheel well, on both sides. I'm planning to glue in a piece of styrene sheet to the outside of the well to make a larger area to glue the cone to.

Over and out for now, more updates coming soon. (expect a venting on the fit of the wings... )
Emeritus
_VISITCOMMUNITY
Uusimaa, Finland
Joined: March 30, 2004
KitMaker: 2,845 posts
AeroScale: 1,564 posts
Posted: Thursday, December 06, 2007 - 03:13 AM UTC
Just a little update this time, you'll have to wait for the wing-fit venting a little longer.
I got the nose-cone gluing surface issue solved. Simple as this:

Well, not that simple as gluing in a piece of styrene, as I had to shave the edge of the nosewheel well a little to ensure the plate fit straight. Also, the base of the nose cone required some more sanding as well to make sure it'll fit right.
Emeritus
_VISITCOMMUNITY
Uusimaa, Finland
Joined: March 30, 2004
KitMaker: 2,845 posts
AeroScale: 1,564 posts
Posted: Tuesday, December 11, 2007 - 07:35 AM UTC
Okay, the wing-rant is going to be on the next post, honestly!
Well, it seems there's not a problem with the angle, since there's supposed to be a 2 degree anhedral, which the instruction say nothing about, but the fit between the wing components and the fuselage are not what I expected from a recent Revell kit.

But I'm almost there, as I now got the instrument panel done and ready to attach to the cockpit tub (and that to the fuselage, and the fuselage halves to each other)
For starters, here's a shot of the instrument panel ready for priming:

I intentionally left out the two small acetate film pieces that are supposed to go behind the few gauges in the bottom panel. They're tiny, and with the backing film being two small pieces instead of a piece covering the whole back of the PE panel, I left it out. Otherwise, there would be a gap between the most of the panel and the styrene part. However, I don't how if the original part was even meant to be used as a backing at all, as it's not mentioned in PART's instuctions. (I used the original panel, sanded flush, both for strengthening the part and help gluing it to the cockpit and fuselage walls)


There's the outer instrument panel painted up and waiting for the acetate film pieces. The original single film piece I cut up to ease gluing it to the PE panel. Acetate doesn't bend that easiely as PE metal, you know.
The back of the artificial horizon was painted light blue before spraying the white for the rest of the film. This is where I wonder if there's any limit in human stupidity...
See, the gauge is scuffed, results from me scraping the blue paint from the film, after erroneously thinking it'll show up if there's paint outside the gauge (Of course it won't! Only the gauges will be visible in the finished part. Silly me. ) Well, I realized this after scraping off the paint and somewhat damaging the printed horizon gauge. Fortunately it won't be so visible when finshed. I hope this is the single stupid mistake you just have to have with each build, I'm not looking towards scratch-building a new pitot tube for this one...


And that's the finished instrument panel, ready for the cockpit. I applied micro's krystal klear and future to simulate the gauge glasses.
Emeritus
_VISITCOMMUNITY
Uusimaa, Finland
Joined: March 30, 2004
KitMaker: 2,845 posts
AeroScale: 1,564 posts
Posted: Wednesday, December 12, 2007 - 09:41 PM UTC
Hey, it looks like there isn't so much to vent about the wing fit after all, but a little nevertheless.
Now this thing starts to look like and airplane.

Using a small cardboard box as a jig (the semi-circular cutouts were just ideal for holding the model) while gluing the wings.
I originally thought there was going to be problems getting the wings aligned, as the gluing surfaces of the wing parts were at a slight angle, but there's supposed to be a 2 degree anhedral, so that kind of sorted out the most. I still think there should be a mention of this in the instructions, though.
The fit of the wings turned out to be quite good, but not what I expected from Revell, and from a kit that's going to be painted with metallics. The most ugly gaps formed at the root of the leading edges, like there's not enough material there.

Some slight gaps over here too:


Looks like I need to mask the surface details with tape before filling the seams with milliput, trying to minimize the need for sanding.

I also got the seat painted:


Now I cross my fingers and hope this kit doesn't need weight to keep the nose wheel on the ground. I thought putting some weights in the front fuselage, but forgot it.

magnusf
_VISITCOMMUNITY
Stockholm, Sweden
Joined: May 02, 2006
KitMaker: 1,953 posts
AeroScale: 1,902 posts
Posted: Saturday, December 15, 2007 - 06:44 AM UTC
That's amazing detail work! Both the instrument panel and the seat are very nice.

Regards

Magnus
Emeritus
_VISITCOMMUNITY
Uusimaa, Finland
Joined: March 30, 2004
KitMaker: 2,845 posts
AeroScale: 1,564 posts
Posted: Saturday, December 15, 2007 - 08:56 AM UTC
Thanks. Good to hear you like it.

Onwards to the next batch of WIP pics.
To battle the wing-to-fuselage seams, I reasoned the only method to minimize the amount of sanding and damage to surrounding details was to mask seam area, then apply the filling material (in this case, first superglue to strengthen the seam, then mr. surfacer to fill).


Quite tedious, since the masking had to be re-appied every time because the tape is removed right after applying CA/surfacer.
The superglue stage didn't produce much in the way of visilbe results, so I'll skip that. Here's the seam after applying Mr. surfacer:

Surprisingly, surfacer didn't handle as nicely as CA. Superglue doesn't harden immeadiately when applied to a seam, so I removing the tape was a breeze. Mr. surfacer however dries quite fast, devoloping a sticky "skin" moments after applied. Fortunately it didn't start to tear off or anything. I think I'll brush a light coat of primer on the seams to check if they need further applications of surfacer and sanding.

Now I got almost all of the scoops and bumps glued to the fuselage. Here's the cannon fairing/airbrake housings installed. Also notice the fuselage seam, smoothed with mr. surfacer and finished with sanding sticks.

Speaking of cannon, the 30mm instrument of destruction was strangely pointed in the kit part, like it had protective cover or something. I modifed it to match my references, sanding it down and drilling a hole to the fairing.

The airbrakes didn't fit snuggly OOB and required some sanding, filing and knifework to make them fit tightly. Not a big issue though.

There was another slight sink mark near the cockpit opening that I missed before. A drop of mr. surfacer and sanding got rid of it.


Next I'll take care of the rest of the wing seam (in the front) with milliput, glue on the horizontal stabilizers (I'm still figuring out how to support them while gluing like on the wings, or if I have to just eyeball them), glue on the wing pylons and install the resin nose accessories.
Speaking of the latter, I'm adding some lead weights inside the nose cone, just in case. I've heard that the kit sits on it's three wheels when built OOB, but just barely. I'll drill a hole in the back, drop in a few lead balls with superglue, and finish off the gluing surface with milliput.
But more of that in the next update.
Emeritus
_VISITCOMMUNITY
Uusimaa, Finland
Joined: March 30, 2004
KitMaker: 2,845 posts
AeroScale: 1,564 posts
Posted: Sunday, December 16, 2007 - 04:46 AM UTC
Today, I worked on the stabilizers. The single locating tabs on them were a bit too thin, resulting in a sloppy fit. This problem was easily solved by making additional pin joints. Now they don't droop on their own anymore.

Another small issue with the stabilizers was my own fault. I knocked off the thin "spike" on the other stabilizer. I filed the break point flat, drilled a hole and inserted a replacement made from a needle.


I also worked on the nose weights. Having forgotten to install any weight inside the fuselage, I drilled a hole to the back of the Quickboost nose cone, glued in two small lead weights and sealed the hole with milliput. (A possible) problem solved.

Emeritus
_VISITCOMMUNITY
Uusimaa, Finland
Joined: March 30, 2004
KitMaker: 2,845 posts
AeroScale: 1,564 posts
Posted: Saturday, December 22, 2007 - 05:53 AM UTC
I've been somewhat lazy again, but here's some more progress nevertheless.
Starting from the smallest, I added an antenna to the rudder from thin brass rod.

There was such detail in the kit, but it was very delicate and divided with the fuselage halves, making a very vulnerable item. I promtly cut it off. It wouldn't have withstood handling anyway. .And getting it round after assembling the fuselage would have been quite impossible anyway.

While trying on the canopy, it turned out that while the PE instrument panel may be accurately shaped, it was much too wide to allow the canopy to fit. I was forced to cut, file, and shave the PE part to the same shape as the plastic part it was glued to.

This went smoothly enough, I only had to re-apply superglue to one tiny spot that popped loose.

The exposed edges had to be touched up, not a big deal though.


Then moving to the daunting chore of making a replacement part to the front gear fork. I dug into my spare parts box and found just what I was looking for. A landing gear to supply the fork half and a round part from a Fw-190 to make the hub. (probably a crank from the cockpit)

No it doesn't look that bad at all.
Emeritus
_VISITCOMMUNITY
Uusimaa, Finland
Joined: March 30, 2004
KitMaker: 2,845 posts
AeroScale: 1,564 posts
Posted: Friday, December 28, 2007 - 12:24 AM UTC
I've been probably saying this so much it has lost all meaning, but now I'm almost ready for priming.
After I got the instrument panel trimmed to allow the canopy to fit, I glued in the gunsight glass, then the "windscreen" that goes over it.


If you're wondering, yes, that head protection plate in the seat isn't supposed to be like that, I must have knocked it while handling the model. Now it's like that under the canopy. So be it, I'm not ripping it off at this point.


With the canopy in place (and protected under masking tape), I moved on to the quickboost items for the nose. This was looking tricky. Both the nose cone and ring had to be glued precisely, but there was no locators of any kind for the cone, so using only superglue was out of the question.
My decision of using epoxy for the cone and superglue for the nose ring worked well. I first attached the cone, eyeballed it's position, then supergued in the ring, and with it firmly in place, finetuned the position of the cone.
Success.


I had to do repeated trimming and dryfitting to make sure the nose ring and the cone would fit right, but when I go them in place, there was very little work cleaning up the seams. I only needed a dab of superglue on upside where the fuselage halves join, and a shim of thin styrene sheet on the belly (actually my fault, me removing the pitot mount from the sprue shorthened the part a little). The sides of the fuselage were a little wider than the nose ring, resulting in slight steps, but that didn't require filling, just a few minutes of work with sanding sticks.
Emeritus
_VISITCOMMUNITY
Uusimaa, Finland
Joined: March 30, 2004
KitMaker: 2,845 posts
AeroScale: 1,564 posts
Posted: Monday, December 31, 2007 - 12:46 AM UTC
Well well, it seems that this project isn't going to be finished during this year. Perhaps the next then...

On to the update then.
To hold the model while painting, I needed something else than the usual stick going in the fuselage through the prop hole.
I settled for an airbrush needle packaging, a plastic tube, to which I made a cut.

When squeezed, it fit nicely to the exhaust and held the model firmly as the tube wanted to expand to it's original shape.


Despite them being commercial pre-cut masks, these were the hardest masks I've applied yet.

There's two sets of canopy masks in the eduard set, the first one being a little smaller than the other. The smaller set is applied to the canopy first and the cockpit interior color followed by black is sprayed on. The latter simulating the rubber lining on the canopy. The masks are removed and the larger masks applied so a black lining remains under the masks.
Pretty clever, but extremely fiddly because the rubber lining isn't marked on the canopy parts. The masks had to be eyeballed into position.
I eventually go them on however. Things got funnier though because I couldn't use a normal primer on the canopy because of the required interior color. Acrylics on bare plastic, not a good combination...

Xtracrylics' RLM76 was followed by a black primer (citadell "chaos black" spray). On top of this, I airbrushed a coat of future to make a smoother surface for the metallics.


Before the future coating, I masked up and painted the green portion of the underside fin.


Looking smoother after an application of future.

When I removed the first set of masks, spots of paint lifted off from the edges. For touch-up, I dug up some enamel black paint, hoping it would withstand the second set of masks.
After drying overnight, I masked the green part of the bellyside fin and slapped on the second set of canopy masks. These were a breeze compared to the first one I had to align using the good old eyeball mk.I, these fit precisely.


Now to spraying some metallics.
And towards the new year known to mankind as 2008...
Emeritus
_VISITCOMMUNITY
Uusimaa, Finland
Joined: March 30, 2004
KitMaker: 2,845 posts
AeroScale: 1,564 posts
Posted: Monday, December 31, 2007 - 07:20 AM UTC
Looks like I managed to squeeze in one more update during this year.
Well, on top of the future-glossed black, I sprayed an overall coat of citadell mithril silver.


Getting that paint on was quite a pain in the rear. The paint clogged my AB like no paint before. Raising pressure and thinning down the metallic didn't seem to have much effect. Like the paint flakes went ballistic once they got inside the airbrush.
After many uncontrolled bursts of paint and equally many cursings and two clean-ups, I was done.
Now I'll wait untill next year ( ) and then give the model a careful coat of future to ensure the silver coat won't start lifting off when I start masking the various areas that'll get different shades of metallics.
That's all folks for this year. See you in 2008.
Emeritus
_VISITCOMMUNITY
Uusimaa, Finland
Joined: March 30, 2004
KitMaker: 2,845 posts
AeroScale: 1,564 posts
Posted: Wednesday, January 02, 2008 - 11:39 PM UTC
I got the thing painted now, and I'm not going to spray whole models with those citadell metallics again.
Of couse, the dark boltgun metal I sprayed on the area near the exhaust worked the smoothest causing least trouble, and the chainmail I used on the various panels around the airframe was a real struggle. I mean G-sus, that paint liked to clog up my airbrush. I had to clean up the needle and tip twice during that single painting session.
For future metal-colored subjects, I'll get some more airbrush-friendly paints.

But before I could paint the selected panels and hatches, they had to be masked. I go the mask in place in sittings on two days. I'd really like to know how many pieces of tape I used. (now, I didn't keep track of that! )


After the troublesome spraying session, I got the chainmail paint sprayed on as well as the darker boltgun metal on the rear fuselage near the exhaust and the blast shield around the cannon muzzle.


Next comes an overall gloss coat to prepare the surface for decaling.
Emeritus
_VISITCOMMUNITY
Uusimaa, Finland
Joined: March 30, 2004
KitMaker: 2,845 posts
AeroScale: 1,564 posts
Posted: Sunday, January 06, 2008 - 10:59 PM UTC
Decals are on. Now it's starting to look familiar.

Decals are the usual recent Revell stuff. Great printing, but somewhat stiff and needing microsol and help from a knife or needle to conform to panel lines and other recessed details.
Props to Revell for providing so much stencils for the three Finnish marking options, but I would have appreciated if they included proper pointers for placing them!

This option I chose had minimal stenciling and all of it was identified in the marking guide, but the other two had the same amount of markings pointed out, leaving a great deal of them unidentified. If they had the references to do all the tiny stencils (which are all readable, btw!), why didn't they bother making a corresponding marking guide is beyond me. The drawings clearly show much more stenciling than is pointed out with numbers.

Feels rushed to me.
 _GOTOTOP