_GOTOBOTTOM
World War II
Discuss WWII and the era directly before and after the war from 1935-1949.
Hosted by Rowan Baylis
BF-109 build
wolfpack6
_VISITCOMMUNITY
Alabama, United States
Joined: August 07, 2004
KitMaker: 179 posts
AeroScale: 80 posts
Posted: Saturday, January 19, 2008 - 01:30 PM UTC
Well here we go, my first Blog, hope you Folks enjoy!
For you 109 experts out there I have some intresting reading for you.
Lynn Ritger's book, The Messerschmitt Bf-109 is a must read, I wont go into great detail, but he has done some research.
Im doing a Bf-109 from 2.JG-88 in Spain, October, 1937.
I started with the Hasegawa 1/32nd E model

Heres the kit for those of you that havnt made it yet
Photobucket Photobucket
Next comes the AM, Phoenix cockpit
Photobucket Photobucket" BORDER="0">
Heres the Preshading
Photobucket
Hope this worked, Ill have more tomarrow.
Have a great night all.
TedMamere
_VISITCOMMUNITY
Moselle, France
Joined: May 15, 2005
KitMaker: 5,653 posts
AeroScale: 4,347 posts
Posted: Saturday, January 19, 2008 - 08:42 PM UTC
Hi Todd!

This will be an interesting project to follow for sure...

I have two questions. First, do you plan to rescribe the kit? I know I did when I built the kit some years ago because I just don't like when the panel lines are in relief on my models. How about you?

Second question, did you apply the wash on the bare resin? If yes, is this something you usually do or is this an experiment? Anyway, I'm curious to see how it will look like in the end...

Good luck for your build, the detailled cockpit will certainly look awesome when finished. I can't wait to see more pictures.

Jean-Luc
wolfpack6
_VISITCOMMUNITY
Alabama, United States
Joined: August 07, 2004
KitMaker: 179 posts
AeroScale: 80 posts
Posted: Saturday, January 19, 2008 - 10:39 PM UTC
Good Morning Jean, thanks for writing!
Im not going to rescribe the kit, and yes the preshade is an experiment.
I washed all the AM parts last night and Ill do more on the cockpit today.
Holdfast
Staff MemberPresident
IPMS-UK KITMAKER BRANCH
#056
_VISITCOMMUNITY
England - South West, United Kingdom
Joined: September 30, 2002
KitMaker: 8,581 posts
AeroScale: 4,913 posts
Posted: Sunday, January 20, 2008 - 07:44 AM UTC
Yes I too will follow this with great interest. Are you going to have to back date the model?
Mal
wolfpack6
_VISITCOMMUNITY
Alabama, United States
Joined: August 07, 2004
KitMaker: 179 posts
AeroScale: 80 posts
Posted: Sunday, January 20, 2008 - 10:10 AM UTC
Thanks Guys for the intrest.
Yes Mal, I will use only about a third of the Hasegawa model, I have to make a new nose, Bottom middle section of the wing, canopy, and backdate the cocpit abit.
I just got home from work, as soon as I slow down Ill post some pics for this.
wolfpack6
_VISITCOMMUNITY
Alabama, United States
Joined: August 07, 2004
KitMaker: 179 posts
AeroScale: 80 posts
Posted: Sunday, January 20, 2008 - 11:34 AM UTC
As promised.
Here are the pics of how I will do this.
The resin is really sturdy to, not brittle like the stuff Im used too.

Photobucket

Photobucket

Photobucket

Hope the Wife wont miss her Emery Board
Photobucket
wolfpack6
_VISITCOMMUNITY
Alabama, United States
Joined: August 07, 2004
KitMaker: 179 posts
AeroScale: 80 posts
Posted: Sunday, January 27, 2008 - 11:33 AM UTC
Update time!
After working all weekend I have had some time to do some more work on my build.
So far this is what I have disscovered, the Resin is less brittle than the Tan stuff and it is a Bear to sand. The fit seems to go together than the model itself, (My first Hasegawa kit) I think I like the Matchbox kit better, strange I know.

Here are some pre-assembeld nose parts.
My airgun took a crap on me, so no Cocpit photos till I get a new one.
The parts are just taped together.


Photobucket

Photobucket

Photobucket

Photobucket


Grifter
_VISITCOMMUNITY
North Carolina, United States
Joined: November 17, 2002
KitMaker: 608 posts
AeroScale: 55 posts
Posted: Monday, January 28, 2008 - 01:39 AM UTC
Nice thread Todd. A very interesting conversion.
I'm actually working on that same kit. I thought I was buying a new mold kit like Hasa's other 109 releases...my ignorance....and because of that I have been very disappointed with the fit overall. This is only my second aircraft since getting back into the hobby and I wasn't really looking for such a challenging fit..oh well. At least you don't have to deal with the cowling problems since you're replacing the whole nose!
Anyway, thanks for posting this, I'm exited to see it come together.
wolfpack6
_VISITCOMMUNITY
Alabama, United States
Joined: August 07, 2004
KitMaker: 179 posts
AeroScale: 80 posts
Posted: Monday, January 28, 2008 - 02:52 AM UTC
Morning Greg! thanks for the reply.
I see your an old Tread Head, I crewed Slick 60's and M-1's myself.
This aircraft isnt that bad after you get past the nose, dont let it get you down, it does turn into a beautiful model in the end.
If you need any help let me know and Ill be happy to help.
Todd
wolfpack6
_VISITCOMMUNITY
Alabama, United States
Joined: August 07, 2004
KitMaker: 179 posts
AeroScale: 80 posts
Posted: Wednesday, February 13, 2008 - 01:44 AM UTC
Sorry about the delay folks.
Here are some updated photos of the cockpit, sorry about the quality of the photos.

This is the Pheonix Kit backdated to the A model of the 109, it went together pretty well and the detail is great.
The only problem I had was the spacing of the Trim Wheel, there isnt enough space between the sidewall and Seat for it to fit as per instructions.


Just before I button up
wolfpack6
_VISITCOMMUNITY
Alabama, United States
Joined: August 07, 2004
KitMaker: 179 posts
AeroScale: 80 posts
Posted: Thursday, February 21, 2008 - 10:47 AM UTC
Evening Folks
Sorry for taking so long to post an update, been pretty busy here and at work.
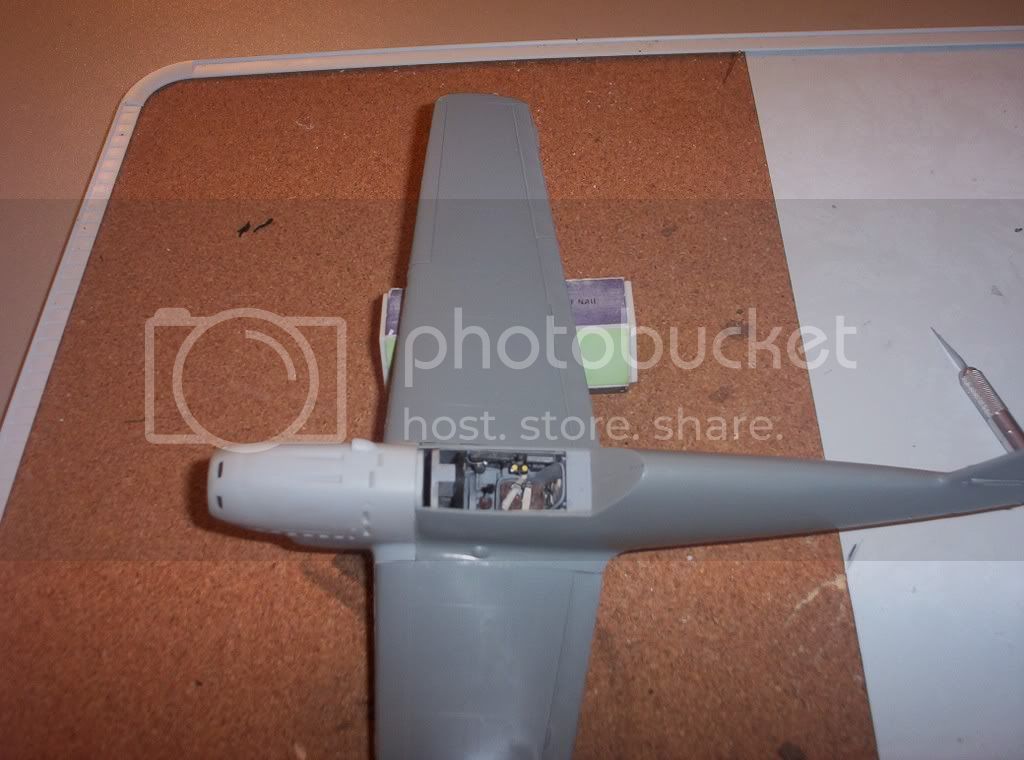
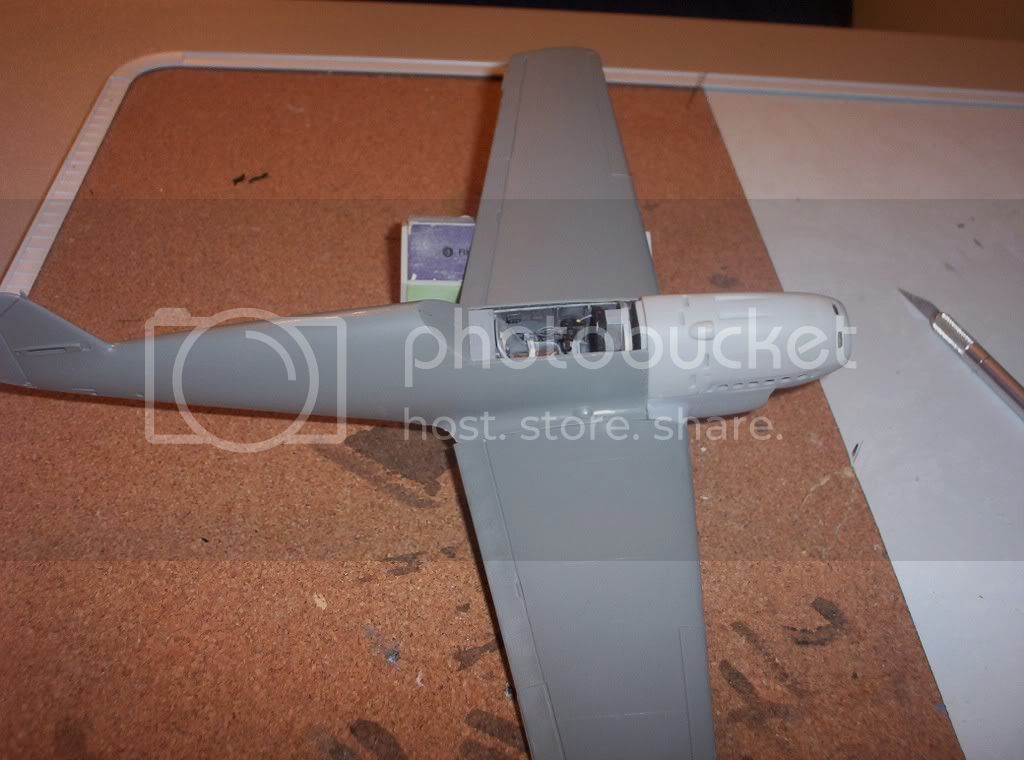
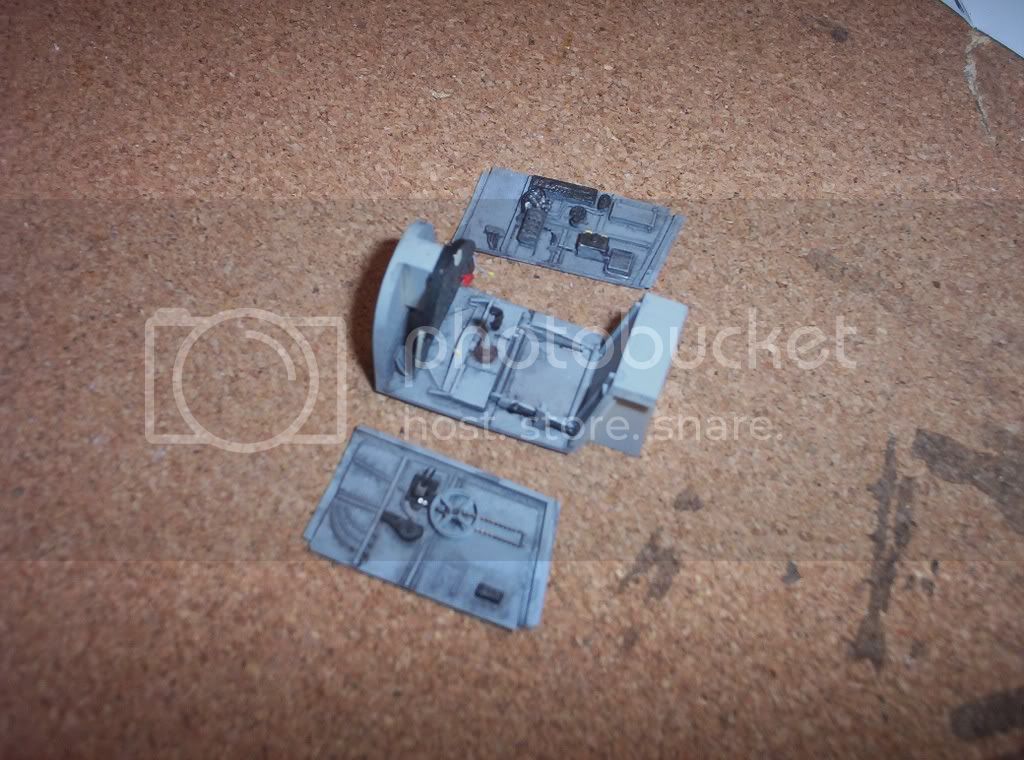
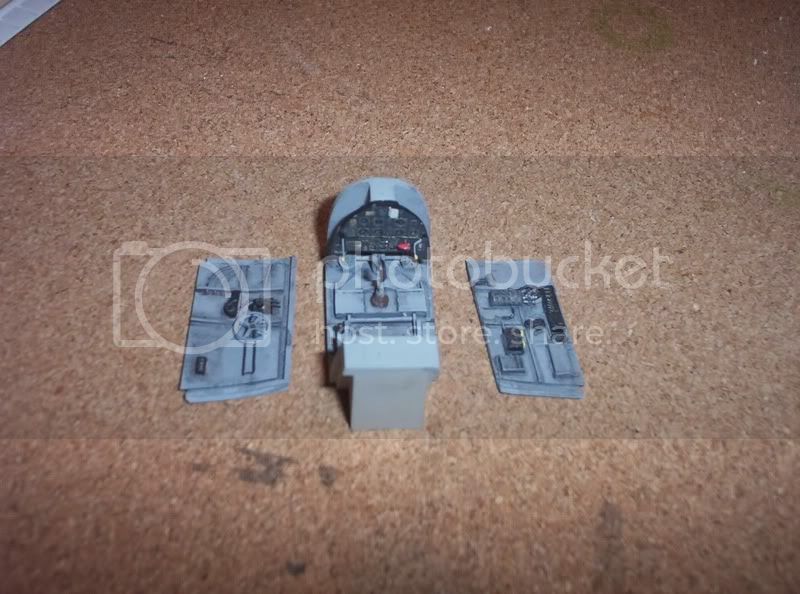
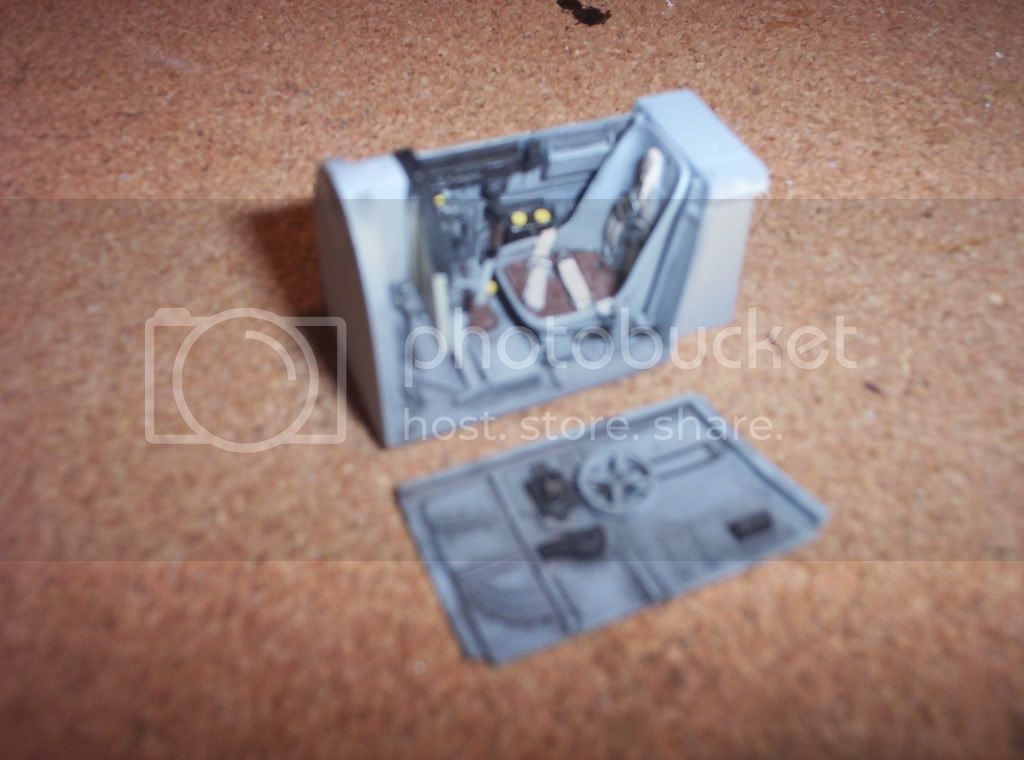
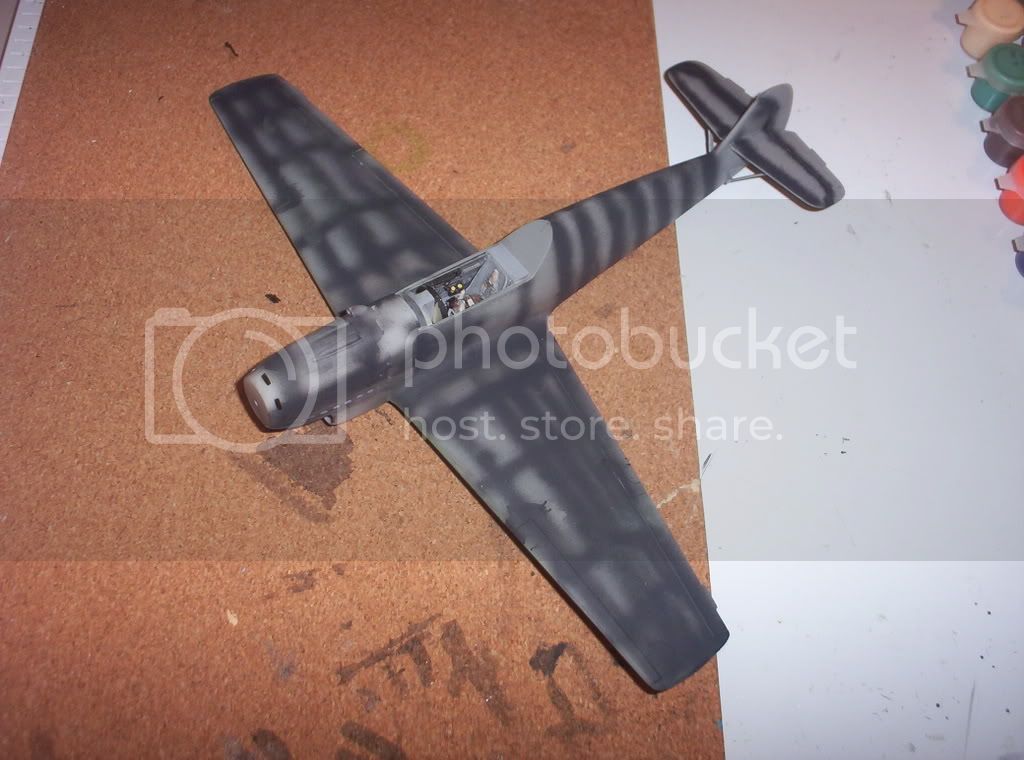
Well this is where Im at on my build, we are starting to take shape.


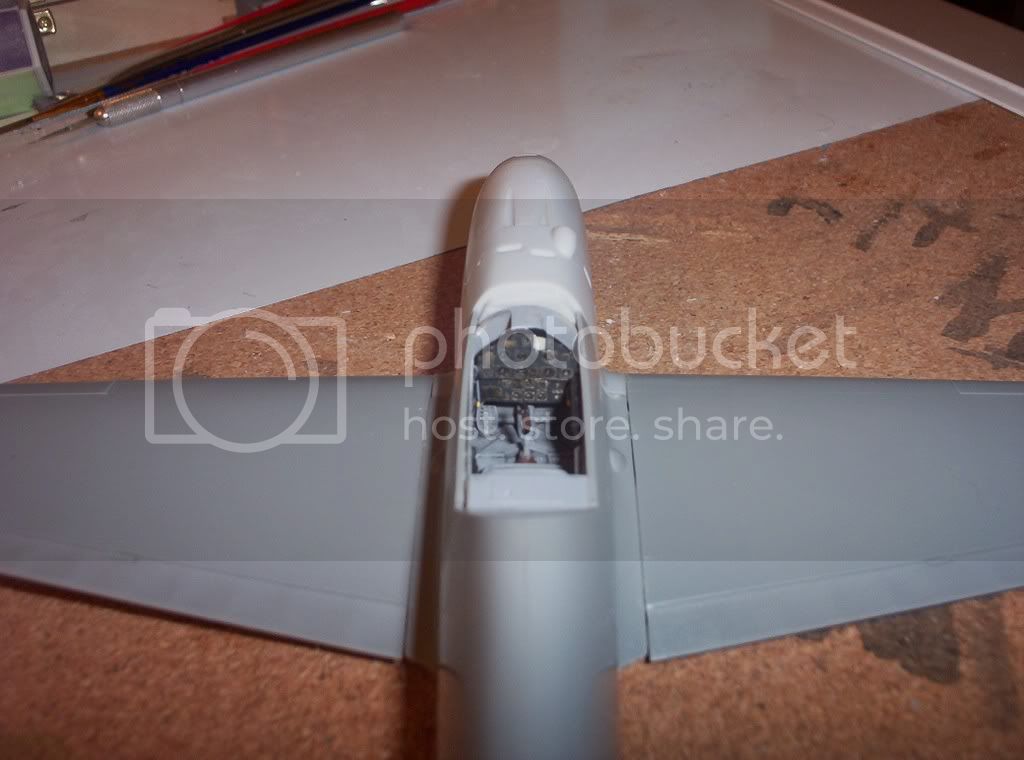
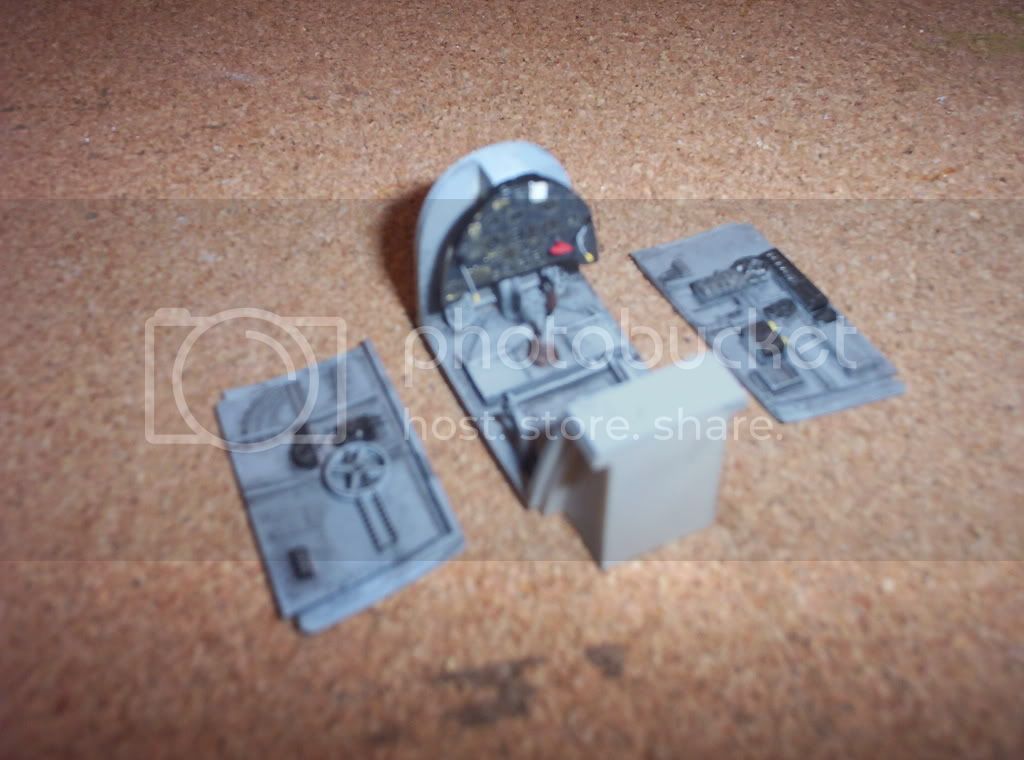
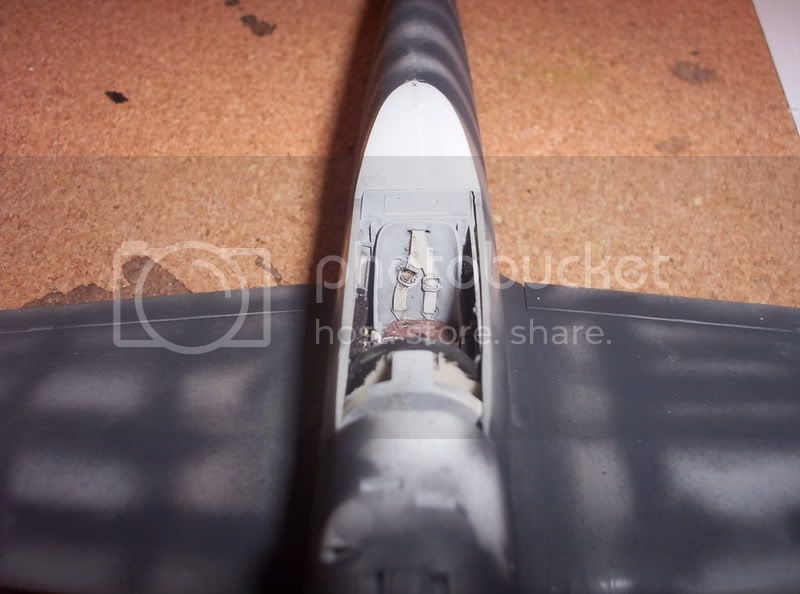
Here are some shots of the Cockpit, it went together pretty well, but I did run into a fit problem at the top of the cockpit tub, it got a little to tight to fit all the way in, so sanding and trial fitting was called for.


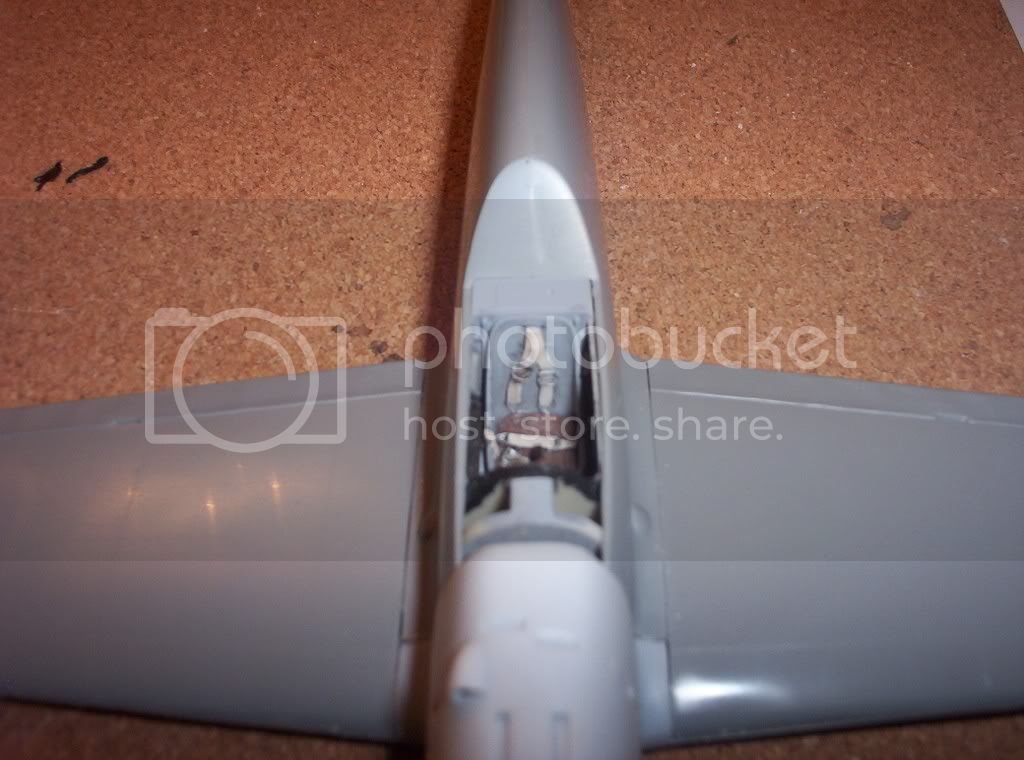
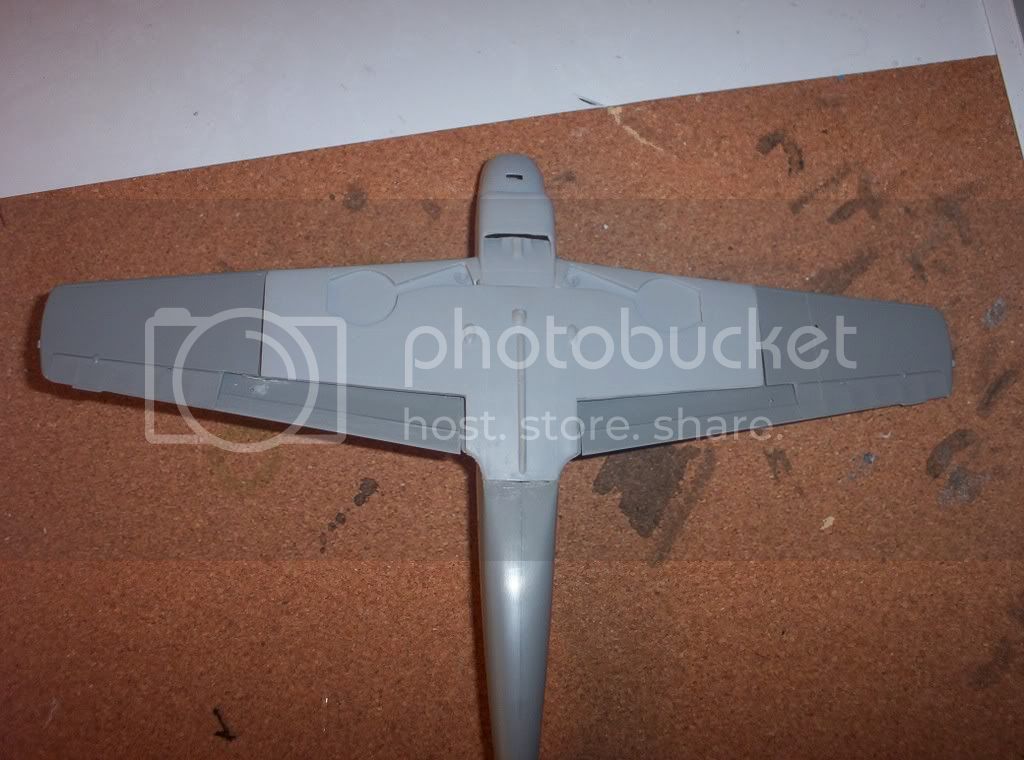
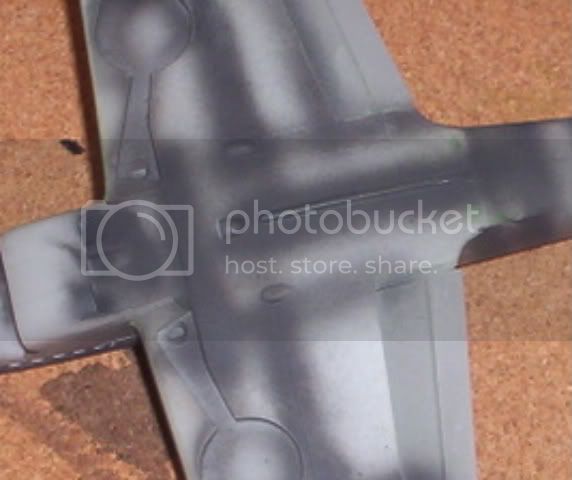
Now here is where it gets intressting, in order to make the A Mod you have to remove the intire center section of the wing, sounds easy but to make a streight cut you have to measure twice and cut once, I sorta botched this but nothing some major Bondo cant fix.
I found the best way to start all of this was to attach the center portion of th wing to the fusalage first then the top wing Assy. to the root and center assy.
Makes a great way to get a good tight wing root seam too.
Now mark and cut the bottom wings to fit.
My MK 19 Eyeballs need to go back to the shop for calibration, you can see this in the photo.


Well this is all for tonight, this has turned into a Humming Bird skills eating an Alligator Kit.
I really dont want to sand anymore

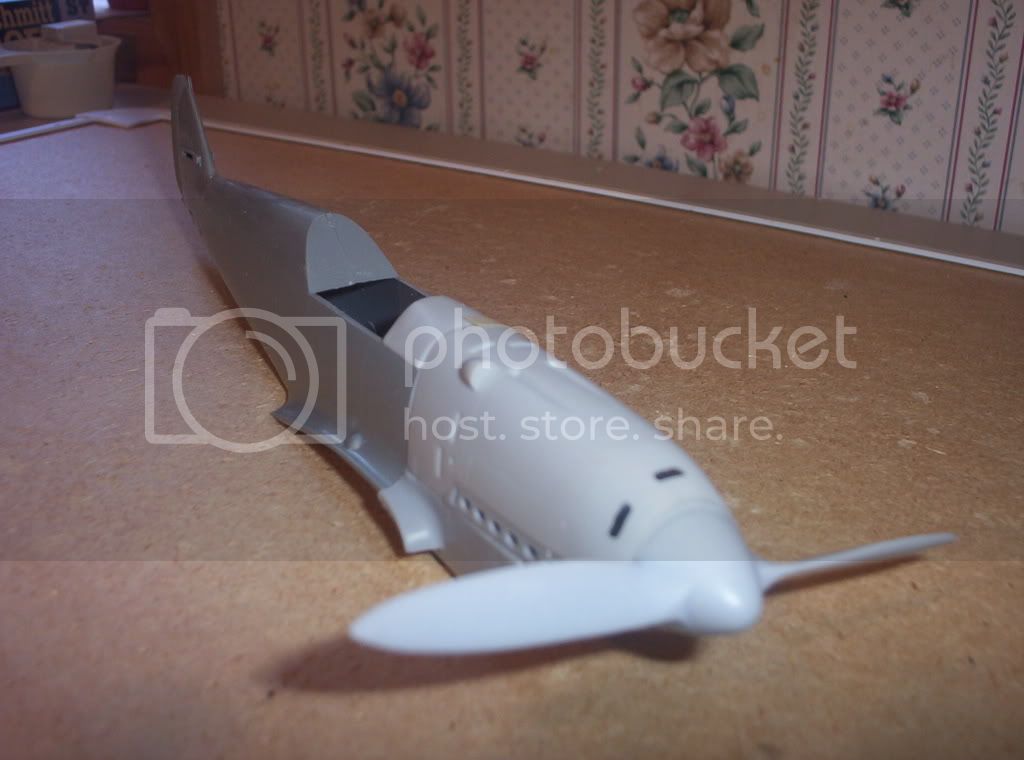
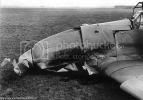
Jean you asked earlier if I intended to rescribe my panel lines, well as luck and research would have it I found out that the taped the seams at the factory much like the 262, I do have photos of this so somthing is going right so far.
wolfpack6
_VISITCOMMUNITY
Alabama, United States
Joined: August 07, 2004
KitMaker: 179 posts
AeroScale: 80 posts
Posted: Thursday, March 27, 2008 - 12:58 PM UTC
Evening Folks, back again and a little work has been done.
Between working out of State and getting the Wife ready to join the Army I have managed to get somwhere.

First off I have the Wings and Tail mounted.
I usualy mount the upper wings first but this time I had to mount the bottom center of the fuselage first to get a good fit with the nose and the trailing edege of the center


Next came the time to try my new airbrush, still a little heavy handed.
I shadded all the panel lines in black and then Ill add my base color tomarrow.


I still need to fit the instrument cover and tape off the cockpit area, hope it wont pull the paint off.


Well this is all for tonight, any comments will be welcome and any info or ideas would really be appreciated.
vanize
_VISITCOMMUNITY
Texas, United States
Joined: January 30, 2006
KitMaker: 1,954 posts
AeroScale: 1,163 posts
Posted: Friday, March 28, 2008 - 08:23 AM UTC
uhm, I hate to mention it at such a late point in the build, but as I understand it, the so called "A" models and the B-1s had longer leading edge slats (supposedly shortened when the wing guns were first installed).

The upshot is, you pretty much cannot find a single picture of the leading edge slats drooping on the very early early machines, so it is possible to scripe the longer slats.

Also, some of the As did not have the cooling slots right behind the spinner, so watch out which markings you put on it - check your references!

here is some info on A models that I wrote up when reviewing the classic airframes 1/48 scale version:


Quoted Text


Originally, the first ten machines ordered by the RLM for trials were to be referred to as 'A' series, but this was changed in the nomenclature to B-0, and this perhaps includes all of the Jumo powered aircraft produced after the Kestrel powered V-1 prototype, including aircraft referred to as V-2, V-3 etc., up until the the B-1 series was officially started. However, other sources state that there were 3 'A' series machines: V-1 (D-IABI), V-2 (D-IILU) and V-3 (D-IOQY). Still other sources state that the B-0 series did not start till after V-7, and that V-4 through V-6 are more correctly seen as prototypes for the B series.

One thing that is clear is that V-1 through V-3 had different cowls than are represented in the kit being reviewed. Also, V-1 - V-3 had unbraced canopies. The canopy provided with the kit is the normal braced type canopy seen on all 109s after V-3. Thus the kit cannot be said to represent the 'A' series at all, but rather the B-0 series and its prototypes.

V-4 clearly has a prop of the type that is supplied in the kit in resin. It also had an engine-mounted MG, so it is necessary to drill a hole in the tip of it to represent this.

Supposedly only V-4 (D-IALY), V-5 (D-IEKS), and V-6 (D-IHHB) were lacking the extra cooling vents in the cowl that is represented by one of the cowls in the kit (markings for both provided in the kit). However, one can find many pictures of 109s in Spanish and German service that lack the three vents at in the top fore portion of the cowl and the ones on the side. So, if only these 3 machines lacked the additional vents, they must have seen a lot of service while dressed in many different markings.

V-7 (D-IJHA) does not appear to have any weaponry, though it does sport the cropped cowl and variable pitch prop seen on B-2 series and later machines. It also has an extra chin scoop nested inside the radiator intake. It is covered with a monotone gloss paint (RLM 63?) and it sports a “4” on a white square, evidently for entry in an air race.

As far as I can tell, the kit allows the modeler to reproduce and machine from V-4 through B-2 machines. References claim that only 3 machines are valid to use the cowl that does not have the additional vents, though I am somewhat dubious of this. Studying the photos I can find, it is difficult to tell if the machines called out in the instructions as being overall silver or aluminum are actually these colors or rather painted gray. Photographic evidence proves the Spanish civil war machines that markings are given for in the kit (6-3 and 6-10) did not have the additional cowl vents. In fact, the lowest numbered aircraft I can find proof of clearly having these vents is 6-15. Clearly 6-4 and 6-7 are without, and perhaps 6-16 as well (note these numbers were recycled on later machines as well once the originally deployed 109s were destroyed or withdrawn - and aircraft were also refitted with parts from the later series as well). All of these aircraft have the style of spinner given in resin in the kit, and seem to not have any hole for an engine mounted MG in the tip of it despite records claiming that all these aircraft should have this gun mounted. There is evidence in some photos that the hole might have been there but was plugged


this link might also be helpful:
http://www.zi.ku.dk/personal/drnash/model/spain/bf109.html
wolfpack6
_VISITCOMMUNITY
Alabama, United States
Joined: August 07, 2004
KitMaker: 179 posts
AeroScale: 80 posts
Posted: Friday, March 28, 2008 - 11:46 AM UTC
Thanks Vance you are absolutely right about the wing slats, found this out later.

But this is what Im working with, I have learnt alot
There are some great sites to visit that may change your mind on some things.
Try http://www.zi.ku.dk/personal/drnash/model/spain/bf109.html
and http://www.bf-109.com/
Thanks again keep the comments comming.
Tomarrow Pre Shadding and some more work.
vanize
_VISITCOMMUNITY
Texas, United States
Joined: January 30, 2006
KitMaker: 1,954 posts
AeroScale: 1,163 posts
Posted: Saturday, March 29, 2008 - 01:56 AM UTC
actually, I know both those sites very well!


anyway, what should i be changing my mind about? What gets called and A and what gets called a B-0 is a matter of semantics really. Nearly every early machine had something different on it than the previous one. small differences in a number of steps add up, and I don't really think there is a clear line between V6 and what comes after till you hit a B-1. The Falcon site is calling all the A/C made before a B-1 an A, which is fine if you want to define it that way. I define things separately.

One thing I am pretty sure of is that either Messerschmidt never made any such distinction, or if they did that information did not survive the war. Being involved in software development, I can appreciate this actually. Early versions of a product are rarely often jsut refered to by the specific build. then some marketing person comes along at some point and says this build is beta1 an makes a limited release of it. It still keeps being amorphous though till Version 1.0 comes out, then suddenly clear distinctions between versions of the software gel in everyones head.

I suspect this is the way of it with the early 109s. I would be surprised if willy messerschmidt himself would be able to clearly tell you what particular aircraft was an A and which was a B-0.

I took a pretty conservative route in naming the A model, mainly because of the contents of the Classic Airframes box.

anyway, early 109s are fascinating, and it is great to see such a nice one being built up in a larger scale!
 _GOTOTOP