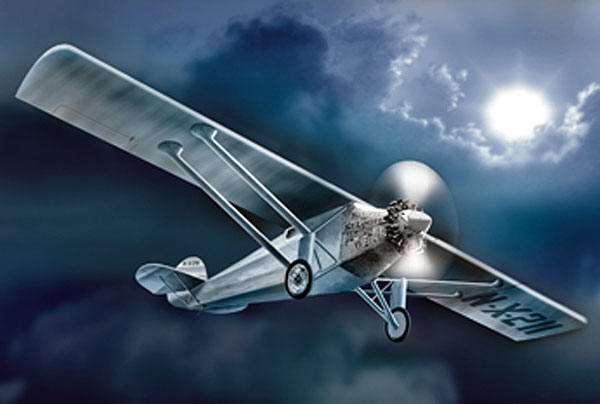
About a year an a half ago our good man Nico (now a proud papa - with all the accolades that go with being a new dad!) displayed his build of a very good looking Spirit of St. Louis. The Ryan NYP. For a refresher on ths subject it can be found here.
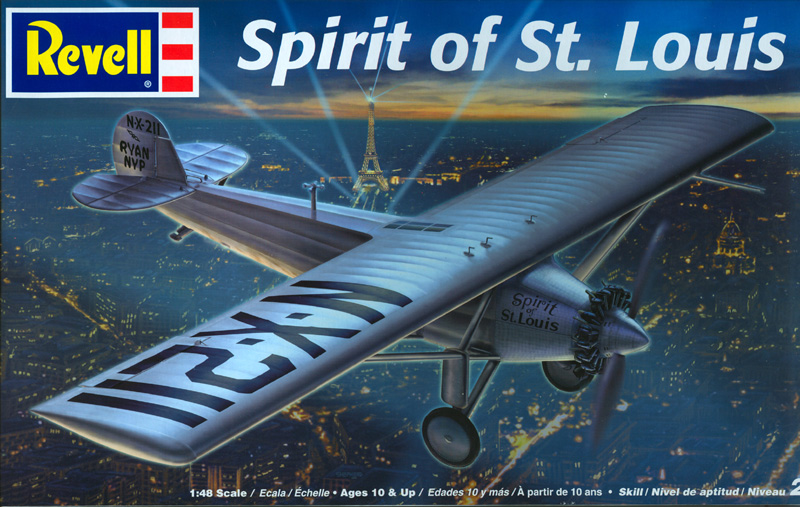
I decided to go with the German Revell issue as is was a whopping 5 dollars cheaper but had as much or more than the American issue kit.
German issue #04524
The Anerican issue RM5244
Both arrived in the hobby shops exactly two years ago. Several modelers have done kit reviews concerning this kit. And when you type "Spirit of St. Louis" into Google , Yaohzah!!! literally a thounsand links come up and all seem to have images and documents having to do with ANYTHING with that title. Most are on topic with the subject here at hand.
In the coming days I hope to knock this little jewel out and if the ingedients go together as hoped I may have a surprise or two to toss in.
Early Aviation
Discuss World War I and the early years of aviation thru 1934.
Hosted by Jim Starkweather
Between Wars Cmpgn Spirit of St. Louis
JackFlash
Colorado, United States
Joined: January 25, 2004
KitMaker: 11,669 posts
AeroScale: 11,011 posts
Joined: January 25, 2004
KitMaker: 11,669 posts
AeroScale: 11,011 posts
Posted: Friday, February 01, 2008 - 05:30 PM UTC
vanize
Texas, United States
Joined: January 30, 2006
KitMaker: 1,954 posts
AeroScale: 1,163 posts
Joined: January 30, 2006
KitMaker: 1,954 posts
AeroScale: 1,163 posts
Posted: Friday, February 01, 2008 - 07:17 PM UTC
I'm looking forward to watching this build - I very nearly bought this same kit for this campaign!
I'm happy to let you show me the ups and downs of it before getting one myself.
JackFlash
Colorado, United States
Joined: January 25, 2004
KitMaker: 11,669 posts
AeroScale: 11,011 posts
Joined: January 25, 2004
KitMaker: 11,669 posts
AeroScale: 11,011 posts
Posted: Saturday, February 02, 2008 - 12:37 PM UTC
In reference to Revell GmbH & Co kit # 04524 manufactured in late 2005 and sold beginning in Feb 2006 we find a typical good to fair quality kit. The history of the The Ryan NYP. The history text is ok but the misspelled a the name of the business man that put up the prize money.
Here is what one fellow wrote;
". . . It was in the fall of 1926, during the lonely hours flying the mail at night, that a young airmail pilot for Robertson Aircraft Corporation, had his first thoughts about flying across the cold Atlantic waters in an attempt to capture the elusive Orteig Prize. His name was Charles A. Lindbergh.
The $25,000 Orteig Prize, which had been offered since 1919 by a prominent New York hotel businessman, Raymond Orteig, for the first non-stop flight from New York to Paris, was not what interested Lindbergh. Instead, he was intrigued by the idea of demonstrating publicly that airplanes could safely link the United States and Europe, and at the same time, giving greater credibility to civilian pilots and commercial aviation. As for the danger of such an incredible flight, Lindbergh believed that neither the weather nor the dangers of a transatlantic crossing could be any worse than what he had already experienced pioneering the air-mail routes from St. Louis. Rain, snow, ice, and fog, could be compensated for with experience and through logical thinking. . ."
". . .Because of the support from the St. Louis backers, Lindbergh was given the freedom to pursue his dream of crossing the Atlantic in a single-engine monoplane with a single pilot, which he knew was safer and more likely of success. Mr. Bixby would later name the plane, the the Spirit of St. Louis. Having been turned down by all the major aircraft manufactures, including his attempt to purchase a Bellanca (the only pre-built plane available for such a flight), Lindbergh traveled by train to San Diego and Ryan Airlines, Inc. at the insistence of his St. Louis backers. He had queried the small company before being turned down by Bellanca.
If Ryan Airlines of San Diego could complete a specially modified aircraft, it would need to be ready in two months. Though a possible task, as far as Lindbergh was concerned his chances for success were waning.
Arriving on February 23, Lindbergh soon realized that the decision whether to place an order with Ryan, and their ability to build such a plane in 60-days, rested in his estimation on one man, Donald Hall, the new Chief Engineer. The two men, scholars of current aviation technology in there own right, and experts in their fields, had much in common. Both had attended flight school in Austin, Texas at Brooks field a year apart. Hall was 28 and Lindbergh 25. Fueled by a common interest, there was a spark between the two men, and on February 25, Lindbergh placed his order for the Spirit of St. Louis. . ."
For more on the story click here.
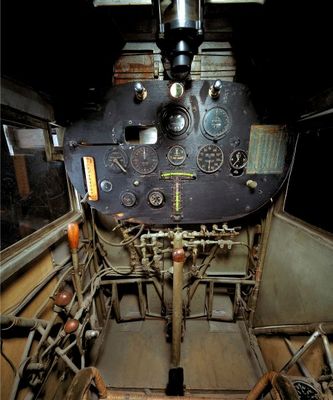
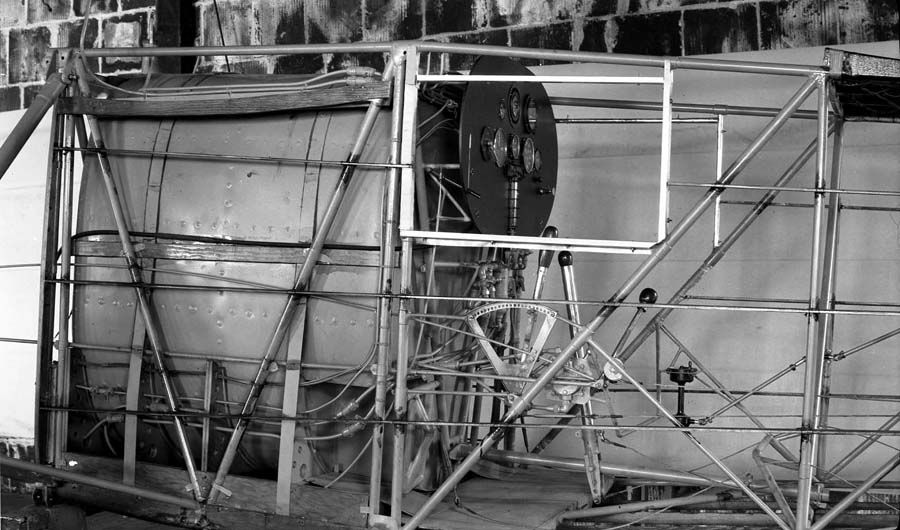
Below is the cockpit of the real deal under const. The nose is at left. Note the fuel cell and black oval instrument panel.
JackFlash
Colorado, United States
Joined: January 25, 2004
KitMaker: 11,669 posts
AeroScale: 11,011 posts
Joined: January 25, 2004
KitMaker: 11,669 posts
AeroScale: 11,011 posts
Posted: Saturday, February 02, 2008 - 01:40 PM UTC
Page 2 -3. The instructions are compiled in an 8 page leaflet. The first two give general instructions in multi language formats. Explainations of symbols, paint codes found in their exploded view plans. Also the rigid format for applying for missing or malformed parts.
Gone are the days when a simple letter from an eight year old boy in Corpus Christi Texas wrote about some missing parts from a "WWI Aces 3 in one box". Then the missing parts showed up in a bag with in two weeks.
Page 4. The parts map is good with corresponding numbers nearby the line drawings.
It was at this point I ran across a kit preview from our own Dave O'Meara (callsign Grumpyoldman) Sprue shots are prominant in the preview.
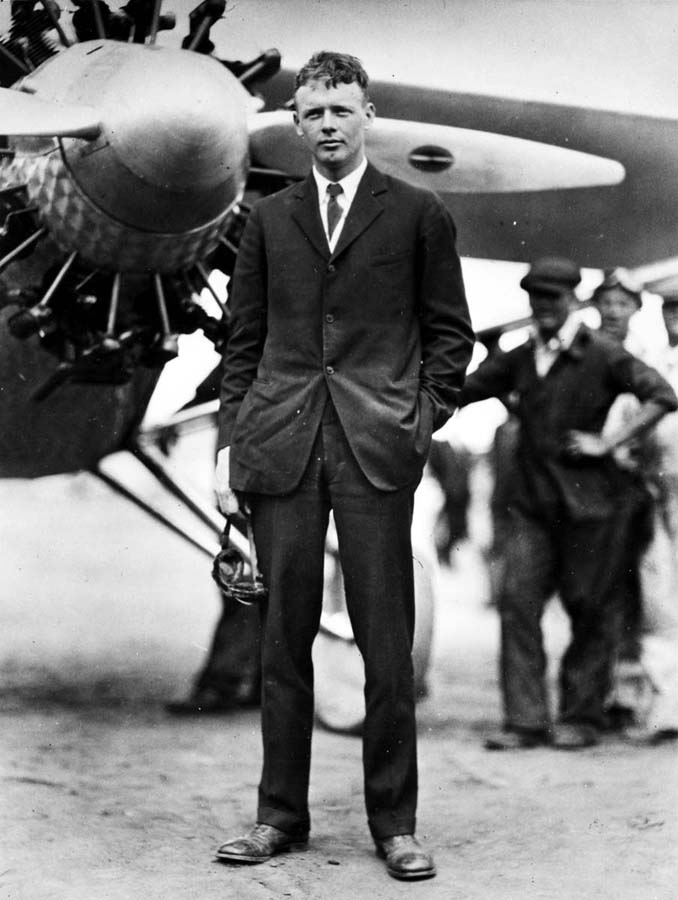
Beginning on Page 5 Steps 1-4 discuss the two figures provided in the kit. Now we must refernce the Laws of Modeleing 101, #16.) The kit instructions, may be very interesting, but are 95 % of the time irrelevant. Especially concerning painting. For his 1928 flights "Lucky Lindy" wore a one piece combination flying suit, In 1927 he wore a shirt and tie with short Jacket (no fur collar) and a pair of riding Jodper type pants (flaired from waist to kee but narrow from the knee down.)
In the kit the top part of the figure represent this but at the waist it becomes a short jacket and they have him wearing blue straight pants.
JackFlash
Colorado, United States
Joined: January 25, 2004
KitMaker: 11,669 posts
AeroScale: 11,011 posts
Joined: January 25, 2004
KitMaker: 11,669 posts
AeroScale: 11,011 posts
Posted: Saturday, February 16, 2008 - 07:10 AM UTC
Page 5
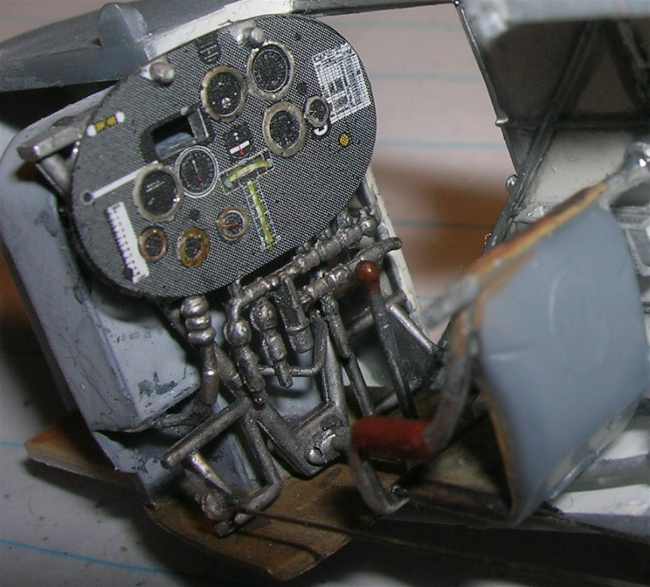
Step 5 concerns the fuel tank facade (#31), The rudder pedal framing (#32), the instrument panel & plumbing facade (#33) and the decal for the instrument face. This decal has all of the gauges (and the periscope opening to match its facade 33). Then finally the control column and its stabilizing yoke at the bottom (#37). I wont add this column until I get ready to mount the whole assembly in the fuselage.
Step 6 Before I add the parts recommended in the kit I had to decide what colour to use to represent the fabric. The largest indicators say that bleached linen was used so after checking some images I decide to proceed with that. Bleached linen was almost white instead of the usual cream , butter colour we see with unbleached linen. The tray (#36) was used by Lindy as a storage for the window insets. I am still trying to figure out what the instrument / gadget is represented by part 45?
JackFlash
Colorado, United States
Joined: January 25, 2004
KitMaker: 11,669 posts
AeroScale: 11,011 posts
Joined: January 25, 2004
KitMaker: 11,669 posts
AeroScale: 11,011 posts
Posted: Sunday, February 17, 2008 - 04:49 AM UTC
Looks like whatever part 45 was its not on the kit's part map and was added to the seat's right arm rest. Curiouser and curiouser.
JackFlash
Colorado, United States
Joined: January 25, 2004
KitMaker: 11,669 posts
AeroScale: 11,011 posts
Joined: January 25, 2004
KitMaker: 11,669 posts
AeroScale: 11,011 posts
Posted: Wednesday, February 20, 2008 - 08:52 PM UTC
Quoted Text
Looks like whatever part 45 was its not on the kit's part map and was added to the seat's right arm rest. Curiouser and curiouser.
Bingo! It looks like the old part 45 was attached to the right arm of the pilot's chair is a small hand crank type starting magneto. Providing the initial spark to begin the start. Instruments and etc. Revell did a poor job of representation. You can see it in the skeletal image at the beginning of the thread. Its midimage and looks like a small black dumbell on its end. Will try to shoot images before closing up the fuselage.
JackFlash
Colorado, United States
Joined: January 25, 2004
KitMaker: 11,669 posts
AeroScale: 11,011 posts
Joined: January 25, 2004
KitMaker: 11,669 posts
AeroScale: 11,011 posts
Posted: Thursday, February 21, 2008 - 11:36 AM UTC
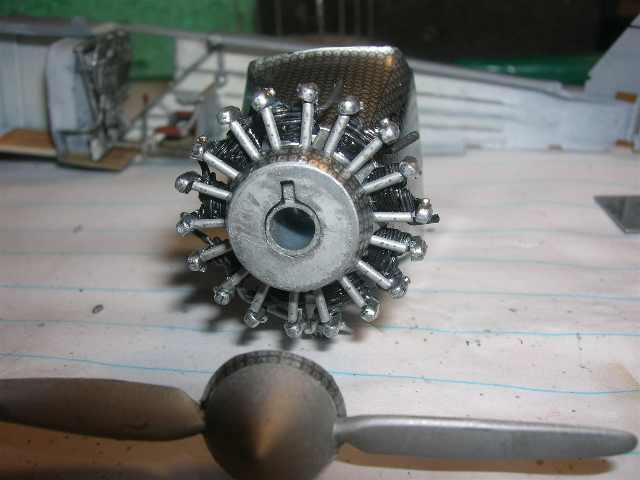
Now we come to the engine area. Here is a shot of the roll out note the blunt spinner.
". . .On April 28, 1927, Lindbergh wired Harry Knight in St. Louis to inform him that the plane was ready for its first flight. That first day, as captured by the photographs and memories of Donald Hall, was extraordinary. With all their hard work and diligence, Ryan Airlines had met their 60-day goal and as the Spirit of St. Louis lifted off a cheer erupted from the assembled factory crew. Their dreams and hopes were embodied in that silver plane and young aviator Charles Lindbergh. . . "
JackFlash
Colorado, United States
Joined: January 25, 2004
KitMaker: 11,669 posts
AeroScale: 11,011 posts
Joined: January 25, 2004
KitMaker: 11,669 posts
AeroScale: 11,011 posts
Posted: Thursday, February 21, 2008 - 11:41 AM UTC
Note, the spinner after its first flight cracked and had to be replaced. It wound up being more pointed and was not engine-turned (damascene) as was the rest of the metal cowling.
http://www.charleslindbergh.com/hall/spirit.asp
JackFlash
Colorado, United States
Joined: January 25, 2004
KitMaker: 11,669 posts
AeroScale: 11,011 posts
Joined: January 25, 2004
KitMaker: 11,669 posts
AeroScale: 11,011 posts
Posted: Thursday, February 21, 2008 - 12:01 PM UTC
Here she is in profile with the original spinner.
http://historicaircraftpictures.com/index-b.html
Before leaving San Diego the Ryan NYP was fitted with strengthened wheels. Since these had inner tubes the fabric covers were sewn into the sidewalls of the tires. These covers, and the sidewalls of the tires, were painted in a silver aluminum. “Silvertown Airplane Cord” was applied in black on the outside faces of the tires on the silver painted surface between the stitching and the black tire tread.
The decal sheet does not include these tire legends so you’ll have to make some custom decals or do a job of fine hand lettering. I think the wheels as modeled by Revell , are too neat. The photo above shows the fabric covers to be loose fitting and very wrinkled with uneven stitching.
The old Lindberg /Glencoe kit wheels capture this look quite well but need to have ejector pin marks on their backsides erased. Also the Lindberg / Glencoe kit has the original rounded blunt spinner.
JackFlash
Colorado, United States
Joined: January 25, 2004
KitMaker: 11,669 posts
AeroScale: 11,011 posts
Joined: January 25, 2004
KitMaker: 11,669 posts
AeroScale: 11,011 posts
Posted: Thursday, February 21, 2008 - 12:08 PM UTC
Here again with the original spinner.
http://www.achievement.org/autodoc/photocredit/achievers/she0-025
JackFlash
Colorado, United States
Joined: January 25, 2004
KitMaker: 11,669 posts
AeroScale: 11,011 posts
Joined: January 25, 2004
KitMaker: 11,669 posts
AeroScale: 11,011 posts
Posted: Saturday, March 08, 2008 - 05:23 PM UTC
Greetings all;
Good progress on my Ryan NYP. Then a bit of a set back. The dogs ate my fuselage. Yeah I know it sounds bizzarre. But the little pigs with fur eat hearing aids and other sundry items too. So I cracked open the second kit I had bought ( they were a great price of 12.95 each) and am roughly where I had been before the laso & the silky decided on polystyrene for a midnight snack. I swear its true they ate or rather gnawed heavily on it. No really it did happen.. .really. No really!
JackFlash
Colorado, United States
Joined: January 25, 2004
KitMaker: 11,669 posts
AeroScale: 11,011 posts
Joined: January 25, 2004
KitMaker: 11,669 posts
AeroScale: 11,011 posts
Posted: Wednesday, March 12, 2008 - 07:50 PM UTC
Greetings all;
Here is a bit of fun from the lilole campaign leader, me. My first ever digital image that I took. (I am old fashioned and uptil today only ever used celluloid and a NikonF with a Macro lens). My first images of the build. This is the second fuselage. I added bezels and rudder cables so far.
I don't care much for the kit push rods but I'll go with them for this build.
JackFlash
Colorado, United States
Joined: January 25, 2004
KitMaker: 11,669 posts
AeroScale: 11,011 posts
Joined: January 25, 2004
KitMaker: 11,669 posts
AeroScale: 11,011 posts
Posted: Wednesday, March 12, 2008 - 07:54 PM UTC
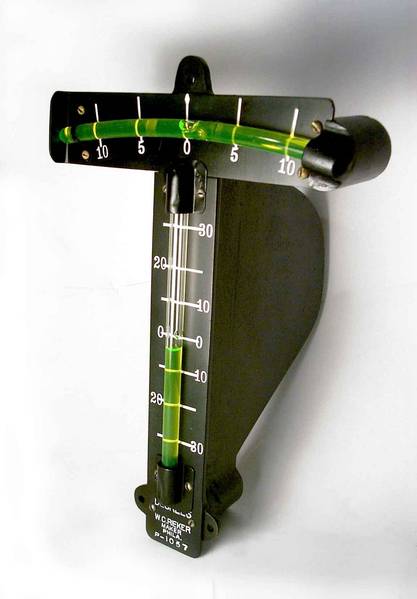
Here are some of the original equipment from the Spirit's cockpit.
The fluid for the balance bubbles was radiator coolant.
JackFlash
Colorado, United States
Joined: January 25, 2004
KitMaker: 11,669 posts
AeroScale: 11,011 posts
Joined: January 25, 2004
KitMaker: 11,669 posts
AeroScale: 11,011 posts
Posted: Thursday, March 13, 2008 - 08:55 PM UTC
Greetings all;
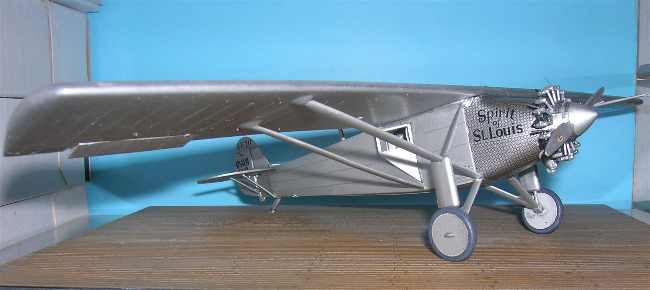
Here a bit of fun. Though still not quite completed. Several bits ands pieces to be added.
Rittersbach
Texas, United States
Joined: August 16, 2007
KitMaker: 83 posts
AeroScale: 80 posts
Joined: August 16, 2007
KitMaker: 83 posts
AeroScale: 80 posts
Posted: Saturday, March 15, 2008 - 02:34 AM UTC
Stephen,
She looks great! I have always loved the design and over all looks of this aeroplane. Plus the great history that accompanied it. It was such a large part of aviation history. I think I have this kit in my stash, and one day will get 'round to building her. I meant to give you a bit of ribbing for the "dog ate it" excuse, because we all used that in school when we were youngsters, but looks like in this case it was more of a reality than an excuse. Also, welcome to the digital world, bout time! I still enjoy my old Vivitar film SLR, but am about to buy a new Canon 40D DSLR. Expensive yes, but oh the wonderful things one can do with it. Now, I'm rambling....Long Live Lindbergh!
JackFlash
Colorado, United States
Joined: January 25, 2004
KitMaker: 11,669 posts
AeroScale: 11,011 posts
Joined: January 25, 2004
KitMaker: 11,669 posts
AeroScale: 11,011 posts
Posted: Saturday, March 15, 2008 - 04:16 AM UTC
Thank you for your kind remarks. After adding the scratchbuilt periscope and the other minor bits it is my intention to put her in a diorama or vignette. Imagine if you will a dark hangar at Le Bourget field with only a few lights burning in its interior. It is late and the new gal from the USA is sitting in one quiet corner. A small tear in the fabric is apparant, the result of an over enthusiastic crowd on her arrival. The pilot sits quietly on one wheel staring out at a star filled night sky through a nearby window. I would call it "Starry starry night. . ."
It has been noted that Charles Lindbergh was a large fan of the works of Vincent Van Gogh.
The Instrument panel is a very sweet part of the build. Under the skin ribs are lacking on the spine and belly of the fuselage. The standing figue provided in the kit looks more like Gort from "The day the Earth Stood Still" but then again injected mold figures have never been Revell's strong suit.
CaptainA
Indiana, United States
Joined: May 14, 2007
KitMaker: 3,117 posts
AeroScale: 2,270 posts
Joined: May 14, 2007
KitMaker: 3,117 posts
AeroScale: 2,270 posts
Posted: Tuesday, March 18, 2008 - 09:29 AM UTC
As usual, it looks great.
JackFlash
Colorado, United States
Joined: January 25, 2004
KitMaker: 11,669 posts
AeroScale: 11,011 posts
Joined: January 25, 2004
KitMaker: 11,669 posts
AeroScale: 11,011 posts
Posted: Tuesday, March 18, 2008 - 04:46 PM UTC
Thanks Jeff & Carl. Your input is always welcome.
Here is the other side.
JackFlash
Colorado, United States
Joined: January 25, 2004
KitMaker: 11,669 posts
AeroScale: 11,011 posts
Joined: January 25, 2004
KitMaker: 11,669 posts
AeroScale: 11,011 posts
Posted: Tuesday, March 18, 2008 - 07:30 PM UTC
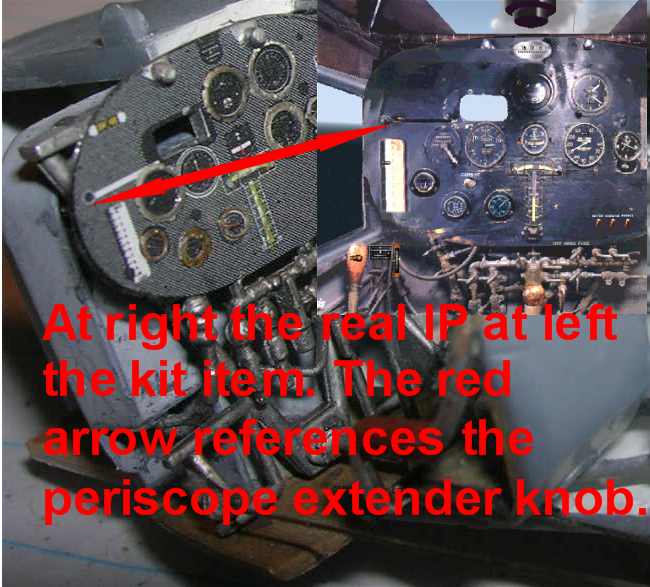
Because the fuel cell was infront of the cockpit Mr. Hall decided to add a periscope that could be retracted behind the instrument Panel (IP.)
JackFlash
Colorado, United States
Joined: January 25, 2004
KitMaker: 11,669 posts
AeroScale: 11,011 posts
Joined: January 25, 2004
KitMaker: 11,669 posts
AeroScale: 11,011 posts
Posted: Wednesday, March 19, 2008 - 09:48 PM UTC
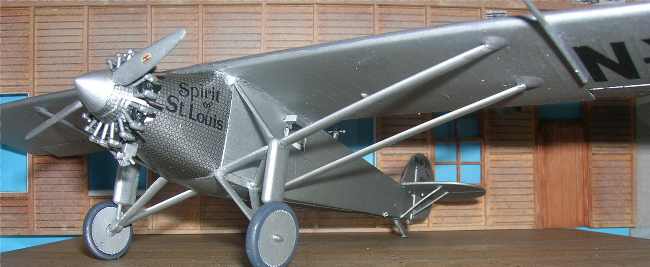
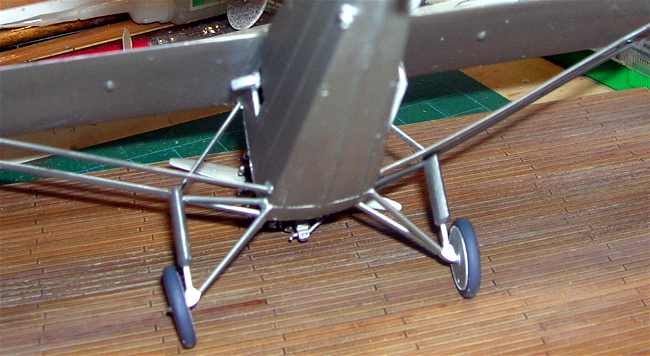
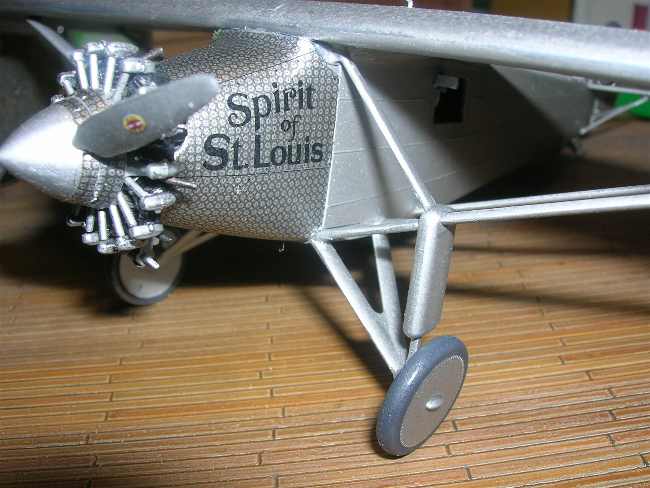
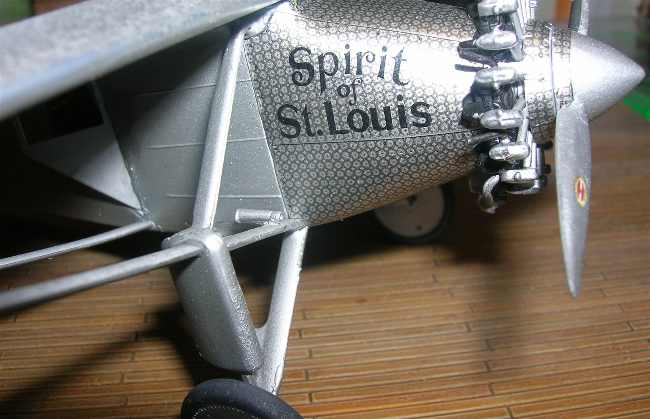
Here are a couple more images. Note the extended periscope and the extra ribbing added to the belly of the fuselage.
The next two show the machined cowling decals to good effect. I just with the artist had overlapped the swirls instead of putting them side by side.
JackFlash
Colorado, United States
Joined: January 25, 2004
KitMaker: 11,669 posts
AeroScale: 11,011 posts
Joined: January 25, 2004
KitMaker: 11,669 posts
AeroScale: 11,011 posts
Posted: Friday, March 20, 2009 - 02:38 PM UTC
Well its been a year since this build and I am putting it in a small in hangar diorama. Thanks to Aeroscale member Louis and Jean-Luc. The idea is to have this in a display box -but- with a bit of a difference. Images to follow. It seems Aeroscale member John Reid has had a bit of an influence on my modeling!