_GOTOBOTTOM
World War II: USA
Aircraft of the United States in WWII.
Hosted by Rowan Baylis
Finished Hasegawa 1/48th P-40N
thehannaman
_VISITCOMMUNITY
New York, United States
Joined: April 04, 2006
KitMaker: 279 posts
AeroScale: 194 posts
Posted: Saturday, February 09, 2008 - 02:47 AM UTC
Hello everyone.
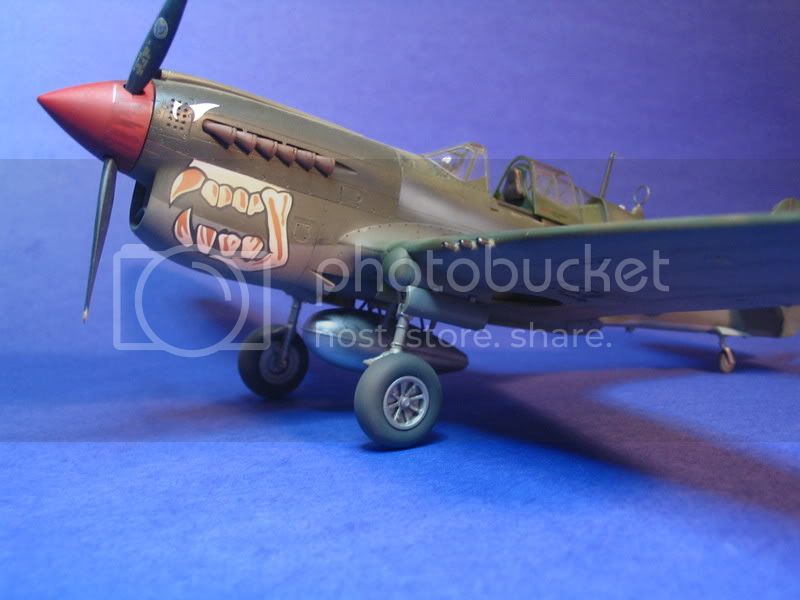
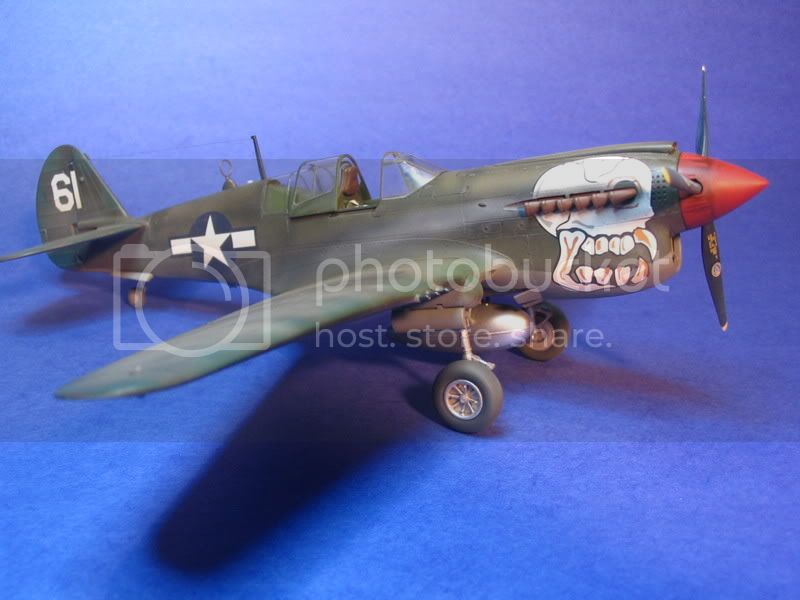
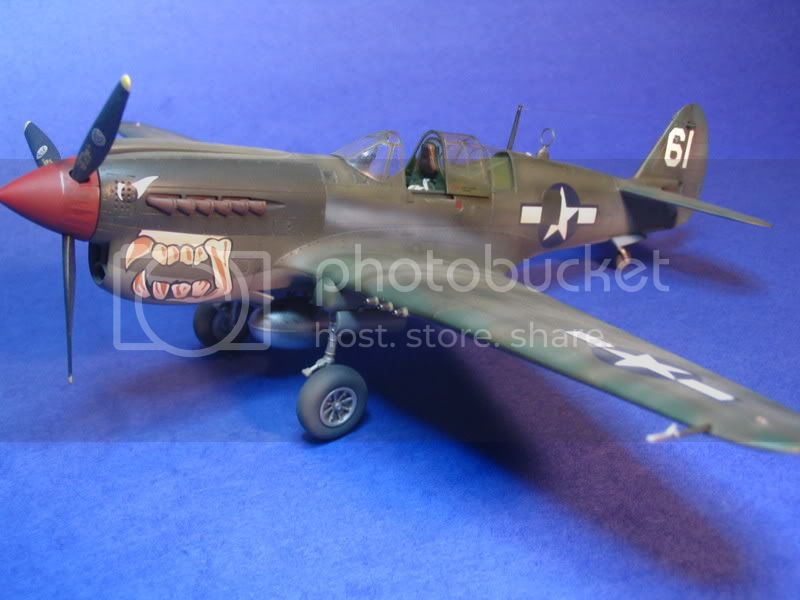
Now here's a face only a mother could love.

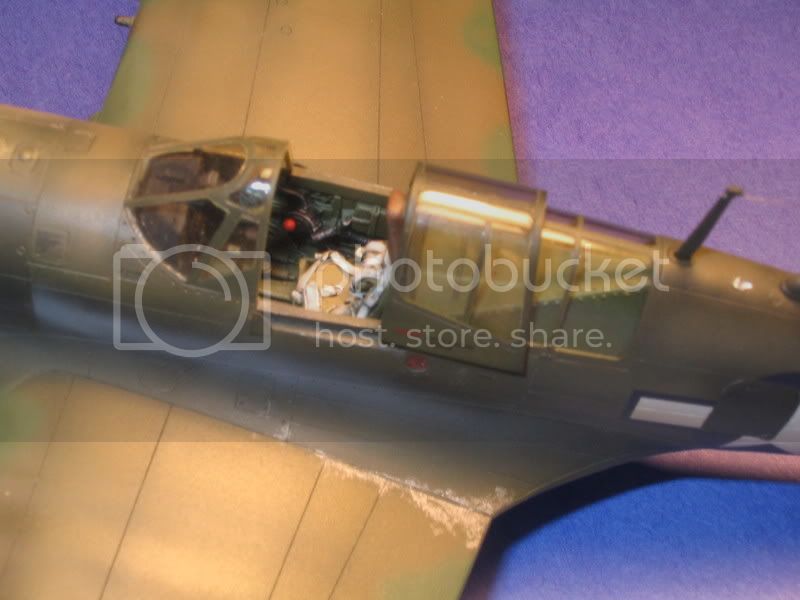
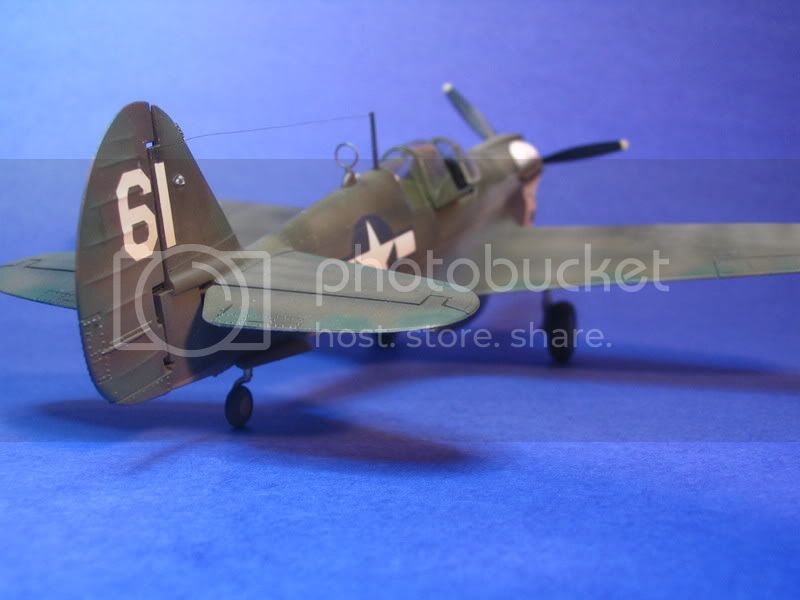
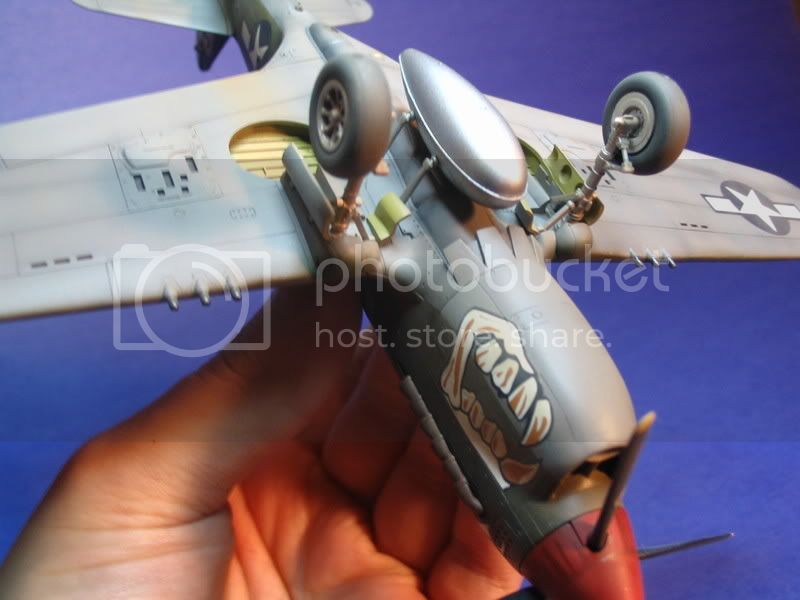
This is the Hasesgawa P-40N in 1/48th. It's done up as a ship of the 89th FS 80th FG in India 1944. I used the Black Box cockpit set (sweet) and Eagle Strike decals (equally sweet.)

I do have to say that, although the detail is really good, I HATE the engineering of this kit. Too many inserts and too many "plug this open that." Not that I mind the work. I just mind doing this much work on a $40 kit.

But, I digress. One of the alterations that I'm proud of is the correction of the canopy and armor "trianges" at the base of the windscreen. Thanks to Steve aka Blackwolf3945, for pointing this out. I cut the kit armor off, made right angles where they were and replaced them with .005" brass. I then added styrene to the "notches" in the canopy and shaped it to make the correct right angled shape.

Without further ado..... As always, comments and critques appreciated.


goldstandard
_VISITCOMMUNITY
California, United States
Joined: March 29, 2007
KitMaker: 208 posts
AeroScale: 186 posts
Posted: Saturday, February 09, 2008 - 05:19 AM UTC
Nice work. I have the K version of this kit, though I am not sure I want to build this with after market stuff. Maybe some PE seatbelts, thats it.
_H_Dori
_VISITCOMMUNITY
England - East Anglia, United Kingdom
Joined: November 09, 2006
KitMaker: 295 posts
AeroScale: 276 posts
Posted: Sunday, February 10, 2008 - 04:59 PM UTC
I personally think that has come out great. The weathering looks spot on to me and I love the nose art. I'd be very pleased if that was my work.

H
TedMamere
_VISITCOMMUNITY
Moselle, France
Joined: May 15, 2005
KitMaker: 5,653 posts
AeroScale: 4,347 posts
Posted: Sunday, February 10, 2008 - 06:21 PM UTC

Quoted Text

I personally think that has come out great. The weathering looks spot on to me and I love the nose art. I'd be very pleased if that was my work.


Hi Justen!

Same here. It only seems that the gear legs are mounted backwards (the scissors should point at the rear) and I would also add some black into the cartridge ejection chute openings under the wings to make them look hollow... other than that it's a superb looking model!

Jean-Luc
propwash
_VISITCOMMUNITY
Charente, France
Joined: July 06, 2007
KitMaker: 289 posts
AeroScale: 231 posts
Posted: Sunday, February 10, 2008 - 06:41 PM UTC
That's a great-looking P-40. The weathering is great and those tyres really look like rubber, not plastic........
vanize
_VISITCOMMUNITY
Texas, United States
Joined: January 30, 2006
KitMaker: 1,954 posts
AeroScale: 1,163 posts
Posted: Sunday, February 10, 2008 - 06:45 PM UTC
Nicely done! Those skull markings have always been a favorite of mine.

I know the kit isn't as easy as it could be, but it does build up nice.

I just finished a Hasegawa P-40K in the last few days as well, so i know where you are coming from:

thehannaman
_VISITCOMMUNITY
New York, United States
Joined: April 04, 2006
KitMaker: 279 posts
AeroScale: 194 posts
Posted: Monday, February 11, 2008 - 04:22 AM UTC

Quoted Text


It only seems that the gear legs are mounted backwards (the scissors should point at the rear)

Jean-Luc


Oh, man, I NEVER noticed that!!!!! That's just a bit embarrassing......


I'm going to get fixing that this evening.......I can't believe I did that.
thehannaman
_VISITCOMMUNITY
New York, United States
Joined: April 04, 2006
KitMaker: 279 posts
AeroScale: 194 posts
Posted: Monday, February 11, 2008 - 04:24 AM UTC

Quoted Text

Nicely done! Those skull markings have always been a favorite of mine.

I know the kit isn't as easy as it could be, but it does build up nice.

I just finished a Hasegawa P-40K in the last few days as well, so i know where you are coming from:


Nice work Vance. I like the look of the "big tail" '40. Are those the kit markings? ALso, which way do your landing gear scissors point?....
vanize
_VISITCOMMUNITY
Texas, United States
Joined: January 30, 2006
KitMaker: 1,954 posts
AeroScale: 1,163 posts
Posted: Monday, February 11, 2008 - 04:53 AM UTC

Quoted Text

Nice work Vance. I like the look of the "big tail" '40. Are those the kit markings? ALso, which way do your landing gear scissors point?....


Thanks.

the markings were from Sky Models - A big sheet of P-40 teeth (which also happens to have some variations on the skull theme). No national insignia to speak of though - those all came from the spares box.

I managed to get my gear on right, though I do have to admit I very nearly did what you did and caught it within seconds of gluing. I did manage to lose one of the struts for a week though (found it on the hall floor after I apparently kicked it while walking and heard something small go "tink, tink, tink" down across the tile).

I was a little less disgruntled with my kit than you were, mainly because I got it on sale for something like $20

I like your wing root wear much better than mine. What technique did you use?

thehannaman
_VISITCOMMUNITY
New York, United States
Joined: April 04, 2006
KitMaker: 279 posts
AeroScale: 194 posts
Posted: Monday, February 11, 2008 - 07:47 AM UTC
Finding that strut piece must have made your day! You probably thought it was long gone.

For the wing root wear, I used a Prismacolor colored pencil that I got from an art store. They are very soft and won't mar the paint. I have a dull point that I repeatedly tap and twist in the area I want to work over. The longer you spent on one area, the more wear and the bigger the wear patches. It's a little tedious but I think it's the best technique for getting nice random chipping and wear.
thehannaman
_VISITCOMMUNITY
New York, United States
Joined: April 04, 2006
KitMaker: 279 posts
AeroScale: 194 posts
Posted: Monday, February 11, 2008 - 07:49 AM UTC

Quoted Text

That's a great-looking P-40. The weathering is great and those tyres really look like rubber, not plastic........


Thanks. I used Polly-Scale "Grimy Black" and dusted them with Tamiya XF-52 Flat Earth.
vanize
_VISITCOMMUNITY
Texas, United States
Joined: January 30, 2006
KitMaker: 1,954 posts
AeroScale: 1,163 posts
Posted: Monday, February 11, 2008 - 11:32 PM UTC

Quoted Text

Finding that strut piece must have made your day! You probably thought it was long gone.

For the wing root wear, I used a Prismacolor colored pencil that I got from an art store. They are very soft and won't mar the paint. I have a dull point that I repeatedly tap and twist in the area I want to work over. The longer you spent on one area, the more wear and the bigger the wear patches. It's a little tedious but I think it's the best technique for getting nice random chipping and wear.


Yeah, I was pretty stoked about finding that strut. I was starting to seriously think about replacement strategies.

I'm going to go out and get a silver prismacolor pencil ASAP. I had heard about this before I guess, but was a little dubious. Your photos clearly show it works well though. thanks for the tip!
 _GOTOTOP