_GOTOBOTTOM
Pre-Flight Check
Constructive critique of your finished or in-progress photos.
Spitfire paint job advice needed
brandydoguk
_VISITCOMMUNITY
England - North, United Kingdom
Joined: October 04, 2002
KitMaker: 1,495 posts
AeroScale: 643 posts
Posted: Monday, February 11, 2008 - 09:03 PM UTC
Hi guys,

I've just done the main camo on an airfix 1/48 spitfire F24. It is the first time I've tried to combine pre and post shading and I really would like some advice on whether it needs fixing and if so how to tone it down? This aircraft served in the far east so I am aiming for a somewhat faded look. However it is post WW2 so I'm not sure if it is overdone.
Any help would be appreciated.

vanize
_VISITCOMMUNITY
Texas, United States
Joined: January 30, 2006
KitMaker: 1,954 posts
AeroScale: 1,163 posts
Posted: Monday, February 11, 2008 - 10:01 PM UTC
it is kind of hard to critique your work with a picture that size, and mind you I am being extra critical because you asked us to be (because it actually looks pretty good to me). With those qualifies in mind...

{opinion}
First off, I tend to think pre-shading and panel accents are overdone in many cases. It is a nice artistic effect to exaggerate, but it is not particularly realist when more than lightly suggested in most cases (granted there are exceptions). But then this just goes the way of the panel line argument - I agree panel lines are exaggerated on models, but I still like to accent them some regardless, so I can appreciate the pre- and post-shading point of view as well, even if i don't fully subscribe to it.
{/opinion}

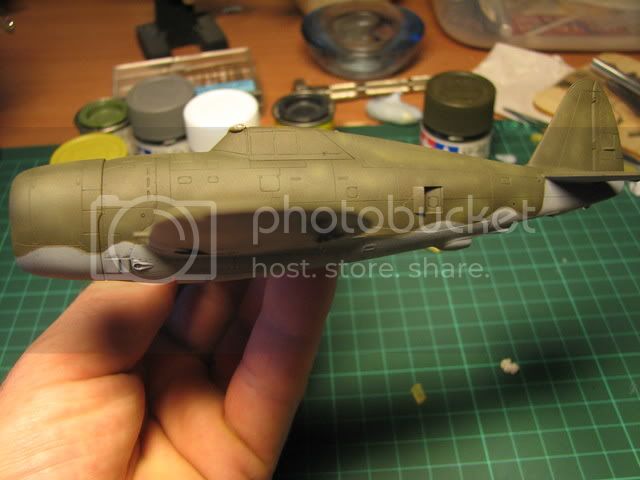
I'd say you probably have a basis to work from. Maybe the gray faded areas look a little too bright (but that might not be the case in real life - digital camera and monitors are famous for skewing color balance). And you faded panels sort of look blotchy - more like the fading has come from wear and scuffing rather than weather exposure.

I bet hitting it with a very dilute spray of some color like "buff" or a light khaki would go a long way to adding to the faded feel while simultaneously bringing your greens and grays together to make them look like they belong on the same object as well as giving a more overall weather/sun faded look.

I suggest spraying the fading color greatly thinned (at least 2:1 thinner to paint, maybe more) and with fairly high pressure from about a foot away from your model. only hit the upper surfaces up the wings, tail, and fuselage (don't include the prop).

Be very cautious about how much you spray - a little goes a long way. do a light mist, let it dry, look at it for a while (and in a mirror - you'd be surprised how much that changes your perspective on your work), and decided if you want a little more or not. You are only trying to calm things down a little and reduce the tonal contrast between colors, not make a visible tint of the buff color.

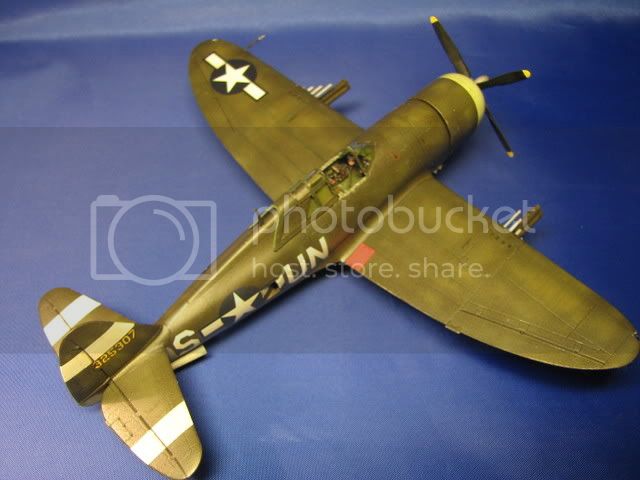
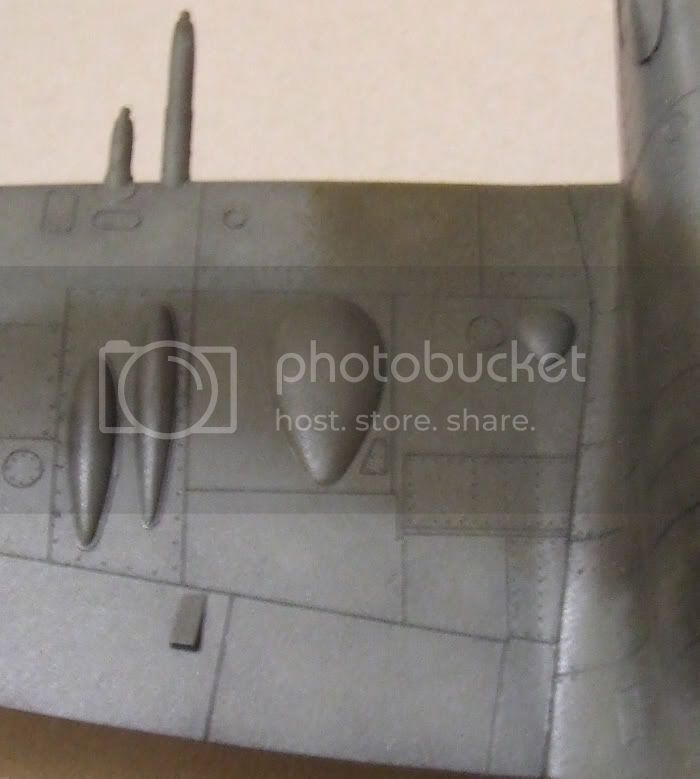
If you look closely in the following photo, you can see the effect on one of my models:

Fading spray probably better seen in this photo - compare the wing to the side of the fuselage:
(and yes, i did wind up changing the camo pattern on the upper wings)

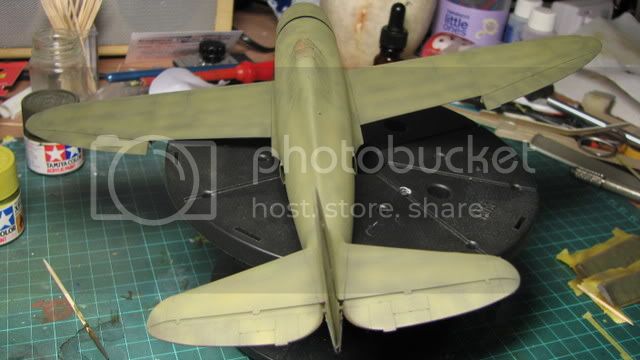
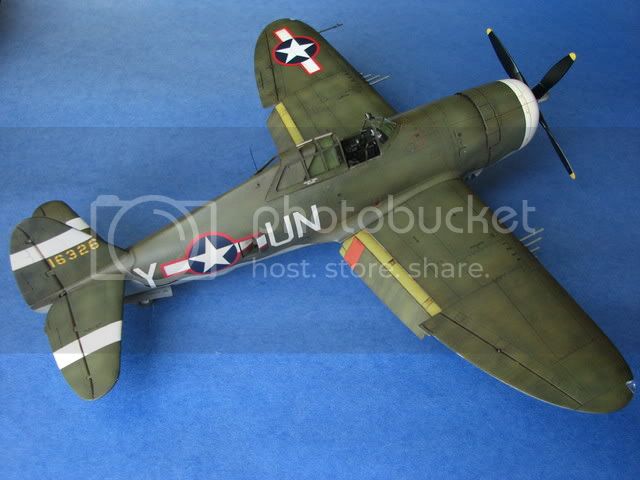
compare that to what it looked like before I did that:


There was also a heavy overall wash earth brown acrylic paint between the last two pictures as well - some thing you might want to consider if you are looking for something really weather beaten - follow up later (after gloss coat, decals, and flat coat) with a darker wash (i like to use watercolors at this stage - burnt sienna with a touch of black) along the panel lines to restore the looks of your pre-shading since the dark earth wash will make your panel lines look like they do in my second picture.

feel free to use all, some, or none of my suggestions.

And be sure to experiment with that fading spray on something besides your model till you get the right effect.

like i said, I think you have a pretty good basis anyway from what i can see.
lampie
#029
_VISITCOMMUNITY
England - East Midlands, United Kingdom
Joined: December 23, 2005
KitMaker: 6,249 posts
AeroScale: 3,270 posts
Posted: Monday, February 11, 2008 - 10:01 PM UTC
Hi Martin.
I reckon youve got it about right for the level of fading you have achieved so far.
The effect will naturally tone down when you add the Klear coats, washes, and varnish.
I dont know how you would go about making a model look more faded during the course of the build?,, Ive tried a similar technique twice. The first time I thought Id taken it too far but the finished effect wasnt very dramatic at all, so the second time I went even further with the pre fading and Im very pleased with the results.
Heres the first attempt before Klear etc.

And the finished model.

The second,more exagerated attempt at the same stages.


you can further blend and tone down the effect by misting on very light and heavily thinned coats of Tamiya Smoke.
I wouldnt worry about the Spit being a postwar subject, my guess is that the far east sun would be just as unforgiving on paint schemes after 1945
Hope this helps.
Your Spits looking great so far.
One this to bear in mind is that the markings would fade in proportion to the main scheme
Nige
vanize
_VISITCOMMUNITY
Texas, United States
Joined: January 30, 2006
KitMaker: 1,954 posts
AeroScale: 1,163 posts
Posted: Monday, February 11, 2008 - 10:16 PM UTC
Nigel put it nicely, and I agree. every overall tint, wash, or other effect you put on this model will tend to unify the colors and bring them together to look like they belong together.

That is the only thing your work thus far really seems to be missing, and you should have no trouble getting to that point, by either his methods or mine.
Percheron
_VISITCOMMUNITY
Washington, United States
Joined: September 23, 2006
KitMaker: 432 posts
AeroScale: 360 posts
Posted: Monday, February 11, 2008 - 10:35 PM UTC
Martin,

Looks pretty good so far and I have nothing to add to what already has been said. Except for one thing I think the Spit's camo had a sharper edge to it. Even with fading I think it should be tighter, when you do your washes it will then soften the edges more.

-Derek
brandydoguk
_VISITCOMMUNITY
England - North, United Kingdom
Joined: October 04, 2002
KitMaker: 1,495 posts
AeroScale: 643 posts
Posted: Monday, February 11, 2008 - 11:52 PM UTC
Many thanks for the replies guys.

@ Vance: That's a good tip about misting on the buff, I tried it and it is certainly better, the strange thing is the buff doesn't really show!

@ Nigel: I was really worried about there being too strong a contrast with my lightened areas. I do now see an improvement after Vance's suggested mist coat and as you say a coat or two of future should tone it down as well.

@ Derek: You are probably right about the camo needing a sharper edge, to be honest I hate masking so I tried to get away with freehand spraying. My airbrush tip isn't really fine enough and my dreadful hand to eye coordination doesn't help.

Anyway here's a pic of the thing after the mist coat, I do think it is better.

Percheron
_VISITCOMMUNITY
Washington, United States
Joined: September 23, 2006
KitMaker: 432 posts
AeroScale: 360 posts
Posted: Tuesday, February 12, 2008 - 12:59 AM UTC
Martin,

I understand what you are saying about masking! Do you guys have Silly Putty there? It works really well for doing camo like the Spits. It does not stick to the plastic, and if some is left behind it rolls off quite nicely. You can also vary how soft the edge is by holding the gun back a bit and also making the putty thicker where you are masking. But be careful as paint will collect a bit under the putty if you go too thick with the paint.

-Derek
vanize
_VISITCOMMUNITY
Texas, United States
Joined: January 30, 2006
KitMaker: 1,954 posts
AeroScale: 1,163 posts
Posted: Tuesday, February 12, 2008 - 01:03 AM UTC

Quoted Text


@ Vance: That's a good tip about misting on the buff, I tried it and it is certainly better, the strange thing is the buff doesn't really show!


I should say it does look better! glad I could help.

and that is exactly right - you don't want to put on enough of the mist coat to show any direct evidence that it exists, but just enough to do what you've achieved - tone down and blend/unify.

It's starting to look pretty sweet.

now your next challenge - resisting the urge to "over-work" things. Always best to stop when things are starting to look good and not go on thinking you can make them look even better.

Invariably things wind up going too far and past the peak while you were too distracted with trying to improve it to notice (that's one of the few lessons I took away from art school that applies to almost all aspects of life).
vanize
_VISITCOMMUNITY
Texas, United States
Joined: January 30, 2006
KitMaker: 1,954 posts
AeroScale: 1,163 posts
Posted: Tuesday, February 12, 2008 - 01:06 AM UTC

Quoted Text

Martin,

I understand what you are saying about masking! Do you guys have Silly Putty there? It works really well for doing camo like the Spits. It does not stick to the plastic, and if some is left behind it rolls off quite nicely. You can also vary how soft the edge is by holding the gun back a bit and also making the putty thicker where you are masking. But be careful as paint will collect a bit under the putty if you go too thick with the paint.

-Derek


"Blue tac" (the gummy stuff for hanging posters without putting holes in a wall - sometimes it is white or yellow too) works great and is cheaper too. I know they have that in England. that is what I used on the model I painted above.
Grifter
_VISITCOMMUNITY
North Carolina, United States
Joined: November 17, 2002
KitMaker: 608 posts
AeroScale: 55 posts
Posted: Tuesday, February 12, 2008 - 08:33 PM UTC
I think it looks great. I Understand your question about being post WWII, and I agree that the finish would still fade, but still be well-maintained overall
.
 _GOTOTOP