_GOTOBOTTOM
Pre-Flight Check
Constructive critique of your finished or in-progress photos.
Spitfire scramble
brandydoguk
_VISITCOMMUNITY
England - North, United Kingdom
Joined: October 04, 2002
KitMaker: 1,495 posts
AeroScale: 643 posts
Posted: Saturday, March 15, 2008 - 05:29 AM UTC
This is my finished Tamiya 1/48 spitfire Mk. 1a posed just after take off. The undercarriage is still retracting and shows the uneven way this happened. The kit depicts a spitfire flown by Eric Lock of 41 squadron.


I am not sure if the canopy would have open or closed at this point so I haven't stuck it in place yet. The pilot figure is an airfix one with a head from an ICM figure set. The oxygen hose is stretched sprue.


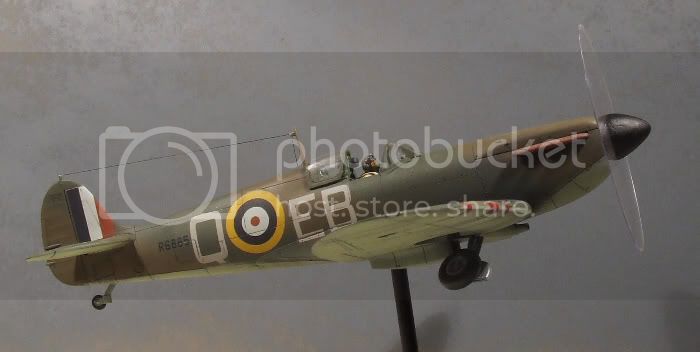
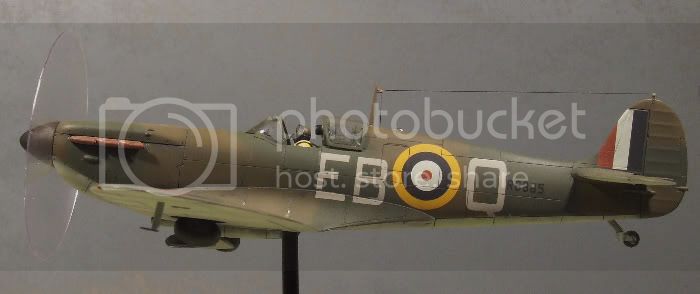
As you can see the prop has been replaced with a disc of clear plastic to hopefully give the impression of it spinning. I added the top part of an Eduard pre painted harness to depict it running from the pilot's shoulders to its anchor point in the fuselage. The chipped paint effect was kept to a minimum, just at the wing roots and bits of the engine cowlings.


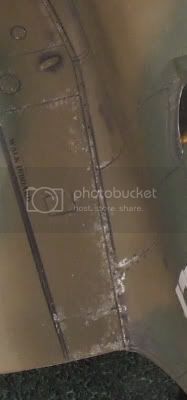
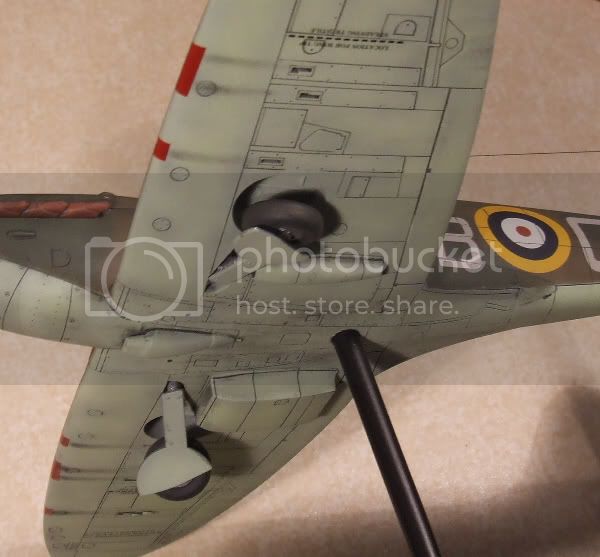
The camo was airbrushed freehand, I know early spitfires had hard edged camo but when I applied some mask it lifted the paint too easily so I ended up freehand airbrushing and doing loads of touch ups. The black walkway lines on the wings were airbrushed using some card held flat on the surface, a mighty struggle that was! The panel lines were picked out with Promodeller Dark Wash and gun and exhaust stains are graphite powder.


Any and all criticisms are welcome.
Percheron
_VISITCOMMUNITY
Washington, United States
Joined: September 23, 2006
KitMaker: 432 posts
AeroScale: 360 posts
Posted: Saturday, March 15, 2008 - 07:51 AM UTC
Martin,

That looks really nice. Personally I'd leave the canopy open, its probably more accurate that way, and then one can have a look inside easier too. As for the prop disk, maybe spraying a coat of a tinted flat would make it look less "plasticy", or just deleting it all together?
Well done!

-Derek
wingman
_VISITCOMMUNITY
Pennsylvania, United States
Joined: December 09, 2003
KitMaker: 880 posts
AeroScale: 654 posts
Posted: Saturday, March 15, 2008 - 10:33 AM UTC
Hi Martin. Very cool. Nice build. The lighting looks nice along with your backround. If you can, try chucking the plastic disc into a drill and on slow speed, take some fine steel wool and drag it across the disc from the center out. Do it lightly a few time so you don't over do it. I did this to my Tamiya P-47 T-Bolts in my "Watch Out The Wolfpack Is Coming" dio. You can see some photos on page 2 of my gallery. Good job, Wingman out.
chris1
_VISITCOMMUNITY
Auckland, New Zealand
Joined: October 25, 2005
KitMaker: 949 posts
AeroScale: 493 posts
Posted: Saturday, March 15, 2008 - 04:53 PM UTC
Way Cool

wot more can I say

Chris
brandydoguk
_VISITCOMMUNITY
England - North, United Kingdom
Joined: October 04, 2002
KitMaker: 1,495 posts
AeroScale: 643 posts
Posted: Sunday, March 16, 2008 - 06:35 AM UTC
Hi Derek,

I will leace the canopy open, I was unsure if it would have been open for takeoff. You are right abot the prop disc looking palasticy but from a distance it isn't so bad. I am giving this model to my friend's son so I hope he won'y mind it as it is.

Wingman I wish I had seen yor pics of the P47 before I did this one, you have made the prop look excellent. I will keep your technique in mind, thanks.

Chris thanks for the complimemt.
lampie
#029
_VISITCOMMUNITY
England - East Midlands, United Kingdom
Joined: December 23, 2005
KitMaker: 6,249 posts
AeroScale: 3,270 posts
Posted: Sunday, March 16, 2008 - 08:54 AM UTC
Lovely job Martin.
Ive aways liked the way the undercarriage looked on Spits as it retracted and its great to see it depicted in a model.
Can you tell me more about how you mounted it on the base.
The paint chipping is particualrly impressive. Its something I cant get to look authentic.
Ive been using a silver pencil but to be honest it always looks as though,,well,,Ive drawn on the model with a silver pencil. How do you do yours?
Nige
brandydoguk
_VISITCOMMUNITY
England - North, United Kingdom
Joined: October 04, 2002
KitMaker: 1,495 posts
AeroScale: 643 posts
Posted: Monday, March 17, 2008 - 04:59 AM UTC
Hi Nigel.

The base is simply a plastic box (that the wife got some perfume in) with a 5 inch nail in it. I cut off the point of the nail anddrilled a hole for it in the box lid. I pushed the nail through the lid from below, glued it with super glue gel and glued the lid to the box. When dry I sprayed the whole thing black and then added some static grass. I then drilled a hole in the underside of the spitfire (where the navigation light should be) and glued it onto the nail with superglue gel.

For the paint chipping I used aluminium paint with a thin brush. After decalling I dabbed lightly it along the panel lines and edges of the wing. When the wash is applied into the panel lines it makes the paint application look finer than it actually is.
okdoky
_VISITCOMMUNITY
Scotland, United Kingdom
Joined: April 30, 2007
KitMaker: 1,597 posts
AeroScale: 34 posts
Posted: Monday, March 17, 2008 - 11:02 AM UTC
Thought I would show you this link that I think is just as excellent as your model and is such an emotive picture of a B of B beauty.

Would it not be the preference of some pilots to have their canopies shut on takeoff. Unless someone could point to standing orders or training that might show otherwise.

Looks fantastic as is including the disc..

Nige
Murdo
_VISITCOMMUNITY
Scotland, United Kingdom
Joined: May 25, 2005
KitMaker: 2,218 posts
AeroScale: 211 posts
Posted: Monday, March 17, 2008 - 12:14 PM UTC
As I understand it, the Spit being a taildragger meant they couldn't see past the engine, therefore the reason they kept the canopy open was...

So they could look out the side and see where they were going until airborne...
okdoky
_VISITCOMMUNITY
Scotland, United Kingdom
Joined: April 30, 2007
KitMaker: 1,597 posts
AeroScale: 34 posts
Posted: Monday, March 17, 2008 - 01:59 PM UTC
Well it must have been a chilly day and he shut up quickly then,,,,,,,,,,,,,,,,,,,,,,,,,,, tee hee!!!

Just like I will before my ignorance of wingy things gets me in the prop!!!!

I still like his Spit though

Nige
csch
_VISITCOMMUNITY
Buenos Aires, Argentina
Joined: December 27, 2002
KitMaker: 1,941 posts
AeroScale: 1,040 posts
Posted: Thursday, July 03, 2008 - 10:55 AM UTC
Nice one !!! Good build and great idea.
LuckyBlunder
_VISITCOMMUNITY
Kansas, United States
Joined: February 02, 2006
KitMaker: 273 posts
AeroScale: 163 posts
Posted: Saturday, October 04, 2008 - 11:00 AM UTC
Hi Martin -

That's a great job! One question though - What did you use for the insulators on the radio and the tail? Also - what did you use for antennae wire?

Steve
brandydoguk
_VISITCOMMUNITY
England - North, United Kingdom
Joined: October 04, 2002
KitMaker: 1,495 posts
AeroScale: 643 posts
Posted: Monday, October 06, 2008 - 09:26 AM UTC

Quoted Text

What did you use for the insulators on the radio and the tail? Also - what did you use for antennae wire?


All I did was to superglue some fishing line from the tail to the mast and a smaller piece from the mast to the fuselage. When the glue set I painted the line black.
Desmoquattro
_VISITCOMMUNITY
New Brunswick, Canada
Joined: September 10, 2008
KitMaker: 235 posts
AeroScale: 18 posts
Posted: Friday, December 05, 2008 - 05:56 AM UTC
A tip for the hard masking, use a paper template. Outline the wing on a sheet of paper, draw the pattern on, then cut out the part you want to paint. Lay it on the wing, just hold it on with your free hand, and spray away. You'll get a slightly feathered edge, just enough to not look hand-painted.
FalkeEins
_VISITCOMMUNITY
England - South East, United Kingdom
Joined: March 07, 2005
KitMaker: 868 posts
AeroScale: 690 posts
Posted: Thursday, December 11, 2008 - 07:41 AM UTC

..very nice work Martin - and some great ideas in this thread...especially novel use of materials for the base ..must try them...plastic box & five inch nail..?!!
HastyP
_VISITCOMMUNITY
Ontario, Canada
Joined: April 23, 2003
KitMaker: 1,117 posts
AeroScale: 47 posts
Posted: Sunday, April 19, 2009 - 06:04 AM UTC
Beautiful work Martin! Makes me want to build a plane this very moment.

HastyP
javathehut
_VISITCOMMUNITY
Washington, United States
Joined: March 17, 2009
KitMaker: 3 posts
AeroScale: 1 posts
Posted: Wednesday, April 22, 2009 - 07:49 PM UTC
Hello, try this site for a simulated prop in flight, I’ve seen a few and they look pretty good.

http://www.propblur.com/Home_Page.php
Zombiefruit
_VISITCOMMUNITY
Ontario, Canada
Joined: September 09, 2008
KitMaker: 124 posts
AeroScale: 1 posts
Posted: Friday, May 08, 2009 - 01:03 PM UTC
Beautiful painting job. I love everything but the prop, and my complaint is not with the execution of it. I think that it's wonderfully done and it looks like it's in motion, but I've always viewed dioramas as displaying a captured moment in time, like a 3-D photograph. To me the prop would look prop-er (:P) if it was static, as if time had been frozen.
 _GOTOTOP