_GOTOBOTTOM
World War II
Discuss WWII and the era directly before and after the war from 1935-1949.
Hosted by Rowan Baylis
Tamiya P-47 Razorback finished
mpatman
_VISITCOMMUNITY
New South Wales, Australia
Joined: March 09, 2006
KitMaker: 248 posts
AeroScale: 160 posts
Posted: Wednesday, March 26, 2008 - 04:16 PM UTC
Hi All,

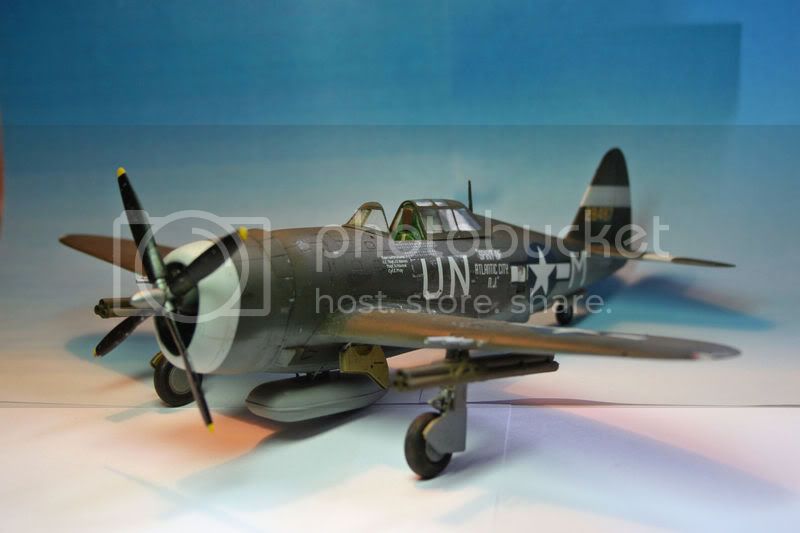
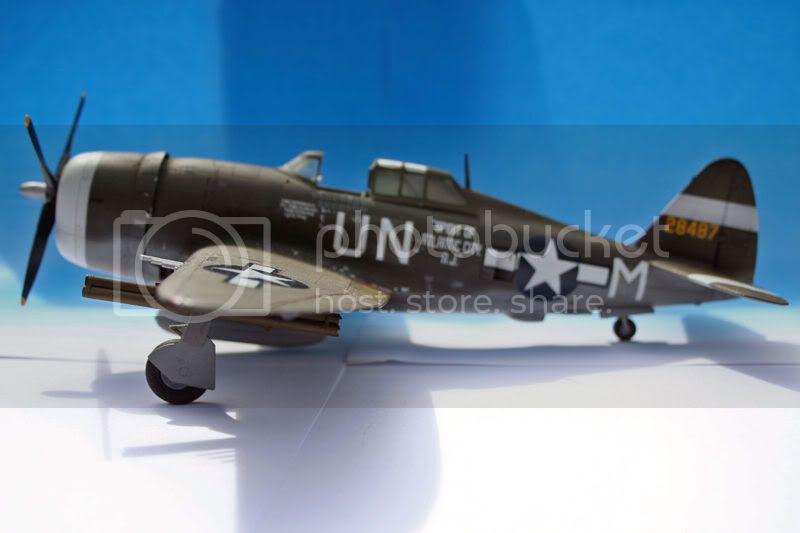
I have just completed my third model, the excellent Tamiya P-47 in 1/48 scale.

I still am learning a lot and am not happy with the results. The gloss coat took out all the panel lightening that i did on the olive drab.

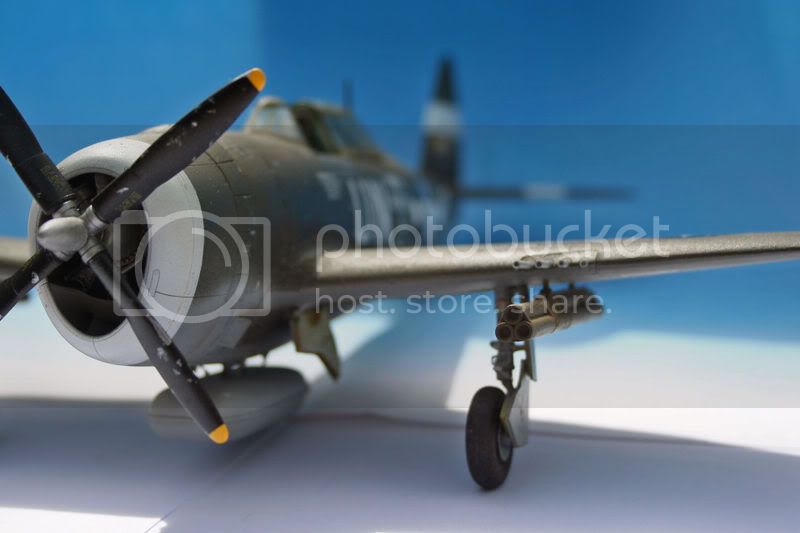
I built this one OOB and used Tamiya and Lifecolor paints. Surprisingly I had some difficulty in one of the underside start decals, it just wouldnt come off the backing paper even after a long soak in warm water. I even tried to lift it with my scalpel. I overdid the exhaust stains abit as well, but hey I have plenty of kits in my stash!

Grifter
_VISITCOMMUNITY
North Carolina, United States
Joined: November 17, 2002
KitMaker: 608 posts
AeroScale: 55 posts
Posted: Wednesday, March 26, 2008 - 11:08 PM UTC
Nice work Mark,
I can still see some of the panel shading, especially on the topside.
I like the rocket/ flat tank combo, that's the same way I outfitted my Jug.
Only minor problem I see is the starboard innermost blast tube looks crooked, I don't know if you would be able to fix that now though.
vanize
_VISITCOMMUNITY
Texas, United States
Joined: January 30, 2006
KitMaker: 1,954 posts
AeroScale: 1,163 posts
Posted: Thursday, March 27, 2008 - 12:02 AM UTC
Don't belittle your work Mark, that is an excellent job for your third model!

as far as the panel shading goes, I prefer it subtle anyway. Sure it is a nice artistic effect and looks cool, but I am of the (apparently minority) opinion that it is usually overdone to an unrealistic degree.

I'd say you are off to a very promising start.

One think you might want to think about doing: After your decals dry but before you put on a clear coat to seal them, run a sharp blade across them very lightly along any panel lines they cover. Once you are done, hit the decals with a little more decal softener fluid. Once the decal is completely dry again, then clear coat. your decals will look a lot more like they are part of the paint job then.

I also noticed a little bit of "silvering" with a couple of your decals. the decal softener can hep eliminate that as well. Once you apply a decal on the gloss coat and have it positioned correctly, dab it very lightly with an absorbent cloth to help it settle down and also absorb the excess water. Give it a minute to really stick into position and the brush Micro-Sol or Solvaset (or some other brand of) decal setting solution onto it. Once you have applied that, do not touch the decal until it is dry, as they are extremely fragile once the setting solvent has been applied. Once they are dry, they are as tough or tougher than ever though. It would be at this stage that you would go back and slice in any panel lines you might want to accentuate as per the paragraph above. Then you can put a clear coat on as usual once they have dried/cured.
propwash
_VISITCOMMUNITY
Charente, France
Joined: July 06, 2007
KitMaker: 289 posts
AeroScale: 231 posts
Posted: Thursday, March 27, 2008 - 01:08 AM UTC
Mark, I think your model looks great and I'll be very happy if I can achieve that level of craftman's -ship after my third model! As well as the subtle weathering, I like your presentation.

I'm still struggling with a 1/72 kit and am on my 3rd month!!!! I guess with standards so high with a lot of the pro modelers on here, we beat ourrselves up if our beginners builds are not show standard....lol
lampie
#029
_VISITCOMMUNITY
England - East Midlands, United Kingdom
Joined: December 23, 2005
KitMaker: 6,249 posts
AeroScale: 3,270 posts
Posted: Friday, March 28, 2008 - 12:40 AM UTC
Hi Mark.
Congratulations on a very nice T'bolt, and only your 3rd model also!,,very well done!.
A couple of things stand out but theyve already been mentioned and I wont repeat them.
As for the fading effects, succesive coats of Klear and the final washes and varnish coats darken the fading. Its all part of the blending process. Ive found that with the initial paint fading process,( the lighter coats sprayed in the middle of the panels etc), it works better if you go past what you would expect to be enough. Im still experimenting though, and a lot of fun it is too!

Purely on a historical note, and not a reflection on your model at all though. Bud Mahurin was shot down in this plane in March 1944, and that was before P47's started to use the rocket tubes.

Well done again!,,,Im looking forward to seeing more.
Nige
PS,,,,sshhh,,,dont tell anyone,,,your undercarriage legs are the right way round,but the covers are on back to front
Yeti123
_VISITCOMMUNITY
Michigan, United States
Joined: February 11, 2008
KitMaker: 311 posts
AeroScale: 278 posts
Posted: Friday, March 28, 2008 - 09:53 AM UTC

Quoted Text


One think you might want to think about doing: After your decals dry but before you put on a clear coat to seal them, run a sharp blade across them very lightly along any panel lines they cover. Once you are done, hit the decals with a little more decal softener fluid. Once the decal is completely dry again, then clear coat. your decals will look a lot more like they are part of the paint job then.

I also noticed a little bit of "silvering" with a couple of your decals. the decal softener can hep eliminate that as well. Once you apply a decal on the gloss coat and have it positioned correctly, dab it very lightly with an absorbent cloth to help it settle down and also absorb the excess water. Give it a minute to really stick into position and the brush Micro-Sol or Solvaset (or some other brand of) decal setting solution onto it. Once you have applied that, do not touch the decal until it is dry, as they are extremely fragile once the setting solvent has been applied. Once they are dry, they are as tough or tougher than ever though. It would be at this stage that you would go back and slice in any panel lines you might want to accentuate as per the paragraph above. Then you can put a clear coat on as usual once they have dried/cured.


Mark:
This is a great T bolt. I wish my 3rd model was as good. Your chipping is nice and subtle. In my mind it looks right.
Ditto to Vance's comments. One thing I would add is after the clear gloss dries I rub the model down with a soft cloth to enhance the shine before you apply the decals. It is my feeling that this tends to even out the finish just enough to make the most of your decal softner. At least I have not had a problem since I started doing this
mpatman
_VISITCOMMUNITY
New South Wales, Australia
Joined: March 09, 2006
KitMaker: 248 posts
AeroScale: 160 posts
Posted: Friday, March 28, 2008 - 02:07 PM UTC
Thank you to everyone for commenting- It is great to be able to get tips and advice- even on errors etc.

I appreciate your time to look at my efforts.

Mark
 _GOTOTOP