_GOTOBOTTOM
Air Campaigns
Want to start or join a group build? This is where to start.
Twin Spinner Condor Legion Do-17P
jaypee
_VISITCOMMUNITY
Scotland, United Kingdom
Joined: February 07, 2008
KitMaker: 1,699 posts
AeroScale: 1,384 posts
Posted: Monday, March 31, 2008 - 11:05 AM UTC
Masks and flaps arrived today from Hannants so I can get this build back on track. The flaps look really nice but require the bottom half of the wing to be removed. Since I've already glued and sanded this area I'm going to chicken out of installing the flap. Discretion being the better part of valor. If I get another kit I'll use them on that, perhaps the ICM one as it is half the price.

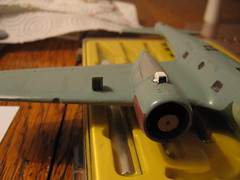
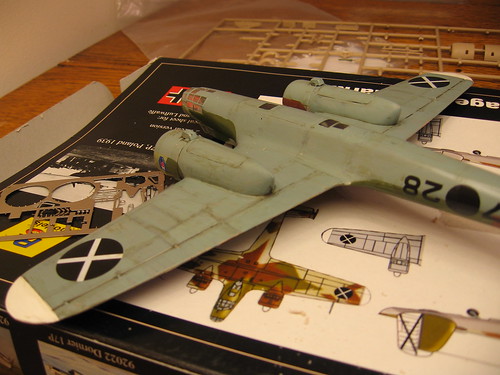
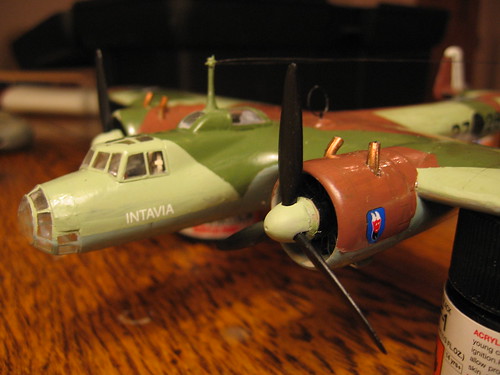
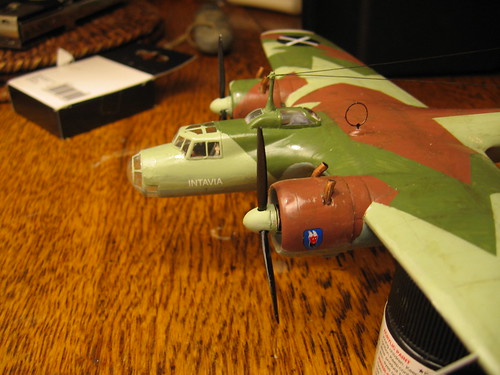
The pre-cut masks are a great idea and fitted perfectly just one small slice needed with the scalpel. The whole thing was masked in half an hour, for a canopy like the Do-17s that is fantastic.

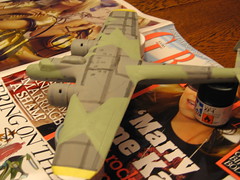
As you can see I've been very lucky when I fogged the canopy, nearly all the places fogging occurred are getting painted anyway. I'll use white glue or something other than cement or superglue in future.

Mask on

Mask on

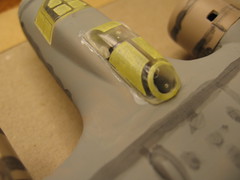
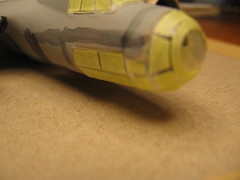
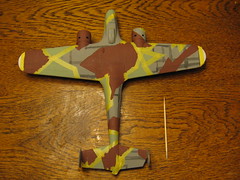
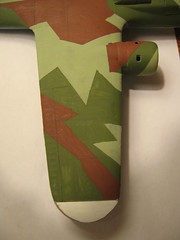
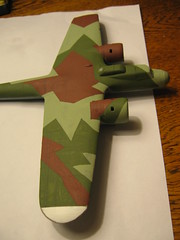
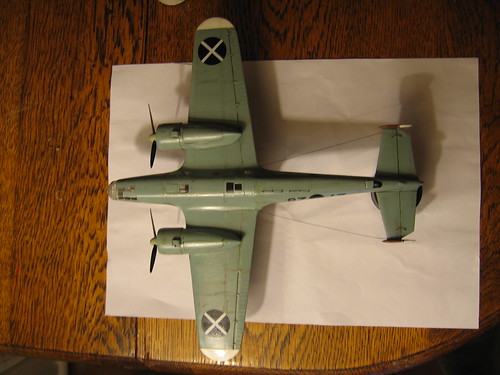
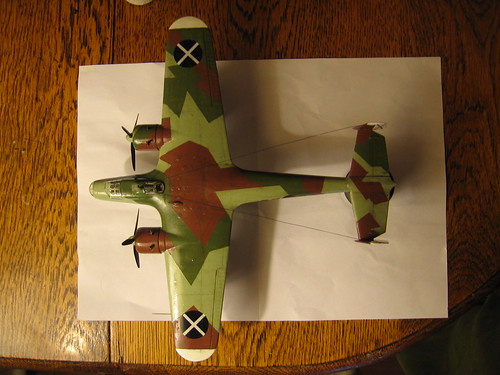
Put PVA Glue on the nose and rear bubble as liquid mask. I'll let that dry overnight and paint on the interior colour tomorrow.
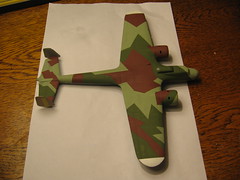
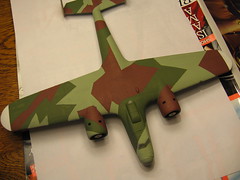
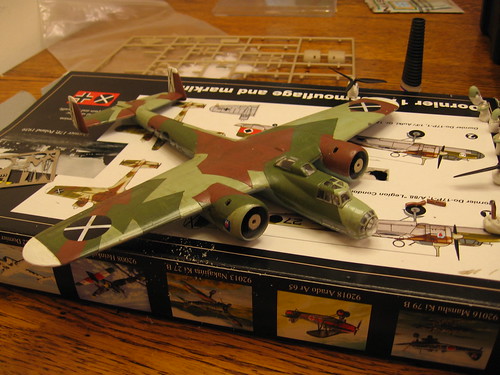
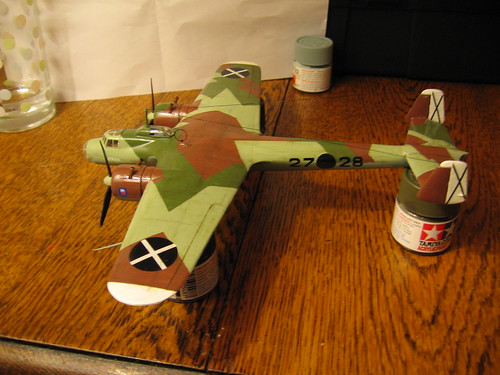
Critique welcome
jaypee
_VISITCOMMUNITY
Scotland, United Kingdom
Joined: February 07, 2008
KitMaker: 1,699 posts
AeroScale: 1,384 posts
Posted: Tuesday, April 01, 2008 - 11:39 AM UTC
Underside painted in sky, and the lightest of the three colour splinter painted. The pattern is marked out with pencil. I had the weirdest thing happen, when painting on sky tamiya onto the underside it lifted off the primer and created a horrible sludge. It was with a new brush and the primer was humbrol enamel. I thought the acryilc shouldn't lift the primer. Could it be chemicals in the new brush? I've given it a good wash with detergent and used an older brush to finish atfer sanding down the damage. Not a nice April Fool.

Progress so far.
First colour added

Next mask off for the next colour.
PS That is most definitely not my copy of "Grazia"
Yeti123
_VISITCOMMUNITY
Michigan, United States
Joined: February 11, 2008
KitMaker: 311 posts
AeroScale: 278 posts
Posted: Wednesday, April 02, 2008 - 02:26 PM UTC
Nice looking DO. I can't wait to see it finished. I love Condor Legion schemes
jaypee
_VISITCOMMUNITY
Scotland, United Kingdom
Joined: February 07, 2008
KitMaker: 1,699 posts
AeroScale: 1,384 posts
Posted: Wednesday, April 02, 2008 - 09:56 PM UTC
Dunkelbraun applied. Looks a little uneven under the light but the gloss and matt coats to come will even it up. Colours are not really correct having done a bit more research but they'll have to do. It appears this plane (27.28) was re-painted in two tone splinter in the winter of '37. I've used enamel for Dunkelbraun after the mess the acrylic made of the underside. It went on nice an easy, I'll need to practice with the acrylic.

Dunkelbraun applied
jaypee
_VISITCOMMUNITY
Scotland, United Kingdom
Joined: February 07, 2008
KitMaker: 1,699 posts
AeroScale: 1,384 posts
Posted: Thursday, April 03, 2008 - 11:01 AM UTC
Aha, the moment of truth. I've never done a camo scheme like this before, and all of the models I've completed since starting back modelling were one colour. A white Stuka, a silver i-153 and a s6-b. So it was with some trepidation that I started removing the masking. Here goes...
Dunkelgrun applied and masking removedDunkelgrun applied and masking removed


More photos to follow, but I'm quite happy with the results. Perhaps not the smooth coverage others have achieved but I'm most happy with the appearance of the seams. Following the advice given out here on aeroscale and other places it looks so much better than my usual rubbish. esp the reading the seams thread in the beginners section. Thanks HawkeyeV
ejclide
_VISITCOMMUNITY
Ohio, United States
Joined: January 03, 2008
KitMaker: 150 posts
AeroScale: 119 posts
Posted: Thursday, April 03, 2008 - 11:45 AM UTC
that paint scheme is..... well, don't think this is fruity, but it's BEAUTIFUL. I gotta try that. But anyway, it looks great, and I can't wait to see that thing done and on it's own legs! good work.
betheyn
Staff MemberSenior Editor
AEROSCALE
#019
_VISITCOMMUNITY
England - South East, United Kingdom
Joined: October 14, 2004
KitMaker: 4,560 posts
AeroScale: 2,225 posts
Posted: Thursday, April 03, 2008 - 11:58 AM UTC
Great looking camo scheme. Should look stunning once its done.
For your first attempt at a 3 tone paint scheme you have done a great job.
Keep up the good work.
Andy
jaypee
_VISITCOMMUNITY
Scotland, United Kingdom
Joined: February 07, 2008
KitMaker: 1,699 posts
AeroScale: 1,384 posts
Posted: Friday, April 04, 2008 - 05:11 AM UTC
Thank you both so much for the kind words. Coming from you it is really appreciated. I know there are a few things I would do better next time. Mostly it is about not rushing.

Tasks left to do:
a bit of touch-up and remedial work on the undersurfaces,
a coat of future,
assemble and paint the landing gear.
decals,
more future,
wash the panel lines,

No weathering on this bird as she has only landed in spain for a month before she is repainted in two tone. Maybe a bit of muck round the wheels and smoke stains for the exhaust. No paint chips.

One last coat of semi matt varnish
Attach landing gear and aerials.
Off with pre-cut canopy masks and a brush of future over the canopy and done.

Probably should be done by two weeks. Since I only get an hour or two if I'm lucky. Better to take it slow and not make mistakes. I've already forget to put the guns in before gluing the canopy, but it isn't coming off and wrecking that paint job
CaptainA
_VISITCOMMUNITY
Indiana, United States
Joined: May 14, 2007
KitMaker: 3,117 posts
AeroScale: 2,270 posts
Posted: Tuesday, April 08, 2008 - 11:27 AM UTC
Wow. That is a beautiful paint job. You done good.
jaypee
_VISITCOMMUNITY
Scotland, United Kingdom
Joined: February 07, 2008
KitMaker: 1,699 posts
AeroScale: 1,384 posts
Posted: Tuesday, April 08, 2008 - 09:35 PM UTC
Thanks, CaptA
No updates here but that don't mean I've not been busy.

The undercarriage is totally out of scale, the wheels are too big to go into the wheel wells and too wide to go into undercarriage forks. So I'm going to do an in flight model instead. It shows the nice lines of the Do-17 better.

I looked at a photo of the Do-17P in flight to see what the tailwheel looked like, and saw that the HUGE air intakes supplied as resin parts for the kit don't exist in real life. They have to go. There is a little hump there instead. I'll make that up with some styrene card.
Why did RS include such rubbish resin parts?
The cockpit was good but the exhausts and air intakes bear no resemblance to reality.

So a bit extra work to do but I'll be happier it is at least someways real looking. Never did like the look of those huge air intakes anyway. It'll look much more like a flying cod when it is done.
jaypee
_VISITCOMMUNITY
Scotland, United Kingdom
Joined: February 07, 2008
KitMaker: 1,699 posts
AeroScale: 1,384 posts
Posted: Thursday, April 10, 2008 - 11:14 AM UTC
This is what I'm talking about. Got a book out of the library which has 1:72 scale drawings of the Do-17P.
So using that I cut out new intakes from plasticard. The hobby shop is next to the library which is very handy indeed. Here is a snap of the new intake. Compare that to the one supplied with the kit which is sitting on the wing. I don't know if you can't make something that small in resin, but there must be a better way.

Rebuilt air intakes

I'll let the glue set on them, then primeand paint them and I'll be back to where I was at the start of the week.
I think I'll try and get scale drawings before I start builds in future. Much happier with the look of the model now though.

jaypee
_VISITCOMMUNITY
Scotland, United Kingdom
Joined: February 07, 2008
KitMaker: 1,699 posts
AeroScale: 1,384 posts
Posted: Monday, April 14, 2008 - 10:39 AM UTC
Last leg now. Decals applied they went on fine with just water, no wrinkling or tearing. I used a sludge wash to pick out the panel lines, and add a bit of grime, not too much, just a bit of dust and dirt on the underside.
Varnished it all with a matt coat. I'm just waiting on the props, aerials and pitot to dry before fitting them.
Here is the story so far.
img_1379.jpg
img_1380.jpg
Hope to finish next time.
ejclide
_VISITCOMMUNITY
Ohio, United States
Joined: January 03, 2008
KitMaker: 150 posts
AeroScale: 119 posts
Posted: Monday, April 14, 2008 - 07:25 PM UTC
that's looking NICE Jaypee. the wash on the underside looks really nice too. can't wait to see it in the campaign gallery!
jaypee
_VISITCOMMUNITY
Scotland, United Kingdom
Joined: February 07, 2008
KitMaker: 1,699 posts
AeroScale: 1,384 posts
Posted: Monday, April 14, 2008 - 10:07 PM UTC
Thanks Eric, but I think the photography masks the sheer messiness of the wash.

It looks OK I guess but I didn't really feel in control of the process.

I need to use a much thinner brush to put the sludge on.
Or just use a thinner wash, but you need to experiment with these things. swannysmodels.com has a good tutorial on this I'll follow that next time.

Also now it has dried the matt varnish has a very glossy look to it. It was humbrol enamel matt varnish. Klear gives a much better semi gloss, I used that on a Stuka I've finshed recently.

Despite all this I'll put it on a stand and admire the splinter camo at least I'm happy enough with how that came out.

The stand is in the post and the build should be finished tonight

I'll take some pictures outside in daylight for the gallery.
jaypee
_VISITCOMMUNITY
Scotland, United Kingdom
Joined: February 07, 2008
KitMaker: 1,699 posts
AeroScale: 1,384 posts
Posted: Wednesday, April 16, 2008 - 11:11 AM UTC
Fini! Put the final touches onto intavia tonight. It's been the most ambitous model I've done to date. And I've learned a lot. Some things went well others not so. Overall though it has been FUN.
Thanks to eric andrew and carl for their encouragement.

Minuses: Out of scale parts, not satisfied with my method of wash. Humbrol matt varnish being glossy. fogging the canopy.

Pluses: Splinter camo, masking windows, seams, scratchbuild from plasticard, research, first use of PE and resin, first limited run kit, changing the plan went things went agley.

Do-17 Finished
Do-17 Finished
Do-17 Finished
Do-17 Finished
Do-17 Finished

All images are clickable and take you to my flickr stream where you can get hi-res versions

I got a stand in the post today so I'll try and post some photos from outside in the daylight tomorrow.

That empty glass is a G&T. That way it don't stain when it spills. Unlike malt which is reserved for a finish, like now. Slainte!

As ever critique and suggestions welcome. And bonus points if you spot the obvious mistake

See y'all in the "when I flew with" campaign.
AirLedge
_VISITCOMMUNITY
Cork, Ireland
Joined: July 26, 2007
KitMaker: 292 posts
AeroScale: 265 posts
Posted: Wednesday, April 16, 2008 - 10:28 PM UTC
Nice work JP

Definitely a lot more pluses than minuses

Slainte
SGTJKJ
#041
_VISITCOMMUNITY
Kobenhavn, Denmark
Joined: July 20, 2006
KitMaker: 10,069 posts
AeroScale: 3,788 posts
Posted: Thursday, April 17, 2008 - 12:37 AM UTC
Looks great. The camouflage is awesome.

A very nice entry into the campaign
CaptainA
_VISITCOMMUNITY
Indiana, United States
Joined: May 14, 2007
KitMaker: 3,117 posts
AeroScale: 2,270 posts
Posted: Thursday, April 17, 2008 - 11:19 AM UTC
That scheme looks fantastic. I think you have really given us a good build for the campaign. You really have one to be proud of.

If you hit the return (ENTER) in between pictures when you post to the forum, it will keep the thread form being so wide. I think you can go to the edit button and correct it also.
jaypee
_VISITCOMMUNITY
Scotland, United Kingdom
Joined: February 07, 2008
KitMaker: 1,699 posts
AeroScale: 1,384 posts
Posted: Thursday, April 17, 2008 - 11:18 PM UTC
Message received and understood. That should rectify it.

Thanks CaptA, I've really enjoyed building it,
I must admit I approached with some trepidation since it cost so much and I'd never used PE which looks horribly fragile, or resin which looked like a block of cheese with some chairs and exhaust ports sticking out of it.

If it hadn't been for this campaign it might have sat there for ages and I'd still be scared of it. Thanks for arranging it.

As for this kit if it wasn't for the price, £24, I'd buy it again. If anyone does buy this kit check the undercarriage with line drawings and photos. And fix those air intakes

I bought it because I really wanted some spanish civil war planes and by the time you pay for decal sheets, PE seat belts and the like you probably are nearly at twenty quid mark.

For now i've got Do17 PE flaps from Extratech left over, so I think I'll try the ICM 1:72 kit as it is half the price.

I'll feel a lot happier next time with these materials. I really liked the seatbelts. Which brings me to the obvious mistake. Where is the crew?! This is the Mary Celeste
jaypee
_VISITCOMMUNITY
Scotland, United Kingdom
Joined: February 07, 2008
KitMaker: 1,699 posts
AeroScale: 1,384 posts
Posted: Friday, April 18, 2008 - 02:09 AM UTC
Finished pics uploaded to the gallery.
almonkey
_VISITCOMMUNITY
England - East Midlands, United Kingdom
Joined: March 23, 2003
KitMaker: 2,124 posts
AeroScale: 788 posts
Posted: Sunday, April 27, 2008 - 06:53 AM UTC
hi jaypee! i have this same kit, i bought it because i really wanted an early dornier, plus i have quite a few other condor legion kits because i think that splinter camo they wore is a really nice scheme.
interesting couple of heads up you give in your thread, especially about the undercarridge! i normally build my stuff wheels down, so hopefully there is a way to make them work.
cheers, phil
 _GOTOTOP