_GOTOBOTTOM
Pre-Flight Check
Constructive critique of your finished or in-progress photos.
When I flew with.. Flashback 1/72 Strutter
jaypee
_VISITCOMMUNITY
Scotland, United Kingdom
Joined: February 07, 2008
KitMaker: 1,699 posts
AeroScale: 1,384 posts
Posted: Wednesday, April 30, 2008 - 01:29 AM UTC
This my entry to the when I flew with campaign.
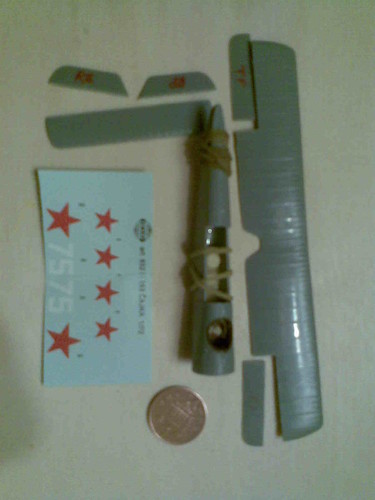
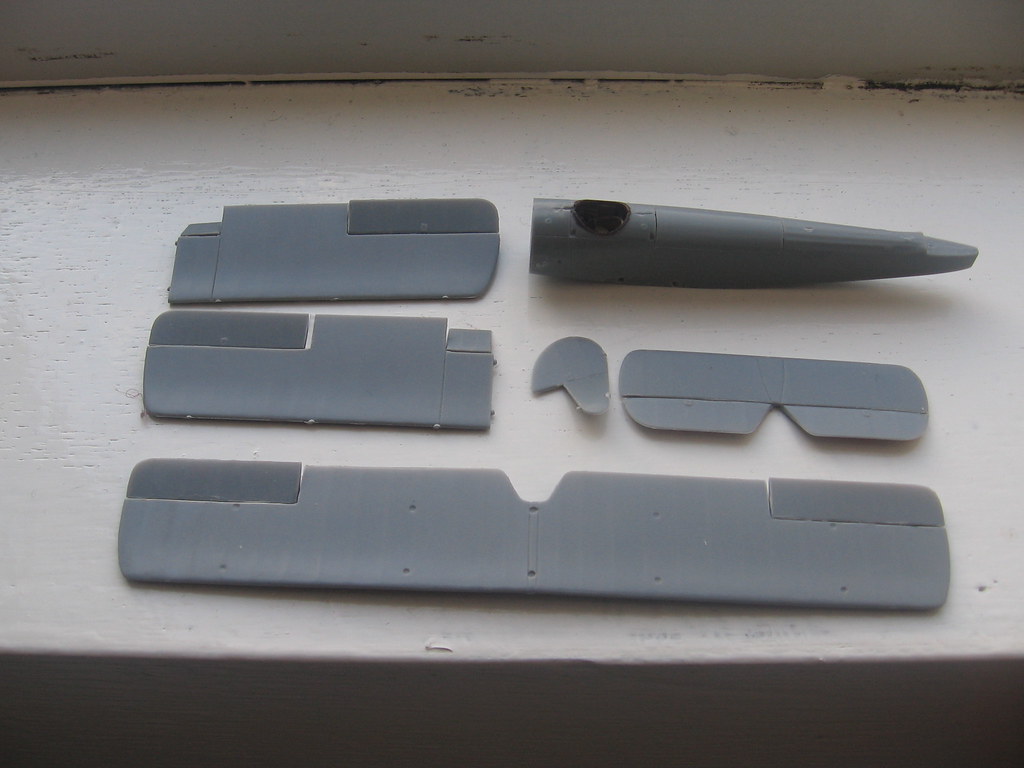
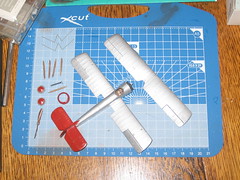
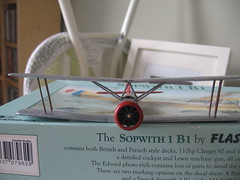
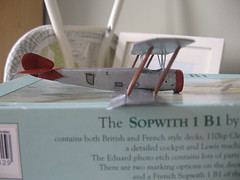
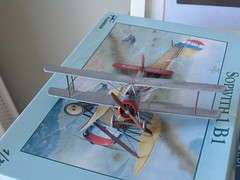
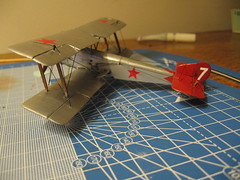
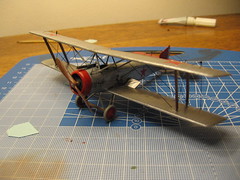
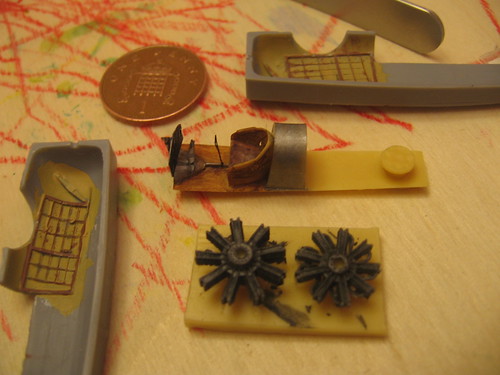
It is a really nice little kit. Esp as it is only a fiver. You get a resin cockpit and engine, some photoetch brass and film as well as one sprue of plastic. The instructions seem fairly clear and a rigging diagram is provided too. Some of the decals in the kit where badly shattered but those that weren't seem nice, clear colours and in register.

Strutter cockpit
Strutter cockpit
Strutter cockpit

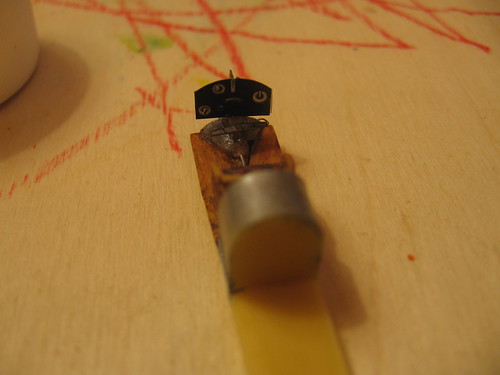
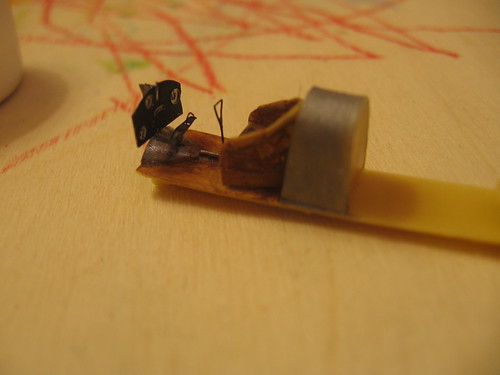
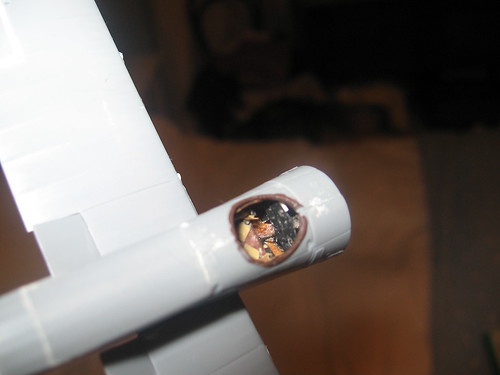
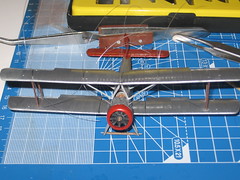
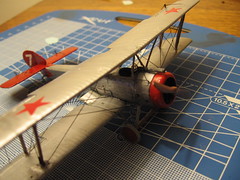
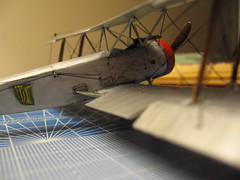
The instrument panel looks quite far away I think I'll move it closer to the seat. Any ideas where it is supposed to go? The instructions seem to have it in two places.

jaypee
_VISITCOMMUNITY
Scotland, United Kingdom
Joined: February 07, 2008
KitMaker: 1,699 posts
AeroScale: 1,384 posts
Posted: Wednesday, April 30, 2008 - 10:30 PM UTC
No camera last night but a little work done while listening to the European Cup Semi Final.
Took some snaps with my phone's camera. Pretty rubbish quality I'll not use it again.
Fuselage closed up. Moved the control panel to just above the pilots knees. Means you won't see the airbrake wheels, throttle, fuel line, rudder pedals. The wicker seat and seatbelt you can still see though.
Decals left over from a SMER I-153.
Inspired by chukw's hell diver build I've freed the control surfaces to add a bit of life to the model

Strutter
jaypee
_VISITCOMMUNITY
Scotland, United Kingdom
Joined: February 07, 2008
KitMaker: 1,699 posts
AeroScale: 1,384 posts
Posted: Saturday, May 03, 2008 - 09:28 AM UTC
All the control surfaces are now poised, had to fill in a portion of the lower port wing with plasticard, due to over zealous use of a #11 blade but I think it brings things to life a bit. Thanks to watching barv at the scottish nationals last weekend repairs like that seem small potatoes now.

stutter wings and fuselage

Waiting for my drills to arrive now before I continue. Caz's strung bag came along at just the right time to spur me on. On Caz's recommendation bought some smoke coloured mending thread at the haberdashers today. Look forward to bringing it all together now.
jaypee
_VISITCOMMUNITY
Scotland, United Kingdom
Joined: February 07, 2008
KitMaker: 1,699 posts
AeroScale: 1,384 posts
Posted: Tuesday, May 06, 2008 - 02:13 AM UTC
I checked the smooth covering part for the bomb bay (french version) was too long against the drawings in windsock 80. You can see this in the previous photo. So I used the ribbed part for RNAS machines, it was a better fit anyway. I marked and masked this part and sanded it smooth. Scribed a line across the back of it to demark where the fabric stops.
Set the lower wings. Prepared the surface by filling gaps and sanding humps.
All set now.
Microdrills arrived today so I'll make a start at drilling holes for the rigging. Caz reckons 80 holes are needed
jaypee
_VISITCOMMUNITY
Scotland, United Kingdom
Joined: February 07, 2008
KitMaker: 1,699 posts
AeroScale: 1,384 posts
Posted: Tuesday, May 06, 2008 - 10:34 AM UTC
No progress today, too much gardening to do. Nice evening for it though. Here are some snaps of the cockpit and attached lower wings. I like the poised airbrakes, although I guess they would never be left in that state.

strutter cockpit

You can see the mark between the ribbed and smooth part, bottom left. I checked it against photos and it looks better now. Nice doing these little alterations. I must admit I feel a little out of my depth but seeing what is done elsewhere all over on aeroscale make me want to stretch myself with each build.

Lower wings fitted

jaypee
_VISITCOMMUNITY
Scotland, United Kingdom
Joined: February 07, 2008
KitMaker: 1,699 posts
AeroScale: 1,384 posts
Posted: Wednesday, May 07, 2008 - 08:14 PM UTC
Phew. Drilled a lot of holes for rigging last light.
Broke the .3 .35 .4 and .45 bits from the drill kit! At least it was only cheap off ebay.
I think now that I've done around 70 holes I've got the hang of using such small bits and I'll not break so many.
To be fair the .4 and .45 only broke because my grip slipped on the drill.
.5mm (#76) equates to a 3.5cm diameter hole in 1/72 so probably a bit big but it will do for my first serious attempt at rigging.
I've only rigged a i-153 with 6 pieces of lyrca before this is something else entirely.
Primer on next and any seam filling that throws up then we should see things start to take shape.
No photos. sorry the holes are just too small to show up on my camera even in macro mode.
jaypee
_VISITCOMMUNITY
Scotland, United Kingdom
Joined: February 07, 2008
KitMaker: 1,699 posts
AeroScale: 1,384 posts
Posted: Monday, May 12, 2008 - 08:57 PM UTC
Thats the aluminium dry and so to work on the markings.
Red wheels, cowling, and tailplane. Masked off some spiky points for
the tailplane
strutterstrutter

Undecided as to the personal insignia. A shamrock or a Guinness?
jaypee
_VISITCOMMUNITY
Scotland, United Kingdom
Joined: February 07, 2008
KitMaker: 1,699 posts
AeroScale: 1,384 posts
Posted: Saturday, May 31, 2008 - 11:08 AM UTC
Well well well. The build has been held up for a few weeks due to the early arrival of my second son Cormac. I hoped to have it finished before he arrived. He seemed to have other ideas though. He is a perfect 1:6 replica. Well not quite he is much better looking than me. Must get that from his mother.

Back to the build I've had several failed attempts to mask a shamrock and paint it. I think if I had an airbrush this might be easier. So instead I'll paint a harp freehand on one side only. Less lines to paint and Lt DeCourcey was quirky that way.

Engine drybrushed and attached to the firewall. Tailplane attached too. I've painted the outer struts and prop ochre and grained with brown to simulate varnished wood.

Next up wash the panel lines, assemble the wings, fit the undercarriage and then rig. Will post some photos of the the progress on Monday.
AIRGUNNER
_VISITCOMMUNITY
England - South East, United Kingdom
Joined: September 27, 2006
KitMaker: 246 posts
AeroScale: 234 posts
Posted: Saturday, May 31, 2008 - 11:26 AM UTC
Congratulations on the arrival of Cormac. Hope all is well with mother and child. Have a few of these to whet the baby's head
jaypee
_VISITCOMMUNITY
Scotland, United Kingdom
Joined: February 07, 2008
KitMaker: 1,699 posts
AeroScale: 1,384 posts
Posted: Tuesday, June 03, 2008 - 09:35 PM UTC
Here's a quick update. Not much happening but did decide on my insignia. A green harp on one side of the fuselage and a red star on the other. I try various masks to draw a shamrock but nothing really worked with a brush. An airbrush may make short work of this. The harp is just painted on freehand.

Painted and awaiting weatheringPainted and awaiting weathering
jaypee
_VISITCOMMUNITY
Scotland, United Kingdom
Joined: February 07, 2008
KitMaker: 1,699 posts
AeroScale: 1,384 posts
Posted: Thursday, June 05, 2008 - 09:38 AM UTC
Thanks Steve, yes mum and son are great. I get about an hour each evening to do some hobby work. So here is what I did yesterday.
Upper wings and struts went on. I must admit I approached this with some trepidation the only othe bipe I've ever done was a i-153 and it had a molded top gull wing. My fears where unfounded though.
I fitted the 1/2 struts to the upper wing and then glued that to the fuselage with superglue. Outer struts where then sprung into place by flexin the lower wing and then secured with glue . The whole thing looks fairly square and feels robust and I'm really pleased with it now. The only thing I need to do was carefully trim the 1/2 struts so they went into the holes in the top wing. They are slightly too long. Better that than too short. This has been a really nice kit to put together so far, and all for a fiver you can't be bad to that.
Here are profile and head on shots.
strutter wings attachedstrutter wings attached
AirLedge
_VISITCOMMUNITY
Cork, Ireland
Joined: July 26, 2007
KitMaker: 292 posts
AeroScale: 265 posts
Posted: Friday, June 06, 2008 - 09:51 PM UTC
Looking good JP.

I'm sure Lt DeCourcey would be proud!

Congrats on the new arrival.
jaypee
_VISITCOMMUNITY
Scotland, United Kingdom
Joined: February 07, 2008
KitMaker: 1,699 posts
AeroScale: 1,384 posts
Posted: Monday, June 09, 2008 - 10:32 PM UTC
A cautionary tale.

There comes a point in every build I do where it seems to be one step forward and two back.

I came to start the rigging and discovered I'd missed a hole, and some were partially blocked with paint or CA.

So out comes the drill again. Drilled the missing hole right through the plastic into my finger, flinched and the struts
flew everywhere. Rats!
Recovered them all but one. Double Rats!

Fear not! I brushed the entire room and there amongst the dust and tumblepubes, lay a solitary outer strut Hurrah!

This is a blessing in disguise as now I can rig the control lines without the wings in the way which I probably should have done in the first place.

Lesson learnt, Proper preparation prevents piss poor performance.

Always the problem is that I try to rush an element and cost me more time in the long run.

Someone's sig on aeroscale read "Think for an hour and build for five rather than think for five and build for an hour". I'll be taking that advice more to heart in future.
jaypee
_VISITCOMMUNITY
Scotland, United Kingdom
Joined: February 07, 2008
KitMaker: 1,699 posts
AeroScale: 1,384 posts
Posted: Wednesday, June 11, 2008 - 08:47 PM UTC
Back on track now. Have applied a single red star to the port side fuselage. Rejoined the wings, added the vickers gun and the wheels and half completed the rigging. .2mm fishing line used I think that scales to about three and a half inch thick! Least you'll not miss it!
All images clickable for larger sizes.

Strutter rigging in progressStrutter rigging in progressStrutter rigging in progress

Left to do is finish the rigging, touch up the holes, apply the stars to the wings, attach the prop, I got eduard's WW1 RFC figure set so I'll try and paint one of those up. I've not painted a figure since I played warhammer as a kid we'll see how it goes.
jaypee
_VISITCOMMUNITY
Scotland, United Kingdom
Joined: February 07, 2008
KitMaker: 1,699 posts
AeroScale: 1,384 posts
Posted: Wednesday, June 25, 2008 - 12:48 AM UTC
Best laid plans and all that. No work on the strutter for nearly two weeks!

Finished the rigging last night though so only a few decals to go on and a quick wash and she should be done. I noticed the kit had no exhausts so I made some out of stretched cotton buds. This makes a nice thin hollow tube. Paint doesn't adhere all that well to it but it is OK for short lengths.

Photos to follow. Sorry for the teaser.
AirLedge
_VISITCOMMUNITY
Cork, Ireland
Joined: July 26, 2007
KitMaker: 292 posts
AeroScale: 265 posts
Posted: Wednesday, June 25, 2008 - 04:19 AM UTC
Looking forward to seeing the completed build
markVI
_VISITCOMMUNITY
Scotland, United Kingdom
Joined: November 26, 2006
KitMaker: 118 posts
AeroScale: 14 posts
Posted: Wednesday, June 25, 2008 - 08:57 AM UTC
Looking good JP. I don't usually go for Bipes but this build has me watching!!!! More pics ASAP please.

Stuart
jaypee
_VISITCOMMUNITY
Scotland, United Kingdom
Joined: February 07, 2008
KitMaker: 1,699 posts
AeroScale: 1,384 posts
Posted: Wednesday, June 25, 2008 - 09:04 PM UTC
Well thanks folks, is a nice spur to a newbie like me to get a bit of encouragement.
As promised here are snaps of the completed plane.
It's been a really nice build and I've tried out some new things. Slicing the control surfaces, drilling with tiny drills, rigging with fishing line, stretching q-tips and my first proper biplane.
All photos clickable for larger sizes.

Strutter finishedStrutter finishedStrutter finished
markVI
_VISITCOMMUNITY
Scotland, United Kingdom
Joined: November 26, 2006
KitMaker: 118 posts
AeroScale: 14 posts
Posted: Wednesday, June 25, 2008 - 10:43 PM UTC
Amazing finish JP. Hey if you like Russian birds (ooer missus), check out my LA-5 in the post a couple below you. Not up to much, it's a re-entry kit for me, but lemme know what you think!

Stuart
 _GOTOTOP