_GOTOBOTTOM
Early Aviation
Discuss World War I and the early years of aviation thru 1934.
Blue Max Halberstadt CL. II
Dwaynewilly
_VISITCOMMUNITY
New York, United States
Joined: December 15, 2006
KitMaker: 365 posts
AeroScale: 344 posts
Posted: Monday, June 02, 2008 - 05:20 PM UTC
Fellow Stringbaggers,

It seems I've caught the Two Seater fever. This was built pretty much out of the box. I was surprised by the detail in and out of the kit.


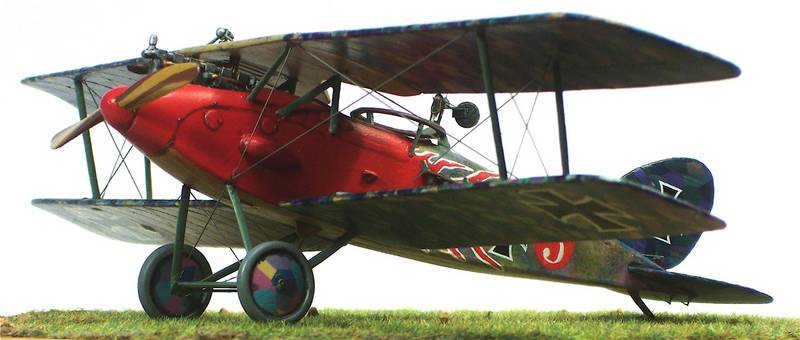
I used Humbrol and Modelmaster enamels. I had to paint over the kit decals that were red as they didn't match the Humbrol red I'd used for the fuselage.


The kit came with some funky material for making most of the struts but it turned out to be pretty sturdy and worked well with Zap a Gap.


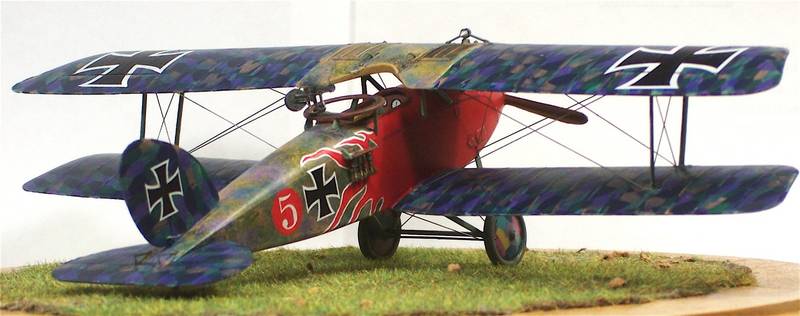
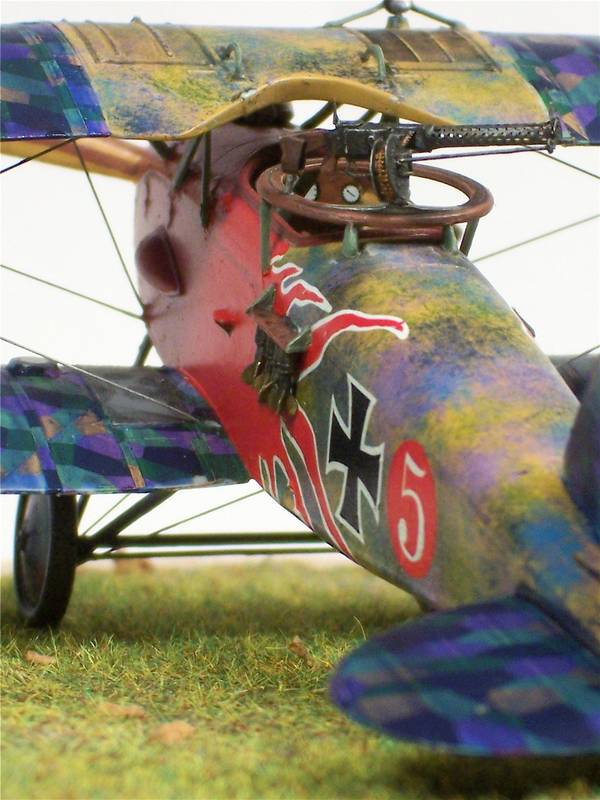
The parabellum on the back is a Copper State Models piece which went together without much trouble.


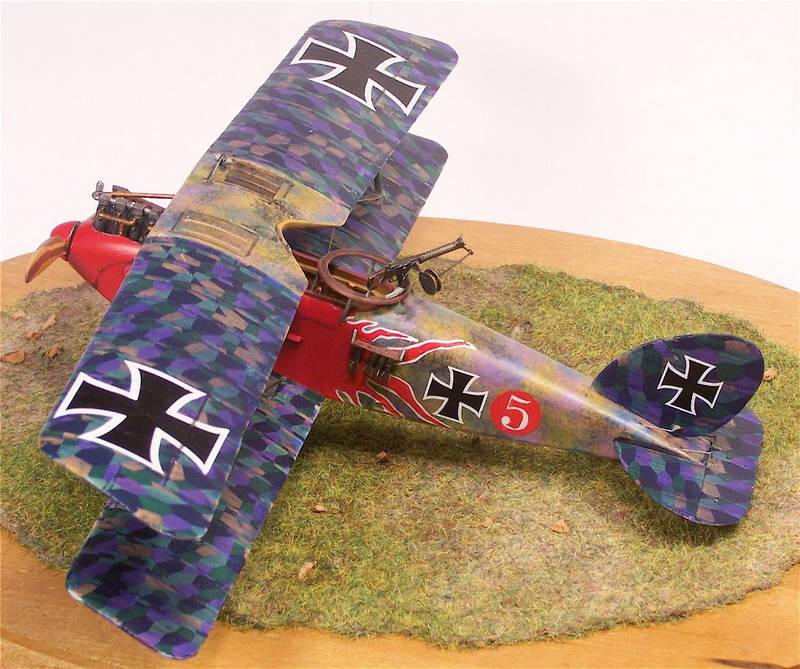
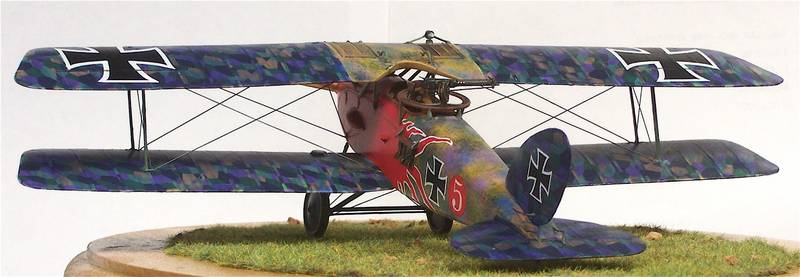
The lozenge is the dreaded Tech Mod which needs to be tinted and textured. The tapes were cut from the upper color. I used bottom lozenge for the wheel covers. The color scheme was drawn from a thread on the Aerodrome site by Dan San Abbott and a gent who goes by the name of Blowhard.


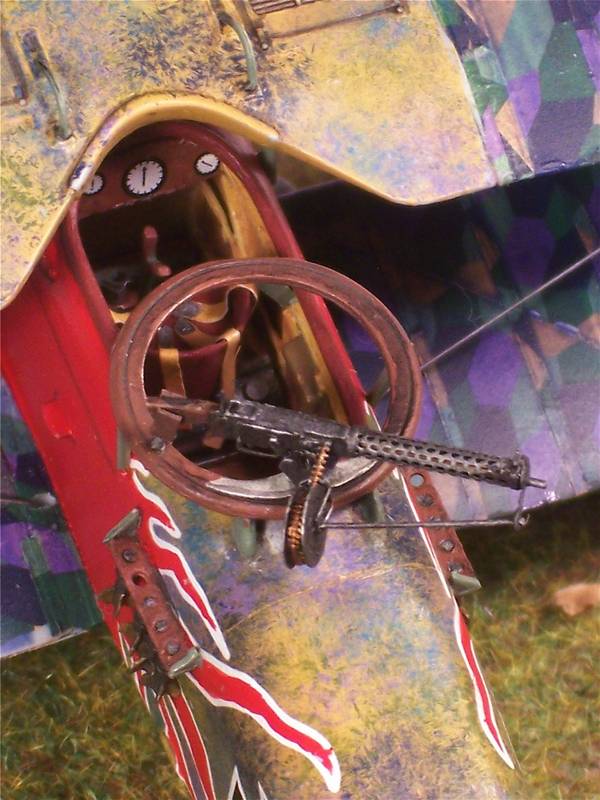
I used monofilament and guitar string for the rigging. I borrowed some photoetch from an eduard kit for the Spandau gun jacket in the front and for the rudder and elevator.


Again, please feel free with comments and critique and thanks for letting me share.

Dwayne

Merlin
Staff MemberSenior Editor
AEROSCALE
#017
_VISITCOMMUNITY
United Kingdom
Joined: June 11, 2003
KitMaker: 17,582 posts
AeroScale: 12,795 posts
Posted: Monday, June 02, 2008 - 07:35 PM UTC
Hi Dwayne

Beautiful! That should be on the Front Page!

What kind of paints did you use to achieve the mottle-effect - enamels, acrylics or maybe even oils?

All the best

Rowan
Kitboy
_VISITCOMMUNITY
Gelderland, Netherlands
Joined: July 20, 2006
KitMaker: 258 posts
AeroScale: 256 posts
Posted: Monday, June 02, 2008 - 08:20 PM UTC
My compliments! Very nice finished model!

Cheers, Nico
MerlinV
_VISITCOMMUNITY
Victoria, Australia
Joined: November 26, 2006
KitMaker: 608 posts
AeroScale: 602 posts
Posted: Monday, June 02, 2008 - 10:57 PM UTC
A very nice build.
It's a shame that the Lozenge decals never came out with that Kit. I often considered purchasing it when it was first released, but the added cost of a couple of sheets of Lozenge priced it out of my budget at the time.

Cheers,

Hugh
thegirl
_VISITCOMMUNITY
Alberta, Canada
Joined: January 19, 2008
KitMaker: 6,743 posts
AeroScale: 6,151 posts
Posted: Tuesday, June 03, 2008 - 03:08 AM UTC
Very beautiful job done . I have this kit on my shelf , but have been unable to build it do to no lozenge decals for it . What colours did you use for mottle ?
Repainted
_VISITCOMMUNITY
Östergötland, Sweden
Joined: April 04, 2006
KitMaker: 1,058 posts
AeroScale: 1,004 posts
Posted: Tuesday, June 03, 2008 - 04:49 AM UTC
That´s a nice looking machine. you got this one good, still having my kit on the shelf, there is no easybuild kit. Thanks for sharing

Larsa
guitarlute101
_VISITCOMMUNITY
West Virginia, United States
Joined: December 18, 2006
KitMaker: 1,121 posts
AeroScale: 1,063 posts
Posted: Tuesday, June 03, 2008 - 04:55 AM UTC
Dwayne,

That is one colorful bird. Excellent!!!

Mark
JackFlash
_VISITCOMMUNITY
Colorado, United States
Joined: January 25, 2004
KitMaker: 11,669 posts
AeroScale: 11,011 posts
Posted: Tuesday, June 03, 2008 - 07:41 AM UTC
Dwayne Nicely Done !!! Your skills are getting better and better with every build. The mottled scheme on the fuselage is excellent. Touch up the one flame on the pilot's left side near the spine. But an excellent build. Please submit this for a Feature on the front page. I would be glad to help you format the article.
Dwaynewilly
_VISITCOMMUNITY
New York, United States
Joined: December 15, 2006
KitMaker: 365 posts
AeroScale: 344 posts
Posted: Tuesday, June 03, 2008 - 04:10 PM UTC
To All,

Thanks for the very kind words, they mean alot to me.

Rowan,
I am deeply flattered that you would consider my build for a cover article. I will confer with Stephen on his generous offer of help in that regard.
The paint used on the fuselage was primarily Humbrol enamels. I painted the fuselage with a base coat of Humbrol #63 which looks like a warm, light almost honey color of brown. Next I used a technique that can best be described as a form of dry brushing for dappling the camouflage. I used and older chisel brush to apply the colors. For those who aren't familiar, a chisel brush is one that is shaped like the end of a metal chisel used in woodworking. The bristles are short and the ferrule, or metal cap holding the bristles, is flat and wide. Dip the brush into the color and wipe most of it off on scrap paper leaving enough on the ends of the individual bristles so that they no longer stick together. I then dab the end of the brush against the surface, I do not drag it at all. This produces the tiny dots of color on the surface. Don't be afraid to repeatedly dab the brush and also to vary the pressure as well. If too much camouflage color gets on the surface you can dapple some of the base color on top of that when it dries so you need not panic if mistakes occur. I used two greens, #78 and #30, two blues, #48 and #198 and Testors Modelmaster #2013 Napoleonic Violet with Humbrol #19 red mixed in slightly to warm it up a bit. I highly recommend the forum sited above on The Aerodrome website as an excellent source of information on this particular paint scheme. Dan San Abbott not only gives the approximate colors but also the lozenge and tape orientation as well. Stephens thread on lozenge is my primary source for the application of the lozenge on two seater machines, and an excellent reference for all things lozenge.

Larsa,
I've seen your work and rest assured, you have nothing to fear from this kit.

Teri,
I hope the above answered your questions about the colors.

One last thing, I cant recommend enough the Windsock Datafile #27 on this aircraft. I believe it was the primary source for the kit and its a tremendous help with alignments and spacings and details thoughout. I wouldn't have been able to pull this off without it.

Thanks to all, Dwayne
TheZOX
_VISITCOMMUNITY
Slovenia
Joined: August 23, 2007
KitMaker: 86 posts
AeroScale: 75 posts
Posted: Wednesday, June 04, 2008 - 05:41 AM UTC
This is stunning! Good job .
Dwaynewilly
_VISITCOMMUNITY
New York, United States
Joined: December 15, 2006
KitMaker: 365 posts
AeroScale: 344 posts
Posted: Monday, June 30, 2008 - 02:52 PM UTC
Stringbaggers,

Per a suggestion I submitted these images to Windsock for consideration and received a reply from Ray Rimell that he would be including them in a future issue of Windsock. I would like to thank all who have coached me with your input and critique, helping me further my abilities.

Regards, Dwayne
JackFlash
_VISITCOMMUNITY
Colorado, United States
Joined: January 25, 2004
KitMaker: 11,669 posts
AeroScale: 11,011 posts
Posted: Monday, June 30, 2008 - 03:03 PM UTC
Sounds like you have arrived! Ray does not put anything into his magazine that is substandard. Top drawer sir, top drawer.
CaptainA
_VISITCOMMUNITY
Indiana, United States
Joined: May 14, 2007
KitMaker: 3,117 posts
AeroScale: 2,270 posts
Posted: Tuesday, July 01, 2008 - 12:42 PM UTC
Super job. This is one of the best looking builds I have seen.
JackFlash
_VISITCOMMUNITY
Colorado, United States
Joined: January 25, 2004
KitMaker: 11,669 posts
AeroScale: 11,011 posts
Posted: Saturday, July 19, 2008 - 04:43 PM UTC
Brace yourself folks! Somethings a-brewing here.
CaptainA
_VISITCOMMUNITY
Indiana, United States
Joined: May 14, 2007
KitMaker: 3,117 posts
AeroScale: 2,270 posts
Posted: Sunday, July 20, 2008 - 09:40 AM UTC
Good idea Stephen.
 _GOTOTOP