

That's right one of the mamajamas of all models the 1:48 Revell/Monogram B-1B Lancer. Some of you may remember my post earlier this year about all the goodies I was given by a friend of mine. This beauty was part of the goodness. I have always loved the Lancer since it's roaring show of beauty and power about 300ft above my house as a kid.
I thought I would put this under this forum for two reasons.
One as a modeller returning to the art I think it would be a good experience for beginning and returning modellers to see the issues that I'm sure will arise with such a huge model. They will be able to see the progress step by step. And, as I seek assistance with issues I don't have a working knowledge of, I can post the walkthroughs to those issues with images.
Secondly I haven't built a model in something like 17 or 18 years and I'm sure there is tons of information that I can learn/relearn to help my modelling skills.
Mainly though this will be for the beginners to follow step through step of the build process and to gain knowledge on how to deal with the different aspects of modelling.
My questions to the more experienced builders:
1. What types of glues/solvents do you prefer and what are the differences.
2. In the reading the seams build I read about the different 3M puttys one was called a "glaze" and others called "fillers". What is the difference between the two?
3. I would like to start using acrylics to paint with and was wondering which acrylics work best? I will be going with my newly aquired airbrush and was also wondering which compressors you guys have noticed work well. I know that a compressor with a tank is the way to go for uniformity of pressure, but has anyone has better experience with some more than others?
4. I always hear about using styrene cardstock and stretched sprue. Where do you get these products from?
5. In this build I will be customizing the "Bone" for realism and accuracy and was wondering if anyone has built one of these or has pictures to show the details that arent included on the model itself.
6. I will be building this as if it were sitting on the flightline at the airfield. so the bays will be closed but I would like to detail the landing gear and wells as much as possible. Anyone have any recommendations for this?
7. I have seen various options for the engine cans, the CE cans are dang near impossible to find as the company seems to have vanished. Has anyone had any experience with the Eduard PE sets on this model? And, if so could you lend your advice here?
I hope this build will bring lots of valuable advice and learning to everyone experienced or not. I am going to take this build slow so that I can add all the detail I wish and let everyone see the different issues that arise and the different ways of getting through those issues.
Start Here (for Beginners)
This forum is for younger modelers or people just starting out in the hobby.
This forum is for younger modelers or people just starting out in the hobby.
Hosted by Jim Starkweather
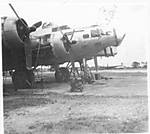
Playing in the "Bone"yard.

AiwaSoundSystem

Joined: February 01, 2008
KitMaker: 52 posts
AeroScale: 49 posts

Posted: Monday, July 28, 2008 - 06:17 AM UTC

Phantom2

Joined: April 18, 2006
KitMaker: 708 posts
AeroScale: 678 posts
Posted: Monday, July 28, 2008 - 07:19 AM UTC
Hi Jason!
Wow, you do dive in the deep end of the pool!
You have many questions, and I´ll try to give some answers, but there´s as many answers as there are model builders!
1. What types of glues/solvents do you prefer and what are the differences.
My primary glue is a liquid glue, about the thickness of water.
It flows easily into all seams as it´s so thin it can use the capillary action.
For real strength, it´s good old tube glue.
When I use etch or resin I use CA-glue, also whenever you need to get a quick grip between plastic parts.
Other glues; white glue (Elmer´s) or Humbrol Clear-fix for gluing canopys as they do not attack the plastic.
2. In the reading the seams build I read about the different 3M puttys one was called a "glaze" and others called "fillers". What is the difference between the two?
Really don´t know, but there´s several very good puttys around.
For filling big gaps, an automotive putty is handy, for finer work I use Tamiya putty.
If I need too fill small scratches I use ordinary paint, applied with a brush and then sanded and polished smooth.
3. I would like to start using acrylics to paint with and was wondering which acrylics work best? I will be going with my newly aquired airbrush and was also wondering which compressors you guys have noticed work well. I know that a compressor with a tank is the way to go for uniformity of pressure, but has anyone has better experience with some more than others?
I use only enamels, so i know nothing about acrylics.
There´s many acrylic-experts here who knows more.
A compressor with a tank is definetly what you want if you intend to stay in the hobby!
4. I always hear about using styrene cardstock and stretched sprue. Where do you get these products from?
Try a Model Railroad shop or Walthers and look for "Evergreen Plastic Stock" or "Plastruct".
5. In this build I will be customizing the "Bone" for realism and accuracy and was wondering if anyone has built one of these or has pictures to show the details that arent included on the model itself.
Sorry, I love the "Bone", but I have not found a kit yet!
I will build it in 1/48 someday, though!
6. I will be building this as if it were sitting on the flightline at the airfield. so the bays will be closed but I would like to detail the landing gear and wells as much as possible. Anyone have any recommendations for this?
The best Bone-reference is the DACO book "Uncovering the B-1", It´s really a One-stop reference book!
I have all of DACO´s books and I really can recommend every one of them!
http://ultra.glo.be/daco/
7. I have seen various options for the engine cans, the CE cans are dang near impossible to find as the company seems to have vanished. Has anyone had any experience with the Eduard PE sets on this model? And, if so could you lend your advice here?
I believe you can use the Aires "Turkey Featherless" F-15E Exhausts as a replacement.
I hope this build will bring lots of valuable advice and learning to everyone experienced or not. I am going to take this build slow so that I can add all the detail I wish and show let everyone see the different issues that arise and the different ways of getting through those issues.
I´m looking forward to your build, and If you need to ask, just shoot!
Cheers!
Stefan E
AiwaSoundSystem
Joined: February 01, 2008
KitMaker: 52 posts
AeroScale: 49 posts
Posted: Monday, July 28, 2008 - 09:55 AM UTC
For those of you that haven't seen this model here is a picture of the box with my laptop next to it. My laptop isn't small by any means, it's got a full keyboard on it for one and it's widescreen.

AiwaSoundSystem
Joined: February 01, 2008
KitMaker: 52 posts
AeroScale: 49 posts
Posted: Monday, July 28, 2008 - 11:39 AM UTC
The first step I believe in a well done model is research. Research the bird you are going to build especially in the areas in which you want to detail on your model. If you are just building OOB models still do some research to know your bird well. You might come across something that is painted differently that what might be red on the instructions might be yellow or something in real life.
Remember if you are going to rely on the internet that different search engines reveal different results which can help you in different areas of research. Books can be a huge source of pictures also.
For me I want to make the exterior of the Lancer as close to accurate as possible. Since I live in the boonies in North Idaho just walking down to the nearest B-1B is almost impossible ( I wish Mountain Home, ID still had them!!! ). I will probably order the book recommended earlier as well as thoroughly research images online.
Man this is going to be a massive build 270 parts (not including custom parts) and something around a 3ft wingspan. It's going to be worth it.

17thVa
Joined: April 21, 2008
KitMaker: 22 posts
AeroScale: 7 posts
Posted: Monday, July 28, 2008 - 03:59 PM UTC
I don't know which issue, but Finescale modeler did a build up of the B1 and showed all the various "bumps" and the "featherless" cans and had a listing of what you may want to model. Also in that issue was the B1 feature.
As for Acrylic paints I use Testors "Acryl" line and have no problems airbrushing
good luck
Pat Jones
As for Acrylic paints I use Testors "Acryl" line and have no problems airbrushing
good luck
Pat Jones
AiwaSoundSystem
Joined: February 01, 2008
KitMaker: 52 posts
AeroScale: 49 posts
Posted: Sunday, August 24, 2008 - 07:06 AM UTC
Sorry for the long wait but I am still doing some research and waiting for some resin pieces to come in the mail.
I have dry fit some of the assemblies and will post pictures sometime this week to show the issues I already see are going to give us some good "fun" during this build .
.
I have dry fit some of the assemblies and will post pictures sometime this week to show the issues I already see are going to give us some good "fun" during this build
.
JackFlash
Joined: January 25, 2004
KitMaker: 11,669 posts
AeroScale: 11,011 posts
Posted: Sunday, August 24, 2008 - 05:30 PM UTC
You can find an example of the Bone in Wings Over the Rockies Air & Space Museum. Nice place because the Air Force donated several birds.
http://www.wingsmuseum.org/
http://www.wingsmuseum.org/
AiwaSoundSystem
Joined: February 01, 2008
KitMaker: 52 posts
AeroScale: 49 posts
Posted: Sunday, August 31, 2008 - 11:37 AM UTC
Does anyone know where to get a set of the CE burner cans for the 1/48 Lancer? I have been looking around everywhere and can't find them.

Hollowpoint
Joined: January 24, 2002
KitMaker: 2,748 posts
AeroScale: 9 posts

Posted: Sunday, August 31, 2008 - 12:52 PM UTC
Quoted Text
2. In the reading the seams build I read about the different 3M puttys one was called a "glaze" and others called "fillers". What is the difference between the two?
The 3M putties are for auto body work. You can use them for modeling, and I know lots of guys who do, but most modelers prefer putties specifically made for modeling. In 3M putties, "filler' is used to fill big gaps and depressions, and "glaze" is used for the finishing coat after lots of sanding on the filler coat, then more sanding on the glaze.
For modeling, Squadron makes two putties similar to automotive body putty, known as White and Green putties for their colors. Some say one is finer grain than the other, but I'm not convinced. They both stink from toulene and shrink a bit as they dry.
Two-part epoxy putties are most popular now. These are like plumbers putty, but are finer grain. Milliputt is an old favoite, as are Duro brand putties. One of the newer and smoother putties on the market is Apoxie Sculpt. It's easy to mix, easy to use and can be smothed with a wet finger before it hardens. After it hardens, it is easy to sand, scribe, drill, etc.

cheese
Joined: April 16, 2007
KitMaker: 106 posts
AeroScale: 45 posts
Posted: Monday, September 01, 2008 - 06:44 AM UTC
I use Tamiya and Model Master Acrylics. They both thin out with Windex very well and work just as good as enamel. For large areas, such as bodies, airframes, etc. I will use the enamel and later use the acrylic to wash and "dirty up".
I use some filler that I bought at Home Depot for large gaps/surfaces. For thinner stuff, I use the old testors putty or the squadron green putty. The squadron stuff is excellent (just dangerous after a few minutes of inhallation). For really fine areas, nothing has done quite as well for me as good ol' white out. Wouldve never thought it, but I heard it on here first from some other brilliant mind.
I began building again over a year ago and havent looked back. Funny, as only completely finished 1 model which got ravaged by my nephew and have almost 3 finished simultaneously. I dont know if I will ever finish them but the stress relief cant be beat. I managed to get away from the carpet monster too!
Oh, as for glue.....I have found a cement that is NON-TOXIC and is extremely thin. Love using Super Glue (CA) for small pieces and PE but always manage to glue my fingers or tweezers in the process.
Good luck and have fun with the build. Ive been staring at the B-1 and B-52 for a while trying to figure out which to do......funny thing that I ended up with a V-22 instead.
Cheers


airraid

Joined: August 13, 2005
KitMaker: 277 posts
AeroScale: 142 posts

Posted: Tuesday, September 02, 2008 - 02:25 AM UTC
[quote] I always hear about using styrene cardstock and stretched sprue. Where do you get these products from?
No one mentioned stretched sprue yet it comes with the kit.It's made by taking a piece of the sprue runner that the kit parts are attached to,then heating it over a candle flame rolling the piece gently above the flame until the plastic becomes soft.When the plastic starts to go bendy , move it away from the flame, whilst giving a gentle but smooth pull on the ends the plastic will stretch into a nice long filament. After just a little practice you should be able to get varying thicknessess with lots of uses.
hope this helps
Den
SilverDollar
Joined: August 16, 2008
KitMaker: 10 posts
AeroScale: 4 posts
Posted: Sunday, September 07, 2008 - 08:12 AM UTC
I think I can help fill in some of the info gaps here. First thing is filling large gaps and holes. I try to stay away from putty when I'm filling large gaps or bridging large spaces. I use pieces of styrene glued into the gaps with liquid glue and I usually let it set overnight to make sure all the solvent gasses out. The advantage of this is that 1) the added material is the same as surrounding plastic and sands exactly the same 2) the fill is a lot stronger and will not crack out which usually happens if you try to bridge gaps with the putty. I use the same material when I'm building something up and then use the putty only as a skim coat to eliminate the final defects. and 3) if you use a one part putty to bridge gap it will shrink and keep shrinking over time and will tend to crack on the finished model. I only use two part mixes because they do not shrink. As for the difference between fillers and glaze, the glaze is made up of smaller particles and is much less grainy than some of the fillers.
I also do not use enamel paints. I use either acrylic or lacquer. Enamel paints take too long to set because they don't dry, they cure like epoxy. The defects in the paint cannot be polished out effectively for at least a month. This I know because of my car modeling days trying to get that perfect showroom finish. Acrylic paint is available for many aviation related colors and is less toxic than enamel. I like the Polly S brand but Tamiya is also pretty good. Lacquer is harder to find in the right colors but gives the fastest drying time with a good hard surface in under a week.. You just need to remember to lay down a good primer coat to act as a barrier so the lacquer solvent doesn't attack the plastic.
Finally, you're absolutely right about research. It's one of the most important parts of the model depending on your modeling objective. If you want just to build out of the box, then just a few pics will be needed. If you want high accuracy, t here's no such thing as a perfect model especially in the large scale I work in. There is always detail to add and shapes to correct. All you need to do is google the daylights out of the net and you should be o.k. Try to look for anything that says "walk around". They usually give the clearest up close shots.
If you need any more info, don't hesitate to ask me. I belong to a number of other sites and have learned a great deal.
AiwaSoundSystem
Joined: February 01, 2008
KitMaker: 52 posts
AeroScale: 49 posts
Posted: Friday, January 08, 2010 - 05:14 AM UTC
 Hello again everyone and sorry about the long wait on this. Real life happened and distracted me from my hobbies, but I'm getting back in the saddle. I have done a lot of research and will be ordering some supplies for this project. I will be posting pictures for this project as soon as I get started within the next month or so. Thanks for all the advice you guys This is definitely going to be a HUGE project Now to clear a spot for it

UNITEDSTATESNAVY
Joined: July 07, 2007
KitMaker: 243 posts
AeroScale: 150 posts
Posted: Friday, January 08, 2010 - 04:23 PM UTC
Quoted Text
what glue is non toxic? super glue is non toxic? huh? plastruct weldene is non toxic but not sure how good it is.I use Tamiya and Model Master Acrylics. They both thin out with Windex very well and work just as good as enamel. For large areas, such as bodies, airframes, etc. I will use the enamel and later use the acrylic to wash and "dirty up".
I use some filler that I bought at Home Depot for large gaps/surfaces. For thinner stuff, I use the old testors putty or the squadron green putty. The squadron stuff is excellent (just dangerous after a few minutes of inhallation). For really fine areas, nothing has done quite as well for me as good ol' white out. Wouldve never thought it, but I heard it on here first from some other brilliant mind.
I began building again over a year ago and havent looked back. Funny, as only completely finished 1 model which got ravaged by my nephew and have almost 3 finished simultaneously. I dont know if I will ever finish them but the stress relief cant be beat. I managed to get away from the carpet monster too!
Oh, as for glue.....I have found a cement that is NON-TOXIC and is extremely thin. Love using Super Glue (CA) for small pieces and PE but always manage to glue my fingers or tweezers in the process.
Good luck and have fun with the build. Ive been staring at the B-1 and B-52 for a while trying to figure out which to do......funny thing that I ended up with a V-22 instead.
Cheers
UNITEDSTATESNAVY
Joined: July 07, 2007
KitMaker: 243 posts
AeroScale: 150 posts
Posted: Friday, January 08, 2010 - 04:31 PM UTC
Quoted Text
here in boise hobbytown is the only store to buy supplies so tamiya acrylic paints are at hand, I use tamiya surface primer thinner with tamiya laquer thinner.I have only been at this for about two years and find that what primers and paints are compatable has been a real buttache so to make things easy I stick with all tamiya products(models too most the time) except when the model instructions call for a certain color that calls for mixing tamiya colors then I use model master paints thinned with water as reccomended.I end up ordering supplies on the net as local store is slow to restock, check out airbrush depot/TCP global online for good value compressors ect,cheers

AiwaSoundSystem
Joined: February 01, 2008
KitMaker: 52 posts
AeroScale: 49 posts
Posted: Saturday, January 09, 2010 - 01:53 AM UTC
Quoted Text
Quoted Texthere in boise hobbytown is the only store to buy supplies so tamiya acrylic paints are at hand, I use tamiya surface primer thinner with tamiya laquer thinner.I have only been at this for about two years and find that what primers and paints are compatable has been a real buttache so to make things easy I stick with all tamiya products(models too most the time) except when the model instructions call for a certain color that calls for mixing tamiya colors then I use model master paints thinned with water as reccomended.I end up ordering supplies on the net as local store is slow to restock, check out airbrush depot/TCP global online for good value compressors ect,cheers
Thanks for the info
I'll stop by there when I'm down in your neck o' the woods. Where is Hobbytown at? I remember seeing it there, but don't exactly remember where it is. UNITEDSTATESNAVY
Joined: July 07, 2007
KitMaker: 243 posts
AeroScale: 150 posts
Posted: Saturday, January 09, 2010 - 03:33 AM UTC
3317 n. cole road,cross road is Ustick I think.
AiwaSoundSystem
Joined: February 01, 2008
KitMaker: 52 posts
AeroScale: 49 posts
Posted: Saturday, January 09, 2010 - 03:37 AM UTC
I know where that is, not too far from base. I'm down there once a month at least and will be there towards the end of this month. I'll check it out!
Here is some of the aftermarket goodies I plan on sprucing this build up with:
Resin ALE-50 and Sniperpod
http://www.shull24.com/
White Metal Landing Gear
http://www.scaleaircraftconversions.com/moreinfo.cfm?KIT=149
Photo-Etch Parts and Burner Cans
Multiple Goodies http://www.eduard.cz/products/card.php?id_product=1619&name=b-1b&catalogue_nb=&type=&pgroup=&scale=&product_month=&product_year=&page_start=0
Burner Cans http://www.eduard.cz/products/card.php?id_product=3616&name=b-1b&catalogue_nb=&type=&pgroup=&scale=&product_month=&product_year=&page_start=0
I also know that TwoMikes is producing some other resin parts including a wheel set that I might be interested in. Waiting to see those parts before I decide though.
UNITEDSTATESNAVY
Joined: July 07, 2007
KitMaker: 243 posts
AeroScale: 150 posts
Posted: Saturday, January 09, 2010 - 05:52 AM UTC
post some pics of your build in pre flight check? the others on this forum offer great advice and I hope to achieve their skills someday.

stugiiif
Joined: December 13, 2002
KitMaker: 1,434 posts
AeroScale: 403 posts
Posted: Saturday, January 09, 2010 - 06:10 AM UTC
Was wondering?? What about the possibility of grabbing 1/32nd scale resin exhausts for an F15 and using them? I've seen it done with 1/72nd scale B1's using reisn cans from 1/148th F-15's. I was just curious as i'd be willing try myself and if it didn't match it would be an excuse to grab the big Tamiya F15C and E kits. Happy modeling.
AiwaSoundSystem
Joined: February 01, 2008
KitMaker: 52 posts
AeroScale: 49 posts
Posted: Saturday, January 09, 2010 - 06:18 AM UTC
Quoted Text
post some pics of your build in pre flight check? the others on this forum offer great advice and I hope to achieve their skills someday.
I joined the Big Beautiful Bombers Campaign with it also. I will be posting in preflight as well for useful suggestions as I progress. I need to get in all the parts and stuff first though so I can sit down and figure out this beast
My plans after this one ... why stop going big ... C-130 in 1/48 scale also! But, for now I need to keep my mind on the project at hand and keep reading up on the Bone.

AiwaSoundSystem
Joined: February 01, 2008
KitMaker: 52 posts
AeroScale: 49 posts
Posted: Saturday, January 09, 2010 - 06:19 AM UTC
Quoted Text
Was wondering?? What about the possibility of grabbing 1/32nd scale resin exhausts for an F15 and using them? I've seen it done with 1/72nd scale B1's using reisn cans from 1/148th F-15's. I was just curious as i'd be willing try myself and if it didn't match it would be an excuse to grab the big Tamiya F15C and E kits. Happy modeling.
Interesting idea, but I am only building in 1/48 scale so I can keep all the planes I build in scale with one another. Plus, I already have the eduard kits ordered. I think they will be gorgeous when it's all said and done

Keeperofsouls2099
Joined: January 14, 2009
KitMaker: 2,798 posts
AeroScale: 2,443 posts
Posted: Sunday, January 10, 2010 - 06:53 AM UTC
I use a tankless compressor and an iwata airbrush works fine for me.and i got the compressor used in the box on evil bay for about $50.00 made by testors.Think a tank is a waist of money unless you plan on starting a production line .But its also what works for you.You will feel out what your comfortable with.
Build On,
Justin
P.S>I also will be doing a B-1B for that campaign LADY OF THE NIGHT
.But its also what works for you.You will feel out what your comfortable with.Build On,
Justin
P.S>I also will be doing a B-1B for that campaign LADY OF THE NIGHT

AiwaSoundSystem
Joined: February 01, 2008
KitMaker: 52 posts
AeroScale: 49 posts
Posted: Monday, January 11, 2010 - 02:03 AM UTC
Quoted Text
I use a tankless compressor and an iwata airbrush works fine for me.and i got the compressor used in the box on evil bay for about $50.00 made by testors.Think a tank is a waist of money unless you plan on starting a production line
Build On,
Justin
P.S>I also will be doing a B-1B for that campaign LADY OF THE NIGHT
I am going with a tank compressor both for smoothness of flow, pressure and for it's dual use purpose around the house. Thanks for the input though
. |

WEB HOSTING BY


Copyright ©2021 AeroScale and Kitmaker Network, a subsidiary of Silver Star Enterprises
All Rights Reserved. Please read our Conditions of Use and Privacy Policy.
All Rights Reserved. Please read our Conditions of Use and Privacy Policy.